

Page 1

HP StorageWorks
XP Disk/Cache P
XP12000/XP10
000 Disk Arrays and SVS 200
artition user guide for
Part number: T1722–96010
Eighth edition: September 2007
Page 2

Legal and notice information
© Copyright 2005, 2007 Hewlett-Packard Development Company, L.P.
Confidential computer software. Valid license from HP required for possession, use or copying. Consistent with FAR 12.211 and
12.212, Commercial Computer Software, Computer Software Documentation, and Technical Data for Commercial Items are licensed
to the U.S. Government under vendor's standard commercial license.
The information contained herein is subject to change without notice. The only warranties for HP products and services are set forth
in the express warranty statements accompanying such products and services. Nothing herein should be construed as constituting
an additional warranty. HP shall not be liable for technical or editorial errors or omissions contained herein.
Microsoft, Windows, Windows XP, and Windows NT are U.S. registered trademarks of Microsoft Corporation.
Java is a US trademark of Sun Microsystems, Inc.
UNIX is a registered trademark of The Open Group.
Page 3

Contents
Aboutthisguide .......................... 7
Supported storage platforms and firmware............................ 7
Intendedaudience...................................... 7
Prerequisites ........................................ 7
Relateddocumentation.................................... 7
Documentconventionsandsymbols .............................. 8
HPtechnicalsupport..................................... 8
Subscriptionservice ..................................... 9
HPwebsites......................................... 9
Documentationfeedback ................................... 9
1OverviewofXPDisk/CachePartition................. 11
XPDisk/CachePartitionfeatures................................ 11
Cachelogicalpartitions(CLPRs) .............................. 11
Storagemanagementlogicalpartitions(SLPRs)....................... 13
Partitionadministrationandadministratorrights ........................ 14
2AccessingXPDisk/CachePartition.................. 17
3WorkingwithCLPRs . ...................... 19
CreatingCLPRs ...................................... 21
DeletingCLPRs ...................................... 22
MigratingparitygroupsinCLPRs............................... 23
4WorkingwithSLPRs . ...................... 25
AdministeringSLPRs .................................... 27
CreatingSLPRs ...................................... 28
DeletingSLPRs ...................................... 29
MigratinganSLPR'sresources................................ 30
Displayingerrormessages ................................. 31
5Troubleshooting . ........................ 33
6Notes,restrictions,andrequirements................ 35
CLPRs .......................................... 35
SLPRs .......................................... 35
Index .............................. 37
HP StorageWorks
3
Page 4

Figures
1
..
2
..
3
..
4
..
5
..
ExampleofaCLPR............................... 12
ExampleofanSLPR .............................. 14
Partition D
Partition Definitionpane(CLPRselected)...................... 19
Partition Definitionpane(SLPRselected)...................... 25
efinitionpane(initialpaneorSubsystemselected) ............. 17
4
Page 5

Tables
1
2
3
4
5
6
..
Documentconventions .............................. 8
..
Capacity for data in a hard disk drive associated with a CLPR and standard cache capacity 13
..
CommandViewusergrouppermissions...................... 15
..
XPRemoteWebConsolemappingtoCommandViewusers ............. 15
..
XPRemoteWebConsoleandCommandViewdefaultusers ............. 15
..
GeneraltroubleshootingforXPDisk/CachePartition ................ 33
HP StorageWorks
5
Page 6

6
Page 7

About this guide
This guide provides information about:
• Understanding XP Disk/Cache Partition
• Understanding partition administration and administrator rights
• Accessing XP Disk/Cache Partition
• Working with CLPRs
• Working with SLPRs
• Troubleshooting XP Disk/Cache Partition
Supported st
In this guide
• HP StorageWorks XP12000 Disk Array
• HP StorageWorks XP10000 Disk Array
• HP StorageW
For informa
user guide
orage platforms and firmware
,the term array refers to the following storage platforms:
orks 200 Storage Virtualization System
tion about required firmware versions, see the HP StorageWorks XP Remote Web Console
for XP12000/XP10000/SVS200.
Intended audience
This guide is intended for customers and HP-authorized service providers with knowledge of:
• Disk array hardware and software
• Data processing and RAID storage subsystems and their basic functions
NOTE:
The functions described in this manual may be limited, depending on your assigned level of user access.
Some users will have read-only access while others will have limited or full array access. For additional
information on users and user groups, please see the HP StorageWorks XP Remote Web Console user
guide for XP12000/XP10000/SVS200.
Prerequisites
Prerequisites for using this product include:
• Installing the HP StorageWorks disk array(s)
• Installing the license key for this product
Related documentation
The following documents provide related information:
•
• HP StorageWorks XP Remote Web Console user guide for XP12000/XP10000 Disk Arrays and
SVS 200
• HP StorageWorks XP Cache LUN user guide for XP12000/XP10000 Disk Arrays and SVS 200
HP StorageWorks
7
Page 8
• HP StorageWorks XP External Storage user guide for XP12000/XP10000 Disk Arrays and
SVS 200
• HP StorageWorks XP LUN Configuration and Security Manager user guide for XP12000/XP10000
Disk Arrays and SVS 200
You can find these documents at
h
ttp://www.hp.com/support/rwc/manuals/
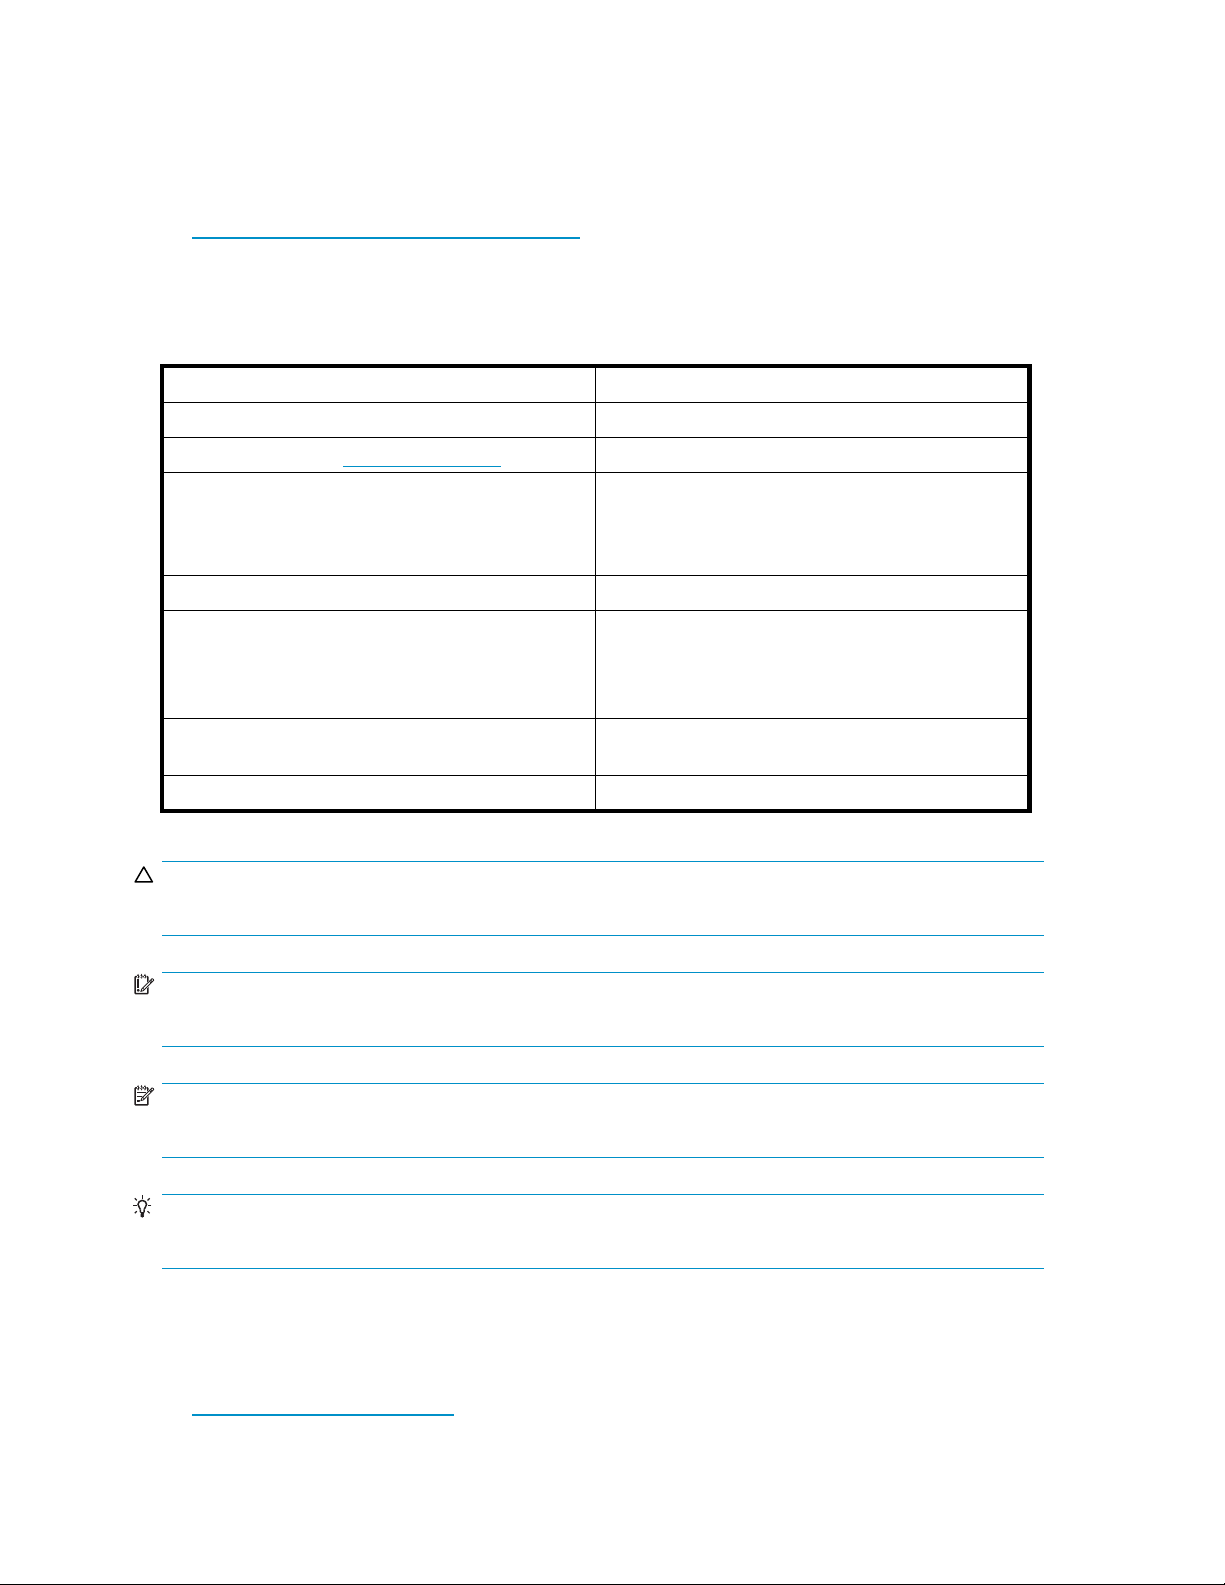
Document conventions and symbols
Table 1 Docume
Convention
Blue text: Table 1
Blue, underlined text: http://www.hp.com
Bold text
Italic text Text emphasis
Monospace text
Monospace, italic text
Monospace, bold text
nt conventions
Element
Cross-reference links and e-mail addresses
site addresses
web
• Keys that are pressed
• Text typed into a GUI element, such as a box
• GUI elements that are clicked or selected, such as
menu and list items, buttons, and check boxes
• File and directory names
• System output
• Code
• Commands, their arguments, and argument values
• Code variables
• Command variables
Emphasized monospace text
CAUTION:
Indicates that failure to follow directions could result in damage to equipment or data.
IMPORTANT:
Provides clarifying information or specific instructions.
NOTE:
Provides additional information.
TIP:
Provides helpful hints and shortcuts.
HP technical support
Telephone numbers for worldwide technical support are listed on the HP support website:
ttp://www.hp.com/support/
h
8
About this guide
Page 9

Collect the following information before calling:
• Technical support registration number (if applicable)
• Product serial numbers
• Product model names and numbers
• Error messages
• Operating system type and revision level
• Detailed, specificquestions
For continuous quality improvement, calls may be recorded or monitored.
Subscription service
HP recommends that you register your product at the Subscriber's Choice for Business website:
ttp://www.hp.com/go/e-updates/
h
After registering, you will receive e-mail notification of product enhancements, new driver versions,
firmware updates, and other product resources.
HP websites
For additional information, see the following HP websites:
• h
ttp://www.hp.com/
• http://www.hp.com/go/storage/
• http://www.hp.com/service_locator/
• http://www.hp.com/support/manuals/
• http://www.hp.com/support/downloads/
• http://www.hp.com/support/rwc/manuals/
Documentation feedback
HP welcomes your feedback.
To make co
storaged
mments and suggestions about product documentation, please send a message to
ocs.feedback@hp.com. All submissions become the property of HP.
HP StorageWorks
9
Page 10

10
About this guide
Page 11
1OverviewofXPDisk/Cache Partition
HP StorageWorks XP Disk/Cache Partition enables logical partitioning of the resources in the array. HP
StorageWorks XP Disk/Cache Partition contains the cache logical partition function (CLPR) and the
storage management logical partition function (SLPR).
The cache logical partition function enables you to partition the built-in cache memory in the array
into multiple virtual cache memories. By allocating the partitioned virtual cache to a host, the I/O
performance of other hosts can be protected from decreasing even if one host issues many I/O requests.
The storage management logical partition function enables you to partition an array into multiple virtual
arrays. By having multiple virtual arrays, your data is better protected from risks, such as accidently
destroyed data.
XP Disk/Cache Partition features
XP Disk/Cache Partition has two components:
• Cache logical partitions (CLPRs)
• Storage m
Cache logical partitions (CLPRs)
anagement logical partitions (SLPRs)
If one array is shared with multiple hosts, and one host reads or writes a large amount of data, the
host's read and write data might occupy a large area in the array's cache memory. In this situation,
other hosts slow down the read/write speed because other hosts must wait to write to cache memory.
To prevent this situation, the cache logical partition function in XP Disk/Cache Partition partitions the
array's cache memory. Partitioned cache memories are used as virtual cache memories, and each of
them is allocated to each host. As a result, this prevents the situation where the specified host exclusively
uses most of cache memory.
Figure 1 shows how a corporation's cache memory is partitioned to three virtual cache memories.
Each virtual cache memory is allocated to each host in the three branch offices. Branch A's host is
inputting and outputting a large amount of data to or from the array. However, the read and write data
of Branch A's host does not occupy cache memory because the cache capacity that Branch A's host
canuse is limitedto 40GB. Even if Branch A'shost accessesalargeamountofdata, thehosts of other
branches do not slow down the read/write speed because of the amount of data Branch A is accessing.
The hosts of other branches can always use up to 40 GB of cache area.
IMPORTANT:
Disk/cache partitioning for the SVS200 can be increased up to 8 CLPR and SLPRs with additional
licensing(theSVS200ships with alicense forone SLPR andfourCLPRs).
The virtual cache memory that the cache logical partition function partitions is referred to as the CLPR.
Up to 32 CLPRs including CLPR0 which is provided as a default can be created in one subsystem. For
more information, see Creating CLPRs.
HP StorageWorks
11
Page 12

Figure 1 Example of a CLPR
To create a CLPR, allocate the parity groups to CLPR. For instructions on allocating parity groups, see
Working with CLPRs.
To create and manage a CLPR, you need user authority for the array. For more information about user
authority, see Partition administration and administrator rights and the HP StorageWorks XP Remote Web
Console user guide for XP12000/XP10000/SVS200.
To manage cache memory using the functions in XP Cache LUN or Partial Cache Residence (PCR), you
can set up the cache area for XP Cache LUN and PCR in each CLPR. For more information, see the HP
StorageWorks XP Cache LUN user guide for the XP12000/XP10000/SVS200.
• Capacity criteria when creating a CLPR
If you create a CLPR, use the following formula to calculate the cache capacity allocated to the CLPR.
Cache capacity (GB) = Standard cache capacity (GB) + ↑ ((Cache Residency capacity (MB) +
PCR capacity MB))/2,048) ↑ x2GB
NOTE:
The PCR capacity (MB) described in the formula is the Partial Cache Residence capacity (MB). For
more information about standard cache capacity, see Table 2.
12
Overview of XP Disk/Cache Partition
Page 13

Table 2 Capacity for data in a hard disk drive associated with a CLPR and standard
cache capacity
Capacity for data in
CLPR
Standard cache
capacity
NOTE:
To calculate t
formulas:
Number of pari
Number of parity groups: capacity of one disk x 6 x (6D+2P)
Number of parity groups: capacity of one disk x 7 x (7D+1P)
Number of par
NOTE:
To add cache memories to the local array, install them with Standard Cache Access Model or High
Performance Cache Access Model mode. If the local array has additional printed circuit boards
(PCBs), you must use the High Performance Cache Access Model mode. For more information about
additional cache memories, contact your HP account support representative.
• RestrictiononCLPRand CU group
he capacity for data in a hard disk drive associated with a CLPR, add the following
ty groups: capacity of one disk x 3 x (3D+1P)
ity groups: capacity of one disk x 2 x (2D+2D)
to 0.7TB to 2.6TB to 8.5TB
4GB
8GB 12GB 16GB 20GB
to 14.4TB
to 20.3TB 20.3TB or
more
24GB
You cannot allocate parity groups belonging to different CU groups to a CLPR other than CLPR0.
For more information about CU groups, see the HP StorageWorks XP Remote Web Console user
guide for XP12000/XP10000/SVS200.
Storage ma
An array ca
an enterp
one array
other or
array be
The sto
resources (that is, ports and CLPRs) to multiple virtual arrays. Each virtual array can be accessed by only
its administrator. Therefore, this prevents the risk that an administrator will destroy another organization's
volume
In a non
parti
groups (PGs) and cache in the non-partitioned environment. After the array is partitioned, CLPR0 contains
the remaining PGs and cache that are not allocated to other CLPRs.
Figure 2 shows an example of when one array is partitioned into two virtual arrays. Each virtual array is
alloc
ente
admi
IMPORTANT:
Disk/cache partitioning for the SVS200 is limited to one SLPR and four CLPRs.
nagement logical partitions (SLPRs)
n be shared with multiple organizations, for example, enterprises and departments within
rise. Therefore, multiple administrators who belong to different organizations might manage
. This creates the potential for an administrator who belongs in one organization to destroy
ganizations' volumes. Furthermore, it can complicate and increase the difficulty of managing the
cause of an incorrect operation by an administrator and its influence on other organizations.
rage management logical partition function in XP Disk/Cache Partition allocates all of an array's
s or leak another organization's data.
-partitioned environment, a full array is considered one single partition SLPR0. After the array is
tioned, SLPR0 becomes the unpartitioned portion of the array. Similarly, CLPR0 contains all parity
ated to two enterprises respectively. In this case, enterprise A's array administrator can manage
rprise A's virtual array, but cannot manage one of enterprise B's arrays. Similarly, enterprise B's array
nistrator can manage enterprise B's virtual array, but cannot manage one of enterprise A's arrays.
HP StorageWorks
13
Page 14

The virtual array created by the partitioned array is referred to as the storage management logical
partition (SLPR). You can create up to 32 SLPRs, including SLPR0 which is provided as a default in one
array (with the exception of the SVS200). For more information, see Creating SLPRs.
Figure 2 E
To create an SLPR, allocate the array's resources (that is, ports and CLPRs). For instructions on allocating
the array's resources, see Working with SLPRs. To create and manage a CLPR, you need user authority
for the array. For more information, see Partition administration and administrator rights and the
HP StorageWorks XP Remote Web Console user guide for XP12000/XP10000/SVS200.
• Restri
You can
NOTE:
If you a
SLPR0, you cannot use the resources:
•CU40-7F
•CU80-B
•CUC0-FE
Do not allocate resources belonging to these CU groups to an SLPR other than SLPR0.
xample of an SLPR
ctiononSLPRand CU group
not allocate array resources belonging to different CU groups to an SLPR other than SLPR0.
llocate local array resources belonging to the following CU groups to an SLPR other than
F
Partition administration and administrator rights
The following groups of users can access XP Disk/Cache Partition:
• Administrators who have modify access to the full array.
• StorageAdmins who have modify access. This group consists of users who have full array access
and users who have partition-level access.
14
Overview of XP Disk/Cache Partition
Page 15

• Users who have read-only access. This group consists of users who have full array access and
users who have partition-level access
Table 3 Command View user group permissions
User group
Administrators
StorageAdmins
Users
Table 4 XP Rem
Permissions
• Modify all managed arrays
• Administer partitions
• Administer Command View framework
• Create other users
Read and modify privileges for assigned arrays/partitions only
Read-only pr
ote Web Console mapping to Command View users
User group
Storage Administrator with
super-user permissions (create
users and administer partitions)
Storage Administrator with general
permissions
Storage Partition Administrator
with super-user permissions
Storage Partition Administrator
with general permissions
ivileges for assigned arrays/partitions
Permissions
• Modify entire array
configuration
• Administer partitions and users
• Download/restore
administrative backup lists
• Configure XP Remote Web
Console settings (for example,
client timeout values)
Modify e
• Access assigned partitions only
• Modify partition configuration
• Create and manage other
• Access assigned partitions only
• Manage assigned partitions
ntire array configuration
users for assigned partitions
only
Command View user group
Administrators
StorageAdmins
Not applicable (new capability in
theXPRemoteWeb Console)
Users
NOTE:
The Command View Users
groupismappedtothe
XP Remote Web Console Users
group with modify permissions
disabled.
Table 5 XP Remote Web Console and Command View default users
User group
Storage Administrator with super-user permissions
age Administrator with general permissions
Stor
Storage Partition Administrator with super-user
permissions
Storage Partition Administrator with general
permissions
Command View and XP Remote Web Console
administrator/administrator
None
None
user/user
NOTE:
The default, “user” has modify permissions
disabled by default.
HP StorageWorks
15
Page 16

16
Overview of XP Disk/Cache Partition
Page 17

2 Accessing XP Disk/Cache Partition
1. Launch Command View XP or XP Remote Web Console.
2. Click the Install button (
3. Click the Partition Definition tab.
). The License Key pane appears.
Figure 3 Partition Definition pane (initial pane or Subsystem selected)
• Tree: Displays SLPRs in the array. The SLPR number and name appear to the right of the SLPR
icon (
SLPRs belonging to a CU group other than the current CU group have this icon (
out.
• Subsys
• No.:List's line number.
• Item:Type of resource. Storage Partition appears in this column
• Name:
• Cache (Num. of CLPRs): SLPR's cache capacity and number of CLPRs in the SLPR.
.
)
)and aregrayed
tem resource list: Displays information about SLPRs belonging to the current CU group.
SLPR's number and name.
HP StorageWorks
17
Page 18

NOTE:
For SLPR0, the cache capacity and number of CLPRs appear as follows:
• Cache capacity: Value is calculated by subtracting the capacity of the cache belonging to a
CU group other than the current CU group from the cache capacity that SLPR0 has.
• Number of CLPRs: Value is calculated by subtracting the number of CLPRs belonging to a CU
group other than the current CU group from the number of CLPRs that SLPR0 has. Regardless
of which CU group is selected, CLPR0 is added as one CLPR.
• Num of PGs: Number of parity groups the SLPR has.
NOTE:
For SLPR0, the value is calculated by subtracting the number of parity groups belonging to a CU
group other than the current CU group from the number of parity groups that SLPR0 has.
• Num of Ports: Number of ports the SLPR has.
NOTE:
For SLPR0, the value is calculated by subtracting the number of ports belonging to a CU group
other than the current CU group from the number of ports that SLPR0 has.
• Status: If the SLPR has been edited, the status appears in the right-most column.
• Change: SLPR's information, such as SLPR name, has been changed.
• Delete : SLPR has been deleted.
• Apply:Applies settings.
NOTE:
You can make changes for more than one CU group before implementing the settings.
• Cancel Cancels settings that were entered or selected, and restores settings to their initial values.
18
Accessing XP Disk/Cache Partition
Page 19

3Working with CLPRs
Figure 4 Partition Definition pane (CLPR selected)
• CU: Displays the selected CU's parity groups in the CLPR resource list.
NOTE:
You cannot specify the number of a CU belonging to a CU group other than the current CU group.
To change the CU group, use the drop-down list for CU groups in the upper right of the XP Remote
Web Console main pane. For more information about CU groups, see the HP StorageWorks XP
Remote Web Console user guide for XP12000/XP10000/SVS200.
• Tree: Lists the array's SLPRs and CLPRs. The SLPR number and name appear to the right of the
SLPR icon (
SLPRs belonging to a CU group other than the current CU group have this icon (
out. CLPRs belonging to a CU group other than the current CU group have this icon (
grayed out. You cannot select these SLPRs and CLPRs.
• CLPR resource list: Displays information about the selected CLPR.
• No.:List's line number.
• Resource Type:Type of CLPR resource. Parity Group appearsinthiscolumn.
• Address: Parity group's address. If the address begins with E (for example, E1-1), the parity
group contains external LUs. If the address begins with V (for example, V1-1), the parity group
contains virtual volumes.
• Properties: For a parity group containing internal volumes of the array, the parity group's
capacity and the RAID configuration appear. For a parity group containing external LUs, the
). The CLPR number and name appear to the right of the CLPR icon ( ).
)and aregrayed
)and are
HP StorageWorks
19
Page 20

external LUs' capacity appears, but the RAID configuration does not appear. For a parity
group containing virtual volumes, the capacity of virtual devices (VDEVs) appears, but the
RAID configuration does not appear.
• Emulation:Parity group's emulation type.
• Information:If an LU is available with On Demand, On Demand appears. To make the LU
available, use the On Demand pane. See the HP StorageWorks Command View XP Advanced
Edition Device Manager Server installation and configuration guide or the HP StorageWorks
XP Remote Web Console user guide for XP12000/XP10000/SVS200.
• Detail for CLPR: Selected CLPR's settings. You must change the CLPR's settings.
• CLPR Name: CLPR's name, up to 16 alphanumeric characters.
NOTE:
You cannot change the name of CLPRs that have this icon (
) and are grayed out. To change
theirnames,switchthe CU groupusing thedrop-down list forCUgroupsinthe upperright
of theXPRemoteWeb Consolemainpane.
• Cache Size: CLPR's cache capacity. Must be between 4 GB and 252 GB in 2 GB increments.
The default is 4 GB.
• Cache LUN XP Size: Cache Residency's cache capacity. Must be between 0 and 252 GB
in 0.5 GB increments. The default is 0 GB.
NOTE:
The value you select for this CLPR must be bigger than the Cache Residency cache's capacity that
has already been defined for this CLPR using Cache LUN XP. Check the size of Cache Residency
that has already been defined in XP Cache LUN before changing the value.
• Number of Cache LUN XP Areas: Number of Cache Residency areas. Must be between 0
and 4,0
96. The default is 0.
NOTE:
ue selected for this CLPR must be bigger than the number of Cache Residency areas that
The val
have al
Reside
ready been defined for the CLPR using Cache LUN XP. Check the number of Cache
ncy areas that have already been defined in XP Cache LUN before changing the value.
• Partial Cache Residence Size: Partial Cache Residence's (PCR's) cache capacity. Must be
between 0 and 252 GB in 0.5 GB increments. The default is 0 GB.
NOTE:
Thevalue selected forthisCLPRmustbebiggerthanthe totalamountofPartial CacheResidence
that has already been defined for this CLPR using Cache LUN XP. Check the total amount of Partial
Cache Residence that has already been defined in XP Cache LUN before changing the value.
NOTE:
You cannot change the capacity value of CLPR0 directly. If you change another CLPR's capacity,
thedifferenceisreflected in CLPR0's capacity.
NOTE:
The maximum available cache capacity (capacity of mounted cache minus total amount of usage
for other CLPRs) appears for each upper limit of Cache Size, Cache LUN XP Size, Number of
Cache LUN XP Areas,and Partial Cache Residence Size.
20
Working with CLPRs
Page 21

NOTE:
The remaining capacity, which is calculated by subtracting Cache LUN XP Size and Partial
Cache Residence Size from Cache Size, must be 4 GB or more in CLPR0. If you changed
Cache Size, Cache LUN XP Size,or Partial Cache Residence Size, verify that the capacity
calculated by subtracting Cache LUN XP Size and Partial Cache Residence from Cache Size
remains 4 GB or more in CLPR0.
NOTE:
For more information about XP Cache LUN and Partial Cache Residence, see the HP StorageWorks
Cache LUN XP user guide for the XP12000/XP10000/SVS200.
• Apply: Applies settings.
NOTE:
You can make changes for more than one CU group before implementing the settings.
• Cancel: Cancels settings that were entered or selected, and restores settings to their initial values.
Creating CLPRs
If you have not yet created a CLPR, the entire cache appears in CLPR0 in the Partition Definition pane.
To partition the cache, create a CLPR. The created CLPR can be allocated to each SLPR. CLPRs can be
created in a selected SLPR.
IMPORTANT:
Disk/cache partitioning for the SVS200 is limited to one SLPR and four CLPRs.
NOTE:
Only the Administrators can create CLPRs.
NOTE:
If you create a CLPR, the default cache size is 4 GB. To create a CLPR, the desired cache size is allocated
from CLPR0 (entire cache).
NOTE:
To create a CLPR, the remaining cache size, which is calculated by subtracting Cache LUN XP Size and
Partial Cache Residence Size from the Cache Size of CLPR0, must be 4 GB or more.
1. Confirm the current CU group in the drop-down list for CU groups at the top of the pane.
NOTE:
To change the CU group, select the desired CU group from the drop-down list for CU
groups in the upperright of theXPRemoteWeb Consolemainpane. Formoreinformation
about CU groups, see the HP StorageWorks XP Remote Web Console user guide for
XP12000/XP10000/SVS200.
HP StorageWorks
21
Page 22

2. Right-clickanSLPRinthe tree,and select Create CLPR. The CLPR is added to the tree.
3. Select a CLPR in the tree. Information about the selected CLPR appears in the Detail For CLPR section.
NOTE:
If a CLPR has this icon (
CU group, return to step 1.
4. Change CLPR settings as needed.
5. Click Apply. The progress bar appears.
NOTE:
Even though you clicked Apply, the parity groups have not been allocated to a CLPR yet.
6. To allocate parity groups to a CLPR, migrate the parity groups from another CLPR (see Migrating
parity group
NOTE:
To change an e
Deleting CLPRs
) and is grayed out, you cannot select the CLPR. To change the
sinCLPRs).
xisting CLPR's settings, repeat step 3 through step 6.
If you delete a CLPR, the resources (that is, parity groups) in the CLPR are automatically returned to CLPR0.
NOTE:
The CLPRs which are not necessary may be deleted. Note, that you cannot delete CLPR0.
1. Confirm the
Remote Web Console main pane.
NOTE:
To change the CU group, select the desired CU group from the drop-down list for CU
groups in the upper right of the XP Remote Web Console main pane. For more information
about CU groups, see the HP StorageWorks XP Remote Web Console user guide for
XP12000/XP10000/SVS200.
2. Right-click the CLPR you want to delete in the tree, and select Delete CLPR.The selected CLPR is
deleted from the tree.
NOTE:
If a CLPR has this icon (
CU group, return to step 1.
3. Click Apply. A progress bar appears.
current CU group in the drop-down list for CU groups in the upper right of the XP
) and is grayed out, you cannot select the CLPR. To change the
NOTE:
To delete the CLPR to which parity groups are allocated, move the parity groups that are allocated to
theCLPR you aregoing to delete to anotherCLPR. Before youdelete the CLPR,makesure thatno
parity group is allocated to that CLPR.
22
Working with CLPRs
Page 23

Migrating pari
You can migrate parity groups in a CLPR to another CLPR.
NOTE:
You cannot migrate parity groups to a CLPR belonging to a CU group other than the current CPLR.
NOTE:
Multiple parity groups that construct the concatenated parity group must belong to the same CLPR.
NOTE:
You cannot migrate the parity group that contains the LDEVs to which the Cache Residency cache extents
is defined to another CLPR.
1. Confirm the current CU group in the drop-down list for CU groups in the upper right of the XP
Remote Web Console main pane.
NOTE:
To change the CU group, select the desired CU group from the drop-down list for CU
groups in the upperright of theXPRemoteWeb Consolemainpane. Formoreinformation
about CU groups, see the HP StorageWorks XP Remote Web Console user guide for
XP12000/XP10000/SVS200.
ty groups in CLPRs
2. Double-click the SLPR in the tree. CLPRs appear under the specified SLPR in the tree.
3. Select a CLPR from the tree. The selected CLPR's resource list appears.
NOTE:
If a CLPR has this icon (
CU group, return to step 1.
4. Right-click the parity groups you want to migrate from the CLPR, and select Cut.
NOTE:
Youcan select themultipleparitygroups.
5. Right-click the CLPR you want to migrate the parity groups to, and select Paste Parity Group.The
selected parity groups are added to the CLPR resource list.
NOTE:
YoumustselectaCLPR that hasthisicon(
6. Click Apply The progress bar appears.
) and is grayed out, you cannot select the CLPR. To change the
) and black characters for the destination CLPR.
HP StorageWorks
23
Page 24

24
Working with CLPRs
Page 25

4 Working with SLPRs
Figure 5 P
• Tree: Displays SLPRs and CLPRs in the array. The SLPR number and name appear on the right of
the SLPR
SLPRs belonging to a CU group other than the current CU group have this icon (
out. CLPRs belonging to a CU group other than the current CU group have this icon (
grayed out. You cannot select these SLPRs and CLPRs.
• SLPR re
and ports) belonging to the current CU group.
NOTE:
If you select SLPR0 in the tree, all resources (CLPRs and ports) that have not been allocated to any
SLPRs yet appear.
NOTE:
Information about CLPR0 appears regardless of which CU group is selected.
• No.:List's line number.
• Resource Type:Type of the SLPR's resources: Cache Partition or Port.
• Name:CLPR or port name.
artition Definition pane (SLPR selected)
icon (
source list: Displays information about resources in the specified SLPR (that is, CLPRs
If theresource typeis Cache Partition, the CLPR number and name appear.
). The CLPR number and name appear on the right of the CLPR icon ( ).
)and aregrayed
)and are
HP StorageWorks
25
Page 26

If theresourcetypeis Port, the port name appears.
• Properties: CLPR's capacity and number of parity groups allocated to the specified CLPR.
NOTE:
The number of parity groups for CLPR0 is calculated by subtracting the number of parity groups
belonging to CU groups other than the current CU group from the total number of parity groups
that CLPR0 has.
• Information: Channel adapter name, if the resource type is Port.
• Status: If the SLPR's resources (CLPRs and ports) have been edited, the SLPR's status appears
in the right-most column.
• Create: A CLPR or port has been created.
• Delete: A CLPR or port has been deleted.
• Detail for SLPR: Displays the SLPR's settings. You can change the SLPR's settings.
• SLPR Name: SLPR's name, up to 32 alphanumeric characters.
NOTE:
You cannot change the name of SLPRs that have this icon (
) and are grayed out. To change
theirnames,switchthe CU groupusing thedrop-down list forCUgroupsinthe upperright
of theXPRemoteWeb Consolemainpane.
• CU(* in use):CU number in the specified SLPR (00-FE). ACUnumber withanasterisk(*)
indicate
to the Ava
s the SSID is registered to the CU. To delete a CU from the specified SLPR and return it
ilable CU list, select the CU from the list, and click Delete.
NOTE:
The numbe
r of a CU belonging to a CU group other than the current CU group does not appear.
• Available CU(* in use):
• CU: Number of the CUs belonging to the current CU group. A CU number with an asterisk
(*) indicates that the SSID is registered to a CU.
• SLPR: SLPR to the CU belongs to.
• SSID(SLPR): SSID if the SSID is registered to a CU. The SLPR the SSID belongs to appears
between parentheses on the right of the SSID.
To add a CU to the specified SLPR and return the CU to the CU list, select the CU from the list,
and click Add. A CU number with an asterisk (*) indicates the SSID is registered to the CU.
You can select up to 64 CUs into which the SSIDs are registered or not.
NOTE:
If users in the StorageAdmins group who have partition-level access want to use the Customized
Volume function, first specify the CU for each SLPR to prevent overlapping the newly allocated
CU numbers and the existing CU numbers in other SLPRs. If CU numbers are not specified first,
users in the StorageAdmins group who have partition-level access cannot use the Customized
Volume function.
• SSID(* in use): SSIDinthe selected SLPR (0004toFFFE).AnSSIDnumber with anasterisk(*)
indicates the SSID is registered to the CU.
26
NOTE:
Only SSIDs registered to a CU belonging to the current CU group appear for SLPR0.
Working with SLPRs
Page 27

NOTE:
If acustomizedvolume(CV)isset usingthe Customized Volume function,and theCUnumber
and SSID are registered to different SLPRs, a dash (-) appears to the right of the SSID. For more
information, see the HP StorageWorks LUN Configuration and Security Manager XP user guide
for the XP12000/XP10000/SVS200.
• From: Starting number of the SSID added to the specified SLPR (0004 to FFFE). You can enter
an SSID that is in SLPR0.
• To: Last number of the SSID added to the specified SLPR (0004 to FFFE). You can enter
up to 256 SSIDs that are in SLPR0.
NOTE:
To add SSIDs to an SLPR, enter the starting number in From,enter thelast number in To,and
click Add.
NOTE:
If you add mul
number.
NOTE:
To delete an SSID from the SSID box, select the SSID from the SSID box, and click Delete.
tiple SSIDs to the specified SLPR, the To number must be smaller than the From
NOTE:
If users in the StorageAdmins group who have partition-level access use the Customized Volume
function, first specify the SSID number for the SLPR to prevent overlapping newly allocated SSID
numbers and existing SSID numbers in another SLPR.
• Apply: Applies settings.
NOTE:
You can make changes for more than one CU group before implementing the settings.
• Cancel: Cancels settings entered or selected, and restores settings to their initial values.
Administering SLPRs
Only storage administrators can make settings for SLPR0. A storage partition administrator only has
authority within the assigned storage logical partition. The storage administrator can also assign write
permission for one or more of the following functions:
• Volume Manager
• XP LUN Security Extension
• LUN Manager
• XP Cache LUN
• XP Auto LUN
The following is the general procedure required for preparing and administering the array with SLPRs.
Only Administrators can perform this procedure.
1. Create an SLPR (see Creating SLPRs).
HP StorageWorks
27
Page 28

2. On the License Key Partition Definition pane, allocate licenses for software products to the
SLPR (see the HP StorageWorks Command View XP Advanced Edition Device Manager Server
installation and configuration guide or the HP StorageWorks XP Remote Web Console user guide
for XP12000/XP10000/SVS200).
NOTE:
If software product licenses have not been allocated to an SLPR, the user assigned to the
SLPR cannot use the software products. For XP Auto LUN, if the licensed capacity for the
entire storage is sufficient, the Administrator can use XP Auto LUN to monitor the entire
storage, even if XP Auto LUN's license has not been allocated to the SLPR.
3. For instructions on adding users, see the HP StorageWorks Command View XP Advanced Edition
Device Manager Server installation and configuration guide or the HP StorageWorks XP Remote
Web Console user guide for XP12000/XP10000/SVS200.
4. To delete an SLPR, delete all users and set the license capacity to 0 GB, or click Disable for all
software products assigned to the SLPR on the License Key Partition Definition pane. See Deleting
SLPRs.
NOTE:
You cannot migrate mainframe volumes out of SLPR0. All mainframe volume operations can be
performed by storage administrators, not storage partition administrators.
NOTE:
You can as
error occurs when that user attempts to launch Command View AE or XP Remote Web Console.
sign a user to an SLPR that has not yet been created. However, if the SLPR does not exist, an
Creating SLPRs
If you have not yet created an SLPR in the array, all of the array's resources (that is, CLPRs and ports)
belong in SLPR0. To divide the array's resources, create a new SLPR in the array.
IMPORTANT:
Disk/cache partitioning for the SVS200 is limited to one SLPR and four CLPRs.
NOTE:
Only Administrators can create SLPRs.
1. Confirm the current CU group in the drop-down list for CU groups in the upper right of the XP
Remote Web Console main pane.
NOTE:
To change the CU group, select the desired CU group from the drop-down list for CU
groups in the upper right of the XP Remote Web Console main pane. For more information
about CU groups, see the HP StorageWorks XP Remote Web Console user guide for
XP12000/XP10000/SVS200.
2. Right-click Subsystem,and select Create SLPR.
28
Working with SLPRs
Page 29

NOTE:
To create multiple SLPRs, repeat step 2.
3. Select an SLPR from thetree(see Figure 5).
NOTE:
If an SLPR hasthisicon(
CU group, return to step 1.
) and is grayed out, you cannot select the SLPR. To change the
4. Change the SLP
5. Click Apply. A progress bar appears.
NOTE:
Even though you clicked Apply, the resources (CLPRs and ports) have not been allocated
to an SLPR yet.
6. To allocate resources (CLPRs and ports) to an SLPR, perform one or both of the following:
a. Create aCLPRinanSLPR(see Creating CLPRs).
b. Migrate a port from another SLPR (see Migrating an SLPR's resources).
NOTE:
To change an existing SLPR's settings, repeat step 3 through step 6.
Deleting SLPRs
If you delete an SLPR, partitioned resources are automatically returned to SLPR0.
NOTE:
You cannot d
elete SLPR0.
R's settings as needed.
NOTE:
Only Administrators can delete SLPRs
1. Confirm the current CU group in the drop-down list for CU groups in the upper right of the XP
Remote Web Console main pane.
NOTE:
To change the CU group, select the desired CU group from the drop-down list for CU
groups in the upperright of theXPRemoteWeb Consolemainpane. Formoreinformation
about CU groups, see the HP StorageWorks XP Remote Web Console user guide for
XP12000/XP10000/SVS200.
2. Right-click the SLPR you want to delete in the tree, and select Delete SLPR.
HP StorageWorks
29
Page 30

NOTE:
If an SLPR has this icon (
CU group, return to step 1.
3. Click Apply. The progress bar appears.
) and is grayed out, you cannot select the SLPR. To change the
Migrating an SLPR's resources
You can migrate CLPRs and ports that are managed in an SLPR to another SLPR.
NOTE:
You cannot migrate CLPRs and ports to an SLPR belonging to a CU group other than the current SLPR.
NOTE:
You can migrate only Target ports to another SLPR. You cannot migrate Initiator, RCU Target, and
External ports.
NOTE:
A NAS port belonging to the same channel adapter must belong to the same SLPR. For more
information, see the HP StorageWorks LUN Configuration and Security Manager XP user guide for the
XP12000/XP10000/SVS200.
1. Confirm the cu
Remote Web Console pane.
NOTE:
To change the CU group, select the desired CU group from the drop-down list for CU
groups in the upper right of the XP Remote Web Console main pane. For more information
about CU groups, see the HP StorageWorks XP Remote Web Console user guide for
XP12000/XP10000/SVS200.
2. Select an SLPR from thetree. TheSLPRresourcelist appears.
3. Right-click the CLPR or port you want to migrate, and select Cut.
NOTE:
You can select multiple CLPRs or ports.
NOTE:
To migrate NAS ports, select all ports in the same CHN (channel adapter for the NAS) and
the CLPRs containing LUN0000 and LUN0001 that belong to the NAS-Sys host group, and
migrate them at the same time.
4. Right-click the SLPR you want to migrate the CLPR or port to, and select Paste CLPRs, Ports.If you
migrated CLPRs, they are added to the tree and SLPR resource list. If you migrated ports, they are
added only to the SLPR resource list.
rrent CU group in the drop-down list for CU groups in the upper right of the XP
30
Working with SLPRs
Page 31

NOTE:
You must select an SLPR that has this icon (
NOTE:
The LUN0000 and LUN0001 belonging to the NAS-Sys host group must belong to the
same SLPR as the NAS port. LUNs from LUN0005 to LUN000A in the NAS system LU
must belong to SLPR0.
5. Click Apply to apply settings. The progress bar appears.
Displaying error messages
If settings contain a discrepancy, an error message appears when you click Apply.Even if you click OK
or Cancel to close the message after seeing the error message, you can refer to the latest error message.
1. Right-click the SLPR in the tree, and select Error Detail.
2. Click OK to close the message.
) and black characters for the destination SLPR.
HP StorageWorks
31
Page 32

32
Working with SLPRs
Page 33

5 Troubleshooting
Table 6 provides general troubleshooting instructions for XP Disk/Cache Partition operations.
Table 6 General troubleshooting for XP Disk/Cache Partition
Error
All XP Disk/Cache Partition functions cannot be
performed.
Port
The specified port cannot be migrated to another
SLPR.
Parity group
The parity group administered in a CLPR cannot
migrate to a CLPR in another SLPR.
NAS system LU
The parity group administrated in a CLPR cannot
migrate to a CLPR in another SLPR.
LU
The parity group administrated in a CLPR migrated to
the CLPR in another SLPR.
LU
ACLPRinanSLPRmigratedto another SLPR or a
CLPR was deleted.
LU
Aportthatisadministrated in an SLPR migrated to
another SLPR.
Corrective Action
If you logged on to Command View XP or XP Remote
Web Console as the storage partition administrator
to use XP Disk/Cache Partition, you cannot perform
any functions. To use XP Disk/Cache Partition:
1. Log on as the storage administrator.
2. Contact the storage administrator and have
that person perform XP Disk/Cache Partition
functions.
You can migrate only Target ports to another SLPR.
You cannot migrate Initiator, RCU Target, and External
ports. Select a Target port.
Only parity groups for open-system user volumes
among parity groups administered in a CLPR can
migrate outside of SLPR0. You cannot migrate parity
groups for mainframe volumes. Select parity groups
that are not for mainframe volumes.
Parity groups that contain the NAS system LU
(LUN0005, LUN0006, LUN0008, LUN0009, and
LUN000A) cannot migrate outside of SLPR0. NAS
system LU (LUN0000 and LUN0001) must belong to
the same SLPR as the NAS channel adapter.
Check the NAS system LU's settings, and correct the
settings if necessary. For more information about
changing NAS system LU settings, contact your
HP account support representative.
• The LU in the parity group administrated in a CLPR
is set across multiple SLPRs.
• The NAS system LU (LUN0000 and LUN0001)
does not belong to the same SLPR as the NAS
channel adapter.
Check the settings, and migrate ports associated to
the LU to the SLPR to which the parity group migrated,
if necessary.
The LU associated to the port administrated in an
SLPR is set across multiple SLPRs.
Check the settings, and migrate the parity group
defined to the LU to the CLPR defined to the SLPR to
which the LU migrated, if necessary.
HP StorageWorks
33
Page 34

Error
Corrective Action
LUSE volume
A parity group that is administrated in a CLPR
migrated to another CLPR.
AportinHighS
TheportinanS
Name of SLPR
The SLPR name cannot be changed.
Name of CLPR
TheCLPRnamecannotbechanged.
Parity Group
The parity group in a CLPR cannot migrate to another
CLPR.
NAS port
TheNAS portsinanSLPR migratedto another SLPR.
SSID
You cannot migrate SSIDs.
peed mode
LPR migrated to another SLPR.
The LUSE volume associated to the parity group
administrated in a CLPR is set across multiple CLPRs.
Check the settings, migrate the entire LUSE volume
to the CLPR to which the parity group migrated, if
necessary.
You are trying
High Speed mod
settings, an
belong to the
You cannot assign the same name to multiple SLPRs.
The SLPR name you entered is already used. Enter
another name.
You cannot assign the same name to multiple CLPRs.
TheCLPRnameyou enteredis already used or
reserved by a system. Enter another name.
If you cann
another CL
• The specifi
another p
construc
belong to thesameCLPR. Specifyall parity groups
that construct the concatenated parity groups.
• If you do not click Apply when creating a new
CLPR, the parity group cannot be allocated. Click
Apply, and migrate the parity group.
NAS ports in the same channel adapter must belong
to the same SLPR. Migrate all NAS ports in the same
channel adapter.
You cannot migrate the SSID associated to a CU
group that does not belong to the current CU group.
In this case, migrate the SSID:
1. Use the drop-down list for CU groups in the
upper right of the XP Remote Web Console main
pane to change the CU group to the CU group
the desired SSID is associated to.
2. Delete the SSID you want to migrate.
3. Use the drop-down list for CU groups in the
upper right of the XP Remote Web Console main
pane to switch the CU group to the CU group
the destination SLPR belongs to.
4. Add the SSID.
to allocate ports in a port block in
e to multiple SLPRs. Check the ports'
d ensure that all ports in the port block
same SLPR.
ot migrate the parity group in a CLPR to
PR.
ed parity group is concatenated to
arity group. The parity groups that
t the concatenated parity groups must
34
Troubleshooting
Page 35

6 Notes, restrictions, and requirements
This chapter provides additional information about using SLPRs and CLPRs.
CLPRs
• When creating
Partition De
Web Console and Java® API. Both are required to enable the Web GUI for new partitions.
• Adding or changing a CLPR definition can take several hours. To minimize the amount of time
required when moving cache from one CLPR to another, create partitions when the array's
workload is
• HP does not recommended the following operations with CLPRs:
• Creating a LUSE volume extending over multiple CLPRs. If performed, you cannot use volumes
belonging
for z/OS® p
• XP Business Copy Quick Restore operations affecting multiple CLPRs.
• XP Auto LUN manual migrations affecting multiple CLPRs.
• If you per
operations, and allocate volumes that extend over multiple CLPRs to the same consistency group,
you cannot create a pair.
• If you pe
operations, you can allocate only XP Continuous Access Asynchronous or TrueCopy for z/OS
Asynchronous pairs belonging to the same CLPR to one consistency group. Parity groups allocated
to the CLPR that these XP Continuous Access Asynchronous or TrueCopy for z/OS Asynchronous
pairs b
• The following CU groups are for mainframe volumes: CU40-7F, CU80-BF, and CUC0-FE.
Therefore, you cannot use these CU groups for some program products. For more information
about whether or not you can use all CU groups, see the user guide for each program product.
elong to cannot migrate to another CLPR.
a partition, the partition's license keys are disabled by default. Use the License Key
finition pane to enable license keys for the new partition. Basic license keys include XP
light.
to the CLPRs to which the LUSE is set as a XP Continuous Access or TrueCopy
air volume.
form XP Continuous Access Asynchronous or TrueCopy for z/OS Asynchronous
rform XP Continuous Access Asynchronous or TrueCopy for z/OS Asynchronous
SLPRs
• Portsbeing assigned to an SLPR should nothaveexistinghostgroupsand LUNs assigned to them.
Assign LUNs and define host groups after the partition is created.
• Assign LUNs for an SLPR from array groups that are assigned to control units (CUs) that have
been assigned to that SLPR. The StorageAdmin for a partition can only allocate from array groups
belonging to the StorageAdmin's assigned partition.
• HP does not recommend making settings on multiple SLPRs in a single operations because it
results in more complex and difficult SLPR administration.
• If an administrator forces the following functions for multiple SLPRs and contradictions occur as a
result, the StorageAdmin user‘s ability to use the SLPR is affected:
• XP Auto LUN manual migration
• XP Business Copy Quick Restore
• LU path settings
• High Speed mode settings
•Creating a LUSE volume
HP StorageWorks
35
Page 36

• Mainframe volumes must be allocated to SLPR0.
• Before a customized volume (CV) is created, the StorageAdmins user must allocate CU numbers to
the SLPR. Allocated CU numbers are required only for defining the CU number to be allocated to
the LDEV when the StorageAdmin user creates a CV.
36
Notes, restrictions, and requirements
Page 37

Index
A
accessing XP Disk/Cache Partition,17
administering SLPRs,27
administrator rights,14
arrays, virtual,13
audience, documentation, 7
C
cache logical partitions. See CLPRs,11
CLPRs
about,11
creating,21
deleting,22
example of,12
migrating parity groups,23
restrictions on,35, 35
settings,19
conventions
document, 8
text symbols, 8
customer support, 8
D
deleting
CLPRs,22
SLPRs,29
displaying error messages,31
document
conventions, 8
feedback, 9
prerequisites, 7
related documentation, 7
E
error messages,31
I
installation,17
M
memory, cache,11
migrating
parity groups across CLPRs,23
SLPR resources,30
P
partition administration,14
prerequisites, 7
R
related documentation, 7
S
SLPRs
about,13
administering,27
creating,28
deleting,29
example of,14
information about,17
migrating resources,30
restrictions on,35
settings,25
storage management logical partitions. See
SLPRs,13
storage platforms, supported, 7
StorageAdmins,14
Subscriber's Choice for Business, HP, 9
supported storage platforms and firmware, 7
symbols in text, 8
F
features,11
feedback, documentation, 9
firmware, supported, 7
H
help, obtaining, 8, 9
HP
storage website, 9
Subscriber's Choice for Business website, 9
technical support, 8
T
technical support, HP, 8
text symbols, 8
U
users, access rights of,14
V
virtual arrays,13
HP StorageWorks
37
Page 38

W
websites
HP documentation, 9
HP storage, 9
HP Subscriber's Choice for Business, 9
38
 Loading...