

Hoyt MSR-200 User Manual
0
1
Welcome
Thank you for choosing the MSR-200 HD Motorsports
Camera to pursue your digital video adventures. Whether
you are racing at the track, off-roading in the desert or
gliding through fresh powder on the trail, to get the utmost
satisfaction from your digital video, please take a moment
to read through this manual. Its contents will send you on
an educational journey into your camera's multiple
capabilities.
1. Camera Precaution
Before using the camera, please ensure that you read and
understand the safety precautions described below.
Always ensure that the camera is operated correctly.
• Never operate the camera inside of an aircraft or
anywhere else where operation of such devices is
restricted. Improper use creates the risk of serious
accident.
• Do not aim the camera directly into the sun or other
intense light sources which could damage your
eyesight.
• Do not try to open the case of the camera or attempt
to modify this camera in any way. High-voltage
internal components create the risk of electric shock
when exposed. Maintenance and repairs should be
carried out only by authorized service providers.
• Keep the camera and its accessories out of the reach
of children and animals to prevent accidents or
damage to the camera.

2
• If you notice smoke or a strange odor coming from
the camera, turn the power off immediately. Take the
camera to the nearest authorized service center for
repair. Never attempt to repair the camera on your
own.
• Use only the recommended power accessories. Use
of power sources not expressly recommended for
this equipment may lead to overheating, distortion of
the equipment, fire, electrical shock or other hazards.
• Never apply too much force when cleaning the
surface of the lens to avoid scratches on the lens
surface or any malfunction.
• The camera may become slightly warm during use.
This does not indicate malfunction.
• If the exterior of the camera needs cleaning, wipe it
with a soft, dry cloth.
• If there is leaking, discoloration, change of shape,
rise in temperature, damaged exterior, strange odor
or any other abnormal condition, immediately
discontinue use and remove the battery pack from
the camera, taking care to keep it well away from fire.
Table of Contents
3
1. Camera Precaution..……………………………….. 1
2. Preparation………………………………………….. 5
Standard Accessories……………………….. 5
Getting to know your MjSR-200…………….. 6
Installing the Battery Pack………………….. 8
Charging the Battery Pack………………….. 9
3. Quick Start…………………………………………. .. 11
Power On/ OFF………………………………. 11
Loading the SD card…………...……………. 12
Recording Video Clips…….…………………. 13
Capturing Still Images.………………………. 14
Using the Zoom………………………………. 14
Adjust Exposure Compensation……………. 15
Mounting the MSR-200……………………… 16
4. Menus and Setup.………………………………….. 16
Camcorder/ Camera Mode……………..…… 17
White Balance……………………………... 17
Resolution...……………………………….. 18
Effect…….….………………………………. 19
Night Mode…………………………………. 19
Setup…..………………………………………. 20
Histogram.…………………………………. 20
Auto Power Off…..………………………... 20
TV standard……………………………….. 21
Format……………………………………... 21
Default……………………………………... 22
Language………………………………….. 22
Table of Contents
4
Frequency…………………………………. 23
Date/ Time…………………………………. 23
5. Playback Mode & Delete………………………….. 24
Playing your Movies…………………...…..... 24
Deleting and Protecting Movies…………….. 24
Viewing your Photos…………………………. 25
Deleting and Protecting Photos………..…... 25
Photo Auto Play………………………………. 26
DPOF………………………………………….. 26
6. Connecting and Uploading..………....................... 27
Connecting to PC/ NB and Install
MediaImpression..…………………………… 27
Download Movies and Photos……………… 29
How to share and upload your movies to
YouTube………………………………………. 31
Connecting to TV or HD TV…………………. 36
7. Appendix…………………………………………..... 37
Specification………………………………….. 37
Computer System Requirement……………. 38
2. Preparation
5
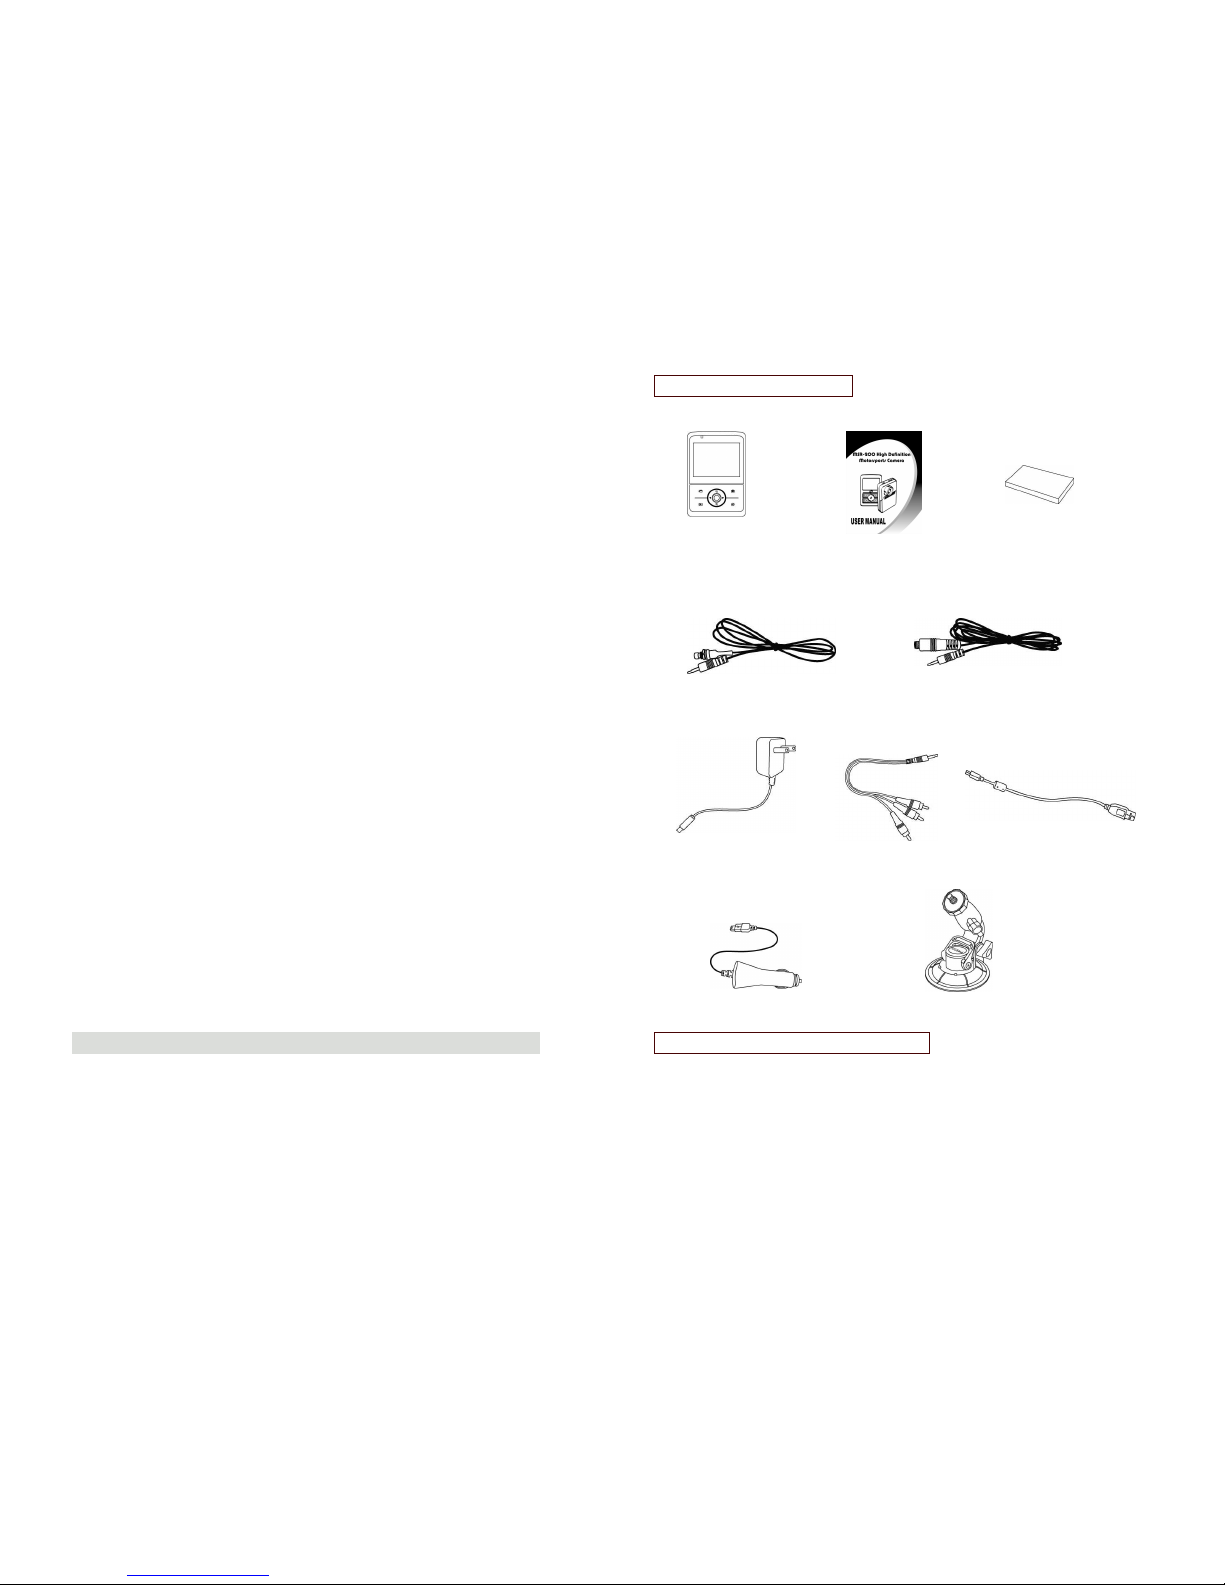
Standard Accessories
Video Camera User Manual Lithium-ion
Battery
Remote Record Button Remote Record Extension cable
AC Adaptor TV cable USB cable
Automobile Power Cord Suction Cup Mount
Getting to know your MSR-200
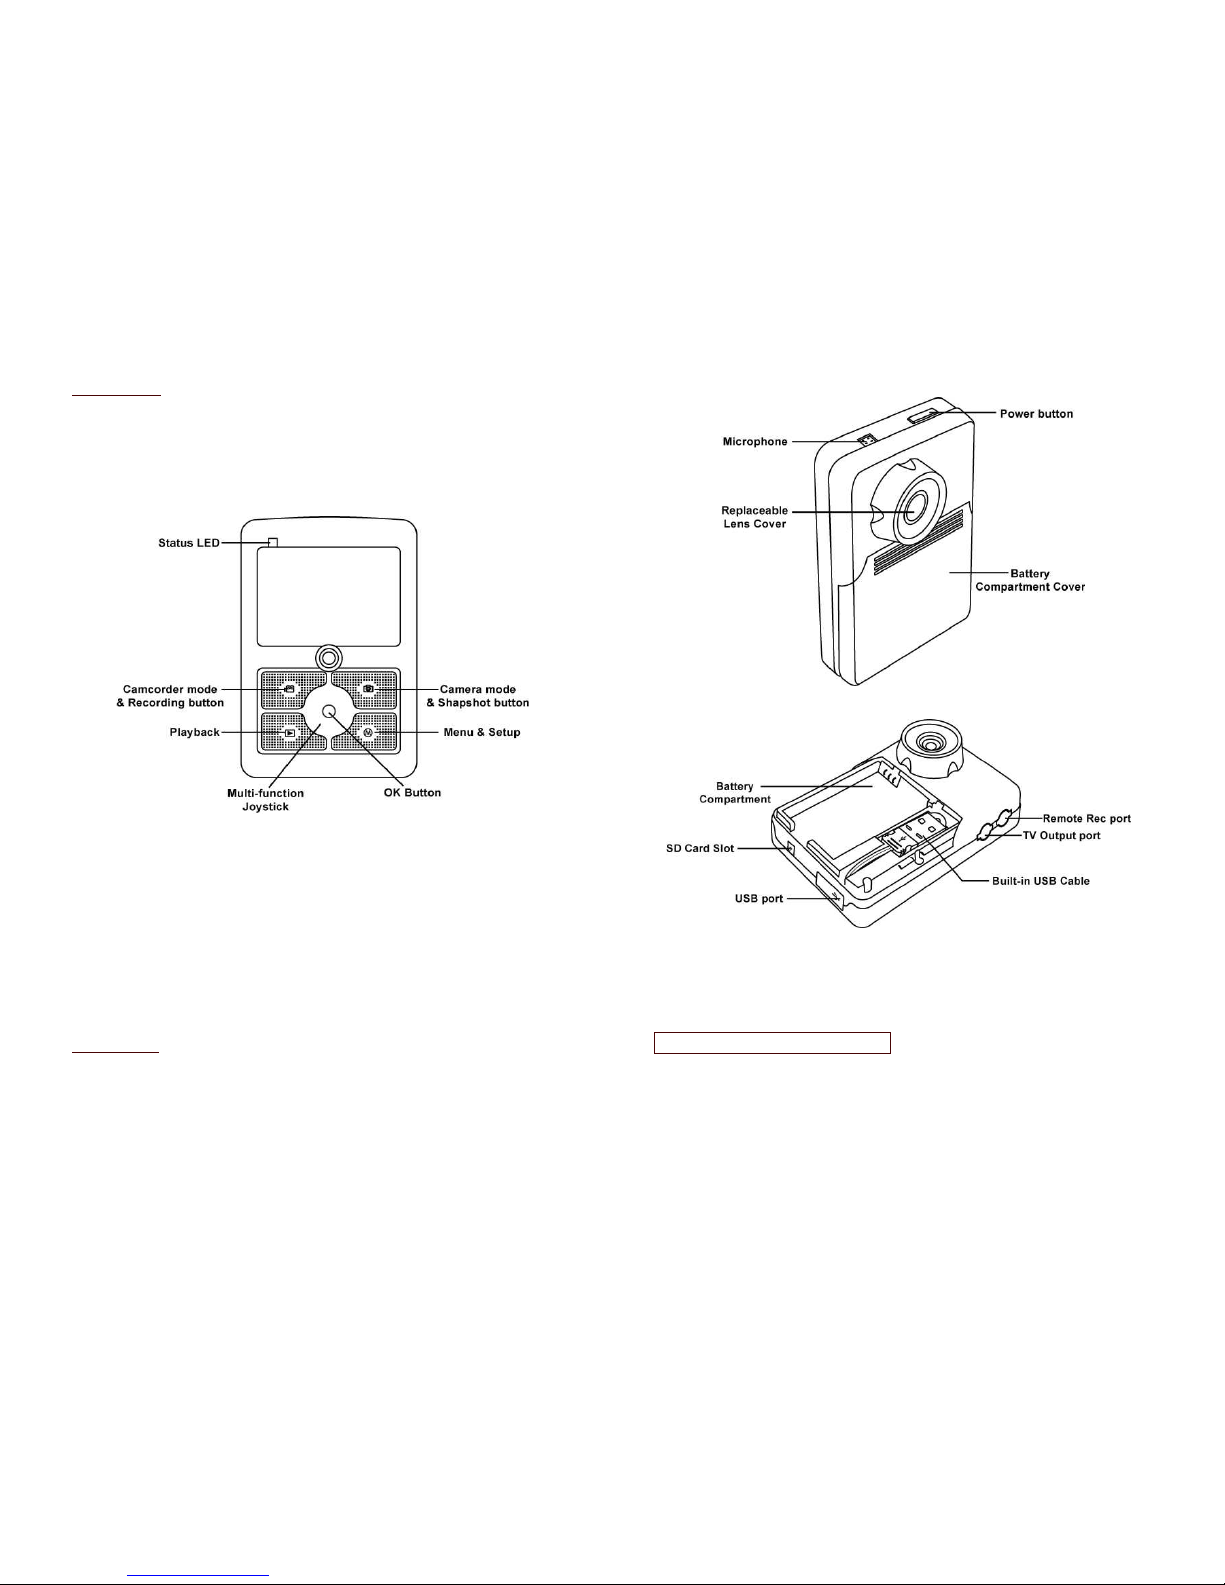
6
Front View
Back View
7
Installing the Battery Pack
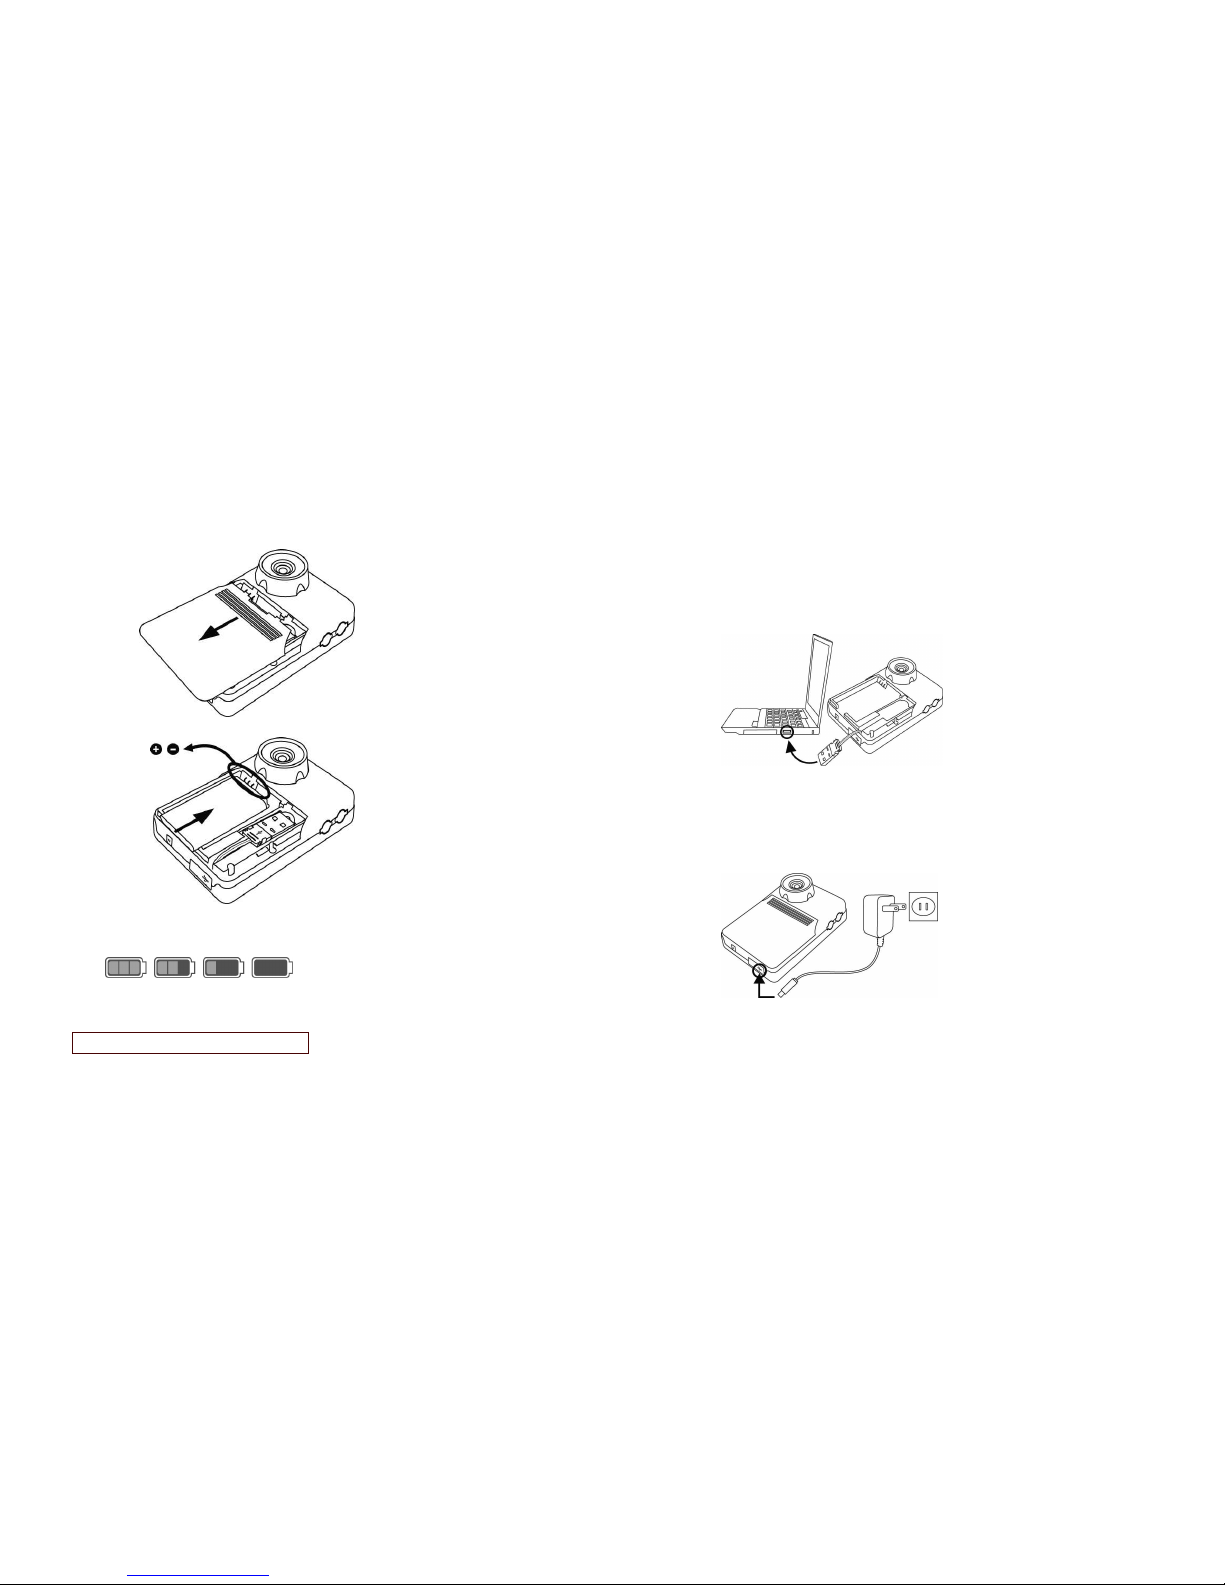
8
1. Open the battery compartment cover by lightly
pressing and sliding it back as shown.
2. Insert the supplied battery. Make sure the battery label
is facing upwards and the (+ and -) ends of the battery
match to the polarities indicated in the battery
compartment.
3. Snap the cover back into place.
Battery power status
Charging the Battery Pack
9
The battery pack is not charged at the time of purchase
and therefore needs to be charged before use. If the
battery charge becomes low while you are using the
camera, it is recommended to recharge it as soon as
possible.
1. Insert the battery pack into the battery compartment
(see page 8)
2. You may charge the battery in 4 ways:
(a) Take the built-in USB cable out of the camera
compartment and plug it into the USB port of your
computer/notebook.
(b) Plug the USB mini B of the supplied AC adaptor to
the USB port of the camera, and plug the adaptor to
the power outlet.
(c) Plug the USB mini B of the supplied USB cable to
the USB port of the camera, and plug the other USB
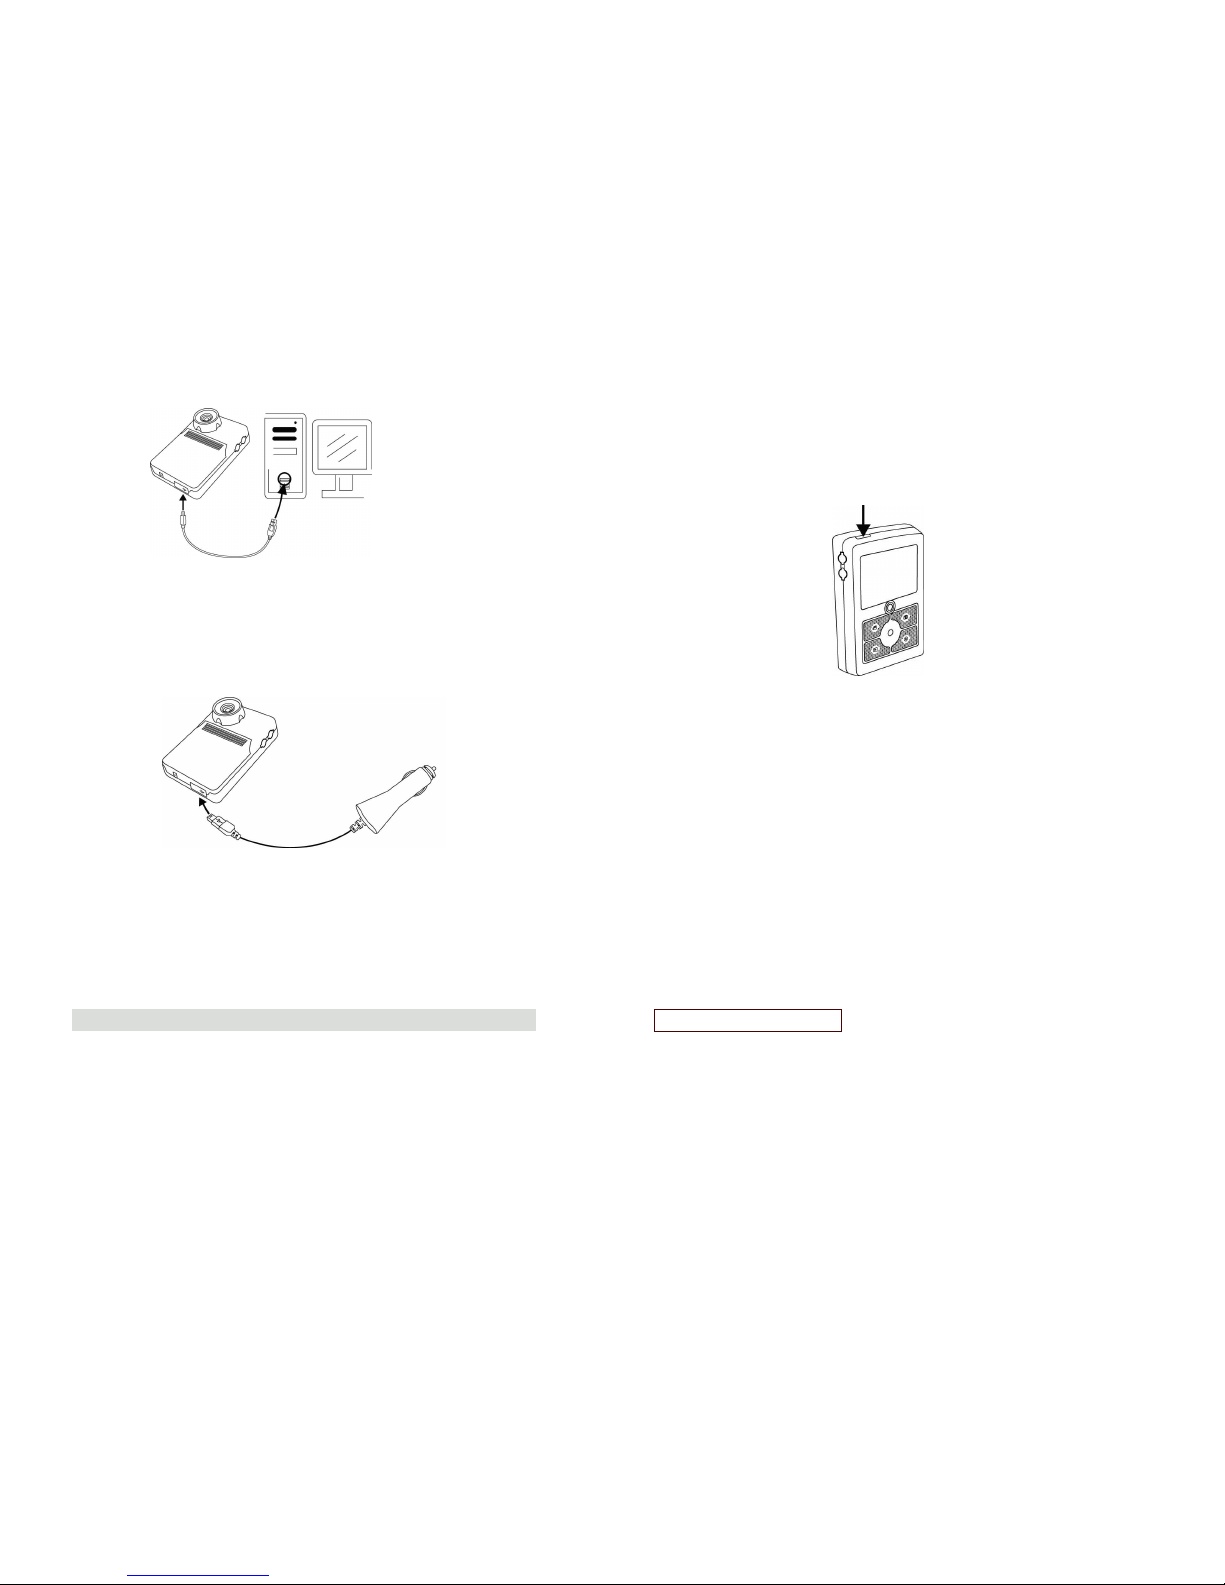
10
end into the USB port of your computer/notebook.
(d) Plug the USB mini B of the supplied automobile
power adaptor to the USB port of the camera, and
plug the adaptor to a 12VDC automobile power
source.
3. Red LED will light on during charging. When the
battery pack is fully charged, the red LED light will be
off and you may disconnect the charging connections.
4. Please charge the battery at least 3.5 hours prior to
your first use.
3. Quick Start
Power ON
11
1. Press the POWER button to turn on the camera.
A green LED lights up on the left-top when the power is
on.
2. When the LCD Monitor has been activated, the
camera is ready to use.
Power OFF
Note: The camera has an Auto Power Off feature to
conserve power when not in use. If, during use, the
camera is shutting off unexpectedly, check to make sure
the Auto Power Off function is set to off. (see page 20)
Loading the SD Card
Insert SD card into memory card slot. The LCD will show
 Loading...