

Hoya AF160FC User Manual
オートマクロストロボ
Auto Macro Flash
使用説明書
OPERATING MANUAL

Introduction
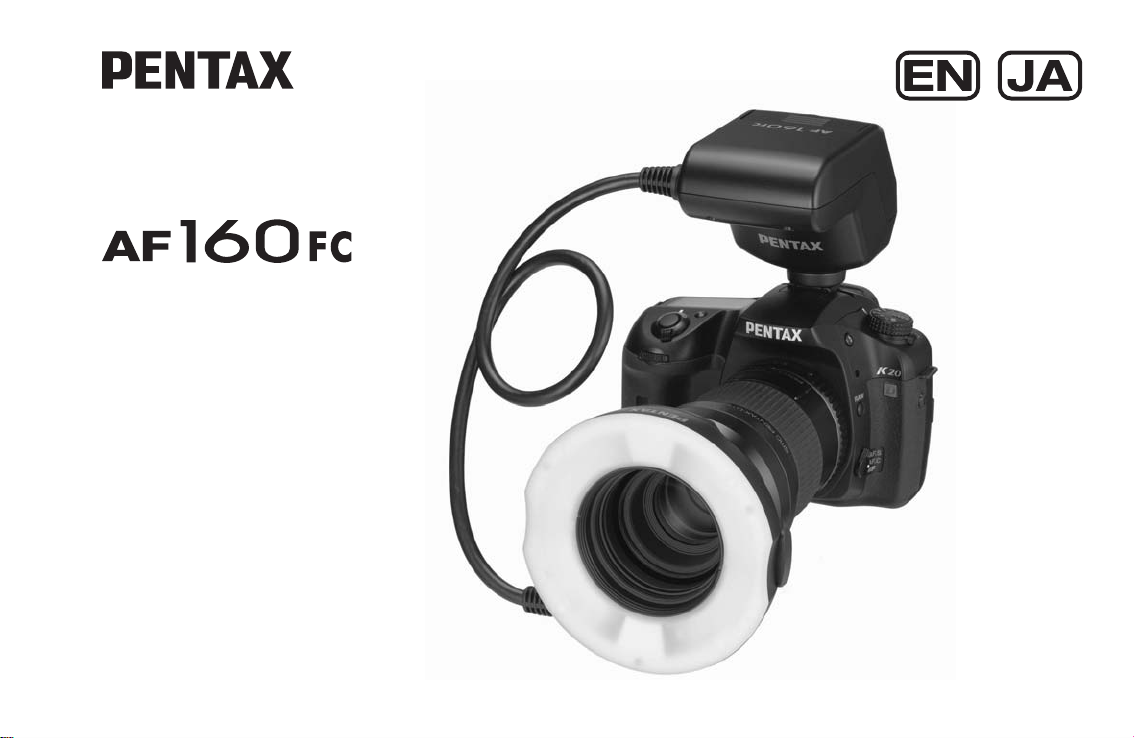
Thank you for purchasing the PENTAX Auto Macro Flash
AF160FC.
The AF160FC is a flash system for taking close-up photos of
small subjects using a flash to eliminate shadows, allowing you
to really enjoy photography. This operating manual is intended
mainly for digital SLR cameras using the P-TTL auto flash
mode. The provided adapter rings make it available for use
with many PENTAX products.
Please read this operation manual carefully before using your
flash unit.
PENTAX is a registered trademark of HOYA CORPORATION.
はじめに
このたびは、ペンタックス・オートマクロストロボAF160FC
をお買い上げいただき、誠にありがとうございます。
AF160FCは近接撮影用に用意されたストロボシステムで、小
さな被写体の無影撮影など、手軽にお楽しみいただけます。本
書は主にP-TTL オートストロボ機能に対応したデジタル一眼
レフカメラを対象に説明をしていますが、同梱のアダプターリ
ングと組み合わせて、幅広くペンタックス製品にご利用いただ
けます。
ご使用前にこの使用説明書をよくお読みのうえ、正しくお使い
ください。
「PENTAX」「ペンタックス」はHOYA株式会社の登録商標です。
1

FOR THE SAFE USE OF YOUR FLASH UNIT
Although we have carefully produced this flash unit for safe
operation, please be sure to especially follow warnings and
cautions given on page 3.
ストロボを安全にお使いいただくために
この製品の安全性については十分注意を払っておりますが、3
ページにある下記マークの内容については特に注意をしてお
使いください。
WARNING
This symbol indicates that violating this item could cause
serious personal injuries.
CAUTION
This symbol indicates that violating this item could cause minor
or medium personal injuries, or material losses.
is a symbol indicating items that are prohibited.
is a symbol emphasizing a warning.
2
警告
このマークの内容を守らなかった場合、人が重大な傷害を受け
る可能性があることを示すマークです。
注意
このマークの内容を守らなかった場合、人が軽傷または中程度
の傷害を受けたり、物理的損害の可能性があることを示すマー
クです。
は、禁止事項を表わすマークです。
は、注意を促すためのマークです。
Warning
The flash contains electronic circuits that operate at
high voltages. Do not attempt to disassemble the flash
unit yourself, as there is danger of an electric shock.
If internal parts of the flash unit become exposed due to
impact, etc., do not touch them as there is danger of an
electric shock.
Do not expose the flash unit to water or moisture as
there is danger of an electric shock.
Caution
Do not use the flash near anyone's eyes, as it may hurt
them. Be particularly careful with the flash around
infants.
The following may lead to an explosion or fire.
● Shorting the batteries
● Exposing the batteries to flames
● Dismantling the batteries
● Attempting to recharge non-rechargeable batteries
Remove the batteries from the flash unit immediately if
they become hot or begin to smoke. Be careful not to
burn yourself during removal.
警告
ストロボを分解しないでください。ストロボ内部には高
電圧部があり、感電の危険があります。
落下などにより、ストロボ内部が露出したときは、絶対
に露出部分に手をふれないでください。感電の危険があ
ります。
ストロボを水に濡らさないでください。感電の危険があ
ります。
注意
目の近くでストロボを発光させないでください。目を痛
めることがあります。特に、乳幼児にはご注意ください。
電池をショートさせたり、火の中に入れないでくださ
い。また、分解や充電をしないでください。破裂・発火
の恐れがあります。
ストロボ内の電池が発熱・発煙を起こしたときは、速や
かに電池を取り出してください。この場合、やけどに十
分ご注意ください。
3

Precautions for Your Flash Unit
取り扱い上の注意
● Never use organic solvents such as paint thinner, alcohol
or benzene to clean the flash unit.
● Avoid leaving the flash unit for extended periods in places
where the humidity and temperature may be very high
such as in a car.
● Be careful not to subject the flash unit to strong vibrations,
shock or pressure. Use a cushion to protect the flash unit
when carrying it in a motorcycle, car, boat, etc.
● Do not use the flash unit where it may be directly exposed
to rain, water, etc.
● Replace all the batteries at the same time. Do not mix
battery brands, type or an old battery with a new one. It
may cause explosion or overheating.
● When using the flash unit off the camera, do not try to
attach any metallic object to the electric contacts or to
mount incompatible accessories. Otherwise, the TTL auto
mechanism may be damaged or rendered inoperable.
● Do not attach any accessories having either fewer or
different electrical contacts (layout other than PENTAX
standard) for the hot shoe or grip. Otherwise, some
functions may not work properly.
● 汚れ落としに、シンナーやアルコール・ベンジンなどの有
機溶剤は使用しないでください。
● 高温多湿の所は避けてください。特に車の中は高温になり
ますのでご注意ください。
● 強い振動・ショック・圧力などを加えないでください。オー
トバイ・車・船などの振動は、クッションなどを入れて保
護してください。
● 雨水などが直接かかるところでは使用できません。
● 新旧の電池を混ぜないでください。また、違う種類の電池
を混ぜないでください。
● ストロボをカメラから離して使う場合、信号接点に金属が
触れないようにしてください。TTLオートが正しく働かな
くなります。
● 接点数の異なるアクセサリー(ホットシューグリップな
ど)を接続しないでください。一部の機能が正しく働かな
くなることがあります。
● 他社製カメラを本製品に使用されたことによる事故、故障
などにつきましては保証いたしかねます。
● 高性能を保つため、1~2 年毎に定期点検をしてください。
長期間使用しなかったときや、大切な撮影の前には点検や
テスト発光をしてください。
4

● We will not be held responsible for any accidents or
damage, etc. caused by using this product with cameras
and accessories made by other companies.
● Periodic checks are recommended every 1 to 2 years in
order to maintain high performance. If the unit has not
been used for an extended period of time, or is being
readied for an important shoot, it is recommended that you
take a test flash with the TEST button and test shoot with
it. Test flash is also important to maintain optimum
performance.
● Avoid contact with garbage, dirt, sand, dust, water, toxic
gases, salt, etc. When the flash unit is subjected to rain or
moisture, wipe it off with a dry soft cloth.
● Remove the batteries when not using the flash unit for
extended periods. Otherwise, battery leakage might result
and cause damage to the circuitry and proper operation of
the flash unit.
● Battery performance may temporarily be hindered in low
temperatures. Batteries should be kept warm in
temperatures below freezing for proper performance.
● When photographing black subjects or white subjects, use
exposure compensation.
● ゴミや泥・砂・ホコリ・水・有害ガス・塩分などがストロ
ボの中に入らないようにご注意ください。故障の原因にな
ります。雨や水滴などが付いたときは、よく拭いて乾かし
てください。
● 長期間使用しないときは、電池を取り出しておいてくださ
い。液漏れなどでストロボ内部を傷めることがあります。
● 寒冷地では、電池を保温しながら使用してください。電池
の性能が低下します。
● 黒い被写体や白い被写体などでは、光量補正などを利用し
て、撮影してください。
5

Contents
Introduction......................................................................................... 1
FOR THE SAFE USE OF YOUR FLASH UNIT.................................. 2
Precautions for Your Flash Unit.......................................................... 4
Overview of the operating manual ...................................................... 9
Packing list........................................................................................ 10
Using the case.................................................................................. 11
Names of parts (Controller) .............................................................. 12
Names of parts (Flash head) ............................................................ 13
Getting ready 14
Inserting the Batteries....................................................................... 14
■ About battery types .................................................................................. 15
Charge check and test flash ............................................................. 17
■ How to check the charge ......................................................................... 17
■ How to test the flash unit ......................................................................... 17
■ About auto power off................................................................................ 17
How to mount the macro flash unit ................................................... 18
■ Attach the controller to the camera. ......................................................... 18
■ Attach the adapter to the lens that is on the camera................................ 20
■ Attach the flash head to the adapter........................................................ 22
Taking pictures 23
Mode dial functions........................................................................... 23
Taking pictures in auto flash mode ................................................... 24
■ Auto flash modes ..................................................................................... 24
■ Auto flash operations for various cameras............................................... 25
■ Procedure................................................................................................. 26
■ TTL auto flash compatible cameras......................................................... 27
■ Compensating flash output with the mode dial ........................................ 27
Taking pictures in manual flash mode............................................... 28
■ ISO sensitivity and guide numbers ........................................................... 28
■ About exposure values ............................................................................. 28
■ Conditions of the subject change exposure values................................... 29
■ Compensating flash output with the mode dial ......................................... 29
■ Procedure ................................................................................................. 29
Other functions 30
Using the flash head output switch.................................................... 30
About the modeling light.................................................................... 31
Appendix 32
Auto flash guidelines and calculation methods ................................. 32
Manual flash guidelines and calculation methods ............................. 33
Lenses with compatibility issues ....................................................... 36
Specifications .................................................................................... 40
Warranty Policy ................................................................................. 41
6

目 次
はじめに ............................................................................................. 1
ストロボを安全にお使いいただくために ........................................... 2
取り扱い上の注意 ............................................................................... 4
本書の構成.......................................................................................... 9
同梱品一覧........................................................................................ 10
ケースの使いかた ............................................................................. 11
各部の名称(コントローラー)......................................................... 12
各部の名称(発光部ユニット)......................................................... 13
準備する 14
電池の入れ方 .................................................................................... 14
■ 電池の種類について................................................................................. 15
充電確認とテスト発光...................................................................... 17
■ 充電確認のしかた .................................................................................... 17
■ テスト発光のしかた................................................................................. 17
■ オートパワーオフ機能について............................................................... 17
マクロストロボの取り付けかた ....................................................... 18
■ コントローラーをカメラ本体に取り付ける............................................. 18
■ カメラに装着されたレンズにアダプターを取り付ける........................... 20
■ アダプターに発光部ユニットを取り付ける............................................. 22
撮影する 23
モードダイヤルについて .................................................................. 23
オートストロボモードで撮影する.................................................... 24
■ オートストロボモードの種類 .................................................................. 24
■ カメラ別のオートストロボ動作モードについて ..................................... 25
■ 撮影手順................................................................................................... 26
■ TTLオートストロボ対応カメラについて................................................. 27
■ モードダイヤルでストロボの発光量を補正する ..................................... 27
マニュアルストロボモードで撮影する ............................................. 28
■ ISO感度とガイドナンバー........................................................................ 28
■ 露出倍数について ..................................................................................... 28
■ 被写体条件で露出値は変わります............................................................ 29
■ モードダイヤルでストロボの発光量を補正する ...................................... 29
■ 撮影手順.................................................................................................... 29
その他の機能 30
発光部切り替えスイッチの使いかた ................................................. 30
イルミネーター(モデリング照明)について .................................. 31
付録 32
オート撮影時の目安表・計算方法 .................................................... 32
マニュアル撮影の目安表・計算方法 ................................................. 34
使用に適さないレンズ ...................................................................... 38
主な仕様 ............................................................................................ 40
アフターサービスについて ............................................................... 41
7

8

Overview of the operating manual
The operating manual includes the following chapters.
1 Getting ready –––––––––––––––––––––––––––––––––––
This chapter explains about getting ready to take pictures after you purchase
the flash unit.
Be sure to read this chapter before you start taking pictures or operating the flash unit.
2 Taking pictures––––––––––––––––––––––––––––––––––
This chapter explains how to take pictures and how to set the functions for
taking pictures.
3 Other functions –––––––––––––––––––––––––––––––––
This chapter explains how to use the functions of the flash unit.
本書の構成
本書は、次の章で構成されています。
1 準備する –––––––––––––––––––––––––––––––––––––––
お買い上げ後、本機を使った撮影のための準備について説明しています。
撮影をはじめる前に必ずお読みになり、操作を行ってください。
2 撮影する –––––––––––––––––––––––––––––––––––––––
撮影の種類と手順、撮影に関する機能の設定方法について説明しています。
3 その他の機能 ––––––––––––––––––––––––––––––––––––
本機に付随する機能とその使いかたについて説明しています。
1
2
3
4 Appendix–––––––––––––––––––––––––––––––––––––––
The appendix includes materials, data tables, and specifications.
4 付録 –––––––––––––––––––––––––––––––––––––––––––
各種資料やデータ表、仕様などを記載しています。
4
9
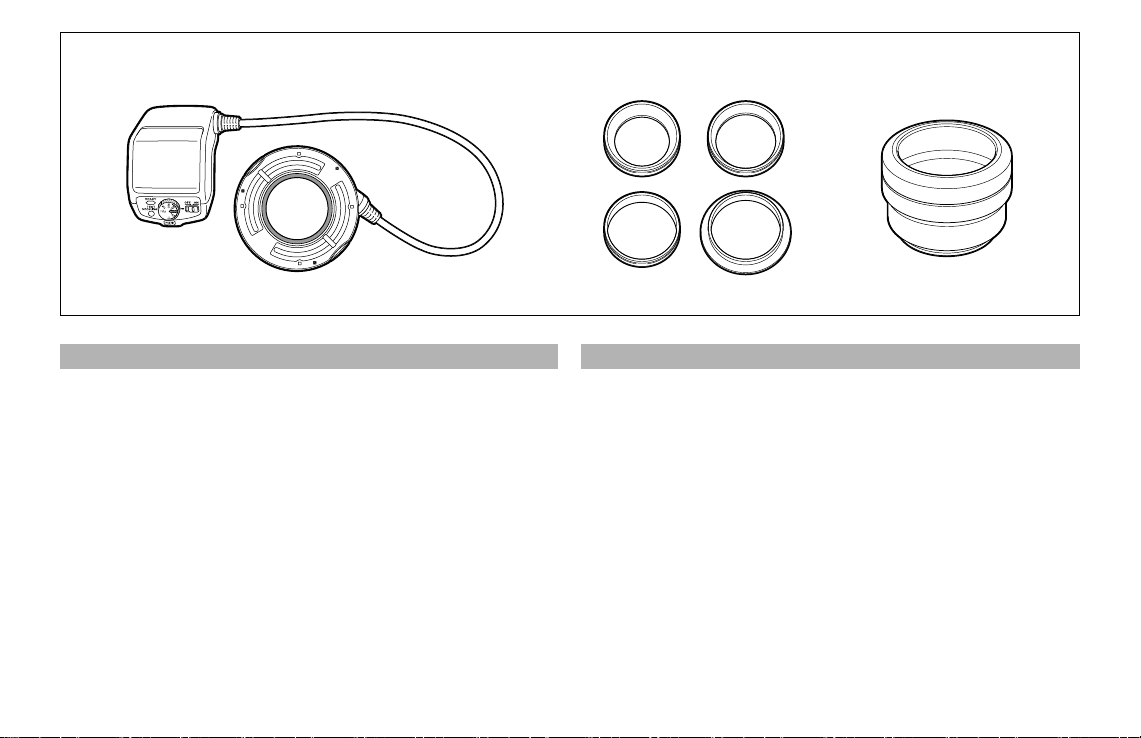
Packing list
123
Make sure that everything on the list is in the package. Contact
the retailer where you purchased the flash unit if anything is
missing or damaged.
1 Macro flash (controller and flash head)
2 Adapter ring (4 types: 49 mm, 52 mm, 58 mm, and 67 mm)
3 Macro adapter (for D FA macro lens)
4 Operating manual (this booklet)
5 Case
6 Warranty
10
同梱品一覧
箱の中身を確認してください。不足しているもの、破損してい
るものがある場合はお買い上げいただいた販売店にご連絡く
ださい。
1 本体(コントローラー、発光部ユニット)
2 アダプターリング(4点:49mm、52mm、58mm、67mm)
3 マクロアダプター(D FAマクロレンズ用)
4 使用説明書(本書)
5 ケース
6 保証書
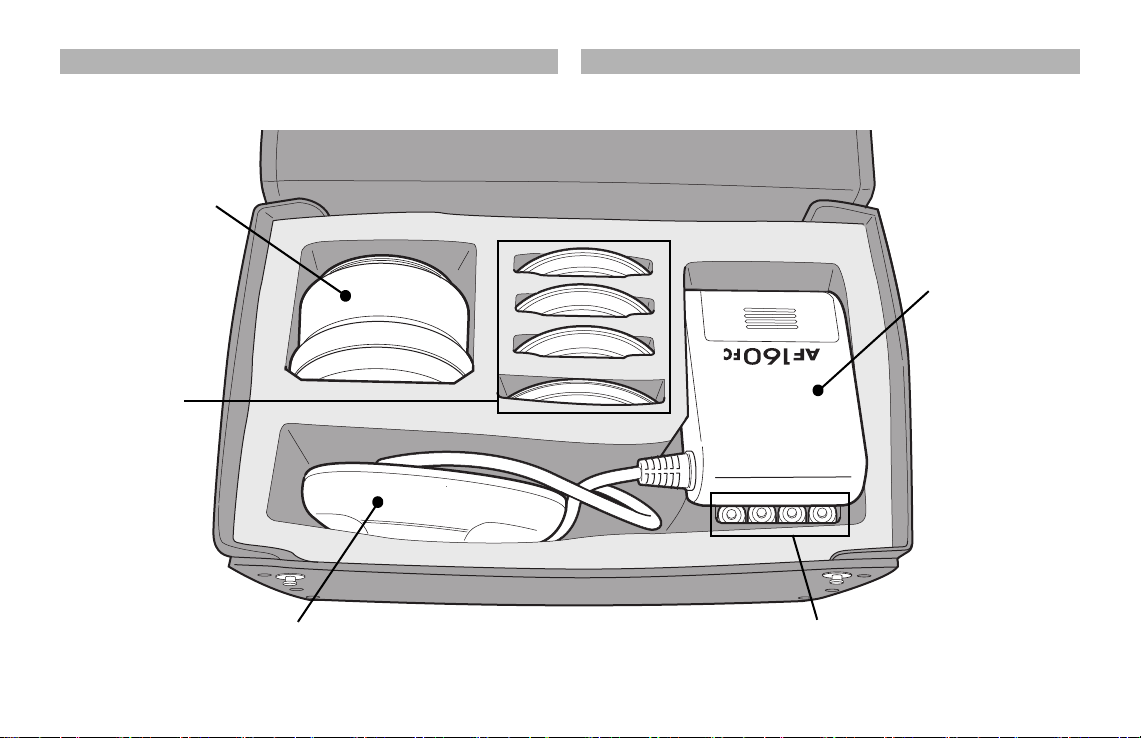
Using the case
Macro Adapter
マクロアダプター
Adapter Rings
アダプターリング
Flash Head
発光部ユニット
AA Batteries (Optional)
単3形電池 (別売)
Controller
コントローラー部
ケースの使いかた
11

Names of parts (Controller)
1
2
3
6
7
8
4
5
1 Battery chamber cover
2 Mode dial: Selects the flash mode. (P.23)
3 Power switch (P.17)
4 Flash shoe
5 Flash signal contacts
6 READY lamp/TEST button (P.17)
Lights when charging is finished. Press to test the flash.
7 MODELING button (P.31)
Turns the modeling light on the flash head on and off.
8 Locking lever (P.19)
12
各部の名称(コントローラー)
1 電池ぶた
2 モードダイヤル:発光モードを選択します。(P.23)
3 電源スイッチ(P.17)
4 シューブラケット
5 ストロボ信号接点
6 READYランプ/TESTボタン(P.17)
充電が完了すると点灯します。押すとテスト発光します。
7 MODELINGボタン(P.31)
発光部ユニットのモデリングライトをON/OFFします。
8 締め付けノブ(P.19)
4
22
4
4
4
5
22
1
3
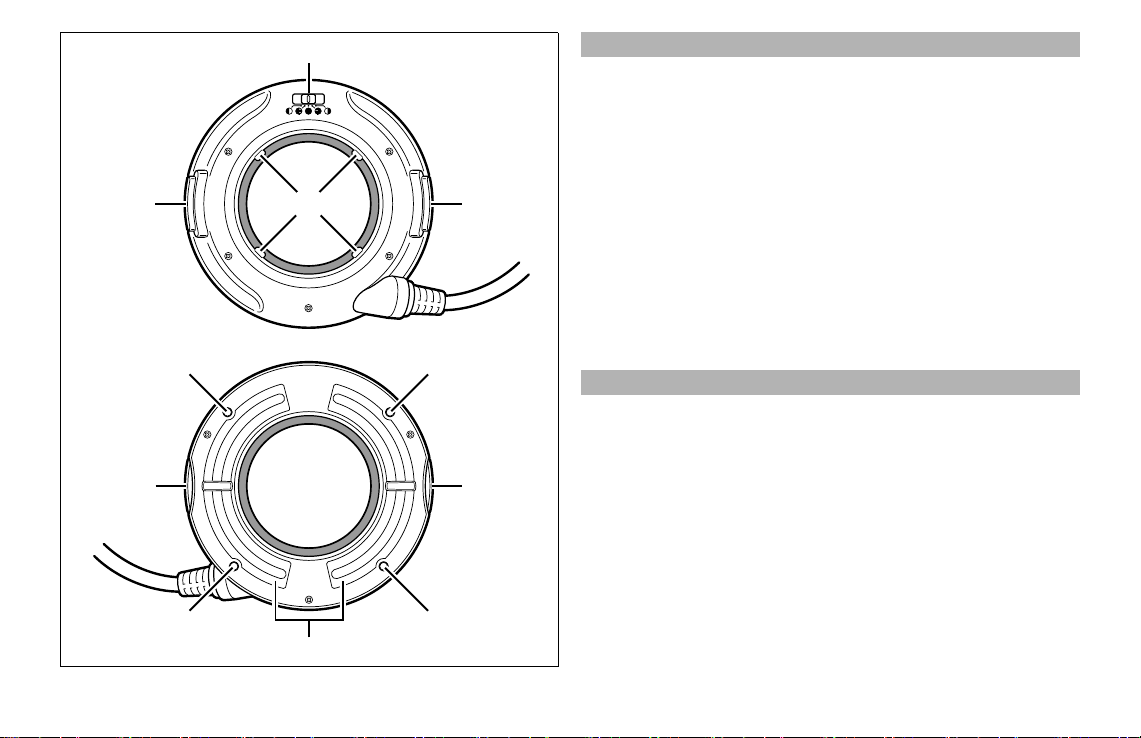
Names of parts (Flash head)
1 Flash head output switch (P.30)
2 Release button (P.22)
3 Mounting tabs (4 positions)
4 Modeling light (LED)
5 Flash lamps
各部の名称(発光部ユニット)
1 発光部切り替えスイッチ(P.30)
2 着脱ボタン(P.22)
3 取り付け爪(4ヶ所)
4 モデリングライト(LED)
5 発光部
13
12
1
1 Getting ready
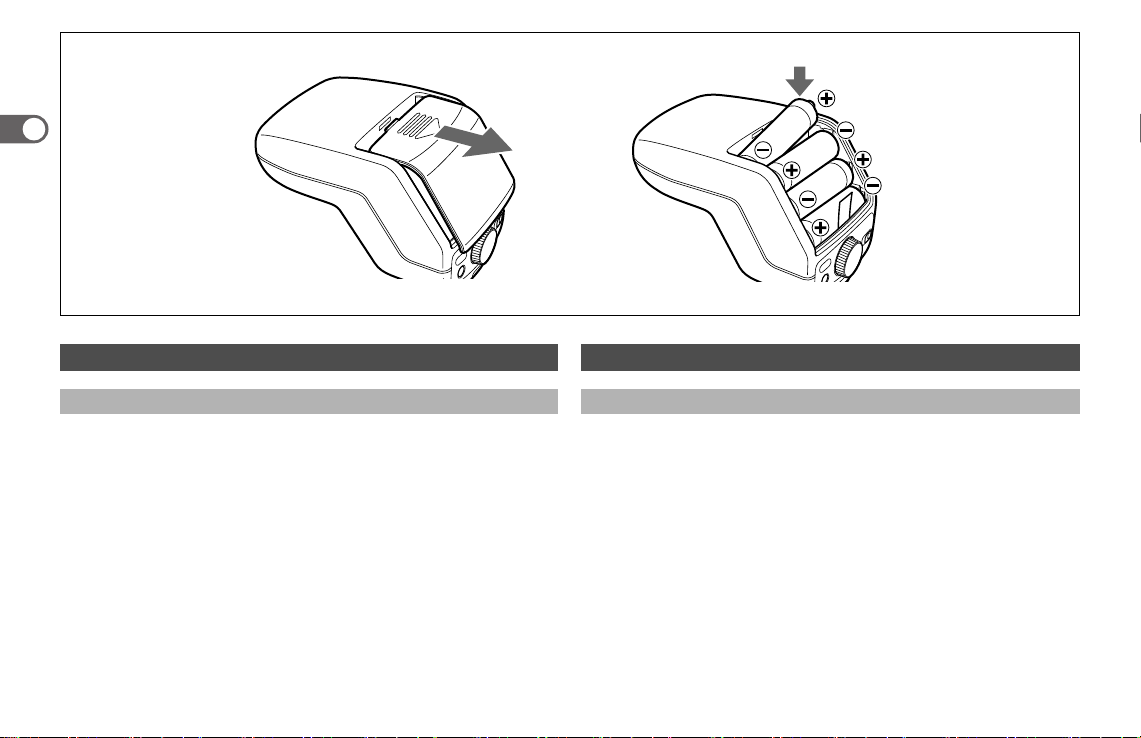
Inserting the Batteries
1 Slide the battery chamber cover as shown in the figure and
remove it.
2 Insert the above four AA batteries sequentially from lower
one making sure the plus/minus markings +, - match the
diagram inside the battery chamber and close the battery
chamber cover.
● If you thread the ribbon in the battery chamber under the
batteries beforehand when inserting the batteries, you
can remove the batteries easily by pulling the ribbon
when removing the batteries.
14
1 準備する
電池の入れ方
1 図のように電池ぶたをスライドさせて取り外します。
2 単3形電池を4本、+-の表記に合わせて下から順番に入れ
ます。
入れ終わったら手順1と反対の手順で電池ぶたを閉じます。
● 電池を入れる際に、電池室内のリボンを電池の下に通してお
くと、電池を取り出す際にリボンの先端を引っ張って、簡単
に取り出すことができます。
 Loading...