

Hotpoint TVF 63 X S, TVF 63 X User Manual

!
Warning - Risk of Fire
Clothes dryer installation must be performed by a qualified installer.
Install the clothes dryer according to the manufacturer’s instructions and local codes.
Do not install a clothes dryer with flexible plastic venting materials.
If flexible metal (foil type) duct is installed, it must be of a specific type identified by the appliance manufacturer as
suitable for use with clothes dryers.
Flexible venting materials are known to collapse, be easily crushed and trap lint.
These conditions will obstruct the clothes dryer airflow and increase the risk of fire.
To reduce the risk of severe injury or death, follow all installation instructions.
Save these instructions.
Avertissement - Risque d’incendie
Les sécheuses doivent être installé espar un installateur qualifié.
Les sécheuses doivent être installées selon les instructions du fabricant et les codes locaux.
EN
F
Ne pas raccorder de matériaux d’évacuation en plastique à une sécheuse.
Si une gaine métallique flexible (de type pellicule métallique) est installée, elle doit être d’un type recommendé par le
fabricant pour utilisation avec la sécheuse.
Les matériaux d’évacuation en plastique ont tendance à s’affaisser, et ils sont faciles à écraser et retiennent la
charpie.
Ces conditions obstrueront la circulation de l’air et augmenteront le risque d’incendie.
Afin de réduire le risque de blessure grave ou de mort, suivre toutes les instructions d’installation.
Conserver ces instructions.
Advertencia - Riesgo de Incendio
La instalación de la secadora de ropa debe ser realizada por un instalador calificado.
Instale la secadora de ropa de acuerdo con las instrucciones del fabricante y los códigos locales.
No instale la secadora de ropa con materiales de ventilación de plástico flexibles.
Si instala un conducto de metal flexible (tipo lámina), éste debe ser del tipo específico identificado por el fabricante
del electrodoméstico como adecuado para su utilización en secadoras de ropa.
Se conoce que los materiales de ventilación de plástico colapsan, se aplastan fácilmente y atrapan pelusas.
ES
Estas condiciones obstruirán la salida se aire y aumentarán el riesgo de incendio.
Para reducir el riesgo de daño severo o muerte, siga todas las instrucciones de instalación.
Guarde estas instrucciones.
1

2
Care, Use and Installation booklet
TUMBLE DRYER
EN
English 3
TVF63
ES
Español, 17FFrançais, 31
Contents
Warnings and Safety Instructions, 4
Important safety instructions
Grounding instructions
Dryer Description, 5
The front
The back
Control panel
Start and Programs, 6-9
Choosing a program
Table of programs
The Controls
Laundry, 10-11
Sorting your laundry
Wash care labels
Special clothing items
Drying times
Maintenance and Care, 12
When to switch off the electricity
Clean the filter after each cycle
Check the drum after each cycle
Cleaning the dryer
EN
Troubleshooting, 13
Spare parts
Installation, 14-15
Electrical
Where to put your dryer
Exhaust ducting
Stacking kit
Warranty, 16
3

EN
Warnings and Safety Instructions
●
! The appliance has been designed and built
according to international safety standards.
These warnings are given for safety reasons and must
be read carefully.
Important safety instructions
WARNING:
To reduce the risk of fire, electric shock or injury to
persons when using your appliance, follow the basic
precautions, including the following:
●
Read all instructions before using the appliance.
●
Do not dry articles that have been previously cleaned in,
washed in, soaked in, or spotted with gasoline, dry-cleaning
solvents or other flammable or explosive substances, as they
give off vapours that could ignite or explode.
●
Do not allow children to play on or in the appliance.
Close supervision of children is necessary when the
appliance is used near children.
●
Before the appliance is removed from service or
discarded, remove the door to the drying compartment.
●
Do not reach into the appliance if the drum is moving.
●
Do not install or store this appliance where it will be
exposed to the weather.
●
Do not tamper with the controls.
●
Do not repair or replace any part of the appliance or
attempt any servicing unless specifically recommended in the
user-maintenance instructions.
●
Do not use fabric softeners or products to eliminate static
unless recommended by the manufacturer of the fabric
softener or product.
●
Do not use heat to dry articles containing foam rubber or
similarly textured rubber-like materials.
●
Clean the lint filter before and after each load (see
Maintenance).
●
Keep the area around the exhaust opening and adjacent
surroundings free from the accumulation of lint, dust and dirt.
●
The interior of the appliance and exhaust duct should be
cleaned periodically by qualified service personnel.
●
Do not place items exposed to cooking oils in your dryer.
Items contaminated with cooking oils may contribute to a
chemical reaction that could cause a load to catch fire.
●
This tumble dryer has been designed for home, and not
professional, use.
●
This dryer must be used by adults, and the instructions in
this booklet should be followed carefully.
●
Do not touch the appliance while barefoot or with wet
hands or feet.
●
The appliance must be installed correctly and have
proper ventilation. The air intake vents behind the
machine, the outlet vents should never be obstructed (see
Installation).
●
Check to see if the dryer is empty before loading it.
●
The back of the dryer could become very hot.
Never touch it while in use.
SAVE THESE INSTRUCTIONS
Do not use the dryer unless the filter is securely in place
(see Maintenance).
●
Do not overload the dryer (see Laundry for maximum
loads).
●
Do not load items that are dripping wet.
●
Tumble dry items only if they have been washed with
detergent and water, rinsed and been through the spin
cycle. It is a fire hazard to dry items that have not been
washed with water.
●
Carefully check all instructions on clothing labels (see
Laundry).
●
Do not tumble dry large, very bulky items.
●
Do not tumble dry acrylic fibres at high temperatures.
●
Complete each program with its Air Fluff phase.
●
Do not turn off the dryer when there are still warm items
inside.
●
Never climb on top of the dryer. It could result in damage.
●
Comply with specified electrical requirements (see
Installation).
●
Always buy original spare parts and accessories (see
Troubleshooting).
Grounding instructions (see installation)
WARNING:
THIS APPLIANCE MUST BE GROUNDED.
Improper connection of the equipment-grounding
conductor can result in a risk of electric shock. Check
with a qualified electrician or service representative or
personnel if you are in doubt as to whether the
appliance is properly grounded!
In the event of malfunction or breakdown, grounding
will reduce the risk of electric shock by providing a
path of least resistance for electric current. This appliance
is equipped with a cord having an equipment-grounding
conductor and a grounding plug. The plug must be
plugged into an appropriate outlet that is properly
installed and grounded in accordance with all local
codes and ordinances.
DO NOT modify the plug provided with the appliance:
if it will not fit the outlet, have a proper outlet installed
by a qualified electrician or exchange the cord with an
appropriate one rated for the dryer.
REFER TO THE RATING PLATE FOR VOLTAGE AND
CURRENT REQUIREMENTS (see diagram for location).
The dryer should be connected to the mains supply
via a suitable socket which is accessible after
installing your dryer. This dryer must be connected to
30A INDIVIDUAL BRANCH CIRCUIT.
For full details see Installation Instruction sections of this
book.
IF IN DOUBT ABOUT ANY OF THE ABOVE CONSULT
A QUALIFIED ELECTRICIAN
4
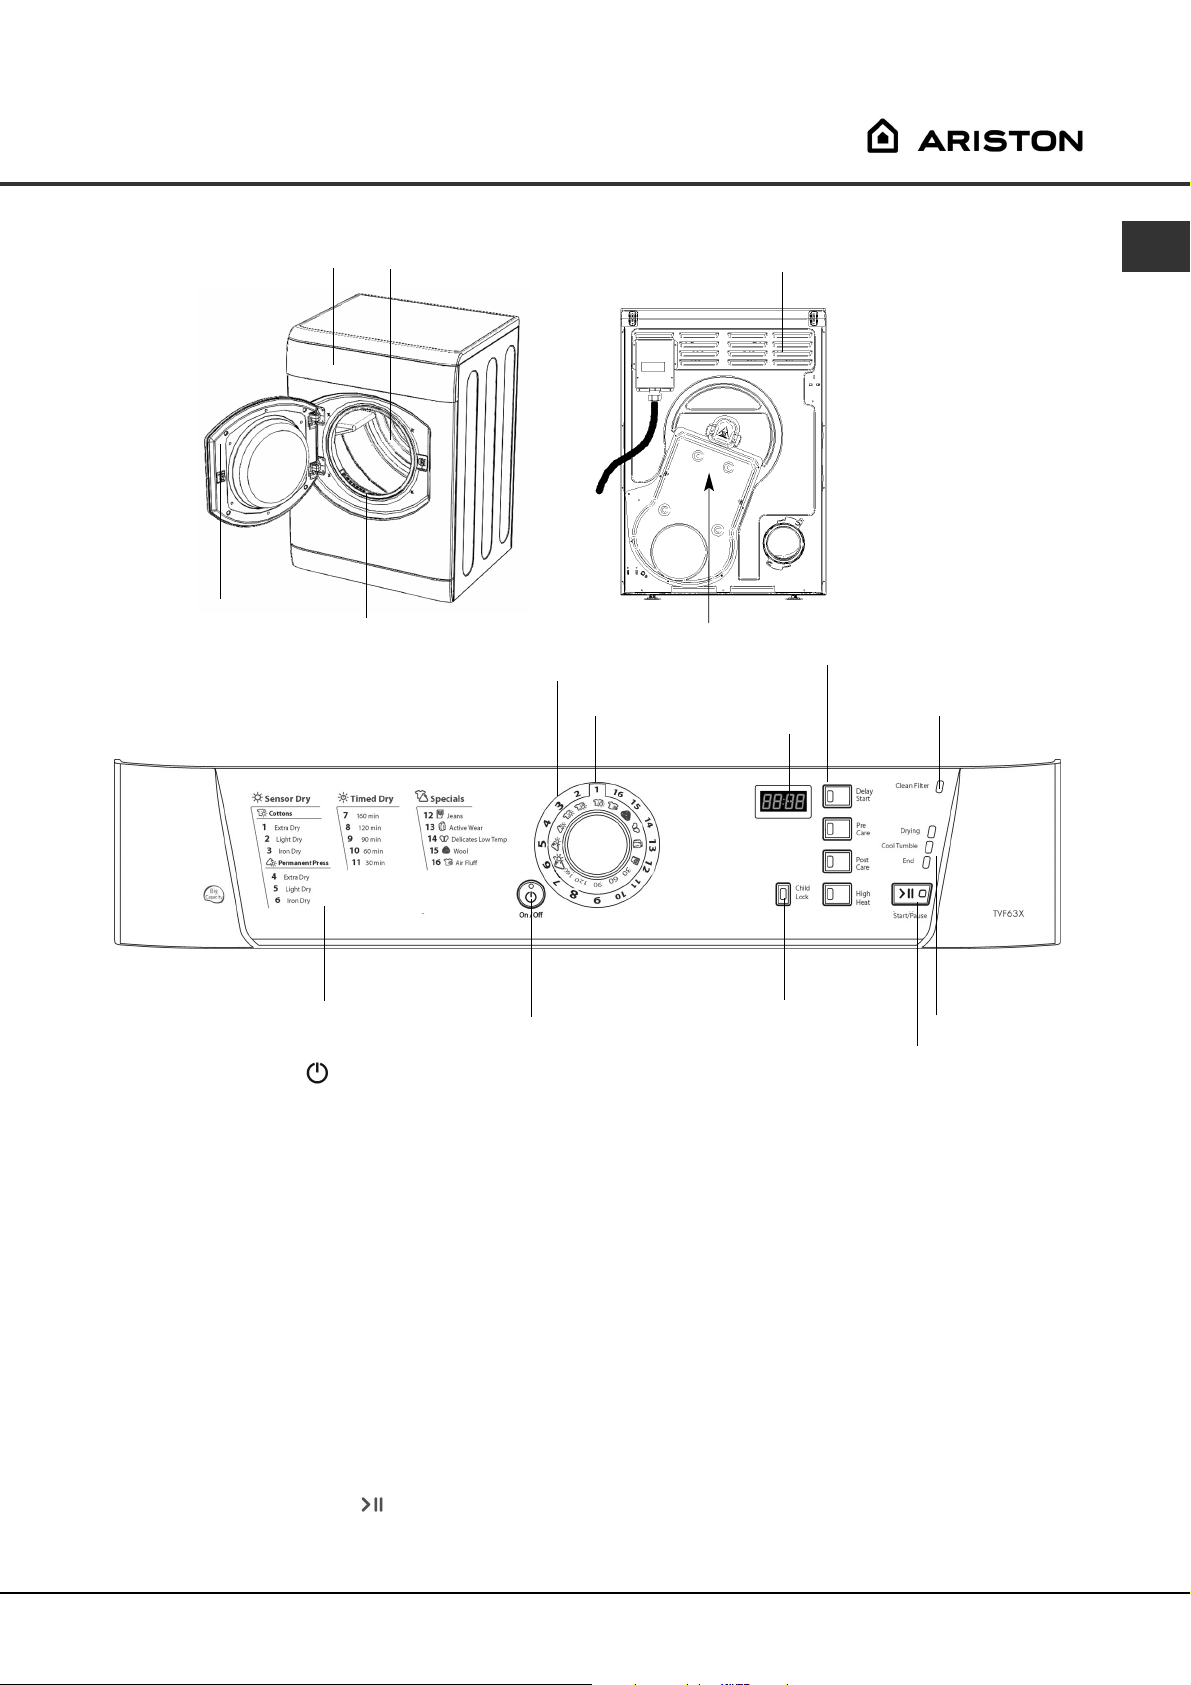
Dryer Description
The front The back
Control Panel
Model & Serial
numbers
Drum
Filter
Caution: Hot!
Control panel
PROGRAMS
Knob
Indicator
DISPLAY
EN
Air Intake Vent
OPTION
Buttons & Lights
Clean Filter
Light
Programs Guide
The ON/OFF button/light : If the dryer is running
and this button is pressed, the dryer is turned off.
Press again, the dryer restarts. The light signals that
your dryer is in use or ready to select a program.
The Programs Guide allows you to consult a user
friendly table of the available programs.
The PROGRAMS knob sets the program: rotate it until
the indicator is pointing to the program you want to select
(see Start and Programs).
The OPTION buttons/lights select available options for
your selected program. The lights indicate that the
option has been selected. If an option is not available
the buzzer (alert) will beep three times (see Start and
Programs).
The START/PAUSE button/light starts a selected
program. When you press this button there will be one
beep and the progress lights will flash to confirm the
action. When a program is running, holding this button
ON/OFF
Button & Light
CHILD LOCK
Button & Light
START/PAUSE
Button & Light
in pauses the program and stops the dryer.
The light is green when the program is running, flashing
amber if the program has been paused or flashing
green if on standby waiting to start a program (see Start
and Programs).
The CHILD LOCK button/light: Press and hold this
button after selecting your program and any options,
this prevents the program settings from being
changed. When the light is lit the other buttons and
the program knob are disabled. Hold the button to
cancel and the light will go out.
The Progress lights show you the status of the
program. As each stage of the program starts the
corresponding light turns on.
The Clean Filter light gives you a reminder before
every program that it is essential to clean the filter
every time the dryer is used (see Maintenance and Care).
Progress
Lights
5

Start and Programs
EN
Choosing a program
During the drying program, you can check on
your laundry and take out the items that are dry
1. Plug the dryer into the electrical socket.
2. Sort your laundry according to fabric type (see
Laundry).
3. Open the door and make sure the filter is clean
and in place (see Maintenance).
4. Load the machine and make sure that the items
are not in the way of the door seal. Close the door.
5. If the On/Off light is not lit: Press the On/Off
button .
6. Choose a program by checking the Programs guide
(see Programs) as well as the indications for each
type of fabric (see Laundry).
- Select a program by rotating the PROGRAMS knob.
7. Set a delay time and other options if necessary.
8. The Start/Pause light is flashing green, press the
Start/Pause button to begin. The green light
stops flashing and the display will show the
estimated time to end.
while others continue drying. When you close
the door again, press the Start/Pause button
in order to resume drying.
(When the door is open the Start/Pause light will
flash amber and after the door is closed and the
Start/Pause button pressed will stop flashing and
show green).
9. During the last few minutes of Drying Programs,
before the program is completed, the final Air Fluff
phase is entered (fabrics are cooled), this phase
should always be allowed to complete.
10. The buzzer (alert) will warn you when the program is
complete. Open the door, take your laundry out,
clean the filter and replace it (see Maintenance).
If the Post Care Option has been selected and
you do not take the clothes out immediately, the
clothes will tumble occasionally for 10 hours or
until you open the door.
11. Unplug the dryer.
Jeans Program
●
This is a program for Jeans made from Denim Cotton. Before drying your Jeans turn the front pockets inside out.
●
It can be used for load sizes up to 7 lbs (3 kg) (approximately 4 pairs).
●
Do not mix dark and light colored items.
●
It can also be used on other garments made from the same material such as jackets.
●
This program will take about 100 minutes, but may take longer depending on the size of the load and the spin
speed used in your washer.
●
Loads dried using this program are usually ready to wear:- the edges or seams may be slightly damp. If this is
found try turning the jeans inside out and running the program again for a short period.
! We do not recommend that you use this program if your jeans have elastic waist bands, studs or embroidery.
Active Wear Program
This program is to dry up to 4 lbs (2 kg) of outerwear and as part of the drying process; it re-activates the
fluorocarbon-based water resistance (also known as DWR durable water resistance). It can also be used to
activate the fluorocarbon finish where the garment has been re-proofed (see the proofing agent manufacturer’s
instructions).
●
This program can also dry outerwear without a fluorocarbon finish.
●
The program dries the items and then runs for a further period of heating at 120˚F (50˚C) to activate the
water-resistant coating.
●
The last 15 minutes of the program is a cool tumble period, without heat, and this stage should always be
completed.
●
If proprietary proofing agents are used during washing, always follow the manufacturer’s instructions.
Wool Program
●
This is a program for tumble dryer safe garments marked with the symbol .
●
It can be used for load sizes up to 2 lb (1 kg) (approximately 3 sweaters).
●
We recommend that garments are turned inside out before drying.
●
This program will take about 60 minutes, but may take longer depending on the size and density of the load
and the spin speed used in your washer.
●
Loads dried using this program are usually ready to wear, but on some heavier garments the edges may be
slightly damp. Allow these to dry naturally as over-drying could damage garments.
! Unlike other materials, the mechanism of wool shrinkage is irreversible; i.e. it will not stretch back to original
size and shape.
! This programme is not suitable for Acrylic garments.
6
Start and Programs
Programs
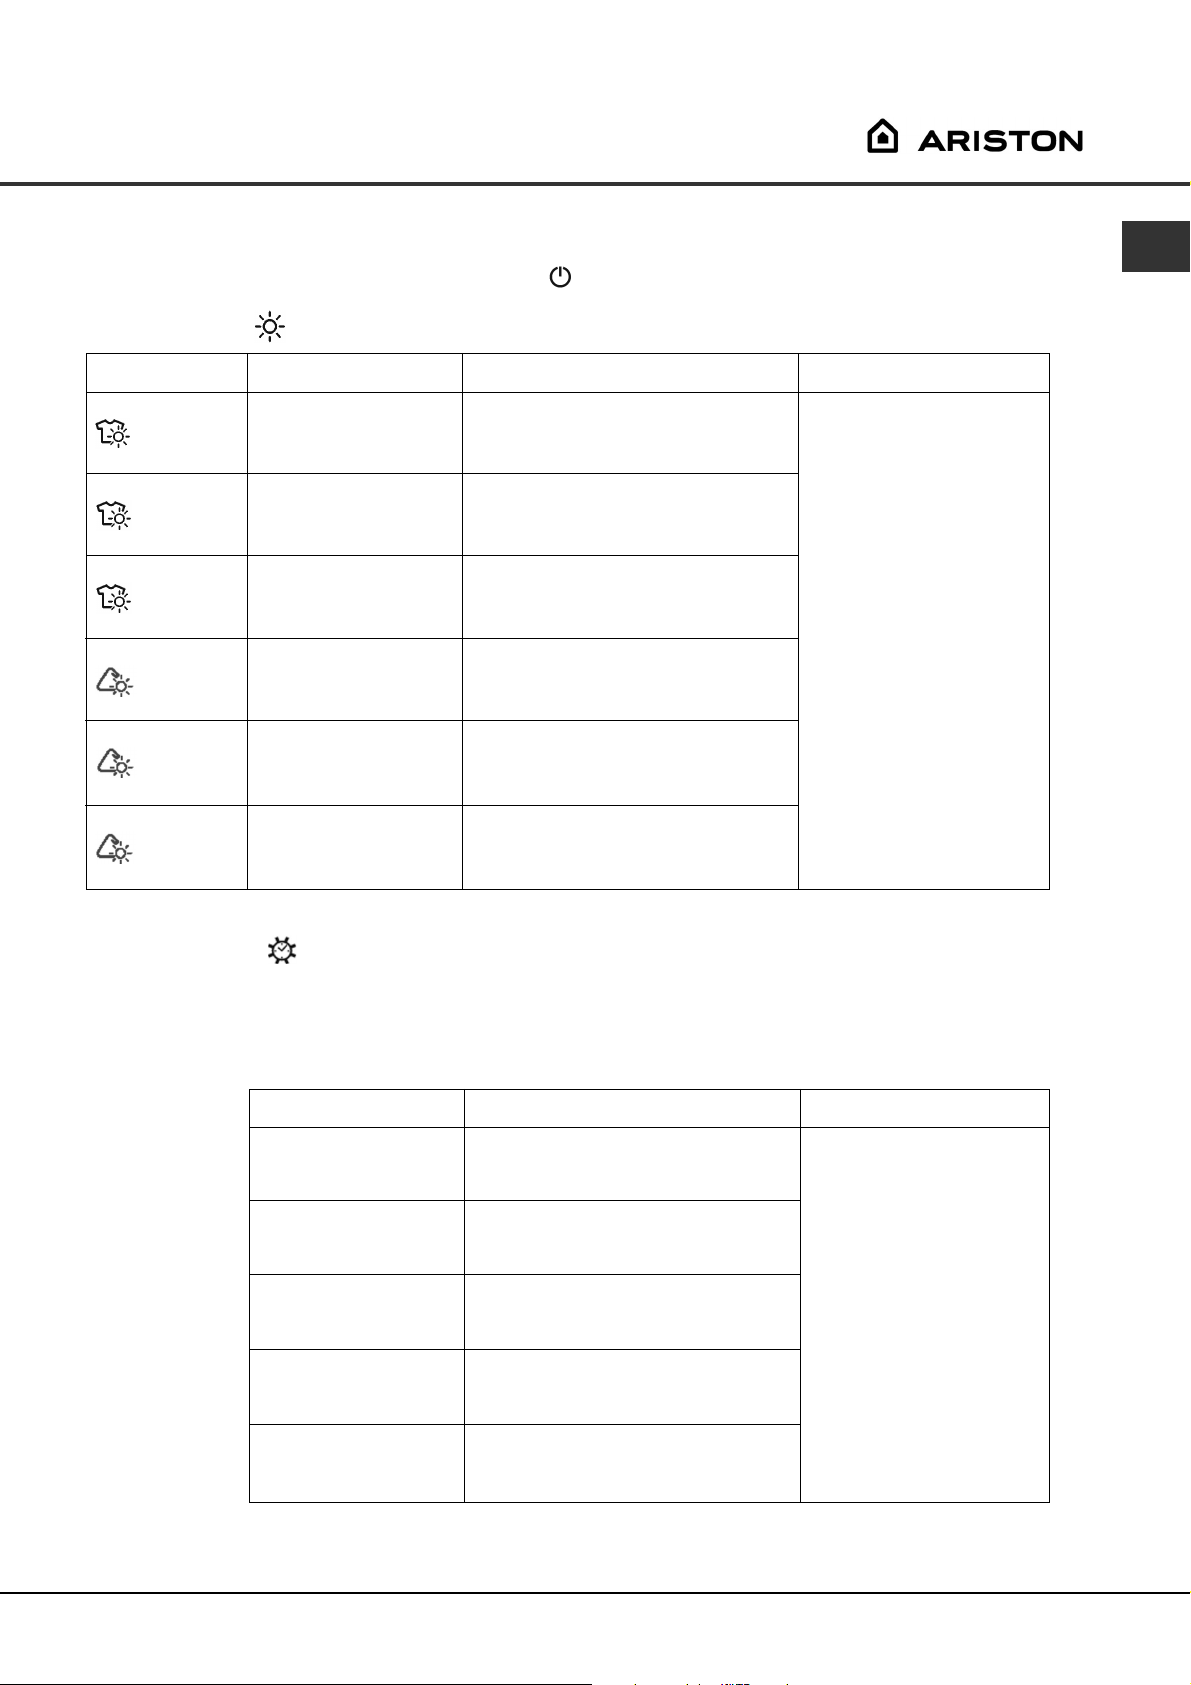
! If the On/Off light is not lit; Press the ON/OFF button and then select program.
SENSOR DRY
Program
Cottons
Extra Dry
Cottons
Light Dry
Cottons
Iron Dry
Permanent press
Extra Dry
Permanent press
Light Dry
Permanent press
Iron Dry
What it does...
Dries your clothes on
High heat setting, ready
for putting away.
Dries your clothes on
High heat setting, ready
for hanging.
Dries your clothes on
High heat setting, ready
for ironing.
Dries your clothes on
High heat setting, ready
for putting away.
Dries your clothes on
High heat setting, ready
for hanging.
Dries your clothes on
High heat setting, ready
for ironing.
How to set it...
1. Position the PROGRAMS knob on 1.
2. Select any Options, if required.
3. Press the Start/Pause button.
1. Position the PROGRAMS knob on 2.
2. Select any Options, if required.
3.
Press the Start/Pause button.
1. Position the PROGRAMS knob on 3.
2. Select any Options, if required.
3.
Press the Start/Pause button.
1. Position the PROGRAMS knob on 4.
2. Select any Options, if required.
3.
Press the Start/Pause button.
1. Position the PROGRAMS knob on 5.
2. Select any Options, if required.
3.
Press the Start/Pause button.
1. Position the PROGRAMS knob on 6.
2. Select any Options, if required.
3.
Press the Start/Pause button.
EN
Note:
Options available:
Delay Start, Pre Care,
Post Care.
TIMED DRYING
Dries wet clothing that you wish to dry on low heat or small loads (less than 2 lb / 1 kg).
Can be used with High Heat option if you prefer to use a timed program.
Consult suggested drying times (see Laundry).
The last 10 minutes of these programs is the air fluff phase (see next page).
Program
Timed Drying
(160 minutes)
Timed Drying
(120 minutes)
Timed Drying
(90 minutes)
Timed Drying
(60 minutes)
Timed Drying
(30 minutes)
How to set it...
1. Position the PROGRAMS knob on 7
2. Select any Options, if required.
3.
Press the Start/Pause button.
1. Position the PROGRAMS knob on 8
2. Select any Options, if required.
3.
Press the Start/Pause button.
1. Position the PROGRAMS knob on 9
2. Select any Options, if required.
3.
Press the Start/Pause button.
1. Position the PROGRAMS knob on 10
2. Select any Options, if required.
3.
Press the Start/Pause button.
1. Position the PROGRAMS knob on 11
2. Select any Options, if required.
3.
Press the Start/Pause button.
Note:
Options available:
High Heat, Delay Start,
Pre Care, Post Care.
7
Start and Programs
EN
Programs
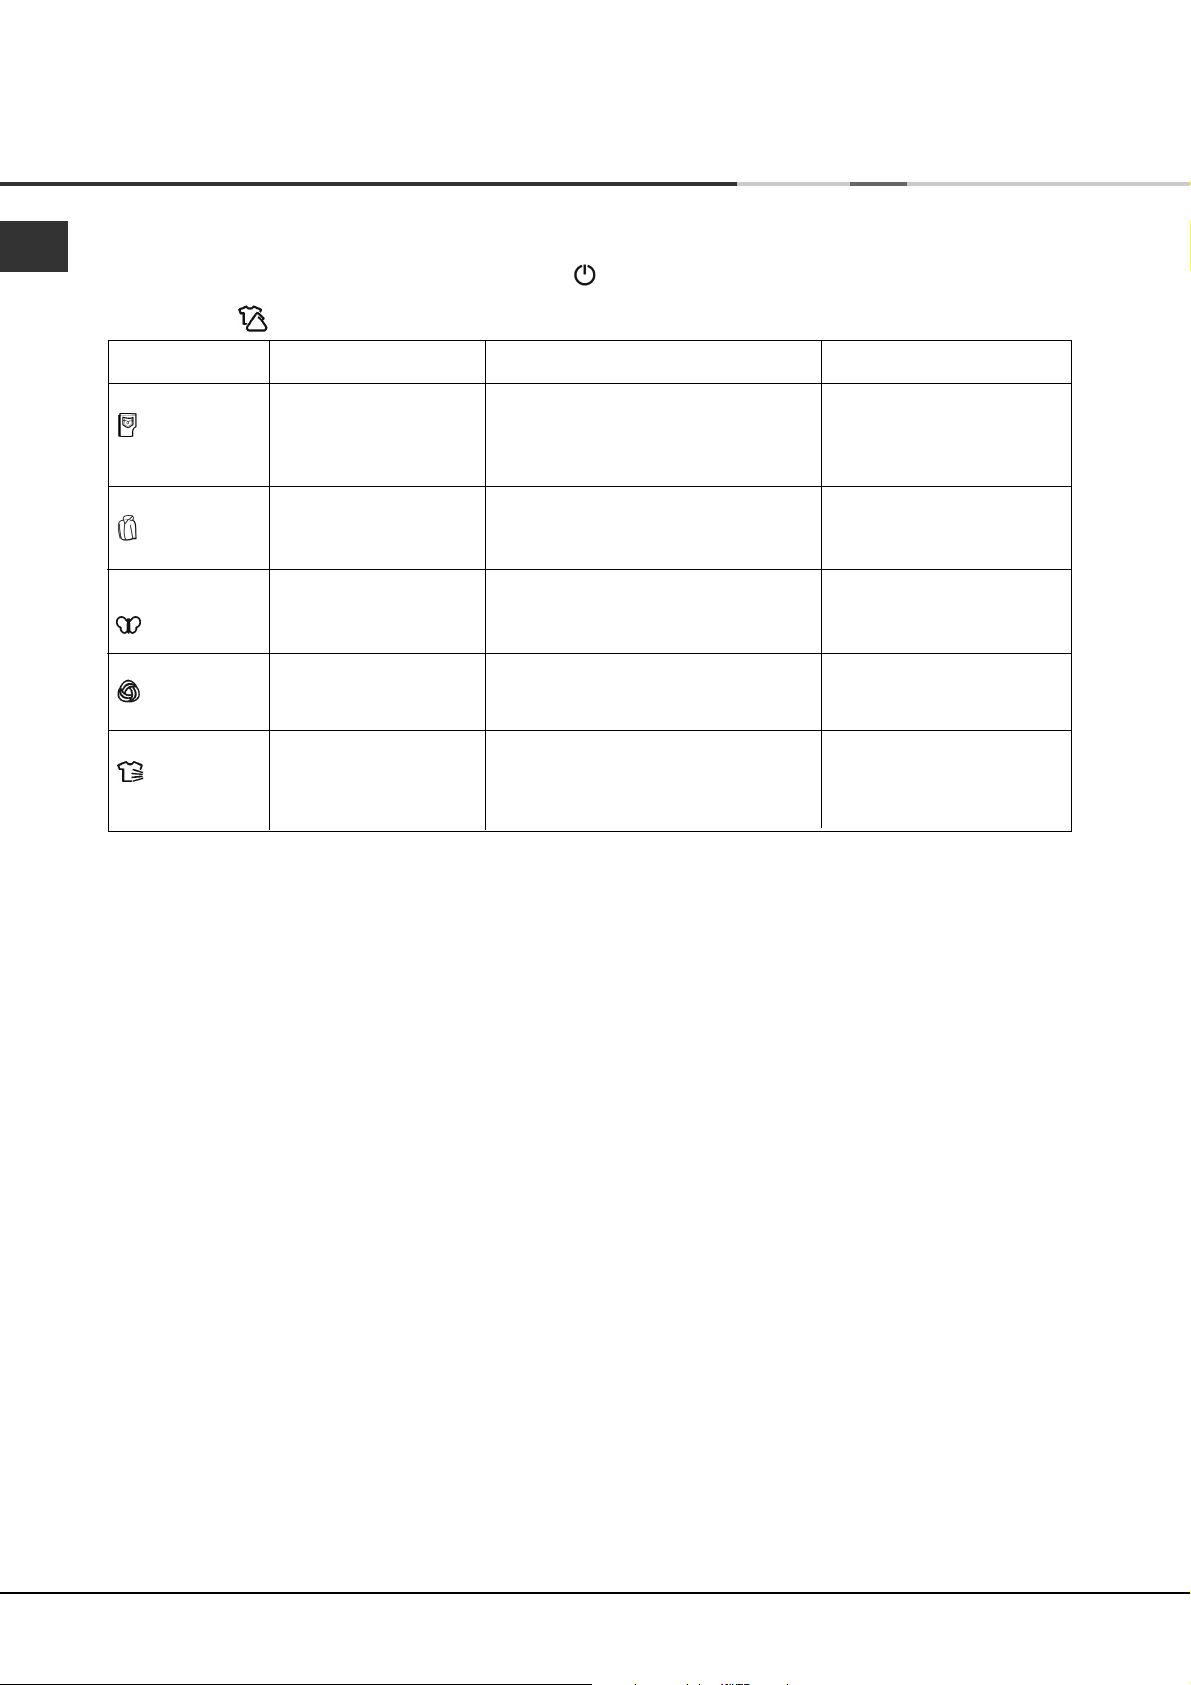
! If the On/Off light is not lit; Press the ON/OFF button and then select program.
SPECIALS
Program
Jeans
Active Wear
Delicates
Low Temp
Wool
Air Fluff
What it does...
Dries your Denim Cotton
clothes on High heat
setting (see previous
page).
Dries your clothes on
High heat setting, (see
previous page).
Dries your clothes on
Low heat setting, ready
to be worn.
Dries your Woollen
clothes, (see previous
page).
Aires your clothes with
cool air, use also to cool
warm clothes
(20 minute program)
How to set it...
1. Position the PROGRAMS knob on 12
2. Select any Options, if required.
3. Press the START/PAUSE button.
1. Position the PROGRAMS knob on 13
2. Press the START/PAUSE button.
1. Position the PROGRAMS knob on 14
2. Select any Options, if required.
3. Press the START/PAUSE button.
1. Position the PROGRAMS knob on 15
2. Press the START/PAUSE button.
1. Position the PROGRAMS knob on 16
2. Press the START/PAUSE button.
Note:
Options available:
Delay Start
Pre Care
Post Care
Options available:
None
Options available:
Delay Start
Pre Care
Post Care
Options available:
None
Options available:
None
8
Start and Programs
The Controls
●
PROGRAMS knob
! Warning, if after pressing the Start/Pause button
the programs knob position has changed, the new
position will NOT change the program selected.
To change the program: Press the Start/Pause button
to pause the program - the light flashes amber to indicate
the program is paused. Select the new program and
any options required - the light will flash green. Press
the Start/Pause button and the new program will
start.
●
OPTION buttons / lights
These buttons are used to customize the selected
program to your requirements. A program must have
been selected on the programs knob before an option
can be selected. Not all options are available for all
programs (see Start and Programs). If an option is not
available and you press the button, the buzzer (alert)
will beep three times. If the option is available there
will be one beep and the option light next to the
button lights to confirm the selection.
After the Start/Pause button has been pressed only
the Pre Care and Post Care options can be changed.
Delay Start
The start of some programs (see Start and Programs)
can be delayed for up to 24 hours.
Press this button, the display shows and the
option light comes on. Press again and a 1 hour delay
is selected and the display indicates 1hr, each further
press of the button adds 1hr to the delay. When 24hr is
displayed a further press and the display shows
and after a couple of seconds cancels the delay.
You can also cancel the delay by pressing the On/Off
button .
Pre Care
This option is only available if a delayed start has
been selected. It tumbles the clothes occasionally
during the delayed period to help prevent creases
developing.
High Heat
Available for Timed Drying programs. Press this
button and a high heat setting is selected and the light
alongside the button comes on.
Timed programs have a default of low heat, if the light
alongside the button is on then pressing the button
selects a low heat setting and the light goes out.
Post Care
When available and selected, the clothes are
occasionally tumbled after the end of the drying and
air fluff cycles,
to help prevent creases developing should you not be
available to remove the load immediately the program
is complete.
OFF
OFF
●
DISPLAY
The display shows either the amount of time delay
remaining or an indication of the amount of time left for
a drying program.
The delay time is displayed in hours and counts down
each minute.
The time to end is displayed in hours and minutes and
counts down each minute, this time includes the air
fluff phase. When timed programs are selected the
time displayed throughout the cycle is the actual time
remaining.
When a sensing program is selected the time
displayed is an estimate of the time remaining. When
the program is selected the display shows the time
required to dry a full load, after around 10 minutes the
controller calculates a better estimate of the cycle
time.
The colons between the hours and minutes in the
display flash to show that the time is counting down.
When the program finishes its air fluff phase the
display will show .
E88
The display also shows if there is a problem with your
dryer, if this occurs the display will show F followed by
a fault code number (see Troubleshooting).
●
Door Opening
Opening the door (or pressing the Start/Pause button )
during a program will stop the dryer and have the
following effects:
●
The Start/Pause light flashes amber.
●
During a delay phase the delay will continue
to count down. The Start/Pause button
must be pressed to resume the delay program.
The progress lights will change to show
current status.
●
During the drying part of the program, the
time to end count continues but the colons
do not flash. The Start/Pause button must
be pressed to resume the program. The
progress lights will change to show the
current status.
●
During the post care phase of a drying
program the program will finish. Pressing the
Start/Pause button will re-start a new
program at the beginning.
●
The Start/Pause button must be pressed to
resume the program. The progress lights will
change to show the current status and the
Start/Pause light will stop flashing and turn green.
●
Changing the Programs knob will select a new
program and the Start/Pause light will flash
green. You can use this to select the Air Fluff
program to cool the clothes, if you find
them dry enough. Press the Start/Pause button
to begin a new program.
●
Note
If you have a power outage, switch off the power or
remove the plug, press the Start/Pause button and the
program will resume.
EN
9
Laundry
EN
Sorting your laundry
●
Check symbols on clothing labels to make sure
that the articles can be tumble dried.
●
Sort laundry by fabric type.
●
Empty pockets and check buttons.
●
Close zippers and hooks and tie loose belts and
strings.
●
Wring out each item in order to eliminate as much
excess water as possible.
! Do not load dripping wet clothes into the dryer.
Maximum load size
Do not load more than maximum capacity.
These numbers refer to dry weight:
Natural fibres: 6 kg max (13 lb)
Synthetic fibres: 3 kg max (6.6 lb)
! DO NOT overload the dryer as this could result in
reduced drying performance.
Typical weights
Clothes
Blouse Cotton 150 g 5 oz
Other 100 g 3 oz
Dress Cotton 500 g 1 lb 2 oz
Other 350 g 12 oz
Jeans 700 g 1 lb 6 oz
10 Diapers 1000 g 2 lb 3 oz
Shirt Cotton 300 g 10 oz
Other 200 g 7 oz
T-Shirt 125 g 4 oz
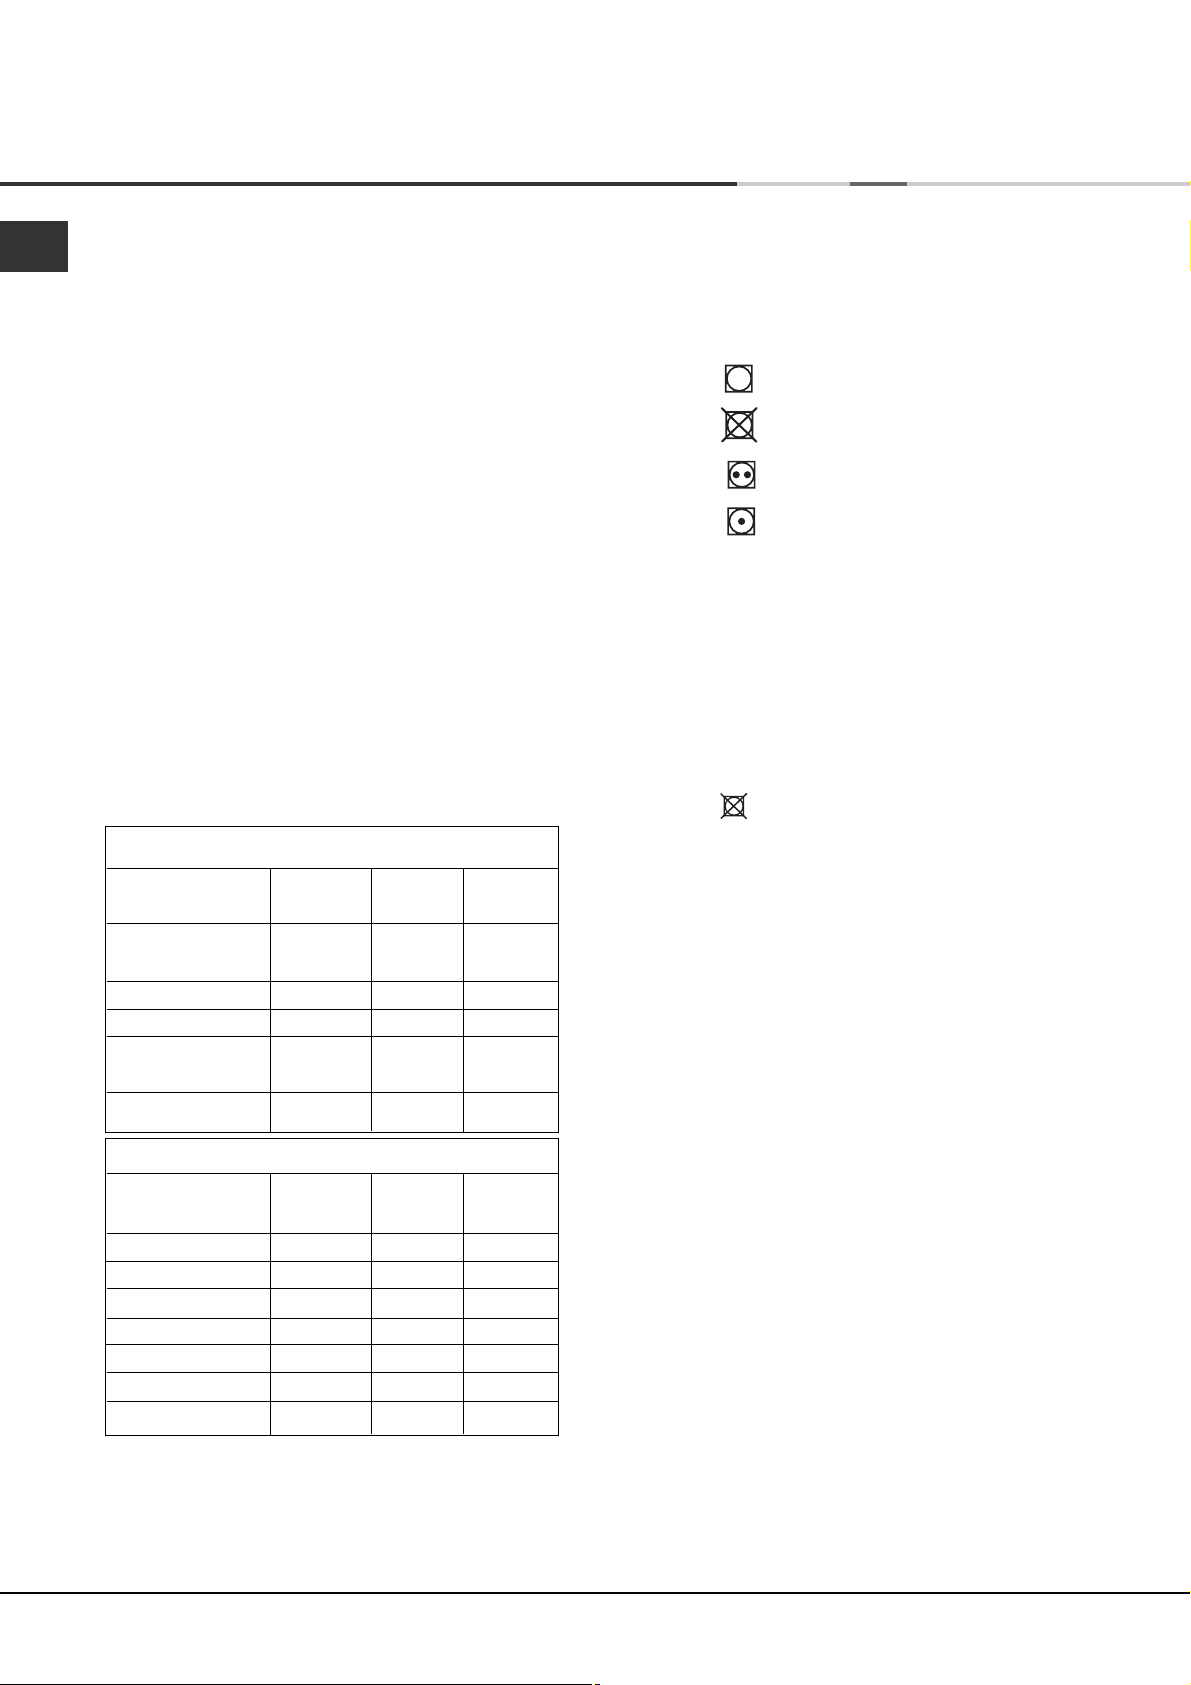
Wash Care Labels
Look at the labels on your garments, especially when
tumble drying for the first time. The following symbols
are the most common:
May be tumble dried
Do not tumble dry
Tumble dry at high heat setting
Tumble dry at low heat setting
What not to tumble dry in your dryer:
●
Articles that contain rubber or rubber-like materials
or plastic film (pillows, cushions, or PVC rainwear),
any other flammable objects or objects that contain
flammable substances (towels soiled with hair spray).
●
Glass fibres (certain types of draperies).
●
Items which have been dry cleaned.
●
Items with the ITCL Code (see Special clothing
items) . These can be cleaned with special
at-home dry cleaning products. Follow instructions
carefully.
●
Large bulky items (quilts, sleeping bags, pillows,
cushions, large bedspreads etc). These expand
when drying and would prevent airflow through
the dryer.
Household Items
Duvet cover Cotton 1500 g 3 lb 5 oz
(Double) Other 1000 g 2 lb 3 oz
Large Tablecloth 700 g 1 lb 6 oz
Small Tablecloth 250 g 9 oz
Tea Towel 100 g 3 oz
Bath Towel 700 g 1 lb 6 oz
Hand Towel 350 g 12 oz
Double Sheet 500 g 1 lb 2 oz
Single Sheet 350 g 12 oz
At the end of a drying cycle, cottons could still be
damp if you grouped cottons and permanent press
items together. If this happens simply give them an
additional short period of drying.
10
Laundry
Special clothing items
Blankets and Bedspreads: acrylic items (Acilan,
Courtelle, Orion, Dralon) must be dried with special
care on LOW heat setting. Avoid drying for a long
period of time.
Pleated or creased garments: read the manufacturer’s
drying instructions on the garment.
Starched articles: do not dry these with non-starched
items. Make sure that as much of the starch solution is
removed from the load as possible before placing it in
the dryer. Do not over-dry: the starch will become
powdery and leave your clothing limp, which defeats
the purpose of starch.
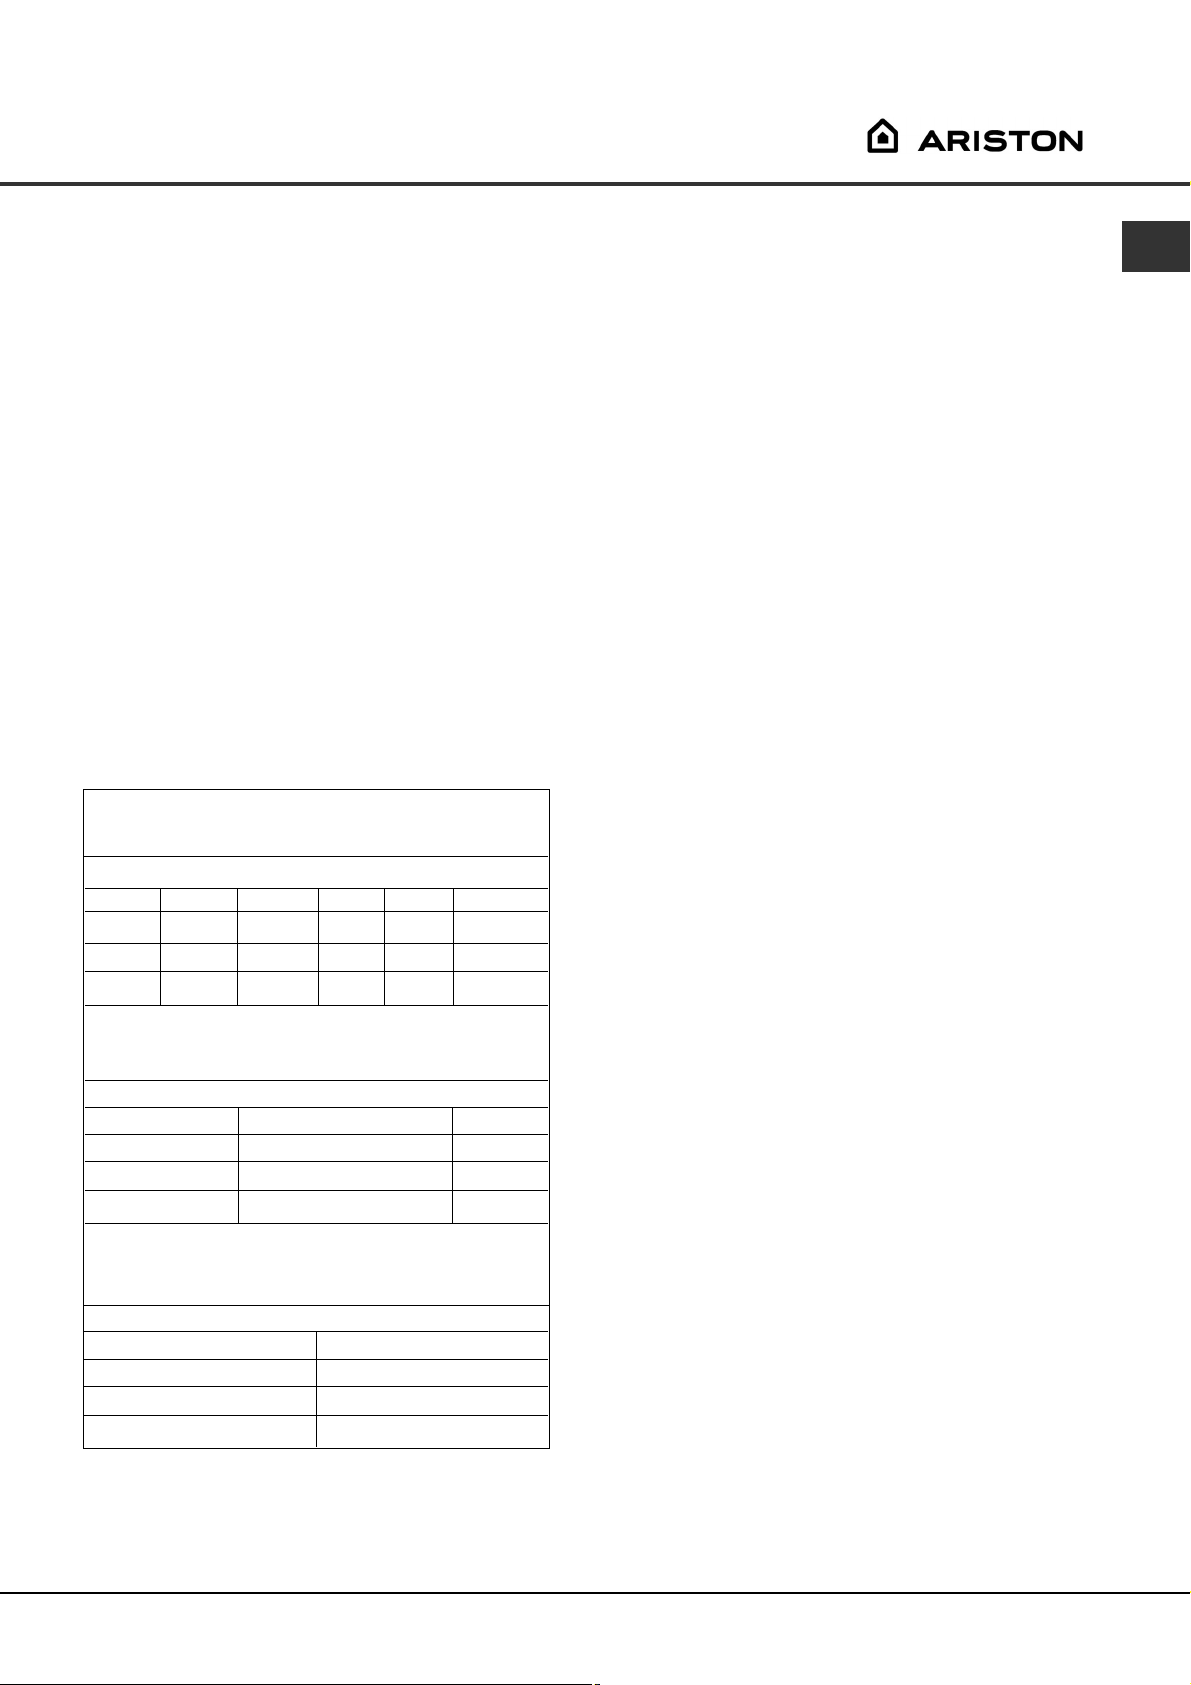
Drying times
The table below presents APPROXIMATE drying times
in minutes. Weights refer to dry garments:
Regular Cottons
High (full) Heat
Drying times 800-1000rpm in washing machine
Half Load Full Load
2 lb 4 lb 7 lb 9 lb 11 lb 13 lb
1 kg 2 kg 3 kg 4 kg 5 kg 6 kg
20-30 35-45 45-60 60-70 70-80 80-100
Times are approximate and can vary depending
upon:
●
Amount of water retained in clothes after spin
cycle: towels and delicates retain a lot of water.
●
Fabrics: items that are the same type of fabric but
different textures and thicknesses may not have
the same drying time.
●
Quantity of laundry: single items or small loads
may take longer to dry.
●
Dryness: If you are going to iron some of your
clothes, they can be taken out while still a bit
damp. Others can be left longer if you need them
to be completely dry.
●
Heat setting.
●
Room temperature: if the room where the dryer is
located is cold, it will take longer for the dryer to
dry your clothes.
●
Bulk: some bulky items can be tumble dried with
care. We suggest that you remove these items
several times, shake them out, and return them to
the dryer until finished.
! Do not over-dry your clothes.
All fabrics contain a little natural moisture, which
keeps them soft and fluffy.
EN
Permanent press
High (full) Heat
Drying times on reduced spin in washing machine
Half Load Full Load
2 lb 4 lb 7 lb
1 kg 2 kg 3 kg
20-40 30-50 40-70
Delicates (e.g.Acrylics)
Low (gentle) Heat
Drying times on reduced spin in washing machine
Half Load Full Load
2 lb 4 lb
1 kg 2 kg
50-70 90-130
11
Maintenance and Care
EN
When you should switch off the electricity
Unplug the dryer when not using it, when cleaning it
and during maintenance activities.
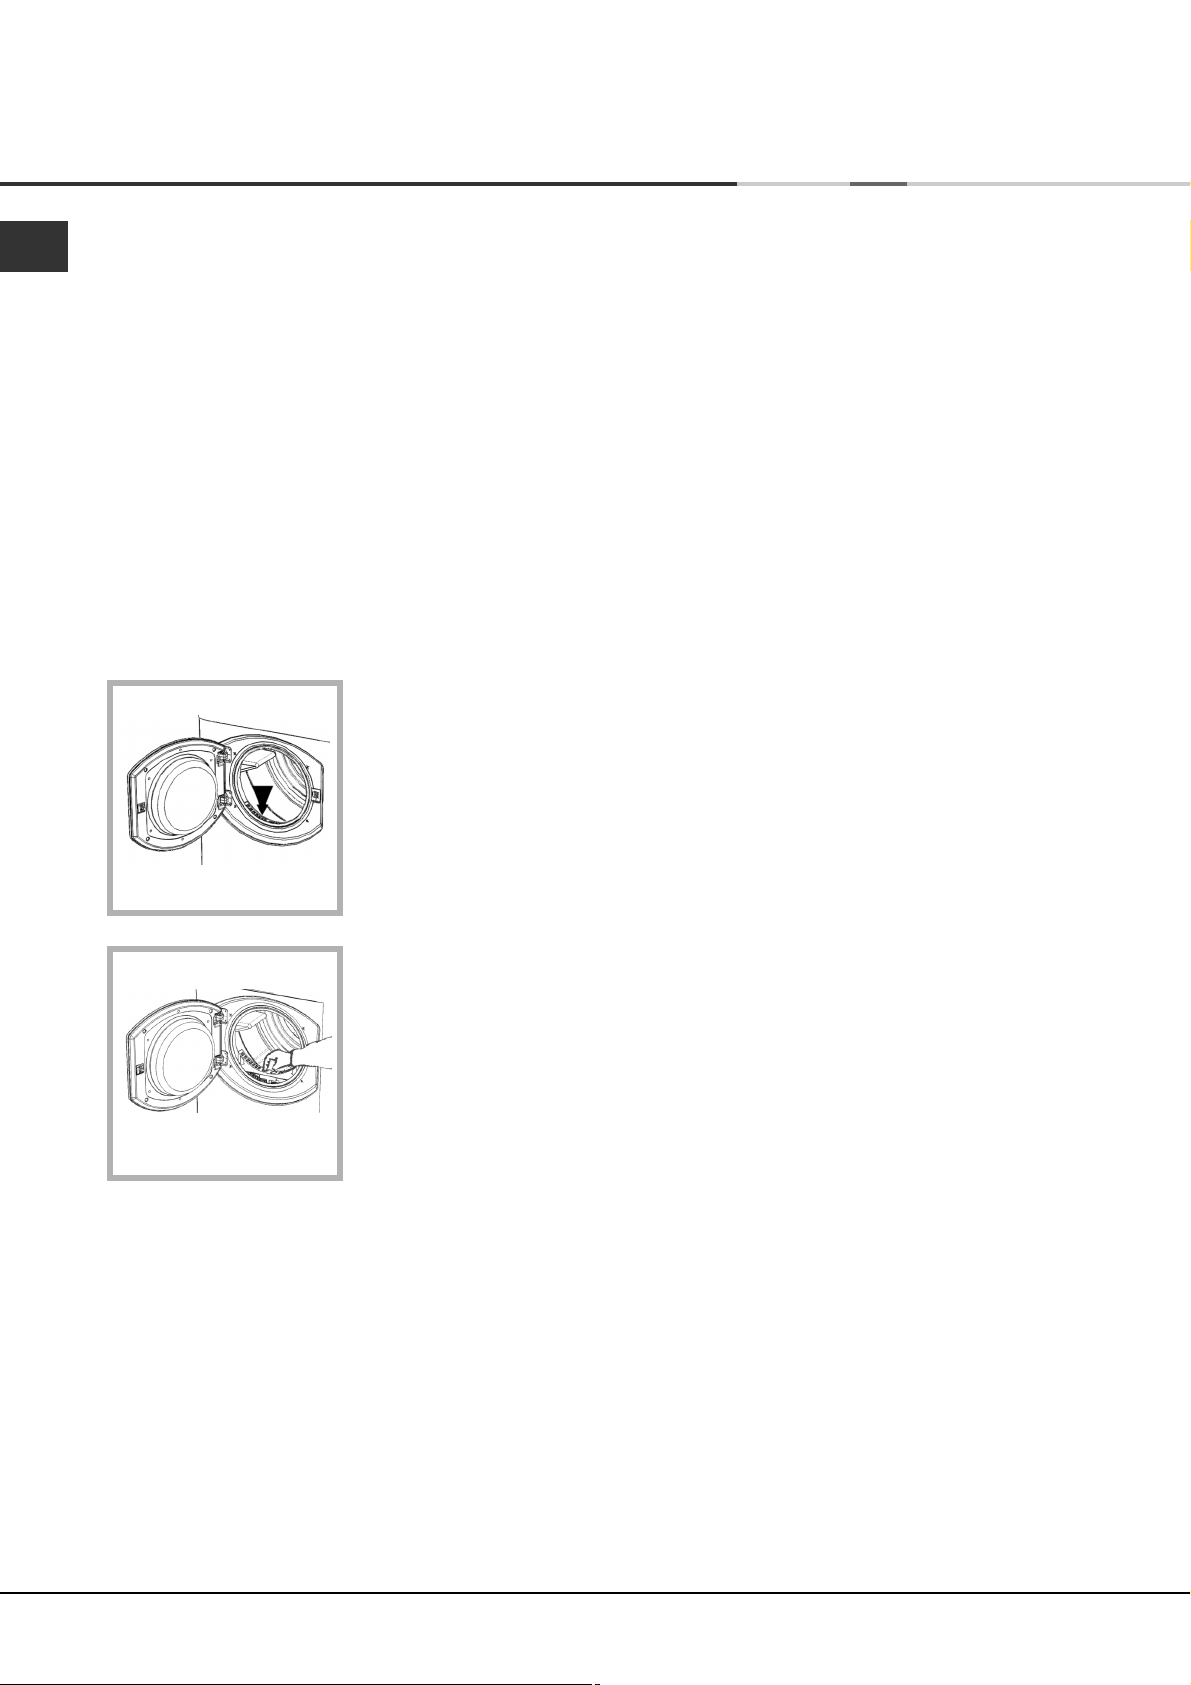
Clean the filter after each cycle
The filter is an important part of your dryer:
it accumulates lint and fluff that is formed while drying.
Small items could also become trapped in the filter.
When finished drying, therefore, clean the filter by
rinsing it under running water or with your vacuum
cleaner. Should the filter become clogged up, the airflow
inside the dryer will be seriously compromised: drying
times lengthen and you will consume more energy. It
may also damage your dryer.
The filter is found in front
of the dryer trim
(see diagram).
Check the drum after each cycle
Turn the drum manually in order to remove small items
(handkerchiefs) that could have been left behind.
Cleaning the drum
! Do not use abrasives, steel wool or stainless steel
cleaning agents to clean the drum.
A colour film may start to appear on the stainless steel
drum, this may be caused by a combination of water
and, or cleaning agents such as fabric conditioner from
the wash. This colored film will not affect the dryer
performance.
Cleaning the dryer
●
External parts in metal or plastic and rubber parts
can be cleaned with a damp cloth.
●
Periodically check the vent tube and any
permanent venting fixture to make sure that there
has been no accumulation of fluff or lint, and
remove it.
Removing the filter:
1. Pull the plastic grip of
the filter upwards (see
diagram).
2. Clean the filter and
replace it correctly.
Ensure the filter is fully
located flush into the
tumble dryer trim.
! Do not use the dryer without replacing the filter..
●
Remove lint that collects around the filter and the
outlet vents.
! Do not use solvents or abrasives.
! Your dryer uses special bearing components which
do not need lubrication.
! Have your dryer checked regularly by authorized
technicians to ensure electrical and mechanical safety.
12

Troubleshooting
Before you call our Customer Care Department, go through the following troubleshooting suggestions:
Problem:
The dryer won’t start.
Possible causes / Solution:
●
The plug is not plugged into the socket, or not making contact.
●
There has been a power outage.
●
The fuse has blown. Try to plug another appliance into the socket.
●
You are using an extension cord? Try to plug the dryer’s power cord
directly into the socket.
●
The door is not closed securely?
●
The PROGRAMS knob has not been set properly (see Start and Programs).
●
The START button has not been pressed (see Start and Programs).
●
Drying cycle will not begin.
Its taking a long time to dry.
You have set a delay time (see Start and Programs).
●
The filter has not been cleaned (see Maintenance).
●
The correct program has not been selected for the type of fabric you are
drying (see Start and Programs).
●
The exhaust duct is obstructed (see Installation).
●
The air intake vent is obstructed (see Installation).
●
The permanent ventilation flap on the storm cover is obstructed (see
Installation).
●
The items were too wet (see Laundry).
●
The dryer was overloaded (see Laundry).
EN
Program finishes and clothes
are damper than expected.
! For safety the dryer has a maximum program time of 3 hours. If an
automatic program has not sensed the required final moisture in this time
the dryer will complete the program and stop. Check the above points and
run the program again, if the results are still damp, contact our Customer
Care Department.
●
The display shows a fault
Note down the code and contact the our Customer Care Department.
code F followed by one or two
numbers.
If you still have a problem call our Customer Care Department on: 1 877 356 0766
Spare Parts
This dryer is a complex machine. Repairing it yourself or having a non-authorized person try to repair it could
cause harm to one or more persons and to the machine, and could invalidate the spare parts warranty.
Call an authorized service center if you experience problems while using the machine.
Contact number: 1 877 356 3766
13
Installation Instructions
EN
Read these instructions with care.
These instructions are provided for use by qualified
installers, in addition the installation must comply with:
●
In the United States, in accordance with the
National Electric Code ANSI/NFPA70 - latest edition
and any State, Municipal or local codes.
●
In Canada, in accordance with the Canadian
Electric Code C22.1 - latest edition and any
Provincial, Municipal or local codes.
Electrical
The dryer comes with a four-wire power supply cord
fitted with a 14-30P (plug), a receptacle should be
fitted in a location accessible after the dryer is
installed. The four wire dryer wire cord assembly fitted
must be used when the appliance is installed in a
location where grounding through the neutral is
prohibited. Grounding through the neutral is prohibited
for; new branch-circuit installations; mobile homes,
recreational vehicles and areas were local codes do
not allow grounding through the neutral conductor.
If a 10-30R (receptacle) is installed a locally obtained
3 wire dryer cord kit minimum ratings 240V, 30A, 90C
and marked for clothes dryers (ring terminals) should
be fitted.
To fit a 10-30P dryer cord assembly follow the steps
below:
1. Make sure the dryer is not plugged into a power
outlet.
2. Remove the cover from the cable junction box
located on the rear of the dryer.
3. Remove Green link wire from ground terminal.
4. Loosen the nut securing the cable bush, disconnect
and discard the existing cable and bush.
5. Fit one end of the Green link to the ground terminal
using washer and nut. Position the link wire to the
Neutral terminal (N), but do not fit securing screw at
this stage.
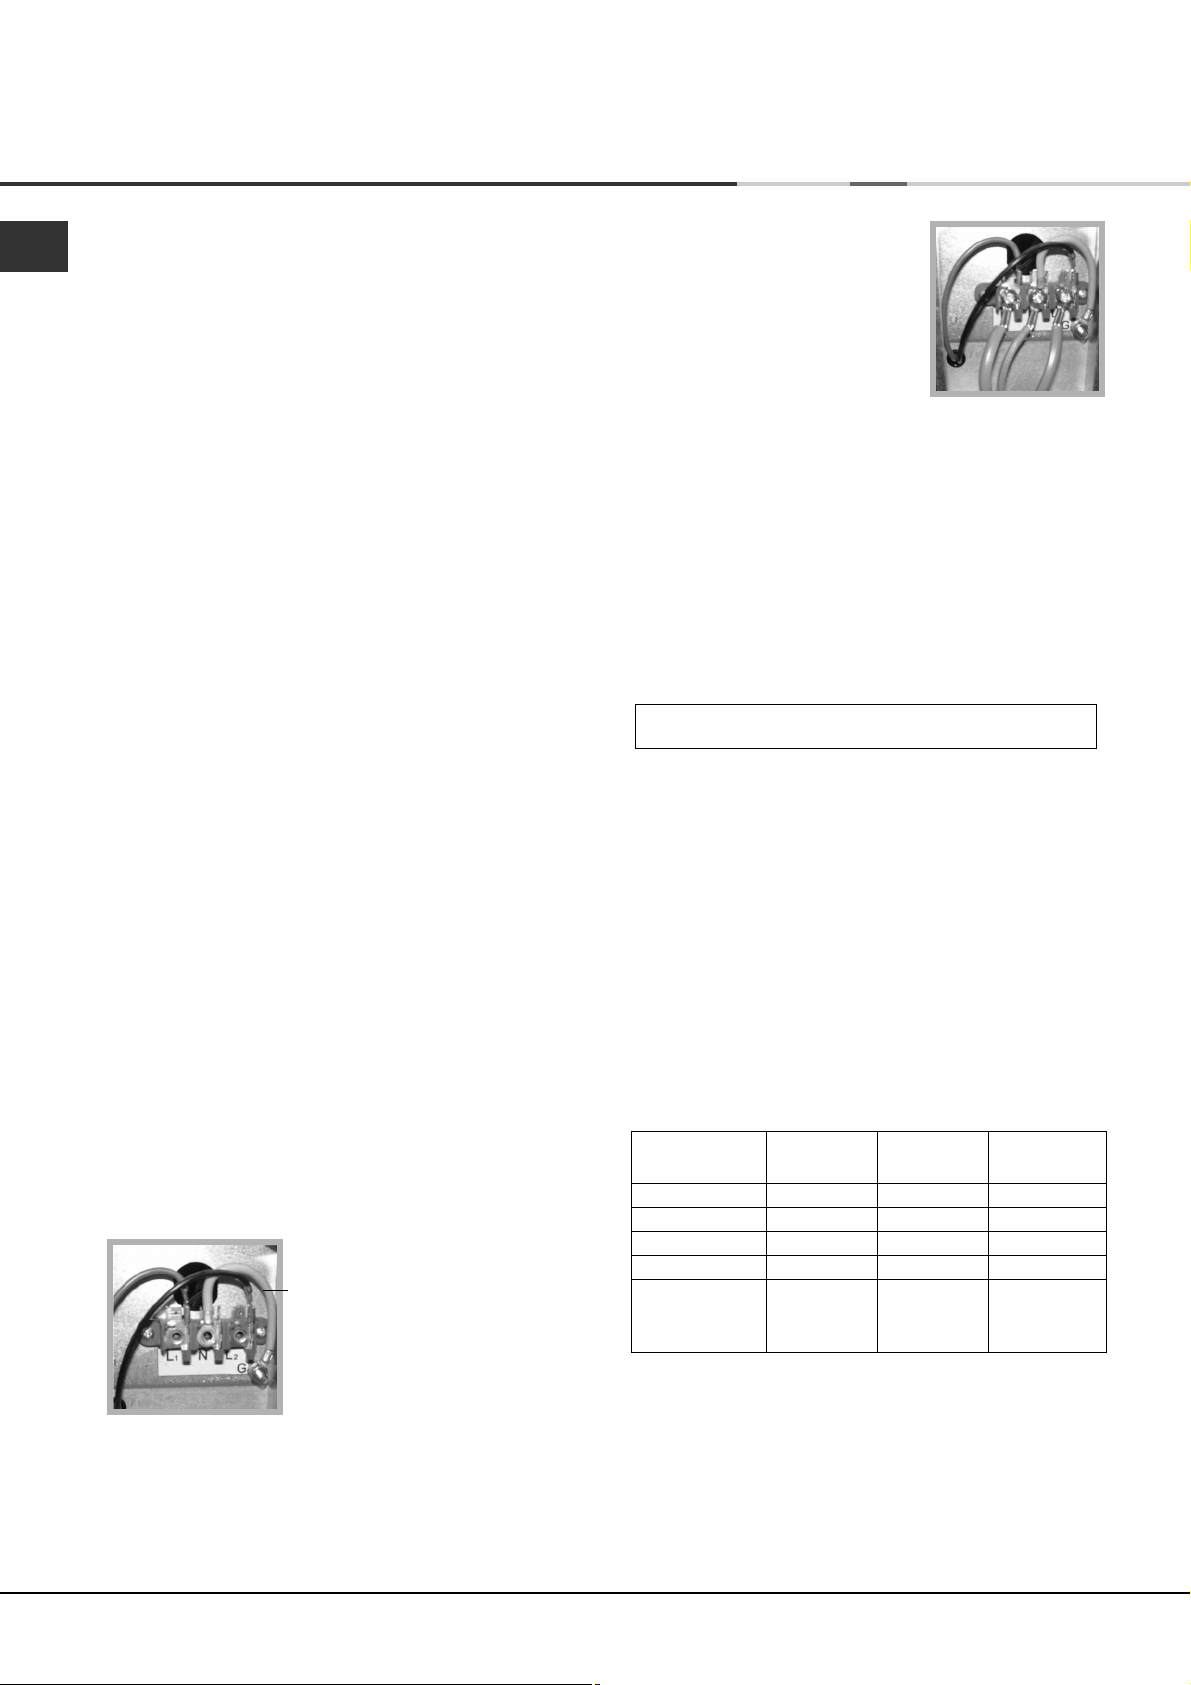
Green link wire.
7. Connect the L1, N and L2
wires.
On flat cords the center wire is
the Neutral conductor, fit to the
terminal marked ‘N’. On round
cords the Green or White
conductor should be fitted to
the terminal marked ‘N’.
8. Fully tighten the terminal block screws and ground
connection nut, position the cord, finally fully tighten
the strain relief.
9. Refit the cover to the box.
Grounding
Some local codes may require a separate ground. In
such cases the required ground wire, clamp and
screw must be purchased separately.
NEVER ground the dryer to plastic plumbing lines,
gas lines or water pipes.
NOTE: IF IN DOUBT ABOUT ANY OF THE ABOVE
CONSULT A QUALIFIED ELECTRICIAN.
Where to put your dryer
Check local codes before choosing a location. Some
codes do not permit installation in a garage, closet,
mobile home or bedroom.
DO NOT install the dryer in an area where gasoline or
other inflammable materials are kept or stored.
When operating the dryer, there has to be adequate
ventilation to avoid the back flow of gases into the
room from appliances burning other fuels, including
open fires.
Minimum installation clearances:
Closet Closet Under
(alternative) Counter
3
Sides
To p
Rear
Front
/4" (15mm) 0
1
/2" (10mm) 4" (100mm)1/2" (10mm)
3
/4" (15mm)3/4" (15mm)3/4" (15mm)
3
/4" (15mm)3/4" (15mm) not applicable
Vent Opening
distance from 6" (150mm) 2" (50mm)
Top of closet
3
/4" (15mm)
not applicable
6. Follow any instructions provided with the kit and fit
the cable using the strain relief supplied with the
kit, do not fully tighten the strain relief at this stage.
14
If installed in a closet it must have the following
dimensions and have two ventilation openings each
having an area 72 sq.ins. (450 sq.cm) located 2"
(50mm) or 6" (150mm) from top (see table) and 6"
(150mm) from bottom of the door.
It must NEVER be installed in a closet with a solid door.
The dryer has adjustable height feet, use these to
level the dryer after fitting into its final position.
 Loading...