

Hotpoint RGB744GER, RGB745GER, RGB745GES, RGB746GES Use And Care & Installation
How
to
get
the
best
from
Aluminum Foil
5, 15, 18,25
Oven Vents
4,5, I 1,28
Use and Care
Anti-Tip Device
2, 3,30,38
Preheating
14, 17,
18
Appliance Registration
2
Roasting, Roasting Guide
16,
17
&Installation
Care and Cleaning
~3–2j3
Self-Cleaning
20-2
of
Models
Clock and Timer
13
Shelves
I 1, 14,26
Consumer Services
47
Thermostat Adjustment
12
RGB744GER
Importun[
Phone Numbers 47
Power
Outage
8, 10
Cooktop
25,28
Problem Solver
44,45
RGB745GER
Features
6,7
Safety
Instructions
2-5
RGB745GES
Flooring Under
Range
31
Surface Cooking
8,9
Installation Instructions
29–43
Burner Grates
8.9.23.24.25
RGB746GES
Leveling
,,
38
Burners
8,9, 23;
24
Model and Serial Numbers
2,3 I
Control Settings
8
oven
1
0–22
Cookware Tips
9
Air Adjustment
37
Flame Size
Baking
9, 36,43
14,
15
Lighting Instructions
8,9
..,,
Broiler Pan and Rack
16, 18,25
Warranty
Back Cover
Broiling, Broiling Guide
18,
19
Installation
29-43
I
Control Settings
1()
Door Removal
26
Light; Bulb Replacement
10, 27
GE Answer
Center’”
Oven
Bottom
p5, 37
800.626.2000”
HmFolNT
HELP US HELP YOU
Read this book carefully.
If you received a damaged range...
It
is intended to help you operate and maintain your
Immediately contact the dealer (or builder) that sold
new range properly.
YOLI
the
range.
Keep it handy for answers to your questions.
Save time and money. Before YOU
If you don’t understand something or need
more help,
request service...
-
write (include your phone number):
Consumer Affairs
Check the
Problcm
Solver in
the
Hotpoint
back of this book. It lists
ctiuses
of
Appliance Park
minor
operating problems that you . . . . . ,
f
Louisville, KY 40225
can
correct yourself.
@
h
h’
-,, <
Write down the model and serial numbers.
Depending on your
runge,
you’ll
find the Inodcl ml
serial numbers on a
label
on
the front
of
the r:mgc.
behind the kick panel.
storqy
drawer or broiler drawer.
These numbers are also on the
ConsLImer
Product
Ownership Registration Card that came
with
your
range. Before sending in this card,
please wri~c
thcw
numbers here:
Model Number
Serial Number
Use these numbers in
any correspimdcncc
or
servi~c
calls concerning your range.
@iiiJ
4
A WARNING
i.;
●
ALL RANGES CAN TIP.
●
lN.JURY
TO PERSONS
COULD RESULT.
●
INSTALL THE ANTI-TIP
Q!!)
4.,
DEVICE PACKED WITH
THE RANGE.
●
SEE THE INSTALLATION
INSTRUCTIONS.
IF YOU NEED SERVICE
To obtain service, see the Consumer Services
poge
in
the back of this book.
To obtain replacement parts,
corrtoct GE/Hotp(Jint
Service Centers.
We’re proud of our service
and wwt
you to
be
pleased. If for
smme
reason
yOLI arc
not
htippy wilh the
service you receive, here are three
steps
to follow
t’or
further help.
FIRST, contact the people who serviced your
appliance. Explain why you are not
plewxi. In
tnos[
cases, this will solve the
problcm.
NI;XT,
it’
yOLI are
still not pleased, write
all
the
clct:iils––irlcl Lidirlg
your phone number-to:
Man:igcr-,
Consumer Relations
lHotpoirrt
Appliance
Pw”k
[ ,t)uisvillc,
KY
40225
FIN
AI..LY”, i!’ yoLIr problem
is
still
not resolved, write:
Major
Appliance
Consumer
Ac[ion Panel
z() ~’ol.t]l WJckcr- Dri v~
(’hictigo,
IL 60606”
WARNING: If the information in this manual is not followed exactly, a fire or explosion may result
causing property damage, personal injury or death.
—Do not
store or use gasoline or other
●
Immediately call your gas supplier from a
flammable vapors and liquids in the vicinity
neighbor’s phone. Follow the gas supplier’s
of this or any
otherappliance.
instructions.
—WHAT TO DO IF YOU SMELL GAS
●
lf
you cannot reach your gas supplier, call
the fire department.
●
Do not try to light any appliance.
—Installation and service must be performed
●
Do not touch any electrical switch; do not
by a qualified installer, service agency or
use any phone in your building.
the gas supplier.
2
IMPORTANT SAFETY NOTICE
c
The California Safe Drinking Water and Toxic
Enforcement Act
requires the Governor of
California to publish a list of substances known
to the state to cause cancer, birth defects or other
reproductive harm, and requires businesses to
warn customers of potential exposure to such
substances.
●
Gas
appliances can cause minor exposure to
four of these substances,
namely benzene, carbon
monoxide, formaldehyde and soot, caused
primarily by the incomplete combustion of natural
gas or LP fuels. Properly adjusted burners,
indicated by a bluish rather than a yellow flame,
will minimize incomplete combustion. Exposure to
these substances can be minimized by venting with
an open window or using a ventilation fan or hood.
●
Fluorescent light bulbs and safety valves on
standing pilot ranges contain mercury.
If your
model has these features, they must be recycled
according to local, state and federal codes.
When You Get Your Range
●
Have the installer show you the location of the
range gas cut-off valve and how to shut it off
if necessary.
●
Have your range installed and properly
grounded by a qualified installer,
in accordance
with the Installation Instructions. Any adjustment
and service should be performed only by qualified
gas range installers or service technicians.
●
Plug your range into a 120-volt grounded
outlet only.
Do not remove the round grounding
prong from the plug, If in doubt about the grounding
of the home electrical system, it is your personal
responsibility and obligation to have an ungrounded
outlet replaced with a properly grounded,
three-
prong outlet in accordance with the National
Electrical Code. In Canada, the appliance must be
electrically grounded in accordance with the
Canadian Electrical Code. Do not use
an
extension
cord with this appliance.
●
Do
not attempt to repair or replace any part of
your range unless it is specifically
recommended in this guide.
All other servicing
should be referred to a qualified technician.
●
Be
sure
all
packing materials are removed from
the range
before operating it to prevent fire or
smoke damage should the packing material ignite.
‘
Locate range out of kitchen traffic path
and out of drafty locations to prevent poor
air circulation.
c
Be sure your range is correctly adjusted by a
qualified service technician or installer for the
type of gas (natural or LP) that is to be used.
Your range can be converted for use with either
type of gas. See Installation Instructions.
WARNING:
These adjustments must be made by
a qualified service technician in accordance with
the manufacturer’s instructions and all codes and
requirements of the authority having jurisdiction.
Failure to follow these instructions could result in
serious injury or property damage. The qualified
agency performing this work assumes
responsibility for the conversion.
●
After prolonged use of a range, high floor
temperatures may result and many floor
coverings will not withstand this kind of use.
Never install the range over vinyl tile or linoleum
that cannot withstand such type of use. Never
install it directly over interior kitchen carpeting.
Using Your Range
●
Do not leave children alone or unattended where
a range is hot or in operation. They
could be
seriously burned.
●
CAUTION: ITEMS OF INTEREST TO
CHILDREN SHOULD NOT
BE
STORED IN
CABINETS ABOVE A RANGE OR ON THE
BACKSPLASH OF A
RANGE-CHILDREN
CLIMBING ON THE RANGE TO REACH
ITEMS COULD BE SERIOUSLY INJURED.
WARNING-A1l
ranges can tip and
injuv
@
,$
could result. To prevent
accidental tipping of the range,
attach an approved Anti-Tip device
to the wall. (See Installation
Instructions.) To check if the device
Q!)
L,
is installed&d engaged properly,
carefully tip the range forward. The
Anti-Tip device should engage and
prevent the range from tipping over.
If you pull the range out from the wall for any
reason, make sure the Anti-Tip device is engaged
when you push the range back against the
wall.
(continued next page)
IMPORTANT SAFETY INSTRUCTIONS
(continued)
●
Do not allow anyone to climb, stand or hang
on the door, storage or broiler drawer (on some
models) or range top.
They could damage the
range and even tip it over, causing severe
personal injury.
●
Let the burner grates and other surfaces cool
before touching them or leaving them where
children can reach them.
●
Never wear loose fitting or hanging garments
while using the appliance.
Be careful when
reaching for items stored in cabinets over the
cooktop. Flammable material could be ignited if
brought in contact with flame or hot oven surfaces
and may cause severe burns.
●
For your safety, never use your appliance for
warming or heating the room.
&
4
●
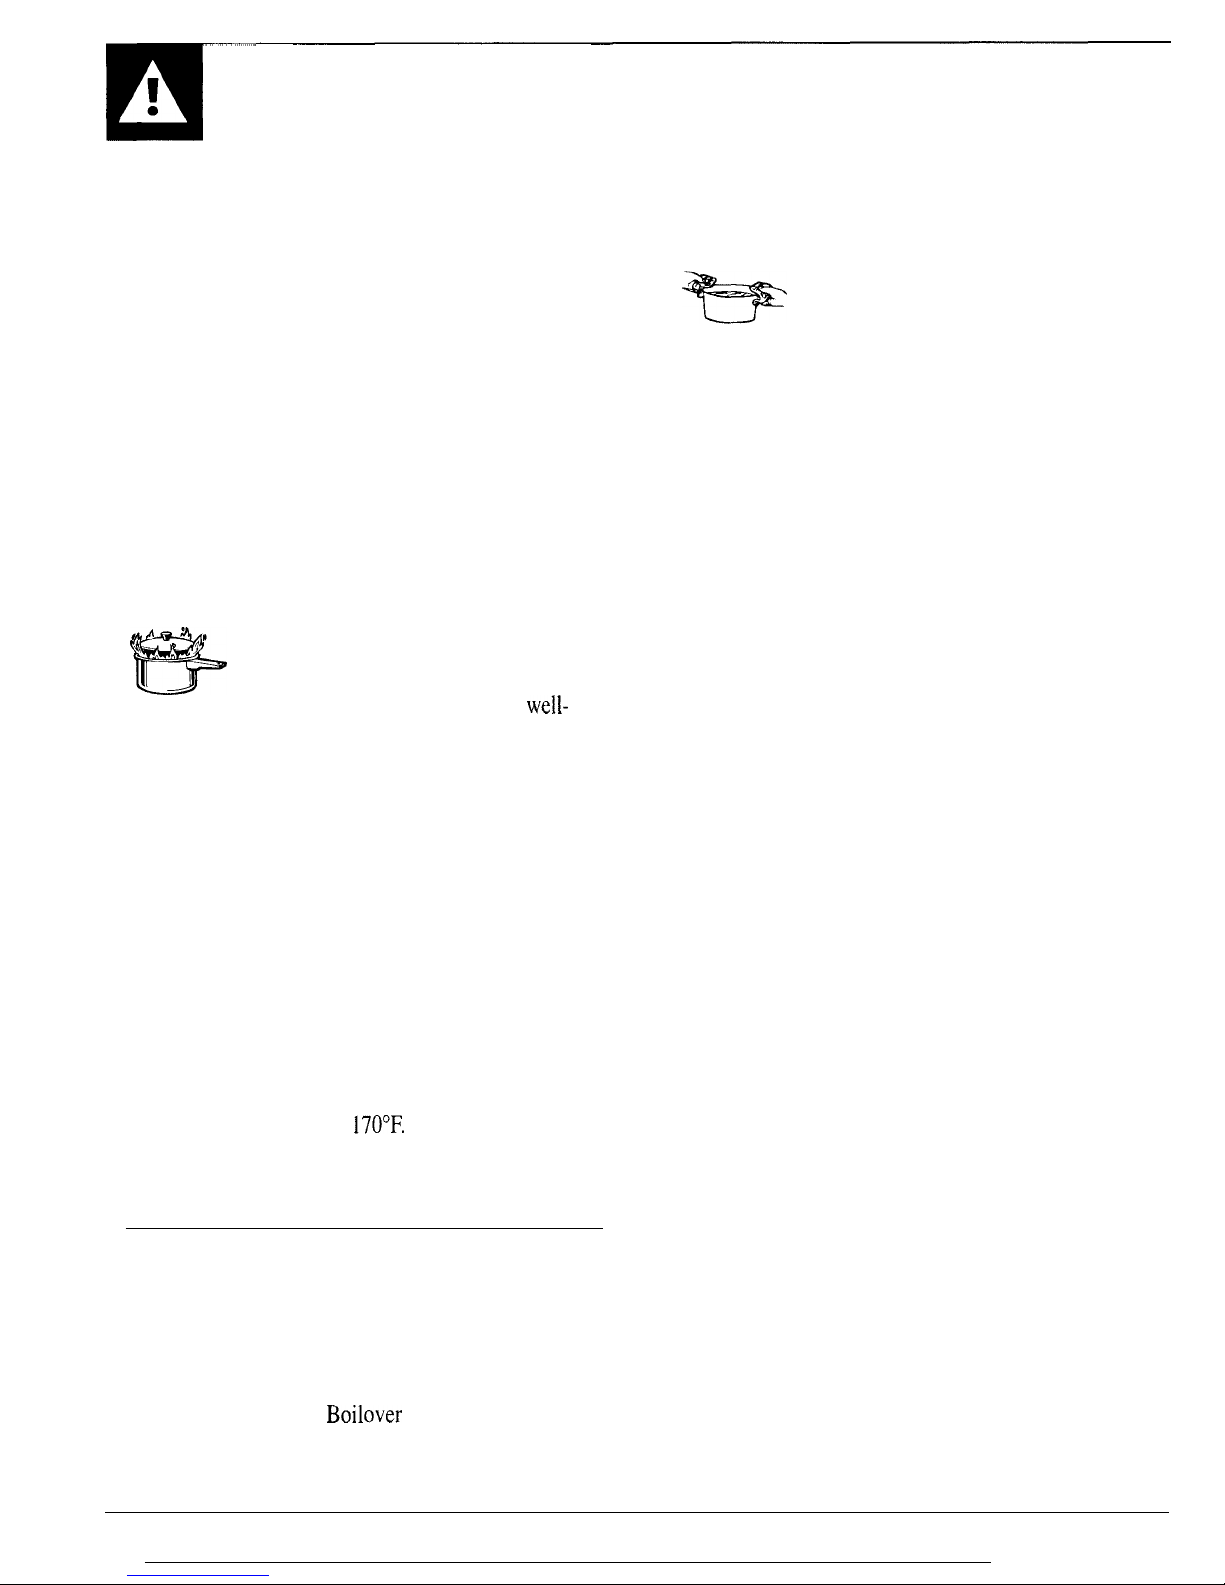
Do not use water on grease fires.
4
‘
‘
Y’
Never pick up a flaming pan. Turn off
burner, then smother flaming pan by
covering pan completely with
well-
fitting lid, cookie sheet or flat tray. Flaming grease
outside a pan can be put out by covering with
baking soda or, if available, a multi-purpose dry
chemical or foam-type fire extinguisher.
●
Do not store flammable materials in an oven,
a range storage drawer, kick panel, or near a
cooktop.
●
Do not store or use combustible materials,
gasoline or other flammable vapors and liquids
in the vicinity of this or any other appliance.
●
Do not let cooking grease or other flammable
materials accumulate in or near the range.
●
When cooking pork,
follow the directions
exactly and always cook the meat to an internal
temperature of at least
170”F.
This assures that, in
the remote possibility that trichina may be present
in the meat, it will be killed and the meat will be
safe to eat.
Surface Cooking
●
Always use the LITE position when
igniting top burners
and make sure the
burners have ignited.
●
Never leave the surface burners unattended at
high flame settings.
Boilover
causes smoking
and greasy spillovers that may catch on fire.
4
●
Adjust the top burner flame size so it does not
extend beyond the edge of the cookware.
Excessive flame is hazardous.
●
Use
only dry pot holders—
moist or
damp pot holders on hot surfaces may
result in burns from steam. Do not let
pot holders come near open flames when lifting
cookware. Do not use a towel or other bulky cloth
in place of a pot holder.
●
To minimize the possibility of burns,
ignition
of flammable materials, and spillage, turn
cookware handles toward the side or back of the
range without extending over adjacent burners.
●
Always turn the surface burner to OFF before
removing cookware.
●
Carefully watch foods being fried at a high
flame setting.
●
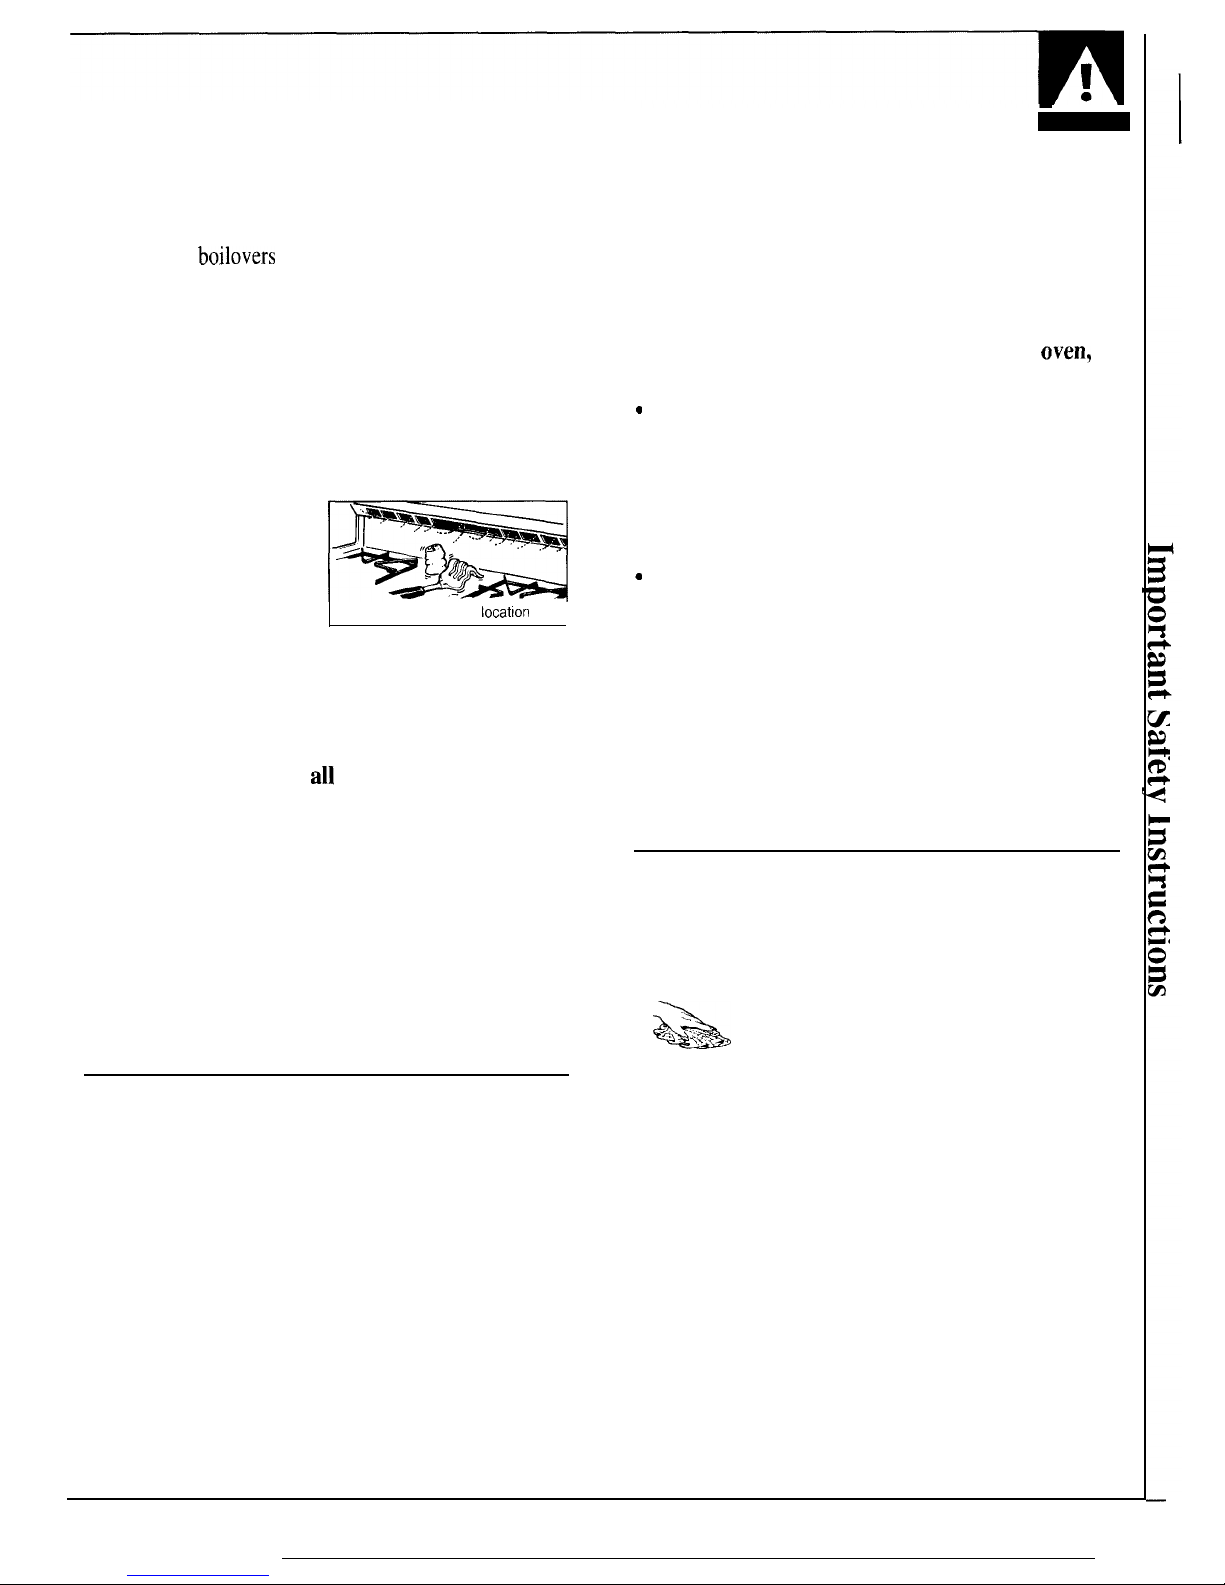
Never block the vents (air openings) of the
range.
They provide the air inlet and outlet that
are necessary for the range to operate properly
with correct combustion. Air openings are located
at the rear of the cooktop, at the top and bottom of
the oven door, and at the bottom of the range,
under the kick panel, storage drawer or broiler
drawer (depending on the model).
●
Do not use a wok on models with sealed burners
if the wok has a round metal ring that is placed
over the burner grate to support the wok.
This
ring acts as a heat trap, which may damage the
burner grate and burner head. Also, it may cause
the burner to work improperly. This may cause a
carbon monoxide level above that allowed by
current standards, resulting in a health hazard.
●
Foods for frying should be as dry as possible.
Frost on frozen foods or moisture on fresh foods
can cause hot fat to bubble up and over sides of pan.
●
Use least possible amount of fat for effective
shallow or deep-fat frying.
Filling the pan too
full of fat can cause spillovers when food is added.
●
If a combination of oils or fats will be used
in frying,
stir together before heating or as fats
melt slowly.
●
Always heat fat slowly, and watch as it heats.
●
Use a deep fat thermometer whenever
possible
to prevent overheating fat beyond the
smoking point.
●
Use proper pan
size—Avoid pans that are
unstable or easily tipped. Select cookware having
flat bottoms large enough to properly contain food
and avoid
boilovers
and spillovers and large
enough to cover burner grate. This will both save
cleaning time and prevent hazardous accumulations
of food, since heavy spattering or spillovers left on
range can ignite. Use pans with handles that can be
easily grasped and remain cool.
●
When using glass cookware,
make sure it is
designed for top-of-range cooking.
●
Keep all plastics away from top burners.
●
Do not leave plastic
items on the cooktop-
they may melt if left too
close to the vent.
w
●
Do not leave any items
Vent appearance and
Iocatlon
vary
on the cooktop.
The hot air from the vent may
ignite flammable items and will increase pressure in
closed containers, which may cause them to burst.
●
To avoid the possibility of a burn, always be
certain that the controls for all burners are at
the OFF position and
all
grates are cool before
attempting to remove them.
●
When flaming foods are under the hood, turn
the fan off. The fan, if operating, may spread
the flames.
●
If the range is located near a window,
do not
hang long curtains that could blow over the top
burners and create a fire hazard.
●
If you smell gas,
turn off the gas to the range and
call a qualified service technician. Never use an
open flame to locate a leak.
Baking, Broiling and Roasting
●
Do not use oven
for a storage area. Items stored
in
the oven can ignite.
●
Stand away from the range when opening the
door of a hot oven. The hot air and steam that
escape can cause burns to hands, face and eyes.
●
Keep the oven free from grease buildup.
●
Place the oven shelves in desired position while
the oven is cool.
●
Pulling out the shelf to the shelf-stop is a
convenience in lifting heavy foods. It is also a
precaution against burns from touching hot
surfaces of the door or oven walls. The lowest
position “R” is not designed to slide.
●
Do not heat unopened food containers. Pressure
could build up and the container could burst,
causing an injury.
●
Do not use aluminum foil anywhere in the oven
except as described in this book.
Misuse could
result in a fire hazard or damage to the range.
●
When using cooking or roasting bags in
oven?
follow the manufacturer’s directions.
c
Use only glass cookware that is recommended
for use in gas ovens.
●
Always remove the broiler pan from oven as
soon as you finish broiling.
Grease left in the pan
can catch fire if oven is used without removing the
grease from the broiler pan.
c
When broiling, if meat is too close to the flame,
the fat may ignite.
Trim excess fat to prevent
excessive flare-ups.
●
Make sure the broiler pan is in place correctly
to reduce the possibility of grease fires.
●
If you should have a grease fire in the broiler
pan,
turn off the oven, and keep the oven door
closed to contain the fire until it burns out.
●
Keep range clean and free of accumulations
of grease or spillovers, which may ignite.
Self-Cleaning Oven
●
Do not clean door gasket, The
door gasket is
essential for a good seal. Care should be taken not
to rub, damage or move the gasket.
&
●
Clean only parts listed in this Use and
“<
+ ‘-<. -
Care Guide.
●
Do not use oven cleaners. No
commercial oven
cleaner or oven liner protective coating of any kind
should be used in or around any part of the oven.
Residue from oven cleaners will damage the inside
of the oven when the self-clean cycle is used.
●
Before self-cleaning the oven, remove the
broiler pan and other cookware.
●
Be sure to wipe up excess spillage before
starting the self-cleaning operation.
●
If the self-cleaning mode malfunctions, turn off
and disconnect the power supply.
Have serviced
by a qualified technician.
SAVE THESE
INSTRUCTIONS
5

FEATURES OF YOUR RANGE
?WM’v
L
E-
6
Your range is equipped with one of the two types of surface burners shown above.

-!
OVCI1 BOI(OI1l°
25, 37
5
okcn Interior
i.ight
lo,
27
6 ()\’cn
[1001””
1
A[cll
I
4–22
(
LISe for
Sell’-Clcmin: cycle only’)
7 OVEN SET
Knob
I ()
8 OYICI1
“on’”
lndicdlt)i 1
.i:hl
10
I
21
[
5
~;US >tlllt (~t’t’ \’:llY’C (~)11
dllili
hlll”llCl” llltKICS
011]]’)
44
I 6
C()()ldop
X5, ~~
]
7 Broiler
l%n mi
r<ddi
16,
18, 26
I 8 Oven Shelves
(c:lsil! rcnl(lkcd (lr rcpt)sititltlcd 011 shelf’
supper(s)
1 I .14,
26
II
] g
oven
stlcll’ Sllppol”[s
20 OVCI1 1)()()1”
cJwkcl
5, 20,
2!2, 26
7
SURFACE COOKING
Electric Ignition
Your surface burners
are
lighted by electric ignition,
eliminating the need
for
standing pilot lights with
constantly burning
flames.
In
case
of a power failure, you
can
light the surface
burners on your range with
a
match. Hold a lighted
match
to the burner, then turn the knob to the LITE
position.
Use extreme caution when lighting burners
this way.
Surface burners in use when an electrical power
failure occurs will continue to operate normally.
The electrode
of
the spark igniter is exposed.
When one burner is turned
to
LITE,
all
the burners
spark. Do not attempt to disassemble or clean
around any burner while another burner is on.
An electric shock may result, which could cause
you to knock over hot cookware.
Surface Burner Controls
Knobs that turn the surface burners on
and
off are
marked as to which burners they control. The two
knobs on the left control the left
front
and left rear
burners. The two knobs on the right control the right
front and right rear burners.
Before Lighting a Burner
●
lf
drip pans
are
supplied with your range, they
should be used at all times.
● Make sure
al
I grates on the range are in place
before
using
any
burner.
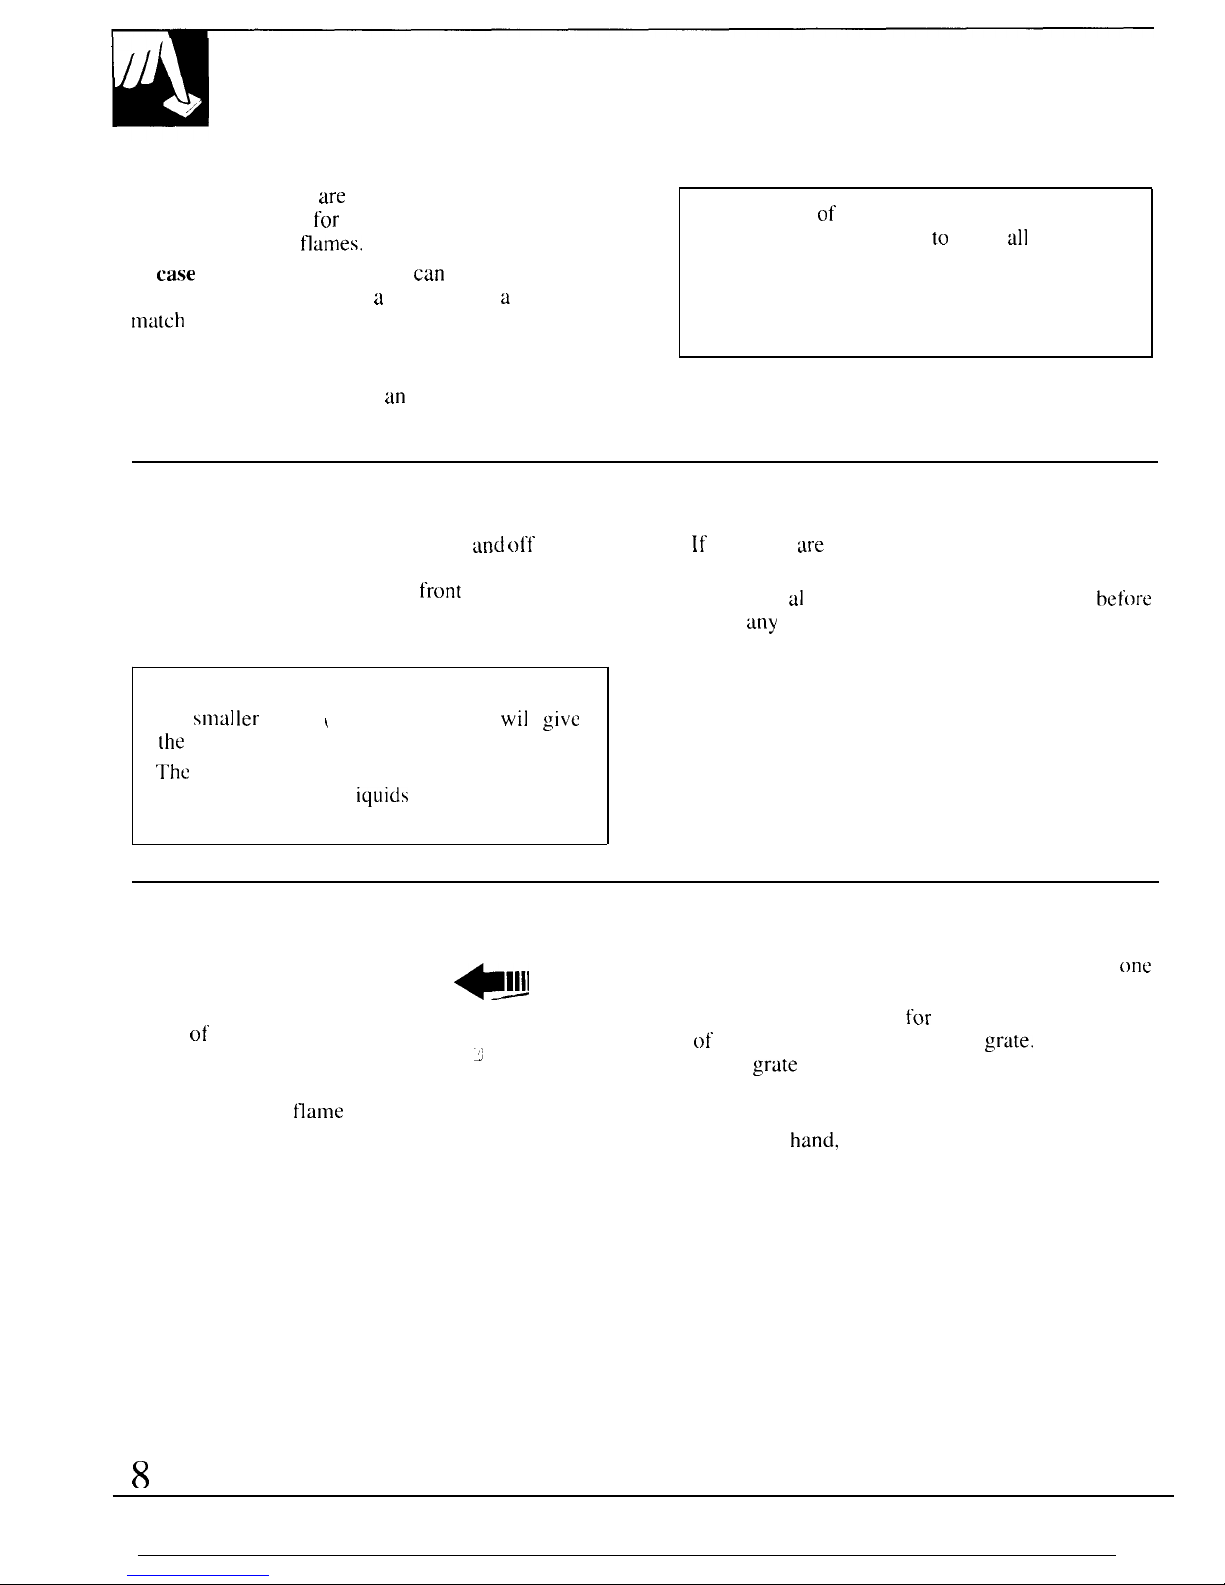
On ranges with sealed burners:
●
The
smal Ier
burner ~ right rear position)
wil
I
give
[he
best simmer results.
●
The
right front burner is higher powered than the
others and will bring 1
iqLlids
to a boil quicker
(natural gas installations only).
To Light a Surface Burner
Push the control knob in and
turn it to LITE. You will hear
+11
a little “clicking” noise-the
sound of the electric spark
igniting the burner.
After the burner ignites, turn the
knob to adjust the
flame
size.
P
(j
After Lighting a Burner
● Check to be sure the burner you turned on is the
one
you want to use.
● Do not operate a burner
for
an extended period
of’
time without cookware on the
grute.
The finish
on the
grute
may chip without cookware to absorb
the heat.
● Be sure the burners and grates are coo] before you
place your
hand,
a pot holder, cleaning cloths or
other materials on them.
8

How to
Select
Flame Size
W:itcb the fldmc, 110[
the
knob,
:Is Yell
I“(X{lICC
hea(.
The t’]~~mc
sim on a
g;is
bLII”nL?r should
m:ltch the
cookware yell
are
using.
FOR
SAt;Ii
lIANI)I,IN(;
()}; C’()()KWARE
NEVER LET THE FLAME
EXTEND UP
THE Sll)f;S
01: ‘1’1 lE
C()()KWARE. Any
t’latTle
lw-gcr
thun
the
botlotn t)l’ the c(x)kwwc
is
w:lstcd :ind
onl) serves [o
heat
the handle.
T~p-of-Range (3mkware
Aluminum: Mecliun-weight
c(mkww-c
is
recommended
hccauw it
beats
quickly and evenly.
Most I’OOLIS brown
evenly in an
:iluminunl
skillet.
Use
saLicepwls wi(h
[igh-fi[[
ing
I
ids when
cooking with
mini mum
am~)urlls c)I’ w:lter.
Cast-Iron:
[[’ Ilc:lted slowly, most skillets
will give
satisl’:ictory results,
Enamelware: Under
sornc cc)ndi[ions, the erl:~mcl
of
s~)nlc ctx)kwarc
may
nlcl
t.
I:ol low c(x)kw:irc
rllil[llrl’:ic(Lrl.cr’s recommcrld:lt ions I’or cooking methods.
(;lass: There
:ue [W(J {ypes ol’ glass
c(mkww-c-those
l’or” oven use only
and
th(~sc for top-oi’-range cm)king
(s~lucep:ms, cOI’I’CC :Lrld [c:ilp{)ts). GILiss
conducts
heat
very slowly.
Heatproof’ Glass Ceramic:
Can be used
for
either
surface or oven cooking. It conducts heat very
slowly
and cools
very slowly. Check cookware
m:mui
’actur-er’s directions to be sure it
can
be used
on
gtis
ranges.
Stainless Steel: This
metal ulone
has poor heating
pr-operties and
is usually combined with copper.
tll
urn i num or other
metals for
i reproved heat
distribution. Combination metal skillets usually work
satisfactorily if they are used
wi[h rnediurn
heat as
the
manufacturer recommends,
Wok Cooking
(t~n rnodcls
with
sc:~led
burners)
Wc rccomrncncl tha( you
use only u l’l:lt-b(~ttomed
wok.
They
are :~v:li lablc
at your Ioc:ll rctai I s[ore,
Do nol
LISC
woks that have
.
support ri rigs. U sc
0[’
these
[ypcs 01” w(~ks.
with
or
wi(hout
the
ring
in
pluce,
Carl be
d:IngcroLIs. P!:ici
ng
e
[heringoverthc burrwrg”r-utc
rnaycauscthc
burner(() work itllpr-()}~crlyrcslrl(irlg
in
c~ll”l~c)rllllorloxicle” lcvcls:ibt~\/c:ill(~w;lble
current
s(:trlcl~lr”(ls.Tllis c(JLrlci[~ccl:trlgcr”t~Lrs
to
y[)urhe~ilth. Do
not try to
usc
such
woks
without
the
ring. You coLIld
be scric)usly burned il’
the
wok
tipped
over.
Use of Stove Top Grills
(on model,; with
seal;d
burners)
Do
not
use
stove top grills
on your sealed
gas
burners.
If’ you use the stove top grill
on the sealed
gas
burner it
will
cause
incomplete
combustion and
can
result in exposure to
carbon
monoxide levels above allowable current standards.
This
can
be hazardous to your health.
9
USING YOUR OVEN
Before Using Your Oven
Be sure you understand how to set the controls properly. Practice removing
and replacing the shelves while the oven is coo].
Read
the information
and
tips on the following pages. Keep this book handy
where
you can refer to it,
especially during the first weeks of
using
your new range.
-. . - . . .
Klectrlc lgmtlon
The oven burner and broil burner are lighted by
electric ignition.
To light either burner, turn the OVEN SET knob to
the desired oven operation and the OVEN TEMP
knob to the desired temperature. The burner should
ignite within
30-90
seconds.
After the oven reaches the selected temperature, the
oven burner cycles—off completely, then on with
a
full flame—to keep the oven temperature controlled.”
I
Power Outage
CAUTION: DO NOT MAKE ANY ATTEMPT TO
OPERATE THE ELECTRIC IGNITION OVEN
DURING AN ELECTRICAL POWER FAILURE.
The oven or broiler cannot be lit during a power
failure. Gas will not
flow
unless the glow bar is hot.
If the
oven is in use when a power failure occurs,
the
oven
burner shuts off- and cannot be
re-lit
until
power is restored.
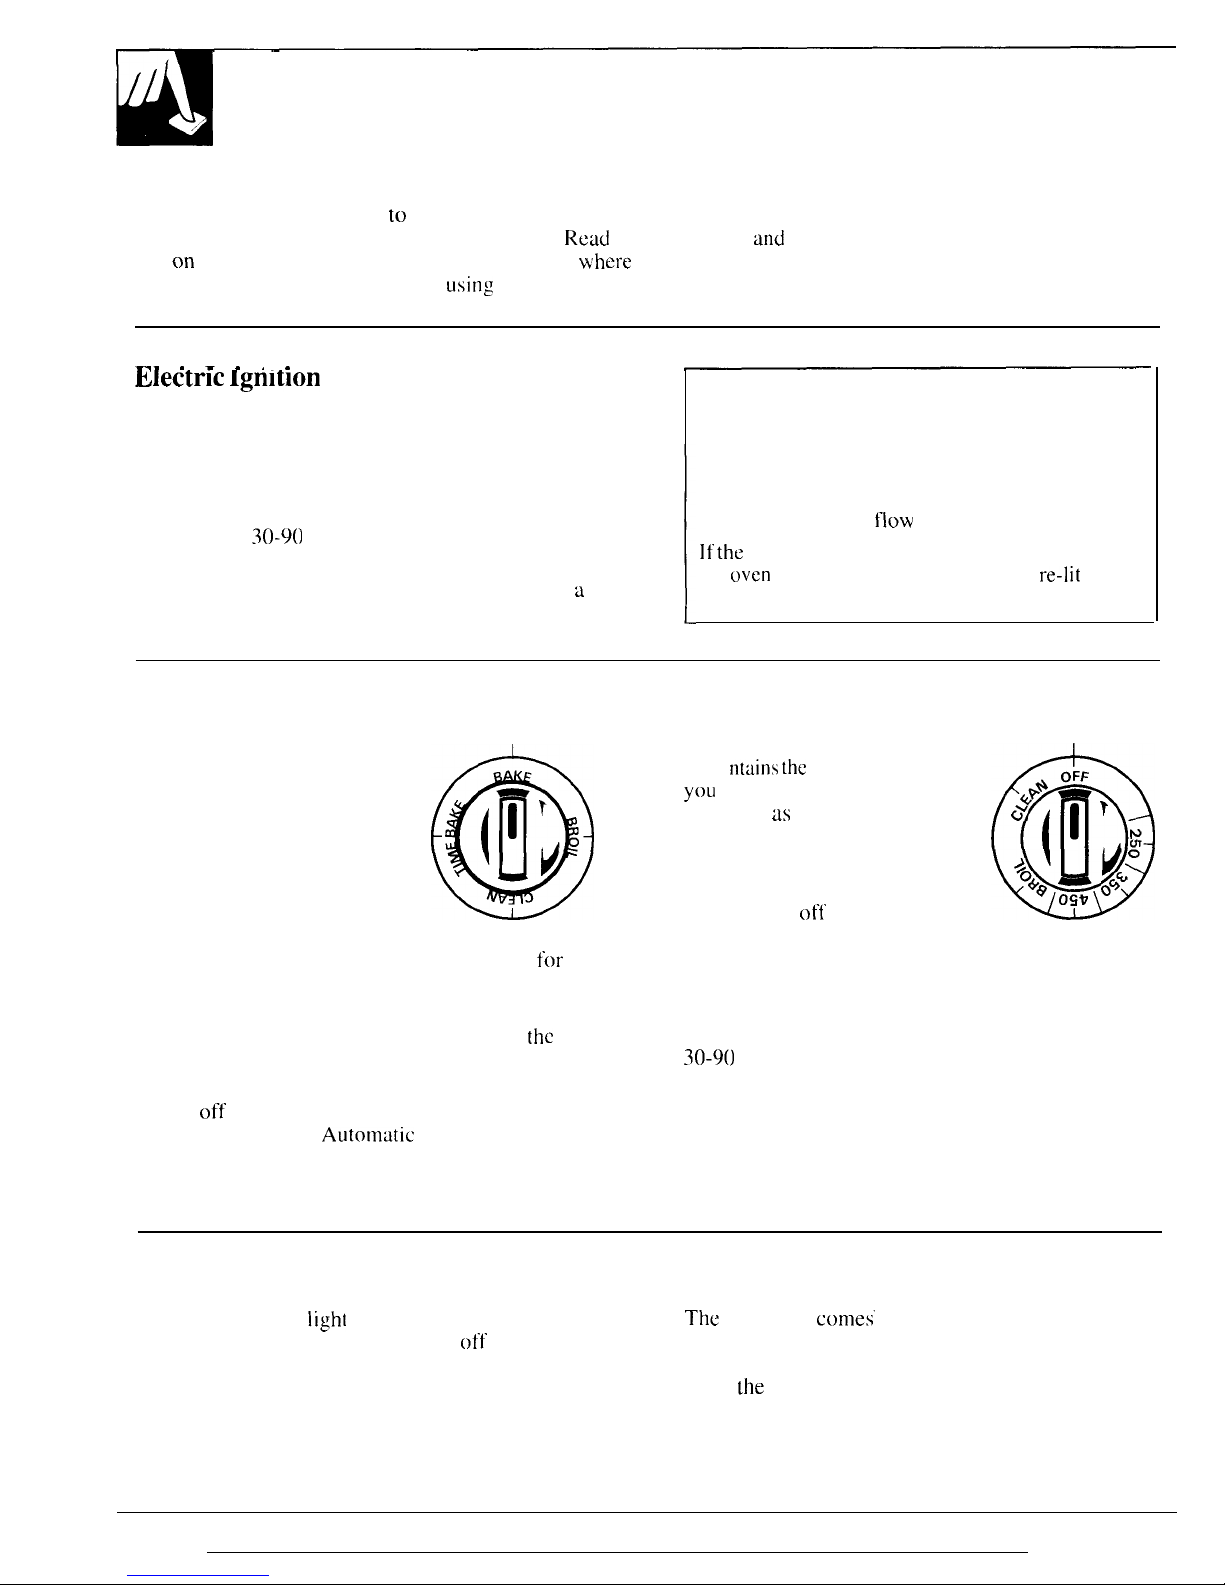
OVEN SET Control
The OVEN SET control
OVEN SET
has settings for BAKE,
BROIL, TIME BAKE
and CLEAN. When
you turn the knob
to the desired setting,
the proper burner is
activated for that operation.
@
(1
!
v
BAKE—Use
this setting
for all normal oven operations-for example,
for
cooking roasts or casseroles. Only the bottom oven
burner operates during baking.
BROIL—Use this setting for broiling. Only
the
top
(broil) burner will operate.
TIME BAKE—Use this setting to turn the oven
on and
off at specified times when you want cooking
to start and stop. See
Automtitic
Oven Timer section.
CLEAN—Use this setting for the self-cleaning
function only.
OVEN TEMP Control
The OVEN TEMP control
OVEN TEMP
main
tuins the
temperature
yOLI
set for normal oven
operation
m
well as for
broiling. Push in and
turn to set temperatures
or to set into CLEAN position.
@
OFF
//$*
&
+
v
T
w
v
E
%.
OFF—Shuts
oft’
power to the
OSV
d$~
oven controls. Oven will not operate.
The OVEN TEMP knob should be turned
to OFF whenever the oven is not in use.
For normal oven operation, push in and turn the
knob to the desired temperature. It will normally take
30-90
seconds before the flame comes on.
After the oven reaches the selected temperature, the
oven burner cycles—off completely, then on with a
full name-to keep the oven temperature controlled.
Oven Indicator Light
Oven Light
The oven indicator
Iighl
glows until the oven reaches
The
oven light comes on automatically when the door
your selected temperature, then goes off and on with
is opened. Some models have a switch on the lower
the oven burner(s) during cooking.
control panel that allows you to turn the light on or off
when
the
door is closed.
10
Oven Moisture
As
your (JVCII heats
Lip,
(he
temperature
change
of the air in the oven
]nay
caLIsc
water droplets
to forlm
on
the
door glass. These
droplets are harmless
:md w’
i I I
c\’aporate
as
the
oven
continues
to heat Lip.
Oven Vents
The
o\cn is
})en(ed through duc[
openings at
the rear
● Handles of pots and pans on the cooktop may
(JI’ [he cook[op. See
Features section. Do
no( block
become hot if left too close to the vent.
[hcsc
openings
when
cooking in the oven-it is
● Metal items
will
become very hot if they are left
impor[ant thiit (he
flow of hot
tiir
from
the
oven
and fresh air
[() (he
oven burners be uninterrupted.
on the cooktop and could cause burns.
● Do not leave any items on the cooktop. The hot air
“~~~~~~~~~~~$~~es
from the vent may ignite flammable items
and
will
increase pressure in closed containers, which may
may become hot.
Do
not touch them.
cause them
to burst.
c
Do not leave plastic
Vent appearance and location vary
items on the cooktop-
they may melt if” left too close to the vent.
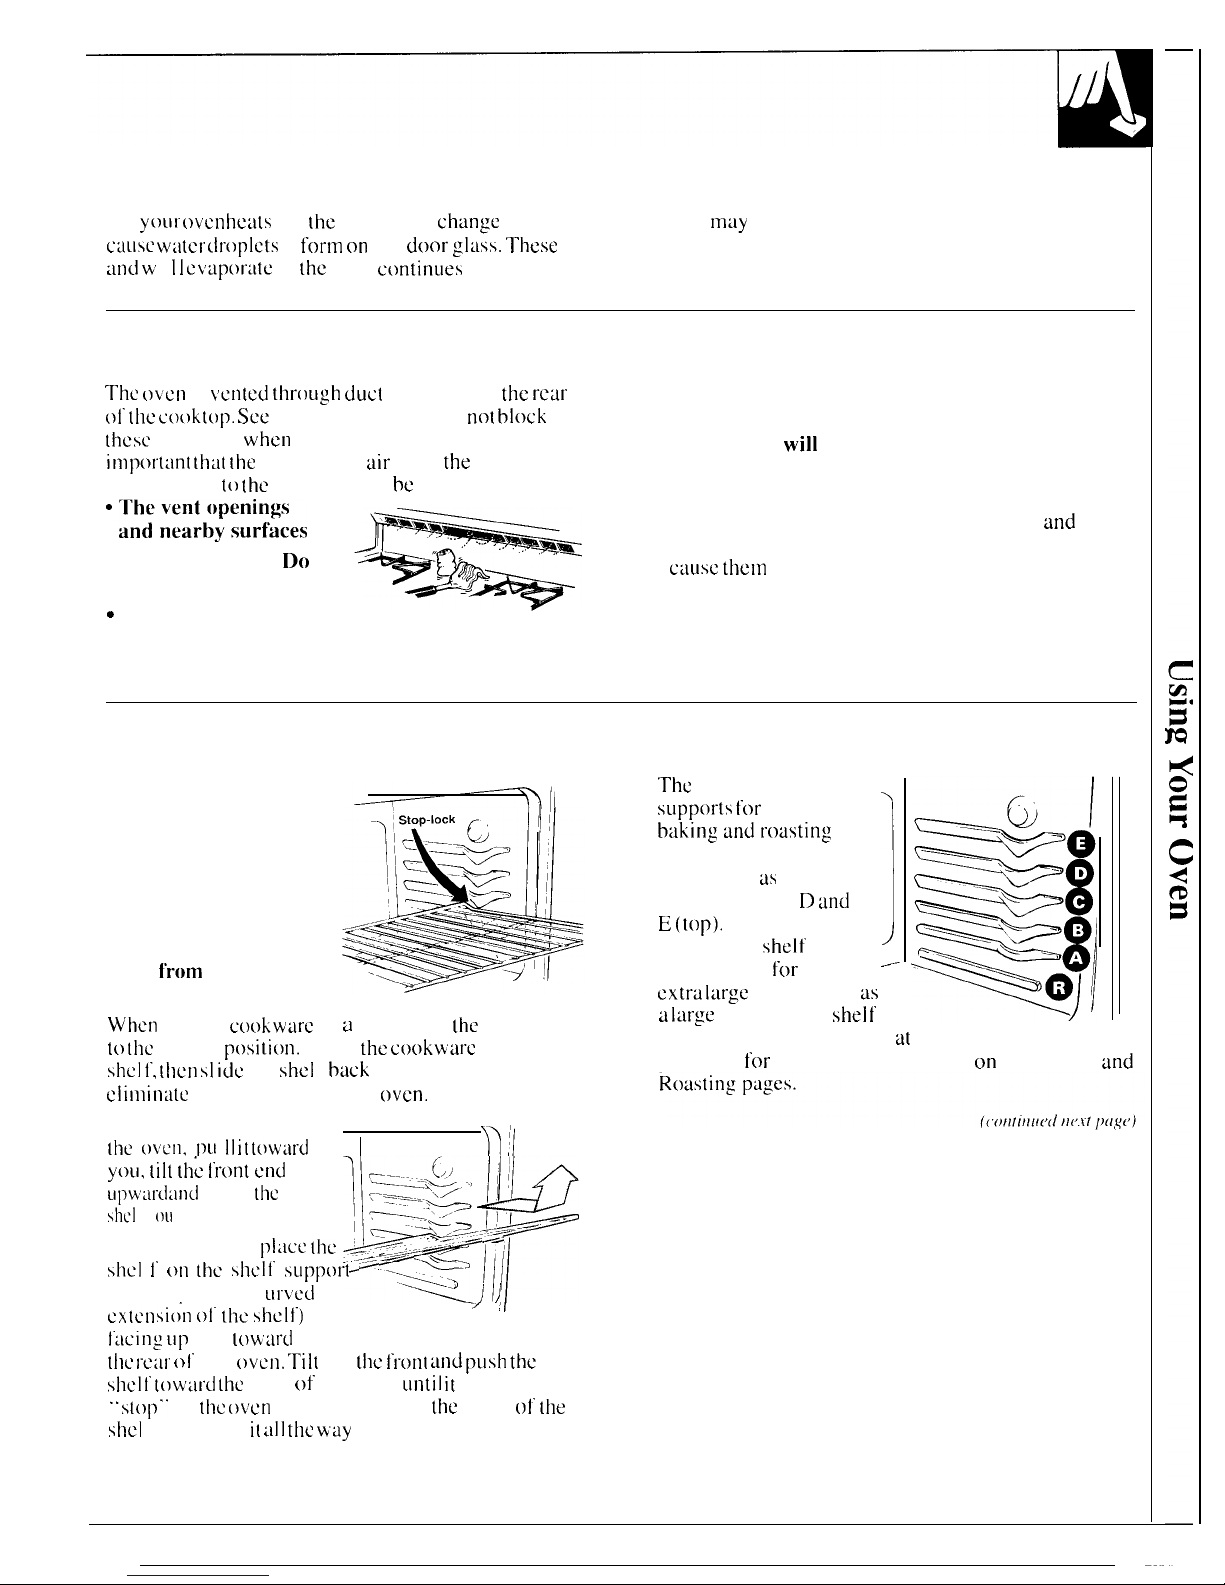
Oven Shelves
The shelves are designed
with stop-locks so when
placed correctly on the
shelf’ supports, they will
stop before coming
completely out of the
oven and will not tilt
when you are removing
f’ood
f’rom
them or
placing f’ood on them.
When
placing cookware on a shell’, pull
(he
shelf” out
tc) (I1c
“stop”
position.
Place
the Cookwat-c
on the
shcl f, (Ilcn SI idc
the
shel
t
back
into the oven. This will
climina[e
reaching into the hot
oven.
To remove a shelf from
[he oven, IX III
i(
((~ward
‘ii !1
Shelf Positions
The
oven has five shelf
sLlpports
for
normal
baking
tind
roasting
identified in this
illustration us A
1
(bottom), B, C,
D tind
E (top),
It also has a
special low
shelf
~
position (R)
for
roasting
-
extra large
items. such
as
a large
turkey—the
shelf
is not designed to slide out
at
this position. Shelf’
positions
for
cooking are suggested cm the Baking md
you,
lilt [hi front end
;=..,&
.,, ‘ 1
Ll]WW”d :Illd
[)11]]
[k
J_g’j
shcl
1’
{)u
I.
I
<Zs
, ; ,, ._
*
“
+-, /Y-,<+---
1’0 replace,
pliice {Iw
,.
~-~+-’””
“
ShC] t’ 011
[he
Shelf SLlppOl”t ““--
‘Lb
with stop-locks (C
L1l’\’iX\
/
‘:=2
)
cx[cnsi(;n 01” the shell”)
-/
!1
facing Up
and (ow’ard
dw
rcat
ol’ the
oven. Tilt
up (Iw
fronl
and
pLlsh
the
shell’ toward
tlw back of the oven
Lintil it
goes past
“s((q~” on
(Iw oven
wall. Then lower
[he
I’rent of
the
shc[
1’ and push i~
al] the way
back.
11
USING YOUR OVEN
(Conllnud
)
)9o
it
YburseZ+Adjust
the Oven Thermostat
[f’
you don’t think the
OVEN TEMP
oven is heating at the right
temperature when you
are
haking
or roasting, you
can
reset $+
=
the
thermostat yourself.
When
cooking”
food”
[’or [he
I’irs[
Ii nlc
i n your
new
oven,
LISC [i Inc
g i
~,~n
011
rccipcs
as a
,!JLl idc.
Oven
[hcrnlos(ats,
over a
period 01”
0
&
Y
+
[fly
N
E
o
&& M &
ycat-s,
Imay
“drill” i’;x)tm [he
Front
of OVEN TEMP
l’actory setting und
the dil’f’ercnccs
knob.
in [i
ming tm[ween
an
old Jnd
a
new (JVCI1
of 5
(t)
I ()
Illillll[cs :ll”c Ilot UIILISLIJI
.
YOLIr OV~ll h:lS hccll sc[
u)rrcc[ly a[
the
l’actory
and is
mot-c
Ii
kcly [() hc
:iccurate thtm the oven
which i [
rcpl aced.
We
do not recommend
the
use
of”
inexpensive
thermometers, such
:Is
th(m
Iound
i n I he
grf)ccty
sIOI”C, [()
check
the
lcnlpera[Llrc SC(I
i IIS ()[’ yoLIr
ncwr
OVCI1.
Thew [hcl”nlotllctct-s
call VW”)’
by ?()--~()
dc:i”ccs.
‘1’()
decide
how much to
change the
temperature,
SC[
[hc oven
tcnlperaturc
25° F.
h ighcr or
l(lwcr [him
[hc tcnlpeI”alLirc
in
your recipe, then b:~ke.
‘[’he
resu]ls
()!’ 1
his ‘lcsl”
sllou Id g
i
\/c
yell
illl id~:l
()[’
hoW lllll~h th~
tClllpCl”iltLll”C
ShoLlld hC
ChWl@.
12
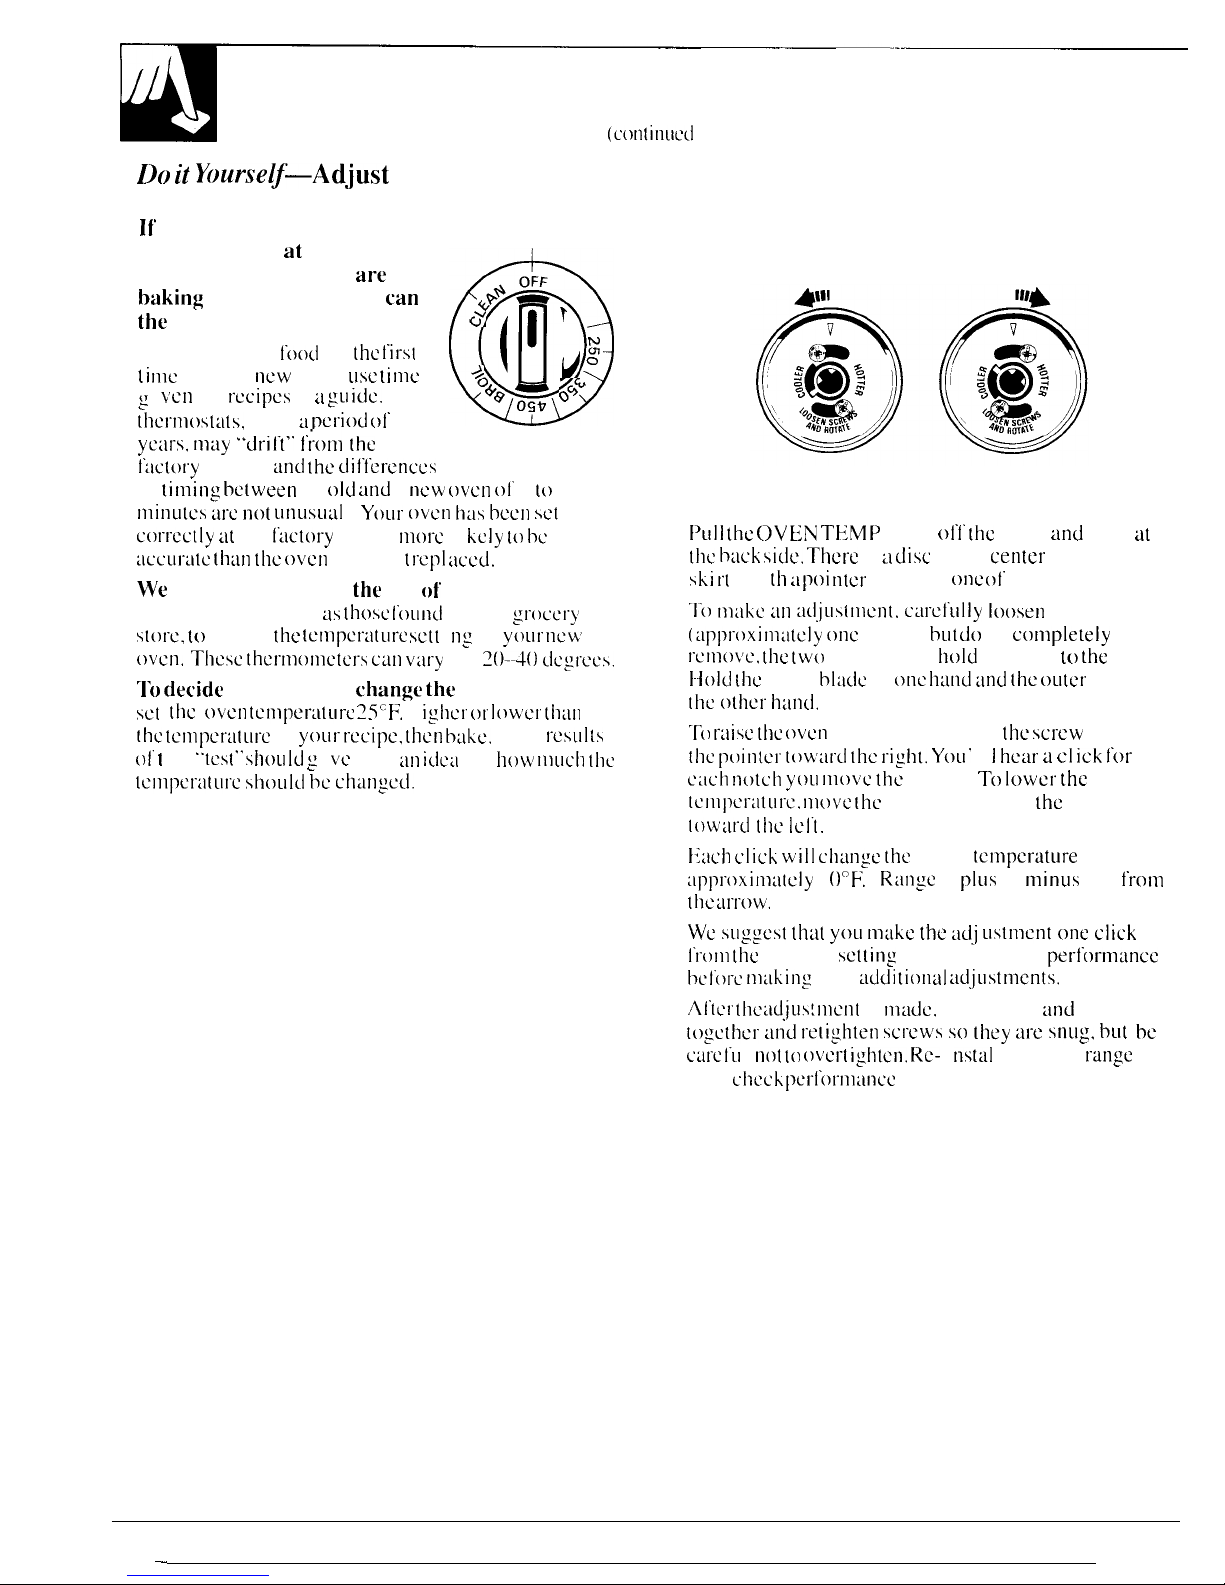
Note position of pointer to screw
before adjustment
Cooler
Hotter
I>LIII [hc
OVE3N
T~MP
knob
01”1” [hc
shalt
and
look at
(I1c
hxk side. Thcm
is a
disc
in the
center
of’ the knob
ski II
w i [h
:L
poi
ntcr
opposite”
onc of”
the screws.
‘]”() Illilkt :111
:l(ijLIs(llK!ll[.
CW’Ct’Uliy
100Sell
(Llp]?t-oxitll:i(cly ollc
[111’11).
hLlt Lfo
not
conlpldy
rctno~c.
(he
two
screws that
hold
the skirt
L()
the knob.
IHold (I1c
knob
hladc
in
onc
hilnd and
{he OLl[cr
skirt in
[he
()[hCl” hand,
T()
raise [hc (JVCI1
temperature, move
the screw
opposite
the pt)intel- toward [he right.
You I I
hear a c1 ick for
L’:lCh
llotCh
J’oll II1OVC the
knob. T()
]OWCI” the
[cmpcrdtLII”c.
IIIOVC lhc
screw opposite”
the
pointer
loww”d [Ilc
1(21’(.
lhch click will chunge
[he oven
tenlpcrature
:Ill]ll”oxitll:l(ely I
OOF”.
(
Rtlnge
is
plLIs
or tminus 600
f’rotm
[he
LIl”l”ow’.
)
We suggest
tha(
yoLI
nl:~kc the
ad,j
Llstnlent
one click
l’rotn
(I1c
original
set(ing
and check oven
perf’ornl;mcc
hcf’orc nl:king
any
dditional ddjLlstnlents.
AI’(cI’ (he :~djLls!]llcn[ is
mwfc,
press skirt
and
knob
[oythcr
Mlcf relighten screws so (hey al-e S1111:,
bllt
be
care f’u
I
not to ()\’ct-t igh(cn. Rc-
i
nstal
1 knob on
range
and
L’llcck
pcrf’ol”nlm’c
—

Clock and Minute Timer
To
set the clock, push the knob in
:md
turn
the clock himds (o
the
correct time. Then
let
the knob
oLit :md
continue turning to OFF.
The Minute Timer
has been
combined with
the range clock. Use
it to time cooking operations. You’11 recognize it as the
poi n(er th:lt
is different in
color from the clock h:mds.
Minutes are
marked
LIp
to
60
on the
center ring
ol’
[he clock.
To
set the Minute Timer,
turn the
knob [o
the left.
}ti//~{j[//
/HLd/iH,q
it?,
until
the pointer reaches
the number
ol’ minutes you wdn[ to time.
At the end of the set time, a
buzzer
sounds to tell
you
time is
up. Turn
the
knob, }t’i[//~~f/f
p//.~i~~,q,q
i//,
unt
i ] the poi
I1(CI”
rcxhes
OFF
and
the
buzzer
stops.
Automatic Oven Timer
This Timer Wil] :LutonlLLtica]]y
stLLrt kind
stop
yoLll” oven [’01” yoL1.
STOP TIME DELAY START
Here’s what you
do:
1. Make
sure
both yoLIr
r:ulge
clock and the DEI.AY STAR-T
dial
.
,.\’
‘
;;’
‘
‘/,,
\\\’ ‘
;’2’
‘
‘/,,
show
the
correct time ol’
day. when
either”
the DELAY STAR’I’ di~ll :-
‘0.
5,
or STOP TIME
dial
is pushed in
anLI
turned, it will “pop”
into
=9
place
when the time
shown
on
the range clock
is
reached.
-.
‘/
2. Set the DELAY START control. Push in and turn the
DE1.AY
‘/
7-
3+
“%-
;9
3*
*.-
.
.
“/
.’
‘//
, , , ,
‘/
,\’ ~t,
6
\.X’
,,[ ,1’
START
dial to
the time you want
the
oven to turn
itscll’
on.
(If you
wont
it to
start
cookin: immediately. do
no[ set
DELAY
PUSH TO SET
START
time.
)
3. Set the STOP TIME control. push in and
tLrrn
the S’l’O1) TIME
knob to
the time you want the oven to turn itscll’01’1’.
NOTE:
There
must be at least a
h:i]l’-hour” dil’1’cr”cnce
between the
DELAY START and STOP TIME
dials. :md [in)cs
cm he set
only
up to I I hours and 45
rninulcs
in advance.
4.
Se( the
OVEN SET knob
[()
TIME BAKE.
5. Set the OVEN TEMP knob
to the
desired cooking temper-:l(urc
The oven
will
turn
itself
on
inlmediatc]y Llnlcss
you
hti~’e set
the
DELAY START control for a
l~l[m sturting time.
It
will oper:ttc
at
the
tcrnpcrature you selected
:md
turn
itsc
11’
oft” at the .S[(~p
Ti
rw
you selected.
After you
take
your
l’(md
out ol’
the
oven. bc sure 10 turn
the
OVEN TEMP
knob to
OFF.
13
—
BAKING
How To Set Your Range For Baking
Do not lock the oven door with the door latch
during baking. This is used for
self cleaning only.
1. To avoid possible burns,
place
the shelves in
the
3.
Check
food for
doneness at minimum time
~Jn
correct position
before
you turn the oven on.
recipe. Cook
longer
if necessary. Turn OVEN
2. Turn the OVEN SET knob
to
BAKE or TIME
TEMP knob
to
OFF
and remove food.
BAKE md turn [he OVEN TEMP knob (o
the
For best bakin:
resul(s. follow these
suggestions:
desired temperature.
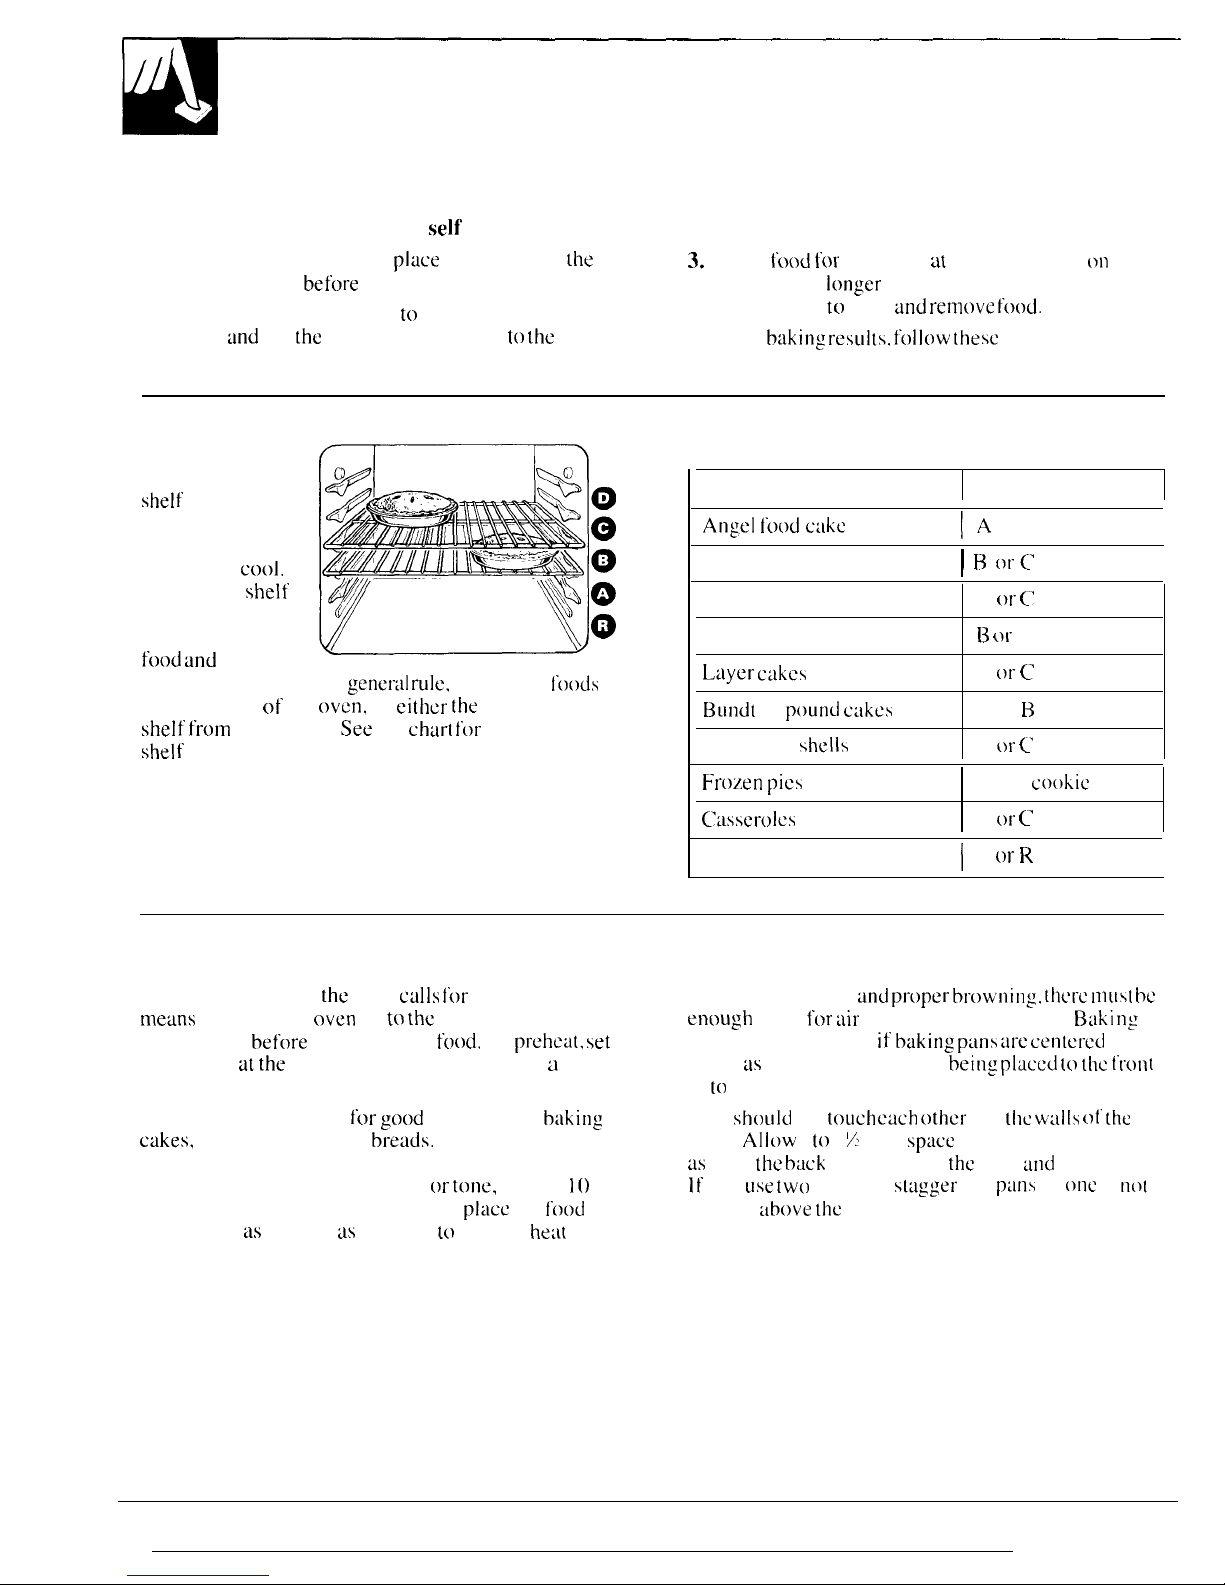
Oven Shelves
Arrange the oven
shelf or shelves i n
the desired
locations while
:
the oven is
coo].
The correct
shelf
z
position” depends
on the kind of
o
food and
the
browning desired. As a
general rule,
place most
foods
in the middle of the
oven.
on
either the
second or third
shelf fiwm
the bottom.
See
the
char{ for
suggested
shelf positions.
Type of Food Shelf Position
Angel food cmke
I
1A
I
Biscuits or muffins
I I? orC
Cookies or cupcakes
B or
C
Brownies
B 01”
C
Lt]yer ctlkm
B or
C
Bund(
or
pound cakes
A or
B
Pies or pie
shells
B or
C
Frozen pies
A (on
c(mkic
sheet)
Cusserolcs
B or
C
Roasting
I
I
B
,,r R
Preheating
Preheat the oven it’
the
recipe
culls I\)r
it. Preheat
means
bringing the
oven
up to
the
specified
temperature
before
putting in the
food.
To
prehca[, set
the oven at
the
correct temperature-selecting a
higher temperature does not shorten preheat time.
Preheating is necessary
for good
results when
baking
cakes,
cookies, pastry and
breuds.
For most casseroles
and roasts, preheating is not necessary. For ovens
without a preheat indicator light or
[one,
preheat
1()
minutes. After the oven is preheated
place
the
food
in the oven as quickly as possible
[cl
prevent
heat
from escaping.
14
Pan Placement
For even cooking
und pt”oper brow’ning. [Ilc>rc tnus[ bc
enough
room
f’or ;iir
circulation i n the oven.
Baki n:
results will be better if
baking pims at-e cen(ercd
as
much
m
possible rather than
being placed (o the t’rt~n~
or to the back of’ the oven.
Pans
shou]d
not
touch each
other 01”
(I1c w:lIIs c~f the
oven.
Allow
I to I X inch
space
between pans as well
us
from
the back
01’ the oven,
the
door
und
the sides.
]f’
yell
LISe tW()
shelves,
slagger
the p:uls so
onc
is not
directly
iibove the
other.
Baking Guides
When using
prepw-ed
baking mixes,
follow
package recipe or instructions
for
best baking results.
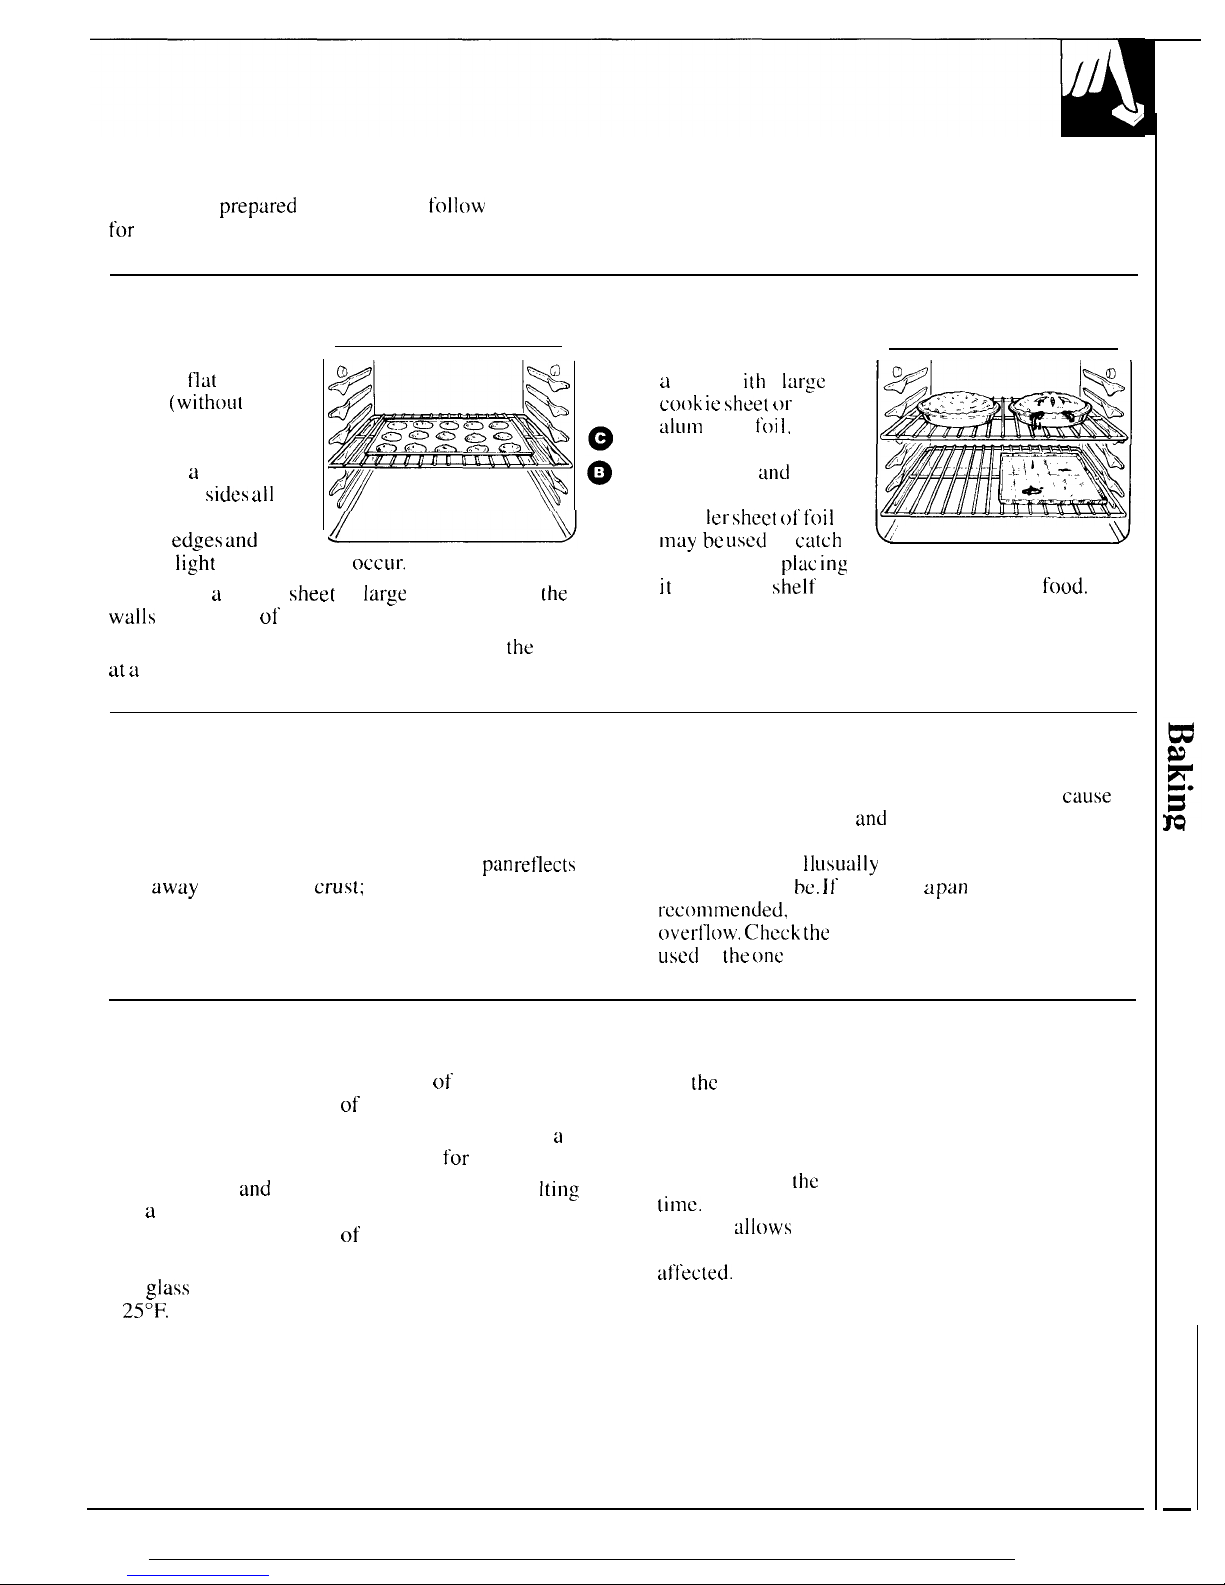
Cookies
When baking
cookies,
tlJt
cookie
sheets
(without
sides)
produce better-looking
cookies. Cookies
baked in
a
jelly roll
pan (short
sides all
around) may have
darker
edges and
@-
Y,,
Y&
pale or
li~ht
browning may
occur,
Do not use a cookie
sheet
so
large
that it touches
the
walls
or the door of the oven.
Aluminum Foil
Never entirely cover
~
shell’ w i[b a
large
cook ie shee[ or
alLIm
inure
foi ].
This
will disturb the heat
circulation
and
results
in poor baking. A
smal
Ier sheet 01” toil
Illtiy
be
UStXf
to
catch
v
~’
a spi I lover by
piac ing
it
on a lower
shelf’
several inches below the
food.
For best results, use only one cookie sheet in
the
oven
at a
time.
Pies
Cakes
For best results, bake pies in dark, rough or dull
When baking cakes, warped or bent pans will
cause
pans to produce a browner, crisper crust. Frozen
uneven baking results
and
poorly shaped products.
pies in foil pans should be placed on an aluminum
A cake baked in a pan larger than the recipe
cookie sheet for baking since the shiny foil
pan retlects
recommends wi
II
LIsually be crisper, thinner and drier
heat
away
from the pie
crust;
the cookie sheet helps
than it should
bc. It’
baked in a pan smaller than
retain it.
rccomrnended,
it may be undercooked and batter may
ovedlow.
Check the
recipe to make sure the pan size
used
is
the one
recommended.
Baking Pans
Use the proper baking pan. The type of finish on the
pan determines the amount of browning that will occur.
● Dark, rough or dull pans absorb heat resulting in
a
browner, crisper crust. Use this type
for
pies.
● Shiny, bright
and
smooth pans reflect heat, resu
Iti]lg
in a lighter, more delicate browning. Cakes and
cookies require this type of pan.
● Glass baking dishes also absorb heat. When baking
in
glass
baking dishes, lower the temperature by
25”F.
and use the recommended cooking time in
the recipe. This is not necessary when baking pies
or casseroles.
Don’t Peek
Set
[hc
timer for the estimated cooking time and do
not open the door to look at your food. Most recipes
provide minimum and maximum baking times such
as “bake 30-40” minutes.”
DO NOT open
the
door to check until the minimum
limo.
Opening the oven door frequently during
cooking
tiliows
heat to escape and makes baking
times longer. Your linking results may also be
ai”t’ected.
15
—
 Loading...