

Hotpoint RGA724PK4WH, RGA724PK3WH, RGA724PK2WH, RGA724PK1WH, RGA724EK4WH Owner’s Manual
...
ge.com
Safety
Instructions ..... 2-7, 22, 23, 24
HOTPOINT
>,
C'q
Operating Instructions
Oxen .................. ]0-16
Surface Burners ............ 8, 9
Care and Cleaning
Broiler Compartment ........ 19
Broiler Pan and Grid ........ 20
Burners ................... 18
Control Panel and I_obs ..... 18
Grates .................... 17
Lift-Up Cooktop ............ 17
Lift-Off Oven Door .......... 20
Metal Parts ................. 18
Oven Interior .............. 21
Painted Surfaces ............ 21
Removable Oven Bottom ..... 19
Shelves ................... 18
Th ermosta t Adj ustm ent ....... ] 4
Installation Instructions.. 22-33
12 ....................... 33
Troubleshooting Tips ....... 34
RGA ,,20
RGA 724
Consumer Support
Consumer Support . . . Back Coxer
X4'arranty .................. 35
Write the model and serial numbers
here:
Model #
Serial #
You can find them on a label under the
cooktop. See the i,itt-Up Cooktop section
in this malmal for instluctions on how to
lift the cooktop.
183D9542PO02 49-85104 12-05JR

IMPORTANTSAFETYINFORMATION.
READALLINSTRUCTIONSBEFOREUSING.
WARNING!
For your safety, the information in this manual must be followed to minimize the risk of fire or explosion, electric
shock, or toprevent property damage, personal injury, or loss of life.
WARNING:if theinformation
in this manual is not followed exactly,
a fire or explosion may result causing
property damage, personal injury
or death.
-- Do not store or use gasoline or other
flammable vapors and liquids in the
WARNING!
vicinity of this or any other appliance.
ANTI-TIPDEVICE
_!_ALL RANGES CAN TIP
_: INJURY TOPERSONS
COULD RESULT
_: INSTALL AN_ TIP
DEVICES PACKED WITH
RANGE
_: SEE INSTALLAtiON
INSTRUCtiONS
- WHATTODOIFYOU
SMELLGAS
iJ_::i:Do not try to light any appliance.
i?_:iDo not touch any electrical switch;
do not use any phone in your
building.
!:_i:Immediately call your gas supplier
from a neighbor's phone. Follow the
gas supplier's instructions.
!_i:If you cannot reach your gas supplier,
call the fire department.
-- Installation and service must be
performed by a qualified installer,
service agency or the gas supplier.
ANTI-TIPDEVICE
All rangescan tip and injury could result.
Toprevent accidental tipping of the range, attach it to the wall by installing the Anti--tip device
supplied.
If the Anti--tip device supplied with the range does not fit this application, use the universal Anti--17p
device WB2X7909.
Tocheck if the device is instafled and engaged properly, carefully tip the range forward. TheAnti--tip
device should engage and prevent the range from tipping over.
If you pull the range out flom the wall for any reason, make sure die device is properly
engaged when you push the range back against the wall. If it is not, there is a possible risk of
the rang_ tipping oxer and causing injui T if you or a child stand, sit or lean on an open door
2
Please refer to the Anti-Tip device infollnation in this manual. Failure to take this precaution
could result in tipping of the rang_ and ilijury.
ge.com
WARNING!
IMPORTANTSAFETYNOtiCE
The Cafifomia Safe Drinking Water and Toxic Enforcement Act requires the Governor of Cafifomia
to publish a list of substances known to the state to cause birth defects or other reproductive harm,
and requires businesses to warn customers of potential exposure to such substances.
Gas appliances can cause minor exposure to four of these substances, namely benzene, carbon
monoxide, formaldehyde and soot, caused primarily by the incomplete combustion of natural gas
or
LP fuels. Properly adjusted burners, indicated by a bluish rather than a yellow flame, will minimize
incomplete combustion. Exposure to these substances can be minimized by venting with an open
window or using a ventilation fan or hood.
SAFETYPRECAUtiONS
Have the installer show you the location of the range gas shut-off valve and how to shut it off if
necessary.
_::Hax> your rang_ installed and properly
grounded by a qualified insmllet; in
accordance with the Installation
Instructions. Any adjusunent and
service should be perfot_ned only by
qualified gv_srang> installers or service
mchnicians.
;f?:':Do not attempt to repair or replace any
part of your rang_ unless it is
specifically recommended in this
manual. All other service should be
refen-ed to a qualified mchnician.
_: Plug your rang_ into a 120_\olt
grounded outlet only. Do not remove
the round grounding prong flom the
plug. If in doubt about file grounding
of fl)e home electrical system, it is your
personal responsibility and obligation
to have an ungrounded outlet replaced
with a properly grounded, three-prong
outlet in accordance with fl)e National
Elecuical Code. Do not use an
exmnsion cord with this appliance.
WARNING:NEVERusethis
appliance as a space heater to heat or
wam] the room. Doing so m W result
in carbon monoxide poisoning and
ox_flleating of rite oxen.
3

IMPORTANTSAFETYINFORMATION.
READALLINSTRUCTIONSBEFOREUSING.
SAFETYPRECAUTIONS
_; Locate tire rang.e out of kitchen traffc _;
paflt arm out of drafty' locations to prm.ent
pilot outag.e (on standing pilot models) ;_;
arm poor air circulation.
_i:,:Be sure all packaging materials are t.emoxed
fiom tire mng.e befot.e operating it m
prexent fire or smoke damag.e should the
packaging material ignite.
_::Be sure your rang.e is cort.ectly adjusted by
a qualified setMce mchnician or installer
for the wpe of gas (nautral or IP) that is
m be used. Your rang.e can be corrxermd
for use with either type of gas. See the
Installation of the range section.
WARNING: tesea >stmentsmnst
be made by a qualified service technician
in accordance with rite manuthcut_er's
irrsmtctions arm all codes arm t.equit.ements
of the authority havingjm_isdicfion. Failure
to follow fltese insmtcfions could t.esult in
serious it_juU or proper)' damag.e. Tire
qualified ag.ency perforating this work
assumes t.esponsibili_' tbr tire corrx.ersion.
;_i:,:Be careflfl when you clean the cooktop
because the at.ea oxer the pilot (on
standing pilot models) will be hot.
_:;After prolong.ed nse of a range, hiOr floor
mmperaun.es m W t.esuh and many floor
cox.ering:s will not wiflrsmnd this kind of
use. Nex.er install fire rang.e oxer vinyl tile
or linoleum that cannot withstand such
type of use. Nexer irrsmll it directly ox.er
inmrior kitchen carpeting.
_{;:Do not leme children alone or unatmnded
where a rang.e is hot or in operation. They
could be seriously burned.
_f):':Do not allow arryone m climb, stand or
hang on the ox.en dent; broiler door or ;_i:,:
cooktop. They could damag.e the rang.e
and exen tip it ox.el, causing sex.ere
personal irljm%
CAUTION: temsofir.erest.
children should not be stored in cabinets
aboxe a range or on tire backsplash of a
rang.e---rhild_.en climbing on tire rang.e
4
m reach items could be seriously injured. ;_i:,:
Clean only parts listed ira this Owner's
Manual.
Nexer wear loose fating or hanging
garments while using the appliance. Be
cat.eflfl when reaching for imms stot.ed in
cabinets ox.er tim rang.e. Flammable
material could be ig_rited if brougir t in
contact wiflr flame or hot oxen surfi_ces
arm m W cause sex.et.e battTlS.
_?:':Do not store flammable materials in an
ox.en, a rang.e broiler or near a cooktop.
_?:':Do not store or use combustible materials,
gasoline or oflter flammable vapors and
liquids ira rite vicinity of this or arty oflter
appliance.
_i;:Do not let cooking gxease or other
flammable materials accumulam in or
near the rang.e.
;_):':Do not rise water on grease fires. Nexer
pick up a flaming pan. Turn tire controls
off. Smother a flaming pan on a surfi_ce
burner by coxering fire pan completely
with a well-fitting lid, cookie sheet or fiat
na> Use a multi-puq)ose d_T chemical or
foam-wpe fire extinguisher
Flaming gt.ease outside a pan can be put
out by covering it with baMng soda at;
if available, by using a mnlfi-pnrpose diT
chemical or foam-wl)e rit.e exfinguishen
Flame in the ox.en can be smothered
completely by closing the ox.en door arm
utrning fire cormel to off or by using a
nmlfi-pm])ose d U chemical or foam-type
fit.e extinguisher
;_;i,et fire burner grams and odter surfaces
cool betbre touching them or leaving
them where child_.en can t.each flrem.
Never block the xents (air openings) of
the rang.e. They provide the air irrlet arm
outlet that are necessa U for the rang.e to
operate properly with correct combustion.
Air opening:s are located at tire rear of
rite cooktop, at the top arm bottom of tim
oxen dent; and at fine bottom of the rang.e
under the broiler door
Large scratches or impacts to glass doors
can lead to broken or shattered glass.

_e.com
COOKMEATANDPOULTRYTHOROUGHLY...
Cook meat and poultry thoroughly--meat to at least an INTERNAL temperature of 160°Fand poultry
to at least an INTERNAL temperature of 180°ECooking to these temperatures usually protects
against foodbome illness.
OVEN
Stand away from the range when opening the door of ahot oven. Thehot air and steam that escape
can cause bums to hands, face and eyes.
_{_:Do not use the oven for a storage area.
Imms stored in file oxen can ignim.
_i_Kee I) tile oxen free from grease buildup.
_::Place the oxen shelxes in the desired
position while tile oxen is cool.
;f?:,iPulling out the shelf m the smi>lock is a
convenience in lifting heaxy' foods. It is
also a precaution against bums flom
ranching hot sniP, tces of tile door or
oxen walls.
Do not heat unopened food containers.
Pressure could build tl I) and die container
could burst, causing an ii)jui>
WARNING:NEVERcover
any slots, holes or passages in dae oxen
bottom or cover an entire rack wifll
mamrials such as alunfinum foil. Doing
so blocks air flow through the oxen and
may cause carbon monoxide poisoning.
'Aluminum foil lining_ m W also uap
heat, causing a fire hazaM.
_]{::Do not use your oxen to dry newspapers.
If oveflleamd, they can catch fire.
_]{::Use only glass cookware that is
recommended for use in gas oxens.
_i:,iAlwws remove the broiler pan flom range
as soon as you finish broiling. Grease left
in the pan can catch fire if oxen is used
without removing tile grease flom the
broiler pan.
_!{,:When broiling, if meat is too close to flae
flame, the fat may ignite. Trim excess fat to
prexent excessive flare-ups.
_i:,iMake sure the broiler pan is in place
coixectly to reduce the possibility of
giease files.
_]{::If you should haxe a grease fire in the
broiler pan, turn off file oven control, and
kee I) the broiler door and oxen door
closed to contain fire until it bums ont.
_i:,:For safeff and proper cooking perfomlance,
always bake and broil with tile oxen and
broiler doors closed.
_i:,:When using cooking or roasdng bags in
tile oxen, follow the manufi_cturer's
directions.
_::Nexer leaxejars of £_t drippings on or near
your range.
5
IMPORTANTSAFETYINFORMATION.
READALLINSTRUCTIONSBEFOREUSING.
WARNING!
SURFACEBURNERS
Use proper pan size--a void pans that are unstable or easily tipped. Select cookware having flat
bottoms large enough to cover bumer grates. Toavoid spillovers, make sure cookware is large
enough to contain the food properly. This will both save cleaning time and prevent hazardous
accumulations of food, since heavy spattering or spiflovers left on range can ignite. Use pans with
handles that can be easily grasped and remain cool
_::Always use die Life position (on elecuic _t{::
ignition models) or d_e Hlposidon (on
standing pilot models) when igniting fl_e
top burners and make sure the burners
hme ig_ited. ;_i:,:
_:;Nexer leme the surfi_ce burners
unattended at high flame settings.
Boilo_rs cause smoking and greasy _i:,:
q)illox>rs that may catch on fire.
_i:,:Adjust the top burner flame size so it
does not exmnd beyond the edge of fl_e
cookwme. Excessive flame is hazardous.
;_;Use only &Y pot holders--moist or damp
pot holders on hot surfiaces may result in
bmxls flom smam. Do not let pot holders
come near open flames when lifting
cookware. Do not use a towel or other
bulky cloth in place of a pot holder
;_i:,:When using glass cookware, make sure it
is designed for rap-of-range cooking.
N To minimize the possibility of bums,
ignition of flammable mamtJals and
spillage, um_ cookware handles toward the
side or back of the range without
exmnding ox_r adjacent burners.
_:;Cateflflly wamh tbods being tided at a hiOt
flame setting.
_:;Alwws heat fiat slowly, and watch as it heats.
;_i:,:Do not leme any imms on fl_e cookmp.
The hot air flom the x_nt m W ignite.
flammable imms and will increase pressure
in closed containers, which m W cause
fltem to burst.
;_i:,:ff a combination of oils or fiats will be used
in flying, stir together before heating or as
tats meh slowly.
;_?:';Use a deep fiat fl_ermometer whenever
possible to prevent ox>rheafing flit beyond
the smoking point.
_fi:,:Foods for fl?'ing should be as dry as
_:;Nex_r ttT to mo\'e a pan of hot fat,
Use the least possible amount of fiat tbr
effecdve shallow or deei>fiat fiTing. Filling
the pan too flfll of fiat can cause spillox>rs
when tbod is added.
Do not flame foods on fl_e cooktop, ffyou
do flame foods under fire hood, um_ fire
[_tIl Oil.
Do not use a wok on tim cooking surfiace
if the wok has a round metal ring that is
placed ox>r rite burner g_am to support
the wok. This ring acts as a heat uap,
which m W damag_ the burner gram and
burner head. Also, it m W cause rite burner
m work improperly. This may cause a
carbon monoxide lexel aboxe that
allowed by cn_Tent standards, resnlung
in a health hazard.
possible. Frost on frozen foods or moisture
on flesh foods can cause hot fiat to bubble
up and over the sides of the pan.
especially a deep fiat flTen _4'ait until the fiat
is cool.
Do not leaxe plastic imms on the
cooktoi>--fltey may melt if left too close to
the \_nt.
Kee I) all plastics away from dte surfl_ce
b/ll31el's.
To moid the possibility of a bum, always be
certain fltat rite conuols for all burners are
at the OFFposition and all grams axe cool
befbre atmmpfing to temoxe them.
It range is locamd near a windox% do not
hang long curtains fl_at could blow ox>r rite
smfi_ce burners and create a fire hazard.
Always tm_ the surface burner controls off
before removing cookware.

ge.com
SURFACEBURNERS(cont.)
_:; V_]len a pilot goes out (on standing pilot _:;Do not place or store items fllat can melt
models), you will demct a faint odor of gas
as your signal to religt_t fl_e pilot. When
relighting the pilot, make sure burner
controls are in the off position, and tbllow
instructions in this book m religtlt.
If you smell gas, and you hax> aheady
made sure pilots are lit (on standing pilot
models), mm off the gas to the rang_ and
call a quafified service technician. Ne_>r
use an open flame to locate a leak.
or catch fire on the grates, ex_n when the
cooktop is not being used,
;_i:':Kee I) range clean and flee of
accumulations of grease or spillox_rs,
which may ignite.
FLOORINGUNDERTHERANGE
Do not locate the range where it may be subject to strong drafts. Any open&gs & the floor or wall
behind the range should be sealed. Make sure the openings around the base of the range that supply
fresh air for combustion and ventilation are not obstructed by carpeting or woodwork.
_bur range, like many odmr household imms,
%
is hea_y and can setde into soft floor coverings
such as cushioned _iW1 or carpeting. Use
care when moving the range on this t).])e of
flooring. It is recommended that the following
simple and inexpensive instructions be
followed m promct your floor:
The mnge should be installed on a sheet of
pl)._vood (or similar material). "_lmn the floor
covering ends at dm fiont of the range, the
area flint the range will rest on should be built
up with pl}_vood m the same level or higher
than the floor co_ering.
LEVELINGTHERANGE
I_.xeling legs are locamd on each comer of
fl3e base of fl_e range. Your range must be
lex_l in order to produce proper cooking and
baking resuhs. Alter it is in its final location,
place a lex_l horizontally on any oxen shelf
This will allow the range to be moved for
cleaning or servicing. Also, make sure your
floor covering will withstand 180°E (See the
Installation Safety Instructions section).
Make snre the wall coverings aronnd },onr
mnge can withstand the heat genemmd (up m
200°F) by the range. (See the Installation
Safety Instructions section).
and check the lexelness front to back and
side to side. Lexel the range by adjusting the
lexeling legs or by placing shims under the
comers as needed.
READANDFOLLOWTHISSAFETYINFORMATIONCAREFULLY.
SAVETHESEINSTRUCTIONS
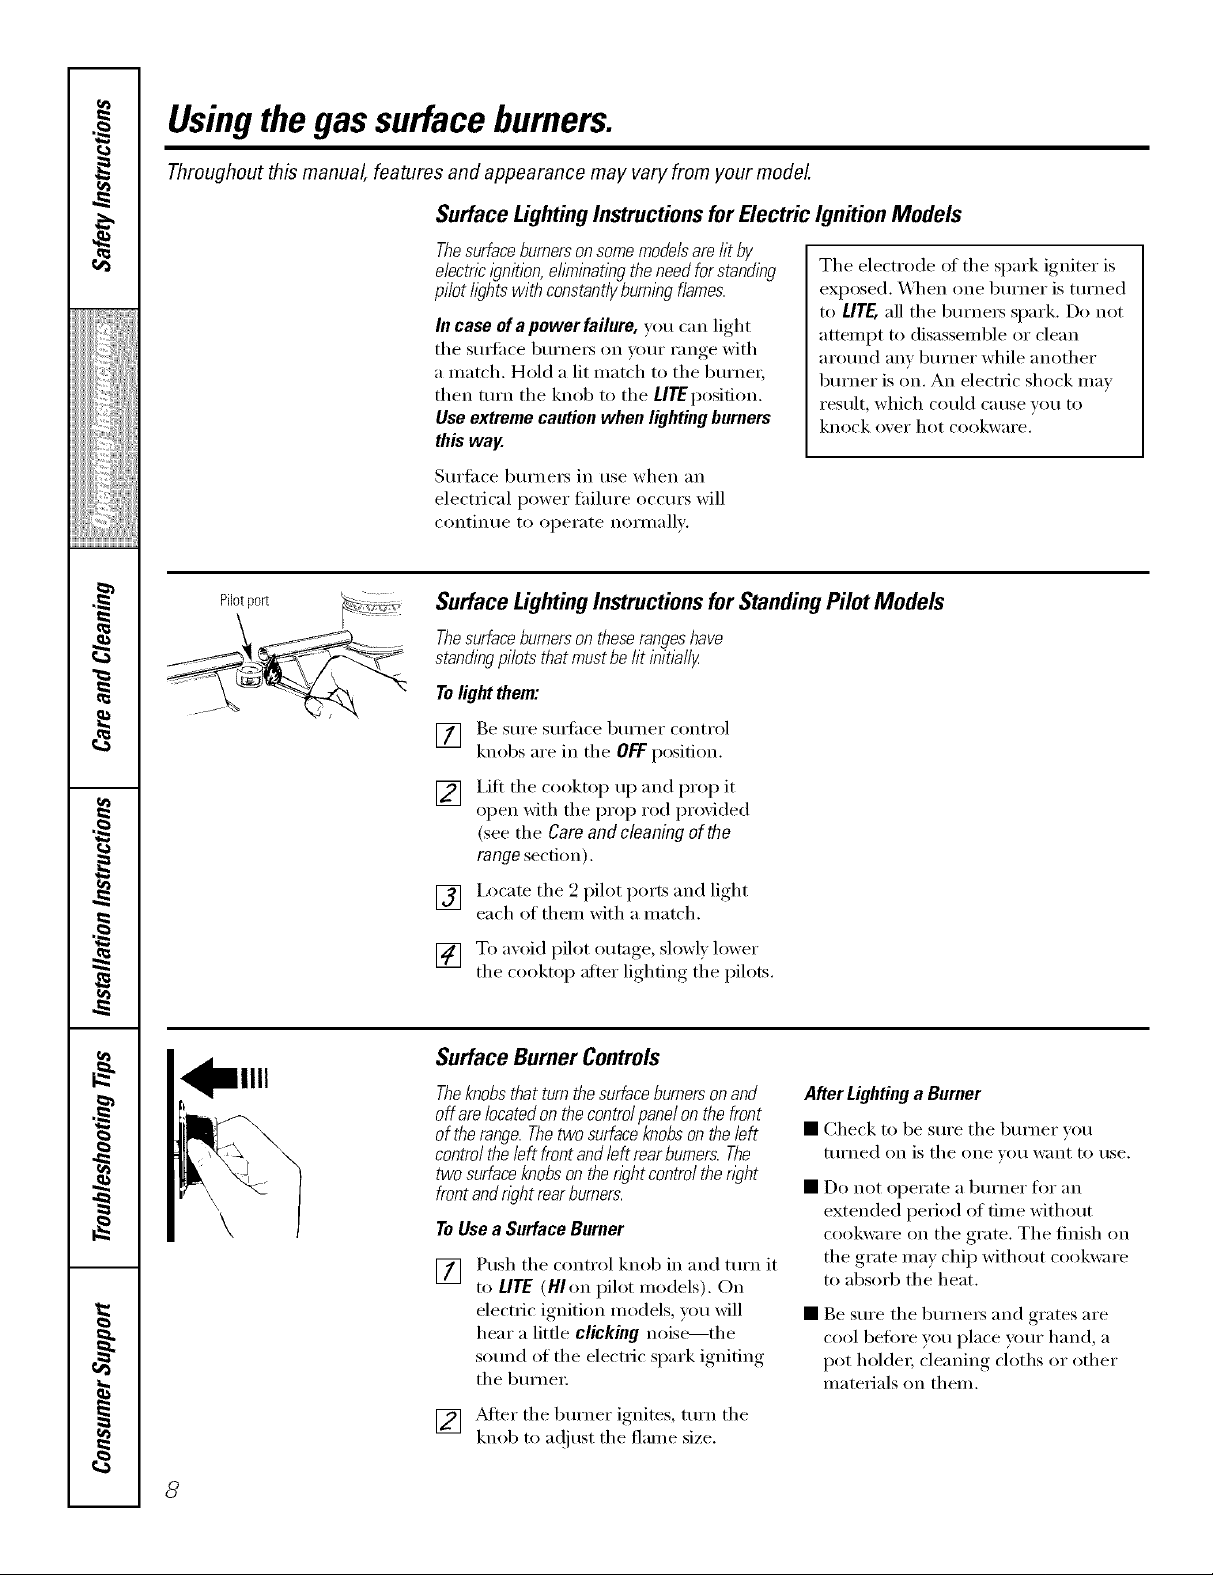
Usingthegas surfaceburners.
Throughout this manual, features and appearance may vary from your model
Surface Lighting Instructions for Electric Ignition Models
Pilotport >:_=<_v
\
Thesurfaceburnerson somemodelsare fit by
electrici)?nition,eflYnlnatlngtheneed forstanding
pilot lights with constant/)/burnlbgflames.
In case ofa powerfailure, you can light
the surfi_ce 1)urnex_ on your range with
a match. Hold a lit match to the burner,
then mrn the knob to the LITE position.
Use extreme caution when lighting burners
this way.
St/i'tilce btli'nei3 in t/se when an
electrical power fifilm'e occm's will
contintle to opei'ate noFi//allv.
The electrode (ff the spark igniter is
exposed. _._l_en one burner is turned
to LITE,all the burnex_ spark. Do not
attempt to disassemble or clean
around any burner while another
burner is on. An electric shock may
result, which could cause you to
knock over hot cookware.
Surface Lighting Instructions for Standing Pilot Models
The surface burners on these ranges have
standingpilotsthat must be fit initMly
To light them:
] Be st/I'e st/FIilce bt/FneI" control
knobs are in the OFF position.
lift the cooktop up and prop it
[]
open with the prop rod provided
(see the Careand cleaning of the
range section).
[] I,ocate the 2 pilot ports and light
each of them with a match.
[] To aw)id pilot outage, slowl) lower
the cooktop after lighting the pilots.
Surface Burner Controls
Theknobsthatturnthesurfaceburnersonand
offarelocatedonthecontrolpanelonthefront
oftherange.Thetwosurfaceknobsontheleft
controltheleft frontandleftrearburners.The
twosurfaceknobsonthewht contro/thewht
\
\
frontandwht rearburners.
ToUsea Surface Burner
Push the control knob in and tm'n it
[]
to LITE(HI on pilot models). On
electric ignition models, you will
hear a little clicking noise---the
sotmd of the electric spark igniting
the burne_;
] _Mter the burner ignites, tm'n the
knob to a(!iust the flame size.
AfterLightinga Burner
• Check to be sure the burner you
ttlrned on is the one _Otl IV}lilt to rise.
• Do not opel'ate a btlrner _k)I"}lIl
extended period of time without
cookware on the grate. The finish on
the grate may chip without cookware
to absorb the heat.
• Be sure the burners and grates are
cool heft)re you place your hand, a
pot holder; cleaning cloths or other
materials on them.
8
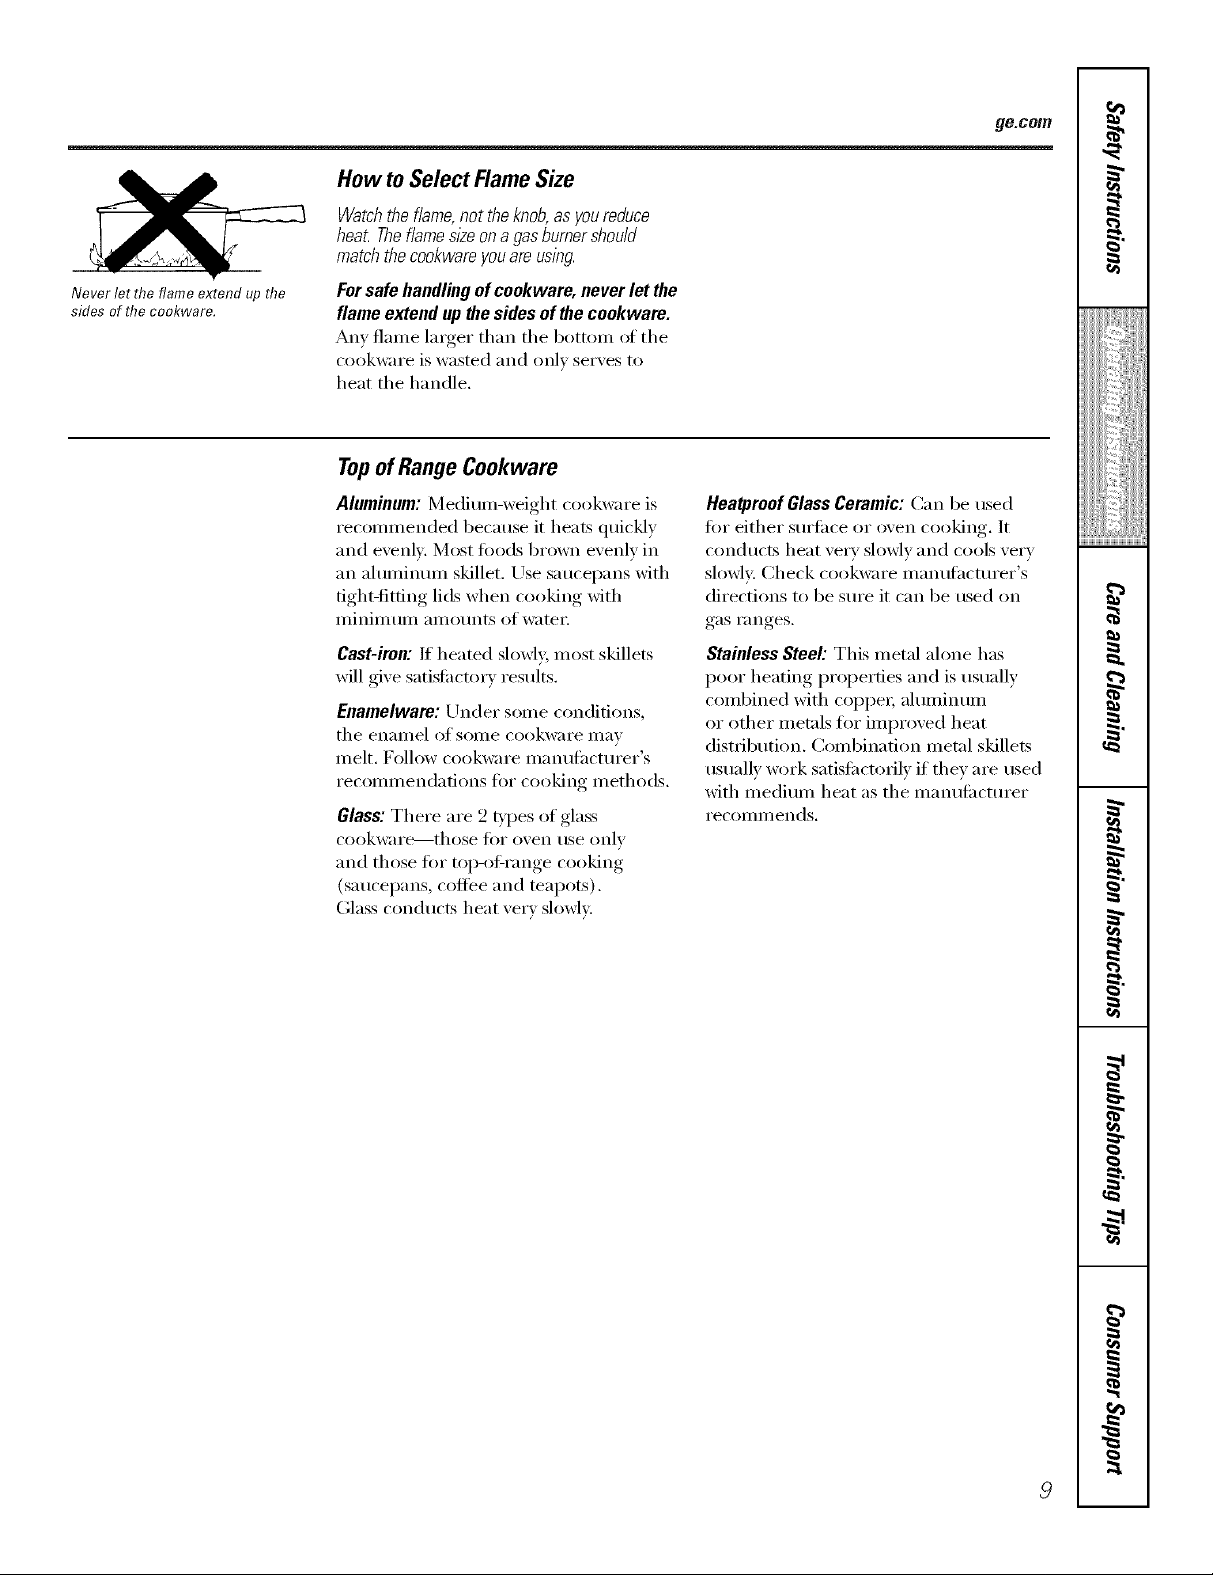
Never let the flame extend up the
sides of the cookware.
How to Select Flame Size
Watchthe flame,not the knob,as youreduce
heat Theflame sloeona gasburner shou/d
match thecookware youare using.
Forsafe handling of cookware, never let the
flame extend upthe sides of the ceekware.
Any flame larger than the botton_ of the
cookwai'e is wasted add oIllV serves to
heat tile handle.
Topof RangeCookware
Aluminum: IMedimn-weight cookware is
recommended because it heats quickly
and evenly. Most fi_o(ls brown evenly in
an ahmfinmn skillet. Use saucepans with
fight-titling lids when cooking with
I/liIliIlltlIll [lIllO/lIltS of water,
Cast-iron: If heated slowly, most skillets
will give satisfi_ctorv results.
Enamelware: Under some conditions,
tile eilai//el of SOille cookware i/l}l_
melt. Follow cookware mantdactm'er's
recommendations for cooking methods.
Glass: There are 2 types of glass
cookware,---those for oven use only
and those fin" top-ol_range cooking
(saucepans, coffee and teapots).
Glass conducts heat very slowly.
ge.com
Hea_mof Glass Ceramic: Can be used
fin" either surfilce or oven cooking. It
conducts heat ve_T slowly and cools very
slowly: Check cookware manufilcturer's
directions to be sure it can be used on
gas ranges.
Stainless Steel: This metal alone has
poor heating properties and is usually
combined with coppe_; ahmfinum
or other metals for improved heat
distribution. Combination metal skillets
usually work satisti_ctorilv if thev are used
with medium heat as the manufi_cmrer
I'eCOIllI//eIlds.
9

Usingthe oven.
Throughout this manual, features and appearance may vary from your model
OVEN • TEMP
OvenControl
Youroven/s controlled byan OVENTEMPknob.
/t can takeup to 90secondsbefore the flame
comes OR.
_dter tile oven reaches tile selected
temperature, tile oven burner maintains
tile selected temperature.
Oven Lighting Instructions for Standing Pilot Models
Thestandingovenpl/otmust belit/nit/a//_
Tolight the oven pilot:
[] Be sm'e the OVEN TEMP knob is in
the OFF position.
[] Open tile oven door and
remove the oven bottom. See the
Removable Oven Bottom section in
Careand Cleaning,
Find tile oxen pilot port at tile back
[]
of tile oxen.
To light tile o'_en pilot, push in
[]
and hold tile OVENTEMP knob xdfile
lighting the pilot with a long match
or match in a match holdeE Once
the oven pilot is lit, contiime holding
tile OVENTEMP knob in fin" one
minute betore releasing.
Power Outage--Standing Pilot Models
10
Bump
An electrical power fifilure will not affect
tile standing o_en pilot,
Power Outage--Electric Ignition Models
CAUTION:Do not make any attempt to
operate _e electric ignition oven duringan
electric powerfailure. Tile oven or broiler
cmmot be lit during a power fifilure. Gas
will not flow tlnless tile glow bar is hot.
OvenShelves
Tile shelves are designed with stop-locl<s
so when placed correctly on the shelf
supports, they will stop before coming
complemly otlt of tile oven and will not
flit when you are removing food fl'om
them or placing fi)od on them.
When placing cookware on a shell
pull the shelf out to the bump on the
shelf support. Place the cookware on the
shelE then slide the shelf back into the
oven. This will eliminate reaching into
tile hot oven.
If tile oven is in use when a power fifilure
occm_, tile oven burner shuts off and
cmmot be re-lit tmtil power is restored.
This is because the flow of gas is
automatically stopped and will not
resume when power is restored until
tile glow bar has reached operating
temperature.
Toremove the shelves from the oven, pull
them toward you, tilt fl'ont end upward
and pull them out.
Toreplace, place shelf on shelf support
with stop-locks (curved extension of
shell) tacing up and toward back of oven.
Tilt up ti'ont and push shelf toward back
of oven until it goes past tile bump on
tile shelf support. Then lower fl'ont of
shelf and push it all the way back.

Theovenhas4shelfpositions.
ge.com
Oven Shelf Positions
The oven has tour shelf supports--
A (bottom), B, C and O (top).
Shelf positions fin" cooking are suggested
in the Using your oven for baking and
Using your oven for roasting sections.
Oven Vents
• Tile oven is vented through •
duct openings at tile fl'ont of tile
backsplash.
• Do not block tile opening when •
cooking in tile oven--it is important
that the flow of hot air fl'om the oven
Handles of pots and pans on the
cooktop may becom e hot if left too
close to tile vent.
Metal items will become \'eta' hot if
tile}' are left on tile cooktop and could
C_l rise b/IYnS.
and fl'esh air to tile oven burner be
tminterrul)ted.
• The vent openings and nearby SUlqfilces
may become hot during baking and
broiling. Do not touch them.
Do not leave }lIIV itelllS on tile cooktop.
Tile hot air from tile vent may ignite
flammable items and will increase
pressure in closed containers, which
Ill,IV (;itlse theI// to btli'St.
• Do not leave plastic items on the
cooktoi_--they may melt if left too
close to the vent.
Thetype of margarine will affect baking performance!
Mostrecipesforbakinghavebeendeveloped
usinghighfatproductssuchasbutteror
margarine(80%fat).If youdecreasethefat,the
recipemaynotgivethesameresu/tsaswitha
higherfatproduc_
Redpe tililure can result if cakes, pies,
pastries, cookies or candies are made
with low lilt spreads, The lower the lilt
content of a spread product, tile more
noticeable these differences become.
Federal standards require products
labeled "margarine" to contain at least
80% tilt by weight. I,ow lilt spreads, on
the other hand, contain less lilt and more
water: The high moisture content of
these spreads affects tile texture and
flavor of baked goods. For best results
with vour old tm'orite redpes, rise
margarine, glitter or stick spreads
containing at least 70% vegetable oil.
1/
 Loading...