How it Works
Log In / Sign Up
Buy Points
How it Works
FAQ
Contact Us
Questions and Suggestions
Users
Hotpoint
Loading...
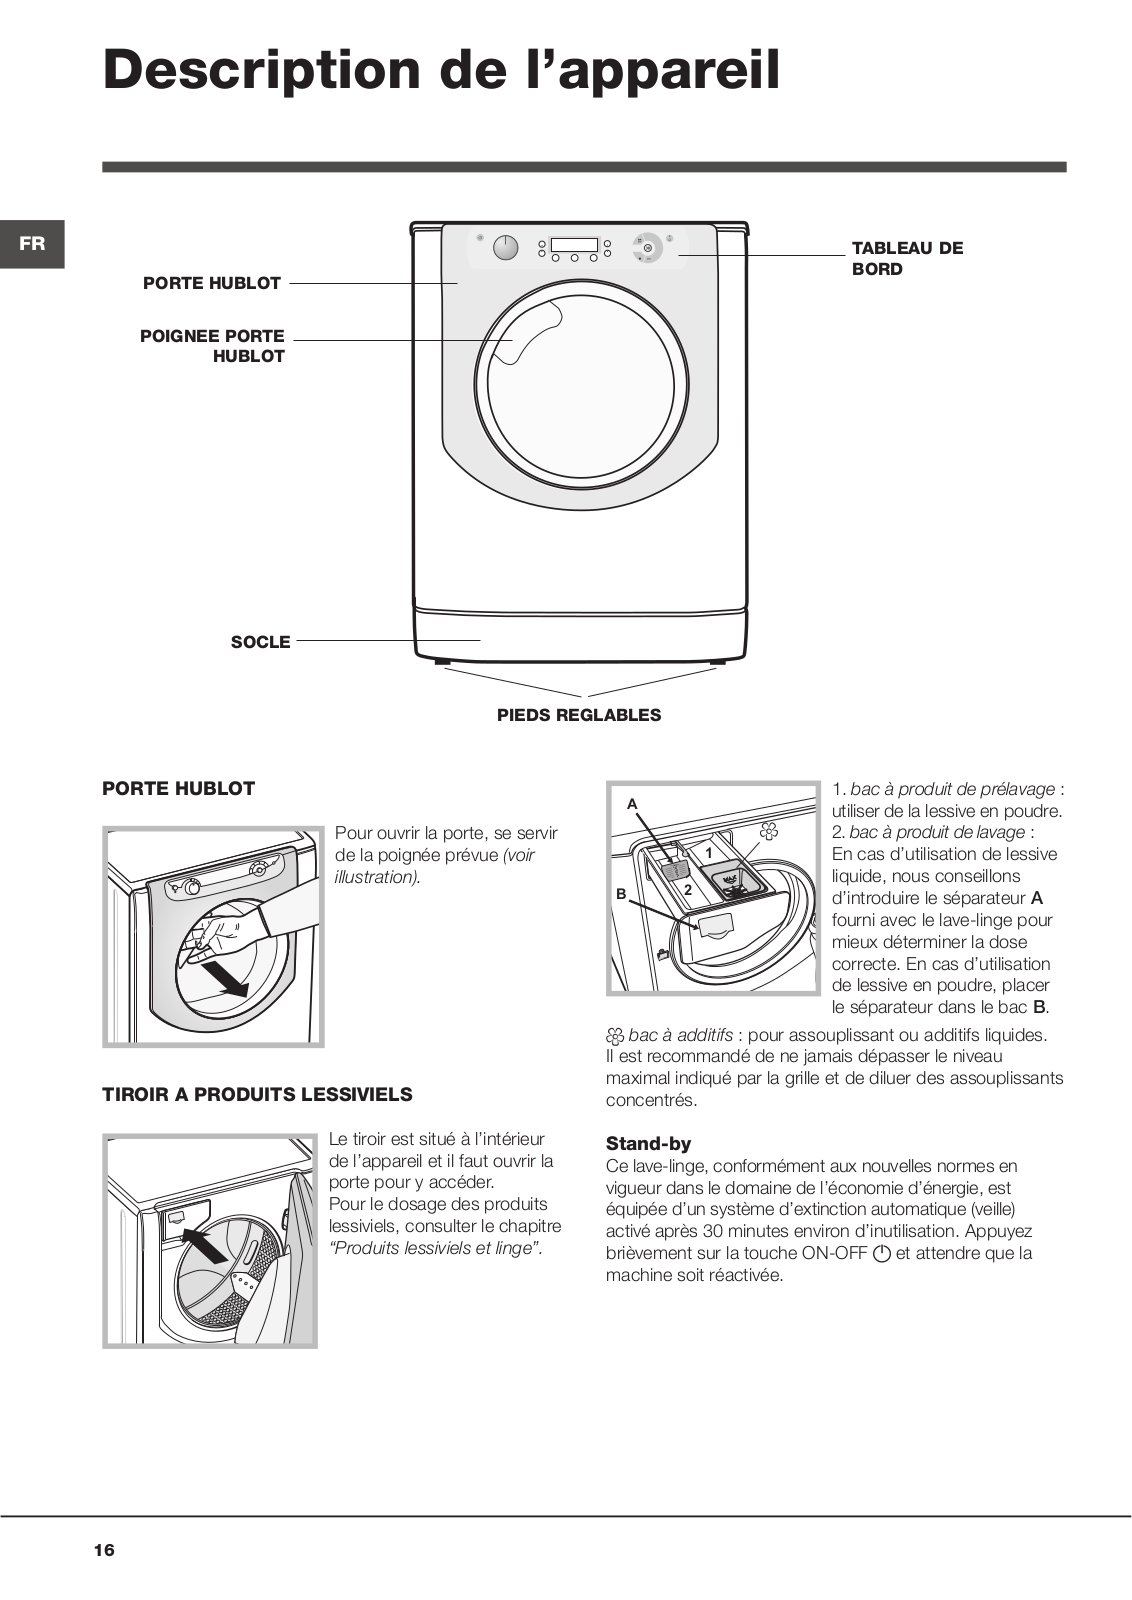
A
AQ7L05UIT
AQ7L 25 X
AQ7L 29 U
AQ7L29UH
2
AQ7L 492 U
AQ7L49I
AQ7L 49 U
AQ7L 85 I
Aq82F
Aq82F29
AQ82 F 49 U
AQ82L 29
AQ82 L 29 U
AQ82L49
AQ82 L 49 U
AQ83D 29 EU-B
AQ83D 29X EU/B
AQ83D 497 EU/B
AQ83F 29 C EU
AQ83F 29C TK
AQ83F 29 EU
AQ83F 29 FR
AQ83F 49
AQ83F 497 EU
AQ83L 09 EU
AQ83L 29 FR
AQ83L 49 FR
AQ86F 29 IT
AQ8D 492 U
2
AQ8D 49 U
AQ8D 69 U
AQ8F 09 U
AQ8F 292 U
AQ8F 29 U
2
AQ8F 29 X
AQ8F49
AQ8F 492 U
AQ8F 49 U
AQ8L 05 U
AQ8L 092 U
AQ8L09U
AQ8L 292 U
AQ8L 29 U
2
AQ8L 492 U
AQ8L49U
2
AQ91L 29 FR
AQ92D 497 EX
AQ92D 497X EX
AQ92F 29
AQ92F 297 EX
AQ92F 297 EX.60HZ
AQ92F 29 EU
AQ92F 49
AQ92F69
AQ93D 297SC TK
AQ93D 49
2
AQ93F 29
AQ93F 29 EU
AQ93F 29 FR
AQ93F 29X EU
AQ93F 49 FR
AQ93F 69
2
AQ93F 69 EU
AQ93L 29 EU
AQ94D 49D
AQ94D 49D IT
AQ94F 29D
AQ94F 29D EU
AQ94F 49D FR
AQ96F 29 IT
AQ97D 49D IT
AQ9D 292 I
2
AQ9D 29 I
AQ9D 29 U H
AQ9D 48 X
2
AQ9D 491 U H
AQ9D 492 U
AQ9D 492 X
2
AQ9D49UH
AQ9D 68 U H
AQ9D 691 U
AQ9D692
AQ9D 692 I
AQ9D 692 S
AQ9D 692 U
AQ9D69I
AQ9D 69 S
2
AQ9D69U
3
AQ9F28U
2
AQ9F 28 X
AQ9F291
AQ9F 29 U
2
AQ9F491
AQ9F 491 U H
AQ9F 491 X
AQ9F492I
AQ9F492U
2
AQ9F 49 U
2
AQ9F 49 U H
AQ9F 691 U
Loading...
Loading...
Nothing found
AQ92F 297 EX
User Manual
72 pgs
8.1 Mb
0
Table of contents
Loading...
Hotpoint AQ92F 297 EX User Manual
...
Hotpoint User Manual
Download
Specifications and Main Features
Frequently Asked Questions
User Manual
Download
Loading...
+
50
hidden pages
Unhide
You need points to download manuals.
1 point = 1 manual.
You can buy points or you can get point for every manual you upload.
Buy points
Upload your manuals
 Loading...