

Horizon RST5.6, 24616-RST5.6 Owner’s Manual

TREADMILLASSEMB£Y
& USER'S GUIDE
I RST5.6 Rev.l.4.indd 1
7/17/06 4:59:17 PM

CONGRATULATIONSand THANKYOUforyourpurchaseof thisHorizonFitnesstreadmill!
Whetheryour goal is to win races or simply enjoy a ruder, healthier lifestyle, a Horizon Fitness treadmill
can help you attain it- adding club-quafity performance toyour at-home workouts, with the ergonomics
and innovative features you need to get stronger and healthier, faster. Because we're committed to
designing fitness equipment from the inside out, we use only the highest quafity components. It's a
commitment we back with one of the strongest frame-to-motor warranty packages in the industry.
Youwantexerciseequipmentthat offers the most comfort, the bestreliability and the highest quality
in its class.
Horizon Fitnessdelivers.
Important Precautions
Assembly 6
Before YouBegin J2
Treadmill Operation 15
Conditioning Guidelines 22
Troubleshooting & Maintenance 28
Limited Warranty 31
CONTACTINFORMATION Back Cover
RST5.6 Rev.l.4.indd 2-3 7/17/06 4:59:18 PM ]
I
il_ i_ ii
I
SAVETHESEINSTRUCTIONS
Readall instructions beforeusing this treadmill. Whenusing an electrical product, basic precautions
shouldalwaysbe followed,including the following:Readaftinstructions beforeusing this treadmill It is the
responsibilityof the ownertoensurethat all usersof this treadmill areadequatelyreformedof aft warnings
and precautions.Ifyouhaveanyquestionsafter readingthis manual,contactSearsat thenumberfistedon
thebackcoverof this manual
......................... :
GROUNDINGINSTRUCTIONS
Thisproductmust begrounded.If a treadmill shouldmalfunction or breakdown,groundingprovidesa path
of least resistanceforelectrical currentto reducetherisk of electricalshock.Thisproductis equippedwith
a cordhavingan equipment-groundingconductoranda groundingplug. Theplug must bepluggedinto an
appropriateoutlet that is properlyinstalled and groundedin accordancewith local codesand ordinances.
i....................................................................................................................................................................................................................................................................................................................................................................................................................................................................................................................................................................
o Neveruse the treadmill beforesecuringthesafety tetherclip toyour clothing.
o Ifyouexperienceanykindofpain, including but notlimited tochestpains,nausea,dizziness,orshortness
of breath,stop exercisingimmediatelyand consultyourphysicianbeforecontinuing.
o Donot wearclothesthat might catch onanypart of the treadmill.
o Alwayswearathletic shoeswhile using this equipment.
o Donotjump on the treadmill.
o Keeppowercord awayfrom heatedsurfaces.
o Donot insert or drop anyobject into anyopening.
o Unplugtreadmill beforemovingor cleaningit. Toclean,wipesurfacesdownwith soapandslightly damp
cloth only:neverusesolvents.(SeeMAINTENANCE)
o At no time shouldmorethan onepersonbeon treadmill whilein operation.
o Thetreadmill shouldnot beusedbypersonsweighingmorethan275 pounds.Failureto complywill void
thewarranty.
o Thetreadmill is intended forin-homeuseonly.Donot usethis treadmill in anycommercial,rental, school
orinstitutional setting.Failureto complywill voidthe warranty.
o Donot usetreadmill in anylocationthat is not temperaturecontrolled,suchasbut notlimited togarages,
porches,poolrooms,bathrooms,car ports oroutdoors.Failuretocomplymay void the warranty.
• Usethe treadmill onlyas describedin this manual.
At NOtime ShOuldpetsOrchiidrenunderthe ageof J2 than ]oieit.
%_ _,_
' improperconnectiOnOftheeq,¢ment:gro,, ingCon ,ctorcanresuitinariskof
dectric shock.Checkwitha qualified electricianor servicemanifyou arein doubt
as towhethertheproduct is properlygrounded.Donot modifythe p!ug provided
with theproduct.!f it wi/! not fit the outlet, havea properoutlet installed by
qua!ified e!ectrician
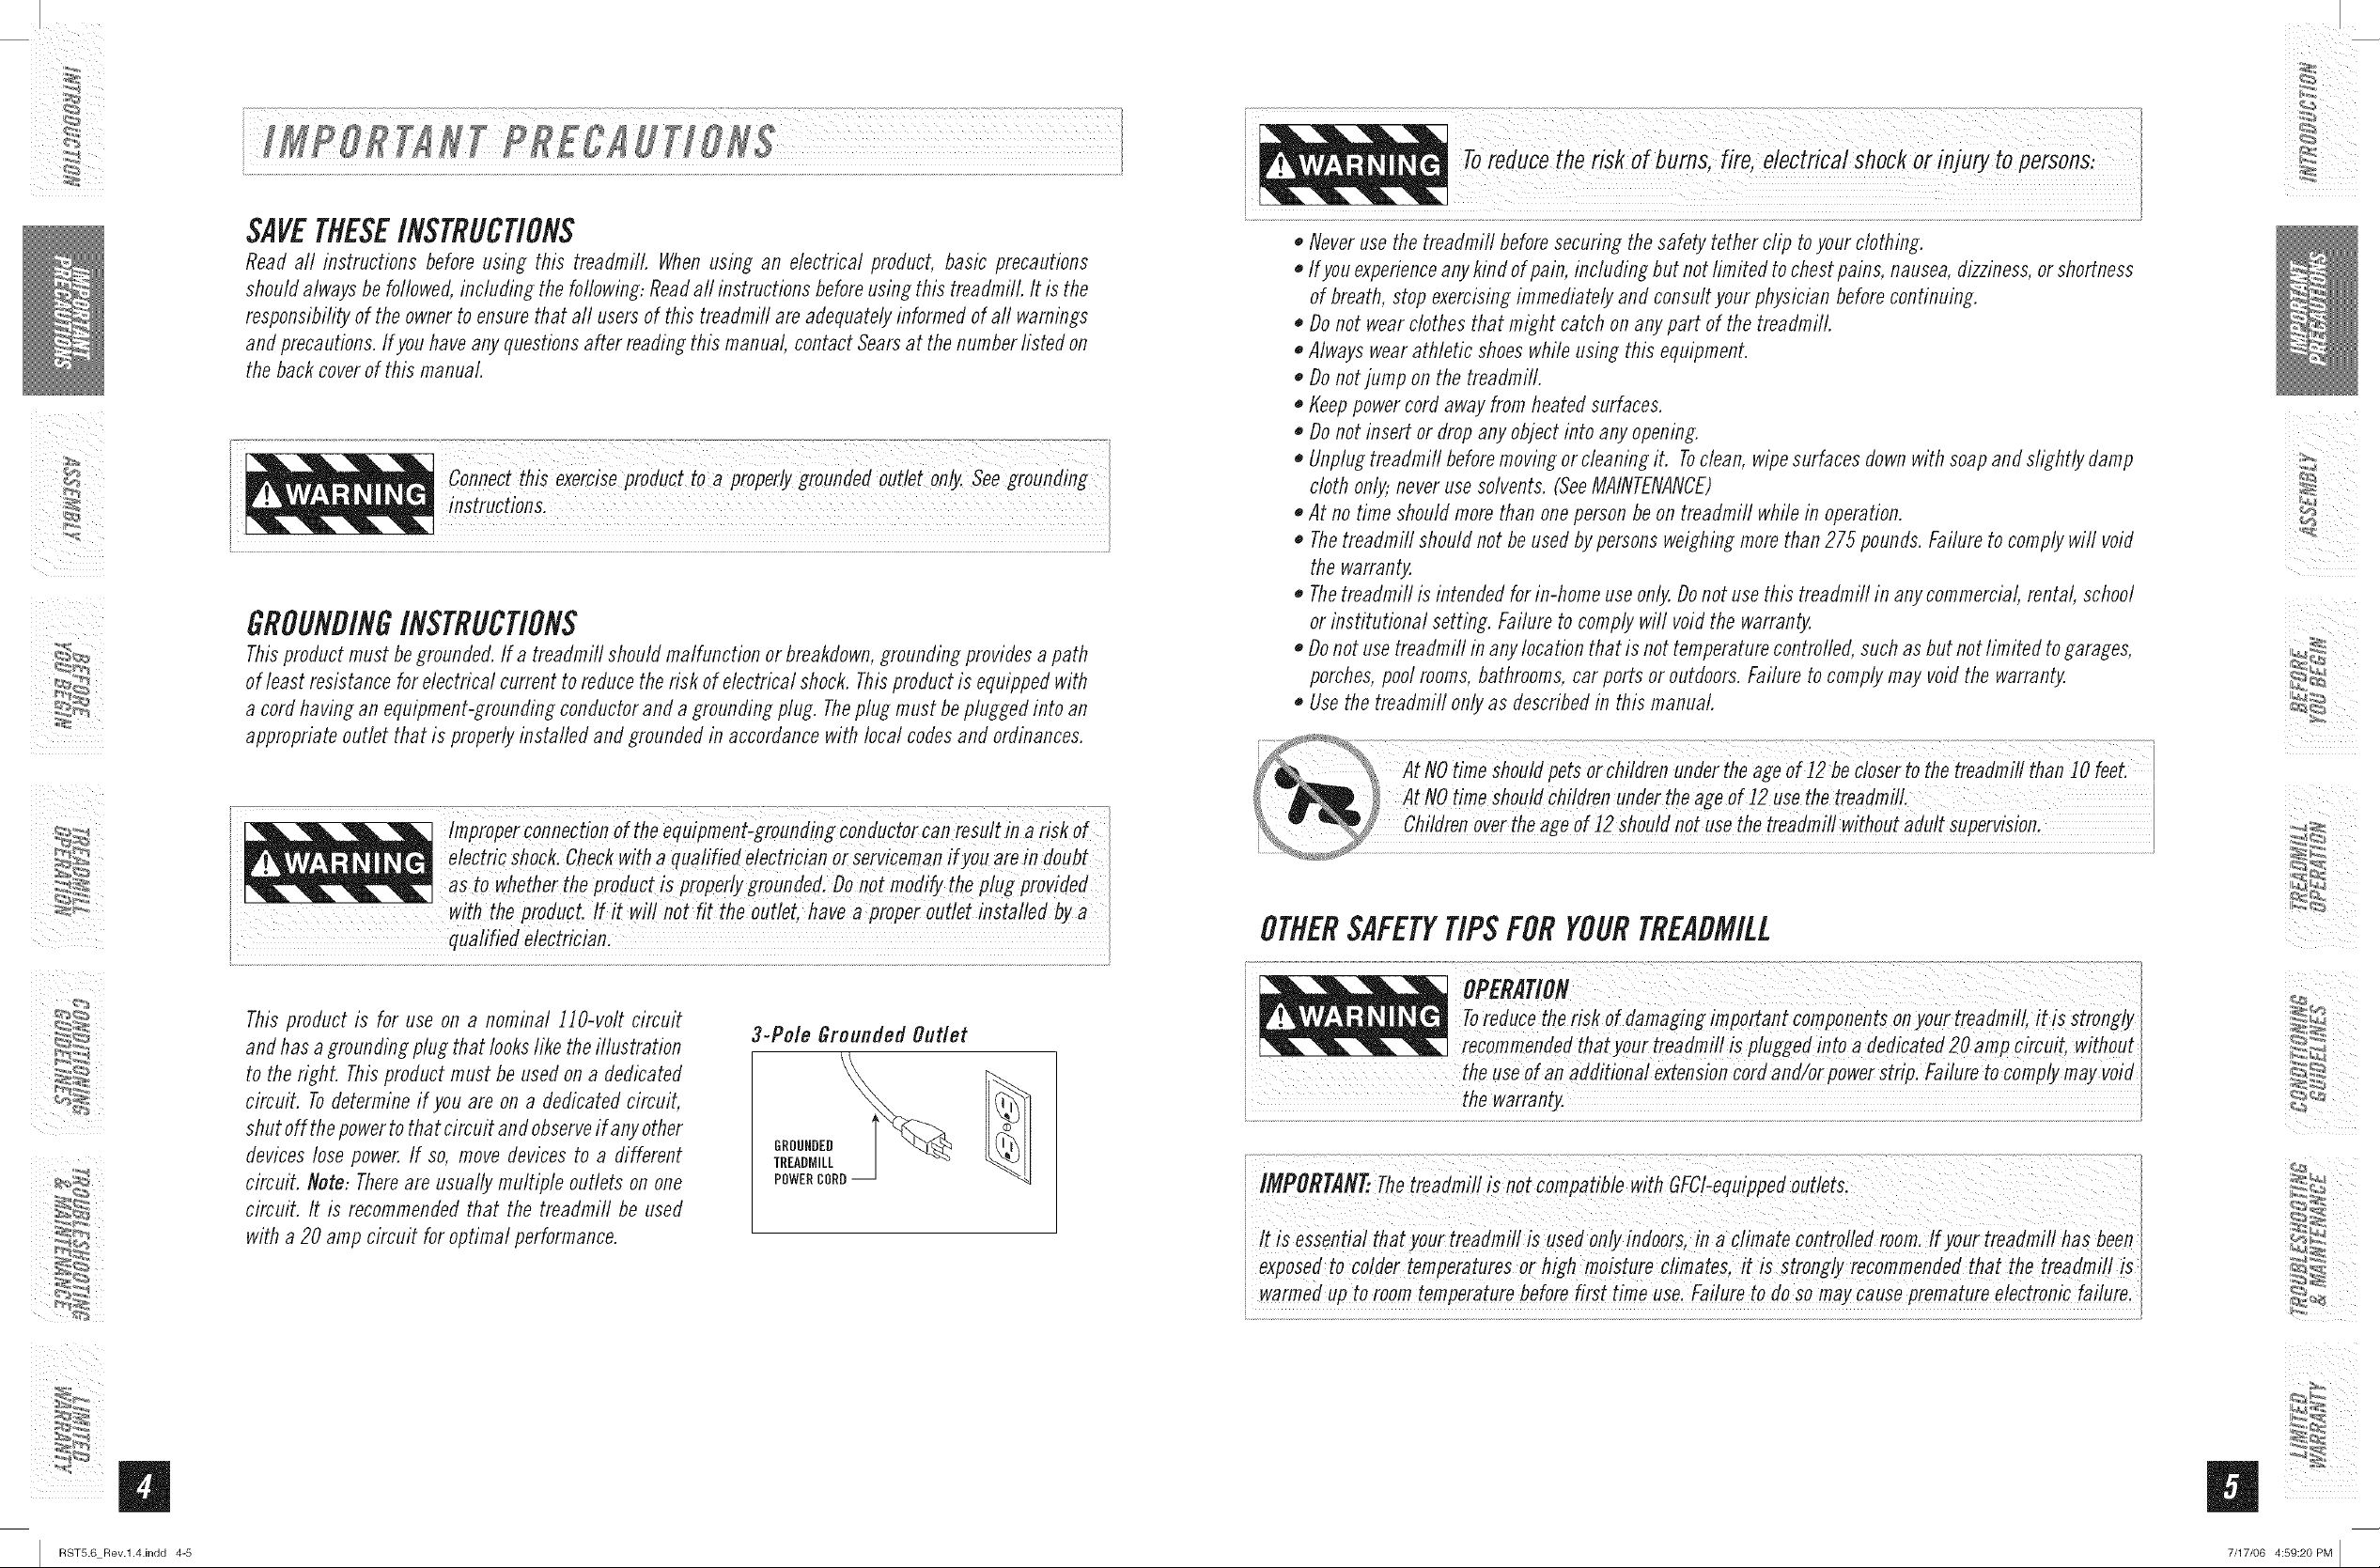
This product is for use on a nominal !10-volt circuit
and has a grounding plug that looks like the illustration
to the right. This product must be used on a dedicated
circuit. To determine if you are on a dedicated circuit,
shut off the power to that circuit and observe if any other
devices lose power. If so, move devices to a different
circuit. Note: There are usually multiple ouflets on one
circuit. It is recommended that the treadmifl be used
with a 20 amp circuit for optimal performance.
3-Pole Grounded Outlet
GROUNDED
TREADMILL
POWERCORD
At NOtime shouldChildrenUndertheage Of !2 usethe treadmill
age°( !2 sh°uldn°t usethe treadmi//with°ut adu[t supervisi°n:
OTHERSAFETYTIPSFORYOURTREADMILL
.....................................................................................................................i oN- : 2::: ::?; 55 ::: !
ToredUcetheriskofdamagi,gimpo antcomPo,entsO,you treadmiH,itisstrongly
i reCommendedthatyourtreadmillis piuggedinto a dedicated20 ampcircuit, without
theUSeofan additional extensioncordand/orpowerstrip. Failuretocomplymay void
arra
i it is essentia!that your treadmiii is usedonlyindoors,in aclimate controltedroOm:ifyourtreadmil! hasbeen
i exposedto colder temperaturesor high moisture cfimates,it is strongly recommendedthat thetreadmifl iS
i warmedup toroomtemperaturebeforefirst time UselFailure to dosomay Causepremature electronicfai!ure;
H
I RST5.6 Rev.l.4.indd 4-5
7/17/06 4:59:20 PM I
I
.oS ;EMB£1
IMPORTANZ.READTHESESAFETYINSTRUCtiONSBEFOREUSE!
Duringtheassemblyprocessof the treadmill thereareseveralareas that special attention must bepaid.
It is veryimportant to follow the assembly instructions correctlyand to make sure all parts are firmly
tightened. If theassemblyinstructions arenot followedcorrectly,thetreadmill couldhaveframeparts that
arenottightenedand will seemlooseandmaycauseirritating noises.Thereshouldbeno side=to=sideplay
in the consolemasts orany forward and back play in the consoleassemblyor handlebars.If thereis any
playin theseareas,the treadmill has notbeenproper!vassembled.Tooreventdamagetothe treadmill, the
assemblyinstructions must bereviewedand correctiveactionsshouldbetaken.
UNPACKING
Placethe treadmill cartonon a levelflat surface.It is recommendedthat youplaceaprotectivecoveringon
your floor. TakeCAUTIONwhenhandling and transporting this unit. Neveropenboxwhenit is onits side.
Oncethe bandingstraps have beenremoved,clonot rift or transportthis unit unless it is fully assembled
anti in the upright folded position, with the lock latch secure.Unpackthe unit whereit will be used.Never
grabhold of anyportion of theincline frameand attempt to rift or movethe treadmill FAILURETOFOLLOW
THESEINSTRUCTIONSCOULDRESULTININJURY!
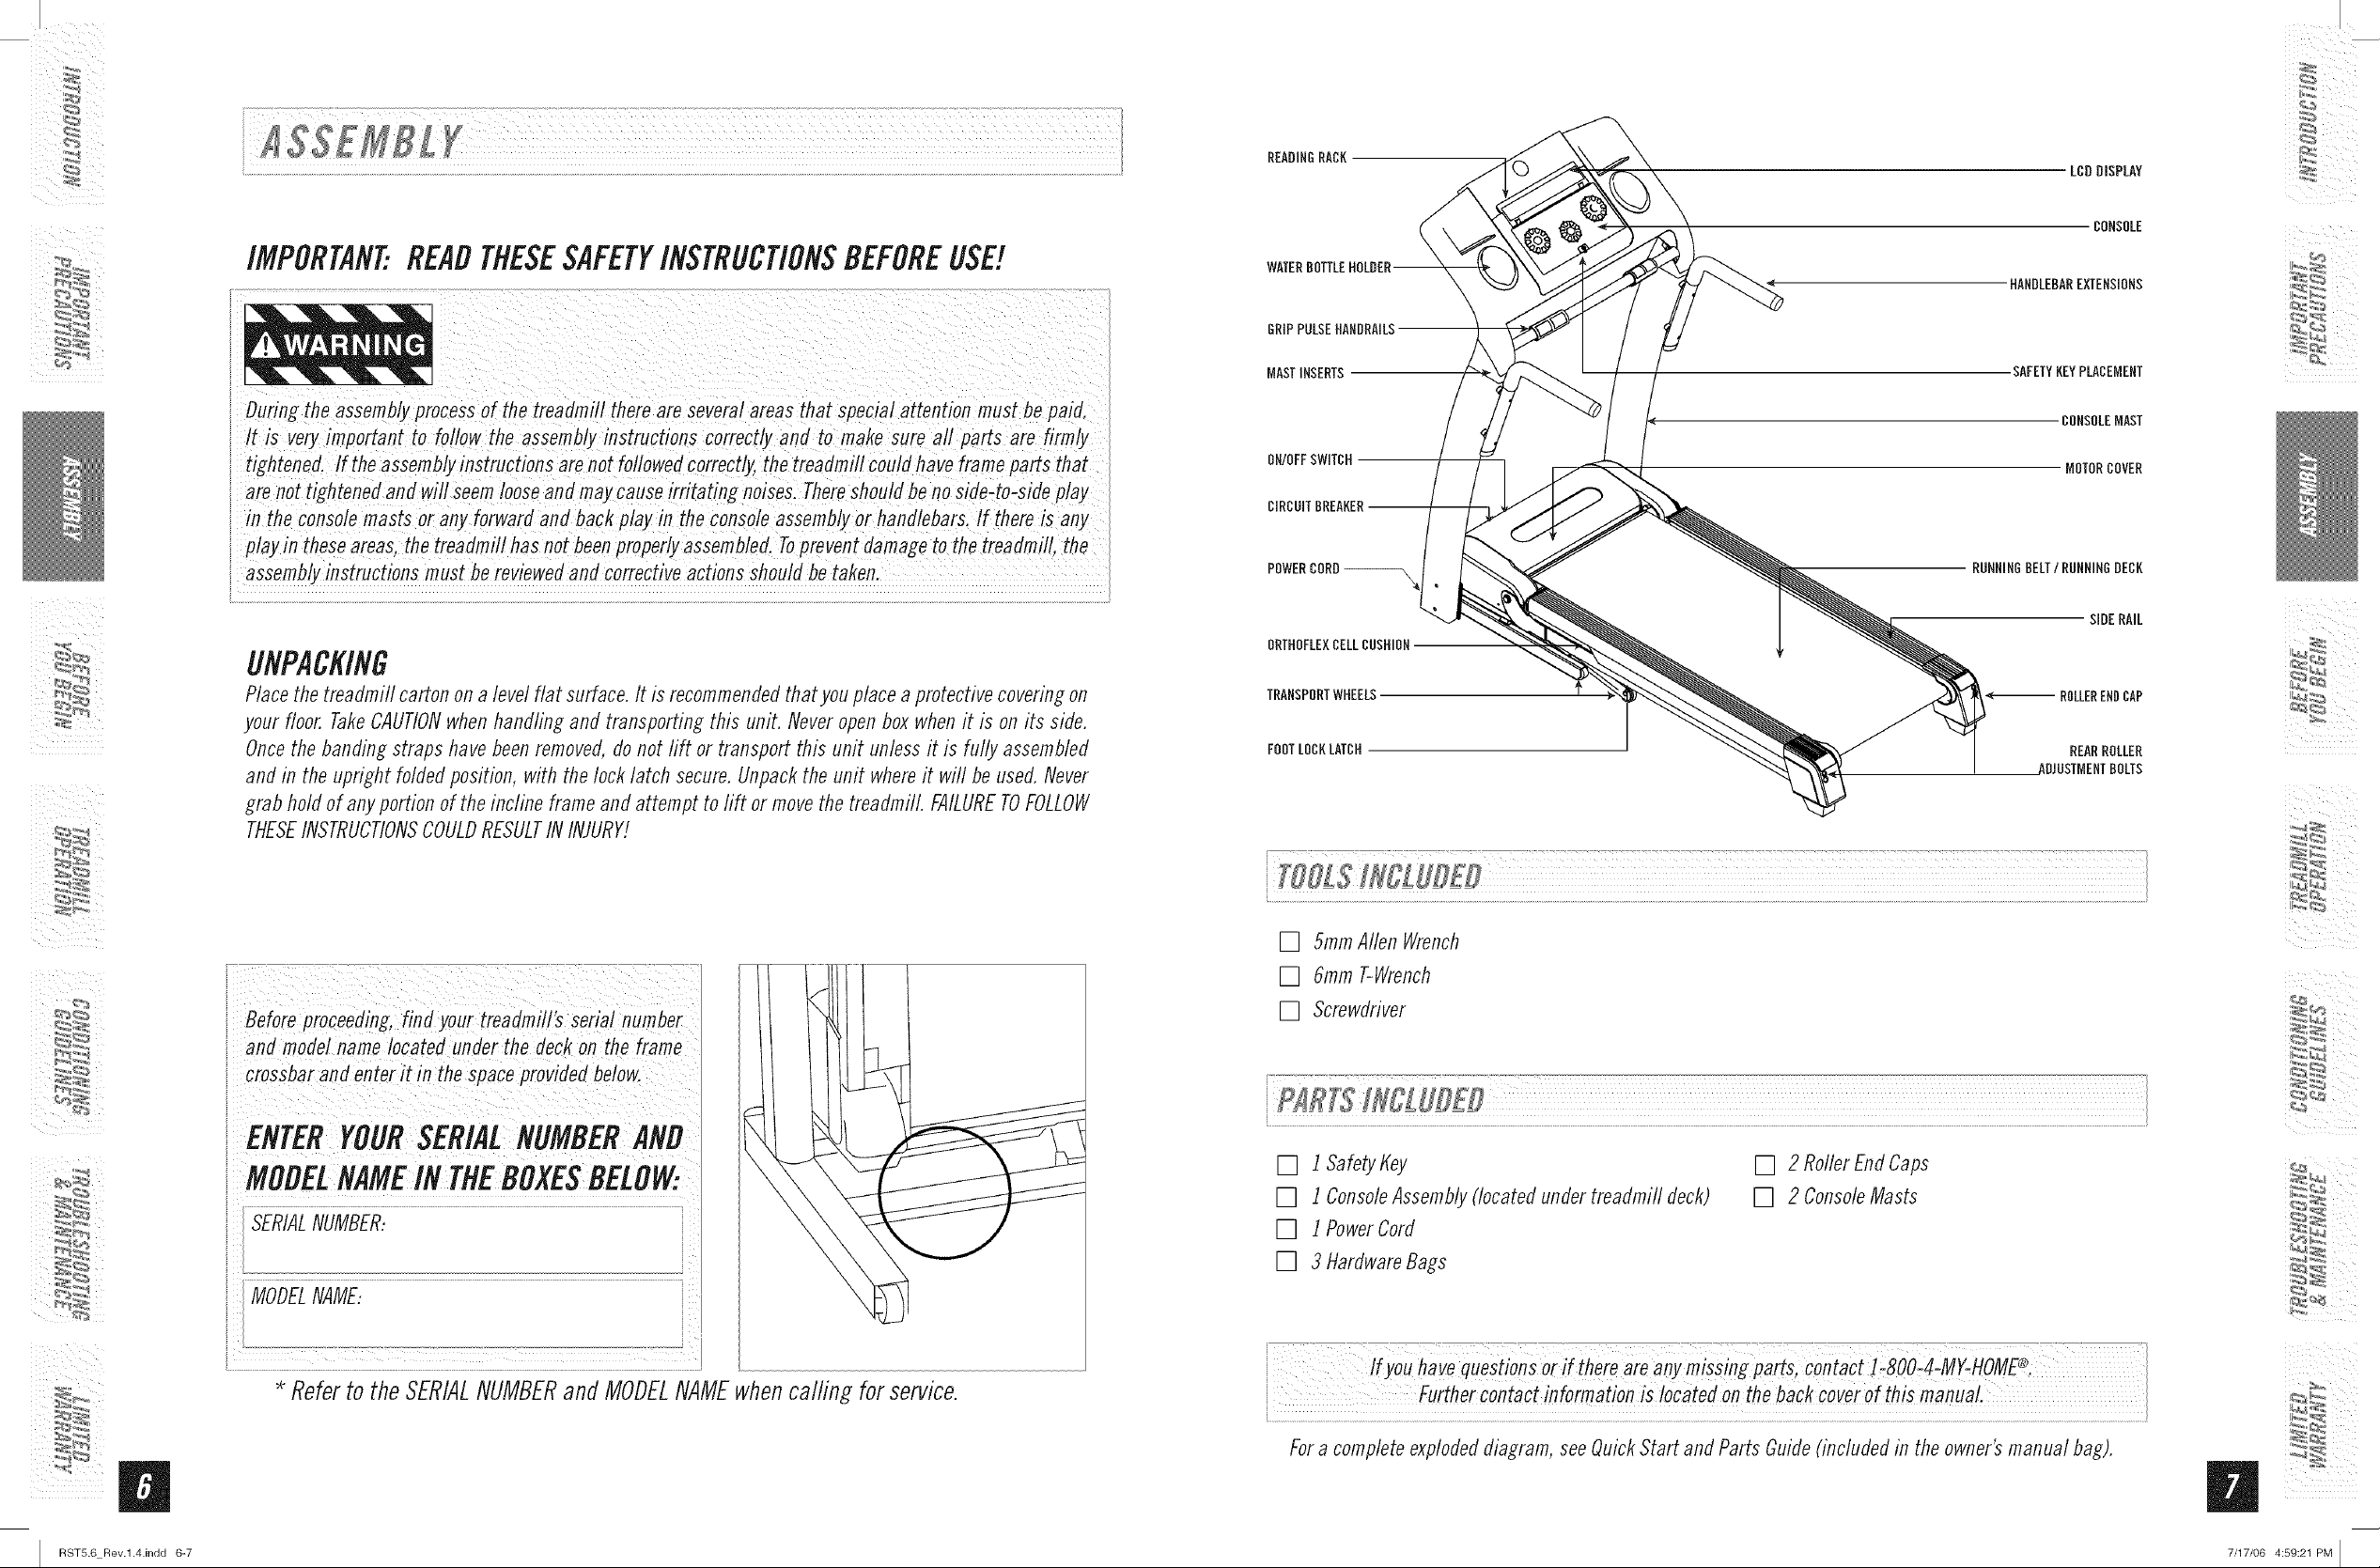
READINGRACK
GRIPPULSEHANDRAILS
MASTINSERTS
ON/OFFSWITCH
POWERCORD_
ORTHOFLEXCELLCUSHION
TRANSPORTWHEELS
FOOTLOCKLATCH
LCDDISPLAY
CONSOLE
HANDLEBAREXTENSIONS
SAFETYKEYPLACEMENT
CONSOLEMAST
MOTORCOVER
RUNNINGBELT/RUNNINGDECK
SIDERAIL
%_ _,4
ROLLERENDCAP
REARROLLER
Beforeproceeding,findyo'rtre"dmilr seriai',mbe
and modelnamelocated under the deckon the frame
crossbarand enterit in the spaceprovidedbelow.
ENTERYOURSERIALNUMBER
MODELNAMEINTHEBOXESBELOW
SERIALNUMBER:
MODELNAME:
.............................................. .....................................................................................................
* Referto theSERIALNUMBERandMODELNAMEwhencalfing forservice.
[] 5ramAllenWrench
[] 6ram T-Wrench
[] Screwdriver
[] i SdetyKey
[] i ConsoleAssembly(locatedundertreadmifl deck)
[] i PowerCord
[] 3 HardwareBags
if youhave questionsorif thereare anymissing partsl contact i _8OO4:MY-HOME',
i Furthercontactinformationis iocatedonthe backcoverof this manual.
Fora completeexplodeddiagram,seeQuickStartanti PartsGuide(includedin the owner'smanual bag).
[] 2 RollerEndCaps
[] 2 ConsoleMasts
®
m
I RST5.6 Rev.l.4.indd 6-7
7/17/06 4:59:21 PM [
I
Disassembleboxand removethe cardboardpackaging that is not beneaththe treadmill. Donot attempt to
lift thetreadmill at this time.Removeplastic wrapfrom consolemasts.
*NOTE: During each assemblystep, ensurethat ALLnuts and bolts are in place and partially threadedin
beforecompletelytightening any ONEbolt. NOTE:A light application of greasemay aid in the installation of
hardware.Anygrease,such aslithium bikegreaseis recommended.
A) OpenHARDWAREBAGI.
55rnrn
__ BOLT(A)
FLATWASHER(B)
Qty:4
LEADWIRE RIGHTCONSOLEMAST CONSOLECABLE
Qty:4
CONSOLEMAST
B) PullLEADWIREthroughRIGHT
CONSOLEMASTto drag upward.
PlaceRIGHTCONSOLEMAST
c)
into upright positionusing2
DOLTS(A)and2 FLATWASHERS
(B),then tighten.Besureto
holdtheCONSOLEMASTfirmly,
asit will not stayin theupright
positiononits own.
*NOTE:Donotpinch CONSOLE
CABLEwhenplacingthe mast
ontothemain frame.
D) Repeatonthe left side.
*NOTE:Thereis no wirein the
LEFTCONSOLEMAST.
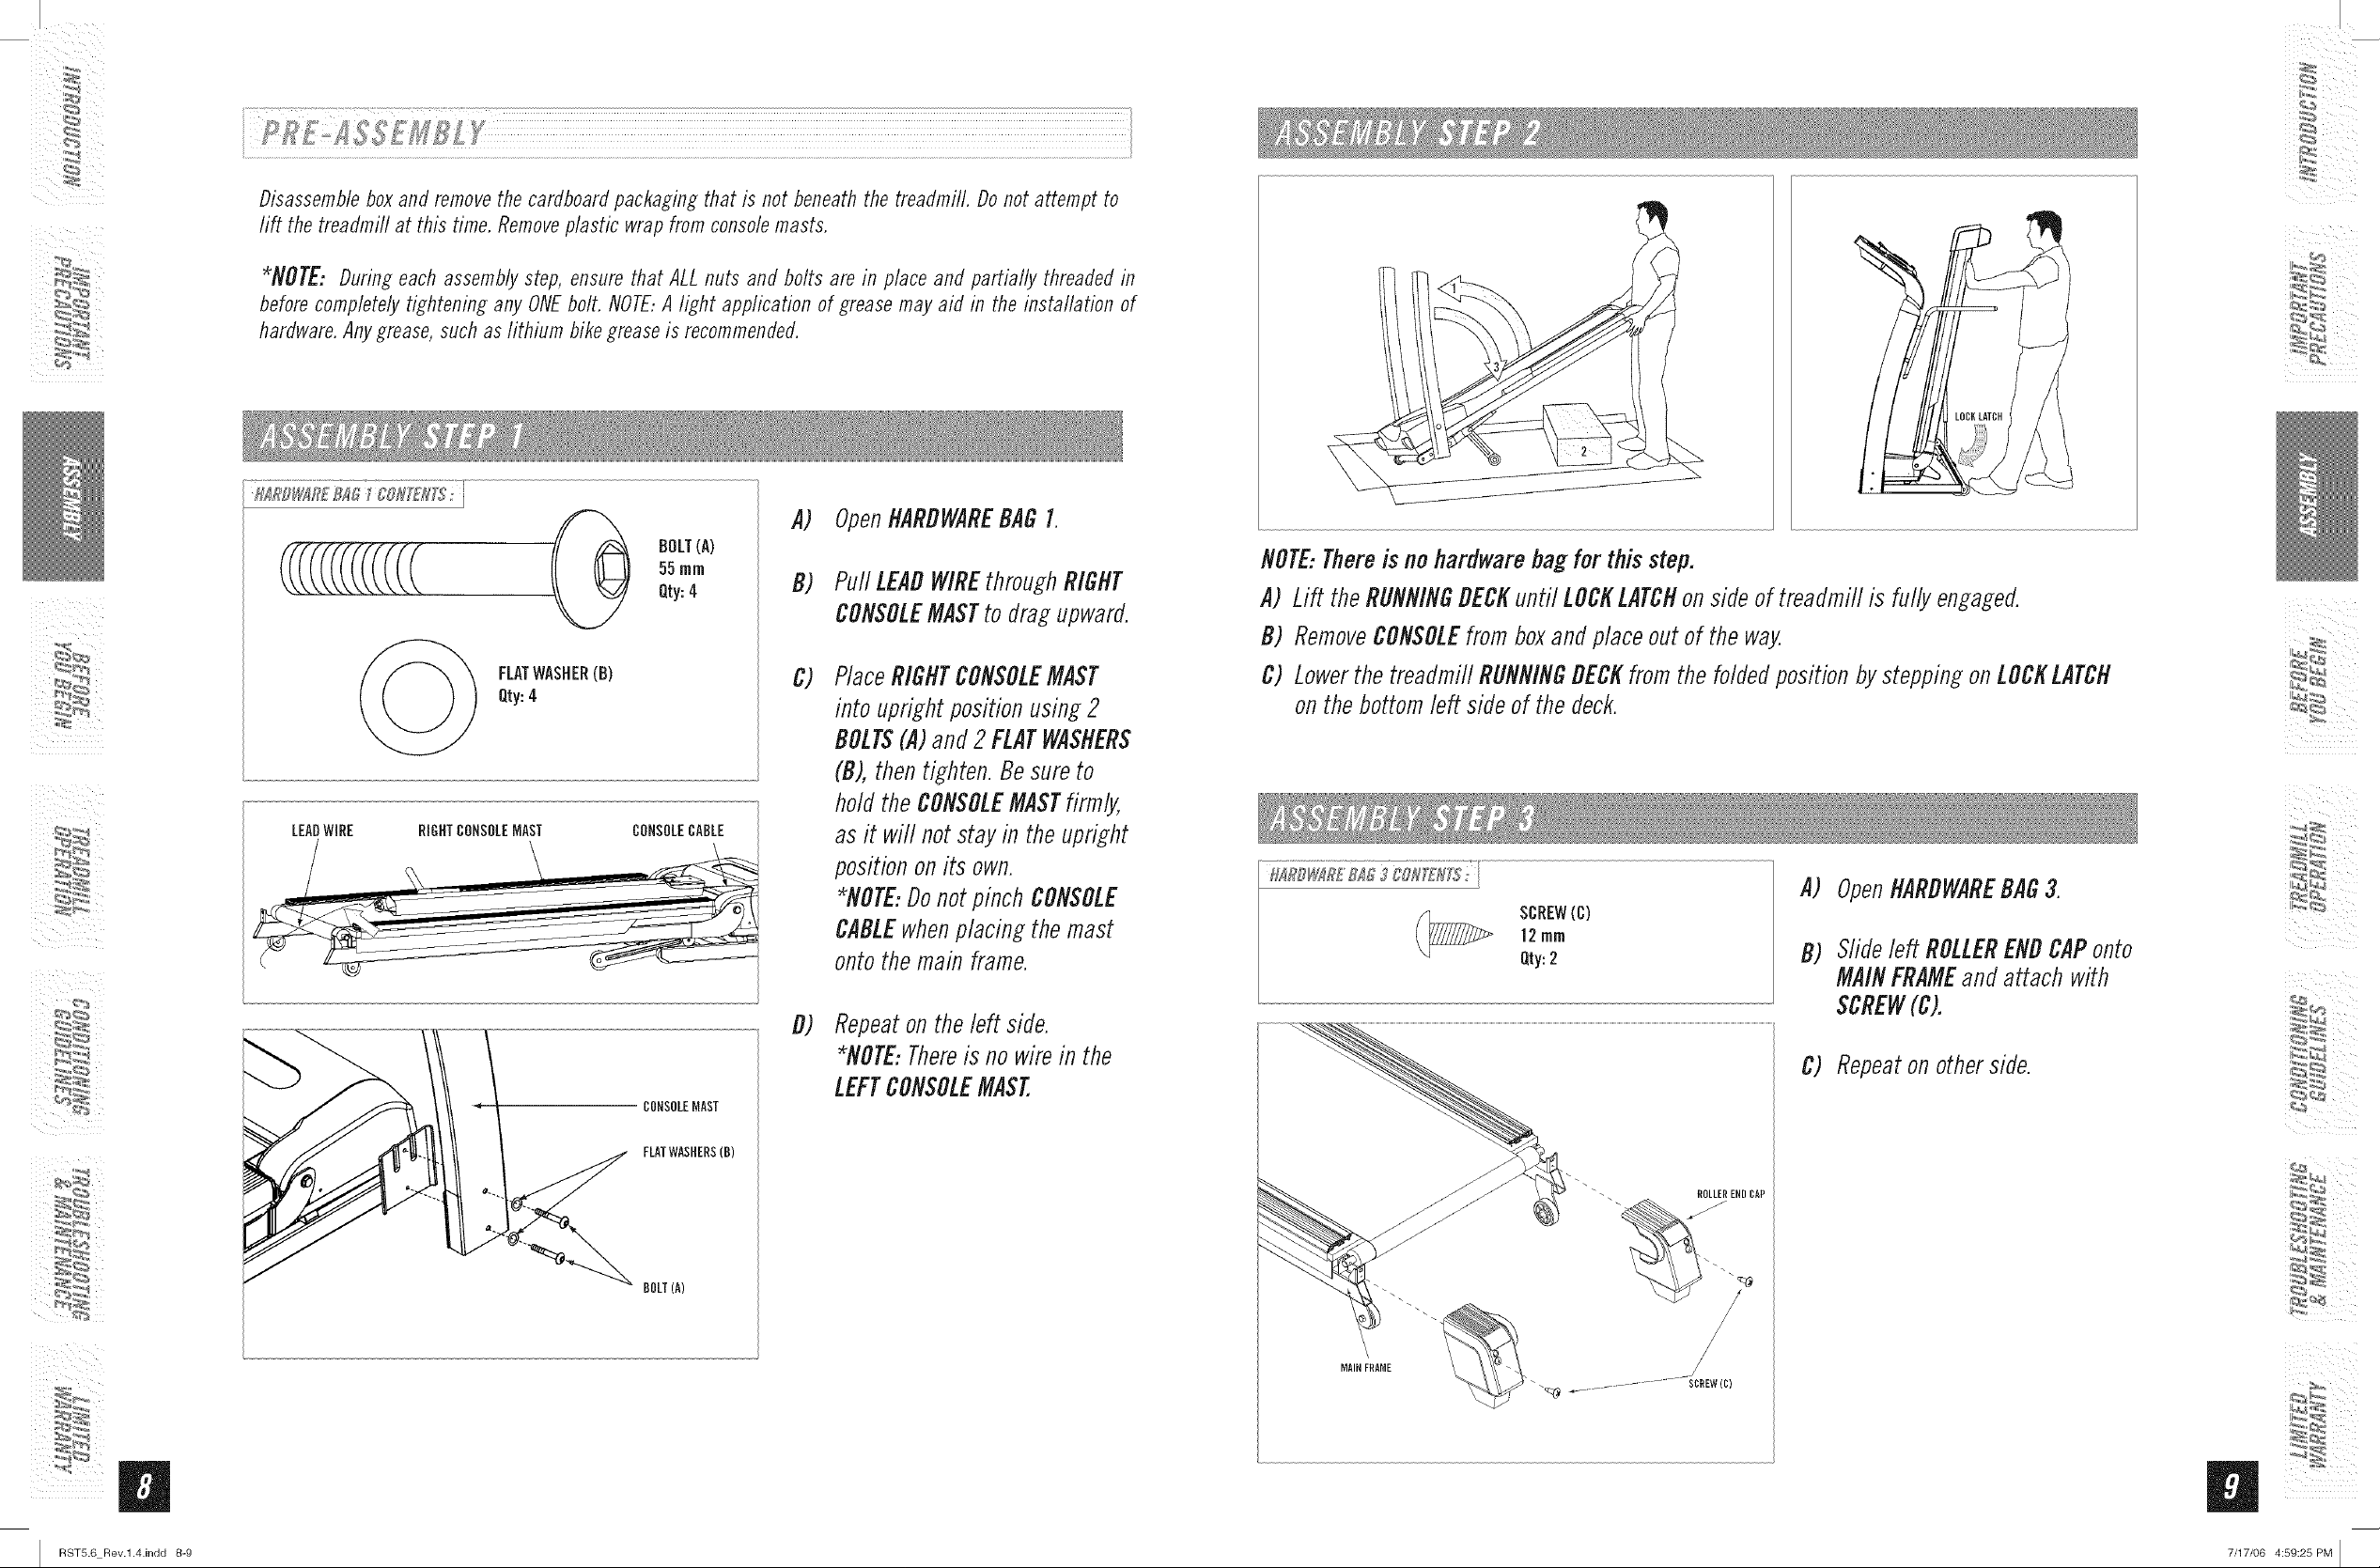
NOTE:Thereis nohardwarebagfor this step.
A) Lift theRUNNINGDECKuntil LOCKLATCHonside of treadmill is fully engaged.
B) RemoveCONSOLEfromboxandplaceoutof the way.
C) LowerthetreadmillRUNNINGDECKfromthe foldedpositionbysteppingonLOCKLATCH
onthebottomleft sideof the deck.
A)
OpenHARDWAREBAG3.
SCHEW(C)
12rnrn
Qty:2
Slideleft ROLLERENDCAPonto
D)
MAINFRAMEandattach with
SCREW(C).
C) Repeaton otherside.
me
I RST5.6 Rev.l.4.indd 8-9
FLATWASHERS(B)
_ ROLLERENDCAP
BOLT(A)
7/17/06 4:59:25 PM I
I
NIIIIWIII£III _ IIORTEII[5: i
topview
lty: 4
BOLT
CONSOLECABLE
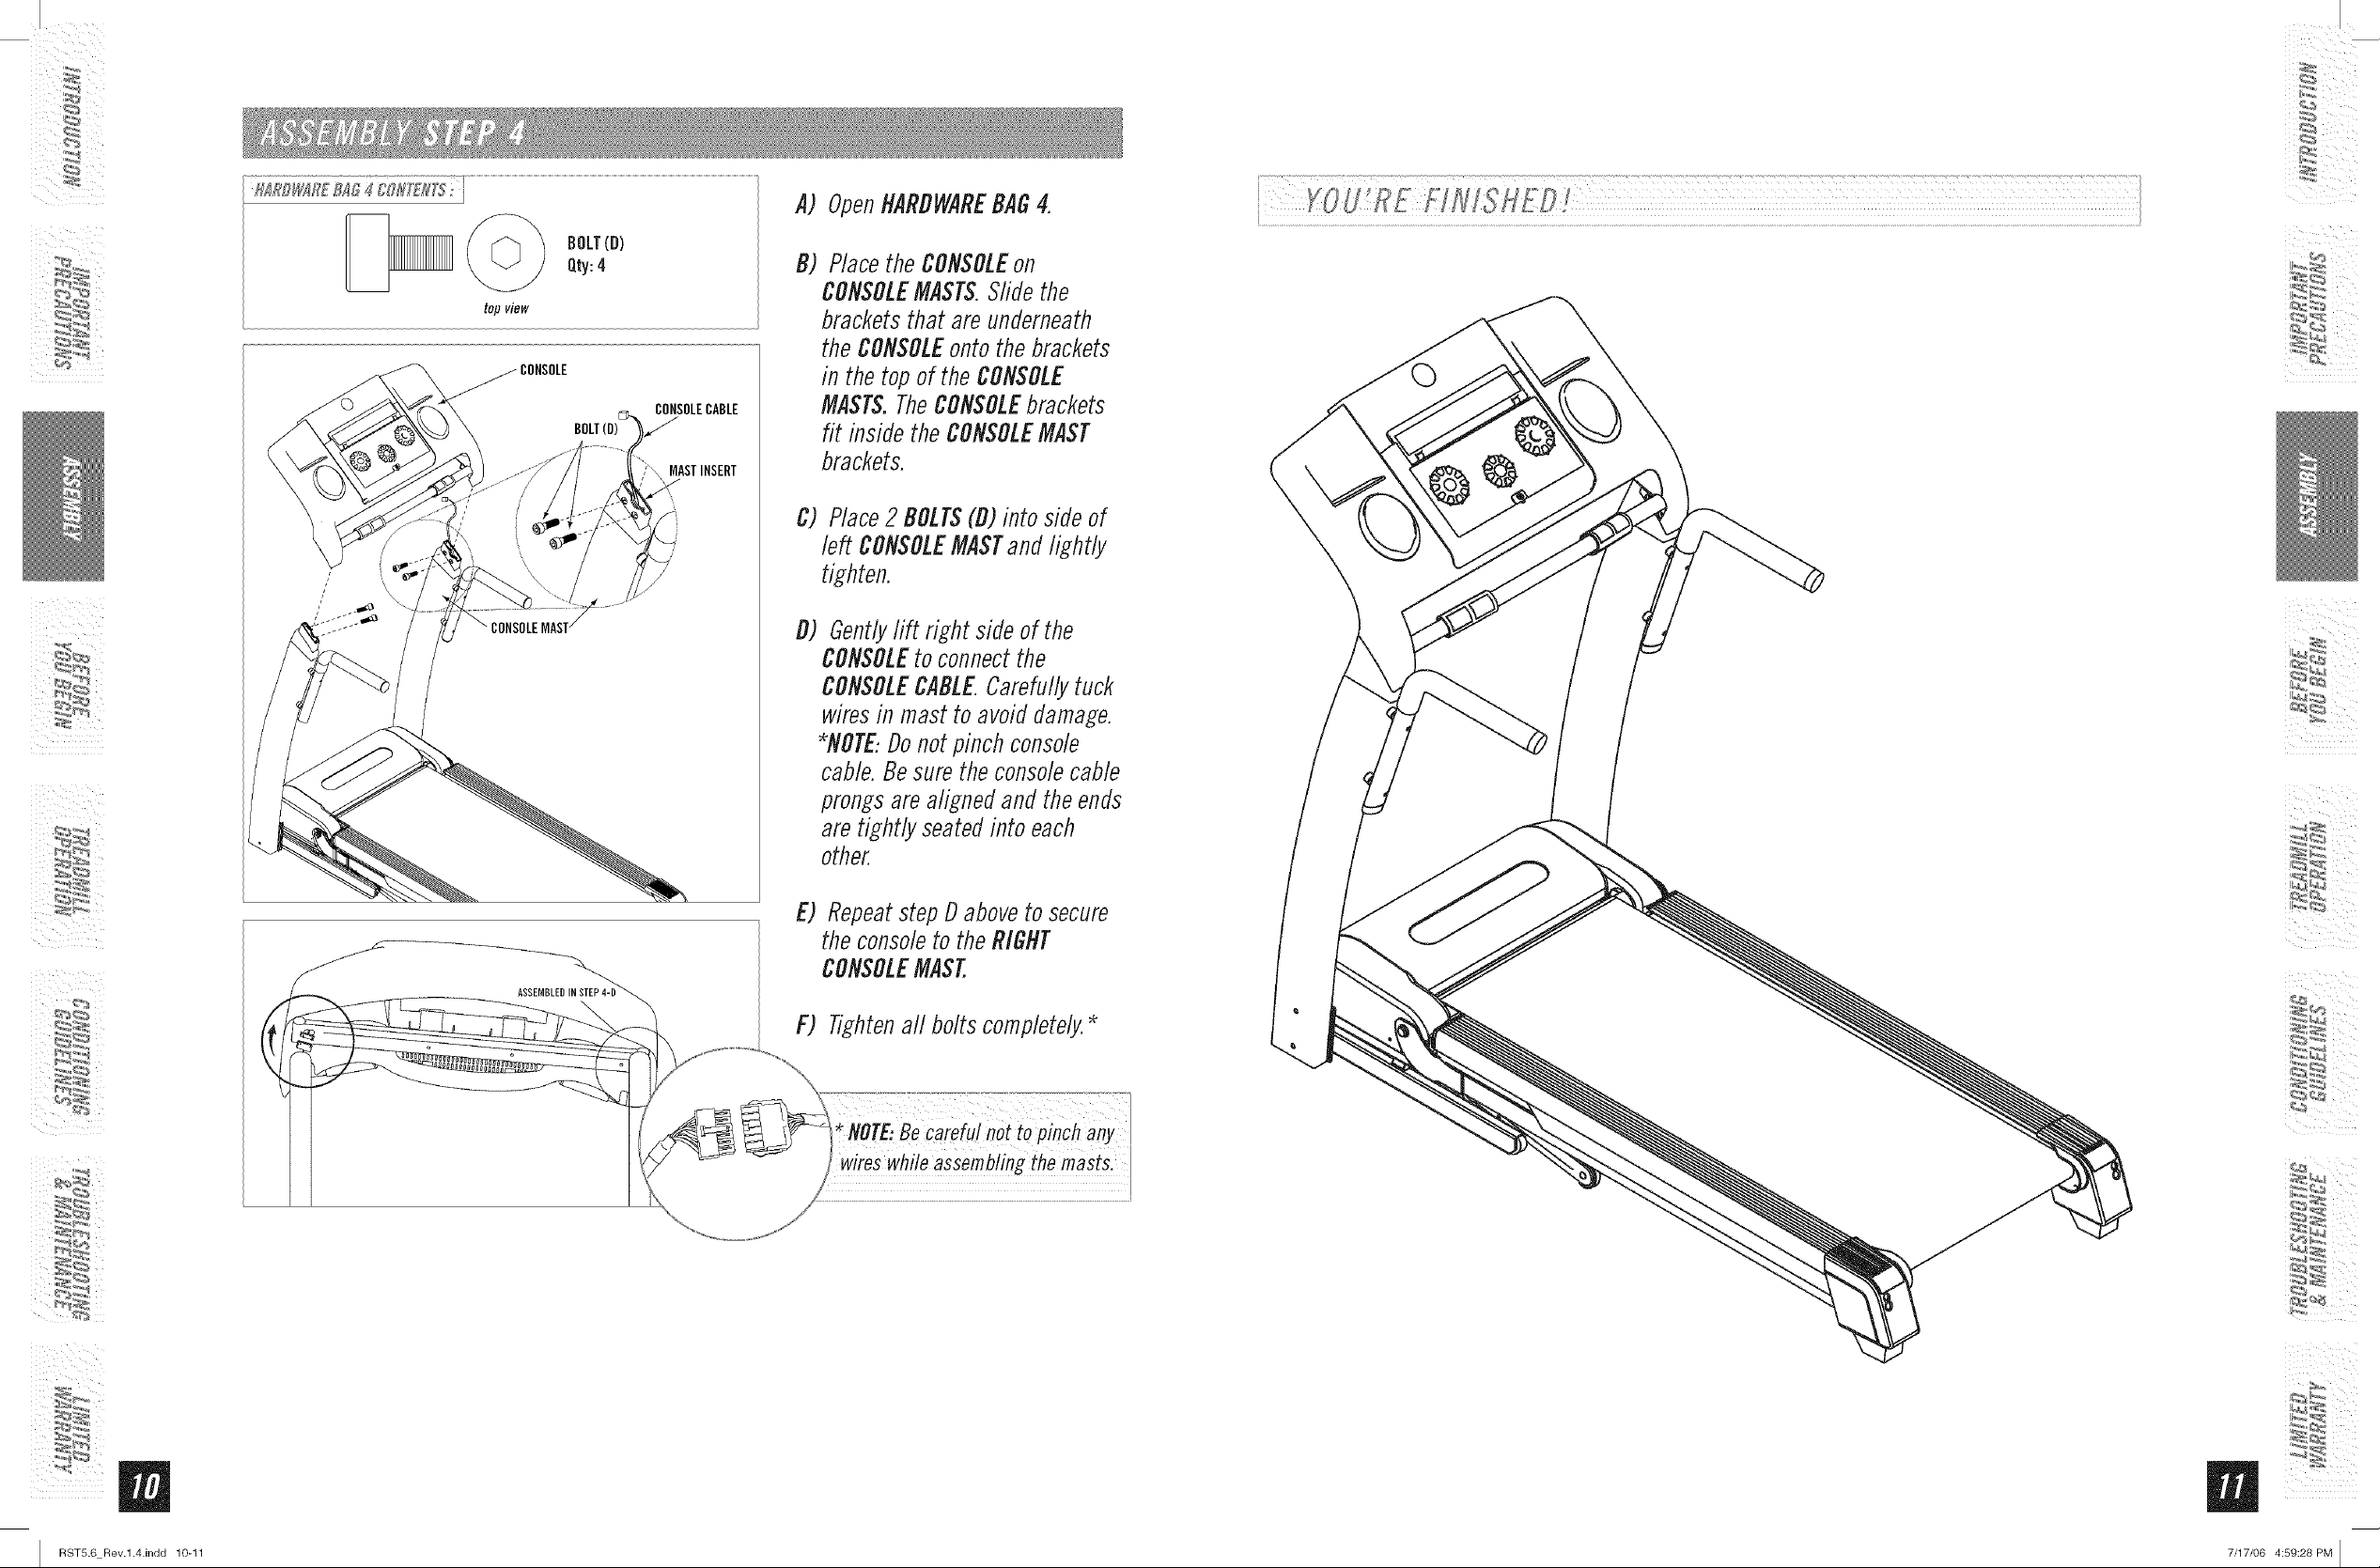
A) OpenHARDWAREBAG4.
B) PlacetheCONSOLEon
CONSOLEMASTS.Slidethe
bracketsthat areunderneath
theCONSOLEontothebrackets
in thetopof the CONSOLE
MASTS.TheCONSOLEbrackets
fit insidethe CONSOLEMAST
brackets.
C) Place2 BOLTS(B)into sideof
left CONSOLEMASTand lightly
tighten.
D) Gently lift right side of the
CONSOLEto connect the
CONSOLECABLE.Carefullytuck
wires in mast to avoid damage.
*NOTE.Donot pinch console
cable. Besure the console cable
prongs are aligned and the ends
are tightly seated into each
other.
%_ _,_
E) RepeatstepDabovetosecure
theconsoleto theRIGHT
CONSOLEMAST.
F) Tightenall bolts completely.*
m
I RST5.6 Rev.l.4.indd 10-11
7/17/06 4:59:28 PM I
 Loading...