

Page 1
Instruction Book
HNF 9167
Washing Machine
English
Nederlands
Français
Deutsch
Italiano
40003674Eng.qxd 11/11/2005 13:46 Page 1
Page 2

Introduction . . . . . . . . . . . . . . . . . . . . . . . . . . . . . . . . . . . . . . . . . . 3
Delivery information . . . . . . . . . . . . . . . . . . . . . . . . . . . . . . . . . . . . . . . . . . . . . 3
Do’s . . . . . . . . . . . . . . . . . . . . . . . . . . . . . . . . . . . . . . . . . . . . . . . . . . . . . . . . . . 3
Don’ts. . . . . . . . . . . . . . . . . . . . . . . . . . . . . . . . . . . . . . . . . . . . . . . . . . . . . . . . . 4
Unpacking the Product . . . . . . . . . . . . . . . . . . . . . . . . . . . . . . . . . . . 5
Installation. . . . . . . . . . . . . . . . . . . . . . . . . . . . . . . . . . . . . . . . . . . . . . . . . 7
Choose a location . . . . . . . . . . . . . . . . . . . . . . . . . . . . . . . . . . . . . . . . . . . . . . . 7
Electricity supply . . . . . . . . . . . . . . . . . . . . . . . . . . . . . . . . . . . . . . . . . . . . . . . . 8
Water supply . . . . . . . . . . . . . . . . . . . . . . . . . . . . . . . . . . . . . . . . . . . . . . . . . . . 8
Connecting to the cold water supply . . . . . . . . . . . . . . . . . . . . . . . . . . . . . . . . 9
Connection of the machine to the drain . . . . . . . . . . . . . . . . . . . . . . . . . . . . . 10
Moving the machine into position . . . . . . . . . . . . . . . . . . . . . . . . . . . . . . . . . 11
Adjusting the feet . . . . . . . . . . . . . . . . . . . . . . . . . . . . . . . . . . . . . . . . . . . . . . 11
Testing the installation . . . . . . . . . . . . . . . . . . . . . . . . . . . . . . . . . . 12
Washing advice . . . . . . . . . . . . . . . . . . . . . . . . . . . . . . . . . . . . . . . . . . 13
Loading your washing machine. . . . . . . . . . . . . . . . . . . . . . . . . . . . . . . . . . . . 13
Sorting the laundry . . . . . . . . . . . . . . . . . . . . . . . . . . . . . . . . . . . . . . . . . . . . . 14
The Dispenser . . . . . . . . . . . . . . . . . . . . . . . . . . . . . . . . . . . . . . . . . . . . 15
Detergent dosage . . . . . . . . . . . . . . . . . . . . . . . . . . . . . . . . . . . . . . . . . . . . . . 15
Dispensing instructions . . . . . . . . . . . . . . . . . . . . . . . . . . . . . . . . . . . . . . . . . . 16
Using Inter@ct 3D for the first time. . . . . . . . . . . . . . . . . . . . 17
The Control Panel . . . . . . . . . . . . . . . . . . . . . . . . . . . . . . . . . . . . . . . . 20
Wash Options . . . . . . . . . . . . . . . . . . . . . . . . . . . . . . . . . . . . . . . . . . . . 23
Automatic Features . . . . . . . . . . . . . . . . . . . . . . . . . . . . . . . . . . . . . . . . . . . . . 28
Programme Selector . . . . . . . . . . . . . . . . . . . . . . . . . . . . . . . . . . . . . 29
Special Programmes. . . . . . . . . . . . . . . . . . . . . . . . . . . . . . . . . . . . . . . . . . . . . 30
Daily Programmes . . . . . . . . . . . . . . . . . . . . . . . . . . . . . . . . . . . . . . . . . . . . . . 31
Programme Guide. . . . . . . . . . . . . . . . . . . . . . . . . . . . . . . . . . . . . . . . 32
A Typical Wash . . . . . . . . . . . . . . . . . . . . . . . . . . . . . . . . . . . . . . . . . . . 33
Selecting the wash programme . . . . . . . . . . . . . . . . . . . . . . . . . . . . . . . . . . . . 34
Starting the wash cycle . . . . . . . . . . . . . . . . . . . . . . . . . . . . . . . . . . . . . . . . . . 34
Cleaning and Routine Maintenance. . . . . . . . . . . . . . . . . . . . 35
Troubleshooting. . . . . . . . . . . . . . . . . . . . . . . . . . . . . . . . . . . . . . . . . . 37
Power Failure . . . . . . . . . . . . . . . . . . . . . . . . . . . . . . . . . . . . . . . . . . . . . . . . . . 39
2
English . . . . . . . . . . . . . . . . . . 2
Nederlands. . . . . . . . . . . . . . 40
Français . . . . . . . . . . . . . . . . 78
Deutsch . . . . . . . . . . . . . . . 116
Italiano. . . . . . . . . . . . . . . . 154
40003674Eng.qxd 11/11/2005 13:46 Page 2
Page 3

Introduction
Please read and follow these instructions
carefully and operate the machine accordingly.
This booklet provides important guidelines for
safe use, installation, maintenance and some
useful advice for best results when using your
machine.
Keep all documentation in a safe place for future
reference or for any future owners.
Delivery information
Please check that the following items are
delivered with the appliance:
● Instruction manual
● Guarantee card
● Blanking plug
● Inlet hose & hooked end support
(see Unpacking and Installation Instructions)
● Base panel & x2 push clips
● Energy Label
Do’s
● All packaging materials used are
environmentally-friendly and recyclable.
Please help dispose of the packaging via
environmentally-friendly means. Your local
council will be able to give you details of
current means of disposal.
● To ensure safety when disposing of an old
washing machine disconnect the mains plug
from the socket, cut the mains power cable
and destroy this together with the plug. To
prevent children shutting themselves in the
machine break the door hinges or the door
lock.
● This machine is solely for domestic use,
i.e. to wash, rinse and spin dry household
textiles and garments.
3
Check that no
damage has
occurred to the
machine during
transit. If it has,
call for service
by GIAS.
40003674Eng.qxd 11/11/2005 13:46 Page 3
Page 4

Don’ts
● Do not touch the appliance when hands or
feet are damp or wet.
● Do not lean on the door when loading the
machine or use the door to lift or move the
machine.
● Do not use adapters, multiple connectors
and/or extensions.
● Do not allow children to play with the
machine or its controls.
● Do not try to open the door when water is
visible in the drum, when the wash
programme is in progress or when the
DOOR LOCKED (DEUR OP SLOT) message
appears on the display.
European directive
2002/96/EC
This appliance is marked according to the
European directive 2002/96/EC on Waste Electrical
and Electronic Equipment (WEEE).
By ensuring this product is disposed of correctly,
you will help prevent potential negative
consequences for the environment and human
health, which could otherwise be caused by
inappropriate waste handling of this product.
The symbol on the product indicates that this
product may not be treated as household waste.
Instead it shall be handed over to the applicable
collection point for the recycling of electrical and
electronic equipment
Disposal must be carried out in accordance with
local environmental regulations for waste
disposal.
For more detailed information about treatment,
recovery and recycling of this product, please
contact your local city office, your household
waste disposal service or the shop where you
purchased the product.
4
Failure to
comply with
the above can
compromise the
safety of the
appliance. You
may be charged
for a service call
if a problem
with your
machine is
caused by
misuse.
If the appliance
is not running
properly or
breaks down,
switch it off,
disconnect the
plug from the
socket, turn off
the water
supply and do
not tamper
with the
appliance.
Consult GIAS
Service for
possible repair.
40003674Eng.qxd 11/11/2005 13:46 Page 4
Page 5

Unpacking the product
Remove the machine from its packaging close to
the final location of the machine.
1. Cut carefully around the base of the
packaging.
2. Lay the machine on its back and remove the
base and the two polystyrene spacers on
each side of the machine. We recommend
that a second person assist in the lifting and
manoeuvring of the machine.
3. Return the machine to the upright position,
remove the remainder of the packaging and
the central screw in the transit bar.
4. Remove the four retaining screws in the
transit bar and pull out the transit bracket.
5
Dispose of the packaging safely.
Make sure it is out of the reach
of children, it is a potential
source of danger.
40003674Eng.qxd 11/11/2005 13:46 Page 5
Page 6

5. Take the base panel provided and fit the
two self adhesive strips by removing the
backing paper on one side and locating the
strips on each side of the base panel.
6. Tilt the machine forward and locate the
base panel under the front of the machine.
Remove the remaining backing paper from
the self-adhesive strips and offer up the
base panel to the bottom of the cabinet.
7. Take the two plastic fixing clips and fix the
base panel to the base of the machine.
Bring the machine back to the upright
position.
6
We recommend you keep the transit bracket and
screws to protect the machine for future transit.
The manufacturers will not be responsible for any
damage to the machine caused by not following the
instructions relating to releasing the transit protection.
The user is responsible for all installation costs.
40003674Eng.qxd 11/11/2005 13:46 Page 6
Page 7

8. Cover the central hole in the rear of the
machine with the cap enclosed in the
instruction bag.
Choose a location
● After the machine has been installed, ensure
that the mains plug and water supply valves
are easily accessible.
● Make sure there is enough space for the
machine. Select a space at least 600mm wide
and 850mm high. Also leave enough space
to open the door fully so you can load and
unload it easily.
● Keep the area underneath and around the
machine free of combustible materials such
as lint, paper, rags, chemicals etc.
7
Installation
Do not plug the
machine in and
switch it on at
the mains until
the installation
is completed.
40003674Eng.qxd 11/11/2005 13:46 Page 7
Page 8

Electricity supply
Washing machines are supplied to operate at a
voltage of 230V, 50 Hz single phase. Check that
the supply circuit is rated to at least 16A.
Electricity can be extremely dangerous.
This washing machine must be earthed.
The socket outlet and the plug on the appliance
must be of the same type.
Do not use multiple adapters and/or extension
leads.
The wires in the mains lead are coloured in
accordance with the following codes:
Blue NEUTRAL
Brown LIVE
Green and Yellow EARTH
CE Appliance complies with European Directive
89/336/EEC, 73/23/EEC and subsequent
amendments.
Water supply
● The cold water pressure should be between
0.05-0.8 Mpa.
● Do not connect the machine to a single
outlet instantaneous water heater.
● The water supply tap should be accessible
when the machine is installed.
● Before connecting the fill hose, check that
the water is running from the water supply
tap to be used.
8
You may be
charged for a
service call if a
problem with
your machine is
caused by
incorrect
installation.
If the mains
cord on this
appliance is
damaged, it
must be
replaced by a
special cord
which is ONLY
obtainable from
the GIAS spares
service. It must
be installed by
a competent
person.
40003674Eng.qxd 11/11/2005 13:46 Page 8
Page 9

Connecting to the cold
water supply
This machine has an inlet hose with a 19mm
(3/4") threaded ferrule fitted to the end, to
attach between the threaded connector on the
appliance and the water supply.
Only use the new hose supplied to connect the
machine and ensure that the sealing washers are
in place inside the hose connectors.
Do not re-use old hoses which are attached to
existing installations.
Do not over-tighten the connections. Hand tight
is sufficient.
Do not trap or kink the hose.
1. Connect the elbow end of the hose provided
to the threaded inlet on the back of the
machine.
Grey pipe to the white threaded inlet on
the machine.
2. Hand tighten the connector.
3. Connect the straight ends of the pipes to
the water supply; ensure that there are no
kinks.
4. Turn on the water supply and check for
leaks. If there is a leak, turn off the water
supply, disconnect the hose and check the
sealing washers are in place. Refit the hose
and turn on the water supply.
Aqua-stop
Certain models will be supplied with a special
hose that has a double skin and incorporates a
water valve (A). If the inner hose bursts the valve
will automatically shut off the water supply to
prevent flooding. The indicator turns red (B).
Should this happen, turn off the water supply
immediately and obtain a replacement hose from
GIAS Service.
The installation is the same as a conventional
hose with the valve end of the aqua-stop hose
fitted to the water supply.
9
A
B
40003674Eng.qxd 11/11/2005 13:47 Page 9
Page 10

Connection of the machine to the
drain
This machine must be connected in accordance with the water supply
regulations. Water byelaws prohibit connection to a surface water drain.
Decide which plumbing option suits you best then follow the instructions
below.
Option 1
Waste pipe connection (waste trap)
Fit the hooked end support to the outlet pipe. Position at least 800mm off the
floor.
After removing the blanking plug or cutting the membrane from the waste
system securely fix the outlet pipe to the drainage system, using a hose clip.
Secure the hooked end support up to at least 800mm to avoid water being
drawn back into the machine.
10
All machines are tested with water prior to leaving the
factory so a small amount of water may remain in the
drum and drain hose.
Flooding could occur if any part of the installation is
not completed correctly.
800 mm
hose clip
hooked end support
sink
flexible
discharge hose
trap with hose
adaptor
40003674Eng.qxd 11/11/2005 13:47 Page 10
Page 11

Option 2
Into a standpipe
Ensure that the standpipe is not located near
an electrical socket.
Fit the hooked end support to the outlet pipe.
Install the hose into the standpipe ensuring
that the pipe is at least 500mm from the floor.
Insert the outlet pipe approximately 100mm
into the standpipe.
Moving the machine
into position
Your machine is heavy so care must be taken
when moving it. We recommend that two people
move the machine to avoid strain and possible
injury.
● Take care not to damage flooring when
moving the machine.
● When moving the machine to its final
position take care not to kink or damage
the hose at the back of the machine.
Adjusting the feet
Once the machine is in place the feet should be
adjusted to ensure that the machine is level. If
the machine is not level it may become noisy or
move.
Adjust the feet on the front corners of the
machine until the machine is firm and level.
When the machine is firm and level, tighten the
locking nuts on the two feet.
11
Do not drag or
lift the machine
by its door.
100 mm
500 mm min
40003674Eng.qxd 11/11/2005 13:47 Page 11
Page 12

Refer to ‘Selecting the wash programme’ for
details of how to select programmes.
1. Turn on the water supply and check for
leaks from the fill hose.
2. Switch on the electricity supply.
3. Select the spin programme and then
press the button to start the machine.
Allow the programme to continue for one
minute and then cancel the programme by
returning the selector to the OFF position.
This will remove any water remaining in the
machine from factory testing.
4. To check for cold water filling to the
machine:
Select the rinse programme and press
the button to start the machine.
Allow the tumble action to continue until
the water has pumped out. Check that the
drain outlet is not leaking or overflowing.
5. Switch off the machine at the end of the
cycle by turning the programme knob to the
OFF position.
6. Select the spin programme and press
the button to start the machine. If the
machine takes longer than one minute to
empty check the drain hose for kinks.
Installation testing is now
complete.
Now you have successfully installed the machine
we advise that you run the machine to ensure the
drum is thoroughly clean after testing and
storage. Select Cottons 90 and run the machine
for a complete cycle using only wash detergent
and water.
12
Testing the installation
This
programme
will take
approximately
2 hours to
complete.
40003674Eng.qxd 11/11/2005 13:47 Page 12
Page 13

The following tips are designed to assist in
getting the best results from your machine whilst
using it in the most environmentally-friendly and
economical way. It is also important to
understand the items to avoid in your laundry, to
ensure the continued safe and reliable operation
of your machine.
Loading your washing
machine
To make further reductions of energy, water and
detergent consumption, we recommend that you
put a full load into your machine. Energy savings
of up to 50% can be achieved by washing one full
load compared to two half loads.
Do not overload the machine as this will reduce
the quality of the wash and may cause damage
to the machine and your laundry.
When is prewashing really
needed?
Only with particularly dirty loads! Energy savings
of 5 to 15% are made by not selecting the
prewash option for less dirty laundry. Pre-treat
awkward stains with a washable stain remover.
Which wash temperature should
you choose?
Using stain removers before machine washing
reduces the need to wash at temperatures over
60°C.
Using a 40°C wash temperature can make energy
savings of up to 50%.
Heavily soiled laundry
To ensure the best performance when washing a
particularly dirty load, we recommend that you
reduce the amount of items to be put into the
machine. Allowing more space in the drum the
13
Washing advice
40003674Eng.qxd 11/11/2005 13:47 Page 13
Page 14
items can circulate more freely and will wash
better.
Sorting the laundry
Items to avoid
We recommend that you do not wash underwired
bras in the machine. Should the wires become
detached they could cause damage to your
clothes and the machine. If the washcare label
states that the bra is machine washable then we
advise placing it in a wash bag.
Recommendations
Always follow the wash care labelling on the
garments.
Fasten zips, tie strings and close press studs to
prevent tangling. Ensure that pockets are
emptied of loose change and other small items.
Check that there are no metal objects in the
laundry as these may damage the laundry and
the machine.
Place small items in a wash bag.
14
Do not use the
machine to
wash items that
do not have a
wash label.
Do not wash
items
previously
treated with
solvents.
40003674Eng.qxd 11/11/2005 13:47 Page 14
Page 15
Detergent dosage
Only use detergents which are suitable for use in a washing machine. You will
obtain the best results from your wash with the minimum use of chemical
products, and the best care for your laundry if you take into consideration the
degree of soiling as well as the type of detergent to choose.
The amount of detergent to use depends on:
● Water hardness.
Depending on the hardness of the water and the type of detergent used,
it is possible to reduce the amount of detergent.
The softer the water supply, the less detergent is required.
● The degree of soiling.
It is possible to reduce the amount of detergent used depending on the
degree of soiling.
Use less detergent for less soiled items.
● Amount of laundry.
It is possible to reduce the amount of detergent when washing only a
small amount of laundry.
For smaller loads use less detergent.
The dosages shown on the packaging of detergents for washing delicates
often already refer to a reduced wash size. Always follow the dosage
instructions on the detergent packaging.
15
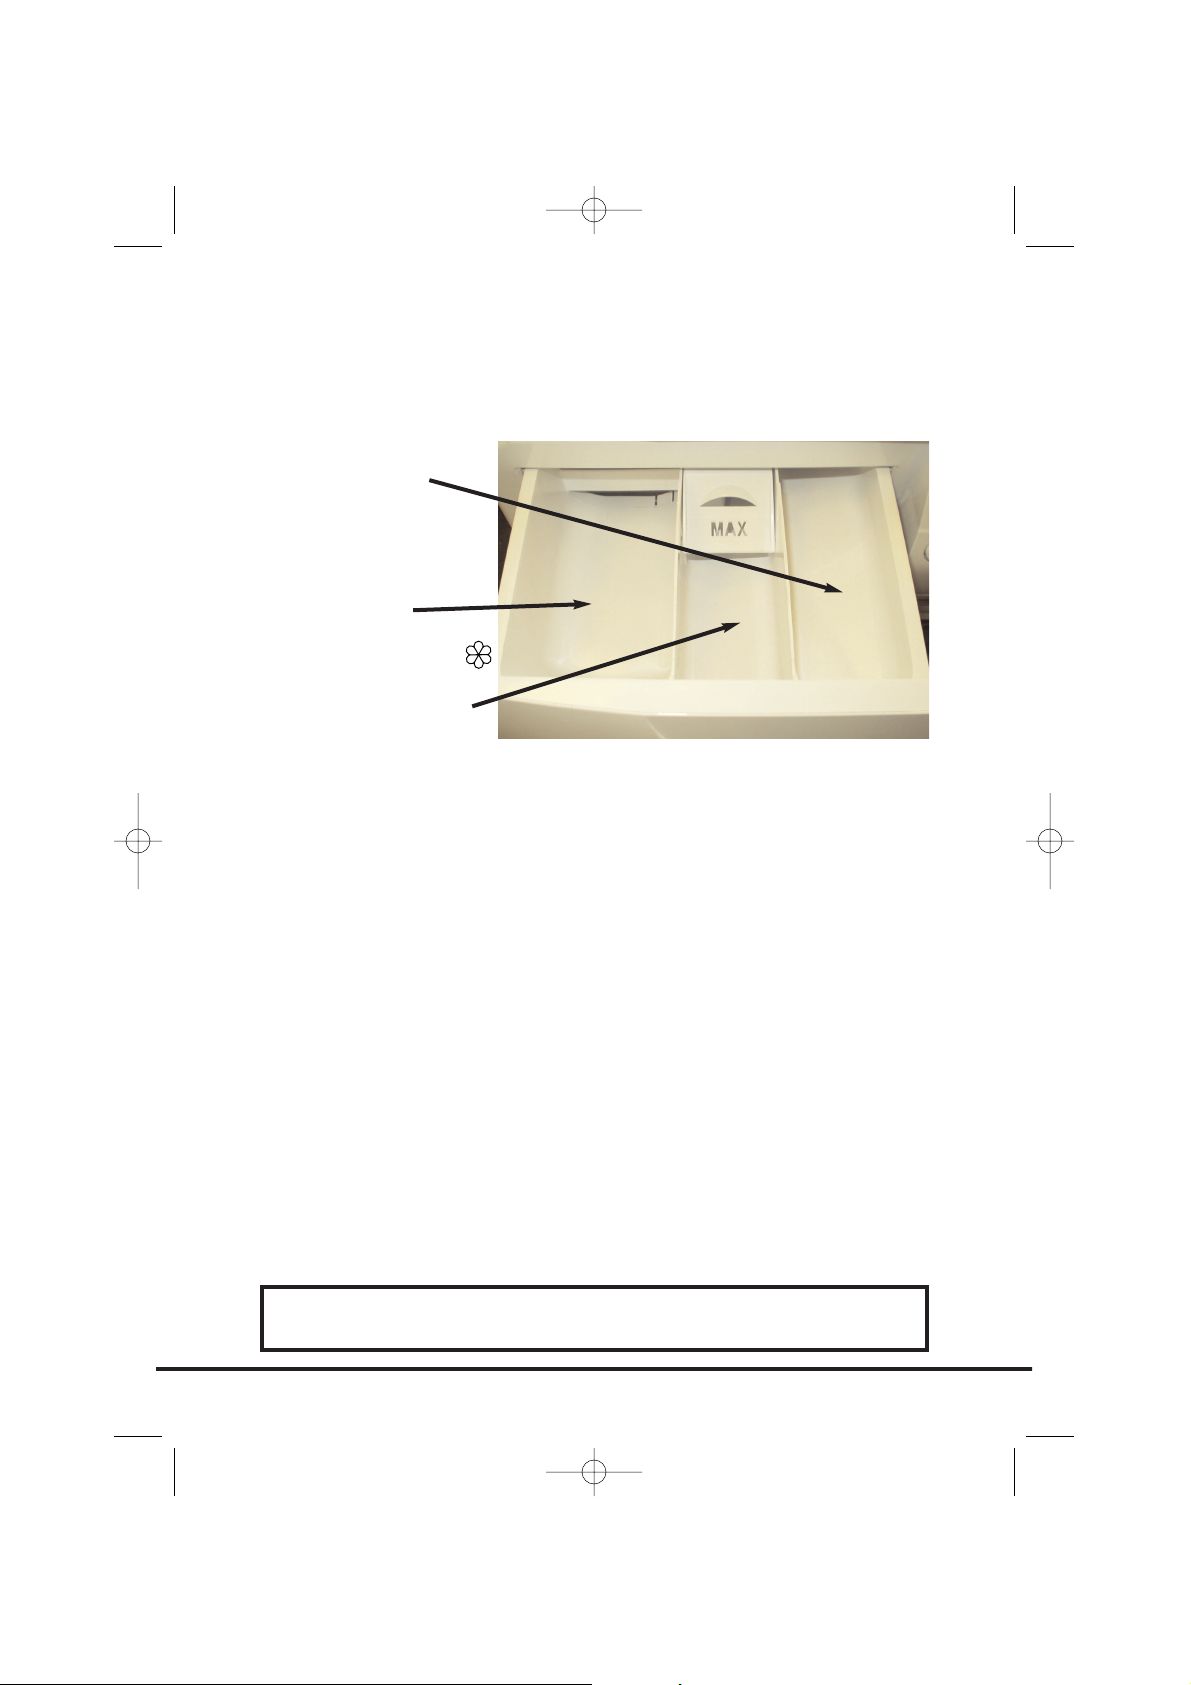
The Dispenser
DO NOT exceed the maximum detergent dosage
COMPARTMENT I
Prewash detergent
Maximum dosage
100ml of powder
COMPARTMENT II
Mainwash detergent
Maximum dosage
200ml of powder
COMPARTMENT
Fabric Conditioner
Maximum dosage 200ml
40003674Eng.qxd 11/11/2005 13:47 Page 15
Page 16
Dispensing instructions
The detergent drawer is split into 3 compartments:
● the left-hand compartment, labelled "II", is
for detergent used during the main wash.
● the centre compartment, labelled is for
special additives such as fabric softeners,
fragrances, starch, brighteners etc.
● the right-hand compartment, labelled "I", is
for detergent used during Prewash.
Dispensing in the drum
Liquid detergents and some tablets are dispensed
via the machine drum using the recommended
dispensing device which is placed upright on top
of the washload towards the back of the drum.
Some tablets are designed to be placed in the
dispenser drawer, check the detergent pack for
details.
16
Do not put any
items into the
drawer other
than detergents
that are
designed to be
dispensed from
the drawer as
they may cause
blockage or
damage.
40003674Eng.qxd 11/11/2005 13:47 Page 16
Page 17
This machine will operate even if you do not programme the Inter@ct set-up.
However, this machine has Start Delay and Programme Set End Time functions
and for these functions to work efficiently the Inter@ct 3D must be
programmed. This is a simple operation and special care has been taken
during manufacture to ensure that the user can operate this machine simply
and effectively.
Programming the machine
Inter@ct needs to be programmed so that the correct clock setting, language
and personal requirements are set. When the machine is turned on and the
programme dial is moved away from the OFF position to a programme
selection, a welcome message will appear:
This message is displayed for a short time while the machine recognises which
programme has been selected. When the machine is ready, the programme
details will appear on the display and from here you may now begin
programming the machine.
Example
Please note that when using the Inter@ct menu you have 30 seconds per
operation to make your selection. Should you run out of time, the display will
17
Using Inter@ct 3D for the
first time
WELKOM!
0:00
00
00
WITTE WAS
STERK VERVUILD
90
11
Spin Speed
x100
Programme
selected
Temperature
(°C)
40003674Eng.qxd 11/11/2005 13:47 Page 17
Page 18

return to the start screen, and you simply have to re-enter the Inter@ct menu
and continue with the programming.
To enter the menu
Hold down the and the buttons together for 5 seconds or until the
beep sounds.
The menu options can be changed by pressing the button. To confirm and
enter an option press the button.
ADOPT LANGUAGE (default setting – DUTCH)
Your washing machine is automatically set to Dutch. If you require another
language you have the option to change it within this set-up menu. Press
to change the language, keep pressing the button until the desired language
is indicated. Press to confirm your selection. When you have entered your
chosen language, the display will then ask you to Set the Time.
SET NEW TIME
This function needs to be set for two reasons, firstly to display the current
time of day on the screen and secondly for the Programme Set End Time/Start
Delay settings to work correctly.
You will notice in the display window that the hours on the clock will be
flashing. To set the hours you must press the button until the required
figure is displayed. Then press the button to enter the chosen figure. Now
the minutes on the clock will begin to flash. Again, press the button until
the required minutes are displayed and press to input the selection. When
you have set the time, the display will ask if you wish to Set the Time Mode.
SET TIME MODE (default setting – ABSOLUUT)
The Set Time Mode allows you choose how you wish the Programme Set End
Time and Start Delay functions to be controlled.
You will be presented with two options. The first, called Absolute Time Mode
(ABSOLUUT), allows you to set the actual time you want the programme to
begin or end, e.g. Programme to start/end at 08:00. The second, called Relative
Time Mode (RELATIEF), allows you to delay the start or end of your wash cycle
by adding hours to the current time displayed on the clock, e.g. Programme to
start/end in 4 hours 30 minutes.
18
STEL TIJD IN
0:08
40003674Eng.qxd 11/11/2005 13:47 Page 18
Page 19

You can select which option you require by pressing the button until your
preferred option is displayed, and then pressing the button to accept the
option you have chosen.
Both options are very useful, but Absolute Time Mode is easier to use since
there is no need for you to calculate how many hours to leave before you
want the machine to end or start your chosen cycle.
When you have entered your preferred Time Mode the display will then ask
for Enable Final Beeping to be set.
SET FINAL BEEP (default setting – JA)
Here you have the option to have a beeping alarm to let you know the wash
cycle has finished. By pressing the button you can scroll through the YES
(JA) and NO (NEE) options.
To confirm your selection press the button. The screen will then move to
the next stage and ask you if you wish to Enable Memory.
ENABLE MEMORY? (default setting – NEE)
This is a useful feature if you frequently wash laundry using the same
programme. Selecting ENABLE MEMORY? will tell the machine to remember
the last programme/functions used and set them in the memory. This feature
works only on the Cottons, Delicates, Synthetics and Woollens programmes.
The memory does not retain settings within the Special Programmes group.
Select JA or NEE by using the button and confirm your selection by
pressing the button.
SET DEMO MODE? (default setting – NEE)
The display will now show a message asking if you require the demo mode to
be set. Please set this option to NEE if this has not already been done. This
function is for SERVICE use only. If the demo mode option is set to JA, the
wash programme WILL NOT commence when you exit the Inter@ct 3D menu.
The Demo Mode must be set to NEE for the wash cycle to commence. Select
NEE using the button and confirm your choice with the button. You
will then be asked if you wish to Exit the Menu.
EXIT MENU?
If you are happy with the settings you have selected, you can now exit the
menu by selecting JA via the button and confirm this selection using the
button. However, if you are not happy with some of the settings selected
you must select NEE and you can then start programming again from the
beginning. By pressing the button you can enter and bypass each option
individually until you reach the option you would like to change.
When you are completely satisfied with the menu options you have selected,
you may exit the menu. Testing of the installation may now start. If you wish
to change any of the menu settings at a later date, you can enter the menu as
19
40003674Eng.qxd 11/11/2005 13:47 Page 19
Page 20

20
The Control Panel
The programme selector must be returned to the OFF
position to reset the controls between each wash cycle.
INTER@CT
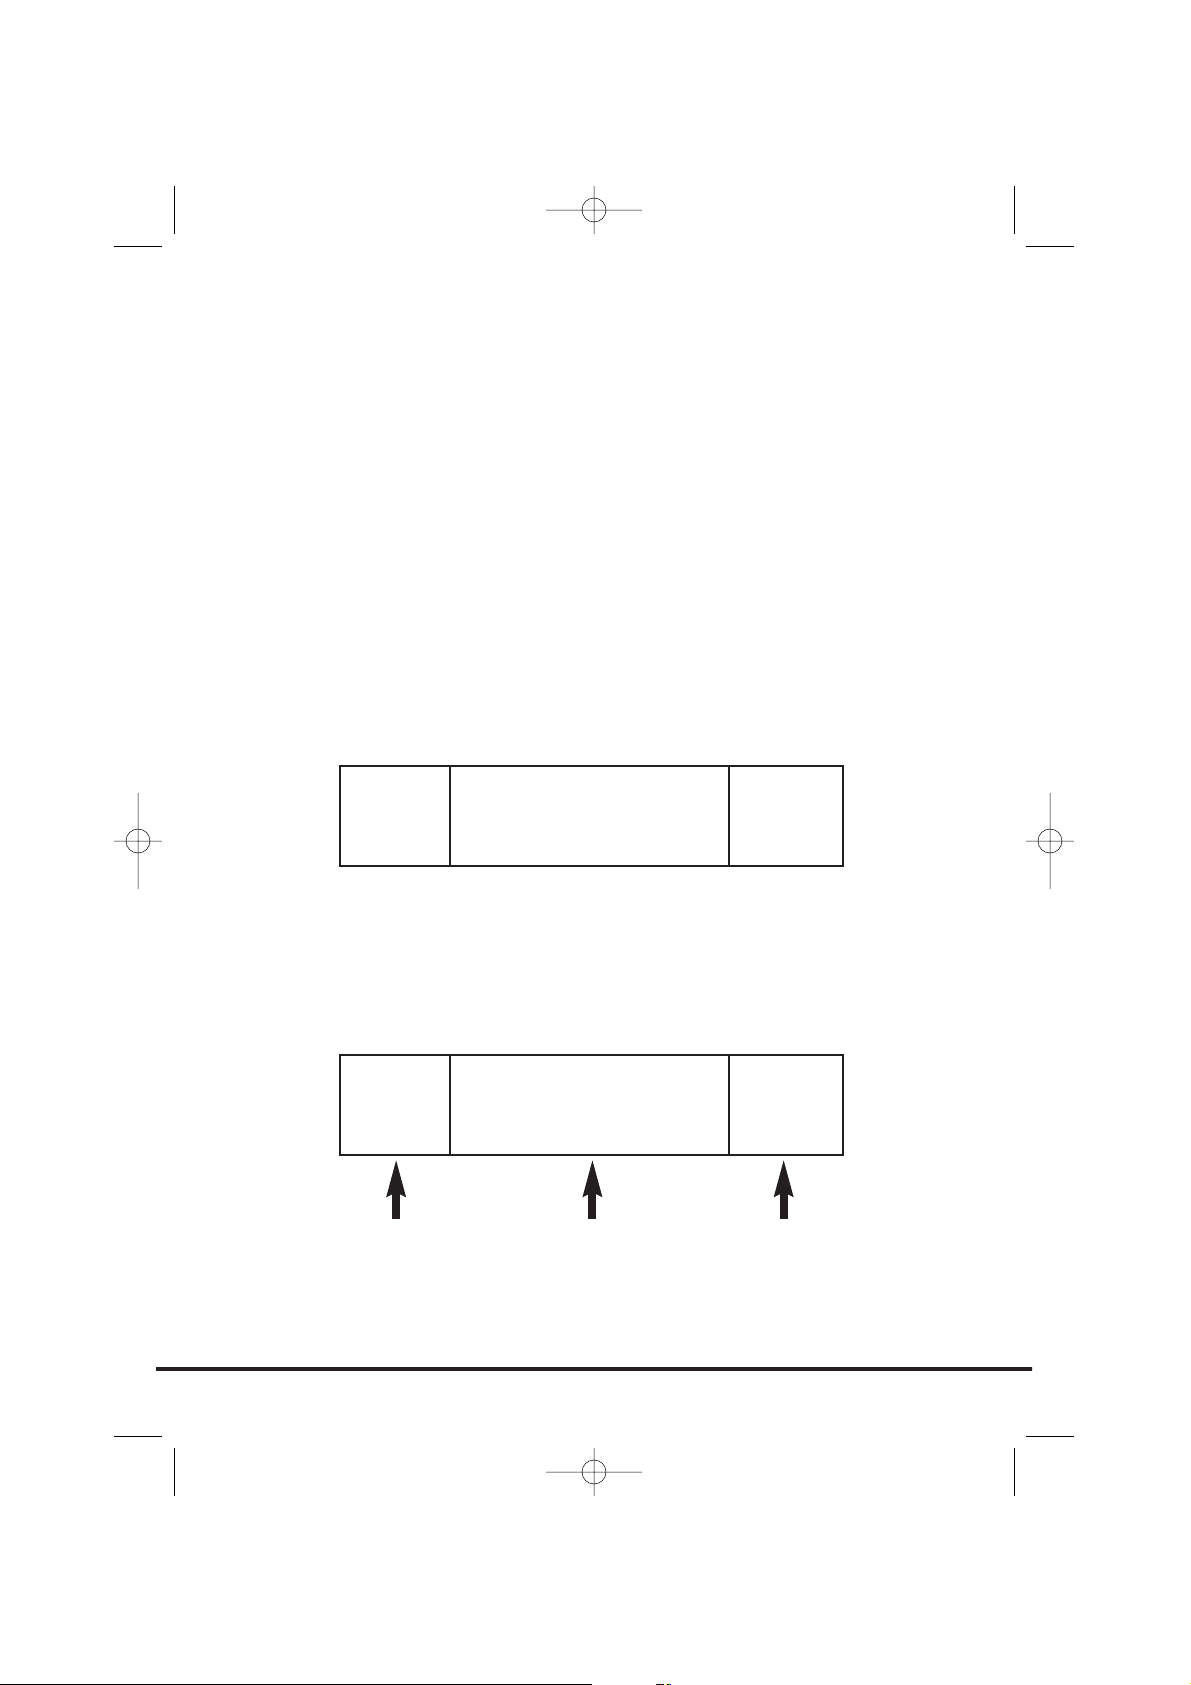
Display
Fast Iron
Spin
Speed
Rapid
Wash
Prewash Temperature
Selection
Extra
Rinse
Start Pause
Start Delay/
Set End Time
Programme Lock
Programme
Selector
previously described, run through the menu options from the beginning and
change whichever options you wish. This may be useful for changing Set New
Time when Daylight Saving starts or ends.
Once set, the menu options will remain in the memory of the machine even if
the machine is unplugged or there is a power cut.
40003674Eng.qxd 11/11/2005 13:47 Page 20
Page 21

Turning the machine on
Turn the machine on by selecting a programme using the programme selector.
The display will then indicate the name of the programme, the spin speed and
temperature of the wash and this display will remain until you press the
button or return the programme selector to the OFF position.
Start/Pause ( )
Start
After selecting the programme and the required options (see the Wash
Options section of this manual), press the button once to start the wash
cycle. The display will indicate that the door is locked and the machine will
begin to sense the wash load and ask you to wait.
After the appropriate parameters have been programmed by the machine the
display will indicate the approximate time until the end of the programme.
This calculation is based on a full load and will be adjusted to suit the size and
composition of the load as the machine progresses through the wash cycle.
21
WITTE WAS
STERK VERVUILD
90
11
WACHTEN AUB
STEL PARAMETER
90
11
EINDE: 2H 45M
WASSEN
90
11
40003674Eng.qxd 11/11/2005 13:47 Page 21
Page 22
Pause
The programme may be paused at any time during the wash cycle by holding
down the button for about three seconds. When the machine is in the
paused mode the following display will appear:
After about two minutes the display will then change to the following, which
means that the door can now be opened:
To restart the programme, close the door and press the button.
Cancelling and changing the programme
To cancel the programme the programme selector should be turned to the OFF
position. In this mode the display will go blank because the machine is now
OFF. When a new programme is selected the display will indicate that the
programme has been cancelled as follows:
To start another wash cycle the programme selector must be returned to OFF
once again BEFORE the next programme can be selected and started.
22
PAUZE
DEUR OP SLOT
90
11
PAUZE
DEUR OPEN
90
11
PROG. GESTOPT
90
11
40003674Eng.qxd 11/11/2005 13:47 Page 22
Page 23
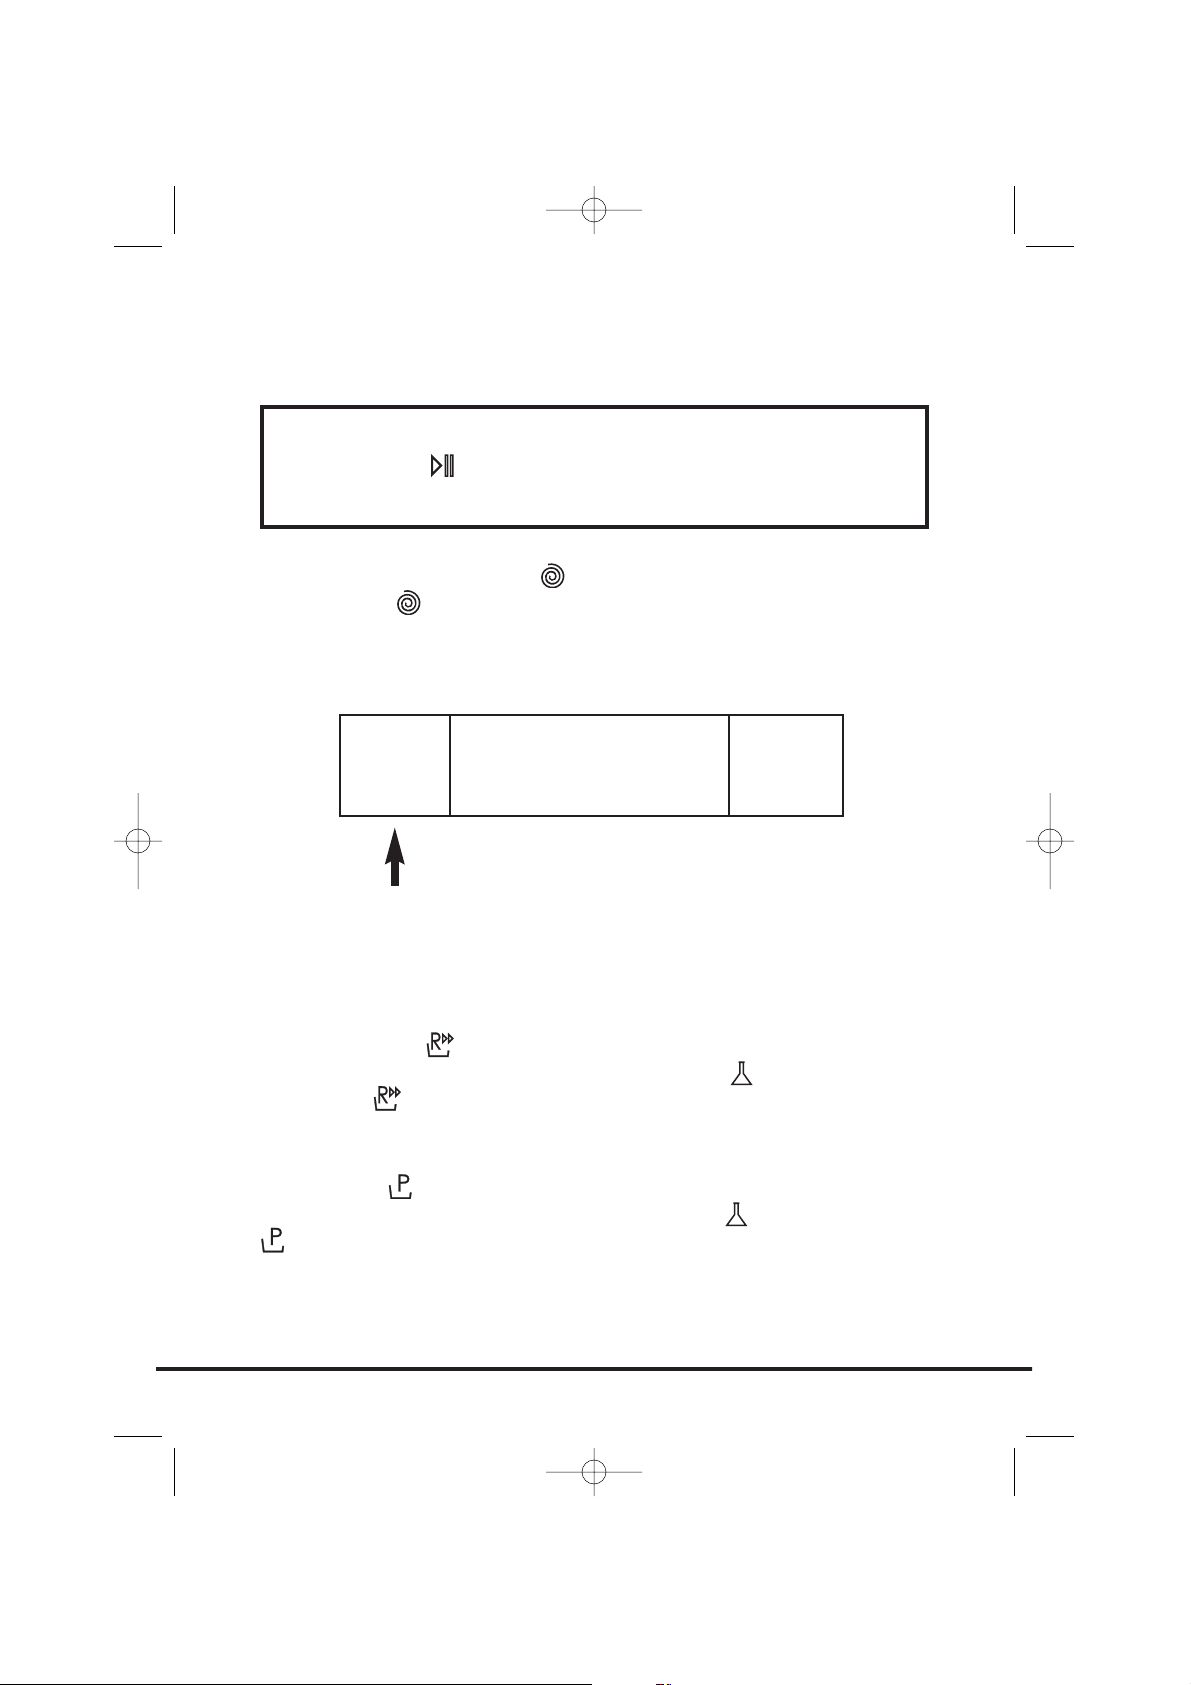
Spin Speed Selection ( )
By pressing the option button it is possible to reduce the maximum spin
speed of your selected programme to suit your needs and to help reduce any
creasing of fabrics. The maximum spin speed will vary depending on the
specification of the machine.
The light on the option button will come on if a spin speed lower than that
stated in the programme guide has been selected.
Rapid Wash ( )
This option can be used on the Cottons and Synthetics ( ) programmes. By
selecting the option, the wash time can be reduced by up to 50 minutes,
depending on the selected programme, temperature and load, without
affecting the quality of the wash.
Prewash ( )
This option is available on the Cottons and Synthetics ( ) programmes.
is set automatically on the Sports programme. This option is particularly
useful for heavily soiled loads and can be used independently of the main
wash programme. Detergent for this programme should be added to the first
compartment of the soap drawer labelled "I" (please refer to The Dispenser
section of this manual). We recommend you use only 20% of the quantity
used for the main wash programme.
23
Wash Options
The following options should be selected BEFORE
pressing the button. The light on each option button
will come on if the option has been selected.
Spin Speed ÷ 100 rpm; so in this example 11 = 1100 rpm
WITTE WAS
STERK VERVUILD
90
11
40003674Eng.qxd 11/11/2005 13:47 Page 23
Page 24

Temperature Selection ( )
This washing machine is equipped with a variable temperature function. Each
press of the button reduces the temperature of the wash. Greater energy
savings can be achieved by setting the temperature between 15°C and 40°C.
By setting the temperature to 15°C the wash temperature is equivalent to the
water inlet temperature, thus reducing energy consumption further.
We recommend that the temperature shown on wash care garments should
never be exceeded. The machine will not accept a temperature input that is
higher than that stated in the programme guide.
The light on the option button will come on if a temperature lower than that
stated in the programme guide has been selected.
Extra Rinse ( )
This option is available on the Cottons programmes and it increases the
number of rinses to five (including the final conditioned rinse). This can help
prevent skin irritation from detergent residue, which can affect people with
particularly sensitive skin. Selecting the button is also recommended when
washing heavily soiled fabrics which need a lot of detergent, or when the
wash load contains towelling fabrics that have a greater tendency to retain
detergent.
24
Temperature (°C)
WITTE WAS
STERK VERVUILD
90
11
40003674Eng.qxd 11/11/2005 13:47 Page 24
Page 25
Fast Iron ( )
This option is only available on the Synthetics, Acrylics, Woolmark and Silk
programmes.
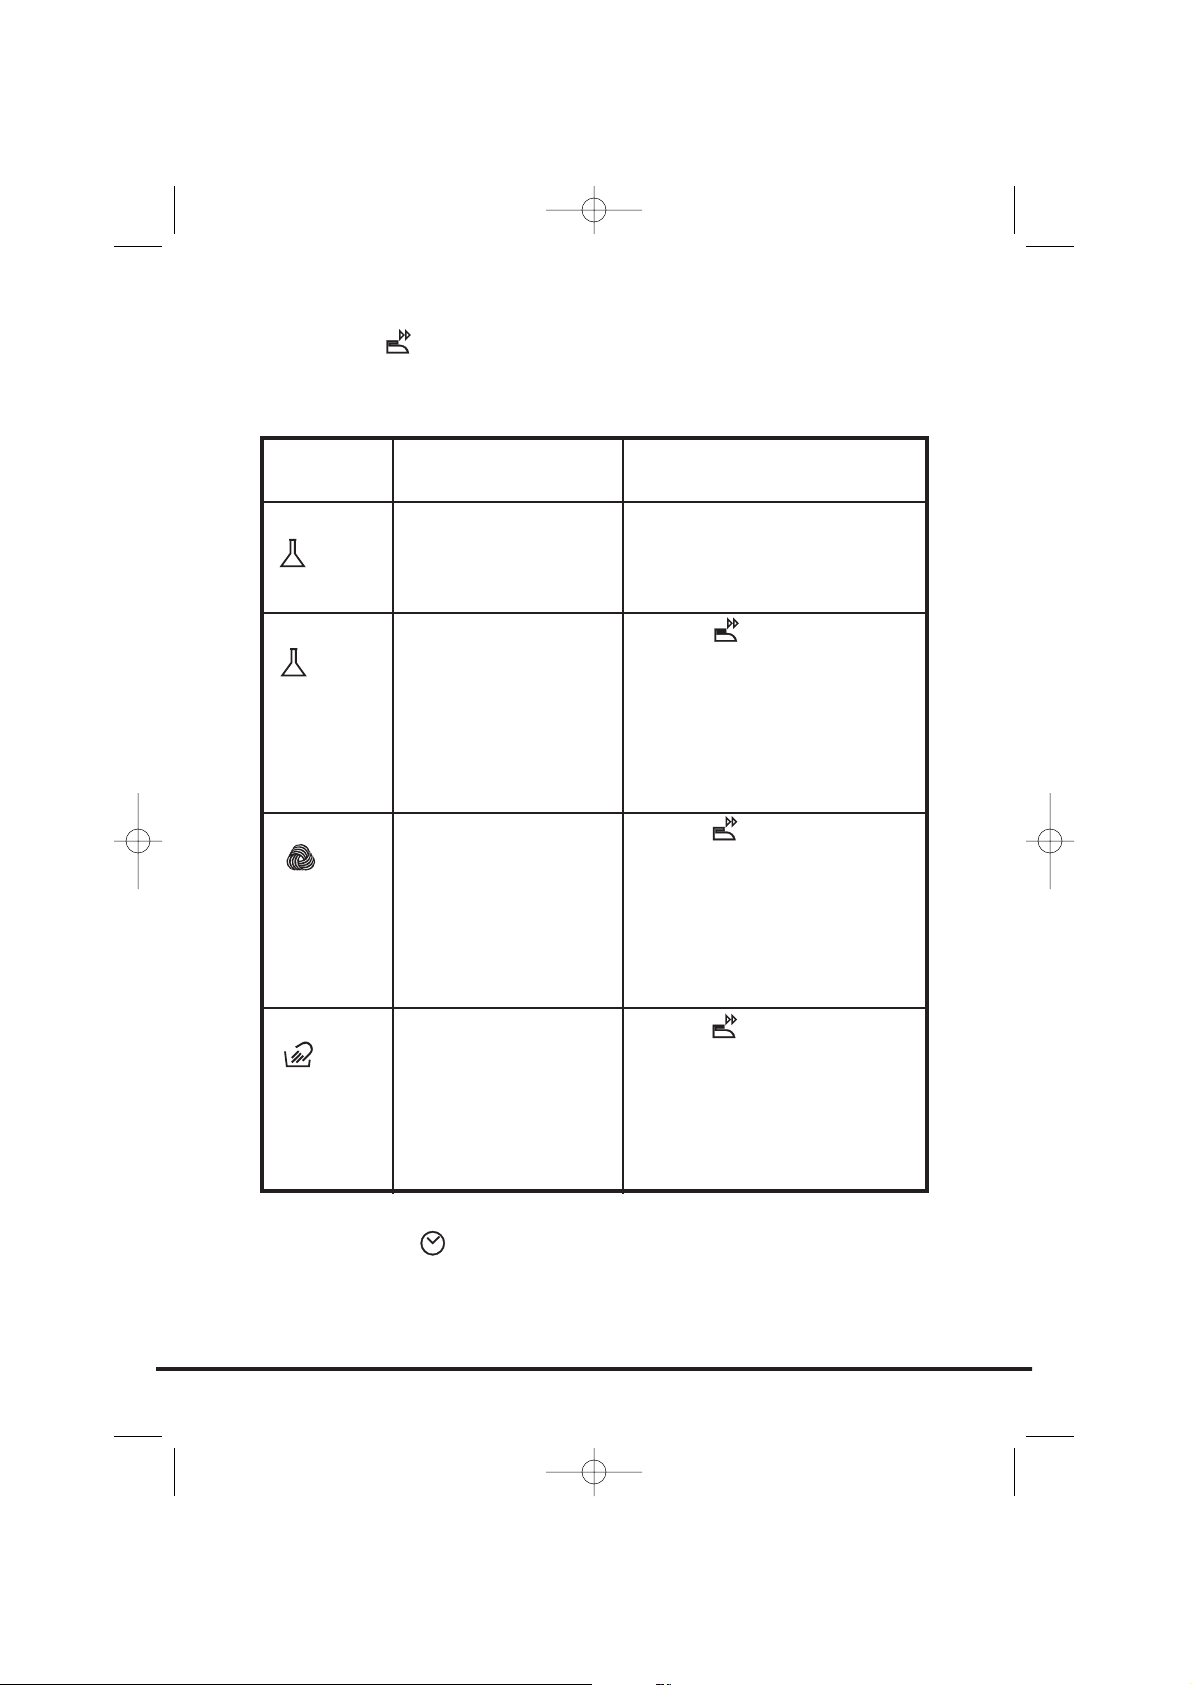
Start Delay ( )
The Programme Set End Time/Start Delay options can be used if you want the
washing to be ready at a later time (but within 24 hours). The way these
buttons function will depend on which Time Mode you have selected in the
Inter@ct menu.
25
Programme
Synthetics
( 50)
Acrylics
( 40)
Woolmark
( )
Silk
( )
Fast Iron function
The programme is
completed by a short
spin, of very low speed.
The machine stops in the
final rinse stage and the
option indicators blink.
The load is held in the
water in the drum, thus
reducing creasing and
enabling easier ironing.
The machine stops in the
final rinse stage and the
option indicators blink.
The load is held in the
water in the drum, thus
reducing creasing and
enabling easier ironing.
The machine stops in the
final rinse stage and the
option indicators blink.
The load is held in the
water in the drum, thus
reducing creasing and
enabling easier ironing.
Action required to complete the
cycle
To select a full spin cycle please
turn the dial to the required spin
programme (see Programme
Guide).
Press the - button to continue
with the programme. The
machine will then pump out the
water and the programme will
conclude with a short spin.
Finally, the programme carries
out a brief tumbling action to
loosen the items in the load.
Press the button and the
machine will pump out the
water and complete the cycle
with a short spin.
Press the button and the
machine will pump out the
water to complete the cycle. The
load will not be spun and will
therefore be very wet.
40003674Eng.qxd 11/11/2005 13:47 Page 25
Page 26

1. Set Start Delay
Press the button once and press the hours and minutes buttons ( and
) until the required time is set. The display returns to the programme
option if you do not start to set the time within 5 seconds. Once you have set
the required Start Delay, press the button.
If the Absolute Time Mode has been selected at the menu set-up stage and
you wish to delay the start of the programme until 08.00, the display will
appear as follows:
If the Relative Time Mode has been selected at the menu set-up stage and you
wish to delay the start of the programme by 4 hours 30 minutes, the display
will appear as follows:
2. Programme Set End Time
Press the button twice and press the hours and minutes buttons ( and
) until the required time is set. When you are entering the Set End Time
option, the display will automatically show the earlier time at which the
programme can end. This time may only be extended as you require.
If the Absolute Time Mode has been selected at the menu set-up stage and
you wish to delay the end of the programme until 08.00, the display will
appear as follows:
If the Relative Time Mode has been selected at the menu set-up stage and you
wish to delay the end of the programme by 4 hours 30 minutes, the display
will appear as follows:
26
PROG. START
OP 08:00
STARTUITSTEL
OVER 4H 30M
PROGR, EINDE
OP 08:00
40003674Eng.qxd 11/11/2005 13:47 Page 26
Page 27

27
These options can be cancelled at any stage after they have been set by
pressing the button for five seconds. The indicator light will go out and
the buzzer will sound.
Programme Lock ( )
This is a useful feature to prevent children playing with the option buttons
and tampering with the programme you have set. After you have set the
programme and option buttons you require, press the button. Press the
button in order to lock the control panel.
You may cancel this function by pressing the button briefly until you see
the light above the button flash. While this light is flashing, press the
button – the display will inform you that the options are no longer locked and
further changes can now be made.
When using the Start Delay/Set End Time functions,
detergents must only be put in the dispenser drawer.
Adding detergents etc. to the drum and then leaving
them to stand for a long period of time may damage
your laundry.
UITSTEL EINDE
OVER 4H 30M
BEVEILIGD
ONGEWIJZIGD
PROG. VAN SLOT
WIJZIG. OKAY
40003674Eng.qxd 11/11/2005 13:47 Page 27
Page 28

Automatic Features
Automatic Variable Capacity
(Half Load)
The washing machine is fitted with a self
adjusting water level system. This system enables
the machine to use the optimum amount of
water needed to wash and rinse the laundry in
relation to the particular load. This results in a
reduction of the water and electricity used
without in any way compromising the washing
and rinsing performance. The amount of water
and electricity used will always be appropriate for
the clothes load.
The washing machine automatically ensures
excellent washing results at minimum cost whilst
respecting the environment.
Out of Balance protection
This model is fitted with an electronic sensor
device that checks if the load is balanced
correctly. If the load is slightly unbalanced the
machine will re-balance it automatically to then
carry out the normal spin.
If, after several attempts, balance is not restored
a reduced spin speed will be used.
If loads are seriously unbalanced the spin stage
will be cancelled. This helps limit vibration,
reduce noise and improve the washing machine's
reliability and life.
28
40003674Eng.qxd 11/11/2005 13:47 Page 28
Page 29

29
Programme Selector
For handling the various types of fabric and their level of soiling in your
laundry the washing machine has different programme groups according to
type of wash, temperature, spin speeds and duration (see Programme Guide).
Cottons
The Cottons programmes are designed for maximum washing and rinsing.
With spin cycles in between, they guarantee the laundry is rinsed perfectly.
The final spin cycle ensures laundry is spun dry as much as possible up to the
maximum speed.
Synthetics and mixed fabrics
Washing and rinsing performance is optimised through drum rotation speeds
and water levels. The delicate spin action minimises creasing.
Delicates
This is a new concept in washing, with a cycle that consists of alternate periods
of activity and pauses, particularly suitable for washing very delicate fabrics.
Washing and rinsing are carried out using a high water level to provide the
best results.
Rinse, Spin and Drain
Individual programmes are available for rinsing, (including the opportunity to
add fabric conditioner), spinning, at 800rpm or less if selected via the
button, and draining the water from the machine.
40003674Eng.qxd 11/11/2005 13:47 Page 29
Page 30

Special Programmes
Woolmark ( )
This is a programme dedicated to washing fabrics
labelled with the woolmark symbol . The cycle
consists of alternate periods of activity and
pauses. Washing and rinsing are carried out using
a high water level to provide the best results. The
programme has a maximum temperature of 30°C
and concludes with 3 rinses, one for fabric
conditioner, and a short spin.
Silk ( )
This washing machine also has a gentle Silk and
Hand Wash programme. This programme allows a
complete washing cycle for garments specified as
“Hand Wash only” and laundry items made from
silk or specified “Wash as silk” on the fabric label.
The programme has a maximum temperature of
30°C and concludes with 3 rinses, one for fabric
conditioner, and no final spin.
Sports
This washing machine has a unique Sportswear
programme.
It is specially designed to wash mixed sportswear
fabrics that cannot be washed on hotter
programmes and is designed to remove the
soiling and staining created by participation in
sports activities.
This programme starts with a cold prewash that
breaks down and loosens any excess dirt and then
washes at a cool 30°C, rinses twice (one is for
fabric conditioner) and spins slowly for the best
care of your heavily soiled, delicate garments.
Detergent for the prewash part of the
programme should be added to compartment I
and detergent for the mainwash should be added
to compartment II. Follow the instructions given
in 'The Dispenser' section.
30
40003674Eng.qxd 11/11/2005 13:47 Page 30
Page 31

31
59’ CLASS A
This specially designed programme maintains the
high quality wash performance identified with the
‘A’ rating whilst greatly reducing the wash time.
The programme is designed for a maximum load of
3.5 kg and is intended for cotton fabrics and items
colourfast to 60°C. The programme concludes with
2 rinses and a high speed spin sequence.
Daily Programmes
By maintaining exceptional washing performance,
these programmes allow you to know in advance
the necessary time for your everyday laundry. In
fact, this washing machine is equipped with two
daily rapid programmes at 40°C, that were
designed for lightly soiled fabrics and medium or
small loads.
DAILY FAST 44'
A complete washing cycle (wash, rinse and spin),
able to wash in approximately 44 minutes
suitable for:
● a maximum load of 3.5 kgs
● lightly soiled fabrics (cotton and mixed
fabrics)
With this programme we recommend that you
reduce the detergent loading dose (compared to
the normal one), in order to avoid detergent
waste.
DAILY FAST 29'
A complete washing cycle (wash, rinse and spin),
able to wash in approximately 29 minutes
suitable for:
● a maximum load of 2.5 kgs
● lightly soiled fabrics (cotton and mixed
fabrics)
With this programme we recommend that you
reduce the detergent loading dose (compared to
the normal one), in order to avoid detergent
waste.
40003674Eng.qxd 11/11/2005 13:47 Page 31
Page 32

32
Programme Guide
Energy label data based on Cotton 60 programme tested in accordance with
CENELEC EN60456
CottonsSynthetics Mixed
Fabrics
Delicates
Special Programmes
Cotton 90
Cotton 60
Cotton 40
AA 40°C
50
40
Rinse
Spin
Drain
Sports
59’
Class A
Daily Fast
44’
Daily Fast
29’
Maximum
Load
Size (kg)
7.5
7.5
7.5
7.5
3
3
-
-
-
1.5
1.5
3
3.5
3.5
2.5
Fabric Type
Cottons, linen
Cotton, colourfast
mixed fibres
Cottons, mixed fabrics,
Coloureds Non-fast
Cottons, mixed fabrics
and synthetics
Mixed fabrics
and synthetics
Synthetics, acrylics
and coloured
mixed fabrics
Mixed Fabrics
Mixed Fabrics.
Spin speed of 800 rpm
max.
Mixed Fabrics
Machine washable
wool
Silks and 'Hand Wash
only' garments
Mixed fabrics
Cotton, colourfast
mixed fibres
Lightly soiled cottons
and mixed fabrics
Lightly soiled cottons
and mixed fabrics
Maximum
Water
Temp (°C)
90
60
40
40
50
40
-
-
-
40
30
30
60
40
40
Programme
40003674Eng.qxd 11/11/2005 13:47 Page 32
Page 33

This section summarises the main points when
completing a wash cycle. For detailed
explanations of features, options and details of
the machine refer to the relevant section in the
instruction manual.
Preparing the laundry
Select and sort the laundry according to the wash
care labels found on each garment. Always check
the care labels.
Loading the laundry
Open the door.
Put the laundry in the washing machine. Close
the door by pushing it until it clicks, ensuring that
no items of laundry are obstructing the lock or
door seal.
Putting detergent in machine
Open the drawer, choose the detergent and put
in the recommended amount.
Do not exceed the dosage stated below
Close the drawer again.
33
A Typical Wash
Maximum quantity
of powder/liquid
100ml
200ml
200ml
Wash
Prewash (option)
Main Wash
(all programmes)
Fabric Conditioner
Compartment
I
II
Liquid
detergents and
some
concentrated
powders and
tablets that are
to be placed
directly into the
drum should be
placed in the
recommended
dispensing
device.
40003674Eng.qxd 11/11/2005 13:47 Page 33
Page 34

Refer to the Programme Guide or the programme
descriptions on the front of the machine to select
the most suitable programme.
The programme is selected by turning the
programme selector and aligning the programme
name with the indicator.
The programme will be displayed on the Inter@ct
3D screen, along with the standard spin speed and
the wash temperature for the selected programme.
Check that the tap is turned on and that the
discharge hose is positioned correctly.
Select the required wash options, including the
spin speed and wash temperature if you wish to
change these from the standard settings.
Starting the wash cycle
Press the button. The Inter@ct 3D screen will indicate that the machine is
setting the wash parameters and then after a few seconds the wash
programme will begin. The display will then indicate the time to the end of
the cycle and the current phase of the cycle (i.e. washing, rinsing or spinning).
Do not try to open the door when the washing programme is in progress. The
screen will indicate when the door can be opened.
Do not open the dispenser drawer during the wash programme.
If you wish to pause the programme press the button; after two minutes
you will be able to open the door. To cancel the programme please refer to
the ‘Cancelling and changing the programme’ section of this manual.
When the programme has finished
Wait approximately two minutes for the door lock to be released. When the
Inter@ct display indicates DOOR OPEN (DEUR OPEN) it will then be safe to
open the door.
Switch off the machine by turning the programme selector to the OFF position
so that it will be ready the next time you use the machine (this action resets
the memory in the machine).
Open the door and remove the laundry.
Disconnect the plug from the mains power supply and turn off the water
supply every time you finish using it.
34
Selecting the wash programme
40003674Eng.qxd 11/11/2005 13:47 Page 34
Page 35

The washing machine needs very little
maintenance, but regular attention to a few small
details will ensure the continued performance of
your washing machine.
Do not use abrasive cleaners, scouring pads,
solvent based cleaners or polishes; wiping the
outside of the machine with a damp cloth will
suffice.
Cleaning the soap dispenser
1. Clean the compartments occasionally to
remove detergents and additives.
2. To do this you just need to pull the drawer
out firmly from the machine, but without
forcing it.
3. Clean the compartments and the syphon
cover under warm running water.
4. Clean the soap dispenser housing to remove
any residue of soap powder
5. Replace the drawer.
Cleaning the door glass
Regularly clean the door glass with a damp cloth.
A build up of soiling and residues from the water
may result in water leaking from the door.
Do not use abrasive cleaners as they can scratch
the surface.
35
Cleaning and Routine
Maintenance
40003674Eng.qxd 11/11/2005 13:47 Page 35
Page 36

36
Cleaning the filter
The washing machine is fitted with a special filter
to prevent items such as coins, buttons, etc.
blocking the discharge hose. These may be
retrieved by:
1. Removing the kickplate by gently pulling it
from the bottom in an outwards and
upwards direction.
2. Use the kickplate to collect the water still in
the filter.
3. Use a screwdriver to loosen the screw
holding the filter, turn the filter
anticlockwise until it stops, remove it and
clean it. After cleaning it, reassemble
following the above instructions in reverse
order.
Replace the kickplate.
We recommend that the filter be cleaned
frequently, at least once a month.
Maintenance wash
Using small quantities of detergent and low
temperature wash programmes can cause the
gradual build up of grease, dirt and scale. Over
time these deposits can damage your laundry and
your machine. They can also cause your machine
to smell. We recommend that you carry out a
maintenance wash a couple of times per year to
keep your machine and pipe work clean and free
of these deposits. Simply run the Cottons 90
programme without a load and with the normal
quantity of detergent.
This wash will take approximately
2 hours to complete.
40003674Eng.qxd 11/11/2005 13:47 Page 36
Page 37

What might be the cause of...
Defects you can remedy yourself
Before calling GIAS Service for technical advice please run through the
following checklist. A charge will be made if the machine is found to be
working or has been installed incorrectly or used incorrectly. If the problem
persists after completing the recommended checks, please call GIAS Service,
they may be able to assist you over the telephone.
The machine will not start…
● Close the door. Check that there is power to the machine. Select a
programme and press . Check if the DOOR LOCKED (DEUR OP SLOT)
message is displayed.
If it is not, check the following:
1. Is the machine connected to the electrical supply?
2. Is the electrical supply OK, check another socket?
3. Has the fuse on the machine blown? If so, replace it.
● If the DOOR LOCKED (DEUR OP SLOT) message is displayed and the
machine does not start this means that the machine cannot fill with
water, check the following:
1. Check the programme dial is correctly aligned with the programme.
2. Is the water supply to the machine switched on?
3. Are the pipes kinked or restricted in any way?
Water does not drain away…
● Ensure that there is not a blockage in the drain hose or the hose is not
kinked.
● Is the drain hose installed correctly? If connected to the sink waste make
sure you have cut the membrane or removed the bung from the under
sink drainage unit.
● Check for foreign bodies in the filter. If present, clean the filter.
If you have found any of the above problems correct them and run the
machine through a spin cycle to drain the water.
● Is the function selected? If so, deselect the option and the programme
will complete (see page 25 for complete explanation of the function).
Water on the floor around the washing machine…
● Is the fill hose tightened? If so, replace the rubber washers and re-tighten.
● Is the standpipe or the household drain blocked? If so, clear the blockage
37
Troubleshooting
40003674Eng.qxd 11/11/2005 13:47 Page 37
Page 38

yourself or call a plumber.
● Is there clothing or dirt between the door gasket and the door glass?
Ensure that the door glass and gasket are kept clean and free of laundry
when loading the machine.
The machine does not spin…
● Water has not drained from the machine? Check the points highlighted
above.
● Have you selected an option that changes the spin profile ( or change
of spin speed using the button)? Check the feature in the description
of the controls.
● Is the load unbalanced? To reduce noise and vibration and improve the
machine’s reliability and life, the machine is fitted with an electronic
sensor that detects if the load is unbalanced. To improve the spin
performance the load can be re-distributed by hand at the end of the
cycle and then re-spun.
The machine is noisy or vibrates a lot during the cycle…
● Has the transit system been fully removed? Check that the bracket and
the polystyrene packing have been taken off the machine.
● Are there any loose items in the pockets of clothing that can rattle in the
drum and cause damage?
● Is the load unbalanced? Stop the programme, re-distribute the load and
restart.
The programme takes a long time…
● Some programmes do take a long time (over 2 hours). Low water
pressure can increase the length of the programme.
The door will not open…
● Has the programme finished?
Does the machine show 'PROGRAM ENDED DOOR OPEN' ('EINDE PROGR.
DEUR OPEN')? If not the programme is not complete, wait a further
couple of minutes and the message 'PROGRAM ENDED DOOR OPEN'
('EINDE PROGR. DEUR OPEN') will appear and you will be able to open
the door.
● If water remains in the drum refer to 'Water does not drain away…'
above.
Problem with the dispenser…
● Not all the detergent has been flushed away.
1. Check the water supply tap is fully turned on.
2. Check the inlet hose is not kinked.
● The dispenser drawer will not close properly.
1. Check the drawer is aligned properly.
38
40003674Eng.qxd 11/11/2005 13:47 Page 38
Page 39

2. Check the drawer is not clogged with detergent (see Cleaning and
Routine Maintenance).
● Steam is coming from the dispenser.
The machine is designed to vent through the drawer, this is nothing to
worry about.
Remember, you may be charged for the service call if incorrect installation or
misuse causes a problem with your machine.
Note:
The use of environmentally-friendly, phosphate-free detergents (check
detergent information on pack) can have the following effects:
● Waste water from rinsing may be cloudier because of the presence of a
white powder (zeolites) held in suspension, without the rinse
performance being adversely affected.
● Presence of white powder on laundry after washing, which is not
absorbed by the fabric and does not alter the colour of the fabric.
● The presence of foam in the final rinsing water is not necessarily an
indication of poor rinsing. Carrying out more rinse cycles does not serve
any purpose in such cases.
Power Failure
If there is a power failure the wash cycle will be interrupted, and the wash
programme and functions will be suspended. When the power is restored, the
wash programme and functions will restart from the same point and complete
the programme.
During a power failure the water can be drained and the load can be removed
from the machine as follows:
1. Switch off the machine both via the programme knob and the mains
power supply. Remove the plug from the mains power supply socket.
2. Carefully move the machine so the rear of the machine is accessible.
Please follow the safety precautions which we recommend under the
Safety Notes section of this manual.
3. Unclip the drain hose from the rear panel of the machine and lower the
hose into a bowl on the floor. When the bowl is full raise the end of the
drain pipe to a height higher than the top of the appliance to stop the
flow of water. Empty and replace the bowl and continue draining the
machine until empty.
4. Once the machine is fully drained of water, clip the hose to the rear of
the machine. Open the door and remove the load.
The door can be opened approximately 2 minutes after the power failure.
Do not force open the door.
39
40003674Eng.qxd 11/11/2005 13:47 Page 39
Page 40

Inleiding . . . . . . . . . . . . . . . . . . . . . . . . . . . . . . . . . . . . . . . . . . . . . 41
Afleveringsinformatie . . . . . . . . . . . . . . . . . . . . . . . . . . . . . . . . . . . . . . . . . . . 41
Wel doen . . . . . . . . . . . . . . . . . . . . . . . . . . . . . . . . . . . . . . . . . . . . . . . . . . . . . 41
Niet doen . . . . . . . . . . . . . . . . . . . . . . . . . . . . . . . . . . . . . . . . . . . . . . . . . . . . . 42
Uitpakken van het product . . . . . . . . . . . . . . . . . . . . . . . . . . . . . 43
Installatie . . . . . . . . . . . . . . . . . . . . . . . . . . . . . . . . . . . . . . . . . . . . . . . . . 45
Kies een plaats . . . . . . . . . . . . . . . . . . . . . . . . . . . . . . . . . . . . . . . . . . . . . . . . . 45
Stroomtoevoer . . . . . . . . . . . . . . . . . . . . . . . . . . . . . . . . . . . . . . . . . . . . . . . . . 46
Waterkraan . . . . . . . . . . . . . . . . . . . . . . . . . . . . . . . . . . . . . . . . . . . . . . . . . . . 46
Aansluiten op de koudwaterkraan . . . . . . . . . . . . . . . . . . . . . . . . . . . . . . . . . 47
De machine aansluiten op de afvoer. . . . . . . . . . . . . . . . . . . . . . . . . . . . . . . . 48
De machine op zijn plaats zetten . . . . . . . . . . . . . . . . . . . . . . . . . . . . . . . . . . 49
De voeten verstellen . . . . . . . . . . . . . . . . . . . . . . . . . . . . . . . . . . . . . . . . . . . . 49
De installatie uittesten . . . . . . . . . . . . . . . . . . . . . . . . . . . . . . . . . . 50
Wasadvies . . . . . . . . . . . . . . . . . . . . . . . . . . . . . . . . . . . . . . . . . . . . . . . . 51
Uw wasmachine laden . . . . . . . . . . . . . . . . . . . . . . . . . . . . . . . . . . . . . . . . . . . 51
Was sorteren . . . . . . . . . . . . . . . . . . . . . . . . . . . . . . . . . . . . . . . . . . . . . . . . . . 52
De zeeplade . . . . . . . . . . . . . . . . . . . . . . . . . . . . . . . . . . . . . . . . . . . . . . 53
Dosering wasmiddel. . . . . . . . . . . . . . . . . . . . . . . . . . . . . . . . . . . . . . . . . . . . . 53
Doseerinstructies . . . . . . . . . . . . . . . . . . . . . . . . . . . . . . . . . . . . . . . . . . . . . . . 54
Inter@ct 3D voor het eerst gebruiken . . . . . . . . . . . . . . . . . 55
Het bedieningspaneel . . . . . . . . . . . . . . . . . . . . . . . . . . . . . . . . . . . 58
Wasopties. . . . . . . . . . . . . . . . . . . . . . . . . . . . . . . . . . . . . . . . . . . . . . . . . 61
Automatische voorzieningen. . . . . . . . . . . . . . . . . . . . . . . . . . . . . . . . . . . . . . 66
Programmakeuzeschakelaar . . . . . . . . . . . . . . . . . . . . . . . . . . . . 67
Speciale Programma’s . . . . . . . . . . . . . . . . . . . . . . . . . . . . . . . . . . . . . . . . . . . 68
Dagelijkse programma’s. . . . . . . . . . . . . . . . . . . . . . . . . . . . . . . . . . . . . . . . . . 69
Programmaoverzicht. . . . . . . . . . . . . . . . . . . . . . . . . . . . . . . . . . . . . 70
Een typische was. . . . . . . . . . . . . . . . . . . . . . . . . . . . . . . . . . . . . . . . . 71
Wasprogramma kiezen . . . . . . . . . . . . . . . . . . . . . . . . . . . . . . . . . . . . . . . . . . 72
Start de wascyclus . . . . . . . . . . . . . . . . . . . . . . . . . . . . . . . . . . . . . . . . . . . . . . 72
Schoonmaken en Onderhoudsbeurten . . . . . . . . . . . . . . . . 73
Storingen . . . . . . . . . . . . . . . . . . . . . . . . . . . . . . . . . . . . . . . . . . . . . . . . . 75
Stroomstoring . . . . . . . . . . . . . . . . . . . . . . . . . . . . . . . . . . . . . . . . . . . . . . . . . 77
40
40003674Dutch.qxd 11/11/2005 14:26 Page 40
Page 41

Inleiding
Lees deze instructies zorgvuldig door en gebruik deze
machine op basis van deze aanwijzingen. Dit boekje
geeft u naast belangrijke richtlijnen voor het veilige
gebruik de veilige installatie en het veilige onderhoud
van de machine ook enkele nuttige tips over hoe u de
beste resultaten bekomt wanneer u met deze machine
wast.
Bewaar alle documentatie op een veilige plek zodat u
of de toekomstige eigenaars van de machine ze in de
toekomst opnieuw kunnen raadplegen.
Afleveringsinformatie
Controleer dat de volgende items samen met de
wasmachine werden geleverd:
● Handleiding
● Garantiekaart
● Onderdrukkingsstekker
● Vulslang & gebogen slangsteun
(zie Uitpakken en installatievoorschriften)
● Onderpaneel en 2 drukklemmen
● Energiekeurmerk
Wel doen
● Alle verpakkingsmaterialen zijn milieuvriendelijk
en recycleerbaar. Doe de verpakkingsmaterialen
op een milieuvriendelijke manier van de hand.
Uw gemeente kan u informeren over de beste
manier om deze materialen weg te ruimen.
● Wanneer u een oude wasmachine van de hand
doet, moet u voor alle veiligheid de stekker uit
het stopcontact halen, het stroomsnoer afknippen
en dit samen met de stekker vernietigen. Om te
voorkomen dat kinderen zichzelf in de machine
opsluiten, breekt u de scharnieren of het slot van
de deur.
● Deze machine is alleen bestemd voor gebruik
thuis, nl voor het wassen, spoelen en
centrifugeren van huishoudelijke stoffen en
kleding.
41
Controleer of de
machine schade
heeft opgelopen
tijdens het vervoer.
Indien dit het
geval is, neem dan
contact op met
GIAS.
40003674Dutch.qxd 11/11/2005 14:26 Page 41
Page 42

Niet doen
● Raak de machine niet aan als uw handen of
voeten nat of vochtig zijn.
● Leun niet tegen de deur als u de machine laadt
en gebruik de deur niet om de machine op te
tillen of te verplaatsen.
● Gebruik geen adapters, meervoudige stekkers
en/of verlengsnoeren.
● Sta niet toe dat kinderen met de machine of de
bediening ervan spelen.
● Open de deur niet als er water zichtbaar is in de
trommel, wanneer het wasprogramma bezig is of
als de mededeling DEUR OPEN op het display
verschijnt.
Europese richtlijn
2002/96/EC
Dit apparaat voldoet aan de Europese richtlijnen
2002/96/EC voor elektrische en elektronische afval.
Door dit apparaat correct te verwijderen, helpt u het
potentiële negatieve gevolg voor de omgeving en
menselijke gezondheid te voorkomen, welke anders
door onjuiste verwijdering zou kunnen worden
veroorzaakt.
Het symbool op het product duidt aan dat dit product
niet behandeld zal worden als huishuidelijk afval. In
plaats daarvan zal het apparaat naar het verzamelpunt
voor de recycling van elektrische en elektronische
uitrusting gaan.
De verwijdering moet in overeenstemming met
plaatselijke milieuvoorschriften voor afvalverwerking
uitgevoerd worden.
Voor meer gedetailleerde informatie over de
verwijderingvan dit product, neemt u contact op met
uw gemeenlijke reinigingsdienst of de dealer waar u
het apparaat heeft gekocht.
3
Als u de
bovenstaande
aanwijzingen niet
opvolgt, kan de
veiligheid van de
machine niet
worden
gegarandeerd.
Indien het
probleem met uw
machine wordt
veroorzaakt door
misbruik, kunnen
de kosten van de
onderhoudsbeurt
aan u worden
doorberekend.
Als de machine
niet goed
functioneert of
defect raakt, zet
hem uit, haal de
stekker uit het
stopcontact, draai
de waterkraan
dicht en laat de
machine
ongemoeid.
Wendt u tot GIAS-
Service voor
reparaties.
40003674Dutch.qxd 11/11/2005 14:26 Page 42
Page 43

Uitpakken van het product
Haal de machine zo dicht mogelijk bij de plek waar hij
geplaatst zal worden uit de verpakking.
1. Snij de verpakking aan de onderkant voorzichtig
open.
2. Leg de machine op zijn achterkant en verwijder
de onderkant en de twee polystyreen
afstandstukken aan iedere zijde van de machine.
We raden aan dat een tweede persoon helpt bij
het tillen en verplaatsen van de machine.
3. Zet de machine weer rechtop, verwijder de rest
van de verpakking en de middelste schroef in de
vervoerstang.
4. Verwijder de vier schroeven in de vervoerstang en
verwijder de vervoerbeugel.
43
Gooi de verpakking veilig weg. Zorg dat
de verpakking buiten bereik van
kinderen blijft, het vormt een potentieel
gevaar.
40003674Dutch.qxd 11/11/2005 14:26 Page 43
Page 44

5. Neem het meegeleverde onderpaneel en bevestig
de twee zelfklevende stroken door het papier aan
één kant te verwijderen en de stroken aan beide
zijden van het onderpaneel te plaatsen.
6. Kantel de machine naar voren en plaats het
onderpaneel onder de voorkant van de machine.
Verwijder het overgebleven papier van de
zelfklevende stroken en plaats het onderpaneel
aan de onderkant de kast.
7. Maak het onderpaneel met de twee plastic
bevestigingsclips vast aan de onderkant van de
machine. Zet de machine weer rechtop.
44
Wij bevelen u aan de transportbeugel en de schroeven te
bewaren, zodat u de machine in de toekomst veilig kunt
vervoeren.
De fabrikant is niet verantwoordelijk voor beschadigingen aan de
machine die het gevolg zijn van het niet opvolgen van de
instructies voor het losmaken van de transportbeveiliging. De
gebruiker is verantwoordelijk voor alle installatiekosten.
40003674Dutch.qxd 11/11/2005 14:26 Page 44
Page 45

8. Bedek de middelste opening in de achterkant van
de machine met het afdekkapje dat u in het zakje
met instructies terugvindt.
Kies een plaats
● Zodra de machine is geïnstalleerd, controleert u
of de stekker en de waterkraan gemakkelijk
bereikt kunnen worden.
● Zorg ervoor dat er genoeg ruimte is voor de
machine. Kies een plaats van tenminste 600 mm
breed en 850 mm hoog. Zorg ook voor voldoende
ruimte om de deur helemaal te openen, zodat u
de machine gemakkelijk kunt laden en legen.
● Houd de ruimte onder en rondom de machine vrij
van brandbare materialen zoals pluizen, papier,
doeken, chemicaliën etc.
45
Installatie
Sluit de machine
niet aan en start
deze niet voordat
de installatie is
voltooid.
40003674Dutch.qxd 11/11/2005 14:26 Page 45
Page 46

Stroomtoevoer
Wasmachines functioneren bij een spanning van 230V,
50 Hz eenfasig. Controleer of het voedingscircuit ten
minste 16A bedraagt.
Elektriciteit kan erg gevaarlijk zijn.
Deze wasmachine moet geaard zijn.
Het stopcontact en de stekker van de machine moeten
van hetzelfde soort zijn.
Gebruik geen meervoudige adapters en/of
verlengsnoeren.
De draden in het stroomsnoer hebben de volgende
kleuren:
Blauw NEUTRAAL
Bruin ONDER STROOM
Groen en Geel AARDVERBINDING
CE apparaat voldoet aan de Europese richtlijn
89/336/EEC, 73/23/EEC en volgende aanvullingen.
Waterkraan
● De waterdruk van het koude water moet tussen
0,05-0,8 Mpa zijn.
● Sluit de machine niet aan op een
doorstroomgeiser met één aftappunt.
● U moet bij de waterkraan kunnen als de machine
is geïnstalleerd.
● Controleer voor u de vulslang aansluit of er water
uit de te gebruiken waterkraan komt.
46
Indien het
probleem met uw
machine wordt
veroorzaakt door
een verkeerde
installatie, kunnen
de kosten van de
onderhoudsbeurt
aan u worden
doorberekend.
Als de stroomkabel
van het toestel
beschadigd is, dan
moet hij vervangen
worden door een
speciaal snoer dat
alleen bij
servicedienst van
GIAS verkrijgbaar
is. De kabel moet
door een bekwaam
persoon worden
geïnstalleerd.
40003674Dutch.qxd 11/11/2005 14:26 Page 46
Page 47

Aansluiten op de
koudwaterkraan
Deze machine heeft een vulslang met aan het uiteinde
een getapte beslagring van 19 mm. De slang wordt aan
het getapte aansluitpunt van de machine en aan de
waterkraan aangesloten.
Gebruik alleen de bijgeleverde nieuwe slang om de
machine aan te sluiten en zorg ervoor dat de
zegeldrukringen binnen de slangverbindingen op hun
plaats zitten.
Gebruik oude slangen die op bestaande installaties
aangesloten zijn niet opnieuw.
De verbindingen niet te strak aandraaien. Met de hand
aandraaien is voldoende.
Klem de slang niet en leg er geen knik in.
1. Sluit het gebogen uiteinde van de meegeleverde
slang aan op de getapte invoer aan de achterkant
van de machine.
Sluit de grijze leiding aan op de witte getapte
invoer van de machine.
2. Draai de verbinding met de hand aan.
3. Sluit de rechte uiteinden van de leidingen aan op
de waterkraan; let erop dat er geen knikken in
zitten.
4. Draai de waterkraan open en controleer of er
lekken zijn. Als er een lek is, zet de waterkraan
uit, koppel de slang af en controleer of de
zegeldrukringen goed zitten. Sluit de slang weer
aan en zet de waterkraan aan.
Aqua-stop
Enkele aantal modellen wordt geleverd met een
speciale dubbelwandige slang met een waterafsluiter
(A). Als de binnenslang barst, sluit de klep automatisch
de watertoevoer af om een overstroming te
voorkomen. Het lichtje wordt rood (B). Wanneer dit
gebeurt, draait u de watertoevoer direct dicht en
bestelt u een vervangende slang bij de GIAS-Service
De installatie gebeurt op dezelfde manier als bij een
conventionele slang. U sluit het kraanuiteinde van de
slang met de waterstop aan op de waterkraan.
47
A
B
40003674Dutch.qxd 11/11/2005 14:27 Page 47
Page 48

De machine aansluiten op de afvoer
De aansluiting van deze machine moet voldoen aan de waterreguleringen.
Waterverordeningen verbieden aansluiting op een oppervlaktewaterriool.
Kies de afvoeroptie die u wenst en volg onderstaande instructies op.
Optie 1
Aansluiten van afvoerleiding (afvoerfilter)
Bevestig de gebogen slangsteun aan de afvoerpijp. Plaats het tenminste 800 mm boven
de vloer.
Verwijder de onderdrukkingsstekker of snij het membraan van het afvoersysteem af en
bevestig de afvoerleiding met een slangklem stevig aan het afvoersysteem.
Bevestig de gebogen slangsteun op tenminste 800 mm hoogte om te voorkomen dat
water in de machine terugstroomt.
48
Alle machines zijn voor het verlaten van de fabriek getest met
water. Er kan dus een kleine hoeveelheid water in de trommel en
afvoerslang achtergebleven zijn.
Als de installatie niet juist is uitgevoerd, kan er water uit de
machine stromen.
800 mm
slangbeugel
gebogen slangsteun
gootsteen
flexibele
afvoerslang
sifon met
slanghulpstuk
40003674Dutch.qxd 11/11/2005 14:27 Page 48
Page 49

Optie 2
In een standpijp
Zorg ervoor dat de standpijp niet naast een
stopcontact zit.
Bevestig de gebogen slangsteun aan de afvoerpijp.
Installeer de slang in de standpijp en zorg ervoor dat
de pijp tenminste 500 mm boven de vloer zit.
Plaats de afvoerpijp ongeveer 100 mm in de
standpijp.
De machine op zijn
plaats zetten
De machine is erg zwaar en moet voorzichtig worden
verplaatst. Om belasting en mogelijk letsel te
voorkomen, raden we raden aan dat twee mensen de
machine verplaatsen.
● Let erop dat u de vloer niet beschadigt tijdens
het verplaatsen van de machine.
● Zorg ervoor dat de slang aan de achterkant van
de machine niet knikt of beschadigd raakt als u
de machine naar de definitieve plek verplaatst.
De voeten verstellen
Als de machine is geplaatst, moeten de voeten
worden versteld zodat de machine waterpas staat. Als
de machine niet waterpas staat, kan hij lawaai maken
of van zijn plaats raken.
Verstel de voeten op de hoeken aan de voorkant van
de machine tot de machine stevig en waterpas staat.
Wanneer de machine stevig en waterpas staat, draait
u de sluitmoeren op de twee voeten aan.
49
De machine niet
vastpakken bij de
deur tijdens het
slepen of tillen.
100 mm
min 500 mm
40003674Dutch.qxd 11/11/2005 14:27 Page 49
Page 50

Raadpleeg ‘Kiezen van het wasprogramma’ voor
informatie over het kiezen van programma’s.
1. Draai de waterkraan open en controleer of de
vulslang lekt.
2. Zet de stroomtoevoer aan.
3. Kies het centrifugeerprogramma en druk op
de -toets om de machine te starten. Laat het
programma één minuut doorgaan, annuleer dan
het programma door de keuzeschakelaar weer op
OFF te zetten. Hierdoor wordt al het water dat in
de machine was gebleven na de fabriekstesten
verwijderd.
4. Controleren of de machine koud water opneemt:
Kies het spoelprogramma en druk op de toets om de machine te starten.
Laat de trommel ronddraaien tot het water uit de
trommel is gepompt. Controleer of de
afvoeruitlaat lekt of overstroomt.
5. Zet de machine aan het eind van de cyclus uit
door de programmaknop op OFF te zetten.
6. Kies het centrifugeprogramma en druk op
de -toets om de machine te starten. Als het
langer dan één minuut duurt voor het water uit
de machine is afgevoerd, controleer dan of er
slagen in de afvoerslang zitten.
De machine is nu getest.
We adviseren om na het voltooien van de installatie de
machine te laten draaien om er zeker van te zijn dat de
trommel helemaal schoon is na testen en opslag. Kies
Katoen 90 en zet de machine aan voor een hele cyclus
met alleen wasmiddel en water.
50
De installatie uittesten
Dit
programma
duurt
ongeveer
2 uur.
40003674Dutch.qxd 11/11/2005 14:27 Page 50
Page 51

Met de volgende tips krijgt u de beste resultaat van de
machine, op de meest milieuvriendelijke en zuinige
wijze. Het is ook belangrijk om te weten welke
artikelen niet in de was moeten. Zo zorgt u ervoor dat
de machine veilig en betrouwbaar blijft werken.
Uw wasmachine laden
Wij raden u aan om een volle lading was in uw machine
te stoppen om het energie-, water- en zeepgebruik te
reduceren. U kunt wel 50% energie besparen als u één
volle lading wast in plaats van twee halve.
Laad niet meer in de machine dan aangegeven. Door te
zwaar laden wast de machine minder goed en kunnen
de machine en de was beschadigd raken.
Wanneer is voorwassen echt
noodzakelijk?
Alleen bij een erg vuile was! U kunt 5 tot 15% energie
besparen door minder vuile was niet voor te wassen.
Behandel lastige vlekken voor met een wasbare
vlekkenverwijderaar.
Welke wastemperatuur moet u
kiezen?
Als u vlekoplossers gebruikt, hoeft u uw was niet op
meer dan 60°C te wassen.
Met een wastemperatuur van 40°C kunt u tot 50%
energie besparen.
Zeer vuile was
Om een zo goed mogelijk resultaat te bereiken bij het
wassen van zeer vuile lading, wordt u aanbevolen om
de hoeveelheid was die u in de machine stopt te
reduceren. Wanneer er meer ruimte is in de trommel,
kunnen de artikelen vrijer circuleren en beter worden
gewassen.
51
Wasadvies
40003674Dutch.qxd 11/11/2005 14:27 Page 51
Page 52

Was sorteren
Welke artikelen niet wassen
We raden aan beugel-bh’s niet in de machine te wassen.
Als de beugels vast komen te zitten, kunnen ze de
kleding en de machine beschadigen. Als het wasetiket
vermeldt dat de bh in de machine kan worden
gewassen, raden we aan de bh in een waszak te doen.
Aanbevelingen
Volg altijd de aanwijzingen op het label op.
Doe ritsen dicht, bindt koorden vast en sluit
drukknoopsluitingen om te voorkomen dat de
kledingstukken aan elkaar vast komen te zitten. Zorg
ervoor dat muntgeld en andere kleine artikelen uit de
zakken zijn verwijderd.
Controleer dat er geen metalen voorwerpen in de was
zitten. Deze kunnen de was en de machine
beschadigen.
Doe kleine artikelen in een waszak.
52
Was artikelen die
geen wasetiket
hebben niet in de
machine.
Was geen artikelen
die daarvoor met
oplosmiddel zijn
behandeld.
40003674Dutch.qxd 11/11/2005 14:27 Page 52
Page 53

Dosering wasmiddel
Alleen wasmiddelen gebruiken die geschikt zijn voor gebruik in wasmachines. U
verkrijgt het beste resultaat voor uw was als u zo min mogelijk chemische producten
gebruikt. U verzorgt uw was het beste als u rekening houdt met de vuilheid én het
juiste wasmiddel kiest.
De hoeveelheid wasmiddel hangt af van:
● De waterhardheid.
Afhankelijk van de hardheid van het water en het soort wasmiddel dat wordt
gebruikt, kunt u de hoeveelheid wasmiddel reduceren.
Hoe zachter het water, hoe minder wasmiddel u nodig heeft.
● Hoe vuil de was is.
U kunt de hoeveelheid wasmiddel verminderen, afhankelijk van hoe vuil de was is.
Gebruik minder wasmiddel voor wasgoed dat niet die niet erg vuil is.
● De hoeveelheid was.
U kunt de hoeveelheid wasmiddel verminderen wanneer u een kleine was heeft.
Voor een kleinere lading is minder wasmiddel nodig.
De dosering die op de verpakking van wasmiddelen voor fijn wasgoed wordt vermeld, is
vaak al voldoende voor een kleine was. Volg altijd de doseringsinstructies op de
verpakking op.
53
De zeeplade
NIET meer dan de maximale dosis toevoegen
VAKJE I
Voorwasmiddel
Maximale dosering
100 ml poeder
VAKJE II
Hoofdwasmiddel
Maximale dosering
200 ml poeder
VAKJE
Wasverzachter
Maximale dosering 200 ml
40003674Dutch.qxd 11/11/2005 14:27 Page 53
Page 54

Doseerinstructies
De wasmiddellade is onderverdeeld in 3 vakjes:
● het linkervakje, met daarop “II”, is voor zeep die
voor de hoofdwas wordt gebruikt.
● het middelste vakje, met daarop is voor alle
andere middelen, wasverzachters, geurmiddelen,
stijfsel, glansmiddelen, enz.
● het rechtervakje, met daarop “I”, is voor zeep die
voor de voorwas wordt gebruikt.
Wasmiddel in de trommel
Vloeibare wasmiddelen en sommige tabletten worden
in de trommel gedaan met het aanbevolen zeepbakje.
Dit wordt rechtop geplaatst, bovenop de was, achterin
de trommel. Sommige tabletten zijn gemaakt voor
gebruik in de zeeplade. Kijk op de verpakking van het
wasmiddel voor informatie.
54
Doe geen andere
artikelen in de lade
dan de
wasmiddelen die
gemaakt zijn om
vanuit de lade in
de trommel te
worden gespoeld.
Andere middelen
kunnen
verstopping of
schade
veroorzaken.
40003674Dutch.qxd 11/11/2005 14:27 Page 54
Page 55

Deze machine kan zelfs worden gebruikt als u de Inter@ct-installatie niet programmeert.
Deze machine heeft echter functie voor Start Uitstel en Instellen Eindtijd. Om ervoor te
zorgen dat deze goed werken, moet Inter@ct geprogrammeerd zijn. Dit is niet moeilijk,
aangezien tijdens de productie er speciaal voor is gezorgd dat deze machine
gemakkelijk en effectief te gebruiken is.
De machine programmeren
Inter@ct moet geprogrammeerd worden, zodat de juiste klokinstelling, taal en
persoonlijke voorkeuren worden gebruikt. Wanneer de machine aan staat en de
programmaknop van de UIT-positie naar een programma wordt gedraaid, dan verschijnt
een welkomstbericht.
Dit bericht wordt korte tijd weergegeven, terwijl de machine het gekozen programma
herkent. Wanneer de machine klaar is, verschijnen de programmagegevens op het
display, en vanaf dat moment kunt u de machine programmeren.
Bijvoorbeeld
Let erop dat u bij gebruik van het Inter@ct-menu steeds 30 seconden heeft om uw
keuze te maken. Mocht deze tijd verstrijken, dan gaat het display terug naar het
startscherm. U hoeft alleen het Inter@ct-menu opnieuw te openen om met de
programmering door te gaan.
55
Inter@ct 3D voor het eerst
gebruiken
WELKOM!
00:00
00
00
WITTE WAS
STERK VERVUILD
90
11
Centrifugesnel
heid x100
Gekozen
programma
Temperatuur
(°C)
40003674Dutch.qxd 11/11/2005 14:27 Page 55
Page 56

Toegang tot het menu
Houd de - en de -toetsen samen 5 seconden lang ingedrukt, of totdat u een piep
hoort.
De menuopties kunnen veranderd worden door op de -toets te drukken. Om een
optie te bevestigen en in te voeren, drukt u op de -toets.
KIES TAAL (de standaardinstelling is NEDERLANDS)
Uw wasmachine werd automatisch in het Nederlands geprogrammeerd. Als u een
andere taal wenst, kunt u dit veranderen in dit instellingsmenu. Druk op om de
taal te veranderen. Druk op de toets tot de gewenste taal wordt aangegeven. Druk op
om uw keuze te bevestigen. Nadat u de gekozen taal heeft ingevoerd, geeft het
display Nieuwe Tijd Instellen aan.
STEL TIJD IN
Deze functie moet om twee redenen worden ingesteld. Ten eerste om de juiste tijd op
het scherm weer te geven en ten tweede om ervoor te zorgen dat de instellingen voor
Instellen Eindtijd/Start Uitstel goed werken.
U ziet op het display dat de uren van de klok knipperen. Om de uren in te stellen, drukt
u op de -toets tot het gewenste aantal verschijnt. Druk dan op de -toets om het
gekozen getal in te voeren. Daarna knipperen de minuten van de klok. Druk weer op de
-toets tot het gewenste aantal minuten verschijnt en druk op om de keuze in te
voeren. Wanneer u de tijd heeft ingesteld, vraagt het display of u de tijdstand wilt
instellen.
STEL TIJD IN (standaardinstelling – ABSOLUUT)
Met tijdstand instellen kunt u kiezen hoe u de functies Instellen Eindtijd Programma en
Start Uitstel wilt regelen.
U krijgt twee opties. Met de eerste, Absolute Tijdstand (ABSOLUUT), kunt u de precieze
tijd instellen waarop u wilt dat het programma begint of eindigt, bijv. programma
start/eindigt om 8.00 uur. Met de tweede, Relatieve Tijdstand (RELATIEF), kunt u de start of
het einde van de wascyclus uitstellen door uren toe te voegen aan de tijd die de klok op
dat moment aangeeft, bijv. programma start/eindigt over 4 uur en 30 minuten.
U kunt de optie kiezen die u wenst door op de -toets te drukken tot de optie van
uw keuze verschijnt. Daarna drukt u op de -toets om de door u gekozen optie te
bevestigen.
Beide opties zijn erg nuttig, maar absolute tijdstand is gemakkelijker te gebruiken
omdat u niet hoeft uit te rekenen over hoeveel uren u wilt dat de machine de gekozen
cyclus begint of beëindigt.
56
STEL TIJD IN
00:08
40003674Dutch.qxd 11/11/2005 14:27 Page 56
Page 57

Wanneer u uw voorkeursstand heeft ingevoerd, vraagt het display u om de laatste piep
te activeren (Eindsignaal).
EINDSIGNAAL (standaardinstelling – JA)
Dit is de optie waarmee een piepsignaal afgaat om u te informeren dat het
wasprogramma is afgelopen. Door op de -toets te drukken kunt u door de ‘JA’- en
‘NEE’-opties gaan.
Druk op de -toets om uw keuze te bevestigen. Het scherm gaat dan naar de
volgende fase en vraagt u of u het geheugen wilt activeren.
STEL GEHEUGEN? (standaardinstelling – NEE)
Dit is een handige functie als u vaak ladingen met hetzelfde programma wast. Als u op
‘STEL GEHEUGEN?’ drukt, vraagt u de machine om het laatste programma/de laatste
gebruikte functies te herinneren en ze in het geheugen op te slaan. Deze functie werkt
alleen voor de katoen-, fijne, synthetische en wolwasprogramma’s. Het geheugen slaat
geen instellingen binnen de speciale programmagroep op. Kies JA of NEE met de toets en bevestig uw keuze door op te -toets te drukken.
STEL DEMOSTAND (standaardinstelling – NEE)
Het display toont dan een bericht dat u vraagt of u de demostand wilt instellen. Stel
deze optie in op NEE als dit nog niet gedaan is. Deze functie is alleen voor gebruik van
SERVICE. Als de demostand op JA is ingesteld, zal het wasprogramma NIET beginnen als
u het Inter@ct 3D-menu verlaat. De demostand moet op ‘NEE’ staan voordat het
wasprogramma kunt starten. Kies NEE met de -toets en bevestig uw keus met de
-toets. Dan wordt u gevraagd of u het menu wilt verlaten.
EINDE MENU?
Als u tevreden bent met de gekozen instellingen, kunt u het menu verlaten door JA te
kiezen met de -toets. Bevestig deze keuze met de knop. Bent u echter niet
tevreden met sommige van de instellingen, kies dan NEE en u kunt opnieuw beginnen
met programmeren. Als u op de -toets drukt, kunt u elke optie apart inzien en
overslaan, totdat u de optie bereikt die u wilt veranderen.
Wanneer u helemaal tevreden bent met de menuopties die u heeft gekozen, kunt u het
menu verlaten. Het controleren van de installatie kan nu worden gedaan. Wilt u menuinstellingen op een later tijdstip veranderen, kunt u het menu openen zoals eerder
beschreven. Dan gaat u door de menuopties en verandert u iedere optie die u wilt
veranderen. Dit kan erg nuttig zijn voor het veranderen van het instellen nieuwe tijd bij
het begin of einde van Dagbesparing.
Eenmaal ingesteld blijven de opties in het geheugen van de machine opgeslagen, zelfs
wanneer de stekker uit het stopcontact wordt gehaald of als er zich een stroomstoring
voordoet.
57
40003674Dutch.qxd 11/11/2005 14:27 Page 57
Page 58

58
Het bedieningspaneel
De programmakeuzeschakelaar moet tussen iedere wasbeurt
terug worden gezet op OFF om de bediening opnieuw in te
stellen.
INTER@CT-
display
Snel
Strijken
Centrifuge-
snelheid
Snelle
Was
Voorwas Temperatuur-
keuze
Extra
spoelen
Start/Pauze
Start Uitstel/
Eindtijd instellen
Programma-
vergrendeling
Programma-
keuzeschakelaar
40003674Dutch.qxd 11/11/2005 14:27 Page 58
Page 59

De machine aanzetten
Zet de machine aan door het kiezen van een programma met de
programmakeuzeschakelaar. Het display geeft dan de naam van het programma aan, de
centrifugesnelheid en de wastemperatuur. Dit blijft staan tot u op de -toets drukt of
de programmakeuzeschakelaar terug zet op de UIT-stand.
Start/Pauze ( )
Start
Na het kiezen van het programma en de benodigde opties (zie het hoofdstuk Wasopties
van deze handleiding), drukt u een keer op de -toets om de wascyclus te starten.
Het display geeft dan aan dat de deur is vergrendeld en de machine begint met het
aftasten van de geladen was en vraagt u te wachten.
Nadat de machine de juiste parameters heeft geprogrammeerd, geeft het display de
geschatte tijd tot het eind van het programma aan. Deze berekening is gebaseerd op
een volle lading en wordt aangepast aan de omvang en samenstelling van de lading
tijdens de voortgang van de wascyclus.
59
WITTE WAS
STERK VERVUILD
90
11
WACHTEN AUB
STEL PARAMETER
90
11
EINDE: 2H 45M
WASSEN
90
11
40003674Dutch.qxd 11/11/2005 14:27 Page 59
Page 60

Pauze
U kunt het programma op elk moment pauzeren door de -toets ca. 3 seconden lang
ingedrukt te houden. Als de machine in de pauzestand is, verschijnt de volgende
mededeling op het display:
Na ongeveer twee minuten verschijnt op het display de volgende mededeling, wat
betekent dat deur kan worden geopend:
Om het programma opnieuw te starten, doet u de deur dicht en drukt u op de toets.
Het programma annuleren en veranderen
Om het programma te annuleren zet u de programmakeuzeschakelaar in de OFF-stand.
In deze stand is het display leeg omdat de machine dan UIT staat. Als een nieuw
programma is gekozen, geeft het display op de volgende manier aan dat het
programma is geannuleerd:
Om een andere wascyclus te starten, moet de programmakeuzeschakelaar nog eenmaal
op UIT worden gezet VOOR het volgende programma kan worden gekozen en gestart.
60
PAUZE
DEUR OP SLOT
90
11
PAUZE
DEUR OPEN
90
11
PROG. GESTOPT
90
11
40003674Dutch.qxd 11/11/2005 14:27 Page 60
Page 61

Keuze Centrifugesnelheid ( )
Door op de optietoets te drukken, kunt u de maximale centrifugesnelheid naar
eigen behoefte verminderen. Hierdoor kreuken de stoffen minder. De maximale
centrifugesnelheid kan variëren, afhankelijk van de specificaties van de machine.
Als de gekozen centrifugesnelheid lager is dan aangegeven in het programmaoverzicht,
gaat het lampje van de optietoets aan.
Snelle Was ( )
U kunt deze optie gebruiken voor de programma’s Katoen en Synthetisch ( ). Door
deze optie te selecteren, kunt u de wastijd met maximaal 50 minuten verkorten,
afhankelijk van het gekozen programma, de temperatuur en de lading, zonder aan
waskwaliteit in te boeten.
Voorwas ( )
Deze optie is beschikbaar bij de programma’s voor Katoen en synthetische ( ) stoffen.
is automatisch ingesteld op het Sportkleding-programma. Deze optie is vooral
handig voor een erg vuile was en kan onafhankelijk van het hoofdwasprogramma
worden gebruikt. De zeep voor dit programma moet in het eerste vakje van de
zeeplade, met de ‘I’ worden gedaan (Lees het hoofdstuk Zeeplade van deze
handleiding). We raden aan om slechts 20% te gebruiken van de hoeveelheid die wordt
gebruikt voor het hoofdwasprogramma.
61
Wasopties
De volgende opties moeten worden gekozen VOOR u op de -
toets drukt. Zodra de optie is gekozen, gaat het lampje op de
betreffende optietoets aan.
Centrifugesnelheid ÷ 100 toeren; dus in dit voorbeeld 11 = 1100 toeren
WITTE WAS
STERK VERVUILD
90
11
40003674Dutch.qxd 11/11/2005 14:27 Page 61
Page 62

Temperatuurkeuze ( )
Deze wasmachine is uitgerust met een regelbare temperatuurfunctie. Bij iedere druk op
de -toets verlaagt de wastemperatuur. U kunt meer energie besparen door de
temperatuur in te stellen tussen 15°C en 40°C. Als u de temperatuur instelt op 15°C is de
wastemperatuur gelijk aan de temperatuur van het ingevoerde water. Hiermee verlaagt
u het energiegebruik nog meer.
We raden aan dat de temperatuur die vermeld staat op de te wassen kleding nooit te
overschrijden. De machine staat niet toe dat een hogere temperatuur wordt ingevoerd
dan aangegeven in het programmaoverzicht.
Als de gekozen temperatuur lager is dan aangegeven in het programmaoverzicht, gaat
het lampje van de optietoets aan.
Extra spoelen ( )
Deze optie is beschikbaar bij de Katoen programma’s. Het verhoogt het aantal
spoelingen tot vijf (inclusief de laatste vastgestelde spoeling). Hiermee kunnen
huidirritaties door zeepresten voorkomen worden bij mensen met een uiterst gevoelige
huid. Wij raden u ook aan de -toets te gebruiken bij een erg vuile was waar veel
zeep voor nodig was of als er badstof werd gewassen, omdat hier veel zeep in blijft
hangen.
62
Temperatuur (°C)
WITTE WAS
STERK VERVUILD
90
11
40003674Dutch.qxd 11/11/2005 14:27 Page 62
Page 63
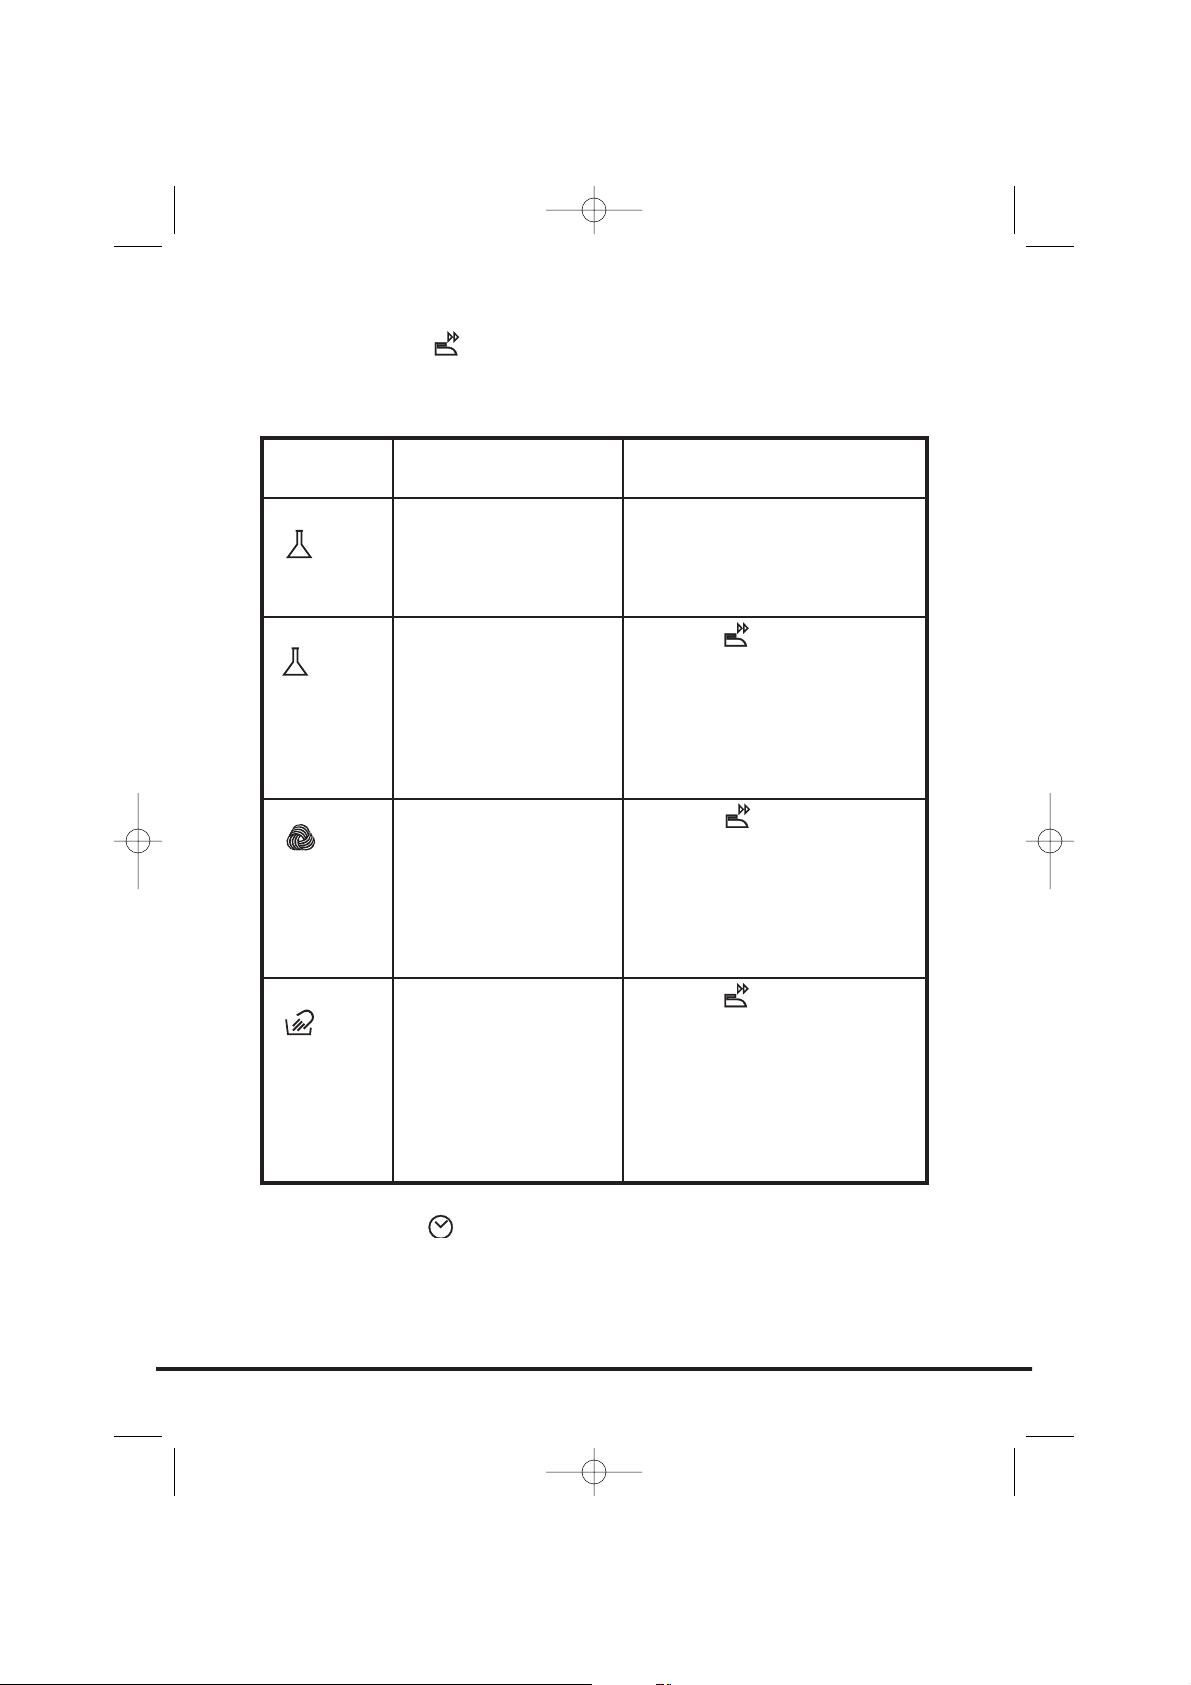
Snel Strijken ( )
Deze optie is alleen beschikbaar bij de programma’s Synthetisch, Acryl, Wolmerk en
Zijde.
Start Uitstel ( )
De opties Instellen Eindtijd Programma/Start Uitstel kunnen worden gebruikt als u wilt
dat de machine op een bepaald tijdstip klaar is (wel binnen 24 uur). Hoe deze toetsen
functioneren hangt af van welke tijdstand u heeft gekozen in het Inter@ct-menu.
63
Programma
Synthetisch
( 50)
Acryl
( 40)
Wolmerk
( )
Zijde
( )
Snel Strijken-functie
Aan het eind van het
programma zal de machine
kort centrifugeren, op erg
lage snelheid.
De machine stopt in de
laatste spoelfase en de
optie-indicatielampjes
knipperen. De lading blijft
in het water in de trommel
liggen, waardoor de was
minder kreukt en het
strijken gemakkelijker gaat
De machine stopt in de
laatste spoelfase en de
optie-indicatielampjes
knipperen. De lading blijft
in het water in de trommel
liggen, waardoor de was
minder kreukt en het
strijken gemakkelijker gaat
De machine stopt in de
laatste spoelfase en de
optie-indicatielampjes
knipperen. De lading blijft
in het water in de trommel
liggen, waardoor de was
minder kreukt en het
strijken gemakkelijker gaat
Benodigde handelingen om de
cyclus af te werken
Voor het kiezen van een volledige
centrifugecyclus zet u de draaiknop
op het gewenste
centrifugeprogramma (zie het
programmaoverzicht).
Druk op de -toets om het
programma verder af te werken. De
machine pompt dan het water weg
en het programma eindigt met een
korte centrifugecyclus. Tot slot
schudt het programma kort de
trommel om de lading los te
schudden.
Druk op de -toets en de machine
pompt het water weg en de cyclus
eindigt met een korte
centrifugecyclus.
Druk op de -toets en de machine
pompt het water weg om de cyclus
af te maken. De lading wordt niet
gecentrifugeerd en zal dus erg nat
zijn.
40003674Dutch.qxd 11/11/2005 14:27 Page 63
Page 64

1. Instellen Start Uitstel
Druk eenmaal op de -toets, en druk op de uur- en minuuttoetsen ( en )
totdat de gewenste tijd is ingesteld. Het display gaat terug naar de programmaopties als
u niet binnen 5 seconden begint met het instellen van de tijd. Zodra u de gewenste start
uitstel heeft ingesteld, drukt u op de -toets.
Als de Absolute Tijdstand is gekozen tijdens het instellen van het menu en u wilt de
start van het programma tot 8 uur uitstellen, verschijnt de volgende mededeling op het
display:
Als de Relatieve Tijdstand is gekozen tijdens het instellen van het menu en u wilt de
start van het programma met 4 uur en 30 minuten uitstellen, verschijnt de volgende
mededeling op het display:
2. Programma Eindtijd
Druk tweemaal op de -toets, en druk op de uur- en minuuttoetsen ( en )
totdat de gewenste tijd is ingesteld. Wanneer u de optie instellen eindtijd opent, toont
het display automatisch het eerdere tijdstip waarop het programma kan eindigen. Deze
tijd kan naar wens worden verlengd.
Als de Absolute Tijdstand is gekozen tijdens het instellen van het menu en u wilt het
beëindigen van het programma tot 8 uur uitstellen, verschijnt de volgende mededeling
op het display:
Als de Relatieve Tijdstand is gekozen tijdens het instellen van het menu en u wilt het
beëindigen van het programma met 4 uur en 30 minuten uitstellen, verschijnt de
64
PROG. START
OP 08:00
STARTUITSTEL
OVER 4H 30M
PROGR. EINDE
OM 08:00
40003674Dutch.qxd 11/11/2005 14:27 Page 64
Page 65

65
volgende mededeling op het display:
Deze optie kan op ieder moment na het instellen geannuleerd worden door vijf
seconden op de toets te drukken. Het indicatorlampje gaat uit en de zoemer klinkt.
Programmavergrendeling ( )
Dit is een handige functie waarmee u kunt voorkomen dat kinderen met de
optietoetsen spelen of met het ingestelde programma knoeien. Wanneer u het
programma en de gewenste optietoetsen heeft ingesteld, drukt u op de -toets.
Druk op de -toets om het bedieningspaneel te vergrendelen.
U annuleert deze functie door kort op de -toets te drukken, totdat u ziet dat het
lichtje boven de toets knippert. Terwijl dit lichtje knippert, drukt u op de -toets – op
het display staat dan dat de opties niet langer zijn vergrendeld en dat u de instelling
kunt veranderen.
Wanneer u de functies Start Uitstel/Instellen Eindtijd gebruikt,
kunnen wasmiddelen alleen in de zeeplade worden gedaan. Als u
zeep in de trommel op de was plaatst, en u laat de was lange tijd
ongemoeid, dan kan de zeep uw was beschadigen.
UITSTEL EINDE
OVER 4H 30M
BEVEILIGD
ONGEWIJZIGD
PROG. VAN SLOT
WIJZIG. OKAY
40003674Dutch.qxd 11/11/2005 14:27 Page 65
Page 66

Automatische
voorzieningen
Automatische variabele capaciteit
(Halve lading)
De wasmachine heeft een zelfregulerend
waterniveausysteem. Dit systeem stelt de machine in
staat om de optimale hoeveelheid water voor het
wassen en spoelen te gebruiken afgestemd op de
lading. Dit resulteert in minder water- en
elektriciteitsverbruik, zonder dat aan was- of
spoelprestatie wordt ingeboet. De gebruikte
hoeveelheid water en elektriciteit wordt altijd aan de
lading aangepast.
De wasmachine zorgt automatisch voor uitstekende
wasresultaten tegen de laagste kosten met respect voor
het milieu.
Balanceerbescherming
Dit model heeft een elektronische sensor die voelt of de
lading goed uitgebalanceerd is. Als de lading enigszins
onevenwichtig is, zal de machine de was automatisch
balanceren en dan normaal centrifugeren.
Als er, na een aantal keren proberen geen evenwicht
wordt bereikt, wordt een lagere centrifugesnelheid
gebruikt.
Als de lading erg onevenwichtig is, wordt de
centrifugefase geannuleerd. Dit vermindert de
trillingen, het lawaai en vergroot de betrouwbaarheid
en de levensduur van de wasmachine.
66
40003674Dutch.qxd 11/11/2005 14:27 Page 66
Page 67

67
Programmakeuzeschakelaar
Voor de behandeling van de verschillende soorten stoffen en verschillende gradaties van
bevuiling heeft de wasmachine verschillende programmagroepen voor iedere soort was,
temperatuur, centrifugesnelheid en duur (zie Programmaoverzicht).
Katoen
De programma’s voor katoen zijn gemaakt voor maximale was- en spoelkracht. Dankzij
de tussentijdse centrifugecycli, is de was gegarandeerd perfect gespoeld. De laatste
centrifugecyclus op de maximale centrifugesnelheid zorgt ervoor dat de was zo droog
mogelijk wordt.
Synthetische en gemengde stoffen
De was- en spoelprestatie wordt geoptimaliseerd door middel van verschillende
trommelrotatiesnelheden en waterniveaus. Door voorzichtig te centrifugeren, kreukt de
was minder.
Fijne was
Dit is een nieuw wasconcept, met een cyclus die bestaat uit elkaar opvolgende periodes
van activiteit en pauzes, vooral geschikt voor het wassen van uiterst fijne stoffen. Voor
het beste wasresultaat gebeurt het wassen en spoelen met hoge waterniveaus.
Spoelen, centrifugeren en afvoeren
Er zijn aparte programma’s beschikbaar voor spoelen, (inclusief de mogelijkheid om
wasverzachter toe te voegen), centrifugeren op 800 toeren of minder, indien gekozen
met de toets, en water uit de machine afvoeren.
40003674Dutch.qxd 11/11/2005 14:27 Page 67
Page 68

Speciale Programma’s
Woolmark ( )
Dit is een programma voor het wassen van stoffen met
het wolmerksymbool . De cyclus bestaat uit
afwisselende periodes van activiteit en pauzes. Voor het
beste wasresultaat gebeurt het wassen en spoelen met
hoge waterniveaus. Het programma heeft een
maximumtemperatuur van 30°C en eindigt met 3
spoelbeurten, één voor de wasverzachter, en één korte
centrifugecyclus.
Zijde ( )
Deze wasmachine heeft ook een voorzichtig zijde- en
handwasprogramma. Met dit programma wordt een
gehele wascyclus uitgevoerd voor kledingstukken met
de vermelding “Handwas” en wasartikelen die zijn
gemaakt van zijde of met de vermelding “Was als zijde”
op het etiket.
Het programma heeft een maximumtemperatuur van
30°C en eindigt met 3 spoelbeurten, één voor de
wasverzachter, en geen laatste centrifuge
centrifugecyclus.
Sports
Deze wasmachine heeft een uniek “Sportkleding”programma.
Het is speciaal voor een lading was die sportkleding
bevat, die niet bij hogere temperaturen gewassen kan
worden, en is gericht op het verwijderen van het vuil en
de vlekken die door deelname aan sportactiviteiten
worden veroorzaakt.
Dit programma begint met een koude voorwas die al
het extra vuil afbreekt en losweekt, en wast de lading
daarna op een koele temperatuur van 30°C, gevolgd
voor twee spoelbeurten (één is voor de wasverzachter)
en een langzame centrifugecyclus voor de beste
verzorging van uw vuile, fijne kleding.
Het wasmiddel voor het voorwasgedeelte van het
programma moet in vakje I worden gedaan en het
hoofdwasmiddel moet in vakje II worden gedaan. Volg
de instructies in het hoofdstuk ‘De Zeeplade.
68
40003674Dutch.qxd 11/11/2005 14:27 Page 68
Page 69

69
59' KLASSE A
Dit speciaal ontworpen programma handhaaft de
wasprestaties van hoge kwaliteit, aangeduid met de ‘A’,
terwijl het de wastijd enorm verkort. Het programma is
gemaakt voor een maximale lading van 3,5 kg en
bedoeld voor katoenen stoffen en kleurechte artikelen
tot 60°C. Het programma eindigt met twee spoelingen en
een zeer snelle centrifugecyclus.
Dagelijkse programma’s
Door een uitzonderlijke wasprestatie te behouden,
maken deze programma’s het u mogelijk op voorhand
te weten hoeveel tijd u nodig heeft voor uw dagelijkse
wasbeurten. Deze wasmachine is eigelijk uitgerust met
twee snelle dagelijkse programma’s op 40°C, die zijn
gemaakt voor licht bevuilde stoffen en halfvolle of
kleine ladingen.
SNELWAS 44'
Met een volledige wascyclus (wassen, spoelen en
centrifugeren) kunt u in ongeveer 44 minuten een was
doen. Dit is geschikt voor:
● een maximale lading van 3,5 kg
● licht vuile was (katoen en gemengde vezels).
Bij dit programma raden we aan de dosis wasmiddel te
verminderen (vergeleken met de normale dosering) om
verspillen van wasmiddelen te voorkomen.
SNELWAS 29'
Met een volledige wascyclus (wassen, spoelen en
centrifugeren) kunt u in ongeveer 29 minuten een was
doen. Dit is geschikt voor:
● een maximale lading van 2,5 kg
● licht vuile was (katoen en gemengde vezels).
Bij dit programma raden we aan de dosis wasmiddel te
verminderen (vergeleken met de normale dosering) om
verspillen van wasmiddelen te voorkomen.
40003674Dutch.qxd 11/11/2005 14:27 Page 69
Page 70

70
Programmaoverzicht
De gegevens op het energiekeurmerk zijn gebaseerd op programma Katoen 60 en
uitgetest volgens de CENELEC EN60456-norm.
KatoenSynthetisch
Gemengde
vezels
Fijne was
Speciale Programma’s
Katoen 90
Katoen 60
Katoen 40
AA 40°C
50
40
Spoelen
Centrifugeren
Afpompen
Sports
59’ KLASSE A
SNELWAS 44’
SNELWAS 29’
Maximum
Laad
vermogen (kg)
7,5
7,5
7,5
7,5
3
3
-
-
-
1,5
1,5
3
3,5
3,5
2,5
Soort stof
Katoen, linnen
Katoen, kleurecht
gemengde vezels
Katoen, gemengde stoffen,
Bont Niet kleurecht
Katoen, gemengde stoffen
en synthetisch
Gemengde stoffen
en synthetisch
Synthetisch, acryl
en bont gemengde
stoffen
Gemengde vezels
Gemengde stoffen.
Centrifugesnelheid van
maximaal 800 toeren.
Gemengde vezels
Wasbaar in de machine
wol
Kleding van zijde en met
indicatie ‘Alleen handwas’
Gemengde stoffen
Katoen, kleurecht
gemengde vezels
Licht bevuild katoen
en gemengde stoffen
Licht bevuild katoen
en gemengde stoffen
Maximale
Water
Temp (°C)
90
60
40
40
50
40
-
-
-
40
30
30
60
40
40
Programma
40003674Dutch.qxd 11/11/2005 14:27 Page 70
Page 71

Dit gedeelte vat de belangrijkste punten samen voor
het uitvoeren van een wascyclus. Raadpleeg voor
gedetailleerde uitleg over de voorzieningen, opties en
gegevens van de machine het desbetreffende hoofdstuk
in de handleiding.
De was voorbereiden
Kies en sorteer de was volgens de wasinstructies van elk
kledingstuk. Lees de wasinstructies altijd goed door.
De was in de machine laden
Open de deur.
Stop de was in de wasmachine. Sluit de deur door te
duwen tot het klikt. Zorg ervoor dat er geen artikelen
of was de sluiting of de deurafdichting belemmeren.
Het wasmiddel in de machine
stoppen
Open de wasmiddellade, kies het wasmiddel en doe er
de aanbevolen hoeveelheid in.
Voeg niet meer toe dan hieronder vermeld staat
Sluit de wasmiddellade.
71
Een typische was
Maximale hoeveelheid
poeder/vloeistof
100 ml
200 ml
200 ml
Was
Voorwas (optie)
Hoofdwas
(alle programma’s)
Wasverzachter
Vakje
I
II
Vloeibare
wasmiddelen en
sommige
geconcentreerde
poeders en
tabletten die direct
in trommel moeten
worden geplaatst,
dienen met het
aanbevolen
zeepbakje worden
gebruikt.
40003674Dutch.qxd 11/11/2005 14:27 Page 71
Page 72

Raadpleeg het programmaoverzicht of de
programmabeschrijvingen aan de voorkant van de
machine om het beste programma te kiezen.
U kiest het programma door de
programmakeuzeschakelaar te draaien en de
programmanaam en de indicator op één lijn te
brengen.
Het programma wordt op het Inter@ct 3D-scherm
getoond, samen met de standaard centrifugesnelheid en
de wastemperatuur voor het gekozen programma.
Controleer of de waterkraan open staat en de
afvoerbuis goed is geïnstalleerd.
Kies de benodigde wasopties, zoals de
centrifugesnelheid en de wastemperatuur, als u deze
wilt veranderen van de standaard instellingen.
Start de wascyclus
Druk op de -toets. Het Inter@ct 3D-scherm geeft aan dat de machine de
wasparameters instelt en het programma zal na enkele seconden beginnen. Dan geeft
het display de tijd tot het eind van de cyclus en de huidige fase van de cyclus aan (bijv.
wassen, spoelen of centrifugeren).
Op de deur niet tijdens het wasprogramma. Het scherm geeft aan wanneer de deur kan
worden geopend.
Open de zeeplade niet tijdens het wasprogramma.
Als u het programma wilt pauzeren, drukt u op de -toets; na twee minuten kunt u
de deur openen. Lees voor het annuleren van het programma het hoofdstuk ‘Het
programma annuleren en veranderen’ van deze handleiding.
Na afloop van het wasprogramma
Wacht ongeveer twee minuten tot de deurvergrendeling wordt uitgeschakeld. Wanneer
het Inter@ct-display DEUR OPEN aangeeft, is het veilig om de deur te openen.
Schakel de machine uit door de programmakeuzeschakelaar op UIT te zetten, zodat de
machine klaar is voor het volgende gebruikt (hiermee reset u het geheugen van de
machine).
Open de deur en haal de was uit de machine.
Haal na elk gebruik de stekker uit het stopcontact en draai de waterkraan dicht.
72
Wasprogramma kiezen
40003674Dutch.qxd 11/11/2005 14:27 Page 72
Page 73
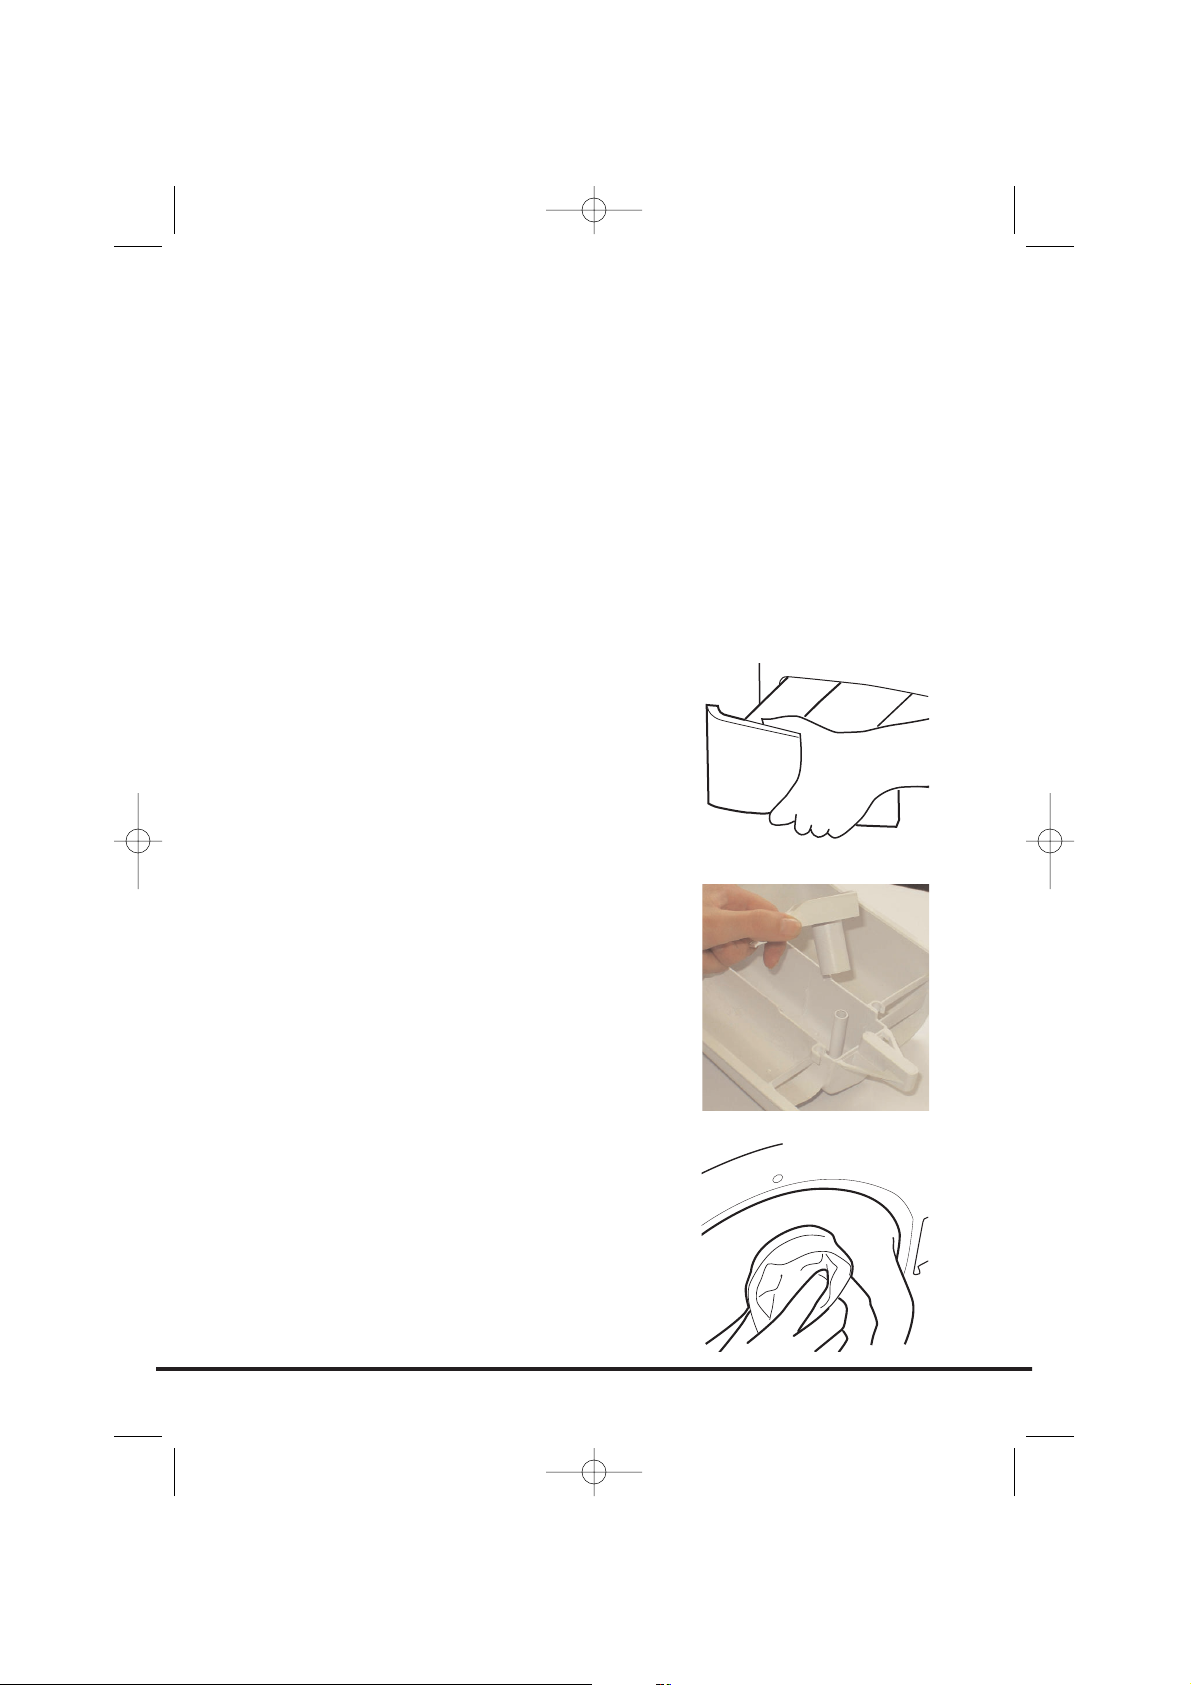
De wasmachine heeft erg weinig onderhoud nodig,
maar door regelmatige aandacht voor een paar kleine
details blijft de wasmachine goed werken
Gebruik geen schuurmiddelen, schuursponzen,
schoonmaakmiddelen met oplosmiddelen of
glansmiddelen; het is voldoende om de buitenkant van
de machine met een vochtige doek af te nemen.
De zeeplade schoonmaken
1. Maak de vakjes af en toe schoon om alle zeep en
extra wasmiddelen te verwijderen.
2. Hiervoor moet u de lade met kracht uit de
machine trekken, zonder iets te forceren.
3. Maak de vakjes en de sifonafsluiting onder warm
stromend water schoon.
4. Maak de ombouw van de zeeplade schoon om
resten van zeeppoeder te verwijderen
5. Plaats de lade terug.
Het deurglas schoonmaken
Maak het deurglas regelmatig schoon met een vochtige
doek. Door de ophoping van vuil en resten uit het
water, kan er water uit de deur lekken.
Gebruik geen schuurmiddelen, deze kunnen krassen op
het oppervlak veroorzaken.
73
Schoonmaken en
Onderhoudsbeurten
40003674Dutch.qxd 11/11/2005 14:27 Page 73
Page 74

74
Het filter schoonmaken
De wasmachine heeft een speciaal filter, zodat
voorwerpen zoals munten, knopen, enz. De afvoerbuis
niet kunnen blokkeren. Zo haalt u deze voorwerpen uit
de machine:
1. Verwijder de schopplaat door er van onderen
naar buiten en naar boven aan te trekken.
2. Gebruik de schopplaat om het water dat nog in
het filter zit te verzamelen.
3. Draai de schroef die het filter bevestigt los met
een schroevendraaier, draai het filter naar links
tot het stopt. Verwijder en reinig het. Na het
schoonmaken, monteert u het geheel door de
bovenstaande aanwijzingen in omgekeerde
volgorde op te volgen.
Zet de schopplaat weer op haar plaats.
Aanbevolen wordt om het filter vaak schoon te maken,
minstens eenmaal per maand.
Onderhoudswas
Door kleine hoeveelheden wasmiddel te gebruiken en
wasprogramma’s op lage temperaturen te draaien, kan
zich geleidelijk vet, vuil en aanzetsel opbouwen. Op den
duur kan dit de was en de machine beschadigen.
Hierdoor kan uw machine ook gaan stinken. We raden
aan om een aantal keer per jaar een onderhoudswas uit
te voeren. Hiermee houdt u uw machine en de
leidingen schoon en bezinkselvrij. Draai hiervoor het
Katoen 90 programma zonder lading en met de
normale hoeveelheid wasmiddel.
Deze was duurt ongeveer 2 uur.
40003674Dutch.qxd 11/11/2005 14:27 Page 74
Page 75

Wat kan de oorzaak zijn van...
Defecten die u zelf kunt oplossen
Voordat u de GIAS-Service voor technisch advies belt, kunt u de volgende controlelijst
afgaan. Er zullen kosten worden aangerekend als blijkt dat de machine werkt of dat de
machine niet juist werd geïnstalleerd of gebruikt. Als het probleem zich na de
aanbevolen controles nog steeds voordoet, belt u GIAS-Service, zodat zij u telefonisch
kunnen helpen.
De machine start niet…
● Sluit de deur. Controleer of de elektriciteit is aangesloten. Kies een programma en
druk op . Controleer of de mededeling DEUR OP SLOT wordt getoond.
Zo niet, controleer dan het volgende:
1. Is de machine aangesloten op het stroomnet?
2. Is de elektriciteitstoevoer in orde? Controleer een ander stopcontact.
3. Is de zekering van de machine doorgeslagen? Zo ja, vervang deze.
● Als de mededeling DEUR OP SLOT verschijnt en de machine start niet, betekent dit
dat de machine niet met water gevuld kan worden. Controleer het volgende:
1. Controleer of de programmaknop op het juiste programma staat.
2. Is de waterkraan opengedraaid?
3. Zijn de leidingen geknikt of worden ze op een andere manier geblokkeerd?
Het water wordt niet afgevoerd…
● Zorg ervoor dat de afvoerslang niet is verstopt of dat de slang niet is geknikt.
● Is de afvoerslang correct geïnstalleerd? Als deze op de gootsteenafvoer is
aangesloten, zorg er dan voor dat u de membraan heeft afgesneden of de stop
van onder de gootsteenafvoer heeft verwijderd.
● Controleer of er geen vreemde voorwerpen in het filter aanwezig zijn. Zitten er
vreemde voorwerpen, maak dan het filter schoon.
Heeft u een van de bovengenoemde problemen, los het op en laat de machine een
centrifugecyclus draaien om het water af te voeren.
● Is de functie gekozen? Zo ja, maak dan de keuze ongedaan en het
programma zal beëindigen (zie pagina 63 voor een uitgebreide uitleg van de
functie).
Water op de vloer rondom de wasmachine…
● Is de vulslang gekrompen? Zo ja, vervang dan de rubberen sluitringen en bevestig
de slang opnieuw.
● Is de standpijp of huishoudafvoer verstopt? Is dit het geval, verwijder dan de
verstopping zelf of laat het door een loodgieter doen.
● Zit er kleding of vuil tussen de deurpakking en het deurglas? Zorg ervoor dat het
deurglas en de deurpakking schoon blijven en dat er geen was op komt tijdens
75
Storingen
40003674Dutch.qxd 11/11/2005 14:27 Page 75
Page 76

het laden van de machine.
De machine centrifugeert niet…
● Is het water niet uit de machine afgevoerd? Controleer de hierboven genoemde
punten.
● Heeft u een optie gekozen die het centrifugeprofiel verandert ( of
verandering van centrifugesnelheid met de toets)? Controleer de voorziening
in de beschrijving van de bediening.
● Is de lading onevenwichtig verdeeld? De machine heeft een elektronische sensor
dit ziet of de lading onevenwichtig is verdeeld. Hierdoor is er minder lawaai en
trilling, en het neemt de betrouwbaarheid en de levensduur van de machine toe.
Om de centrifugeprestaties te verbeteren verdeelt u de lading aan het eind van de
cyclus met de hand opnieuw, waarna de was opnieuw kan worden
gecentrifugeerd.
De machine maakt lawaai of trilt erg tijdens de cyclus…
● Is het vervoersysteem geheel verwijderd? Controleer of de beugel en de
polystyreen verpakking van de machine zijn verwijderd.
● Zijn er losse artikelen in de zakken van de kleding die kunnen ratelen in de
trommel en waardoor schade kan ontstaan?
● Is de lading onevenwichtig verdeeld? Stop het programma, herlaad de machine en
start opnieuw.
Het programma doet er lang over om…
● Sommige programma’s duren lang (meer dan 2 uur). Het programma kan langer
duren door lage waterdruk.
De deur gaat niet open…
● Is het programma beëindigd?
Toont de machine ‘EINDE PROGR. DEUR OPEN’? Is dit niet het geval, dan is het
programma niet afgelopen. Wacht enkele minuten en de mededeling ’EINDE
PROGR. DEUR OPEN’ verschijnt en u kunt de deur openen.
● Als er water in de trommel blijft staan, raadpleeg dan hierboven ‘Het water wordt
niet afgevoerd…’.
Probleem met de zeeplade…
● Niet al het wasmiddel is weggespoeld.
1. Controleer of de waterkraan helemaal open staat.
2. Controleer of er slagen in de vulslang zitten.
● De zeeplade sluit niet goed.
1. Controleer of de lade goed aansluit.
2. Controleer of de lade niet verstopt is met wasmiddel (zie Schoonmaken en
Onderhoudsbeurten).
● Er komt stoom uit de zeeplade.
De machine is gemaakt om via de lade te ontluchten. U hoeft zich hier dus geen
zorgen over te maken.
Onthoud: indien het probleem met uw machine wordt veroorzaakt door een verkeerde
76
40003674Dutch.qxd 11/11/2005 14:27 Page 76
Page 77

installatie of misbruik, kunnen de kosten van de onderhoudsbeurt aan u worden
doorberekend.
Opmerking:
Het gebruik van milieuvriendelijke, fosfaatvrije wasmiddelen (lees de informatie op de
verpakking) kan de volgende gevolgen hebben:
● Het afvalwater kan troebeler zijn vanwege de aanwezigheid van een wit poeder
(zeoliten) dat in het water zit, zonder dat de spoelprestatie hierdoor negatief
wordt beïnvloed.
● De aanwezigheid van een wit poeder op de schone was, die niet door het
materiaal wordt geabsorbeerd en die de kleur van het materiaal niet wijzigt.
● De aanwezigheid van schuim in het laatste spoelwater is niet noodzakelijkerwijs
een indicatie van een slechte spoelfunctie. In dergelijke gevallen brengt een extra
spoelcyclus geen oplossing.
Stroomstoring
Als er een stroomstoring optreedt, wordt de wascyclus onderbroken. Het
wasprogramma en de andere functies worden opgeschort. Zodra er weer stroom is,
beginnen het wasprogramma en de functies vanaf hetzelfde punt, en zal het
programma afgemaakt worden.
Tijdens een stroomstoring kunt u op de volgende manier het water afvoeren en de
lading uit de machine halen:
1. De machine uit te schakelen via de programmatoets en het netsnoer. De stekker
uit het stopcontact te halen.
2. Verplaats de machine voorzichtig, zodat u bij de achterkant kunt komen. Volg de
voorzorgsmaatregelen die in het hoofdstuk Veiligheidsmaatregelen van deze
handleiding staan beschreven.
3. Haal de afvoerslang van het achterpaneel van de machine af en laat de slang in
een teil of op de vloer leeglopen. Wanneer de teil vol is, tilt u het uiteinde van de
slang hoger dan de machine, zodat het water er niet langer uit stroomt. Maak de
teil leeg, en zet hem weer op zijn plaats. Blijf het water aftappen, totdat de
machine leeg is.
4. Zodra de machine geen water meer bevat, maakt u de slang weer aan de
achterkant van de machine vast. Doe de deur open en haal de was eruit.
De deur kan ongeveer 2 minuten na het afbreken van de stroomvoorziening worden
geopend.
De deur niet open forceren.
77
40003674Dutch.qxd 11/11/2005 14:27 Page 77
Page 78

Introduction. . . . . . . . . . . . . . . . . . . . . . . . . . . . . . . . . . . . . . . . . . 79
Informations sur la livraison . . . . . . . . . . . . . . . . . . . . . . . . . . . . . . . . . . . . . . 79
A faire . . . . . . . . . . . . . . . . . . . . . . . . . . . . . . . . . . . . . . . . . . . . . . . . . . . . . . . 79
A ne pas faire. . . . . . . . . . . . . . . . . . . . . . . . . . . . . . . . . . . . . . . . . . . . . . . . . . 80
Déballage du produit . . . . . . . . . . . . . . . . . . . . . . . . . . . . . . . . . . . . 81
Installation. . . . . . . . . . . . . . . . . . . . . . . . . . . . . . . . . . . . . . . . . . . . . . . . 83
Choisissez un emplacement . . . . . . . . . . . . . . . . . . . . . . . . . . . . . . . . . . . . . . . 83
Alimentation électrique. . . . . . . . . . . . . . . . . . . . . . . . . . . . . . . . . . . . . . . . . . 84
Alimentation en eau . . . . . . . . . . . . . . . . . . . . . . . . . . . . . . . . . . . . . . . . . . . . 84
Branchement à l’eau froide . . . . . . . . . . . . . . . . . . . . . . . . . . . . . . . . . . . . . . . 85
Branchement au dispositif d’évacuation . . . . . . . . . . . . . . . . . . . . . . . . . . . . . 86
Mise en place de la machine . . . . . . . . . . . . . . . . . . . . . . . . . . . . . . . . . . . . . . 87
Ajustement des pieds. . . . . . . . . . . . . . . . . . . . . . . . . . . . . . . . . . . . . . . . . . . . 87
Testez l’installation . . . . . . . . . . . . . . . . . . . . . . . . . . . . . . . . . . . . . . 88
Conseils de lavage . . . . . . . . . . . . . . . . . . . . . . . . . . . . . . . . . . . . . . . 89
Chargement de votre machine à laver . . . . . . . . . . . . . . . . . . . . . . . . . . . . . . 89
Tri du linge. . . . . . . . . . . . . . . . . . . . . . . . . . . . . . . . . . . . . . . . . . . . . . . . . . . . 90
Le doseur . . . . . . . . . . . . . . . . . . . . . . . . . . . . . . . . . . . . . . . . . . . . . . . . . 91
Dosage du détergent. . . . . . . . . . . . . . . . . . . . . . . . . . . . . . . . . . . . . . . . . . . . 91
Mode de dosage . . . . . . . . . . . . . . . . . . . . . . . . . . . . . . . . . . . . . . . . . . . . . . . 92
Utiliser Inter@ct 3D pour la première fois . . . . . . . . . . . . . 93
Le panneau de commande . . . . . . . . . . . . . . . . . . . . . . . . . . . . . . 96
Options de lavage . . . . . . . . . . . . . . . . . . . . . . . . . . . . . . . . . . . . . . . 99
Fonctions automatiques. . . . . . . . . . . . . . . . . . . . . . . . . . . . . . . . . . . . . . . . . 104
Sélecteur de programmes . . . . . . . . . . . . . . . . . . . . . . . . . . . . . . 105
Programmes spéciaux. . . . . . . . . . . . . . . . . . . . . . . . . . . . . . . . . . . . . . . . . . . 106
Programmes quotidiens . . . . . . . . . . . . . . . . . . . . . . . . . . . . . . . . . . . . . . . . . 107
Guide de programmation . . . . . . . . . . . . . . . . . . . . . . . . . . . . . . 108
Lavage typique . . . . . . . . . . . . . . . . . . . . . . . . . . . . . . . . . . . . . . . . . . 109
Sélectionner le programme de lavage. . . . . . . . . . . . . . . . . . . . . . . . . . . . . . 110
Commencez le cycle de lavage. . . . . . . . . . . . . . . . . . . . . . . . . . . . . . . . . . . . 110
Nettoyage et Entretien de Routine . . . . . . . . . . . . . . . . . . . 111
Dépistage de pannes . . . . . . . . . . . . . . . . . . . . . . . . . . . . . . . . . . . 113
Panne de courant. . . . . . . . . . . . . . . . . . . . . . . . . . . . . . . . . . . . . . . . . . . . . . 115
78
40003674Fre.qxd 11/11/2005 15:34 Page 78
Page 79

Introduction
Veuillez lire et suivre ces instructions avec soin et
utiliser la machine en conséquence. Ce livret contient
des instructions importantes sur la sécurité d’utilisation,
l’installation et l’entretien de la machine, ainsi que des
conseils utiles pour obtenir les meilleurs résultats
possibles lors de son utilisation.
Conservez toute la documentation dans un endroit sûr
pour pouvoir vous y reporter à une date ultérieure ou la
transmettre aux prochains propriétaires.
Informations sur la
livraison
Vérifiez que les articles suivants ont bien été livrés avec
l’appareil :
● Manuel d’utilisation
● Carte de garantie
● Bonde
● Tuyau d’admission et crochet de support du tuyau
(voir la section Déballage et installation)
● Panneau inférieur et 2 fixations à poussoir
● Étiquette d’énergie
A faire
● Tous les matériaux de conditionnement utilisés
sont écologiques et recyclables. Veuillez les
éliminer de manière écologique. Votre
municipalité pourra vous donner le détail exact
des méthodes d’élimination en vigueur.
● Pour assurer la sécurité lors de l’élimination d’une
vieille machine à laver, veuillez débrancher la
fiche du courant de secteur, couper le câble
d’alimentation et le détruire avec la fiche. Pour
empêcher que les enfants ne s’enferment dans la
machine, cassez les charnières de la porte ou son
dispositif de verrouillage.
● Cette machine est conçue uniquement pour usage
domestique, soit pour laver, rincer et essorer le
linge domestique et les vêtements.
79
Vérifiez que la
machine ne s’est
pas détériorée en
transit. Si c’est le
cas, contactez GIAS
pour une opération
de dépannage.
40003674Fre.qxd 11/11/2005 15:34 Page 79
Page 80

A ne pas faire
● Ne touchez pas la machine si vous avez les mains
ou les pieds mouillés ou humides.
● Ne vous appuyez pas sur la porte lorsque vous
chargez la machine et n’utilisez pas la porte pour
soulever ou déplacer la machine.
● N’utilisez pas d’adaptateurs, de multi-prises et/ou
de rallonges.
● Ne laissez pas des enfants jouer avec la machine
ou avec ses commandes.
● N’essayez pas d’ouvrir la porte lorsque l’eau est
visible dans le tambour, lorsque le programme de
lavage est en cours ou lorsque le message PORTE
BLOQUEE s’affiche à l’écran.
Directive européenne
2002/96/CE
Cet appareil est commercialisé en accord avec la
directive européenne 2002/96/CE sur les déchets des
équipements électriques et électroniques (DEEE).
En vous assurant que ce produit est correctement
recyclé, vous participez à la prévention des
conséquences négatives sur l'environnement et la santé
publique qui pourrait être causé par une mise au rebut
inappropriée de ce produit.
Le symbole sur ce produit indique qu'il ne doit pas être
traité comme un déchet ménager. Il doit être rapporté
jusqu'à un point de recyclage des déchets électriques et
électroniques.
La collecte de ce produit doit se faire en accord avec les
réglementations environnementales concernant la mise
au rebut de ce type de déchets.
Pour plus d'information au sujet du traitement, de la
collecte et du recyclage de ce produit, merci de
contacter votre mairie, votre centre de traitement des
déchets ou le magasin où vous avez acheté ce produit.
80
Le non-respect de
ces instructions
peut compromettre
la sécurité de votre
appareil. Un appel
de service peut
vous être facturé si
la défaillance de
votre appareil est
causée par une
mauvaise
utilisation.
Si l’appareil ne
fonctionne pas
correctement ou
s’il tombe en
panne, mettez-le à
l’arrêt, débranchez-
le du courant de
secteur, coupez
l’alimentation en
eau et ne touchez
pas à la machine.
Consultez le
service GIAS pour
prévoir une
éventuelle
réparation.
40003674Fre.qxd 11/11/2005 15:34 Page 80
Page 81

Déballage du produit
Déballez la machine à proximité de son emplacement
définitif.
1. Découpez l’emballage avec soin tout autour de la
partie inférieure de la machine.
2. Posez la machine sur le côté et enlevez la base et
les deux cales de polystyrène situées de chaque
côté de la machine. Nous vous recommandons de
faire appel à une seconde personne pour vous
aider à soulever et à manœuvrer la machine.
3. Remettez la machine en position verticale,
enlevez le reste de l’emballage et l’écrou central
qui fixe la barre de transit en place.
4. Enlevez les quatre écrous de fixation de la barre
de transit et tirez le support de transit.
81
Mettez l’emballage au rebut en toute
sécurité. Conserver hors de portée des
enfants car il représente une source de
danger potentielle.
40003674Fre.qxd 11/11/2005 15:34 Page 81
Page 82

5. Prenez le panneau inférieur fourni et installez les
deux bandes adhésives en retirant le support en
papier d’un côté et en plaçant les bandes de
chaque côté au panneau inférieur.
6. Inclinez la machine vers l’avant et placez le
panneau inférieur sous l’avant de la machine.
Enlevez le reste du support en papier de la bande
adhésive et placez le panneau inférieur en bas du
caisson de la machine.
7. Prenez les deux pinces de fixation en plastique et
fixez le panneau inférieur au socle de la machine.
Remettez la machine en position verticale.
82
Nous vous recommandons de conserver le support et les vis de
transit pour protéger la machine en cas de déplacement ultérieur.
Les fabricants déclinent toute responsabilité en cas de
détérioration de la machine résultant du non-respect des
instructions sur la dépose de la protection de transit. Tous les frais
d’installation sont à la charge de l’utilisateur.
40003674Fre.qxd 11/11/2005 15:34 Page 82
Page 83

8. Bouchez le trou central situé à l’arrière de la
machine avec le bouchon que vous trouverez dans
le sac d’instructions.
Choisissez un
emplacement
● Une fois la machine installée, vérifiez que la prise
électrique et les robinets d’alimentation en eau
sont facilement accessibles.
● Vérifiez qu’il y a suffisamment de place pour la
machine. Sélectionnez un espace d’au moins
600 mm de large et 850 mm de haut. Laissez
également suffisamment de place pour ouvrir la
porte à fond de manière à charger et décharger la
machine facilement.
● Maintenez le dessous et les alentours de la
machine libres de matériaux combustibles comme
les peluches, le papier, les chiffons, les produits
chimiques, etc.
83
Installation
Ne branchez pas
l’appareil et ne
mettez pas en
marche
l’interrupteur de
secteur tant que
l’installation n’est
pas terminée.
40003674Fre.qxd 11/11/2005 15:34 Page 83
Page 84

Alimentation électrique
Les machines à laver sont prévues pour une tension
monophasée de 230 V, 50 Hz. Vérifiez que la tension
nominale du circuit d’alimentation est réglée sur 16 A
minimum.
L’électricité peut être extrêmement dangereuse.
Cette machine à laver doit être mise à la terre.
La prise de courant et la fiche de la machine doivent
être du même type.
N’utilisez pas de multi-prises et/ou de rallonges.
Les fils du câble de secteur sont colorés en fonction des
codes suivants :
Bleu NEUTRE
Marron SOUS TENSION
Vert et jaune TERRE
La machine est conforme aux directives européennes
89/336/EEC, 73/23/EEC et à leurs modifications
ultérieures.
Alimentation en eau
● La pression d’eau froide doit se situer entre 0,05
et 0,8 Mpa.
● Ne branchez pas la machine sur un chauffe-eau
instantané mono-prise.
● Le robinet d’alimentation en eau doit être
accessible une fois la machine installée.
● Avant de brancher le tuyau de remplissage,
vérifiez que l’eau coule du robinet d’eau qui sera
utilisé.
84
Un appel de
service peut vous
être facturé si la
défaillance de
votre appareil est
causée par une
installation
incorrecte.
Si le cordon
électrique de cet
appareil est
endommagé, il doit
être remplacé par
un cordon spécial
qui est
UNIQUEMENT
disponible auprès
du service des
pièces de rechange
de GIAS. Il doit
être installé par
une personne
compétente.
40003674Fre.qxd 11/11/2005 15:34 Page 84
Page 85

Branchement sur
l’alimentation en eau
froide
Cette machine est équipée d’un tuyau de remplissage
dont les extrémités sont munies d’embouts filetés de 19
mm. Ce tuyau est installé entre le connecteur fileté de
l’appareil et l’alimentation en eau.
Veillez à n’utiliser que le nouveau tuyau fourni pour
connecter la machine et vérifiez que les rondelles sont
bien en place à l’intérieur des connecteurs du tuyau.
Ne réutilisez pas d’anciens tuyaux qui sont installés sur
d’autres machines.
Ne serrez pas trop les raccords. Un serrage manuel est
suffisant.
Assurez-vous de ne pas coincer ou couder les tuyaux.
1. Branchez l’extrémité du coude du tuyau fourni
dans l’orifice fileté situé à l’arrière de la machine.
Tuyau gris sur l’orifice fileté blanc de la machine.
2. Serrez le connecteur.
3. Raccordez les extrémités droites des tuyaux sur
l’alimentation en eau ; vérifiez qu’il n’y a pas de
coudes.
4. Ouvrez l’alimentation en eau et vérifiez la
présence éventuelle de fuites. En cas de fuite,
coupez l’alimentation en eau, débranchez le
tuyau et assurez-vous que les rondelles
d’étanchéité sont bien en place. Remettez le
tuyau et ouvrez l’alimentation en eau.
Aqua-stop
Certains modèles sont fournis avec un tuyau spécial à
double paroi qui contient un robinet d’eau (A). Si le
tuyau interne éclate, le robinet coupe automatiquement
l’alimentation en eau pour empêcher les inondations. Le
témoin devient rouge (B). Dans ce cas, coupez
immédiatement l’alimentation en eau et procurez-vous
un tuyau de rechange auprès du service GIAS.
L’installation est identique à celle d’un tuyau
conventionnel et l’extrémité du robinet du tuyau aquastop est connectée sur l’alimentation en eau.
85
A
B
40003674Fre.qxd 11/11/2005 15:34 Page 85
Page 86

Branchement au dispositif
d’évacuation
Cette machine doit être connectée conformément aux réglementations en matière
d’alimentation en eau. Les arrêtés municipaux en matière d’évacuation d’eau interdisent
la connexion à un égout d’eau de surface.
Décidez de l’option de plomberie qui vous convient le mieux et suivez ensuite les
instructions qui figurent ci-dessous.
Option 1
Connexion du tuyau d’évacuation des eaux sales
(trappe d’évacuation des eaux sales)
Installez le crochet de support sur le tuyau de sortie. Placez à un minimum de 800 mm
du sol.
Après avoir enlevé la bonde ou coupé la membrane du système d’évacuation des eaux
sales, fixez le tuyau de sortie en toute sécurité au système d’évacuation, à l’aide d’une
pince.
Fixez le crochet de support à une hauteur d’au moins 800 mm pour éviter que l’eau ne
retourne dans la machine.
86
Toutes les machines sont testées avec de l’eau avant de quitter
l’usine, alors il se peut qu’une petite quantité d’eau reste dans le
tambour et le tuyau d’évacuation.
Il y a un risque d’inondation si l’installation n’est pas effectuée
correctement.
800 mm
attache de
fixation du tuyau
support à crochet
évier
tuyau d’évacuation
flexible
trappe avec raccord
de tuyau
40003674Fre.qxd 11/11/2005 15:34 Page 86
Page 87

Option 2
Dans une colonne d’alimentation
Vérifiez que la colonne d’alimentation ne se trouve pas
à proximité d’une prise électrique.
Installez le crochet de support sur le tuyau de sortie.
Installez le tuyau dans la colonne d’alimentation en
veillant à ce que le tuyau se trouve au moins à 500 mm
du sol.
Enfoncez le tuyau de sortie sur une profondeur
d’environ 100 mm dans la colonne d’alimentation.
Mise en place de la
machine
La machine est lourde, alors vous devez faire attention
lorsque vous la déplacez. Nous vous recommandons
d’être à deux pour déplacer la machine afin d’éviter les
efforts excessifs et les blessures éventuelles.
● Prenez soin de ne pas endommager le sol lorsque
vous déplacez la machine.
● Lorsque vous déplacez la machine jusqu’à son
emplacement définitif, prenez soin de ne pas
couder ou endommager le tuyau qui se trouve à
l’arrière de la machine.
Ajustement des pieds
Lorsque la machine est en place, les pieds doivent être
ajustés pour mettre la machine de niveau. Si la machine
n’est pas de niveau, il se peut qu’elle devienne bruyante
ou qu’elle bouge.
Ajustez les pieds qui se trouvent aux angles avant de la
machine, jusqu’à ce qu’elle soit stable et de niveau.
Lorsque la machine est stable et de niveau, serrez les
écrous de fixation situés sur les deux pieds.
87
Ne pas tirer ou
soulever la
machine par sa
porte.
100 mm
500 mm mn.
40003674Fre.qxd 11/11/2005 15:34 Page 87
Page 88

Veuillez consulter la section “Sélection du programme
de lavage” sur la sélection des programmes.
1. Ouvrez l’alimentation en eau et vérifiez la
présence éventuelle de fuites au niveau des
tuyaux de remplissage.
2. Ouvrez l’alimentation électrique.
3. Sélectionnez le programme d’essorage et
appuyez sur le bouton pour mettre la
machine en marche. Laissez le programme se
poursuivre pendant une minute et ensuite
annulez le programme en remettant le sélecteur
en position OFF. Ceci permet d’éliminer l’eau qui
reste dans la machine suite aux essais en usine.
4. Pour vérifier le remplissage de la machine en eau
froide :
Sélectionnez le programme de rinçage et
appuyez sur le bouton pour mettre la
machine en marche.
Attendez que toute l’eau soit vidangée. Vérifiez
qu’il n’y a pas de fuite ou de débordement au
niveau de la sortie de vidange.
5. Mettez la machine à l’arrêt à la fin du cycle en
tournant le bouton de commande à la position
OFF.
6. Sélectionnez le programme d’essorage et
appuyez sur le bouton pour mettre la
machine en marche. Si la machine prend plus
d’une minute à se vider, vérifiez la présence
éventuelle de coudes au niveau du tuyau
d’évacuation.
Les essais d’installation sont alors
terminés.
Vous avez maintenant installé la machine correctement
et nous vous conseillons de la faire tourner pour vérifier
que le tambour est bien propre après les essais et la
période de stockage de la machine. Sélectionnez
Coton 90 et faites tourner la machine pendant un cycle
complet, en n’utilisant que du détergent et de l’eau.
88
Testez l’installation
Ce programme
dure environ
2 heures.
40003674Fre.qxd 11/11/2005 15:34 Page 88
Page 89

Les conseils suivants visent à ce que vous obteniez les
meilleurs résultats de votre machine en l’utilisant de la
manière la plus écologique et la plus économique
possible. Il est également important de comprendre les
articles que vous devez éviter d’incorporer dans votre
linge pour veiller à un fonctionnement sûr et fiable de
votre machine.
Chargement de votre
machine à laver
Pour réduire plus encore la consommation d’énergie,
d’eau et de détergent, nous vous recommandons
d’utiliser votre machine à pleine charge. Vous pouvez
réaliser des économies de jusqu’à 50 % en procédant à
un lavage à pleine charge plutôt que deux en demicharge.
Ne chargez pas excessivement la machine pour ne pas
affecter la qualité du lavage ou détériorer la machine
ou votre linge.
Quand le prélavage est-il
vraiment nécessaire ?
Uniquement lorsque le linge est particulièrement sale !
Vous pouvez réaliser des économies de 5 à 15 % en
désactivant l’option de prélavage pour le linge moins
sale. Traitez les taches tenaces avec un détachant
lavable.
Quelle température de lavage
dois-je sélectionner ?
L’utilisation de détachants avant le lavage à la machine
réduit la nécessité de laver à des températures
supérieures à 60°C.
Un lavage à une température de 40°C peut produire des
économies d’énergie de jusqu’à 50 %.
Linge très sale
Pour obtenir les meilleurs résultats possibles lorsque
vous lavez du linge particulièrement sale, nous vous
recommandons de limiter le nombre d’articles que vous
mettez dans la machine. Laissez de la place dans le
tambour pour que les articles circulent plus librement et
pour optimiser le lavage.
89
Conseils de lavage
40003674Fre.qxd 11/11/2005 15:34 Page 89
Page 90

Tri du linge
Articles à éviter
Nous vous recommandons de ne pas laver les soutiensgorge avec armature dans la machine. Si l’armature se
décroche, vous risquez d’endommager vos vêtements
ainsi que la machine. Si l’étiquette de conseil de lavage
indique que le soutien-gorge est lavable en machine,
nous vous conseillons de le placer dans un sac.
Recommandations
Suivez toujours l’étiquette de conseil de lavage qui se
trouve sur les vêtements.
Fermez les fermetures éclair, nouez les ficelles et fermez
les pressions pour empêcher que le linge n’accroche.
Vérifiez qu’il n’y a pas de pièces de monnaie ou autres
articles de petites dimensions dans les poches.
Vérifiez qu’il n’y a pas d’objets métalliques dans le
linge pour ne pas endommager le linge ou la machine.
Placez les petits articles dans un sac à lessive.
90
Ne pas utiliser la
machine pour laver
les articles qui
n’ont pas
d’étiquette de
conseil de lavage.
Ne pas laver les
articles qui ont été
antérieurement
traités avec des
solvants.
40003674Fre.qxd 11/11/2005 15:34 Page 90
Page 91

Dosage de détergent
N’utilisez que des détergents qui conviennent à un lavage en machine. Vous obtiendrez
les meilleurs résultats possibles en utilisant un minimum de produits chimiques, en
tenant compte du degré de saleté du linge et en sélectionnant soigneusement le type de
détergent nécessaire.
La quantité de détergent à utiliser dépend :
● de la dureté de l’eau.
En fonction de la dureté de l’eau et du type de détergent utilisé, il est possible de
réduire la quantité de détergent utilisé.
Plus l’eau est douce, moins vous avez besoin de détergent.
● du degré de saleté.
Il est possible de réduire la quantité de détergent utilisée selon le degré de saleté.
Utilisez moins de détergent pour le linge moins sale.
● de la quantité de linge. Il est possible de réduire la quantité de détergent lorsque
vous lavez uniquement quelques articles.
Pour les lots plus petits, utilisez moins de détergent.
Les dosages qui figurent sur l’emballage des détergents pour le lavage d’articles délicats
s’appliquent généralement à un lot de plus petite taille. Suivez toujours les instructions
de dosage qui figurent sur l’emballage du détergent.
91
Le doseur
NE PAS dépasser la dose de détergent maximum
COMPARTIMENT I
Détergent pour le prélavage
Dosage maximum 100 ml
de poudre
COMPARTIMENT II
Détergent pour le lavage
principal
Dosage maximum 200 ml
de poudre à laver
COMPARTIMENT
Assouplissant
Dosage maximum 200 ml
40003674Fre.qxd 11/11/2005 15:35 Page 91
Page 92

Mode de dosage
Il existe trois bacs à détergents :
● le bac de gauche, étiqueté "II", est destiné au
détergent utilisé lors du lavage principal.
● le bac central, étiqueté est destiné à des
additifs spéciaux tels qu'adoucissants, parfums,
amidon, brillants, etc.
● le bac de droite, étiqueté "I", est destiné au
détergent utilisé lors du Prélavage.
Dosage dans le tambour
Les détergents liquides et certains détergents en
tablettes sont distribués depuis le tambour de la
machine, à l’aide du doseur recommandé qui est placé
directement sur le linge, vers l’arrière du tambour.
Certains détergents en tablette sont conçus pour être
placés à l’intérieur du bac de dosage. Vérifiez
l’emballage du détergent pour tous renseignements
complémentaires.
92
Ne rien mettre
dans le bac hormis
des détergents
prévus pour être
ainsi distribués afin
d’éviter les
possibilités de
blocage ou de
détérioration.
40003674Fre.qxd 11/11/2005 15:35 Page 92
Page 93
Cette machine à laver fonctionnera même si la configuration Inter@ct n’est pas
programmée. Cependant, cette machine est équipée de fonctions de départ différé et
d’une configuration de la fin du cycle. Pour assurer le fonctionnement efficace de ces
fonctions, il est nécessaire de programmer Inter@ct 3D. Il s’agit d’une opération simple
et nous avons pris toutes les précautions possibles pendant la fabrication de cette
machine pour veiller à ce que l’utilisateur puisse l’utiliser en toute simplicité et de
manière efficace.
Programmation de la machine
Inter@ct doit être programmé pour que l’horloge, la langue et les exigences
personnelles soient réglées correctement. Lorsque l’utilisateur met la machine en marche
et tourne le cadran de programmation de la position ‘OFF’ à un programme particulier,
un message de bienvenue s’affiche.
Ce message s’affiche un court moment pendant que la machine détermine le
programme qui a été sélectionné. Lorsque la machine est prête, le détail du cycle
s’affiche et vous pouvez alors commencer la programmation de la machine.
Exemple :
A noter que lors de l’utilisation du menu Inter@ct vous avez 30 secondes par opération
pour effectuer votre sélection. Au cas où vous n’auriez pas suffisamment de temps,
l’affichage retourne à son premier écran et il vous suffit de retourner au menu Inter@ct
et de continuer la programmation.
93
Utiliser Inter@ct 3D pour la
première fois
BIENVENUE !
00:00
00
00
COTON
RESISTANT
90
11
Vitesse d’essorage
x 100
Programme
sélectionné
Température
(°C)
40003674Fre.qxd 11/11/2005 15:35 Page 93
Page 94

Pour entrer dans le menu
Maintenez les boutons et enfoncés pendant 5 secondes ou jusqu’à ce qu’un bip
sonore se fasse entendre.
Les options du menu peuvent être changées en appuyant sur le bouton . Pour
confirmer et saisir une option, appuyez sur le bouton .
CHOIX LANGUE (configuration par défaut –
NEERLANDAIS)
Votre machine à laver est réglée par défaut au néerlandais. Si vous exigez une autre
langue, il vous est possible de changer l’option à l’aide de ce menu de configuration.
Appuyez sur pour changer la langue et continuez d’appuyer sur le bouton jusqu’à
l’affichage de la langue voulue. Appuyez sur pour confirmer votre sélection.
Lorsque vous avez choisi la langue que vous voulez, l’affichage vous invite à CHANGER
HEURE.
CHANGER HEURE
Cette fonction doit être réglée pour deux raisons : tout d’abord pour afficher l’heure de
la journée sur l’écran et ensuite pour que les configurations de Départ
Différé/Configuration de la fin du cycle fonctionnent correctement.
Vous remarquerez sur la fenêtre d’affichage que les heures de l’horloge clignotent. Pour
configurer les heures, vous devez appuyer sur le bouton jusqu’à ce que la valeur
souhaitée s’affiche. Ensuite, appuyez sur le bouton pour saisir la valeur choisie. Les
minutes de l’horloge se mettront alors à clignoter. Appuyez à nouveau sur le bouton
jusqu’à ce que le nombre de minutes voulu s’affiche et appuyez sur pour enregistrer
votre sélection. Lorsque vous avez configuré l’heure, l’affichage vous invite à configurer
le mode temporel (MODE TEMPS).
MODE TEMPS (configuration par défaut – A HH:MM)
La fonction de configuration du mode temporel vous permet de décider comment vous
souhaitez contrôler les fonctions de configuration de la fin du cycle et de départ différé.
Vous aurez deux options. La première, appelée Mode temporel absolu (A HH:MM) vous
permet de configurer l’heure véritable à laquelle vous souhaitez que le programme
commence ou se termine, par exemple Début/fin de programme à 08h00. La seconde,
appelée Mode temporel relatif (DANS HH:MM) vous permet de retarder le commencement
ou la fin de votre cycle de lavage en ajoutant des heures à l’heure actuelle affichée à
l’écran, par exemple Début/Fin de programme dans 4 heures et 30 minutes.
Vous pouvez sélectionner l’option que vous souhaitez en appuyant sur la touche
jusqu’à ce que votre option préférée s’affiche, puis en appuyant sur la touche pour
accepter l’option que vous avez choisie.
94
CHANGER HEURE
00:08
40003674Fre.qxd 11/11/2005 15:35 Page 94
Page 95

Les deux options sont très utiles mais le Mode temporel absolu est plus facile à utiliser
car vous ne devez pas calculer le nombre d’heures à attendre avant que la machine ne
finisse ou ne commence le cycle choisi.
Lorsque vous avez saisi votre mode temporel préféré, l’affichage vous invite à activer le
bip sonore final.
SONNERIE (configuration par défaut – OUI)
Vous avez ici la possibilité de sélectionner un bip sonore qui indique que le cycle de
lavage est terminé. En appuyant sur le bouton , vous pouvez faire défiler les options
“OUI” et “NON”.
Pour confirmer votre sélection, appuyez sur le bouton . L’écran passera alors à
l’étape suivante et vous invitera à Mémoriser.
MEMORISER ? (configuration par défaut – NON)
Il s’agit d’une fonction utile si vous utilisez souvent le même programme. Sélectionnez
“MEMORISER ?” pour mémoriser le dernier programme ou les dernières fonctions
utilisées. Cette fonction n’est possible que sur les programmes de lavage du coton, des
articles délicats, des synthétiques, et des lainages. La mémoire ne conserve pas les
configurations dans le groupe de Programmes spéciaux. Sélectionnez OUI ou NON à
l’aide du bouton et confirmez votre sélection en appuyant sur le bouton .
MODE DEMO ? (réglage par défaut - NON)
Vous serez invité à indiquer si vous souhaitez configurer le mode de démonstration.
Veuillez configurer cette option à NON si vous ne l’avez pas encore fait. Cette fonction
est exclusivement réservée au SERVICE. Si l’option du mode Démo a été réglée à OUI, le
programme de lavage NE commencera PAS quand vous quitterez le menu Inter@ct 3D.
Le mode de démonstration doit être réglé à “NON” pour que le cycle de lavage puisse
commencer. Sélectionnez NON à l’aide du bouton et confirmez votre choix à l’aide
du bouton . Vous êtes invité à indiquer si vous souhaitez “Quitter menu?”.
QUITTER MENU ?
Si vous êtes satisfait des configurations que vous avez sélectionnées, vous pouvez quitter
le menu en sélectionnant OUI à l’aide du bouton et en confirmant votre sélection à
l’aide du bouton . Cependant, si vous n’êtes pas satisfait de certaines des options
sélectionnées, vous devez sélectionner NON et recommencer la programmation depuis le
début. En appuyant sur le bouton , vous pouvez saisir et éviter chaque option
individuellement jusqu’à ce que vous arriviez à l’option que vous souhaitez modifier.
Lorsque vous êtes totalement satisfait des options du menu que vous avez sélectionnées,
vous pouvez quitter le menu. Vous pouvez alors procéder aux essais de l’installation. Si
vous souhaitez changer les options du menu à une date ultérieure, vous pouvez
retourner au menu comme expliqué plus haut, passer en revue les options du menu
depuis le début et changer celles que vous souhaitez. Ceci peut être utile pour changer
d’heure lorsque l’heure d’été commence ou se termine.
Ceci fait, les options du menu resteront dans la mémoire de la machine, même si la
machine est débranchée ou en cas de panne de courant.
95
40003674Fre.qxd 11/11/2005 15:35 Page 95
Page 96

96
Le panneau de commande
Le sélecteur de programme doit être remis en position OFF pour
remettre les commandes à zéro entre chaque cycle de lavage.
Afficheur
INTER@CT
Repassage
rapide
Vitesse
d’essorage
Lavage
rapide
Prélavage Programmation
de la
température
Rinçage
supplémentaire
Marche/Pause
Départ différé/
Configuration de
la fin du cycle
Verrouillage de
programme
Sélecteur de
programmes
40003674Fre.qxd 11/11/2005 15:35 Page 96
Page 97
Mise en marche de la machine
Mettez la machine en marche en sélectionnant un programme à l’aide du sélecteur de
programmes. L’écran indiquera alors le nom du programme, la vitesse d’essorage et la
température de lavage et cet affichage restera visible jusqu’à ce que le bouton soit
activé ou jusqu’à ce que vous remettiez le sélecteur de programme en position OFF.
Marche/Pause ( )
Marche
Après avoir sélectionné le programme et les options voulues (voir la section Options de
lavage de ce manuel), appuyez une fois sur le bouton pour commencer le cycle de
lavage. L’écran indiquera que la porte est verrouillée et la machine commencera à sentir
le linge et vous demandera d’arrêter.
Lorsque la machine a programmé les paramètres nécessairest, l’affichage indiquera le
temps approximatif avant la fin du cycle. Ce calcul repose sur un lot complet et sera
ajusté en fonction de la taille et de la composition du lot, au fur et à mesure de la
progression du cycle de lavage.
97
COTON
RESISTANT
90
11
PROGRAMMATION
ATTENDRE SVP
90
11
FIN : 2H 45M
LAVAGE
90
11
40003674Fre.qxd 11/11/2005 15:35 Page 97
Page 98

Pause
Il est possible d’arrêter momentanément le programme pendant le cycle de lavage, en
maintenant le bouton enfoncé pendant environ trois secondes. Lorsque la machine
est en mode de pause, l’affichage suivant s’affiche :
Après environ deux minutes, le message suivant s’affiche, ce qui signifie que vous
pouvez maintenant ouvrir la porte :
Pour relancer le programme, fermez la porte et appuyez sur le bouton .
Annulation et changement de programme
Pour annuler le programme, le sélecteur de programme doit être mis en position OFF.
Dans ce mode, l’affichage disparaît parce que la machine est maintenant à l’ARRET. A la
sélection d’un nouveau programme, l’affichage indique que le programme a été annulé,
comme suit :
Pour commencer un autre cycle de lavage, le sélecteur de programme doit être remis en
position OFF AVANT que le programme suivant puisse être sélectionné et mis en
marche.
98
PAUSE
PORTE BLOQUEE
90
11
PAUSE
PORTE OUVERTE !
90
11
ANNULATION
90
11
40003674Fre.qxd 11/11/2005 15:35 Page 98
Page 99

Sélecteur de vitesse d’essorage ( )
En appuyant le bouton d’option , il est possible de réduire la vitesse d’essorage
maximale du programme que vous avez sélectionné en fonction vos besoins et donc
d’empêcher que le linge ne se froisse excessivement. La vitesse d’essorage maximum
varie selon les spécifications de la machine.
Le voyant lumineux du bouton d’option s’allumera si une vitesse d’essorage inférieure à
celle qui figure dans le guide de programmation a été sélectionnée.
Lavage rapide ( )
Cette option peut être utilisée sur les programmes Coton et Synthétiques ( ). En
sélectionnant l’option , le temps de lavage peut diminuer de jusqu’à 50 minutes,
selon le programme sélectionné, la température et la taille du lot, sans compromettre la
qualité de lavage.
Prélavage ( )
Cette option est disponible sur les programmes Coton et Synthétiques ( ). est
configuré automatiquement sur le programme Sports. Cette option est très utile pour le
linge particulièrement sale et elle peut être utilisée indépendamment du programme de
lavage principal. Pour ce programme, le détergent doit être ajouté dans le premier bac
de dosage de poudre, identifié par “I” (voir la section “Le doseur” de ce manuel). Nous
vous recommandons de n’utiliser que 20 % de la quantité utilisée pour le programme de
lavage principal.
99
Options de lavage
Les options ci-dessous doivent être sélectionnées AVANT d’appuyer
sur la touche . Le voyant lumineux de chaque bouton d’option
s’allumera si l’option a été sélectionnée.
Vitesse d’essorage = 100 tr/mn ; alors dans cet exemple 11 = 1100 tr/mn
COTON
RESISTANT
90
11
40003674Fre.qxd 11/11/2005 15:35 Page 99
Page 100

Sélection de la température ( )
Cette machine à laver est équipée d’une fonction de température variable. Chaque
pression du bouton réduit la température de lavage. Vous pouvez réaliser des
économies d’énergie plus importantes en réglant la température entre 15 et 40°C. Si
vous réglez la température à 15°C, la température de lavage est équivalente à la
température d’arrivée d’eau, ce qui réduit plus encore la consommation d’énergie.
Nous vous recommandons de ne jamais dépasser la température indiquée sur les
vêtements à laver. La machine n’accepte pas de température d’admission supérieure à
celle qui figure dans le guide de programmation.
Le voyant lumineux du bouton d’option s’allumera si vous avez sélectionné une
température inférieure à celle qui figure dans le guide de programmation.
Rinçage supplémentaire ( )
Cette option est disponible sur les programmes Coton et fait passer le nombre de
rinçages à cinq (en comptant le dernier rinçage avec assouplissant). Ceci permet
d’empêcher les irritations de la peau causées par les résidus de détergent chez les
personnes dont la peau est particulièrement sensible. Nous recommandons également
de sélectionner le bouton pour laver un linge très sale qui nécessite beaucoup de
détergent ou pour laver des articles en éponge qui ont davantage tendance à imbiber le
détergent.
100
Température (°C)
COTON
RESISTANT
90
11
40003674Fre.qxd 11/11/2005 15:35 Page 100
 Loading...