

Hoover 7122-01 Instructions Manual
Hoover is a registerd trademark of Techtronic Industries
Limited and is being used under license by Homewerks
Worldwide, LLC.
BATH FAN WITH LIGHT
MODEL #7122-01
Español p. 11
Questions, problems, missing parts? Before returning to your retailer, call our customer
service department at 1-877-319-3757, 8 a.m. - 5 p.m., CST, Monday - Friday.
www.homewerksww.com
Dec. 1, 2011
TABLE OF CONTENTS
Product Specications ........................................................................................................................2
Package Contents ..............................................................................................................................3
Hardware Contents.............................................................................................................................3
Safety Information ..............................................................................................................................4
Preparation .........................................................................................................................................5
New Construction Assembly Instructions ...........................................................................................6
Existing Construction Assembly Instructions ......................................................................................8
Care and Maintenance .......................................................................................................................9
Troubleshooting ..................................................................................................................................9
Warranty ...........................................................................................................................................10
PRODUCT SPECIFICATIONS
SPECIFICATIONS SPECIFICATIONS
Airow: 50CFM Power consumption: 42 W
120V, 60Hz Exhaust fan speed: 1300 rpm
Duct diameter: 4 in. Weight: 5.3 lbs.
Sound output: 4.0 Sones
2
www.homewerksww.com

PACKAGE CONTENTS
A
B
PART DESCRIPTION QUANTITY PART DESCRIPTION QUANTITY
Fan unit: body, grille, light
A
1 B 13 watt, GU24 bulb 1
reector, duct connector
HARDWARE CONTENTS (not actual size)
AA BB CC DD
Machine
Screw
Long Wood
Screw
Washer Washer
Qty. 2 Qty. 4 2 2
www.homewerksww.com
3

SAFETY INFORMATION
Please read and understand this entire manual before attempting to assemble, operate or install
the product.
1. Always disconnect the power supply prior to servicing the fan, motor or junction box.
2. Installation work must be carried out by a qualied person(s) in accordance to all local and
safety codes including the rules for re-rated construction.
3. Follow all local building, safety and electrical codes as well as NEC (National Electrical Code)
and OSHA (Occupational Safety and Health Act).
4. Electric Service supply must be 120 volts, 60 hertz.
5. This unit must be properly grounded.
6. Do not bend or kink the power wires.
7. Exercise care to not damage existing wiring when cutting or drilling into walls or ceilings.
8. Sufcient air supply is required for proper combustion and the exhaustion of gases through
the chimney (ue) of fuel burning equipment to prevent back-drafting. See the standards of
NFPA (National Fire Protection Association) and ASHRAE (American Society for Heating
Refrigeration and Air Conditioning Engineers) and the local building code authorities.
9. Do not use this fan with any solid state control device, such as a remote control, dimmer switch,
or certain timers. Mechanical timers are not solid state devices.
10. This ventilation fan is approved for use over a bathtub or shower when installed in a GFCI
protected circuit. Do not use fans over a bathtub or shower that are not approved for that
application and marked accordingly.
11. Do not install in a cooking area.
12. Do not use to exhaust hazardous or explosive vapors.
13. Fans should always be vented to the exterior and in compliance with local codes.
14. Do not install in a ceiling with insulation greater than R42.
15. Duct work should be installed in a straight line with minimal bends.
16. Duct work size must be the same size as the discharge and should not be reduced. Reducing
the duct size may increase fan noise.
17. Prior to service or cleaning this unit, shut off power supply at the panel and lock to
prevent the power from being turned on. If the panel cannot be locked, clearly mark
the panel with a warning tag to prevent the power from being turned on.
18. Use this unit in the manner intended by the manufacturer. If you have any questions. Please
call customer service.
4
www.homewerksww.com
PREPARATION
Before beginning assembly of product, make sure all parts are present. Compare parts with package
contents list and hardware contents. If any part is missing or damaged, do not attempt to assemble
the product. Contact customer service for replacement parts.
Estimated Assembly Time: 60 minutes
Tools Required for Assembly (not included): Hammer, Drill Bits, Flathead Screwdriver, Wire Nuts, Nails,
Duct Tape, Phillips Head Screwdriver, Utility Knife
Helpful Tools (not included): Electric Drill, Wood Screws
WARNING: Turn off electricity at breaker box before beginning installation.
Carefully remove unit from carton.
Check area above installation location to be sure that wiring can run to the planned location and that
duct work can be run and the area is sufcient for proper ventilation.
Inspect duct work and wiring before proceeding with installation.
Before installation, provide inspection and future maintenance access at a location that will not interfere
with installation work.
You may need the help of a second person to install this fan; one person on the attic side and one on
the room side.
Note: Installations may vary depending on how the previous bath fan was installed. Supplies necessary
for the installation of your bath fan are not all included; however, most are available at your local
home improvement or hardware store.
DIMENSIONS REQUIREMENTS
Ceiling
Opening (L)
Ceiling
Opening (W)
Ceiling
Opening (H)
7-11/16 in. 7-7/32 in. 5-1/8 in.
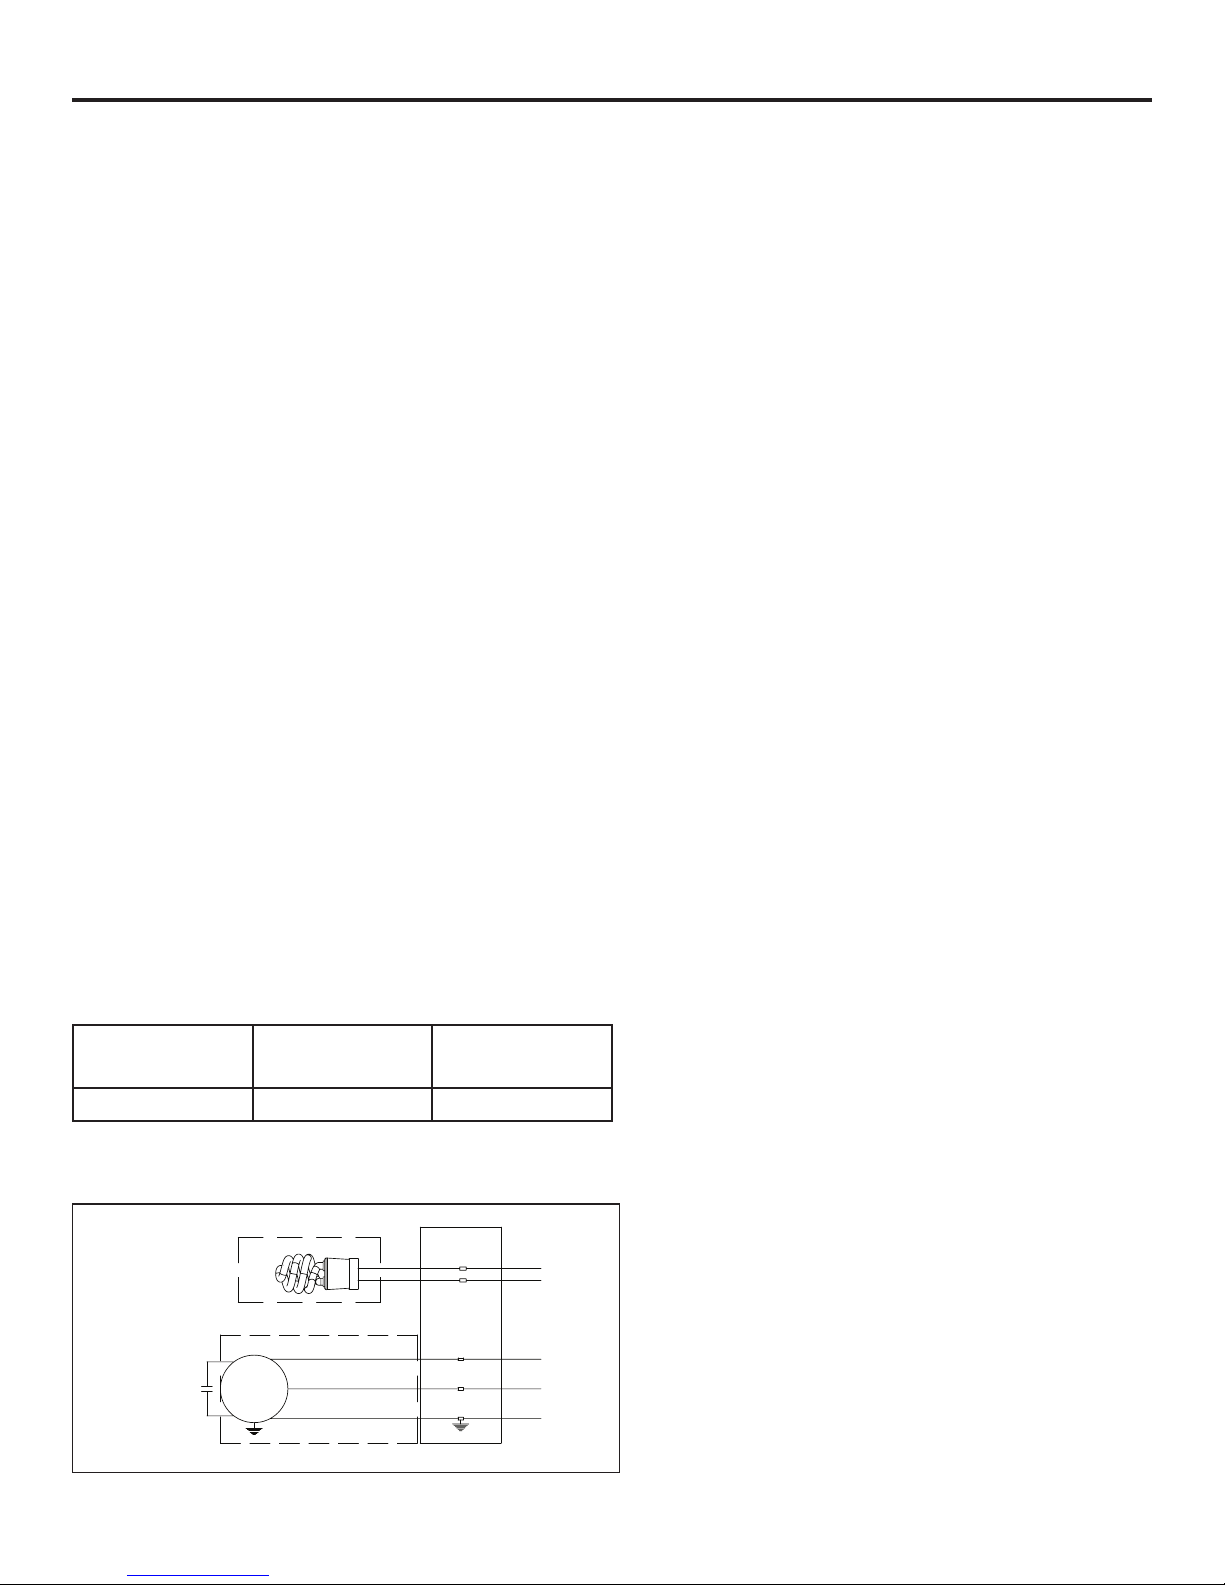
WIRING DIAGRAM
LIGHT HOUSING
Up to 13 Watts
to 120V AC 60Hz
to switch
to neutral
Capacitor for
longlife of
motor
www.homewerksww.com
motor
FAN HOUSING
black
white
green
to switch
to neutral
to ground
Junction box
5
ASSEMBLY INSTRUCTIONS
CAUTION: MAKE SURE POWER IS SWITCHED OFF AT SERVICE PANEL BEFORE STARTING
INSTALLATION.
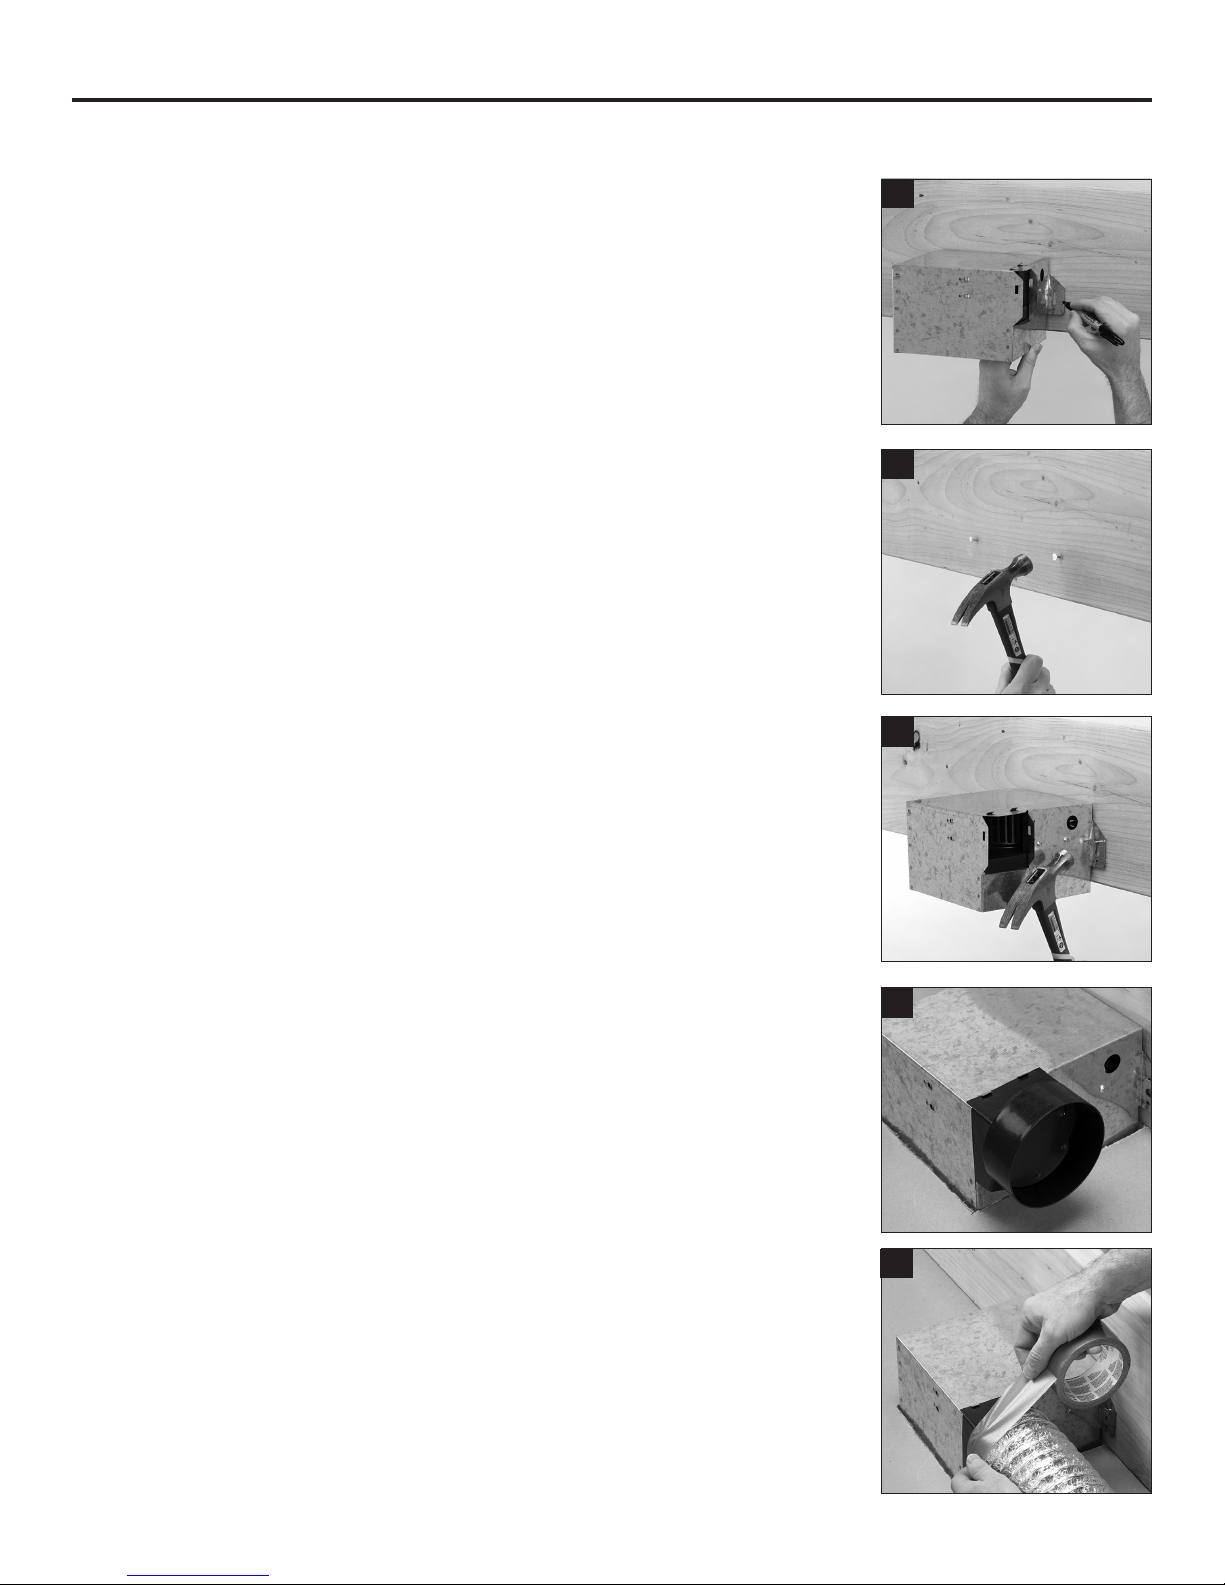
INSTALLATION IN NEW CONSTRUCTION
1. Select the location for the fan in the ceiling. Position housing
mounting tabs against joist so that bottom edge of housing is
ush with ceiling board. Do not ush mount to joist.
Mark the joist at the keyhole slot of both mounting tabs.
2. Put housing on the side and drive nails part way into joist at
the top of keyhole marks.
3. Hang housing from nails and pound nails into joist. For a quieter
mount, hammer another nail through the additional hole of each
mounting tab.
1
2
3
INSTALLING DUCT WORK
4. Snap the duct connector onto housing. Tabs on the connector
need to lock into slots in housing.
Top of duct connector should be ush with top of housing.
5. Connect circular duct to connector with duct tape (not supplied)
or clamps (not supplied) and extend duct to outside.
4
5
6
www.homewerksww.com
 Loading...