

Page 1
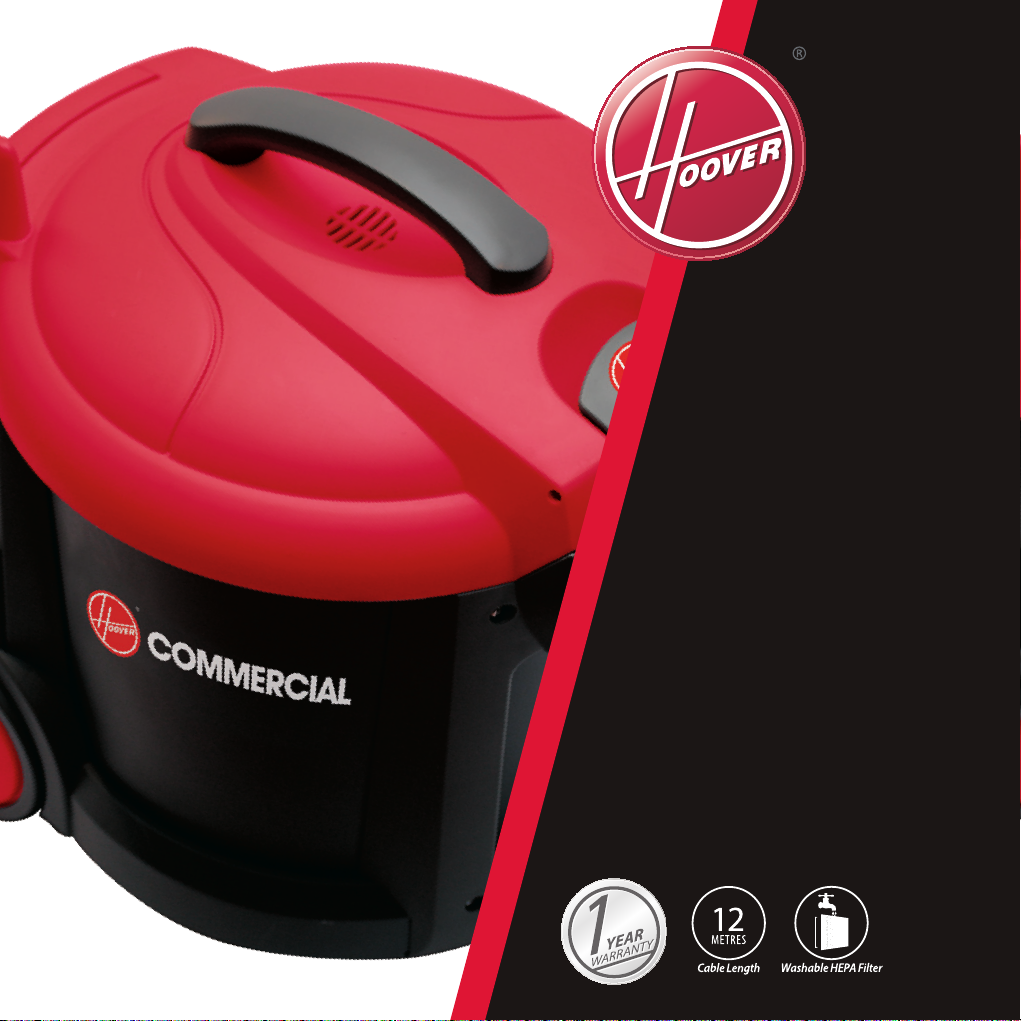
4080
WORKMAN
DRY CANISTER – 8L
Easy to Manoeuvre
Micro Fresh Cloth Dust Bag
Accessories Included
Image not to scale
COMMERCIAL
Page 2
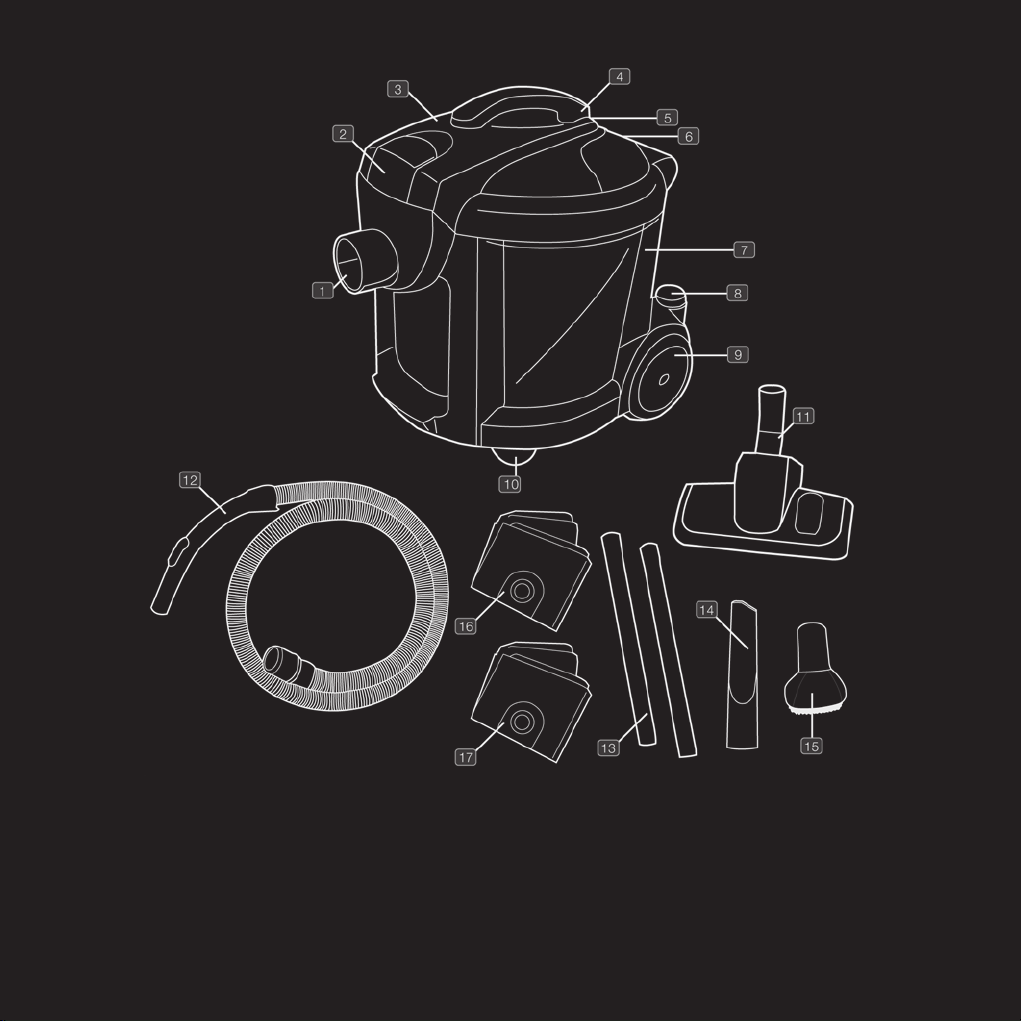
1 Hose inlet
2 Top cover retainer clip
3 Top cover
4 Carry handle
5 Power cord storage
6 Parking slot
7 Exhaust grill
8 On/off button
9 Wheel
10 360° rotating casters
11 Combination floor tool
12 Flexible hose
13 Extension tubes
14 Crevice tool
15 Dusting brush
16 Paper dust bags
17 Cloth dust bag
Page 3

4080 WORKMAN
Thank you for choosing a HOOVER product.
Please enter the COMPLETE model and serial numbers in the spaces provided.
The numbers are located on the bottom of your vacuum cleaner.
Model: _______________________________
Serial number: ________________________
Hint: Attach your sales receipt to this owner’s manual.
Verification of date of purchase may be required for warranty service
of your HOOVER product.
Contents
Safety Instructions ...........................2-3
How to Assemble................................4
How to Operate ............................. 5-6
Accessories ......................................... 7
Dirt Container.................................. 7-9
Clearing Blockages.......................... 10
Service and Help ............................. 11
Technical Specification................... 12
Troubleshooting................................ 13
1
Page 4

1. SAFETY INSTRUCTIONS
For Commercial Use Only
When using the vacuum cleaner, basic
safety precautions should always be
observed, including the following:
1. This appliance is for dry use only and
is not to be used or stored outdoors or
in wet conditions.
2. Turn off the vacuum cleaner
controls before connecting to or
disconnecting from the mains supply.
3. Always unplug the vacuum cleaner
before connecting or disconnecting
the vacuum hose.
4. This appliance is not intended for use
by young or infirm persons unless they
have been adequately supervised by
a responsible person to ensure that
they can use the appliance safely.
Young children should be supervised
to ensure that they do not play with
the appliance.
5. Use only as described in this manual.
Use only the manufacturer’s
recommended attachments. This
appliance is suitable for commercial
use, for example in hotels, schools,
hospitals, factories, shops, offices
and rental businesses.
6. Do not use the vacuum cleaner
with a damaged cord or plug. Do
not use the vacuum cleaner if it
has been dropped, damaged, left
2
outdoors or dropped into water.
Return the vacuum cleaner to a
Hoover Authorised Service Agent for
examination, repair or adjustment.
Regularly examine the power cord for
damage, such as cracking or ageing.
If damage is found replace the cord
before further use.
7. Do not pull or carry by the cord. Do
not use the cord as a handle, close
a door on the cord or pull the cord
around sharp edges or corners. Do
not run the vacuum cleaner over
the cord. Keep the cord away from
heated surfaces.
8. Do not handle the plug or vacuum
cleaner with wet hands. Do not use
outdoors or on wet surfaces.
9. Do not put any objects into openings.
Do not use with any openings
blocked and do not restrict air flow.
Keep all openings free of dust, lint, hair
or anything that may reduce airflow.
10. Keep hair, loose clothing, fingers
and all parts of the body away from
openings and moving parts.
11. Do not pick up hot coals, cigarette
butts, matches or any hot, smoking or
burning objects.
12. Do not pick up flammable, hazardous
dust or combustible materials (lighter
fluid, petrol, kerosene, etc) or use in
the presence of explosive liquids
or vapours.
Page 5

13. Do not vacuum up harmful or toxic
material (chlorine bleach, ammonia,
drain cleaner, etc).
14. Do not vacuum up hard or sharp
objects such as glass, nails, screws,
coins, etc.
15. Do not use without the filters in place.
16. Use extra care when vacuuming
on stairs.
17. Keep vacuuming area well lit.
18. Store the vacuum cleaner indoors in
a cool, dry area.
19. Turn off the switch before unplugging.
20. Do not immerse the vacuum cleaner
into water or other liquids.
WARNING: Always switch off and
unplug the vacuum cleaner from the
electrical outlet before assembling,
opening or emptying the dirt container,
or before connecting/disconnecting the
attachments.
IMPORTANT: If the inlet or hose is
blocked, switch off the vacuum cleaner
and remove the blockage(s) before
re-starting.
IMPORTANT: Cleaning filters improves
vacuum performance. Make sure all
filters are replaced and locked into
place before use.
This appliance is suitable for commercial
use. PLEASE KEEP THESE INSTRUCTIONS
FOR FURTHER USE.
Motor Thermostat
IMPORTANT: The motor is equipped
with a thermal cut-out. If for any reason,
the vacuum cleaner should over-heat,
the thermostat will automatically turn
the unit off. Should this occur, unplug
the vacuum cleaner from the electrical
outlet and turn off the switch. Remove
the dirt container and empty. Clean
the filters. Allow the cleaner to cool for
approximately one (1) hour before
re-starting.
CAUTION: The vacuum cleaner is a very
powerful unit. Before plugging the cord
into the outlet make sure the switch is
in the ‘off’ position. Hold the vacuum
cleaner firmly when starting.
3
Page 6

2. HOW TO ASSEMBLE
1. Insert the flexible hose into the
inlet on the main body of the
vacuum cleaner. Turn the hose
clockwise until it cannot be
turned any further.
2. Push the extension tube on
to the end of the handle.
The extension tubes can be
used together to lengthen
or shortened by using one
section of the extension tube
as required.
3. Fit the combination floor
head by pushing onto the
extension tube.
4
Page 7

3. HOW TO OPERATE
Fully unwind the power cord.
On/Off Button
Insert the power plug into the
electrical outlet. Ensure the
vacuum cleaner is switched off.
Press the on/off button located at
the rear of the machine to turn on
and press the button again to turn
the vacuum cleaner off.
Carpet Cleaning
For carpet and rug cleaning
press the rocker switch on the
combination floor head to raise
the brushes.
Hard Floor Cleaning
For hard floor cleaning, press the
rocker switch on the combination
floor head to lower the brushes.
5
Page 8

3. HOW TO OPERATE (CONTINUED)
Carry Handle
Use the carry handle located on
the top of the machine to move
the vacuum cleaner from room
to room.
Cable Storage
After use, turn the vacuum cleaner
off and unplug from the electrical
outlet. Wrap the cord around the
cable storage hook for moving
the unit from room to room or
for storage.
Hose Storage
For convenience there is a parking
slot located on the side of the
vacuum cleaner where the floor
tool and hose can be parked for
carrying and storage.
6
Page 9

4. ACCESSORIES
The accessories can be attached
directly to the handle by removing
the extension tube and pushing in the
desired accessory.
The accessories can also be attached
to the extension tube for extra reach.
Remove the combination floor head
and push on the desired accessory.
Crevice Tool: for crevices, corners,
cracks, sills, etc.
Dusting brush: for delicate surfaces.
5. DIRT CONTAINER
Removal and Replacement
IMPORTANT: Always unplug the
vacuum cleaner from the electrical
outlet before removing the dust bag.
IMPORTANT: DO NOT use the
vacuum cleaner without ALL of the
filters in place.
Dust Bag Replacement
1. Turn off the vacuum cleaner and
unplug it from the mains. Remove
the hose. Unclip the retainer clip
on the top of the unit and lift up
to gain access to the dust bag
compartment.
7
Page 10

5. DIRT CONTAINER (CONTINUED)
2. Lift out the full dust bag Fig.6/2
3. Dispose the full dust bag and
insert a new dust bag into the
vacuum cleaner. Align the
front of the dust bag with the
air entrance.
NOTE: The seal ring around the
dust bag opening should cover
the air entrance connector
inside the housing.
8
Page 11

HEPA Pre-motor Filter
1. Turn off the vacuum cleaner and
unplug it from the electrical outlet.
2. Unclip the retainer clip on the top
of the vacuum cleaner and lift up
to gain access to the dirt container
department.
3. The HEPA pre-motor filter is found
in the centre of the dirt container.
Rotate the filter clockwise to remove.
4. Gently tap the filter against the side
of the rubbish bin to remove excess
dirt. The filter may then be rinsed in
cool water. Allow to thoroughly air
dry before replacing. Replace the
filter every 3-6 months depending
on usage or when the filter
becomes discoloured.
NOTE: Do NOT use any detergents or
boiling water to wash the filter.
5. Replace the HEPA filter back in the
machine before use.
Fig.6/3
Fig.6/4
Fig.6/5
9
Page 12

6. CLEARING BLOCKAGES
WARNING: To reduce the risk of injury,
the power cord must be disconnected
before performing maintenance or
troubleshooting checks.
Turn vacuum cleaner off and
disconnect the power plug from the
electrical outlet. The flexible hose can
be disconnected from the vacuum
cleaner by rotating anti-clockwise
and pulling away from the machine.
Remove any blockages found then
reconnect the hose.
Fig.6/6
10
Page 13

7. SERVICE & HELP:
Please contact Hoover Customer Care
1300 361 505 if you have any queries or
concerns about this product.
11
Page 14

8. TECHNICAL SPECIFICATION
Model Number: HCC-07
Wattage: 1500W
Dust Capacity: 8 litres max
Telescopic Tube: Chrome
Power Cable Length: 12 metres
Hose Length: 2.5kg
Weight: 9.6kg
12
Page 15

9. TROUBLESHOOTING
WARNING: To reduce the risk of injury,
unplug the vacuum cleaner before servicing.
PROBLEM: Vacuum cleaner won’t run
Cause: Not properly plugged into
electrical outlet
Solution: Plug unit in firmly.
Cause: Vacuum cleaner not turned on.
Solution: Press on/off button.
Cause: No electricity in the electrical outlet.
Solution: Check fuse or breaker.
Cause: Blown fuse/tripped breaker.
Solution: Reset circuit breaker or replace fuse.
Cause: Motor thermostat has tripped.
Solution: Switch off and unplug the vacuum
cleaner. Leave for one (1) hour. See page 2.
PROBLEM: Cleaner won’t pick up/
loss of suction
Cause: Dust bag not installed correctly.
Solution: Review dust bag removal and
replacement.
Cause: Dust bag full or blocked.
Solution: Replace dust bag. Empty/clean/
replace cloth bag
Cause: Clogged filter.
Solution: Remove wash/replace HEPA filter.
Cause: Blockage in hose.
Solution: Disconnect hose, remove the
obstruction then re-fit.
PROBLEM: Accessories won’t pick up
Cause: Accessories are not attached
correctly.
Solution: Refer to page 5 for fitting
information.
PROBLEM: Dust escaping from the
vacuum cleaner
Cause: Dust bag full.
Solution: Dispose of paper dust bag, replace
with a new one or empty/clean/replace
cloth bag.
Cause: Dust bag not installed correctly.
Solution: Review dust bag removal and
replacement.
Cause: Hose is not installed correctly.
Solution: Review hose installation.
Cause: Filter not installed completely.
Solution: Review filter removal and
replacement.
13
Page 16

Conditions of warranty
Your Hoover cleaner has a one year parts and labour
warranty against product defects and failures when
the product is used in accordance with the terms and
conditions of this warranty statement.
This warranty commences from the original date of
purchase and is not transferable; please retain your
original proof of purchase for any warranty claims. This
warranty is valid only in the country where the cleaner
is purchased.
The cleaner must be operated in accordance with
these instructions. This cleaner is not designed for
the collection of vitreous building material including
particle board, construction products and similar
products such as wood/fibres, cement, fillers, fibre
glass etc or excessive or frequent sand. The infrequent
pick-up of these materials in these circumstances
may be harmful to your cleaner and may void the
manufacturer’s warranty.
Accessories and consumables including dust bags
and filters, unless defective in manufacture, are not
subject to this warranty. In order to prolong the life
of accessories and consumables, regular care and
maintenance is recommended.
When properly used and cared for, your cleaner
will render excellent service; refer to the instruction
manual for further details, as misuse or failure to
follow the instructions makes this warranty void.
In the event of service or advice being needed, please
contact Hoover Floorcare Asia Pacific Pty Ltd, Level
1, Building 2 Brandon Business Park, 530 Springvale
Road, Glen Waverley Victoria 3150, or on 1300 360 845,
Monday-Friday 9am-5pm EST. The decision to repair or
replace the cleaner is at the sole discretion of Hoover
Floorcare. If Hoover Floorcare decide to repair or
replace the cleaner, it will do so at its own cost.
V1 0212
Hoover Floorcare is unable to accept responsibility under
this warranty for any repair work not carried out by an
authorised Hoover Service Agent or from the use of
non-genuine parts. If any part is no longer available or
manufactured, Hoover Floorcare will replace it with a
genuine functional replacement part. This warranty
does not apply to the cost of replacing any parts of
the product due to normal wear and tear, alterations,
improper installation, physical abuse, misuse or
accidental damage. Any transportation costs
involved in the repair of defective parts shall be
borne by the claimant.
If proof of purchase cannot be provided at the
time of a warranty claim or service, any work
carried out on the cleaner is chargeable.
The repair or replacement of the cleaner
under this warranty does not extend the
original period of warranty.
The benefits conferred by this warranty are
in addition to all other rights and remedies
in respect of the product as outlined
under the Competition and Consumer
Act and other State and Territory laws.
“Our goods come with guarantees that
cannot be excluded in the Australian
Consumer Law. You are entitled to a
replacement or refund for a major
failure and for compensation for
any other reasonably foreseeable
loss or damage. You are also
entitled to have the goods
repaired or replaced if the goods
fail to be of acceptable quality
and the failure does not
amount to a major failure.”
Australia 1300 360 845
To find out more about our range,
visit: www.hooverfloorcare.com.au
email: sales@hooverfloorcare.com.au
Call Hoover Floorcare
with any product queries
COMMERCIAL
 Loading...