

Hooker Furniture 535075206 Assembly Guide
ASSEMBLY INSTRUCTION
Item#: 5350-75007 Rectangle Trestle Dining Table Base
5350-75008 Rectangle Trestle Dining Table Top w/2-22in Leaves
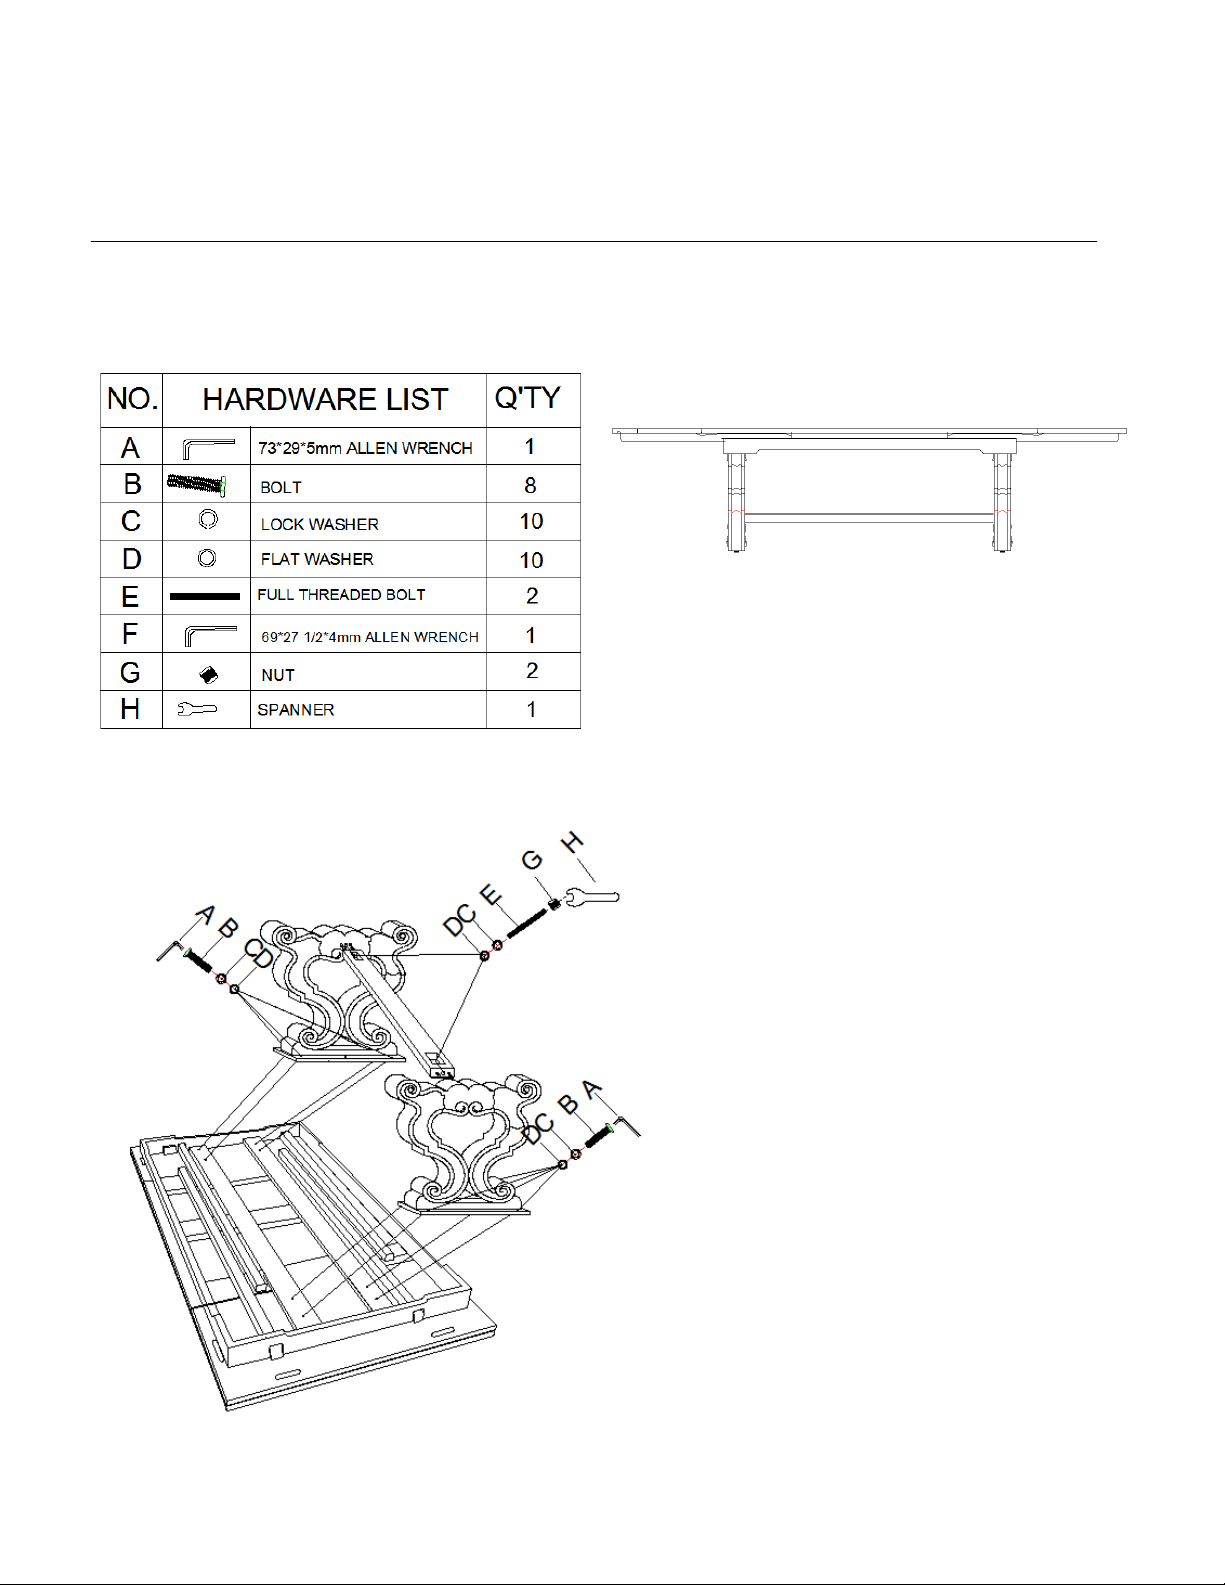
** Please make sure you have all parts indicated below prior to assembly.
This unit is heavy and can best be assembled with the help of two or more people.
1/2
Diagram 1
Diagram 2
Assembly Steps:
1. Place the dining table top upside
down on a soft surface to prevent it
from scratching.
2. Assemble bases to the top, using flat
washers(D), lock washers(C) and
bolts(B), secure by turning with allen
wrench(A) in a clockwise direction.
Please do not tighten up bolts in this
step. (See diagram 1).
3. Well insert stretcher into the holes of
bases, then using flat washers(D),
lock washers(C) and full threaded
bolts(E), secure by turning nuts(G)
with spanner(H) in a clockwise
direction. Please do not tighten up full
threaded bolts in this step. (See
diagram 2).
4. Adjust the bases and stretcher to be
at right place and then secure all bolts
(B) and nuts(G) tightly now.
5. Turn the dining table upright.
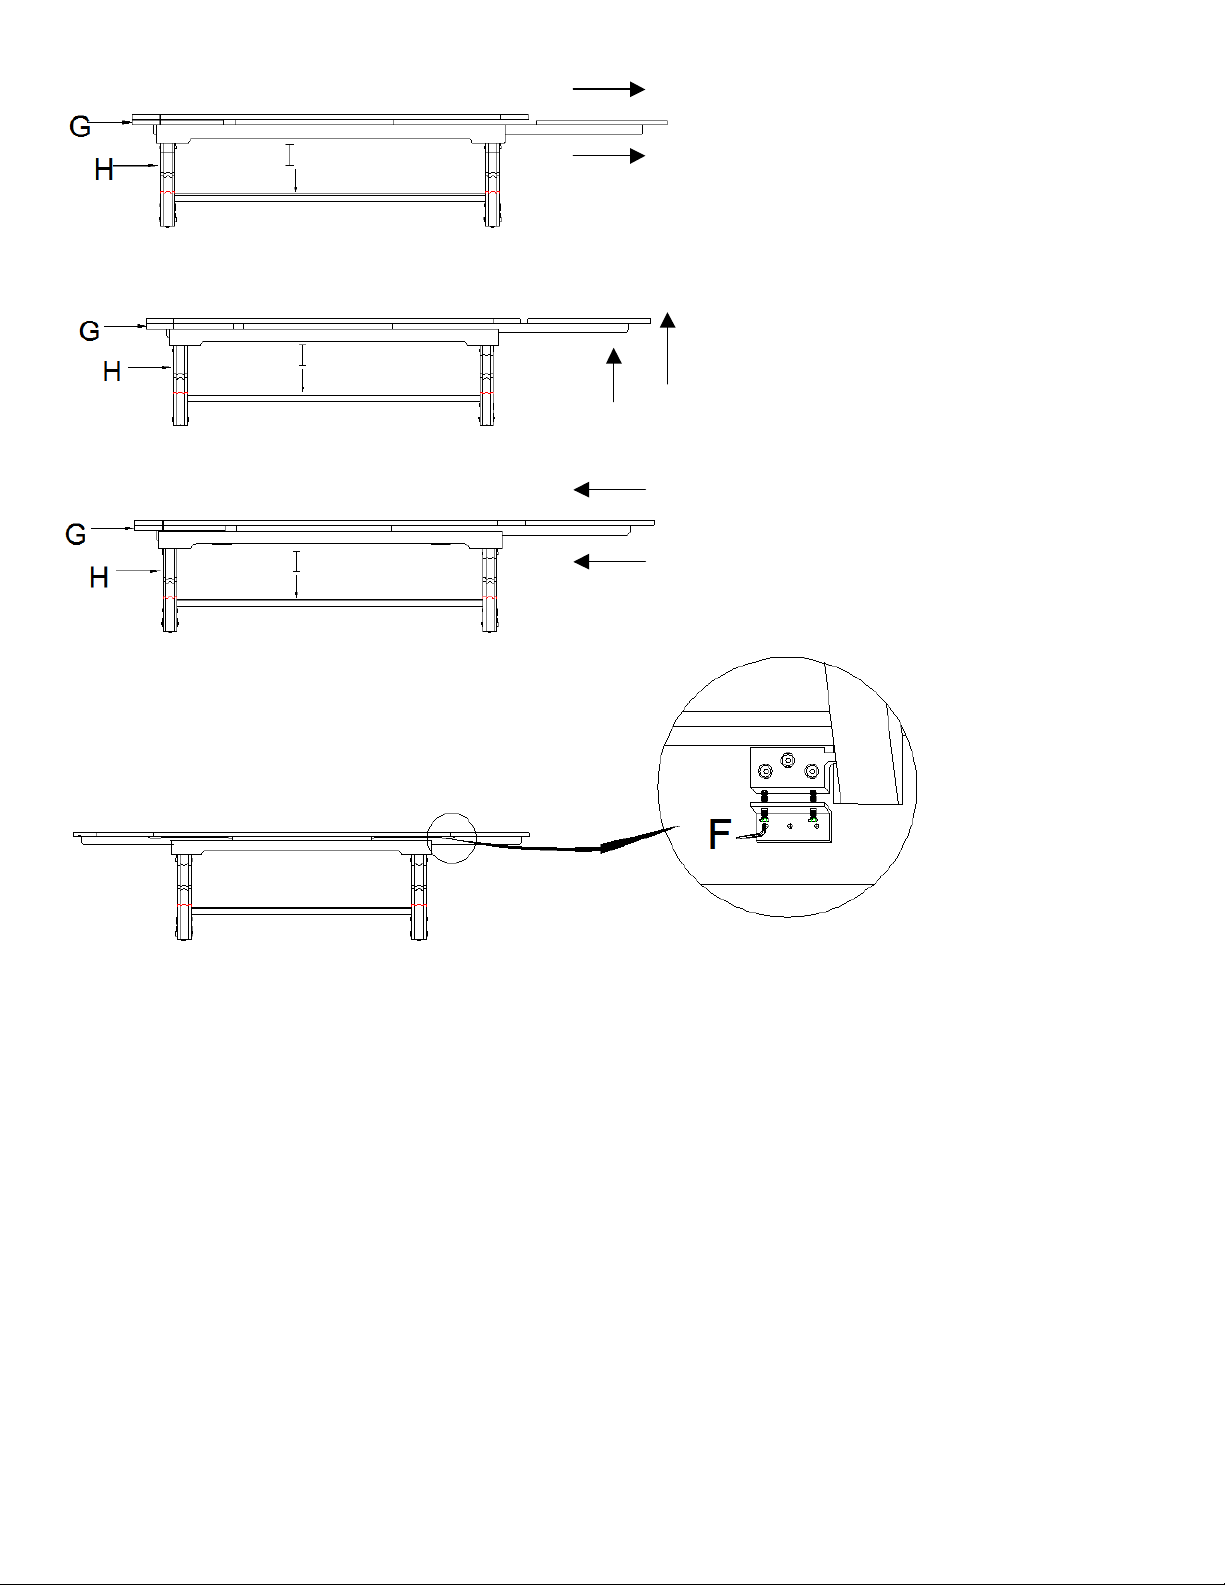
You can adjust the bolts under the top if the leaves are not leveling with the top. The steps for
adjusting the leaves lower and higher in order to keep it parallel with the top are listed below (See
diagram 6)
1. Loosen all of the bolts at the metal block.
2. Insert allen wrench (F) through the hole on to the head of the bolt on the “L” shaped metal
bracket.
3. Turn allen wrench (F) clockwise to raise the metal block, counter clockwise to low it, adjust it to
keep the leaves parallel with the top.
4. Tighten all bolts on the metal block.
Cleaning Instruction: Clean finished parts with a damp cloth using a mild dishwashing liquid and water solution.
Polish the finish with soft cloth and an industry recognized furniture polish.
2/2
Instruction for the leaves:
1. Pull out the leaves as the arrow
direction shown in diagram 3.
2. Lift the leaves up and make them 1/2”
higher than the center top.(See
diagram 4)
3. Push and lay down the leaves as
shown in diagram 5.
4. There is a latch under both sides of the
leaf, unscrew the button by hand a little
and push it to the bottom of top, screw
the button tightly.
5. Before you put the leaves under the
top, please follow the reverse way of
step 4 to pull the latch back first.
Diagram 3
Diagram 4
Diagram 5
Diagram 6
 Loading...