

Page 1
1/4
ASSEMBLY INSTRUCTION
ITEM# 5291-90267 6/6-6/0 Mirrored Panel Headboard
5291-90367 6/6 Wood Panel Headboard
5291-90867 6/6 Upholstered Panel Headboard
5291-90268 6/6-6/0 Panel Footboard
5291-90269 6/6 Rails
5291-90263 6/0 Rails
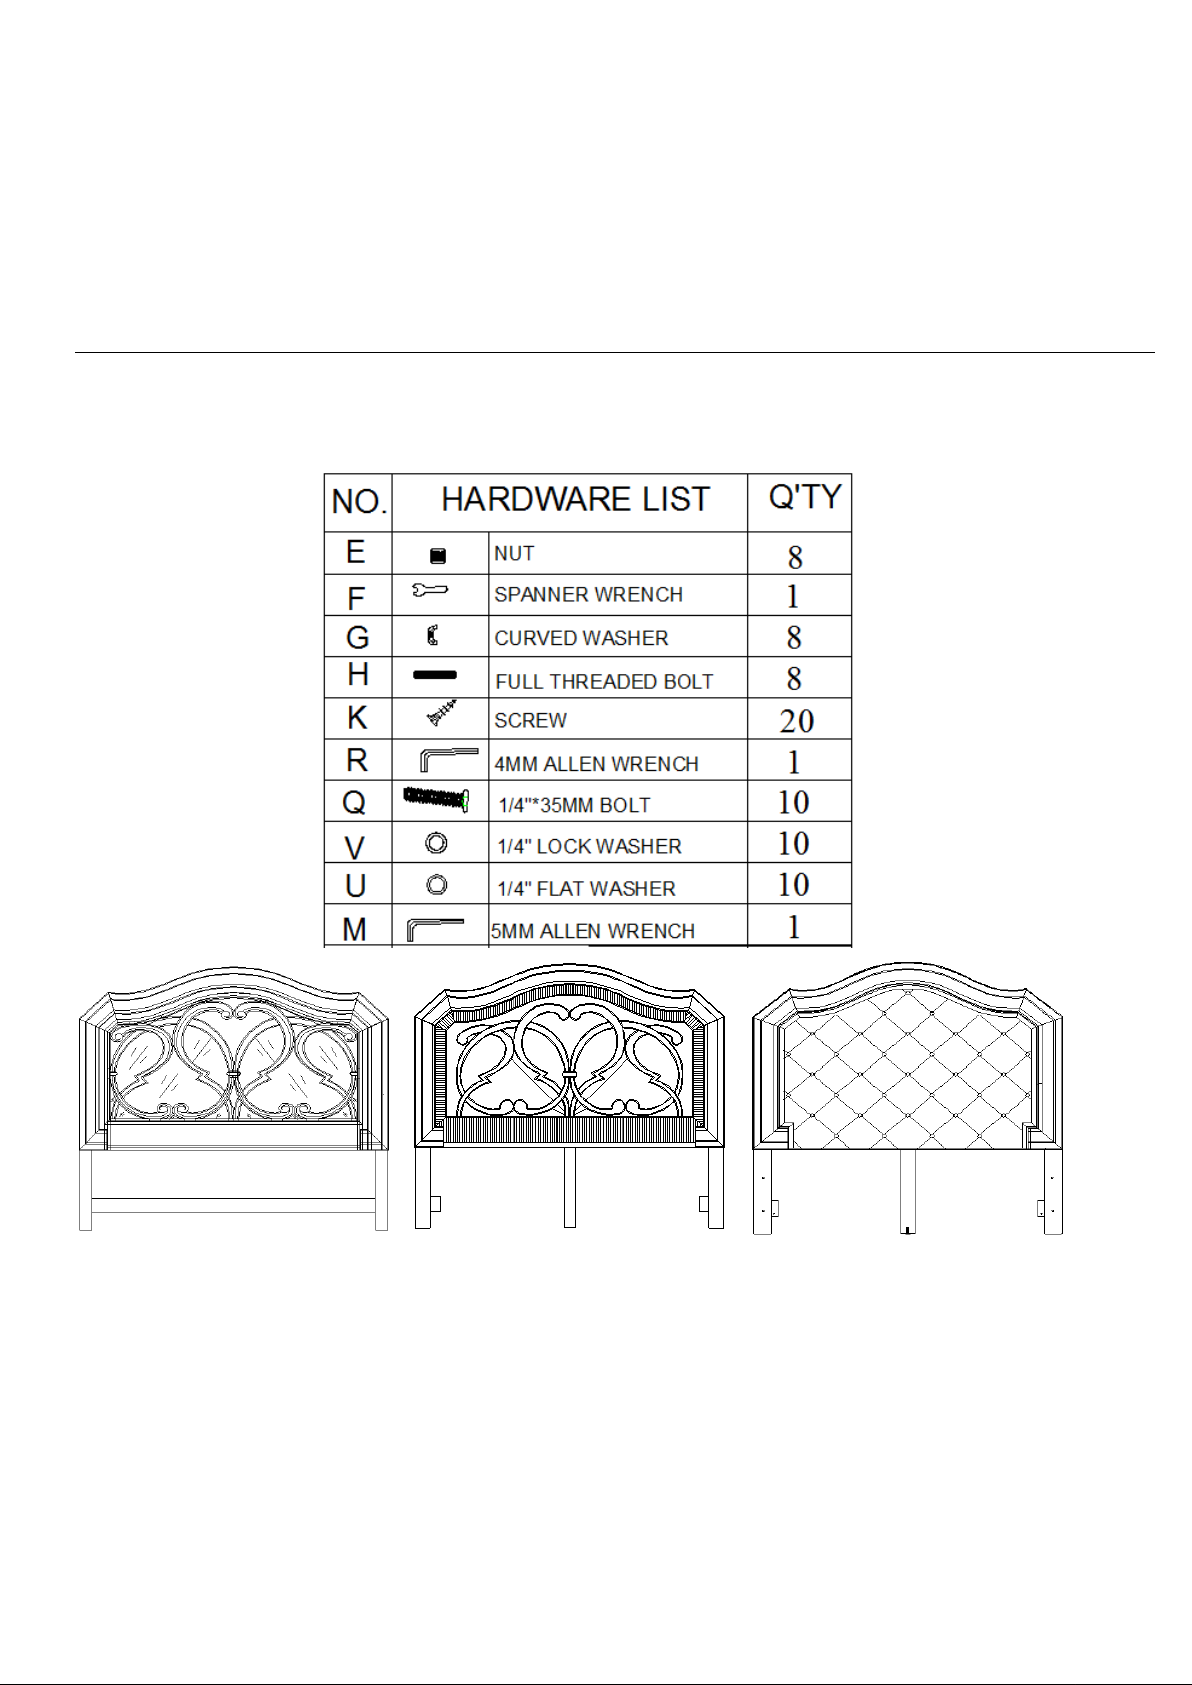
Caution: Please make sure you have all parts indicated below prior to assembly.
This bed is heavy and can best be assembled with the help of two or more persons.
5291-90267 5291-90367 5291-90867
PS: Here are three headboards that use same footboard 5291-90268 and rails
5291-90269.These beds are in the same way to assemble. Below use 5291-90267 headboard
as example.
Page 2
2/4
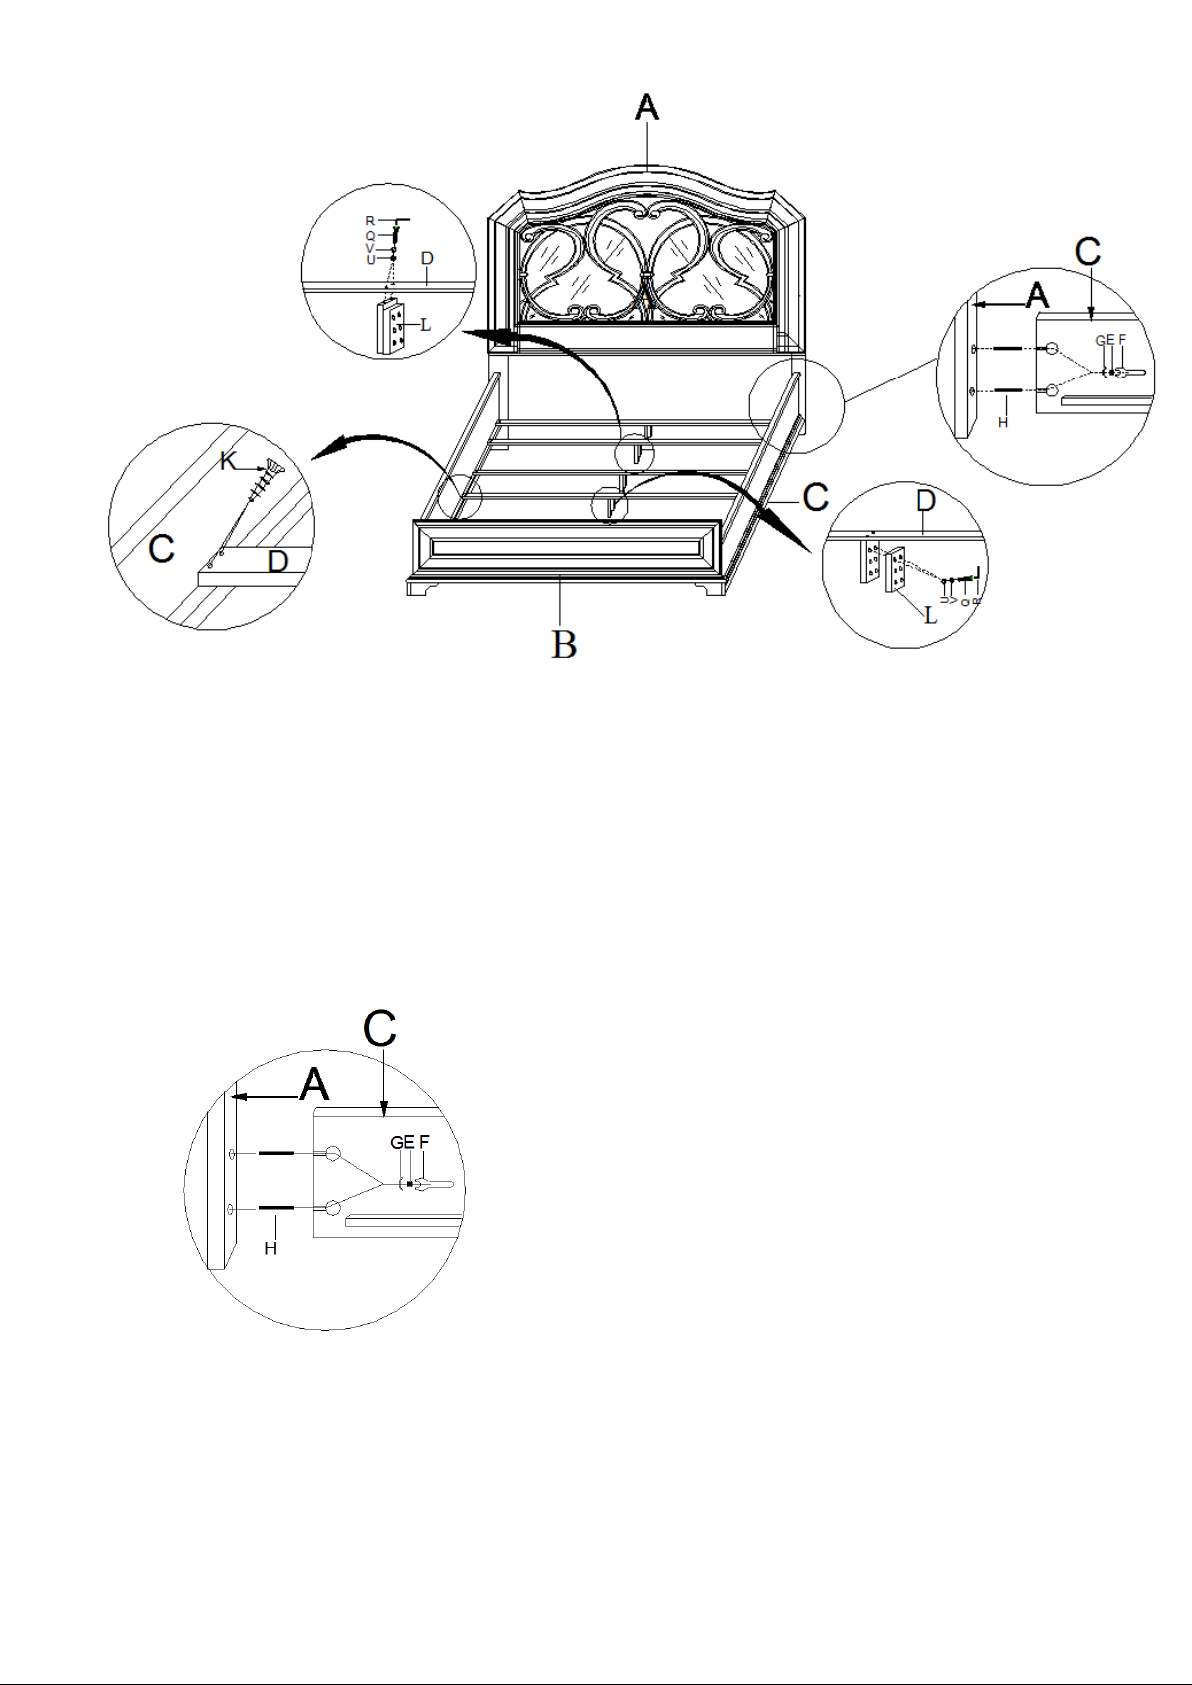
See Diagram 1
See Diagram 2
See Diagram 3
See Diagram 5
Please note the hardware bag to assemble side rails to HB&FB is in the box of
side rails.
Assembly steps:
1. Insert 2 bolts (H) into holes of each side post on Headboard (A) and Footboard (B), attach the end
of side rails (C) to bolts (H) on posts by using 2 curved washers (G) and 2 nuts (E), tighten nuts (E)
securely with spanner wrench (F). (See diagram 1)
Diagram 1
Page 3
3/4
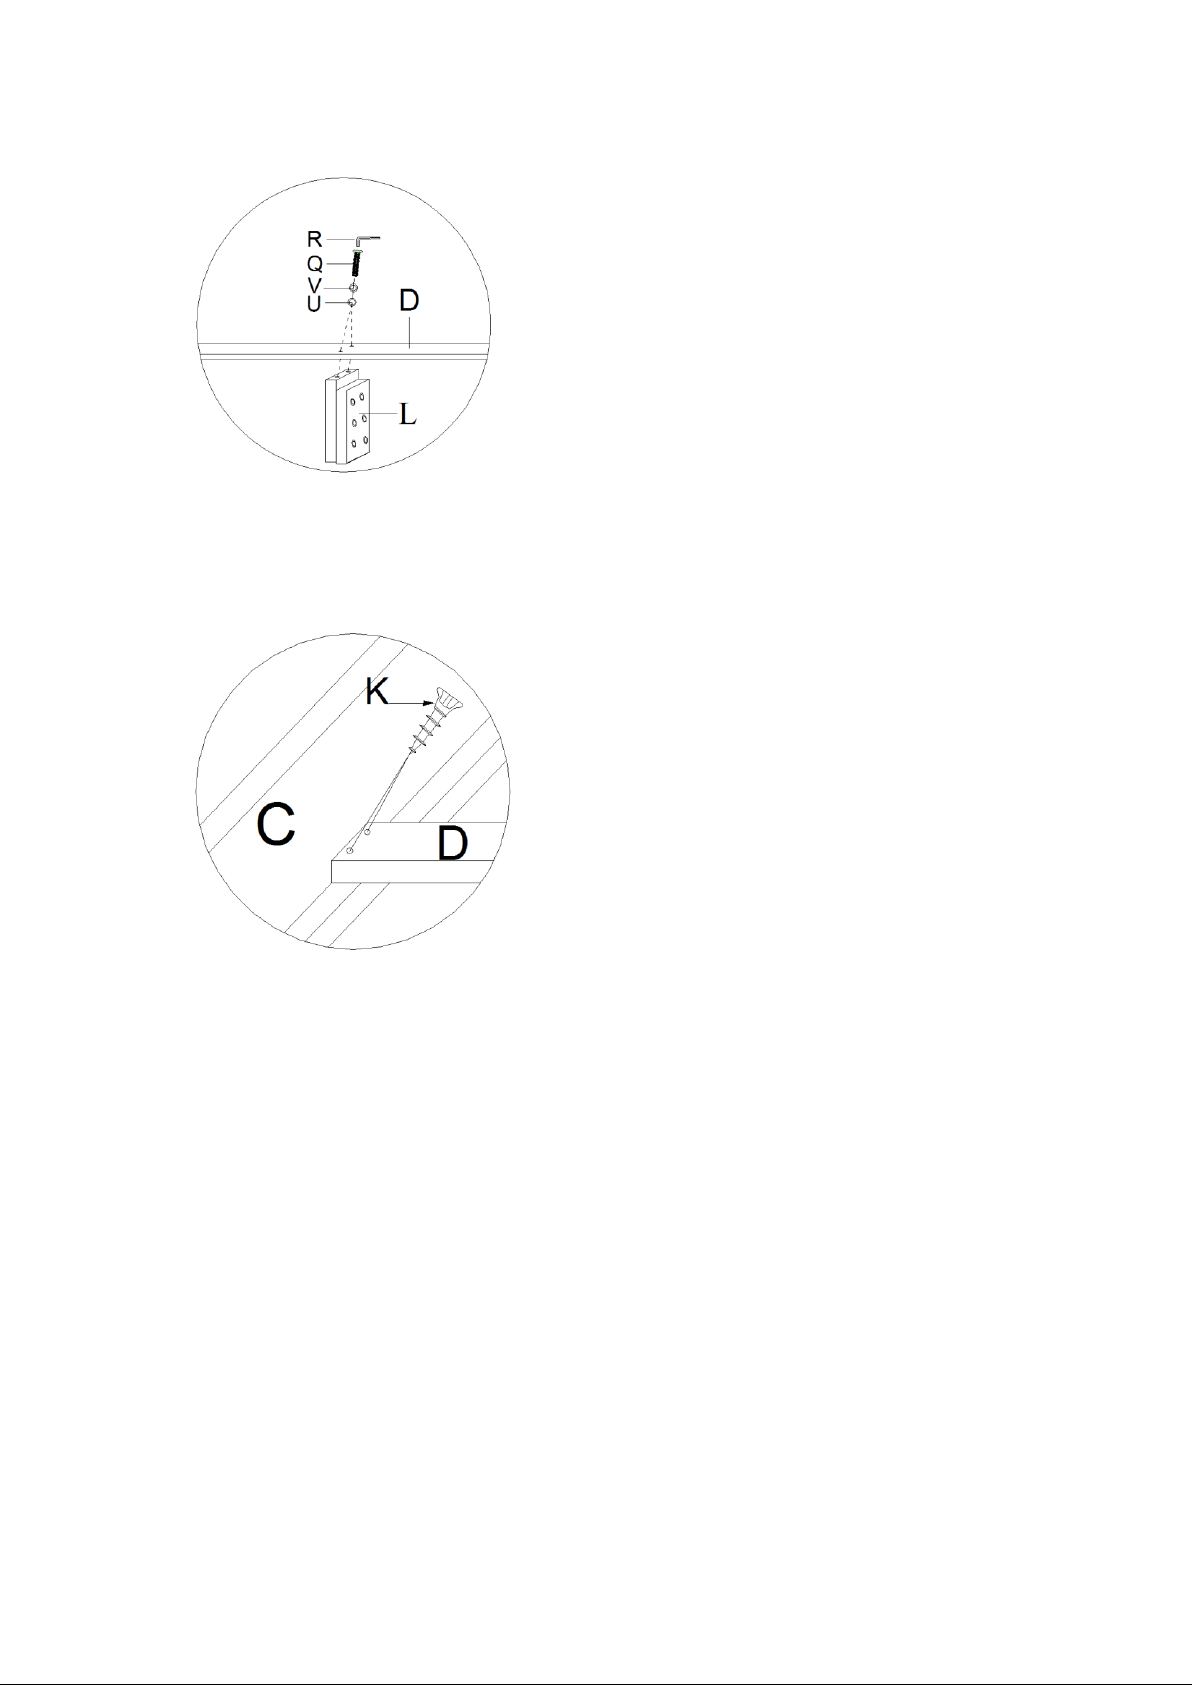
2. Take out center supports (L) from the rail box, attach center supports (L) to slats by using 2 bolts
(Q), 2 lock washers (V) and 2 flat washers (U). Secure bolts (Q) by using allen wrench (R). (See
diagram 2)
Diagram 2
3 Attach slats (D) to side rails (C), align pre-drilled holes on the slat to holes on the cleat of side rail
(C), using screws (K) to tighten both. (See diagram 3)
Diagram 3
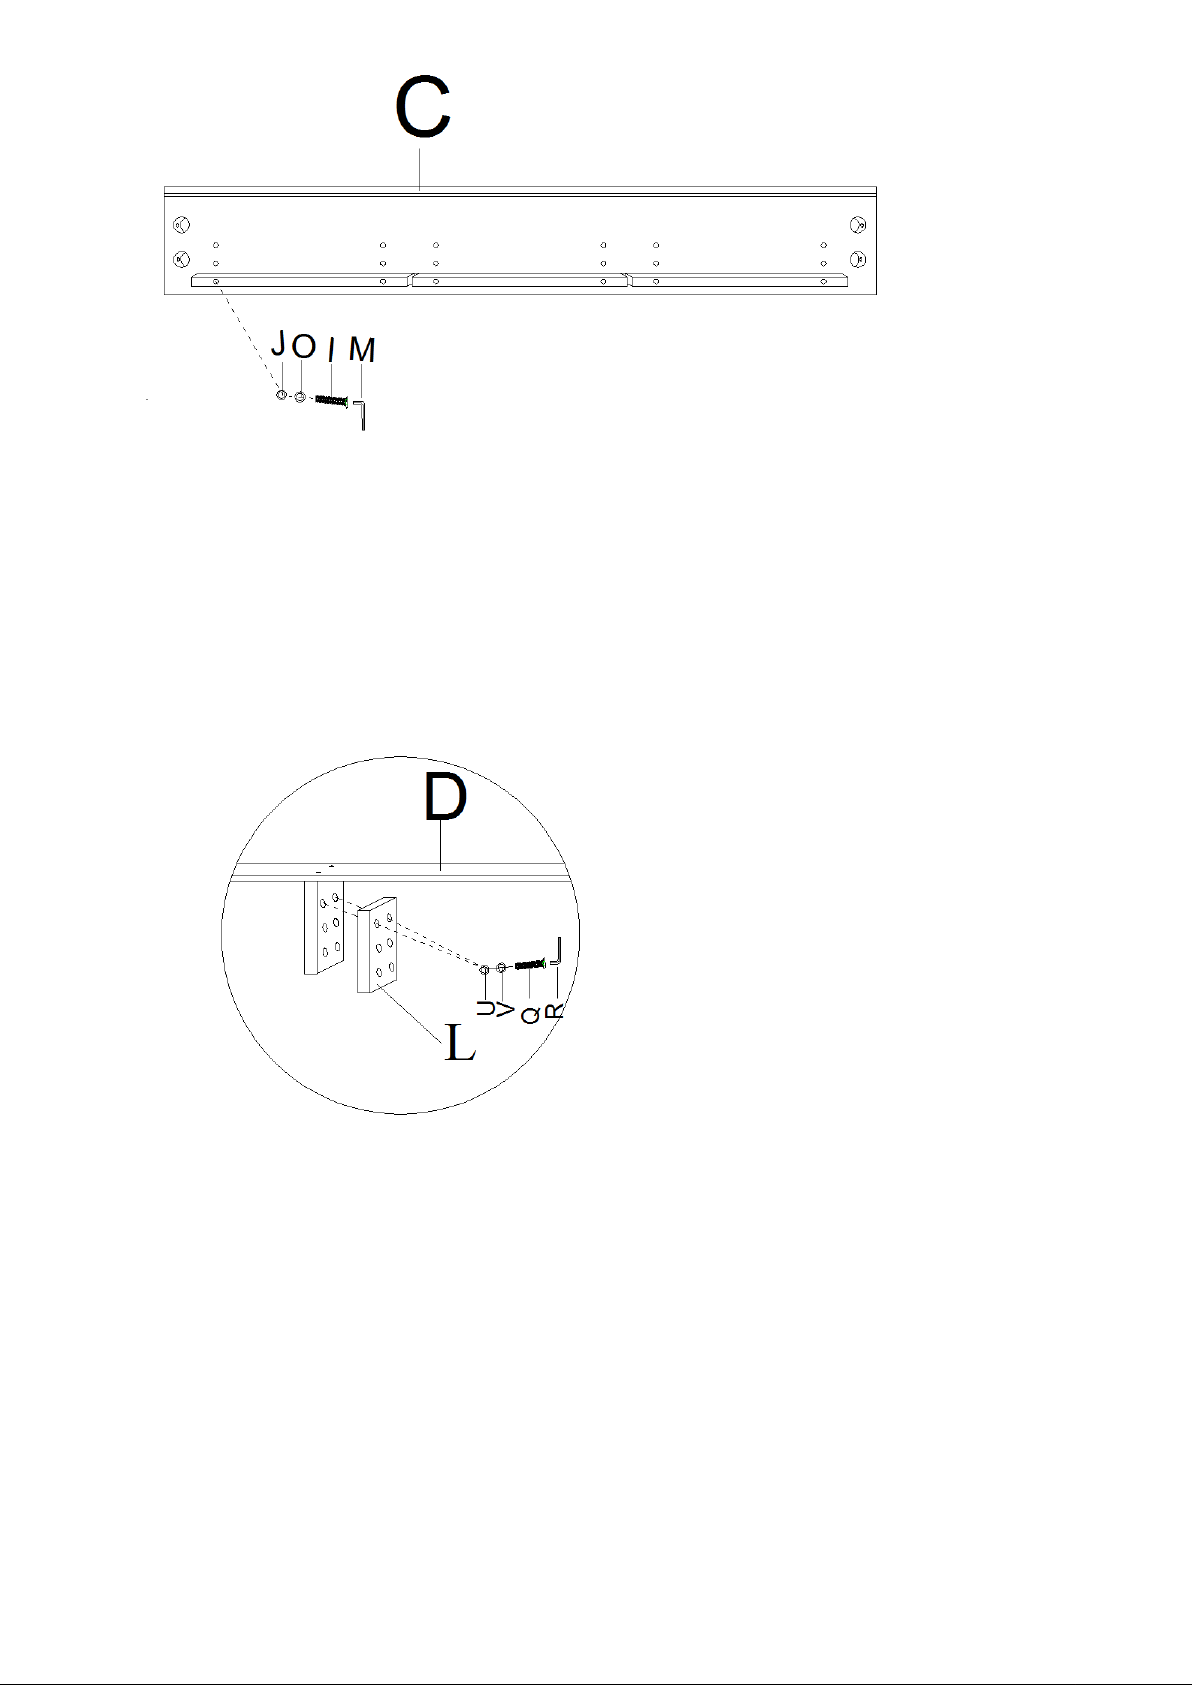
Note: You can change the height of slat by adjusting the height of cleat on side rail as shown in
diagram 4. Remove bolt (I), lock washer (O) and flat washer (J) from the cleat by turning the
bolt (I) with allen wrench (M) in anti-clockwise direction. Adjust the cleat to a desired position,
and then secure lock washer, flat washer, bolt in a clockwise direction by turning with allen
wrench.
Page 4
4/4
Diagram 4
You can adjust the height of center supports (L) as shown in Diagram 5 to meet your need by the
following steps.
1. Unscrew bolts on center supports (L) with allen wrench (R).
2. Adjust the height of center supports, align the holes on 2pcs of woods and tighten them together
with 2 bolts (Q), 2 lock washers (V) and 2 flat washers (U) by turning with allen wrench (R) in a
clockwise direction.
Diagram 5
Cleaning Instruction: Clean finished parts with a mild dishwashing liquid and water solution
on a damp cloth. Polish the finish with soft cloth and an industry recognized furniture
polish.
 Loading...