

Page 1
WREX Wi-Fi Repeater Extender – Quick Installation Guide
For Online Support visit: http://www.security.honeywell.com/hsc/resources/MyWebTech/
General information
This guide provides information on installing and configuring Honeywell' s WREX Wi-Fi Repeater Extender (referred to as the Repeater). The
repeater enables extending the wireless range of your Honeywell IP cameras when used with Honeywell’s WAP-PLUS Wireless Access Point.
Some major features:
Functions as a wireless repeater that communicates with Honeywell’s WAP-PLUS to g reatly extend the range of IP cameras or the ACU Wireless
Analog Converter Unit (ACU).
Wireless communications utilizes the 802.11b/g/n protocol with WPS security. WPS (Wi-Fi Protected Setup) is a standard for easy setup of a
secure wireless network.
IMPORTANT: This repeater is for indoor use only. DO NOT mount this within 4 feet (1.2m) of any wireless device.
To utilize this repeater, you must have
:
An AlarmNet account for a GSM or Internet communicator, or a “Video Services Only” account.
Total Connect account. (If an account does not exist, the dealer should use the A larmNet Direct website to set up a Total Connect account for
the customer.)
Internet access with a wireless router capable of DHCP hosting. The router must also support one button WPS data encryption. If this is not
available, order the Honeywell WAP-PLUS Wireless Access Point for connectio n to your router.
RESET
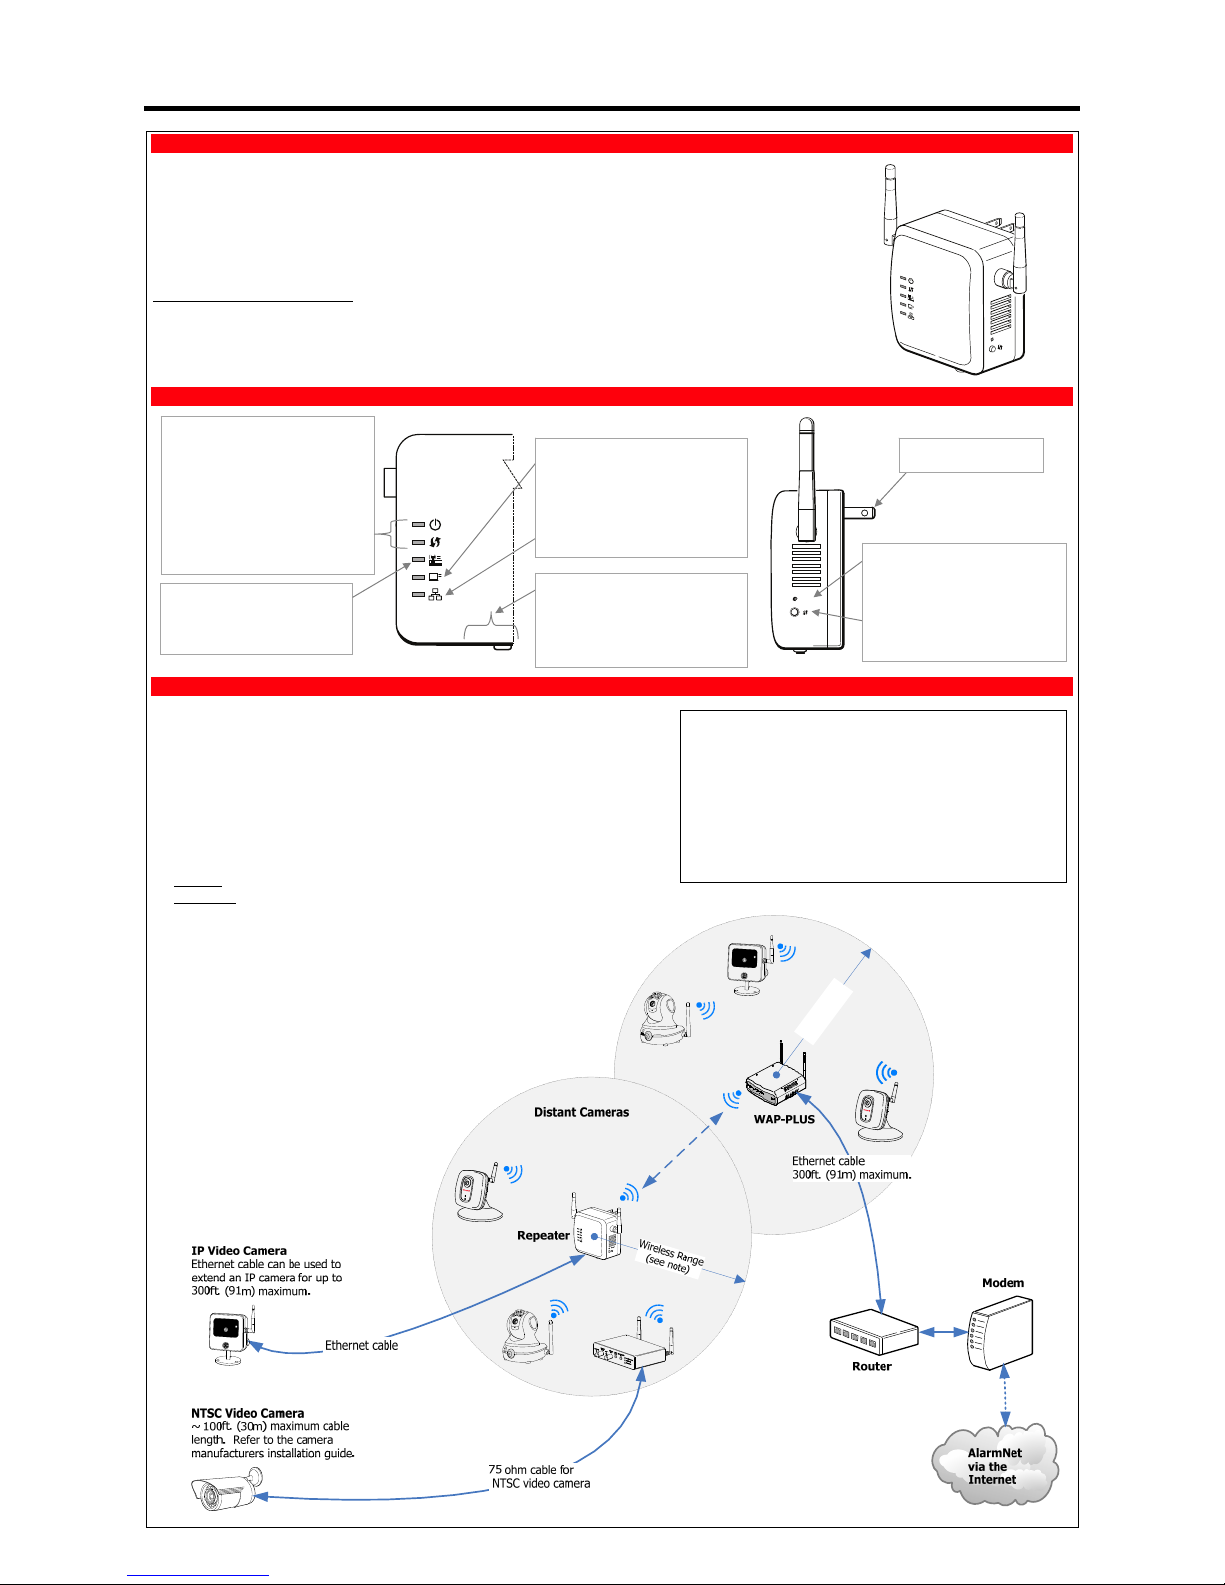
Component identification
Reset
Planning the repeater installation
The installation of repeater, cameras, and WAP-PLUS can be as simple as installing one camera, or up to
six cameras per Total Connect account. In large installations it may inc lude a mix of wireless, and
wired cameras.
The installer should work closely with the customer to achieve a satisfactory installat ion.
W
i
r
e
l
e
s
s
R
a
n
g
e
(
s
e
e
n
o
t
e
)
Layout Considerations:
Depending on layout and distances, one or more Repeaters or WAP-PLUS units may be
needed. Only one Repeater per WAP-PLUS can be used.
Wireless distance may be reduced by thick walls, wire lath, and large metal objects.
For installations where wireless connectivity is poor, see if the WAP-PLUS ha s the newer
WAP-ANT5dB antennas. They are approximately 6 inches (15cm) long. If not, they
can be ordered to retrofit the WAP-PLUS.
Each close IP camera or ACU will communicate directly to the WAP-PLUS.
Each distance IP camera or ACU (Analog Converter Unit) will communicate through the
repeater to the WAP-PLUS
For installations where multiple repeaters or WAP-PLUS units are used, label the units
to indicate which repeater are linked to which WAP-PLUS.
Ensure the correct power transformer is used with each device.
When needed, secure wires with cable ties.
Refer to the installation guides for the WAP-PLUS, ACU (Analog Converter Unit), and
each IP camera for detailed information about that product.
POWER indicator
Green – Power on.
Blinking – Will blink for up t o 40 seconds
during the initial start up.
Amber – System failur e.
WPS indicator
Green – Lights for about 2 minutes when
the WPS button is pushed.
Green Slow Blink ing – WPS is activating.
Green Fast Blinking – WPS fail ure.
Wired Client connector (Ethernet)
Underside (not shown) – Can be connected
to an IP camera or ACU device for wired
connectivity up to 300ft.
POWER button
Depress to power the repeater.
Connect to an outlet that is
alwa
y
s on.
RESET button
Resets repeater to the factory default settings. (Use a paper clip to depress and
hold for 12 seconds, then RELEASE.)
WPS button
Used during setup to configure wireless
encrypted connectivity.
Wireless Range:
The wireless range and bandwidth (data rate) are dependent on the wireless
technology used; as determined by the 802.11b/g/n specifications. This determines the range and data transfer rate. For instance under ideal conditions,
802.11 g provides up to 125ft (38m) range, and 54Mbits/s data rate, and
802.11 n provides up to 230ft (70m) range, and 150Mbits/s data rate.
Other factors that reduce the range are thick walls, wire lath, large metal objects,
and the number of cameras sending data.
Because of the many variables, the best way to determine if the installation is
successful, is to test the finished installation by logging into the Total Connect
website and checking each camera.
Wi-Fi Client connected indicator
One or more client devices are present.
Blinks when data is being transferred.
Green –Signal str ength is good.
Amber – Signal strength is normal.
Wired Client connected indicator
Green
–
Wired client is present.
WAP-PLUS Uplink signal strength
indicator
Green –Signal str ength is good.
Amber – Signal strength is normal.
Page 2
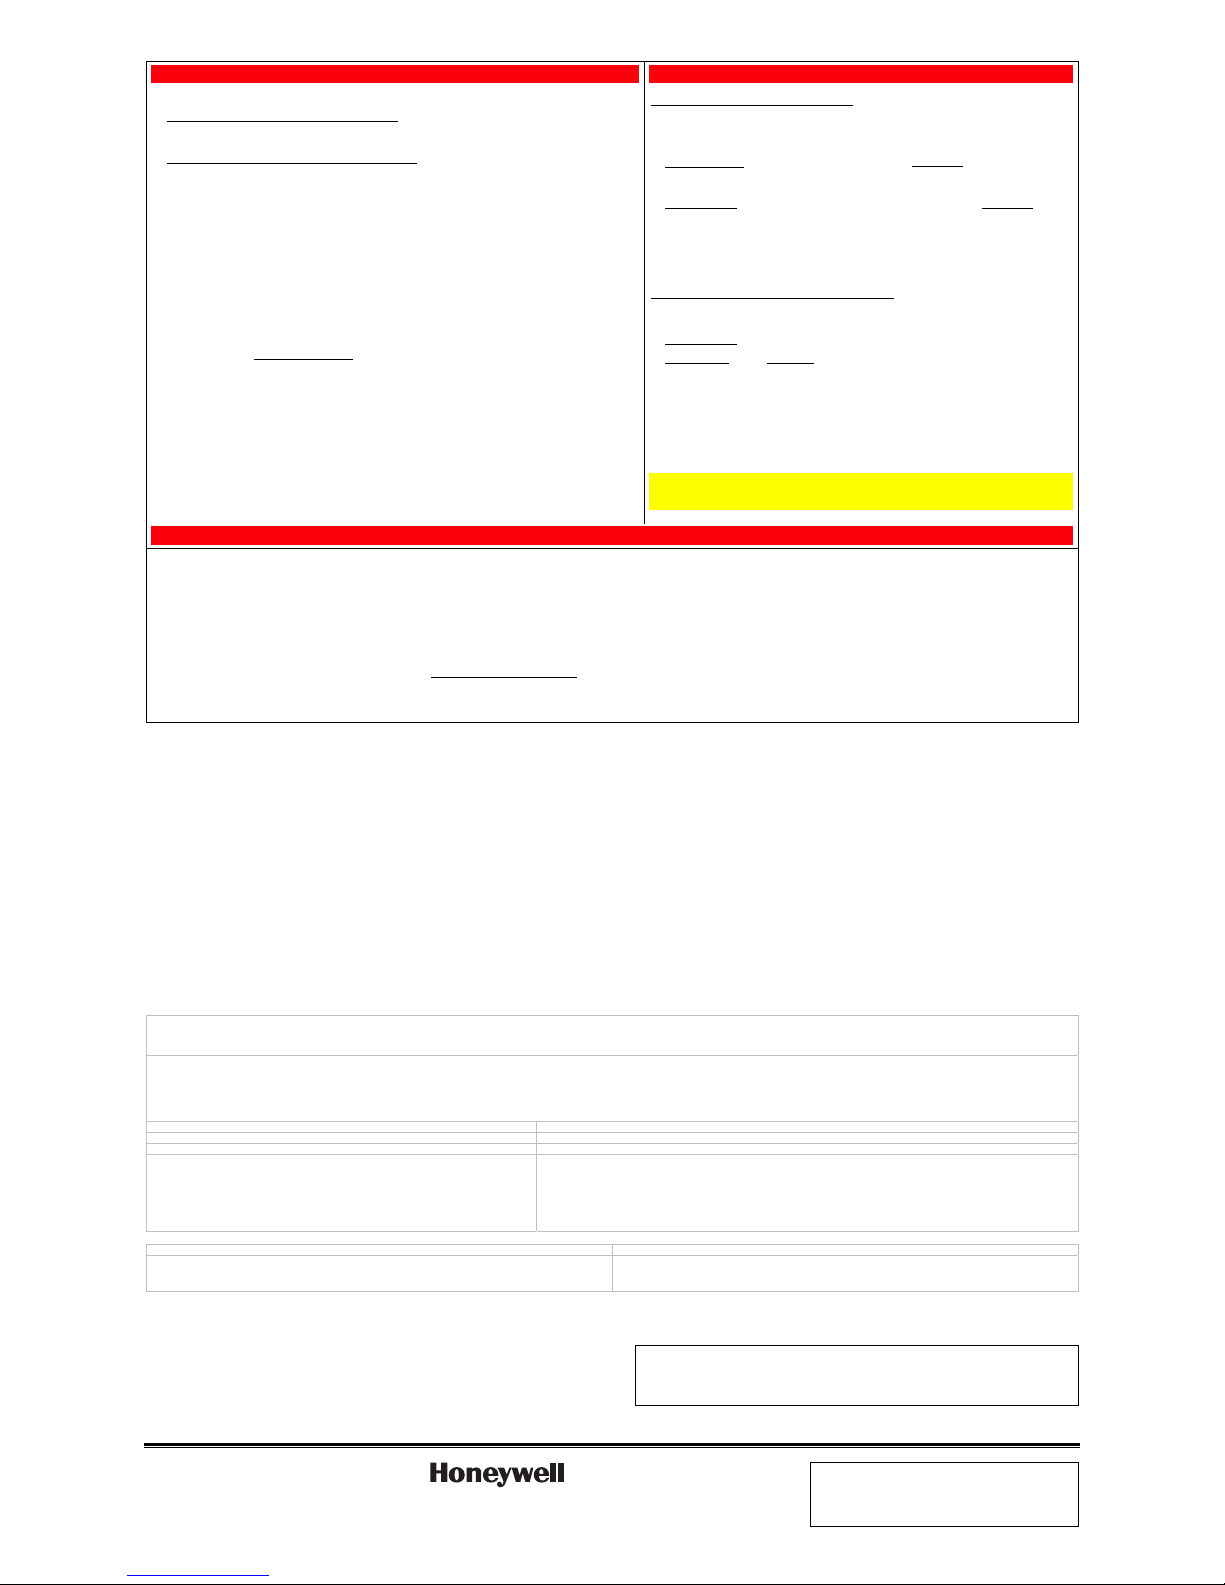
1. Installing the repeater 2. Configure wireless security
1. Refer to the previous topic to plan the installation.
2. For all cameras that are in range of the WAP-PLUS
and DO NOT need the extended range of the
Repeater, these cameras must be installed first. Refer to the camera’s installation guide for directions.
(Note, for existing systems this may have already been done.)
3. For all cameras that are out of range of the WAP-PLUS
continue to the next step.
4. Select a power outlet for the WREX that is powered on all the time and not tied to a switch. Further,
an outlet that is higher is preferable.
5. On the Repeater, depress the POWER button and allow time for the POWER indicator to stop blinking
and remain steady (approximately 40 seconds).
6. Apply power to each camera that is to be associated with the Repeater.
7. Configure wireless security for the Repeater as described to the right.
NOTES:
Refer to the installation guides for the WAP-PLUS, ACU (Analog Converter Unit), and each camera for
detailed information about that product.
If using more than one wireless camera, each must be configured for wireless security. Configure one
camera at a time.
When setting up a wireless configuration
in very large buildings or buildings with dense walls, wireless
communications may be marginal. It is best to first configure the system in the same room. Then
upon successful configuration, place each camera in the desired location. Verify t hat all cameras
exhibit good communications as indicated by a STEADY GREEN Power LED and a Network LED that
occasionally BLINKS GREEN.
Linking the Repeater to the WAP-PLUS
1. Ensure the WAP-PLUS is on and fully booted (allow 2 minutes for the boot process to
complete).
2. Ensure the Repeater is on and fully booted (approximately 40 seconds).
3. At the WAP-PLUS
, press and hold the WPS button for 3 seconds, then RELEASE. Verify
the WAP-PLUS Security light starts blinking (other wireless access poin ts may be
different).
4. At the Repeater
, within 1 minute, press and hold the WPS button for 5 seconds, then
RELEASE.
5. Verify the repeater’s WPS indicator blinks slowly at first then the WAP-PLUS Uplink
signal strength indicator lights steady green. (This process may take 5 minutes so be
patient.) If the WPS indicator switches to a fast blink that indicates a WPS failure.
Repeat the above steps.
Linking the Repeater to its associated cameras
1. Ensure the cameras are powered up and fully booted (allow 2 minutes for the boot
process to complete).
2. At the Repeater
, depress the WPS button, then RELEASE.
3. At the camera
, within 1 minute, click and RELEASE the WPS button on the camera.
4. Allow up to 45 seconds for the WPS process to complete. Then at the camera, verify
successful wireless security as indicated by a STEADY GREEN Power LED and a Network
LED that occasionally BLINKS GREEN. If these indicators are present you are done.
5. Repeat the above steps for each camera.
NOTES:
If the WREX is power cycled, a camera may need 10-15 minutes to re-establish connec-
tivity to the WREX repeater.
If the camera is being used in a wireless mode, and the Reset button was used to
restore factory defaults; you must delete that camera from the AlarmNet Direct account,
and enroll it back into the account. Then reconfigure wireless security for that camera.
3. Enroll or edit the camera(s) in AlarmNet Direct
Dealers can enroll the camera and set up a Total Connect account for their customers b y
visiting the AlarmNet Direct website:
https://services.alarmnet.com/AlarmNetDirect/
Go to the online help and;
For customers with no AlarmNet accounts – follow the procedure for “
Creating a Video
Services Only Account
.”
For customers with an existing “Video Only” account – just add the new camera.
For customers with an existing AlarmNet GSM or Internet communicator account –
ensure the account number is green (registered) and the Has Remote Service Capabilities
icon is
present. Then just add the new camera.
When the Repeater and its associated cameras are set up and the customer’s Total
Connect account is established, they can view their video by visi ting:
http://www.mytotalconnect.com/
The cameras are now ready for customer use.
Have the customer log into their Total Connect account to view the video.
If their PC does not have QuickTime® and Flash® player, you will be prompted to install or
update these applications.
If any of the cameras were mounted upside down, there is a setting to upright the im age.
At this time the location of each camera can be adjusted for the desired view.
When adding, editing, or deleting a camera, the customer will receive email notification.
For detailed camera operation refer to the Total Connect online help guide.
FEDERAL COMMUNICATIONS COMMISSION STATEMENTS
The user shall not make any changes or modifications to the equipment unless authorized by the Installation Instructions or User's Manual. Unauthorized changes or modifications could void the user's authority to operate the
equipment.
CLASS B DIGITAL DEVICE STATEMENT
This equipment has been tested to FCC requirements and has been found acceptable for use. The FCC requires the following statement for your information:
This equipment generates and uses radio frequency energy and if not installed and used properly, that is, in strict accordance with the manufacturer's instructions, may cause interference to radio and television reception. It has
been type tested and found to comply with the limits for a Class B computing device in accordance with the specifications in Part 15 of FCC Rules, which are designed to provide reasonable protection against such interference in
a residential installation. However, there is no guarantee that interference will not occur in a particular installation. If this equipment does cause interference to radio or television reception, which can be determined by turning the
equipment off and on, the user is encouraged to try to correct the interference by one or more of the following measures:
• If using an indoor antenna, have a quality outdoor antenna installed. • Move the antenna leads away from any wire runs to the receiver/control.
• Reorient the receiving antenna until interference is reduced or eliminated. • Plug the receiver/control into a different outlet so that it and the radio or television receiver are on different branch circuits.
• Move the radio or television receiver away from the receiver/control. • Consult the dealer or an experienced radio/TV technician for help.
INDUSTRY CANADA CLASS B STATEMENT
This Class B digital apparatus complies with Canadian ICES-003.
Cet appareil numérique de la classe B est conforme à la norme NMB-003 du Canada.
FCC / IC STATEMENT
This device complies with Part 15 of the FCC Rules, and RSS210 of Industry Canada. Operation is subject to the following two
conditions: (1) This device may not cause harmful interference, and (2) This device must accept any interference received,
including interference that may cause undesired operation.
Cet appareil est conforme à la partie 15 des règles de la FCC & de RSS 210 des Industries Canada. Son fonctionnement est
soumis aux conditions suivantes: (1) Cet appareil ne doit pas causer d' interferences nuisibles. (2) Cet appareil doit accepter toute
interference reçue y compris les interferences causant une reception indésirable.
DECLARACIÓN COFETEL DECLARACIÓN ANATEL
La operación de este equipo está sujeta a las siguientes dos condiciones.
1. Es posible que este equipo o dispositivo no cause interferencia perjudicial y.
2. Este equipo debe aceptar cualquier interferencia, incluyendo la que pueda causar su operación no deseada.
Este equipamento opera em caráter secundário, isto é, não tem direito a proteção contra interferência
prejudicial, mesmo de estações do mesmo tipo, e não pode causar interferência a sistemas operando em caráter
primário.
TRADEMARKS
Honeywell is a registered trademark of Honeywell International Inc.
Flash is a registered trademark of Adobe Systems Incorporated, registered in the U.S. and other countries.
QuickTime is a registered trademark of Apple Inc., registered in the U.S. and other countries.
Ê800-14129:Š
800-14129 7/13 Rev. C
2 Corporate Center Drive, Suite 100
P.O. Box 9040, Melville, NY 11747
Copyright 2013 Honeywell International Inc.
www.honeywell.com/security
WARRANTY
For the latest warranty information go to:
http://www.security.honeywell.com/hsc/resources/wa/
 Loading...