

Page 1
WAP Wireless Access Point – Quick Installation Guide
For Online Support visit: http://www.security.honeywell.com/hsc/resources/MyWebTech/
General Information
This guide provides information on installing and setting up Honeywell's WAP Wireless Access
Point. The WAP provides an easy-to-setup secure wireless solution that enables Honeywell's
iPCAM series internet video cameras to communicate with a broadband modem or LAN.
Some major features of Honeywell's WAP Wireless Access Point are:
• Functions as a secure wireless access point.
• Wireless communications utilizes the 802.11b/g/n protocol with WPS security. WPS (Wi-Fi
Protected Setup) is a standard for easy setup of a secure wireless network.
• In addition to wireless communications, there are three 10/100 Mbps Ethernet ports
available for wired cameras.
IMPORTANT: This device is for indoor use only.
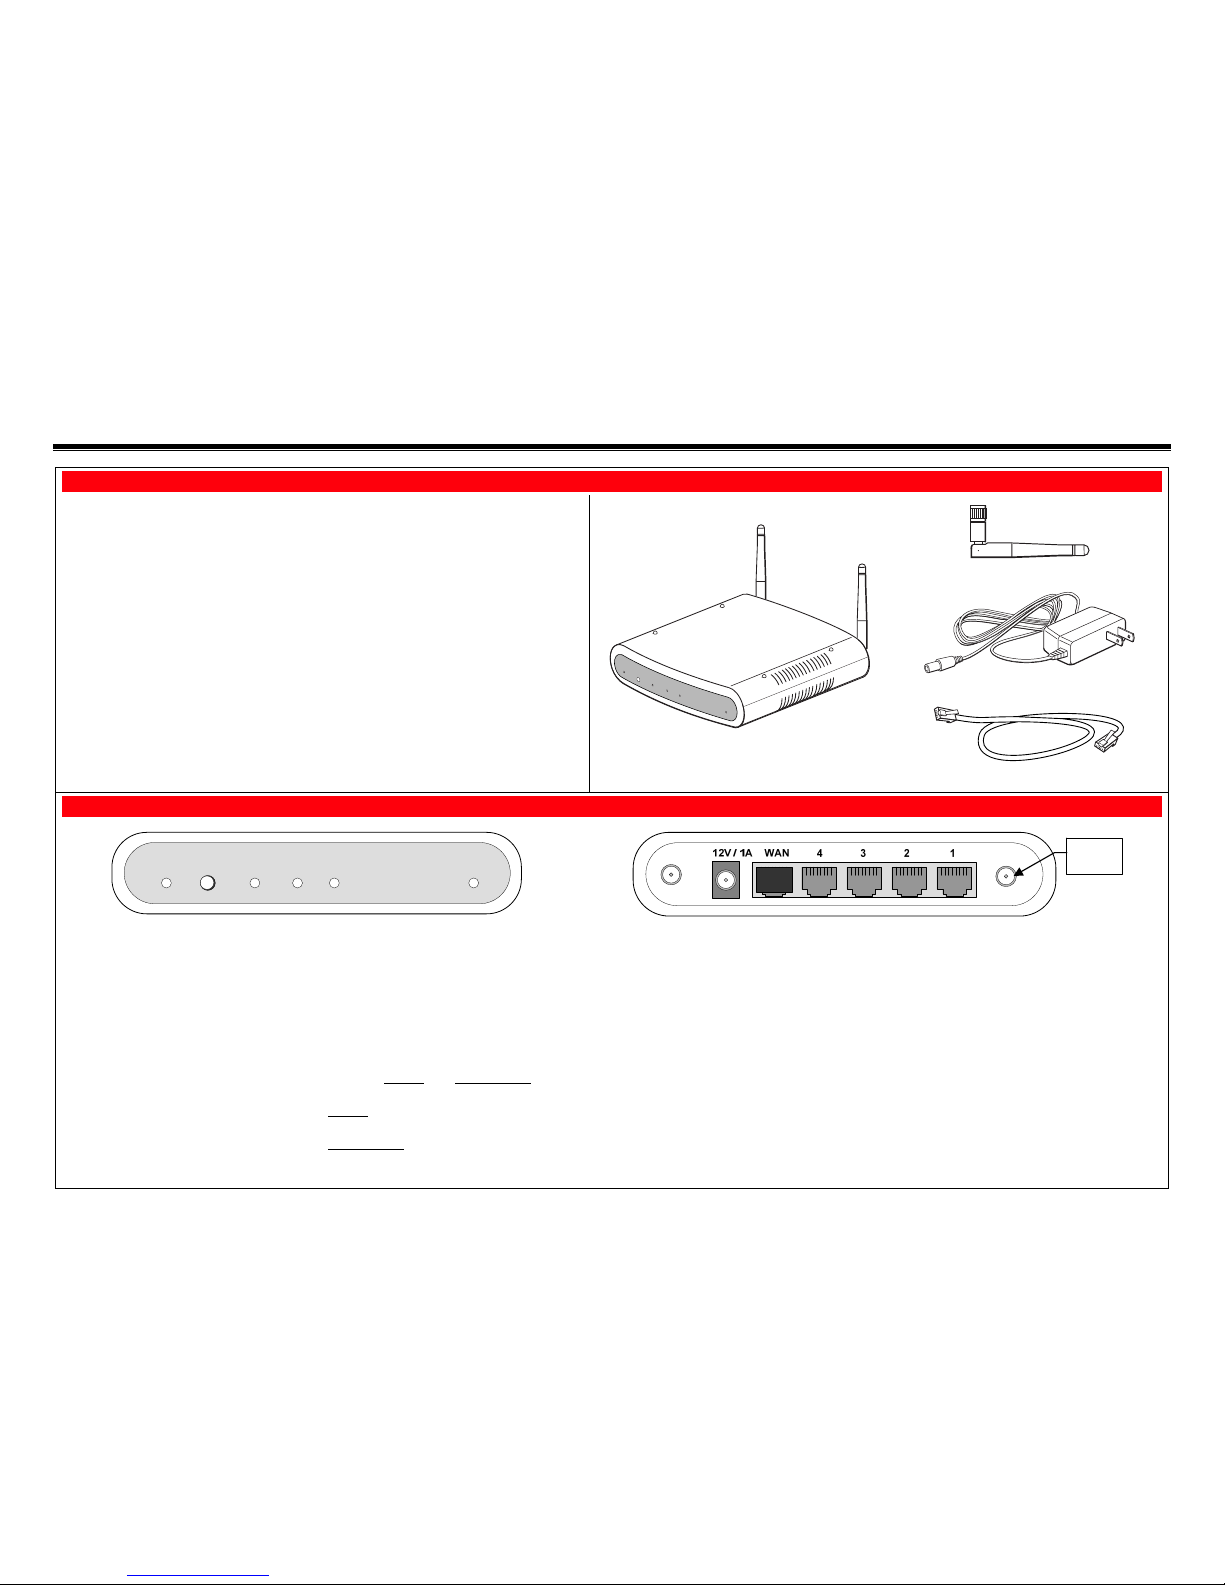
PACKAGE CONTENTS
LAN
Wireless
WPS
Reset
Security
Power
WAP Wireless Access Point
Antenna [Qty 2]
Power Transformer
Ethernet Cable
Component Identification
Security WPS Wireless LAN Power Reset
Security:
On – WPS security is set to on.
Flashing – Flashes when WPS button has
been pressed for 3 seconds and released,
to indicate the WAP is transmitting a new
security key to the wireless camera. When
the wireless camera replies, the Security
LED lights solid.
WPS (button): Used to setup a secured
wireless connection. (Refer to the
documentation for the wireless camera.)
Wireless:
On – Wireless connection exist.
Off – No Wireless connections exist.
Flashing (Amber) – Problem occurred while
trying to establish the Wireless connection.
LAN:
On – The LAN port(s) is active.
Flashing (Amber) – Problem occurred while
trying to connect to the LAN.
Power: When power is applied the LED
blinks during an initialization period, then
remains steady to indicate power is
connected.
Reset (switch): This switch has two
functions; Reboot
, and Clear All Data. Use
a paper clip to depress.
Reboot
– Depress and Release to reboot.
(Allow cycle to complete.)
Clear All Data
– Depress and hold for 8
seconds to clear all data, and restore
factory settings. (Allow cycle to complete.)
12V / 1A: Connect Power Transformer.
WAN: Not Used. (Do not remove the cap plug.)
Ports 1, 2, 3, 4: For connection to Ethernet devices.
Antenna Ports: Connect the supplied antennas to these ports.
Antenna
Port (2)
Page 2
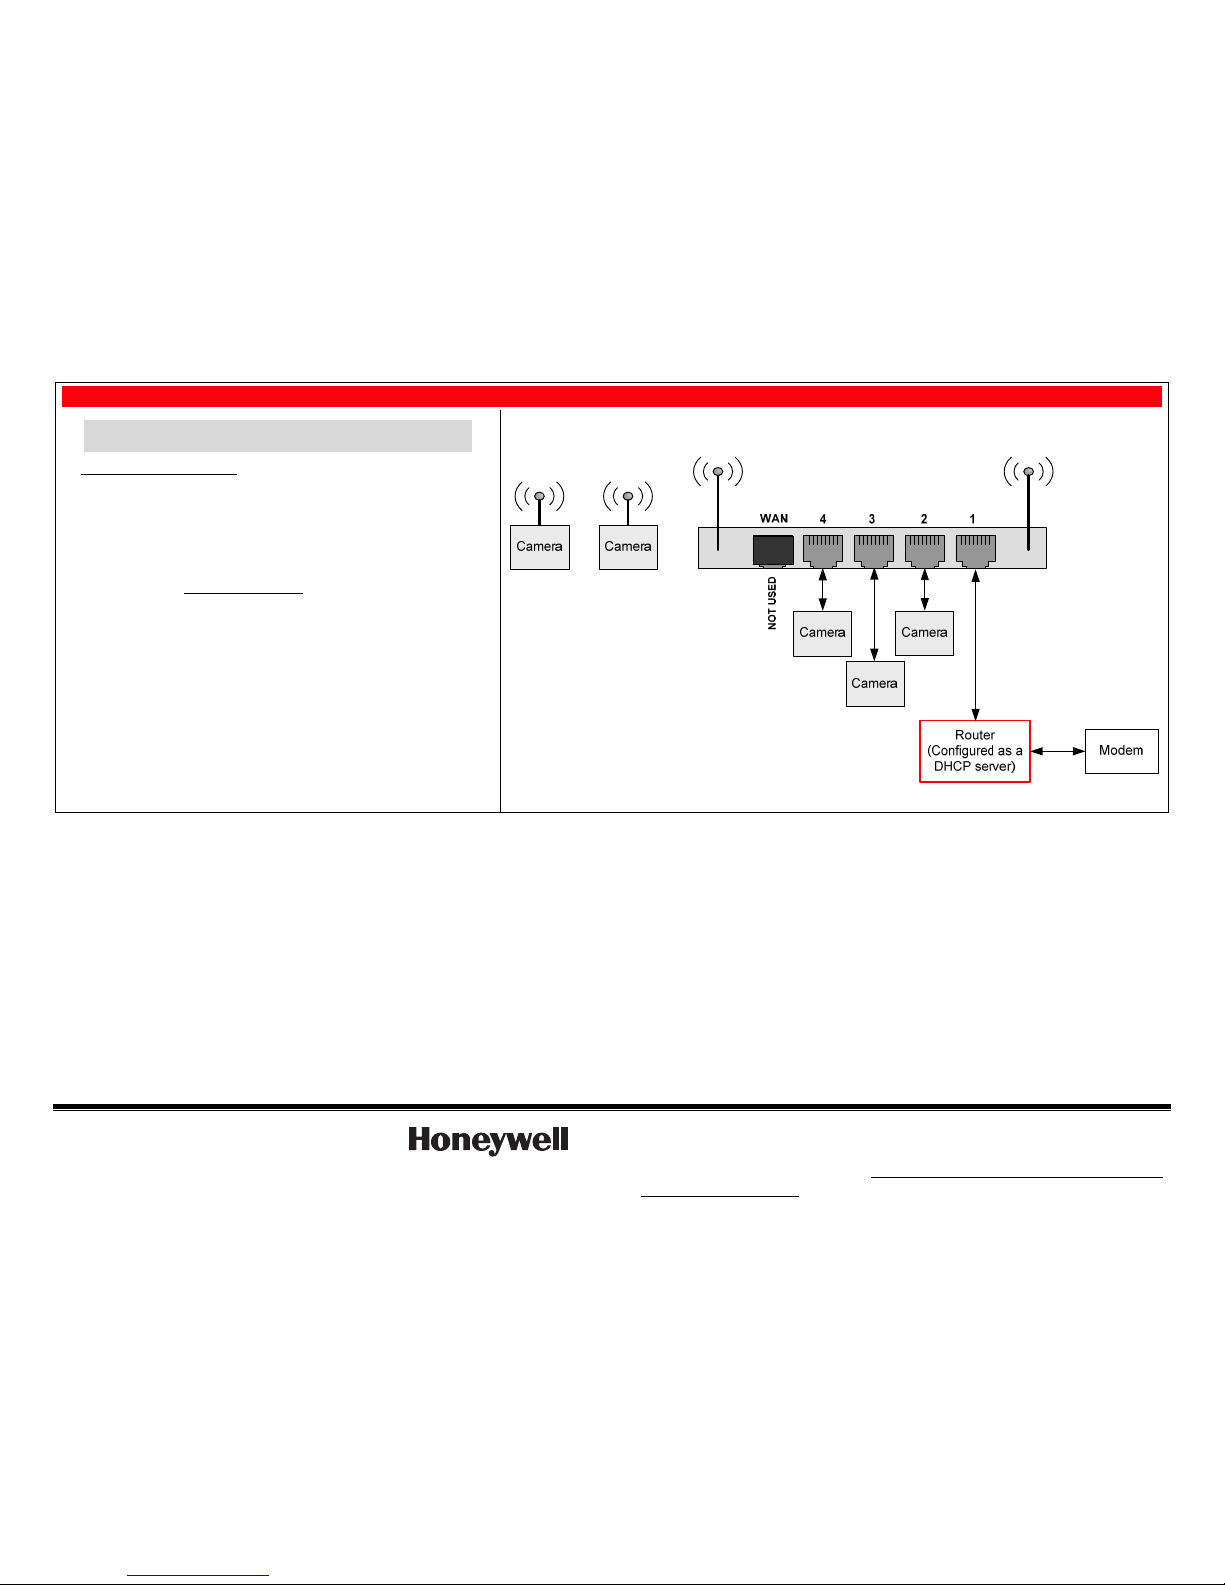
Typical Setup Configuration for the WAP
For specific setup and configuration instructions for your
wireless camera, refer to the camera's installation guide.
1. If using wireless connectivity, attach the two antennas to the WAP. Orient
each antenna vertically and tighten the knurled connectors.
2. Connect the Power Transformer wire to the 12V / 1A connector on the
WAP back. Plug the Power Transformer into an outlet.
NOTE: The Power Transformer must be powered by a non-switchable
power outlet.
IMPORTANT:
• When setting up a wireless configuration
in very large buildings or
buildings with dense walls, wireless communications may be marginal. It is
best to first configure the system in the same room. Then upon successful
configuration, place each wireless camera in the desired location.
• If using more than one wireless camera, each must be configured for
wireless security.
• If using a router instead of Honeywell's WAP, please ensure your router is
configured for DHCP. (This is the default setting for most routers.) If you
are unsure, you can access the router's configuration page and set it for
DHCP if necessary (refer to the router's manual). Since the operation of
each router varies, please refer to the router's manufacturer for support.
• Test the system to ensure all cameras exhibit good communications.
Typical configuration using a mix of wired and wireless cameras:
Ê800-05000:Š
800-05000 11/09 Rev. A
2 Corporate Center Drive, Suite 100
P.O. Box 9040, Melville, NY 11747
Copyright © 2009 Honeywell International Inc.
www.honeywell.com/security
WARRANTY
For the latest warranty information go to:
http://www.security.honeywell.com/hsc/resources/wa/
 Loading...