

Portable Air Conditioner
User Manual (Web)
Read and save these instructions before use
Model:
MN10CHESWW
MN12CHESWW
Customer Support:
Web: www.jmatek.com
USA: 1-800-474-2147 | usinfo@jmatek.com
CANADA^: 1-888-209-0999 | canadainfo@jmatek.com
^ Canada Customer Support service available for models sold in Canada only.

SAFETY
READ AND SAVE THESE INSTRUCTIONS
IMPORTANT SAFETY INSTRUCTIONS. READ CAREFULLY AND
KEEP FOR FUTURE REFERENCE. IN CASE THERE IS ANY
INCONSISTENCY OR CONFLICT BETWEEN THE ENGLISH
VERSION AND ANY OTHER LANGUAGE VERSION OF THE
CONTENT OF THIS MATERIAL, THE ENGLISH VERSION
SHALL PREVAIL.
WARNING:
•
DO NOT operate the unit with a damaged plug or loose wall
outlet. If the supply cord is damaged, it must be replaced
by the manufacturer, its service agent or similarly qualified
persons in order to avoid a hazard.
•
DO NOT cover the air intake and exhaust when in use.
•
DO NOT place objects on or sit on the unit.
•
Always turn off and unplug the unit when cleaning or
servicing.
•
DO NOT use the appliance if it is damaged.
•
If service is needed contact an authorized service agent.
•
Unplug the unit when stored or not in use.
•
DO NOT pull or carry the appliance by the power cord.
•
DO NOT pinch the power cord in the door and DO NOT pull
it along edges or sharp corners.
•
DO NOT run the power cord under carpeting and rugs.
•
Use caution to prevent tripping on cord.
•
DO NOT use the device in the following cases:
- Near a fire source
- In areas where gasoline, paint or other flammable
goods are stored
- In an area where the water can be projected
•
DO NOT touch the plug or the device with wet hands.
•
Basic safety precautions should always be followed when
using electrical appliances.
EN

SAFETY (CONTINUED)
This appliance has been manufactured for use in domestic
•
environments and should not be used for other purposes.
Only use the installation kit provided to install this unit.
•
DO NOT attempt to extend the Exhaust Hose or install
this unit using other methods other than that shown in
this manual. Improper installation will void any existing
warranties.
DO NOT use an extension cord with this unit.
•
This appliance can be used by children aged from 8 years
•
and above, and persons with reduced physical, sensory or
mental capabilities or lack of experience and knowledge if
they have been given supervision or instruction concerning
use of the appliance in a safe way and understand the
hazards involved. Children shall not play with the appliance.
Cleaning and user maintenance shall not be made by
children without supervision.
Never insert your fingers or rods into the air outlet. Take
•
special care to warn children of these dangers.
The manufacturer is not liable for injury caused to
•
persons or property damage due to non-compliance
with maintenance instructions and improper use of the
appliance.
The appliance shall be installed in accordance with national
•
wiring regulations.
The appliance is not to be used by persons (including
•
children) with reduced physical, sensory or mental
capabilities, or lack of experience and knowledge, unless
they have been given supervision or instruction.
Children should be supervised to ensure that they do not
•
play with the appliance.
EN
THANK YOU
Congratulations on your purchase of this Honeywell Portable Air Conditioner.
Regarding the information pertaining to the installation, handling, servicing, cleaning and disposal
of the appliance, please refer to the below paragraph of the manual.
USER TIPS
Portable Air Conditioners are ideal for spot cooling. The compressor, condenser and evaporator are
housed in a compact unit. The air is dehumidified and cooled while a flexible Exhaust Hose sends
heat outside. The air conditioner includes a window venting kit.
No permanent installation is needed. The unit is easy to move from room to room and offers a truly
flexible air conditioning solution.
Auto Evaporation System - The unit automatically evaporates the condensate through the Exhaust
Hose. There is no need to empty the drainage tank except in humid conditions. Read and follow the
instructions carefully.
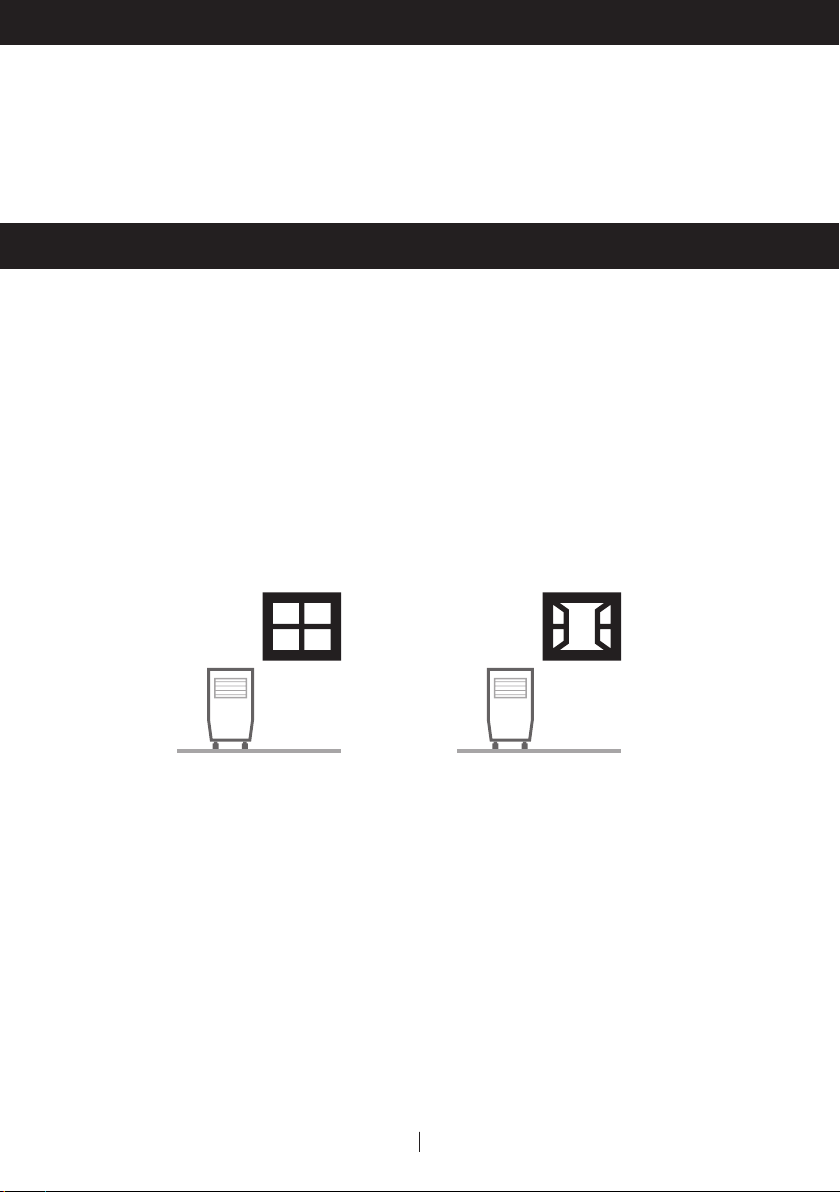
To ensure optimal efficiency of the product, keep doors and windows closed when it is used as an air
conditioner or dehumidifier. If the product is being used with the fan function only, an open window
could improve air circulation.
Cooling, Heating* and Dehumidifying
Important:
Before installing the unit, place it UPRIGHT for 1 hour before use to allow the refrigerant to stabilize.
Manually adjust the air vent located at the top of the unit to adjust the direction of air flow.
Follow installation instructions to set up the unit.
•
Plug the unit into a properly grounded circuit. DO NOT plug into an extension cord.
•
Operation
EN
Fan Operation
*Applicable for models with Heating feature only.
1
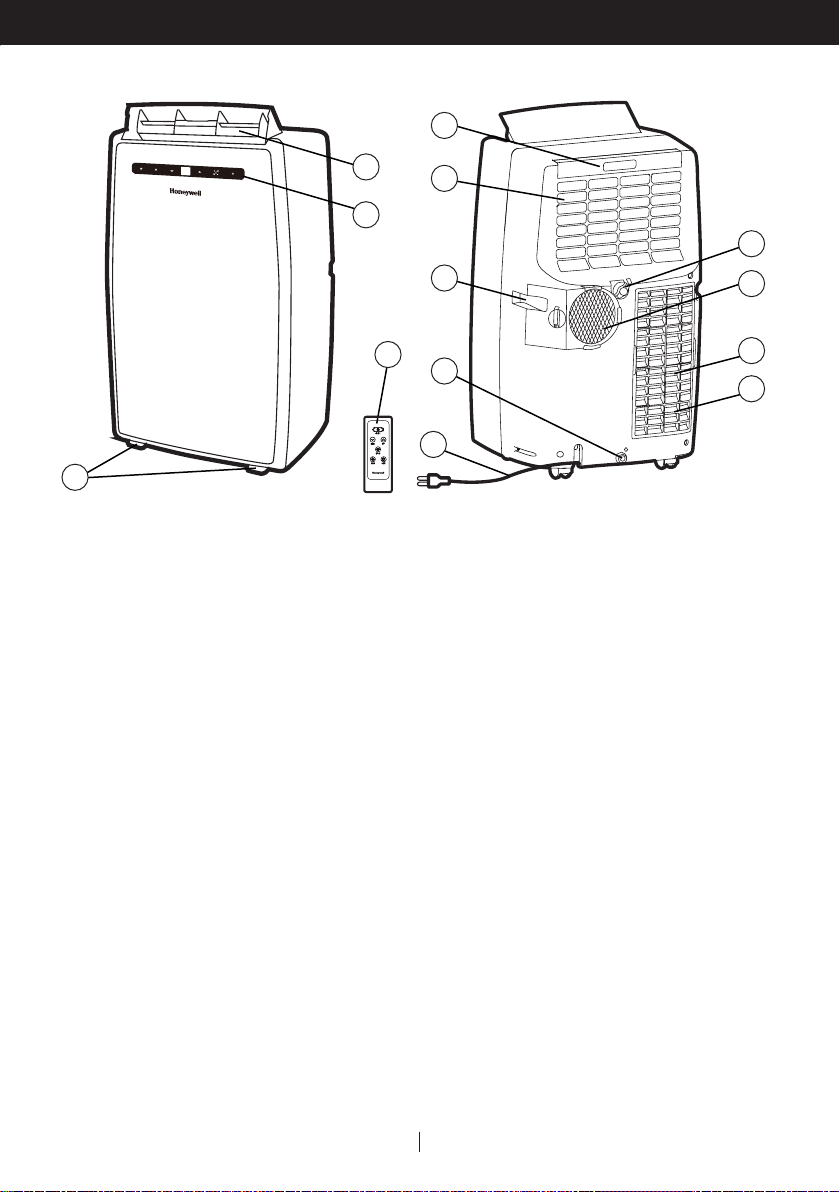
PARTS DESCRIPTION
5
2
6
1
3
9
10
8
4
1) Control Panel
(Incl. Signal Receptor)
2) Air Outlet 9) Remote Control
3) Handle 10) Lower Drain Plug with Plastic Cap
4) Casters 11) Upper Drain Plug
8) Power Supply Cord
(Air Conditioning Mode)
(Dehumidifier Mode)
11
7
13
12
5) Upper Dust Filter 12) Lower Dust Filter
6) Upper Grill 13) Lower Grill
7) Exhaust Hose Connector
EN
2
INSTALLATION
It is important that the installation instructions below are followed for successful installation of this
Portable Air Conditioner. Please call Customer Support if you have any difficulties or queries
regarding these installation procedures.
1 3
x1
4
x1
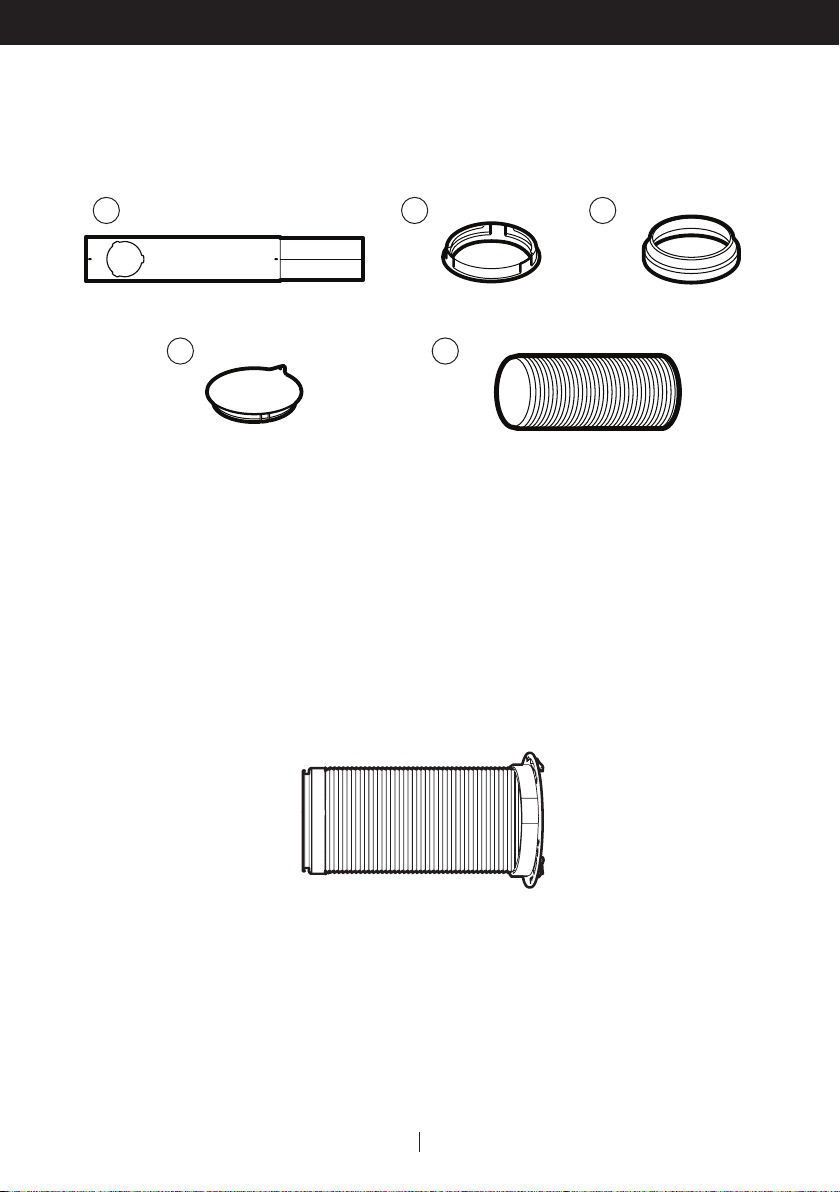
Installation Kit:
1. Window Bracket Kit (1 Set) 4. Hole Cover (1 Piece)
2. Window Bracket Panel Adapter (1 Piece) 5. Exhaust Hose (1 Piece)
3. Exhaust Hose Connector (1 Piece)
Installation Steps:
Exhaust Hose Connector, Exhaust Hose and window bracket panel adapter are pre-assembled
1.
inside the package.
2
x1 x1
5
x1
Hose:
Length: 12" to 47" (30 cm to 120 cm)
3EN
INSTALLATION (CONTINUED)
2. The Window Brackets are approximatley 19.7" (50 cm) each, allowing you to install to windows
and balcony doors of different heights or width.
19.7" (50 cm)
1 part
19.7" (50 cm) to
38.2" (97 cm)
2 parts
Adjustable Knobs
47.2" (1.2 m)
3 parts
To install the window bracket to the window frame, you need to adjust the height or width of the
window bracket by extending the length according to the height or width of the window. When the
length is set, tighten the Adjustable Knobs (preinstalled on the window bracket) to ensure the window
bracket is secured in the desired position. Use one or all three pieces of window bracket as needed.
Note: After setting the window bracket to the size of your window, please remove it from the window
and follow the instructions below.
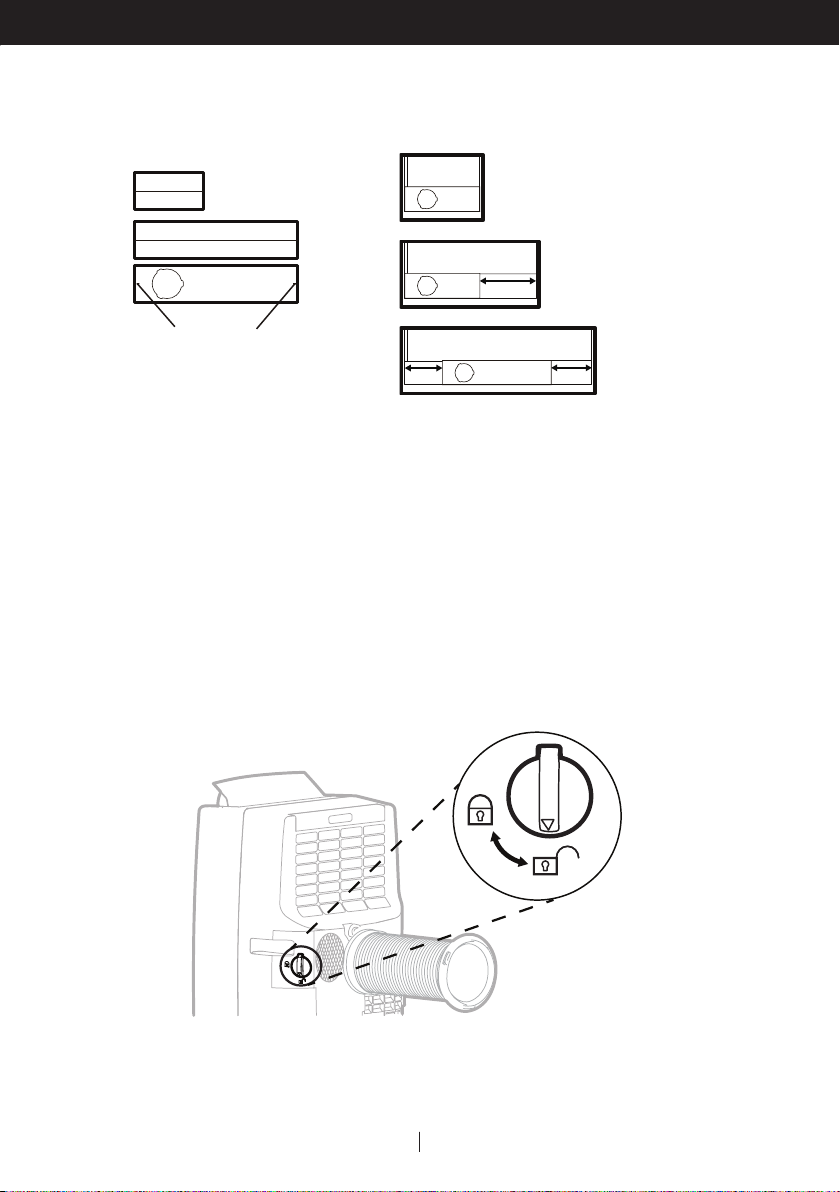
3. Connect the Exhaust Hose to the rear exhaust outlet on the back of the unit. Slide-in the Hose
Connector from left to right. Rotate clockwise to ensure the knob mechanism is locked in place.
Anticlockwise to unlock the knob mechanism.
EN
4
 Loading...