

Honeywell MAXPRO NVR Hybrid XE, MAXPRO NVR, MAXPRO NVR Hybrid PE, MAXPRO NVR XE, MAXPRO NVR SE Installation And Configuration Manual
...
MAXPRO® NVR 5.6
Installation and Configuration Guide
Document 800-16419V5- Rev - J – 5/2019

This page is intentionally left blank.

Revisions
Issue Date Description
1.0 Rev D Mar, 2014 Updated document for 3.1 Build 65 Rev C
1.0 Rev E Aug, 2014 Updated document for 3.1 SP1
2.0 Rev A Aug, 2015 Updated document for 3.5
3.0 Rev A August, 2016 Updated document for 4.0 Release
800-16419V4-A Feb, 2017 Updated document for 4.1 Release
800-16419V5-A August 2017 Updated document for 4.5 Release
800-16419V5-B November 2017 Updated document for 4.7 Release
800-16419V5-C February, 2018 Updated document for 4.9 Release
800-16419V5-D June, 2018 Updated document for 5.0 Release
800-16419V5-E September, 2018 Updated document for 5.0 T Patch Release
800-16419V5-F October, 2018 Updated document for 5.0 SP1 Release
800-16419V5-G February, 2019 Updated document for 5.5 Release
800-16419V5-J May, 2019 Updated document for 5.6 Release

This page is intentionally left blank.

MAXPRO NVR 5.6
Table of Contents
Table of Contents
Precautions . . . . . . . . . . . . . . . . . . . . . . . . . . . . . . . . . . . . . . . . 21
Cautions and Warnings . . . . . . . . . . . . . . . . . . . . . . . . . . . . . . . . . . . . . . . . . . . . . . . . . . . 21
FCC Compliance Statement . . . . . . . . . . . . . . . . . . . . . . . . . . . . . . . . . . . . . . . . . . . . . . . . 21
Important Safeguards . . . . . . . . . . . . . . . . . . . . . . . . . . . . . . . . . . . . . . . . . . . . . . . . . . . . . 22
Warranty and Service . . . . . . . . . . . . . . . . . . . . . . . . . . . . . . . . . . . . . . . . . . . . . . . . . . . . . 24
List of Symbols . . . . . . . . . . . . . . . . . . . . . . . . . . . . . . . . . . . . . . . . . . . . . . . . . . . . . . . . . . 24
About This Guide . . . . . . . . . . . . . . . . . . . . . . . . . . . . . . . . . . . 27
Overview . . . . . . . . . . . . . . . . . . . . . . . . . . . . . . . . . . . . . . . . . . . . . . . . . . . . . . . . . . . . . . . 27
Intended Audience . . . . . . . . . . . . . . . . . . . . . . . . . . . . . . . . . . . . . . . . . . . . . . . . . . . . . . . 27
Scope . . . . . . . . . . . . . . . . . . . . . . . . . . . . . . . . . . . . . . . . . . . . . . . . . . . . . . . . . . . . . . . . . 27
Overview Of Contents . . . . . . . . . . . . . . . . . . . . . . . . . . . . . . . . . . . . . . . . . . . . . . . . . . . . . 27
Related Documents . . . . . . . . . . . . . . . . . . . . . . . . . . . . . . . . . . . . . . . . . . . . . . . . . . . . . . 28
Typographical Conventions . . . . . . . . . . . . . . . . . . . . . . . . . . . . . . . . . . . . . . . . . . . . . . . . 29
Introduction to MAXPRO NVR . . . . . . . . . . . . . . . . . . . . . . . . . 31
Overview . . . . . . . . . . . . . . . . . . . . . . . . . . . . . . . . . . . . . . . . . . . . . . . . . . . . . . . . . . . . . . . 31
MAXPRO NVR Turnkey Boxed Solutions . . . . . . . . . . . . . . . . . . . . . . . . . . . . . . . . . . . . . . . . . . 31
MAXPRO NVR Software Only Solution. . . . . . . . . . . . . . . . . . . . . . . . . . . . . . . . . . . . . . . . . . . . 31
MAXPRO NVR Family . . . . . . . . . . . . . . . . . . . . . . . . . . . . . . . . . . . . . . . . . . . . . . . . . . . . . . . . . 31
MAXPRO NVR Features . . . . . . . . . . . . . . . . . . . . . . . . . . . . . . . . . . . . . . . . . . . . . . . . . . . 33
New Features in NVR 5.6 . . . . . . . . . . . . . . . . . . . . . . . . . . . . . . . . . . . . . . . . . . . . . . . . . . . . . . 33
New Features in NVR 5.5 . . . . . . . . . . . . . . . . . . . . . . . . . . . . . . . . . . . . . . . . . . . . . . . . . . . . . . 34
New features in NVR 5.0. . . . . . . . . . . . . . . . . . . . . . . . . . . . . . . . . . . . . . . . . . . . . . . . . . . . . . . 35
Archival Improvements . . . . . . . . . . . . . . . . . . . . . . . . . . . . . . . . . . . . . . . . . . . . . . . . . . . . . . . . 35
MAXPRO NVR Typical System Architecture . . . . . . . . . . . . . . . . . . . . . . . . . . . . . . . . . . . 49

MAXPRO NVR 5.6
Table of Contents
MAXPRO NVR Standalone System Diagram. . . . . . . . . . . . . . . . . . . . . . . . . . . . . . . . . . . . . . . 49
MAXPRO NVR Hybrid Standalone System Diagram . . . . . . . . . . . . . . . . . . . . . . . . . . . . . . . . . 50
MAXPRO NVR Distributed System Architecture . . . . . . . . . . . . . . . . . . . . . . . . . . . . . . . . . . . . 51
Commissioning MAXPRO NVR . . . . . . . . . . . . . . . . . . . . . . . . . 53
Overview of Commissioning Procedure . . . . . . . . . . . . . . . . . . . . . . . . . . . . . . . . . . . . . . .53
Steps in the Commissioning Procedure . . . . . . . . . . . . . . . . . . . . . . . . . . . . . . . . . . . . . . . 53
Setting up the MAXPRO NVR. . . . . . . . . . . . . . . . . . . . . . . . . . . . . . . . . . . . . . . . . . . . . . . . . . . 53
Installing the Software in the Server and Client Computers . . . . . . . . . . . . . . . . . . . . . . . . . . . 53
Configuring the MAXPRO NVR . . . . . . . . . . . . . . . . . . . . . . . . . . . . . . . . . . . . . . . . . . . . . . . . . 54
Verifying the Configuration. . . . . . . . . . . . . . . . . . . . . . . . . . . . . . . . . . . . . . . . . . . . . . . . . . . . . 54
Setting up the MAXPRO NVR . . . . . . . . . . . . . . . . . . . . . . . . . . 55
Chapter Overview . . . . . . . . . . . . . . . . . . . . . . . . . . . . . . . . . . . . . . . . . . . . . . . . . . . . . . . .55
Setting up the MAXPRO NVR Turnkey Box Solutions . . . . . . . . . . . . . . . . . . . . . . . . . . . .55
Typical MAXPRO NVR System Diagram . . . . . . . . . . . . . . . . . . . . . . . . . . . . . . . . . . . . . . . . . . 55
Typical MAXPRO NVR Hybrid System Diagram . . . . . . . . . . . . . . . . . . . . . . . . . . . . . . . . . . . . 56
Connecting the Monitors . . . . . . . . . . . . . . . . . . . . . . . . . . . . . . . . . . . . . . . . . . . . . . . . . . . . . . 57
Powering on the MAXPRO NVR Unit . . . . . . . . . . . . . . . . . . . . . . . . . . . . . . . . . . . . . . . . . . . . . 57
Changing the MAXPRO NVR IP Address and Machine Name . . . . . . . . . . . . . . . . . . . . . . . . . 57
Configuring the Monitor Display Properties. . . . . . . . . . . . . . . . . . . . . . . . . . . . . . . . . . . . . . . . 59
Setting up the MAXPRO NVR Software-Only Solution . . . . . . . . . . . . . . . . . . . . . . . . . . . . 60
Before you Begin . . . . . . . . . . . . . . . . . . . . . . . . . . . . . . . . . . . . . . . . . . . . . . . . . . . . . . . . . . . . 60
Hardware Specifications . . . . . . . . . . . . . . . . . . . . . . . . . . . . . . . . . . . . . . . . . . . . . . . . . . . . . . 60
MAXPRO NVR Software System Architecture . . . . . . . . . . . . . . . . . . . . . . . . . . . . . . . . . . . . . . 60
MAXPRO NVR Hybrid Connections . . . . . . . . . . . . . . . . . . . . . . . . . . . . . . . . . . . . . . . . . .62
Rear Panel Connectors . . . . . . . . . . . . . . . . . . . . . . . . . . . . . . . . . . . . . . . . . . . . . . . . . . . . . . . 62
Connecting a Video Source . . . . . . . . . . . . . . . . . . . . . . . . . . . . . . . . . . . . . . . . . . . . . . . . . . . . 66
Looping Output Termination . . . . . . . . . . . . . . . . . . . . . . . . . . . . . . . . . . . . . . . . . . . . . . . . . . . 67
Connecting Control Outputs . . . . . . . . . . . . . . . . . . . . . . . . . . . . . . . . . . . . . . . . . . . . . . . . . . . 68

MAXPRO NVR 5.6
Table of Contents
Connecting Sensors . . . . . . . . . . . . . . . . . . . . . . . . . . . . . . . . . . . . . . . . . . . . . . . . . . . . . . . . . . 68
Connecting an Analog PTZ Camera . . . . . . . . . . . . . . . . . . . . . . . . . . . . . . . . . . . . . . . . . . . . . 69
Connecting the Joystick Controller . . . . . . . . . . . . . . . . . . . . . . . . . . . . . . . . . . . . . . . . . . 70
How to log on to the UltraKey Plus keyboard? . . . . . . . . . . . . . . . . . . . . . . . . . . . . . . . . . . . . . 70
How to log off from the UltraKey Plus keyboard? . . . . . . . . . . . . . . . . . . . . . . . . . . . . . . . . . . . 70
Installing the NVR Software . . . . . . . . . . . . . . . . . . . . . . . . . . . 71
Overview . . . . . . . . . . . . . . . . . . . . . . . . . . . . . . . . . . . . . . . . . . . . . . . . . . . . . . . . . . . . . . . 71
Before you Begin . . . . . . . . . . . . . . . . . . . . . . . . . . . . . . . . . . . . . . . . . . . . . . . . . . . . . . . . . . . . 71
MAXPRO NVR Software Installation . . . . . . . . . . . . . . . . . . . . . . . . . . . . . . . . . . . . . . . . . . 73
How to Install MAXPRO NVR . . . . . . . . . . . . . . . . . . . . . . . . . . . . . . . . . . . . . . . . . . . . . . . . . . . 74
Full Installation . . . . . . . . . . . . . . . . . . . . . . . . . . . . . . . . . . . . . . . . . . . . . . . . . . . . . . . . . . 78
Client Installation . . . . . . . . . . . . . . . . . . . . . . . . . . . . . . . . . . . . . . . . . . . . . . . . . . . . . . . . 85
Uninstalling MAXPRO NVR . . . . . . . . . . . . . . . . . . . . . . . . . . . . . . . . . . . . . . . . . . . . . . . . . 89
Client Uninstall . . . . . . . . . . . . . . . . . . . . . . . . . . . . . . . . . . . . . . . . . . . . . . . . . . . . . . . . . . . . . . 89
Full Uninstall . . . . . . . . . . . . . . . . . . . . . . . . . . . . . . . . . . . . . . . . . . . . . . . . . . . . . . . . . . . . . . . . 89
Logging on and Getting Started . . . . . . . . . . . . . . . . . . . . . . . 93
Logging on Using Profiles . . . . . . . . . . . . . . . . . . . . . . . . . . . . . . . . . . . . . . . . . . . . . . . . . 93
Logging on to MAXPRO NVR . . . . . . . . . . . . . . . . . . . . . . . . . . . . . . . . . . . . . . . . . . . . . . . . . . . 93
Configuring MAXPRO NVR Windows/ Desktop Client. . . . . . . . . . . . . . . . . . . . . . . . . . . . . . . . 96
Managing Profiles. . . . . . . . . . . . . . . . . . . . . . . . . . . . . . . . . . . . . . . . . . . . . . . . . . . . . . . . . . . . 96
Port Forwarding . . . . . . . . . . . . . . . . . . . . . . . . . . . . . . . . . . . . . . . . . . . . . . . . . . . . . . . . . 99
Getting to Know the MAXPRO NVR User Interface . . . . . . . . . . . . . . . . . . . . . . . . . . . . . 101
Viewer Tab . . . . . . . . . . . . . . . . . . . . . . . . . . . . . . . . . . . . . . . . . . . . . . . . . . . . . . . . . . . . . . . . 102
Configurator Tab. . . . . . . . . . . . . . . . . . . . . . . . . . . . . . . . . . . . . . . . . . . . . . . . . . . . . . . . . . . . 104
Search Tab . . . . . . . . . . . . . . . . . . . . . . . . . . . . . . . . . . . . . . . . . . . . . . . . . . . . . . . . . . . . . . . . 105
Report Tab . . . . . . . . . . . . . . . . . . . . . . . . . . . . . . . . . . . . . . . . . . . . . . . . . . . . . . . . . . . . . . . . 106
Setting Preferences . . . . . . . . . . . . . . . . . . . . . . . . . . . . . . . . . . . . . . . . . . . . . . . . . . . . . 107

MAXPRO NVR 5.6
Table of Contents
Settings for Video Rendering . . . . . . . . . . . . . . . . . . . . . . . . . . . . . . . . . . . . . . . . . . . . . . . . . . 107
Rendering Settings for a GPU system . . . . . . . . . . . . . . . . . . . . . . . . . . . . . . . . . . . . . . . . . . . 108
Pausing the Video Rendering . . . . . . . . . . . . . . . . . . . . . . . . . . . . . . . . . . . . . . . . . . . . . . . . . 109
Settings for Alarm Preview Pane . . . . . . . . . . . . . . . . . . . . . . . . . . . . . . . . . . . . . . . . . . . . . . . 109
Setting the Alarm Threshold Value . . . . . . . . . . . . . . . . . . . . . . . . . . . . . . . . . . . . . . . . . . . . . 110
Configuring the Snapshot Clip Export Settings. . . . . . . . . . . . . . . . . . . . . . . . . . . . . . . . . . . . 111
Configuring the OSD Settings . . . . . . . . . . . . . . . . . . . . . . . . . . . . . . . . . . . . . . . . . . . . . . . . . 111
Configuring the Timeline Settings . . . . . . . . . . . . . . . . . . . . . . . . . . . . . . . . . . . . . . . . . . . . . . 112
Configuring the Diagnostic Settings . . . . . . . . . . . . . . . . . . . . . . . . . . . . . . . . . . . . . . . . . . . . 113
Configuring the Advanced Settings . . . . . . . . . . . . . . . . . . . . . . . . . . . . . . . . . . . . . . . . . . . . . 113
Configuring the Default Settings . . . . . . . . . . . . . . . . . . . . . . . . . . . . . . . . . . . . . . . . . . . . . . . 115
Licensing Information . . . . . . . . . . . . . . . . . . . . . . . . . . . . . . . . . . . . . . . . . . . . . . . . . . . .116
Viewing the Version and License Information of MAXPRO NVR. . . . . . . . . . . . . . . . . . . . . . . 116
Registration and Licensing. . . . . . . . . . . . . . . . . . . . . . . . . . . . . . . . . . . . . . . . . . . . . . . . . . . . 117
Logging off . . . . . . . . . . . . . . . . . . . . . . . . . . . . . . . . . . . . . . . . . . . . . . . . . . . . . . . . . . . . . . . . 118
Closing the MAXPRO®NVR User Interface . . . . . . . . . . . . . . . . . . . . . . . . . . . . . . . . . . . . . . . 118
Configuring MAXPRO NVR . . . . . . . . . . . . . . . . . . . . . . . . . . . 119
Overview . . . . . . . . . . . . . . . . . . . . . . . . . . . . . . . . . . . . . . . . . . . . . . . . . . . . . . . . . . . . . .120
Before you Begin . . . . . . . . . . . . . . . . . . . . . . . . . . . . . . . . . . . . . . . . . . . . . . . . . . . . . . . . . . . 121
Firewall Settings . . . . . . . . . . . . . . . . . . . . . . . . . . . . . . . . . . . . . . . . . . . . . . . . . . . . . . . . 121
Configuring the Honeywell cameras with MAXPRO NVR Wizard . . . . . . . . . . . . . . . . . . .121
MAXPRO NVR Wizard Settings on the Task bar . . . . . . . . . . . . . . . . . . . . . . . . . . . . . . . . 125
Navigating to Configurator tab. . . . . . . . . . . . . . . . . . . . . . . . . . . . . . . . . . . . . . . . . . . . . . . . . 125
Configuring the System Settings . . . . . . . . . . . . . . . . . . . . . . . . . . . . . . . . . . . . . . . . . . . .127
Configuring General Settings. . . . . . . . . . . . . . . . . . . . . . . . . . . . . . . . . . . . . . . . . . . . . . . . . . 127
Event Recording Settings. . . . . . . . . . . . . . . . . . . . . . . . . . . . . . . . . . . . . . . . . . . . . . . . . . . . . 128
Email Settings. . . . . . . . . . . . . . . . . . . . . . . . . . . . . . . . . . . . . . . . . . . . . . . . . . . . . . . . . . . . . . 128
Site Info Settings . . . . . . . . . . . . . . . . . . . . . . . . . . . . . . . . . . . . . . . . . . . . . . . . . . . . . . . . . . . 129
Archival Schedule Settings . . . . . . . . . . . . . . . . . . . . . . . . . . . . . . . . . . . . . . . . . . . . . . . . . . . 129

MAXPRO NVR 5.6
Table of Contents
Edge Sync Settings . . . . . . . . . . . . . . . . . . . . . . . . . . . . . . . . . . . . . . . . . . . . . . . . . . . . . . . . . 130
Manual Archival . . . . . . . . . . . . . . . . . . . . . . . . . . . . . . . . . . . . . . . . . . . . . . . . . . . . . . . . . . . . 130
Holidays/Exceptions Settings. . . . . . . . . . . . . . . . . . . . . . . . . . . . . . . . . . . . . . . . . . . . . . . . . . 132
Configuring the Disk Management Settings . . . . . . . . . . . . . . . . . . . . . . . . . . . . . . . . . . 132
Configuring the Cameras . . . . . . . . . . . . . . . . . . . . . . . . . . . . . . . . . . . . . . . . . . . . . . . . . 136
Adding IP Cameras / Encoders . . . . . . . . . . . . . . . . . . . . . . . . . . . . . . . . . . . . . . . . . . . . . . . . 137
Adding Additional Streams for a Camera. . . . . . . . . . . . . . . . . . . . . . . . . . . . . . . . . . . . . . . . . 147
Configuring 360/180 Cameras . . . . . . . . . . . . . . . . . . . . . . . . . . . . . . . . . . . . . . . . . . . . . . . . . 157
Managing Analog Cameras . . . . . . . . . . . . . . . . . . . . . . . . . . . . . . . . . . . . . . . . . . . . . . . . . . . 169
Server VMD (SMART VMD) . . . . . . . . . . . . . . . . . . . . . . . . . . . . . . . . . . . . . . . . . . . . . . . . . . . 181
Updating the Cameras . . . . . . . . . . . . . . . . . . . . . . . . . . . . . . . . . . . . . . . . . . . . . . . . . . . . . . . 184
Deleting the Cameras . . . . . . . . . . . . . . . . . . . . . . . . . . . . . . . . . . . . . . . . . . . . . . . . . . . . . . . . 184
Configuring the Schedules . . . . . . . . . . . . . . . . . . . . . . . . . . . . . . . . . . . . . . . . . . . . . . . . 184
Creating a Schedule . . . . . . . . . . . . . . . . . . . . . . . . . . . . . . . . . . . . . . . . . . . . . . . . . . . . . . . . . 184
Deleting a Schedule . . . . . . . . . . . . . . . . . . . . . . . . . . . . . . . . . . . . . . . . . . . . . . . . . . . . . . . . . 186
Configuring the Sequences . . . . . . . . . . . . . . . . . . . . . . . . . . . . . . . . . . . . . . . . . . . . . . . 186
Creating a Sequence . . . . . . . . . . . . . . . . . . . . . . . . . . . . . . . . . . . . . . . . . . . . . . . . . . . . . . . . 186
Updating a Sequence. . . . . . . . . . . . . . . . . . . . . . . . . . . . . . . . . . . . . . . . . . . . . . . . . . . . . . . . 187
Deleting a Sequence . . . . . . . . . . . . . . . . . . . . . . . . . . . . . . . . . . . . . . . . . . . . . . . . . . . . . . . . 188
Performing User Administration . . . . . . . . . . . . . . . . . . . . . . . . . . . . . . . . . . . . . . . . . . . . 188
Adding a User . . . . . . . . . . . . . . . . . . . . . . . . . . . . . . . . . . . . . . . . . . . . . . . . . . . . . . . . . . . . . . 190
Updating a User . . . . . . . . . . . . . . . . . . . . . . . . . . . . . . . . . . . . . . . . . . . . . . . . . . . . . . . . . . . . 192
Deleting a User . . . . . . . . . . . . . . . . . . . . . . . . . . . . . . . . . . . . . . . . . . . . . . . . . . . . . . . . . . . . . 192
Recommendation to use Low bandwidth stream option . . . . . . . . . . . . . . . . . . . . . . . . . 194
Automatic Retry for Backfilled Clips . . . . . . . . . . . . . . . . . . . . . . . . . . . . . . . . . . . . . . . . . 195
Upgrade MAXPRO NVR . . . . . . . . . . . . . . . . . . . . . . . . . . . . . . . . . . . . . . . . . . . . . . . . . . . . . . 195
Enable Recording During On Demand Streaming . . . . . . . . . . . . . . . . . . . . . . . . . . . . . 197
Privacy Protection Settings (GDPR Favored) . . . . . . . . . . . . . . . . . . . . . . . . . . . . . . . . . 199

MAXPRO NVR 5.6
Table of Contents
Anonymization . . . . . . . . . . . . . . . . . . . . . . . . . . . . . . . . . . . . . . . . . . . . . . . . . . . . . . . . . . . . . 199
Four Eye Authentication. . . . . . . . . . . . . . . . . . . . . . . . . . . . . . . . . . . . . . . . . . . . . . . . . . . . . . 199
Licensing . . . . . . . . . . . . . . . . . . . . . . . . . . . . . . . . . . . . . . . . . . . . . . . . . . . . . . . . . . . . . . . . . 200
How to enable Anonymization . . . . . . . . . . . . . . . . . . . . . . . . . . . . . . . . . . . . . . . . . . . . . . . . . 200
How to enable Four Eye Authentication . . . . . . . . . . . . . . . . . . . . . . . . . . . . . . . . . . . . . . . . . 204
Video Anonymization . . . . . . . . . . . . . . . . . . . . . . . . . . . . . . . . . . . . . . . . . . . . . . . . . . . . . . . . 207
Improved GPU Rendering . . . . . . . . . . . . . . . . . . . . . . . . . . . . . . . . . . . . . . . . . . . . . . . . . . . . 209
Guidelines to configure NAS Drive for Recording . . . . . . . . . . . . . . . . . . . . . . . . . . . . . .212
QNAP NAS for Recording . . . . . . . . . . . . . . . . . . . . . . . . . . . . . . . . . . . . . . . . . . . . . . . . . . . . 214
Playing archived clips through Client machine . . . . . . . . . . . . . . . . . . . . . . . . . . . . . . . . . . . . 215
How to configure the Archival and Deletion retry settings . . . . . . . . . . . . . . . . . . . . . . . . . . . 219
Annotations . . . . . . . . . . . . . . . . . . . . . . . . . . . . . . . . . . . . . . . . . . . . . . . . . . . . . . . . . . . .220
How to get/configure Annotation Feature . . . . . . . . . . . . . . . . . . . . . . . . . . . . . . . . . . . . . . . . 221
Install the VA packages . . . . . . . . . . . . . . . . . . . . . . . . . . . . . . . . . . . . . . . . . . . . . . . . . . . . . . 221
Obtain the License and install . . . . . . . . . . . . . . . . . . . . . . . . . . . . . . . . . . . . . . . . . . . . . . . . . 222
Configure and Enable Annotation in NVR . . . . . . . . . . . . . . . . . . . . . . . . . . . . . . . . . . . . . . . . 231
Snapshots with Annotations . . . . . . . . . . . . . . . . . . . . . . . . . . . . . . . . . . . . . . . . . . . . . . . . . . 237
Setting the Audio Codec in Camera Web Page . . . . . . . . . . . . . . . . . . . . . . . . . . . . . . . . . . . 238
Verifying the Configuration . . . . . . . . . . . . . . . . . . . . . . . . . . . 239
Overview . . . . . . . . . . . . . . . . . . . . . . . . . . . . . . . . . . . . . . . . . . . . . . . . . . . . . . . . . . . . . .239
Before you Begin . . . . . . . . . . . . . . . . . . . . . . . . . . . . . . . . . . . . . . . . . . . . . . . . . . . . . . . . . . . 239
Activities to Perform in this Phase . . . . . . . . . . . . . . . . . . . . . . . . . . . . . . . . . . . . . . . . . . . . . . 239
Checking the Connection with the MAXPRO NVR Server . . . . . . . . . . . . . . . . . . . . . . . . 240
Checking the Device listing in the Devices Window . . . . . . . . . . . . . . . . . . . . . . . . . . . . . 240
Checking the Acknowledgment and Clearing of Alarms . . . . . . . . . . . . . . . . . . . . . . . . . 240
Checking the Live Video from Cameras . . . . . . . . . . . . . . . . . . . . . . . . . . . . . . . . . . . . . .241
Checking the Playback of Recorded Video . . . . . . . . . . . . . . . . . . . . . . . . . . . . . . . . . . .241
Checking the Panning, Tilting, and Zooming . . . . . . . . . . . . . . . . . . . . . . . . . . . . . . . . . . 241

MAXPRO NVR 5.6
Table of Contents
Checking the Creation of Images . . . . . . . . . . . . . . . . . . . . . . . . . . . . . . . . . . . . . . . . . . . 242
Checking the Creation of Clips . . . . . . . . . . . . . . . . . . . . . . . . . . . . . . . . . . . . . . . . . . . . 242
Checking the Salvo View Feature . . . . . . . . . . . . . . . . . . . . . . . . . . . . . . . . . . . . . . . . . . 242
Checking the Search for Recorded Video in MAXPRO NVR . . . . . . . . . . . . . . . . . . . . . . 242
Checking the Generation of Event History/ Operator Log Report . . . . . . . . . . . . . . . . . . 243
Upgrade MAXPRO NVR Software . . . . . . . . . . . . . . . . . . . . . 245
Overview . . . . . . . . . . . . . . . . . . . . . . . . . . . . . . . . . . . . . . . . . . . . . . . . . . . . . . . . . . . . . . 245
Upgrade to MAXPRO NVR 4.0 . . . . . . . . . . . . . . . . . . . . . . . . . . . . . . . . . . . . . . . . . . . . . . . . . 262
MAXPRO NVR Web Client . . . . . . . . . . . . . . . . . . . . . . . . . . . 267
Introducing Web Client. . . . . . . . . . . . . . . . . . . . . . . . . . . . . . . . . . . . . . . . . . . . . . . . . . . . . . . 267
Installing Web Client. . . . . . . . . . . . . . . . . . . . . . . . . . . . . . . . . . . . . . . . . . . . . . . . . . . . . . . . . 267
Setting the MAXPRO Web Configurator. . . . . . . . . . . . . . . . . . . . . . . . . . . . . . . . . . . . . . . . . . 268
Creating Self Signed Certificate . . . . . . . . . . . . . . . . . . . . . . . . . . . . . . . . . . . . . . . . . . . . . . . . 274
Binding the generated certificate with https. . . . . . . . . . . . . . . . . . . . . . . . . . . . . . . . . . . . . . . 277
Installing the Certificate . . . . . . . . . . . . . . . . . . . . . . . . . . . . . . . . . . . . . . . . . . . . . . . . . . . . . . 278
Procuring and Installing CA Certificate . . . . . . . . . . . . . . . . . . . . . . . . . . . . . . . . . . . . . . 280
Installing an SSL Certificate in Windows Server 2008 (IIS 7.0) . . . . . . . . . . . . . . . . . . . . . . . . 280
Changing Default Port 443 for the MAXPRO Web Client and MAXPRO Mobile app . . . . . . . 289
Viewing the Certificate Information. . . . . . . . . . . . . . . . . . . . . . . . . . . . . . . . . . . . . . . . . . . . . . 291
MAXPRO NVR Mobile App . . . . . . . . . . . . . . . . . . . . . . . . . . . 293
Introduction . . . . . . . . . . . . . . . . . . . . . . . . . . . . . . . . . . . . . . . . . . . . . . . . . . . . . . . . . . . . 293
MAXPRO NVR Mobile app Installation . . . . . . . . . . . . . . . . . . . . . . . . . . . . . . . . . . . . . . . . . . . 294
Installing the MAXPRO NVR Mobile app . . . . . . . . . . . . . . . . . . . . . . . . . . . . . . . . . . . . . . . . . 295
Typical Network Configuration and Settings . . . . . . . . . . . . . . . . . . . . . . . . . . . . . . . . . . . . . . 296
Creating Users for the MAXPRO NVR Mobile app . . . . . . . . . . . . . . . . . . . . . . . . . . . . . . . . . . 298
Adding the MAXPRO NVR to the MAXPRO NVR Mobile app . . . . . . . . . . . . . . . . . . . . . . . . . 300
Adding Multiple NVR Recorders. . . . . . . . . . . . . . . . . . . . . . . . . . . . . . . . . . . . . . . . . . . . . . . . 307
Editing NVR Recorder Details . . . . . . . . . . . . . . . . . . . . . . . . . . . . . . . . . . . . . . . . . . . . . . . . . 309

MAXPRO NVR 5.6
Table of Contents
Deleting the Saved NVR Recorders. . . . . . . . . . . . . . . . . . . . . . . . . . . . . . . . . . . . . . . . . . . . . 311
Changing Default Port 443 for the MAXPRO Web Client and MAXPRO NVR Mobile app . . . 311
Appendix A . . . . . . . . . . . . . . . . . . . . . . . . . . . . . . . . . . . . . . . . 313
Customizing IP Address and Machine Name and Scheduling Metadata and Database Back-
up . . . . . . . . . . . . . . . . . . . . . . . . . . . . . . . . . . . . . . . . . . . . . . . . . . . . . . . . . . . . . . . . . . . . .313
Changing the Default IP address and Machine Name . . . . . . . . . . . . . . . . . . . . . . . . . . . . . . 313
Scheduled Metadata and Database Backup . . . . . . . . . . . . . . . . . . . . . . . . . . . . . . . . . . 313
Scheduled Task for Backing up the Metadata and Database. . . . . . . . . . . . . . . . . . . . . . . . . 314
Meta Data Conversion Utility . . . . . . . . . . . . . . . . . . . . . . . . . . . . . . . . . . . . . . . . . . . . . . . . . . 318
How to Enable Video on demand feature in MAXPRO NVR . . . . . . . . . . . . . . . . . . . . . . . . . . 324
Appendix B . . . . . . . . . . . . . . . . . . . . . . . . . . . . . . . . . . . . . . . . 327
Image Stream Combinations for Oncam Grandeye Cameras . . . . . . . . . . . . . . . . . . . . .327
For Oncam Grandeye Evolution Cameras. . . . . . . . . . . . . . . . . . . . . . . . . . . . . . . . . . . . . . . . 327
Device Characteristics of Oncam Grandeye Cameras . . . . . . . . . . . . . . . . . . . . . . . . . . . 327
VMD Settings and Motion-based Recording Configuration . . . . . . . . . . . . . . . . . . . . . . . 328
Overview of MAXPRO NVR Recording Options. . . . . . . . . . . . . . . . . . . . . . . . . . . . . . . . . . . . 328
Configuring the Pre and Post Event Recording Settings . . . . . . . . . . . . . . . . . . . . . . . . . . . . 330
Configuring Camera Settings for VMD-Based Recording . . . . . . . . . . . . . . . . . . . . . . . . . . . . 330
Server VMD (SMART VMD) . . . . . . . . . . . . . . . . . . . . . . . . . . . . . . . . . . . . . . . . . . . . . . . . . . . 331
Configuring Built-in VMD (Camera based VMD) on Honeywell IP Cameras . . . . . . . . . . . . . 331
Event and Alarm Types . . . . . . . . . . . . . . . . . . . . . . . . . . . . . . . . . . . . . . . . . . . . . . . . . . .334
Configuring Loitering & Intrusion Trace Alarms . . . . . . . . . . . . . . . . . . . . . . . . . . . . . . . . . . . 336
MAXPRO®NVRs - AXIS Camera/Encoders Discovery and Configuration (using ONVIF) 341
Step 1: Enable ONVIF Web Service on AXIS Camera/Encoder . . . . . . . . . . . . . . . . . . . . . . . 341
Step 2: Discover and Configure the AXIS Camera/Encoder in MAXPRO® NVR . . . . . . . . . . 344
Appendix C . . . . . . . . . . . . . . . . . . . . . . . . . . . . . . . . . . . . . . . 347
Patches Released on Top of NVR 4.0 . . . . . . . . . . . . . . . . . . . . . . . . . . . . . . . . . . . . . . . . 347

MAXPRO NVR 5.6
Table of Contents
AXIS Patch . . . . . . . . . . . . . . . . . . . . . . . . . . . . . . . . . . . . . . . . . . . . . . . . . . . . . . . . . . . . . . . . 347
Skylake Patch . . . . . . . . . . . . . . . . . . . . . . . . . . . . . . . . . . . . . . . . . . . . . . . . . . . . . . . . . . . . . . 347
How to increase the Limit for Rendering Camera . . . . . . . . . . . . . . . . . . . . . . . . . . . . . . . . . . 348
How to Disable the GPU Rendering. . . . . . . . . . . . . . . . . . . . . . . . . . . . . . . . . . . . . . . . . . . . . 349
Index . . . . . . . . . . . . . . . . . . . . . . . . . . . . . . . . . . . . . . . . . . . . 351

MAXPRO NVR 5.6
Table of Contents
This page is intentionally left blank

MAXPRO NVR 5.6
List of Figures
List of Figures
Figure 1-1: MAXPRO NVR SE System Diagram ............................................................... 49
Figure 1-2: MAXPRO NVR HYBRID XE Standalone System Architecture ........................ 50
Figure 1-3: MAXPRO NVR Distributed System Architecture ............................................. 51
Figure 3-1: Typical MAXPRO NVR System Diagram ......................................................... 55
Figure 3-2: Typical MAXPRO NVR Hybrid System Diagram ............................................. 56
Figure 3-3: Network and Sharing Center .......................................................................... 58
Figure 3-4: LAN Properties ................................................................................................ 58
Figure 3-5: MAXPRO NVR Software Solution Standalone System ................................... 60
Figure 3-6: MAXPRO NVR Software Solution Distributed System .................................... 61
Figure 3-7: Hybrid XE Connections ................................................................................... 63
Figure 3-8: Hybrid SE Connections .................................................................................. 64
Figure 3-9: Hybrid PE Connections ................................................................................... 65
Figure 3-10: Input and Output Ports For MAXPRO NVR Hybrid PE ................................. 66
Figure 3-11: Connecting a Video Source .......................................................................... 66
Figure 3-12: Looping Output Termination ......................................................................... 67
Figure 3-13: Control Outputs ............................................................................................. 68
Figure 3-14: Connecting Sensors ..................................................................................... 68
Figure 3-15: 4-Pin Adapter ................................................................................................ 69
Figure 4-1: Automatic Windows Update Enabled Warning Message .............................. 72
Figure 4-2: Pending Reboot Error Message ..................................................................... 72
Figure 4-3: License Agreement ......................................................................................... 75
Figure 4-4: Customer Information and Destination Folder details .................................... 75
Figure 4-5: Validation of User Credentials ........................................................................ 76
Figure 4-6: Choose Installation Type ................................................................................ 77
Figure 4-7: Choose Installation Type ................................................................................ 78
Figure 4-8: Database Server Log on ................................................................................. 79
Figure 4-9: Choose location for MAXPRO NVR database Path ........................................ 80
Figure 4-10: Choose Recording Drives ............................................................................. 81
Figure 4-11: Localization Support ..................................................................................... 82
Figure 4-12: Summary ....................................................................................................... 82
Figure 4-13: Reboot prompt .............................................................................................. 83
Figure 4-14: MAXPRO NVR 5.0 Client Configuration ........................................................ 86
Figure 4-15: Localization Support ..................................................................................... 87
Figure 4-16: Summary ....................................................................................................... 88
Figure 4-17: Reboot prompt .............................................................................................. 88
Figure 4-18: Retaining Trinity Database ............................................................................ 90
Figure 4-19: Installation Finish .......................................................................................... 91
Figure 5-1: MAXPRO NVR Log on dialog box ................................................................... 94
Figure 5-2: Server Settings dialog box .............................................................................. 97
Figure 5-3: Setting the Default Profile ............................................................................... 97
Figure 5-4: Editing the Ports .............................................................................................. 98
Figure 5-5: Port Forwarding Scenario 1 ............................................................................ 99
Figure 5-6: Port Forwarding scenario 2 .......................................................................... 100
Figure 5-7: Viewer tab ...................................................................................................... 102
Figure 5-8: Configurator tab ............................................................................................ 104
Figure 5-9: Search tab ..................................................................................................... 105
Figure 5-10: Report tab ................................................................................................... 106
Figure 5-11: General Settings tab ................................................................................... 107
Figure 5-12: Rendering Settings tab ............................................................................... 107
Figure 5-13: Rendering Settings tab ............................................................................... 108

MAXPRO NVR 5.6
List of Figures
Figure 5-14: Settings for pausing the Video Rendering .................................................. 109
Figure 5-15: Settings for the Alarm Preview Pane ........................................................... 110
Figure 5-16: Setting the Alarm Threshold ........................................................................ 111
Figure 5-17: Settings for SnapShot Clip Export .............................................................. 111
Figure 5-18: OSD Settings tab ......................................................................................... 112
Figure 5-19: Timeline Settings tab ................................................................................... 112
Figure 5-20: Diagnostic Settings tab ............................................................................... 113
Figure 5-21: Advanced Settings Tab ............................................................................... 114
Figure 5-22: Advance Settings Tab Service Restart ........................................................ 114
Figure 5-23: About MAXPRO NVR ................................................................................... 116
Figure 5-24: License Management Console .................................................................... 117
Figure 6-1: CONFIGURATION page ................................................................................ 122
Figure 6-2: CAMERA DISCOVERY page ......................................................................... 123
Figure 6-3: Discovered Cameras ..................................................................................... 123
Figure 6-4: INSTALLATION page ..................................................................................... 124
Figure 6-5: MAXPRO NVR Wizard Task bar Settings ...................................................... 125
Figure 6-6: System page .................................................................................................. 127
Figure 6-7: Archive Progress ............................................................................................ 131
Figure 6-8: Disk Management page ................................................................................ 133
Figure 6-9: Graphical Illustration ...................................................................................... 135
Figure 6-10: Drive Type .................................................................................................... 136
Figure 6-11: Camera page ............................................................................................... 137
Figure 6-12: Camera Properties pane ............................................................................. 141
Figure 6-13: Auto Discovery Window .............................................................................. 146
Figure 6-14: Camera Properties Pane ............................................................................. 147
Figure 6-15: Adding Stream ............................................................................................. 148
Figure 6-16: Camera Type field displaying “ONVIF DEVICE” for a ONVIF camera ........ 150
Figure 6-17: Encoder discovery ....................................................................................... 151
Figure 6-18: Adding the Encoder ..................................................................................... 152
Figure 6-19: Adding FLIR Model Camera ........................................................................ 153
Figure 6-20: Saving FLIR Camera .................................................................................... 154
Figure 6-21: RTSP Settings .............................................................................................. 154
Figure 6-22: IO page ........................................................................................................ 156
Figure 6-23: Panomorph Settings .................................................................................... 158
Figure 6-24: Grandeye Dewarping Settings .................................................................... 160
Figure 6-25: Discovering AXIS 360 Camera .................................................................... 161
Figure 6-26: Adding Remaining Axis Channels ............................................................... 162
Figure 6-27: AXIS Channels ............................................................................................. 162
Figure 6-28: Adding Arecont 360 Model Camera ............................................................ 164
Figure 6-29: Adding Remaining Arecont channels .......................................................... 164
Figure 6-30: Arecont Channels ........................................................................................ 165
Figure 6-31: EquIP- Fisheye camera Settings ................................................................. 166
Figure 6-32: Dewarping Success Message ..................................................................... 167
Figure 6-33: Dewarped Views List ................................................................................... 168
Figure 6-34: Adding or Deleting Analog Camera ............................................................ 169
Figure 6-35: Camera page ............................................................................................... 170
Figure 6-36: Camera properties pane .............................................................................. 171
Figure 6-37: Color Correction dialog box ........................................................................ 173
Figure 6-38: Camera properties pane .............................................................................. 175
Figure 6-39: Input and Output Ports For MAXPRO NVR Hybrid XE ................................ 177
Figure 6-40: Input and Output Ports For MAXPRO NVR Hybrid SE ................................ 178

MAXPRO NVR 5.6
List of Figures
Figure 6-41: MAXPRO NVR Hybrid PE Rear View .......................................................... 179
Figure 6-42: Input and Output Ports For MAXPRO NVR Hybrid PE ............................... 180
Figure 6-43: Detection of relevant motion ....................................................................... 182
Figure 6-44: SMART VMD Configuration ......................................................................... 183
Figure 6-45: Schedule page ............................................................................................ 185
Figure 6-46: Sequence page ........................................................................................... 186
Figure 6-47: User page .................................................................................................... 190
Figure 6-48: Enable On Demand .................................................................................... 197
Figure 6-49: License Privacy protection Settings ........................................................... 200
Figure 6-50: Privacy protection Settings ......................................................................... 201
Figure 6-51: Anonymization Camera Level ..................................................................... 201
Figure 6-52: Anonymization at USer level ....................................................................... 202
Figure 6-53: Blur View ..................................................................................................... 203
Figure 6-54: Pixelize Views .............................................................................................. 204
Figure 6-55: Enable Four Eye .......................................................................................... 204
Figure 6-56: Four Eye Authentication .............................................................................. 205
Figure 6-57: Four Eye Authentication Success ............................................................... 206
Figure 6-58: Authenticating User ..................................................................................... 206
Figure 8-1: Welcome Wizard ........................................................................................... 246
Figure 8-2: Installation Complete .................................................................................... 246
Figure 8-3: Welcome Wizard ........................................................................................... 247
Figure 8-4: Installation Complete .................................................................................... 248
Figure 8-5: Welcome Wizard ........................................................................................... 249
Figure 8-6: Installation Complete .................................................................................... 249
Figure 8-7: Welcome Wizard ........................................................................................... 250
Figure 8-8: Installation Complete .................................................................................... 250
Figure 8-9: Welcome Wizard ........................................................................................... 251
Figure 8-10: Validation of User Credentials .................................................................... 252
Figure 8-11: Localization Support ................................................................................... 253
Figure 8-12: Summary ..................................................................................................... 253
Figure 8-13: Upgrade Finish ............................................................................................ 254
Figure 8-14: Welcome Wizard ......................................................................................... 255
Figure 8-15: Installation Complete .................................................................................. 256
Figure 8-16: Welcome Wizard ......................................................................................... 257
Figure 8-17: Installation Complete .................................................................................. 257
Figure 8-18: Welcome Wizard ......................................................................................... 259
Figure 8-19: Installation Complete .................................................................................. 259
Figure 8-20: Welcome Wizard ......................................................................................... 261
Figure 8-21: Installation Complete .................................................................................. 261
Figure 8-22: Taking Database backup using the MAXPRO NVR Agent ......................... 262
Figure 8-23: Validation of User Credentials .................................................................... 263
Figure 8-24: Choose Metadata Path ............................................................................... 264
Figure 8-25: Summary ..................................................................................................... 264
Figure 8-26: Reboot prompt ............................................................................................ 265
Figure 9-1: MAXPRO WebConfigurator ........................................................................... 269
Figure 9-2: MAXPROWebConfigurator-Server Configuration ......................................... 272
Figure 9-3: MAXPROWebConfigurator-Security Configuration ...................................... 273
Figure 9-4: Home ............................................................................................................. 275
Figure 9-5: Server Certificate ........................................................................................... 275
Figure 9-6: Specify Friendly Name .................................................................................. 276
Figure 9-7: Generated Certificate .................................................................................... 276

MAXPRO NVR 5.6
List of Figures
Figure 9-8: Site Bindings Dialog ...................................................................................... 277
Figure 9-9: Edit Site Bindings .......................................................................................... 277
Figure 9-10: Certificate Error ............................................................................................ 278
Figure 9-11: Untrusted Certificate .................................................................................... 278
Figure 9-12: Certificate ..................................................................................................... 279
Figure 9-13: Certificate Import Wizard ............................................................................. 279
Figure 9-14: IIS Home ...................................................................................................... 280
Figure 9-15: Create Certificate Request ........................................................................... 281
Figure 9-16: Request Certificate ...................................................................................... 281
Figure 9-17: Request Certificate ...................................................................................... 282
Figure 9-18: Request Certificate ...................................................................................... 283
Figure 9-19: IIS Manger .................................................................................................... 284
Figure 9-20: IIS Manger .................................................................................................... 284
Figure 9-21: Complete Certificate request ....................................................................... 285
Figure 9-22: IIS manger-Server Certificate ...................................................................... 285
Figure 9-23: Site Bindings Dialog .................................................................................... 286
Figure 9-24: Add Site Bindings ........................................................................................ 286
Figure 9-25: Certificate ..................................................................................................... 287
Figure 9-26: Certificate Import Wizard ............................................................................. 288
Figure 9-27: Server Configuration .................................................................................... 289
Figure 9-28: Program Maintenance ................................................................................. 291
Figure 9-29: Certificate dialog .......................................................................................... 292
Figure 10-1: System Diagram .......................................................................................... 297
Figure A-1: Computer Management ................................................................................ 314
Figure A-2: Task Scheduler .............................................................................................. 315
Figure A-3: Create Basic Task ......................................................................................... 315
Figure A-4: Task Trigger .................................................................................................. 316
Figure A-5: Daily Dialog ................................................................................................... 316
Figure A-6: Action dialog .................................................................................................. 317
Figure A-7: Start a Program ............................................................................................. 317
Figure A-8: Meta Data Conversion Utility Login ............................................................... 319
Figure A-9: Meta Data Conversion Utility ......................................................................... 320
Figure A-10: Define Unique ID screen ............................................................................. 321
Figure A-11: Updating Unique ID ..................................................................................... 322
Figure A-12: Offline Mode ................................................................................................ 323
Figure A-13: Offline Updating Unique ID ......................................................................... 323
Figure B-1: I-frame Example ............................................................................................ 329
Figure B-2: Camera configuration page .......................................................................... 330
Figure B-3: Sensitivity Level Comparison: Normal Field of View .................................... 333
Figure B-4: Sensitivity Level Comparison: Wide Field of View ........................................ 333
Figure B-5: Combination Field of View Example ............................................................. 334
Figure B-6: Upgrade Firmware - Setup Page .................................................................. 336
Figure B-7: Smart Plan Setup Page ................................................................................. 337
Figure B-8: Extensional smart function page .................................................................. 337
Figure B-9: Xtralis Login ................................................................................................... 338
Figure B-10: Loiter Trace Page ........................................................................................ 338
Figure B-11: Loiter Trace Configuration .......................................................................... 339
Figure B-12: Loiter Trace - Calibrate ................................................................................ 339
Figure B-13: Loiter Trace - Zones .................................................................................... 340
Figure B-14: Loiter Trace - Parameters ............................................................................ 340
Figure B-15: Loiter Trace - Live View Logs ...................................................................... 341

MAXPRO NVR 5.6
List of Figures
Figure B-16: User List ...................................................................................................... 342
Figure B-17: ONVIF User Setup ...................................................................................... 342
Figure B-18: Server Maintenance .................................................................................... 343
Figure B-19: Axis Credentials .......................................................................................... 345

MAXPRO NVR 5.6
List of Figures
This page was intentionally left blank
Precautions
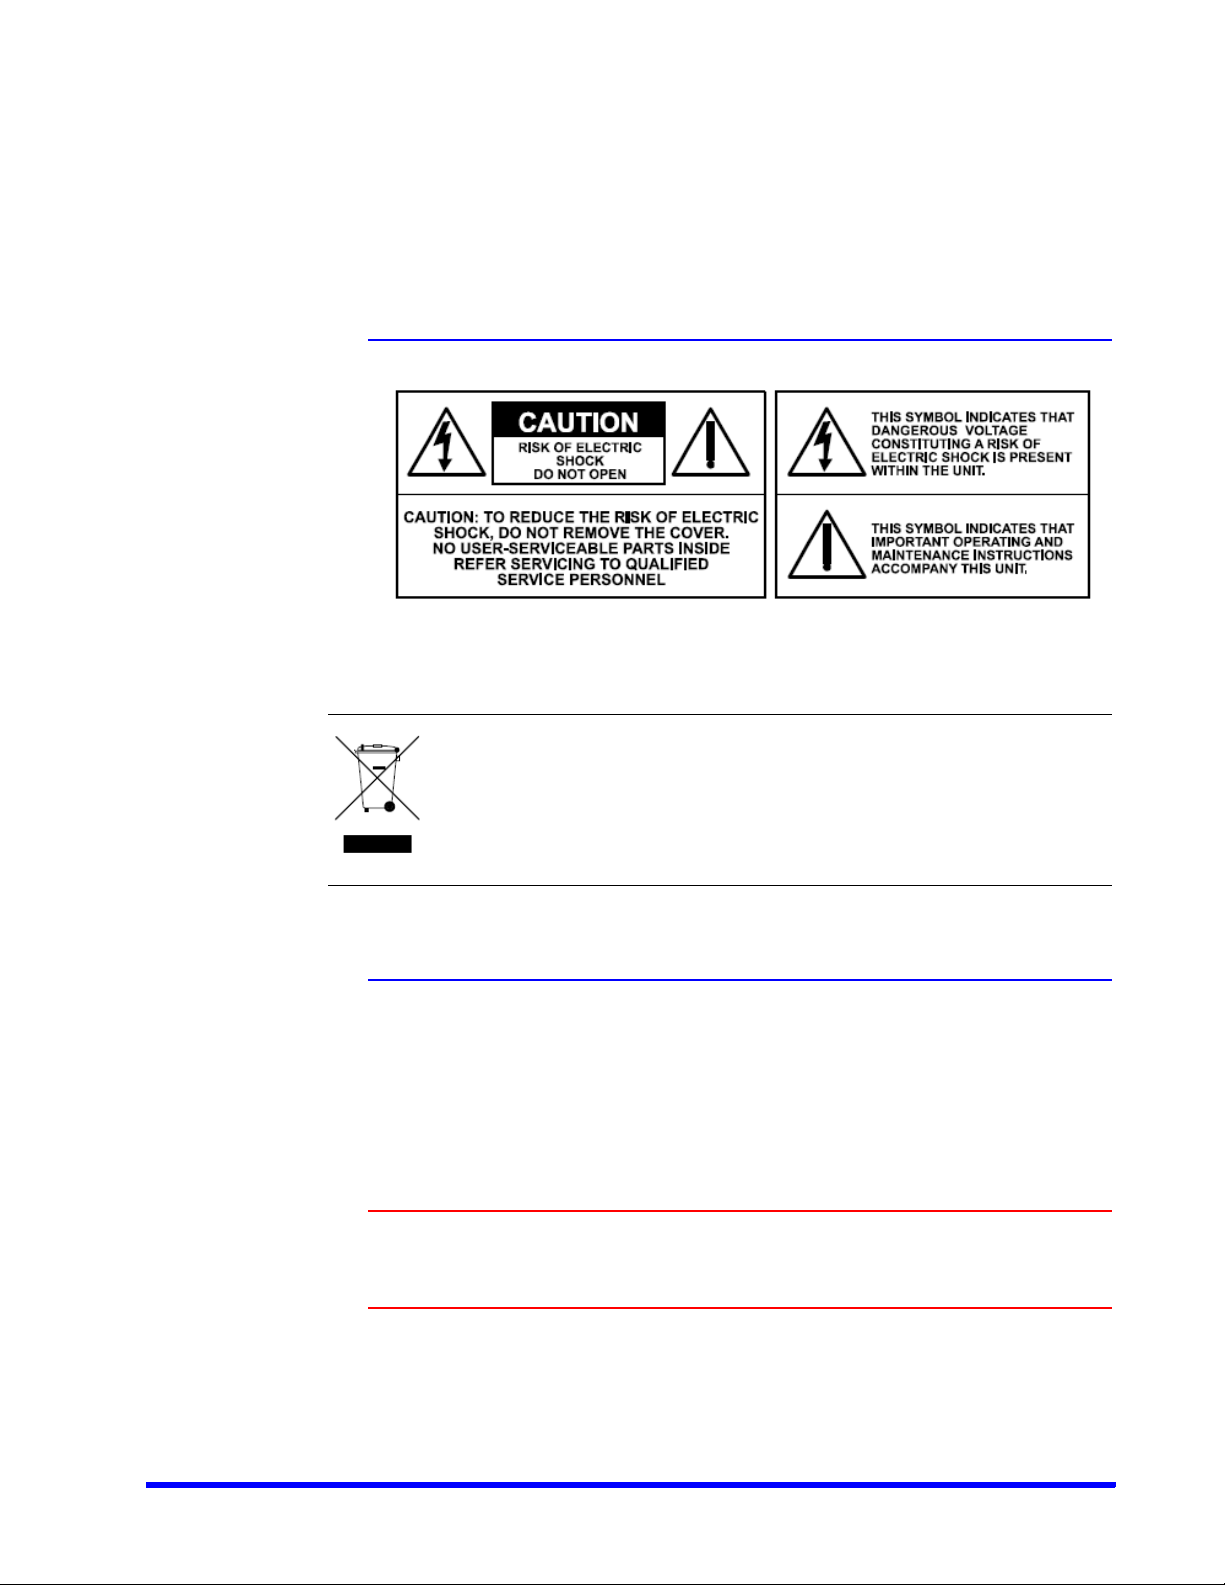
Cautions and Warnings
Installation and servicing should be performed only by qualified and experienced technicians
to conform to all local codes and to maintain your warranty.
WEEE (Waste Electrical and Electronic Equipment). Correct disposal of this
product (applicable in the European Union and other European countries with
separate collection systems). This product should be disposed of, at the end of
its useful life, as per applicable local laws, regulations, and procedures.
FCC Compliance Statement
Information to the User: This equipment has been tested and found to comply with the limits
for a Class A digital device. Pursuant to Part 15 of the FCC Rules, these limits are designed to
provide reasonable protection against harmful interference when the equipment is operated
in a commercial environment. This equipment generates, uses, and can radiate radio
frequency energy and, if not installed and used in accordance with the instruction manual,
may cause harmful interference to radio communications. Operation of this equipment in a
residential area is likely to cause harmful interference in which case the user will be required
to correct the interference at his own expense.
Caution: Changes or modifications not expressly approved by the party
responsible for compliance could void the user’s authority to operate the
equipment.
This Class A digital apparatus complies with Canadian ICES-003.
Cet appareil numérique de la Classe B est conforme à la norme NMB-003 du Canada.
MAXPRO NVR 5.6 Installation and Configuration Guide 21

PRECAUTIONS
Important Safeguards
Important Safeguards
1. Read Instructions
All the safety and operating instructions should be read before the appliance is operated.
2. Retain Instructions
The safety and operating instructions should be retained for future reference.
3. Cleaning
Unplug this equipment from the wall outlet before cleaning it. Do not use liquid aerosol
cleaners. Use a damp soft cloth for cleaning.
4. Attachments
Never add any attachments and/or equipment without the approval of the manufacturer
as such additions may result in the risk of fire, electric shock, or other personal injury.
5. Water and/or Moisture
Do not use this equipment near water or in contact with water.
6. Ventilation
Place this equipment only in an upright position. Ensure product ventilation openings are
not obstructed.
7. Accessories
Do not place this equipment on an unstable cart, stand, or table. The
equipment may fall, causing serious injury to a child or adult, and
serious damage to the equipment. Wall or shelf mounting should
follow the manufacturer's instructions, and should use a mounting
kit approved by the manufacturer.
This equipment and cart combination should be moved with care.
Quick stops, excessive force, and uneven surfaces may cause the
equipment and cart combination to overturn.
8. Power Sources
This equipment should be operated only from the type of power source indicated on the
marking label. If you are not sure of the type of power, please consult your equipment
dealer or local power company.
9. Power Cords
Operator or installer must remove power, BNC, alarm, and other connections before
moving the equipment.
10. Lightning
For added protection for this equipment during a lightning storm, or when it is left
unattended and unused for long periods of time, unplug it from the wall outlet and
disconnect the antenna or cable system. This will prevent damage to the equipment due
to lightning and power-line surges.
11. Overloading
Do not overload wall outlets and extension cords to avoid the risk of fire or electric shock.
12. Objects and Liquids
Never push objects of any kind through openings of this equipment as they may touch
dangerous voltage points or short out parts that could result in a fire or electric shock.
Never spill liquid of any kind on the equipment.
13. Servicing
Do not attempt to service this equipment yourself. Refer all servicing to qualified service
personnel.
22 MAXPRO NVR 5.6 Installation and Configuration Guide

PRECAUTIONS
Important Safeguards
14. Damage Requiring Service
Unplug this equipment from the wall outlet and refer servicing to qualified service
personnel under the following conditions:
• When the power-supply cord or the plug has been damaged
• If liquid is spilled or objects have fallen into the equipment
• If the equipment has been exposed to rain or water
• If the equipment does not operate normally by following the operating instructions,
adjust only those controls that are covered by the operating instructions as an
improper adjustment of other controls may result in damage and will often require
extensive work by a qualified technician to restore the equipment to its normal
operation.
• If the equipment has been dropped or the cabinet damaged
• When the equipment exhibits a distinct change in performance-this indicates a need
for service.
15. Replacement Parts
When replacement parts are required, be sure the service technician has used
replacement parts specified by the manufacturer or that have the same characteristics as
the original part. Unauthorized substitutions may result in fire, electric shock, or other
hazards.
16. Safety Check
Upon completion of any service or repairs to this equipment, ask the service technician to
perform safety checks to determine that the equipment is in proper operating condition.
17. Field Installation
This installation should be made by a qualified service person and should conform to all
local codes.
18. Correct Batteries
. . . . .
WARNING! Risk of explosion if battery is replaced by an incorrect type.
Dispose of used batteries according to the instructions.
19. Operating Temperature
An operating temperature range is specified so that the customer and installer may
determine a suitable operating environment for the equipment.
20. Elevated Operating Ambient Temperature
If installed in a closed or multi-unit rack assembly, the operating ambient temperature of
the rack environment may be greater than room ambient. Therefore, consideration
should be given to installing the equipment in an environment compatible with the
specified operating temperature range.
21. Reduced Air Flow
Installation of the equipment in the rack should be such that the amount of airflow
required for safe operation of the equipment is not compromised.
22. Mechanical Loading
Mounting of the equipment in the rack should be such that a hazardous condition is not
caused by uneven mechanical loading.
MAXPRO NVR 5.6 Installation and Configuration Guide 23
PRECAUTIONS
Warranty and Service
23. Circuit Overloading
Consideration should be given to connection of the equipment to supply circuit and the
effect that overloading of circuits might have on over-current protection and supply wiring.
Appropriate consideration of equipment nameplate ratings should be used when
addressing this concern.
24. Reliable Earthing (Grounding)
Reliable grounding of rack mounted equipment should be maintained. Particular attention
should be given to supply connections other than direct connections to the branch circuit
(for example, use of power strips).
Warranty and Service
Subject to the terms and conditions listed on the Product warranty, during the warranty period
Honeywell will repair or replace, at its sole option, free of charge, any defective products
returned prepaid.
In the event you have a problem with any Honeywell product, please call Technical Support at
1-800-323-4576 (North America only) for assistance or to request a Return Merchandise
Authorization (RMA) number.
Be sure to have the model number, serial number, and the nature of the problem available for
the technical service representative.
Prior authorization must be obtained for all returns, exchanges, or credits. Items shipped to
Honeywell without a clearly identified Return Merchandise Authorization (RMA) number
may be refused.
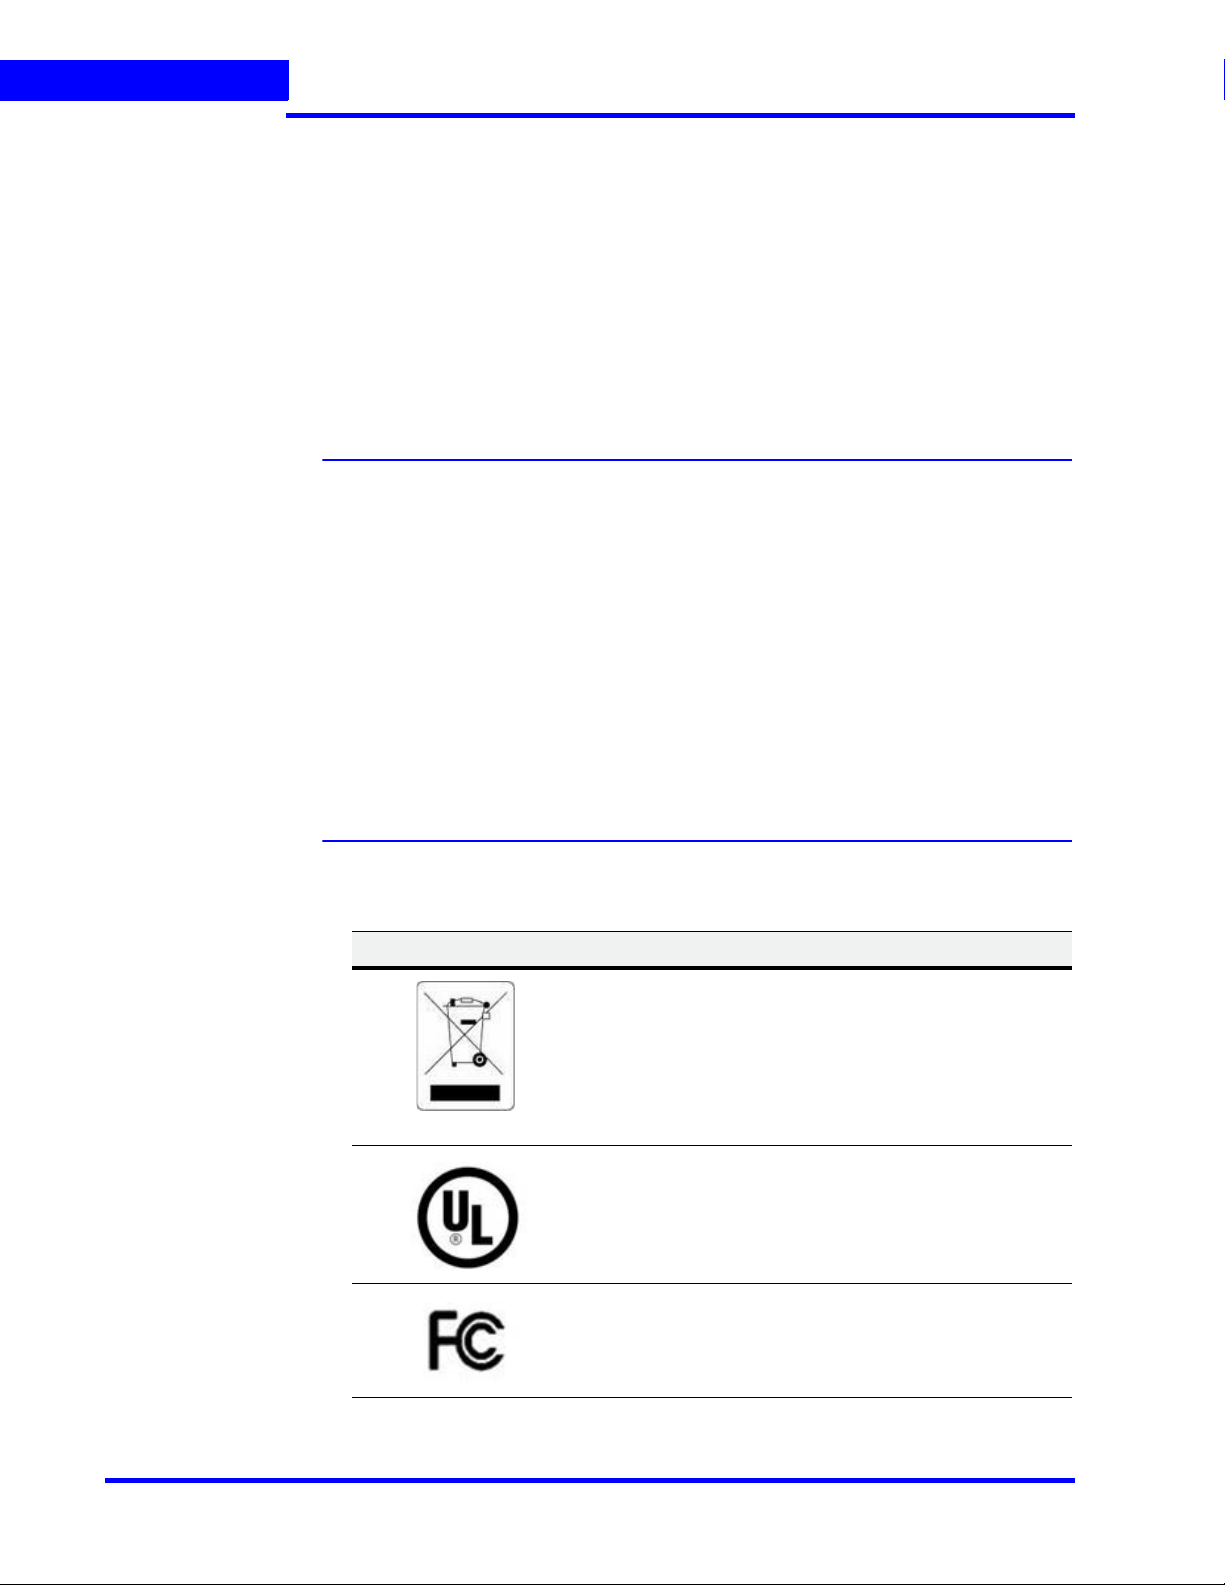
List of Symbols
The following is a list of symbols that might appear on the NVR.
Symbol Explanation
The WEEE symbol.
This symbol indicates that when the end-user wishes to discard this product, it must be sent to separate collection facilities for recovery and recycling. By separating this product
from other household-type waste, the volume of waste sent to
incinerators or landfills will be reduced, and thus natural resources will be conserved.
The UL compliance logo.
This logo indicates that the product has been tested and is listed by the Underwriters Laboratories.
The FCC compliance logo.
This logo indicates that the product conforms to Federal Communication’s Commission compliance standards.
24 MAXPRO NVR 5.6 Installation and Configuration Guide
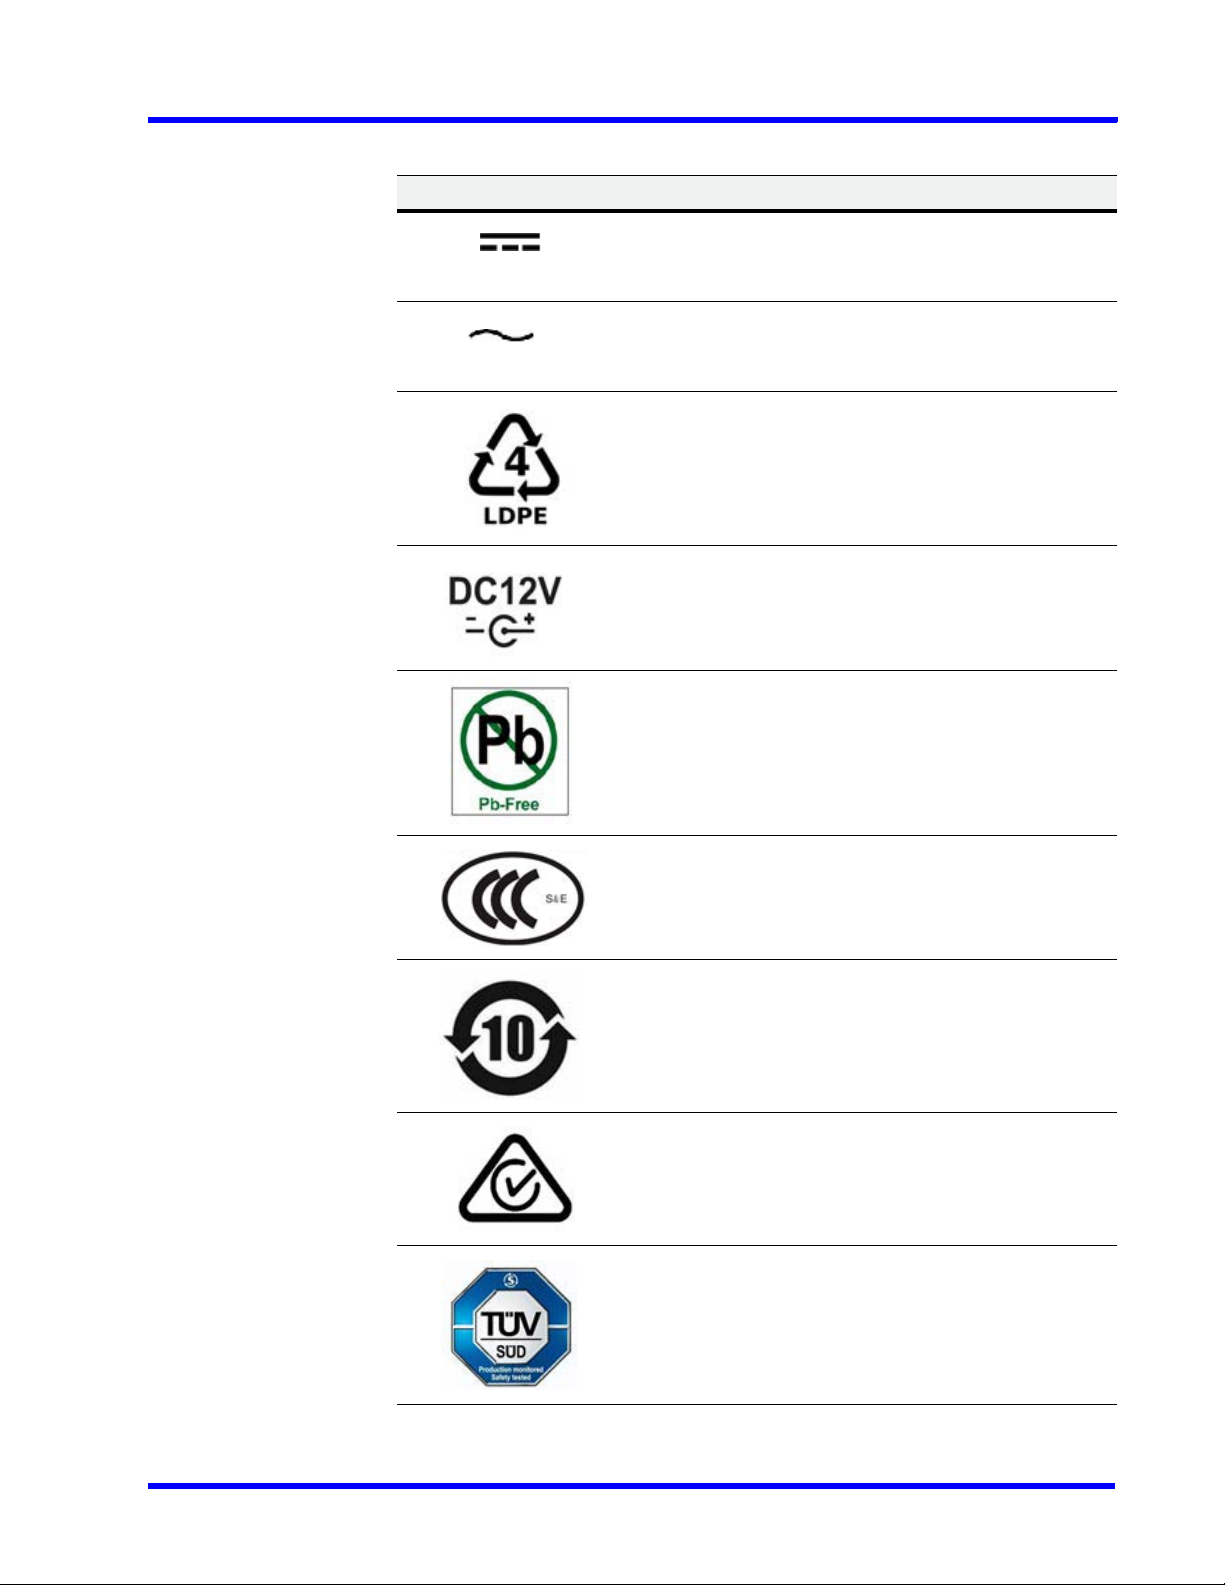
Symbol Explanation
The direct current symbol.
This symbol indicates that the power input/output for the product is direct current.
The alternating current symbol.
This symbol indicates that the power input/output for the product is alternating current.
The LDPE symbol.
This symbol indicates that this product is made of Low-Density Polyethylene (LDPE).
The Direct Current symbol.
This symbol indicates that the product operates from a 12 V
direct current.
PRECAUTIONS
List of Symbols
. . . . .
The Lead-free symbol.
This symbol indicates that the product does not contain lead
(Pb).
The CCC compliance logo.
This logo indicates that the product conforms with the China
Compulsory Certification guidelines.
The Environment Friendly Use-period symbol.
This symbol indicates the length of time that this electronic
product can used without harming the environment.
The RCM Compliance symbol.
This symbol indicates that the product conforms with the Australian RCM guidelines.
The TUV Lab symbol.
This symbol indicates that the product has been safety tested
by the TUV Lab.
MAXPRO NVR 5.6 Installation and Configuration Guide 25
PRECAUTIONS
List of Symbols
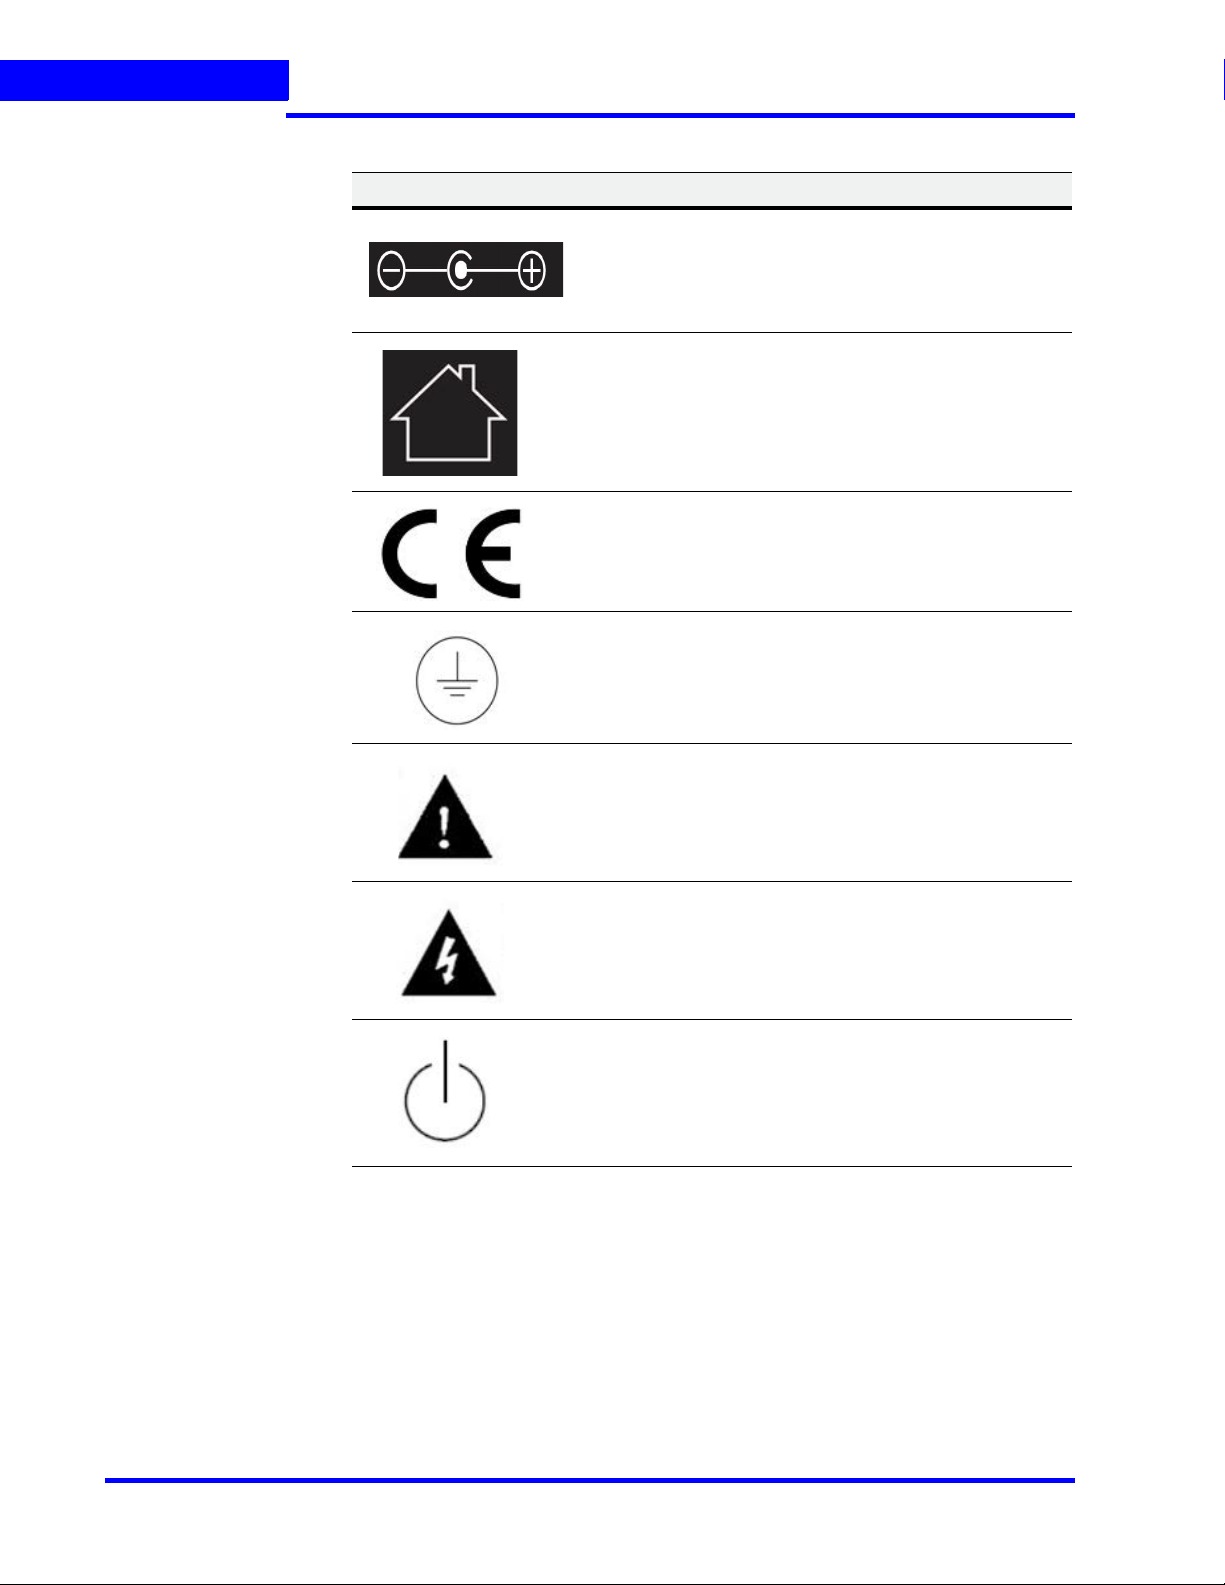
Symbol Explanation
The Direct Current symbol.
This Direct Current symbol indicates that the product operates
direct current.
This symbol indicates that the product is to be used indoors.
The CE Compliance logo.
This logo indicates that the product conforms to the relevant
guidelines/standards for the European Union harmonization
legislation.
The Protective Earth symbol.
This symbol indicates that the marked terminal is intended for
connection to the protective earth/grounding conductor.
This symbol is used to direct attention to important information.
This symbol warns that the corresponding action could result
in an electric shock.
This symbol indicates On/Standby functionality of the corresponding control/button/switch.
26 MAXPRO NVR 5.6 Installation and Configuration Guide

About This Guide
Overview
This guide describes the procedures and guidelines for installing, configuring and using the
MAXPRO
®
NVR system.
Intended Audience
This document is intended for field and commissioning engineers.
Scope
This guide describes the installation and configuration procedures for both the MAXPRO NVR
turnkey boxed solutions (MAXPRO NVR XE, SE, PE and MAXPRO NVR Hybrid XE, SE, PE
models) and MAXPRO NVR software-only solution. This guide covers the following four major
sections:
• Installing MAXPRO NVR
• Configuring MAXPRO NVR
• Configuring Web Client
• Installing and Configuring MAXPRO NVR Mobile App
• Upgrading MAXPRO NVR
•Securing MAXPRO NVR
Overview Of Contents
The following table describes the detailed structure and the contents of each chapter in this
guide.
No Chapter Description
1 Introduction to MAXPRO NVR Introduces the MAXPRO NVR system and
types of Video surveillance solutions.
2 Commissioning MAXPRO NVR Describes the commissioning procedures
for the MAXPRO NVR system.
3 Setting up the MAXPRO NVR Describes the tasks to set up the:
• MAXPRO NVR Single Box solutions.
• MAXPRO NVR Software-Only solution.
4 Installing the NVR Software Describes the procedures to install the
MAXPRO NVR software.
5 Logging on and Getting
Started
MAXPRO NVR 5.6 Installation and Configuration Guide 27
Describes how to log on and gives an
overview of the MAXPRO NVR.

ABOUT THIS GUIDE
Related Documents
No Chapter Description
6 Configuring MAXPRO NVR Describes the tasks for configuring the
MAXPRO NVR.
7 Verifying the Configuration Describes the tasks to verify the MAXPRO
NVR configuration.
8 Upgrade MAXPRO NVR
Software
9 MAXPRO NVR Web Client Describes the procedures to install and
10 MAXPRO NVR Mobile App Describes the procedures to install and
11 Securing MAXPRO NVR Describes the mandatory security settings
12 Appendix A Describes the procedures to customize
13 Appendix B Describes the Image Stream Combinations
14 Appendix C Lists the various patches that are released
Describes how to upgrade MAXPRO NVR
configure the MAXPRO NVR Web Client.
configure the MAXPRO NVR Mobile App.
that needs to be performed on MAXPRO
NVR.
MAXPRO NVR Single-box Turnkey solutions
and setting up the Antivirus software on
MAXPRO NVRs.
and Device Characteristics of Oncam
Grandeye Cameras, Configuring VMD
Settings and Motion-based Recording,
Event and Alarm Types and
MAXPRO®NVRs - AXIS Camera/Encoders
Discovery and Configuration (using ONVIF).
on top of MAXPRO NVR 4.0. It also explains
the enhancements that you can experience
after installing the specific patch.
Related Documents
This document listed in the table serves as a necessary prerequisite for understanding
MAXPRO NVR.
Document title Part number Description
MAXPRO NVR Operator’s
Guide
28 MAXPRO NVR 5.6 Installation and Configuration Guide
800-16422V5-J This document is written for everyday MAXPRO NVR users who
perform the basic video surveillance operations.

Typographical Conventions
This guide uses the following typographical conventions.
Font What it represents Example
ABOUT THIS GUIDE
Typographical Conventions
. . . . .
Swiss721 BT Words or characters that you must type. The word
“enter” is used if you must type text and then press
the Enter or Return key.
Menu titles and other items you select Double-click Open from the File menu.
Buttons you click to perform actions Click Exit to close the program.
Heading
Italic Cross-reference to external source Refer to the System Administrator
Cross-reference within document See Installation.
Enter the password.
Installation
Guide.
MAXPRO NVR 5.6 Installation and Configuration Guide 29

ABOUT THIS GUIDE
Typographical Conventions
This page is intentionally left blank
30 MAXPRO NVR 5.6 Installation and Configuration Guide
 Loading...