

Honeywell H34S-IC Quick Installation Manual
H34S-IC In-Ceiling Mount
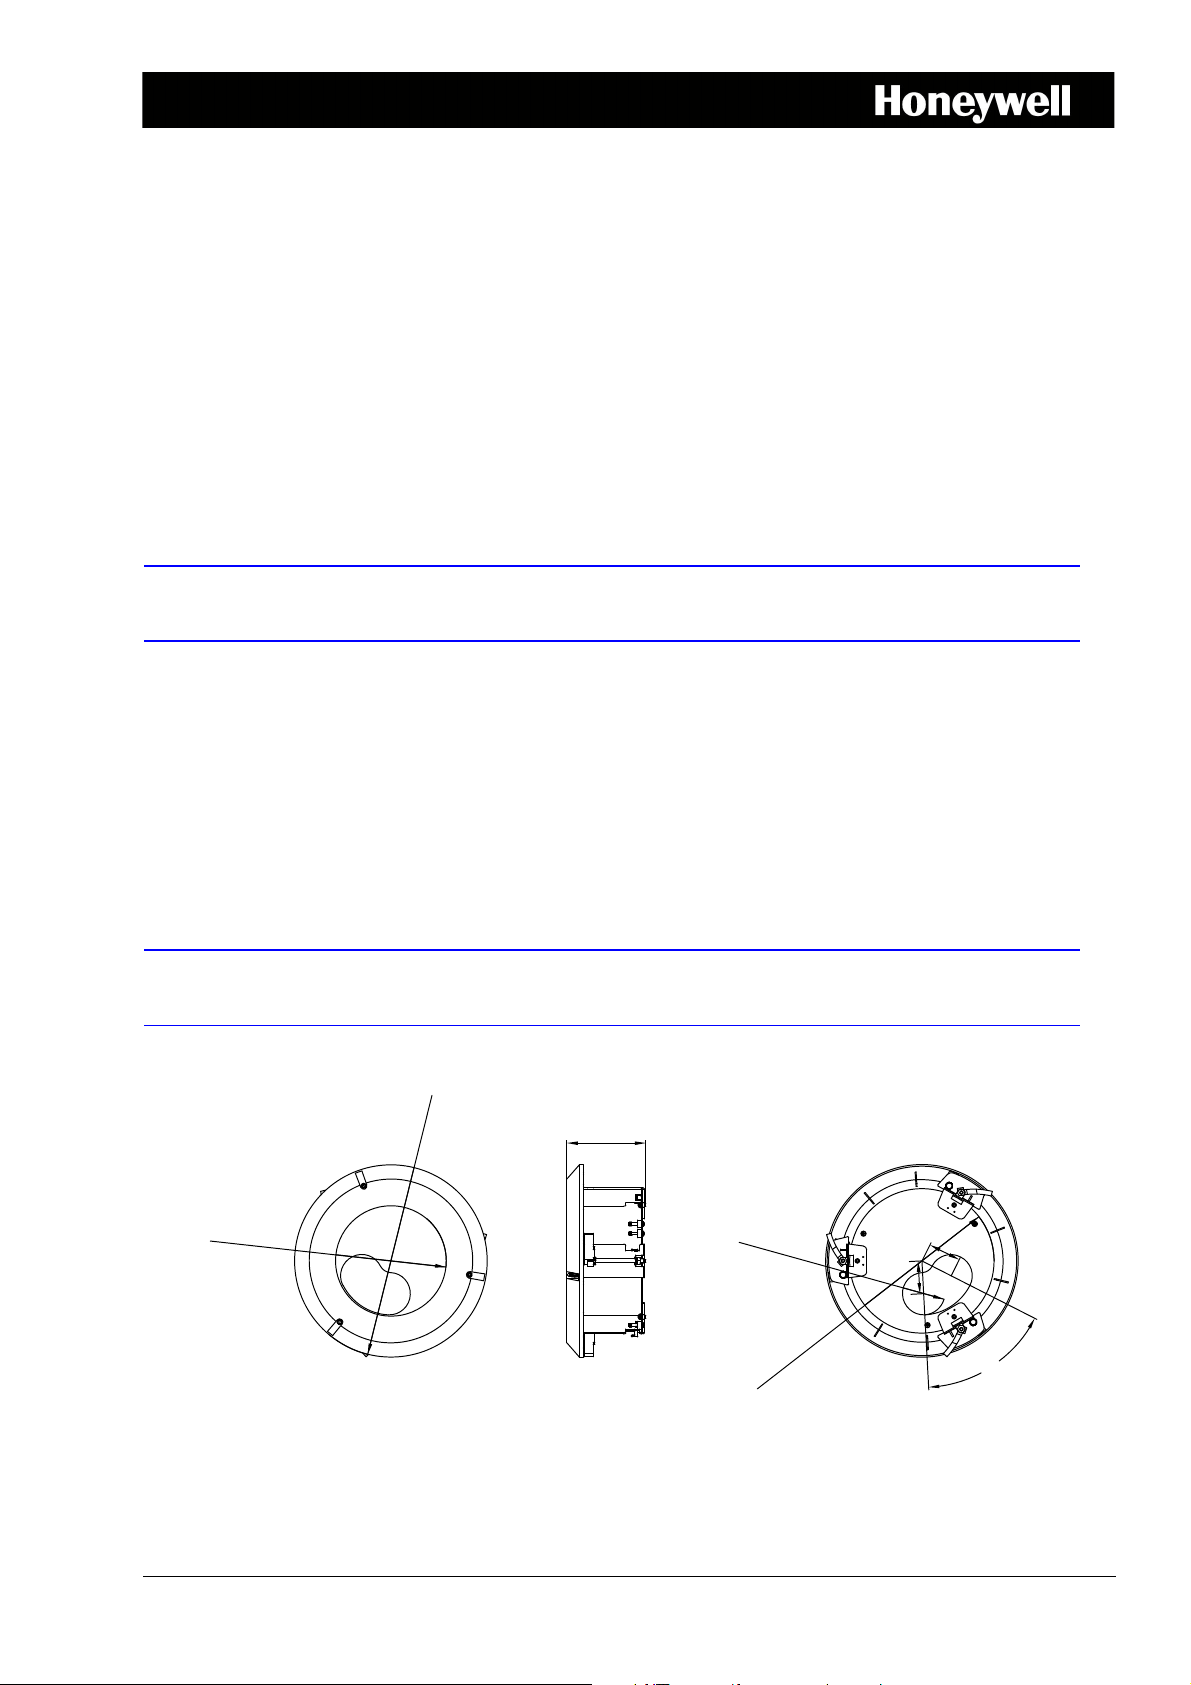
3.23 in.
(82.1 mm)
Ø 7.87 in.
(200 mm)
Ø 4.53 in.
(115 mm)
Ø 1.73 in.
(44 mm)
Ø 5.91 in.
(150 mm)
60°
1.34 in.
(34 mm)
Quick Installation Guide
This document describes how to install an equIP® Series H3D S Series indoor or H4D S Series
rugged IP minidome camera in a suspended ceiling using the H34S-IC in-ceiling mount.
CAUTION Installation and servicing should be performed only by
qualified and experienced technicians to conform to all local codes and
to maintain your warranty.
Package Contents
Before you begin, check that you have received all of the parts listed below. If any parts are
missing or damaged, contact your dealer immediately.
• In-ceiling mount
• Trim ring
•Template
You will also need drilling tools and a Phillips screwdriver (not supplied).
In-Ceiling Mount Dimensions
• Security Torx key
• Quick Installation Guide
Document 800-16667 – Rev A – 01/2014
2 | H34S-IC In-Ceiling Mount Quick Installation Guide
Indoor Dome Rugged Dome
Indoor Dome Rugged Dome
Indoor Dome Rugged Dome
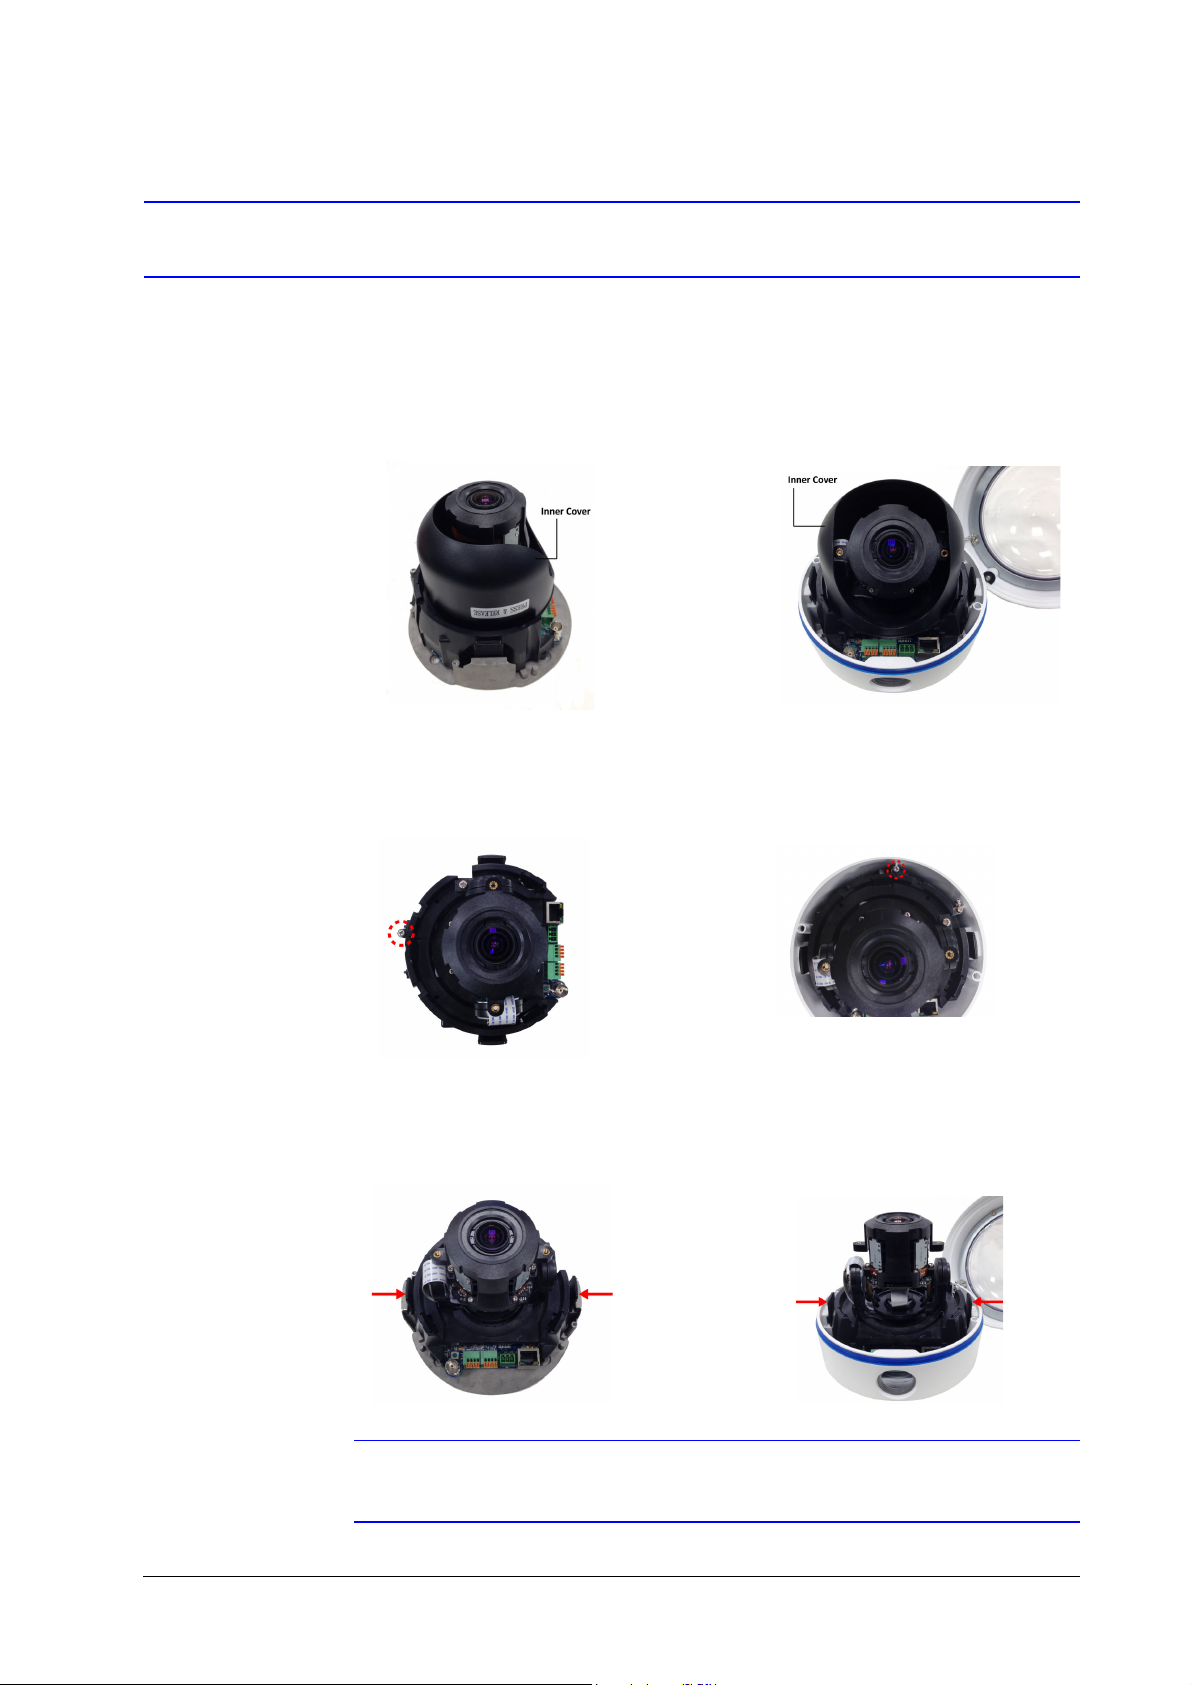
Preparing the Camera
1. Loosen the two captive security screws on the dome cover using the supplied Torx key
and remove the dome cover from the camera base.
2. Remove the inner cover from the camera assembly. Press both sides of the inner cover to
release it from the camera assembly.
3. Remove the screw securing the camera assembly to the camera base using a Phillips
screwdriver (not supplied).
4. Remove the camera assembly from the camera base by pressing the tabs on the sides of
the camera assembly. Store the camera assembly in the product box while you attach the
camera base to the in-ceiling mount.
Note For rugged cameras only: There are two cable entry holes on the camera base. Install
the conduit plug in the hole you are not using.
www.honeywell.com/security
 Loading...