

Page 1
Owner’s Manual
IMPORTANT
SAFETY
INSTRUCTIONS
READ AND SAVE THESE
SAFETY INSTRUCTIONS
BEFORE USING THIS FAN
When using electrical appliances, basic
precautions should always be followed to
reduce the risk of fire, electric shock, and
injury to persons, including the following:
FOR US MODELS ONLY – This product employs
overload protection (fuse). A blown fuse
indicates an overload or short-circuit situation.
If the fuse blows, unplug the product from
the outlet. Replace the fuse as per the user
servicing instructions (follow product marking
for proper fuse rating) and check the product. If
the replacement fuse blows, a short-circuit may
be present and the product should be discarded
or returned to an authorized service facility for
examination and/or repair.
1. Use this fan only as described in this
manual. Other use not recommended as it
may cause fire, electric shock or injury to
persons.
2. This product is intended for household use
ONLY and not for commercial, industrial or
outdoor use.
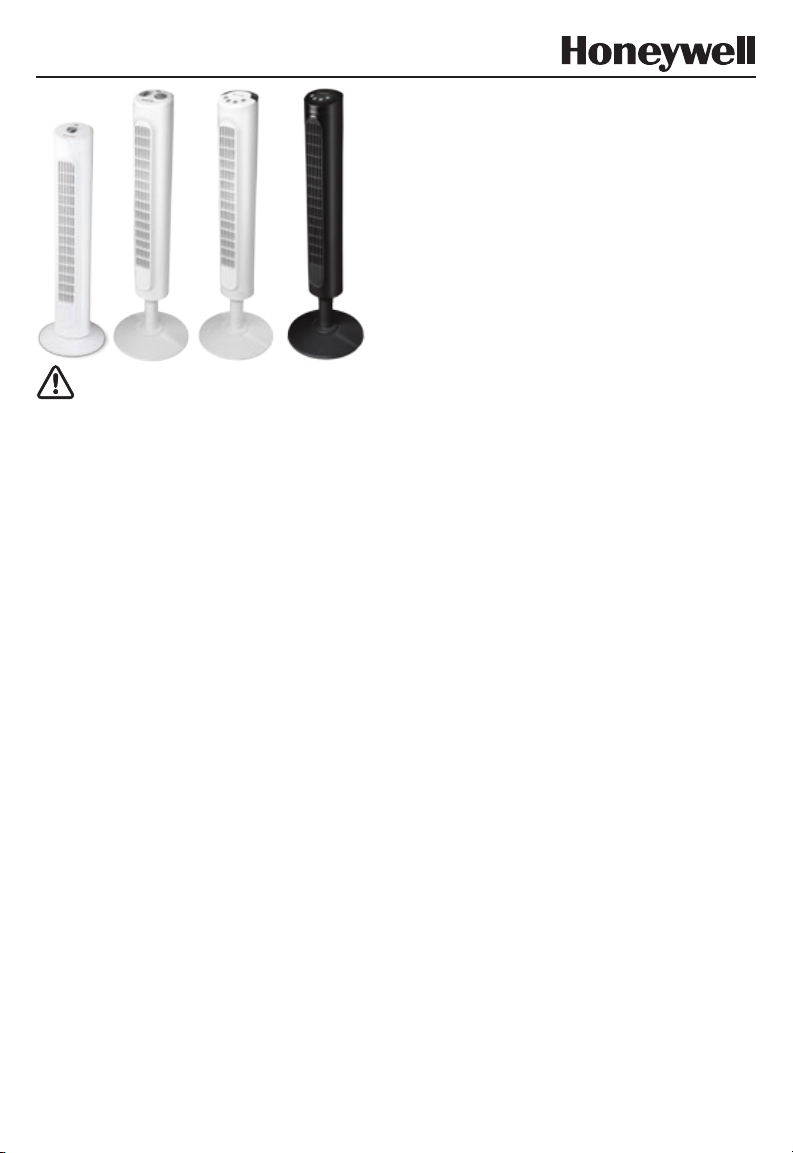
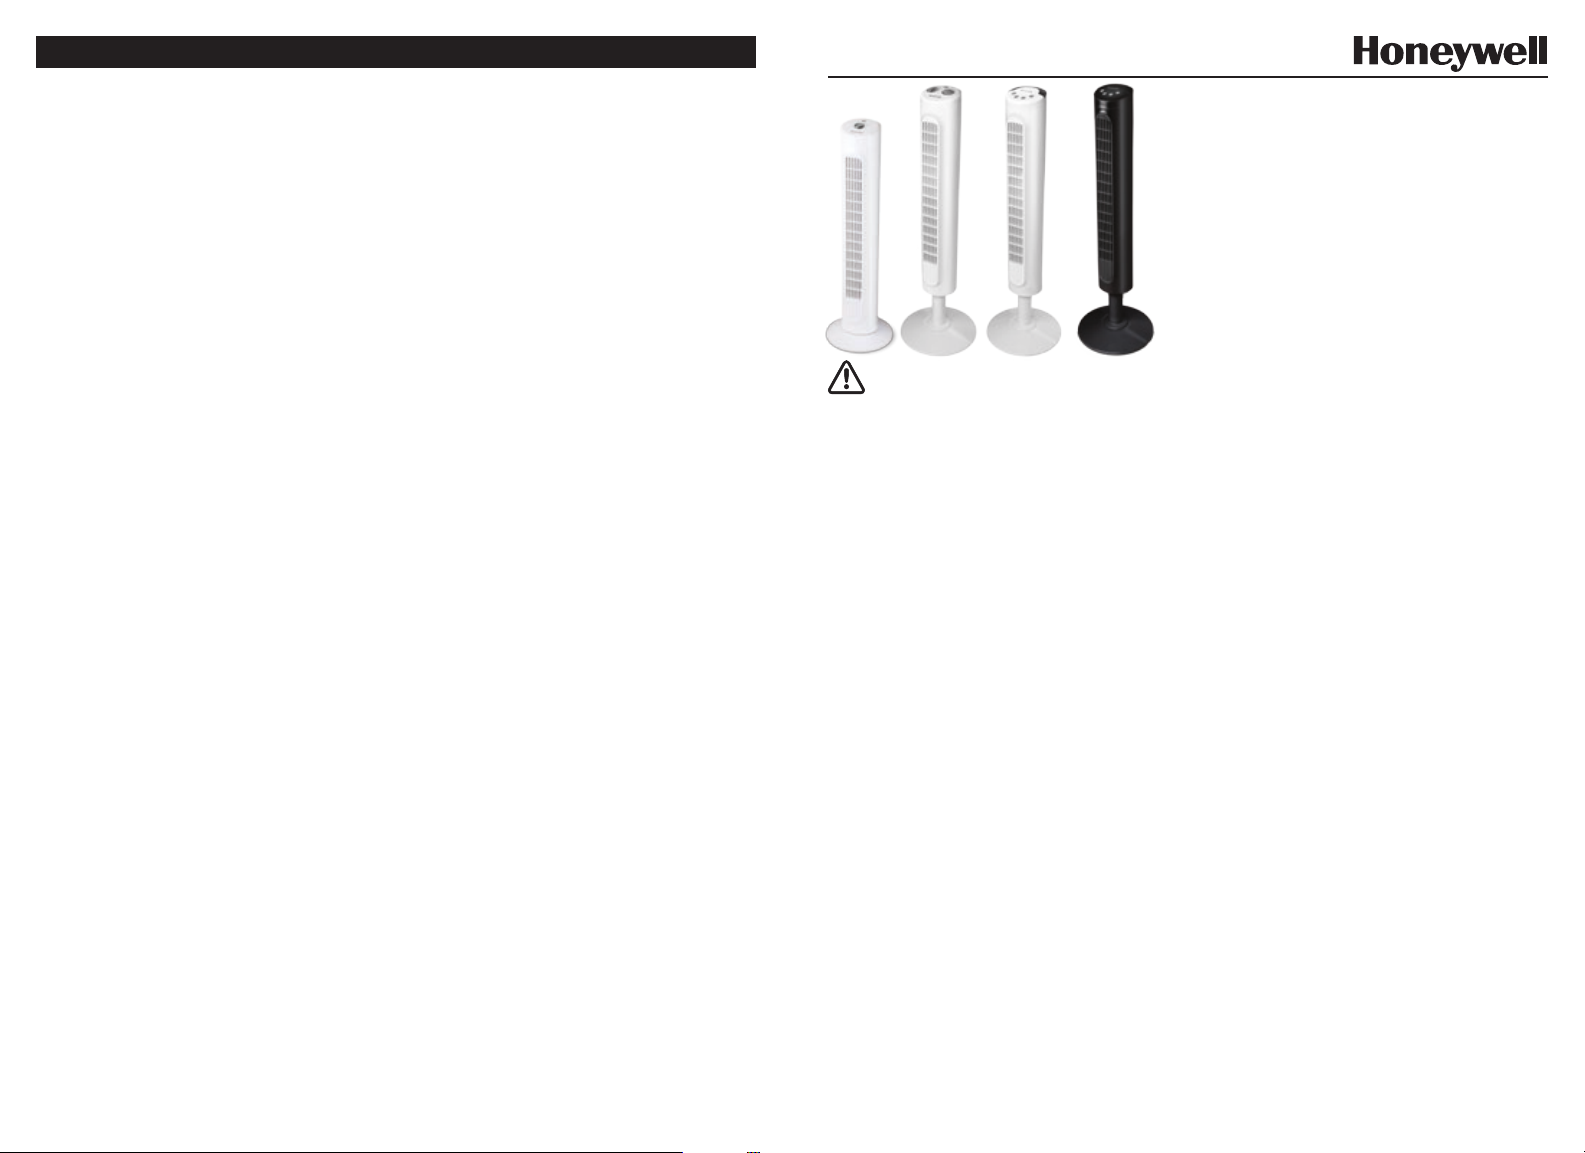
TOWER FAN
Model DYF012 Series
Model HYF013 Series
Model HYF023 Series
3. To protect against electric shock, do not
place fan in window, immerse unit, plug
or cord in water or spray with liquids.
4. This appliance has a polarized plug (one
blade is wider than the other). To reduce
the risk of shock, this plug is intended to
fit only one way in a polarized outlet. If the
plug does not fit fully in the outlet, reverse
the plug. If it still does not fit, contact a
qualified electrician. Do not attempt to
defeat this safety feature.
5. Close supervision is necessary when any
appliance is used by or near children.
6. Turn the fan OFF and unplug the fan from
the outlet when not in use, when moving
the fan from one location to another and
before cleaning.
7. To disconnect the fan, first turn the unit
OFF, grip the plug and pull it from the wall
outlet. Never pull the plug by the cord.
8 Do not operate the fan in the presence of
explosive and/or flammable fumes.
9. Do not place the fan or any parts near
an open flame, cooking or other heating
appliance.
10. Do not operate the fan with a damaged
cord or plug or if the product malfunctions,
is dropped or damaged in any manner
(see warranty).
11. Do not use fan with an extension cord.
12. Avoid contact with moving fan parts.
13. The use of attachments not recommended
by the manufacturer may be hazardous.
14. Place the fan on a dry level surface.
Honeywell is a trademark of Honeywell International Inc., used under license by Helen of Troy Limited.
Honeywell International Inc. makes no representation or warranties with respect to this product.
Page 2
15. Do not hang or mount fan on a wall or
ceiling.
16. Do not operate if the fan housing is
damaged.
17. A loose fit between the AC outlet
(receptacle) and plug may cause over
heating and a distortion of the plug.
Contact a qualified electrician to replace
loose or worn outlet.
18. Do not operate any fan with a damaged
cord or plug. Discard any damaged fan,
return the fan to the retailer where the
FUSED SAFETY PLUG – FOR US MODELS ONLY
fan was purchased, or request a return
authorization to return to Kaz USA, Inc. for
examination and/or repair.
19. Do not run fan cord under carpeting. Do
not cover cord with throw rugs, runners,
or similar coverings. Do not route cord
under furniture or appliances. Arrange
cord away from traffic areas and where
it will not be tripped over.
WARNING: To Reduce The Risk of Fire or
Electric Shock, Do Not Use This Fan With
Any Solid-State Speed Control Device.
This fan features a fused safety plug which is designed to cut off electric current to the fan if an
electrical fault occurs. Please see below for more information on how to properly use your fan and
replace the safety plug fuse, if needed.
USER SERVICING INSTRUCTIONS
• If your fan loses power and you suspect that the fuse on your fan has
blown, grasp plug and remove from the receptacle or other outlet
device. Do not unplug by pulling on cord.
• Slide fuse cover, located on the top of the plug, towards the prongs of
the plug. (Fig. 1)
• Carefully remove the blown fuse and snap a new fuse into
Fig. 1
place. To reduce the risk of fire, replace fuse only with 2.5 Amp, 125
volt fuse. Fully close the fuse door by sliding back into place. (Fig. 2)
Discard the blown fuse. The plug should now be ready for normal use.
• To reduce the risk of fire, do not replace attached plug. Contains a
safety device (fuse) that should not be removed. Discard product if the
attached plug is damaged.
• If you need further information on how or when to replace the fuse in
the safety plug, please contact Kaz Consumer Relations Department
Fig. 2
by visiting our website at www.honeywellpluggedin.com/fans
or calling 1-800-477-0457.
DYF012 SERIES ASSEMBLY INSTRUCTIONS
NOTE: Remove all contents from the box being careful not to discard
the manual and hardware needed for assembly. A phillips head screw
driver (
purchase.
) is required for assembly and is not included with the fan
Fig. 1
A. Base Assembly
• Gently turn the fan upside down.
• Place the power cord through the recessed channel located in the
center of the rear base assembly (Fig. 1).
• Align the rear and front base assembly and firmly snap together
by pushing the 4 round extrusion into the adjacent circles of the
connecting pieces (Fig. 2).
Fig. 2
B. Securing the Tower Fan to the Base
• Using the 3 (M5 x 12) screws and phillips head screw driver ( )
secure the base into the bottom portion of the fan housing by
aligning the 3 screw holes on the base with the 3 screw holes on
the bottom of the fan housing (Fig. 3).
• Gently pull any slack out of the power cord and place the cord
securely in the power cord
holding bracket (Fig. 4).
• Place the fan right side up.
Your fan is now ready
for use.
DYF012 SERIES OPERATION INSTRUCTIONS
• Place the fan on a level
and dry surface.
• Plug the power cord into
a polarized 120 Volt AC
wall outlet.
• To operate, press the
appropriate speed control
option: High (
Medium (
Low (
• To activate or disengage the fan oscillation, press the oscillation button (
• To turn the fan OFF (
), or
) (Fig. 5).
),
Fig. 3
Fig. 5
) press the Off button once.
Fig. 4
Fig. 6
) (Fig. 6).
2 3
Page 3
HYF013, HYF023 SERIES ASSEMBLY INSTRUCTIONS
HYF013 SERIES OPERATION INSTRUCTIONS
NOTE: Remove all contents from the box being careful not to discard the manual and hardware needed
for assembly. A phillips head screw driver (
) is required for assembly and is not included with the
fan purchase.
A. Pedestal Assembly
Fig. 7
• Place the power cord through the center of the front and rear
pedestal assemblies with the screw hole openings facing
towards the fan.
• Align the front and rear pedestal assembly and firmly snap
together (Fig. 7).
B. Securing the Tower Fan to the Pedestal
• Gently turn fan upside down.
• Line up the 3 screw holes on the pedestal with the 3 screw
holes on the bottom of the fan housing. Use the 3 (M5 x 12)
screws included in the box and a phillips head screw driver
(
) to secure the pedestal to the fan housing (Fig. 8).
Fig. 8
C. Base Assembly
• With the fan in the upside down position, pass the power cord
through the recessed slot located in the center of the rear base
assembly (Fig. 9).
• Align the rear and front base assembly and firmly snap together
by pushing the 4 round extrusion into the adjacent circles of the
connecting pieces (Fig. 10).
D. Securing the Tower
Fig. 9
Fig. 10
Fan to the Base
• Align the 3 screw holes in
the bottom of the pedestal
with the 3 screw holes
located on the base. Using
the 3 (M5 x 12) screws and
phillips head screw driver
(
), secure the base into
the bottom portion of the
fan housing (Fig. 11).
• Place the power cord
through the cut out on the
bottom of the base. Gently
pull any slack out of the
power cord and place the
cord securely in the power
cord holding bracket
(Fig. 12).
• Place the fan right side up.
Your fan is now ready for use.
Fig. 11 Fig. 12
• Place the fan on a level and dry surface.
• Plug the power cord into a polarized 120 Volt AC wall outlet.
• To operate, turn knob and select appropriate fan speed:
High ( ) Medium ( ), or Low ( ) (Fig. 13).
• To activate or disengage the fan oscillation, press the oscillation
button. (
) (Fig. 14).
• Operate the automatic shut-off timer feature by turning the timer
knob to the desired setting of 10 to 120 minutes (Fig. 15).
• To turn on the fan after automatic shut-off, turn the knob
counterclockwise
to the ON position
•
To turn the fan Off, turn
.
Fig. 14
knob to the Off position.
( )
HYF023 SERIES OPERATION INSTRUCTIONS
• Place the fan on a level and dry surface.
• Plug the power cord into a polarized 120 Volt AC wall outlet.
• To turn the fan on, press the Power button (
) located on
the left side of the control panel.
• To select fan speed, press Speed Control button (
) until
the desired speed is selected:
High (
), Medium ( ), or Low ( ) (Fig. 16).
• To activate or disengage the fan oscillation, press the
oscillation button (
). Press the Oscillation button again to
turn the Oscillation feature off (Fig. 17).
Fig. 13
Fig. 15
Fig. 16
Fig. 17
4 5
Page 4
HYF023 SERIES OPERATION INSTRUCTIONS (CONTINUED)
CONSUMER RELATIONS
• Activate the Timer feature by pressing the Timer button (
(Fig. 18).
)
Fig. 18
Choose from 1, 2, 4 and 8 hour settings by performing the
following functions:
• 1 hour: Press the Timer button once.
• 2 hour: Press the Timer button twice.
• 4 hour: Press the Timer button a third time.
• 8 hour: Press the Timer button a fourth time.
Press the Timer button a fifth time to turn the Timer feature off.
• To turn the fan off after use, press the Power button
( ) once.
USER SERVICING INSTRUCTIONS
CLEANING AND STORAGE
• Unplug the fan before cleaning.
• Use only a soft, damp cloth to gently wipe the outside surface of the fan.
• DO NOT immerse the fan in water and never allow water to drip into the motor housing.
• DO NOT use gasoline, paint thinner or other chemicals to clean the fan.
• Gently wipe the grilles with a cloth. To clean between the grilles we recommend using a pipe cleaner,
flexible dustwand, vacuum cleaner or compressed air to gently remove dust. DO NOT IMMERSE THE
FAN IN WATER AND NEVER ALLOW WATER TO DRIP INTO THE MOTOR HOUSING. DO NOT USE
GASOLINE, PAINT THINNER, OR OTHER CHEMICALS TO CLEAN THE FAN.
• For storage, clean the fan carefully as instructed. Store the fan in the original packaging or cover the
product to protect it from dust. Store the fan in a cool, dry place.
Mail questions or comments to:
Kaz USA, Inc.
Consumer Relations Dept.
250 Turnpike Road
Southborough, MA 01772
Call us toll-free at: 1-800-477-0457
E-mail: consumerrelations@kaz.com
Or visit our website at:
www.honeywellpluggedin.com/fans
Please be sure to specify a model number.
NOTE: IF YOU EXPERIENCE A PROBLEM, PLEASE CONTACT CONSUMER RELATIONS FIRST OR SEE
YOUR WARRANTY. DO NOT RETURN TO THE ORIGINAL PLACE OF PURCHASE. DO NOT ATTEMPT TO
OPEN THE MOTOR HOUSING YOURSELF, DOING SO MAY VOID YOUR WARRANTY AND CAUSE DAMAGE.
THIS DEVICE (HYF023 SERIES ONLY) COMPLIES WITH PART 15 OF THE FCC RULES
NOTE: This equipment has been tested and found to comply with the limits for a Class B digital device,
pursuant to Part 15 of the FCC Rules. These limits are designed to provide reasonable protection against
harmful interference in a residential installation. This equipment generates, uses, and can radiate radio
frequency energy and, if not installed and used in accordance with the instructions, may cause harmful
interference to radio communications. However, there is no guarantee that interference will not occur in
a particular installation. If this equipment does cause harmful interference to radio or television reception,
which can be determined by turning the equipment off and on, the user is encouraged to try to correct the
interference by one or more of the following measures:
• Reorient or relocate the receiving antenna.
• Increase the separation between the equipment and receiver.
• Connect the equipment into an outlet on a circuit different from that to which the receiver is connected.
• Consult the dealer or an experienced radio TV technician for help.
Please note that changes or modifications of this product is not expressly approved by the party
responsible for compliance could void the user’s authority to operate the equipment.
6 7
Page 5
1 YEAR LIMITED WARRANTY
Guide d’utilisation
You should first read all instructions before
attempting to use this product.
A. This 1 year limited warranty applies to
repair or replacement of product found to be
defective in material or workmanship. This
warranty does not apply to damage resulting
from commercial, abusive, unreasonable use
or supplemental damage. Defects that are
the result of normal wear and tear will not be
considered manufacturing defects under this
warranty.
KAZ USA, INC. IS NOT LIABLE FOR
INCIDENTAL OR CONSEQUENTIAL DAMAGES
OF ANY NATURE. ANY IMPLIED WARRANTY
OF MERCHANTABILITY OR FITNESS FOR A
PARTICULAR PURPOSE ON THIS PRODUCT IS
LIMITED IN DURATION TO THE DURATION OF
THIS WARRANTY. Some jurisdictions do not
allow the exclusion or limitation of incidental or
consequential damages or limitations on how
long an implied warranty lasts, so the above
limitations or exclusions may not apply to you.
This warranty gives you specific legal rights,
and you also may have other rights which vary
from jurisdiction to jurisdiction. This warranty
applies only to the original purchaser of this
product from the original date of purchase.
B. At its option, Kaz USA, Inc. will repair or
replace this product if it is found to be
defective in material or workmanship.
8 9
C. This warranty does not cover damage resulting
from any unauthorized attempts to repair
or from any use not in accordance with the
instruction manual.
D. Return defective product to Kaz USA, Inc. with
a brief description of the problem. Include
proof of purchase and a $10 US/$15.50 CAN
check or money order for handling, return
packing and shipping charges. Please include
your name, address and a daytime phone
number.
You must prepay shipping charges.
We suggest having tracking or delivery
confirmation. Send to:
In U.S.:
Attn: Returns Department
1 Helen Of Troy Plaza
El Paso, TX 79912
USA
In Canada:
Kaz Canada, Inc.
Attn: Returns Department
510 Bronte Street South
Milton, ON L9T 2X6
Canada
Please go to
www.honeywellpluggedin.com/register and
register your product under the Customer Care
Center and receive product information updates
and new promotional offers.
VENTILATEUR DE COLONNE
Série DYF012
Série HYF013
Série HYF023
3. Afin de prévenir les chocs électriques, éviter
IMPORTANTES
INSTRUCTIONS
DE SÉCURITÉ
LIRE ET CONSERVER CES
INSTRUCTIONS DE SÉCURITÉ AVANT
D’UTILISER LE VENTILATEUR
Lors de l’emploi d’appareils électriques, il convient
de toujours observer des précautions élémentaires
afin de réduire le risque d’incendie, de choc
électrique et de blessure corporelle, y compris les
précautions suivantes:
MODÈLES ÉTATS UNIS SEULEMENT - Cet
appareil présente une protection (fusible
contre les surcharges. Un fusible grillé signale
une surcharge ou un court-circuit. Si le
fusible saute, débrancher l’appareil à la prise.
Remplacer le fusible selon les instructions
d’entretien fournies (le calibre du fusible requis
est donné sur le produit) et vérifier l’appareil.
Si le fusible de rechange grille, un court-circuit
peut en être la cause ; en ce cas, l’appareil doit
être jeté ou retourné à un centre de services
agréé pour vérification et/ou réparation.
1. Utiliser uniquement ce ventilateur conformément
aux directives contenues dans le présent guide
d’utilisation. Tout autre usage non recommandé
pourrait être cause d’incendie, de choc
électrique ou de blessures.
2. Ce produit est conçu pour un usage domestique
UNIQUEMENT, et non pour une utilisation
commerciale, industrielle ou en plein air.
Honeywell est une marque de commerce de Honeywell International Inc., utilisée sous licence par Helen of Troy Limited.
Honeywell International Inc. n’effectue aucune représentation ou garantie relativement à ce produit.
de placer le ventilateur dans une fenêtre,
d’immerger l’appareil, son cordon d’alimentation
ou sa fiche dans l’eau ou de vaporiser du liquide
sur l’appareil.
4. Ce produit est équipé d’une fiche polarisée (fiche
dont l’une des lames est plus large que l’autre).
Afin de réduire le risque de choc électrique,
cette fiche ne peut être insérée que d’une seule
manière dans une prise de courant polarisée.
Si la fiche ne pénètre pas complètement dans
la prise, tourner la fiche. Si la fiche ne s’insère
toujours pas dans la prise, communiquer avec
un électricien. ÉVITER de contourner le dispositif
de sécurité que constitue la fiche polarisée.
5. Une étroite surveillance est recommandée
lorsque tout appareil est utilisé en présence d’un
enfant ou par un enfant.
6. Régler le ventilateur à la position D’ARRÊT et le
débrancher quand il ne sert pas ou avant de le
déplacer ou de le nettoyer.
7. Pour débrancher le ventilateur, régler d’abord la
commande à la position D’ARRÊT, saisir la fiche
et la tirer pour la sortir de la prise de courant. Ne
jamais tirer sur le cordon d’alimentation.
8 Ne pas de faire fonctionner l’appareil
en présence de vapeurs explosives ou
inflammables.
9. Ne pas placer le ventilateur ou des pièces du
ventilateur à proximité d’une flamme ou d’un
appareil de cuisson ou de chauffage.
10. Ne pas utiliser le ventilateur si la fiche ou le
cordon d’alimentation est endommagé. Éviter
également d’utiliser l’appareil si celui-ci a montré
des signes de mauvais fonctionnement, si on
l’a laissé tomber ou s’il a été endommagé de
quelque façon que ce soit (consulter la garantie).
Page 6

11.
N’utilisez pas de rallonge électrique avec ce
ventilateur.
12. Éviter tout contact avec les pièces mobiles du
ventilateur.
13. L’utilisation d’accessoires non recommandés par
le fabricant peut représenter un danger.
14. Placer l’appareil sur une surface sèche et bien
horizontale.
15. Ne pas suspendre ou de fixer le ventilateur au
mur ou au plafond.
16. Ne pas fonctionner le ventilateur si son boîtier
est endommagé.
17. Une connexion trop lâche entre la fiche et
la prise de courant c.a. peut entraîner une
surchauffe et une déformation de la fiche.
Communiquer avec un électricien pour faire
FICHE DE SÉCURITÉ AVEC FUSIBLE - ÉTATS-UNIS MODÈLES SEULEMENT
remplacer les prises de courant lâches ou usées.
18. Ne pas faire fonctionner un ventilateur dont
le cordon ou la fiche est endommagé. Mettre
tout ventilateur abîmé au rebut, le retourner au
lieu d’achat ou demander l’autorisation de le
renvoyer à Kaz USA, Inc. pour le faire vérifier et
réparer au besoin.
19. Ne pas acheminer le cordon sous de la
moquette. Ne pas le recouvrir de carpettes, tapis
de corridor ou revêtement de sol de ce genre.
Ne pas passer le cordon sous des meubles ou
des appareils. De plus, l’éloigner du passage
afin qu’il ne risque pas de faire trébucher.
MISE EN GARDE : Afin de réduire le risque
d’incendie ou de choc électrique, ne pas utiliser
avec une commande de vitesse transistorisée
avec le ventilateur.
Ce ventilateur comprend une fiche de sécurité avec fusible conçue pour couper le courant au
ventilateur en cas de défaillance électrique. Voyez, ci-dessous, comment utiliser correctement
le ventilateur et remplacer le fusible de la fiche de sécurité, si nécessaire.
INSTRUCTIONS D’ENTRETIEN DESTINÉES À L’UTILISATEUR
• Si votre ventilateur a moins de puissance et que vous soupçonnez que le
fusible sur votre ventilateur ait sauté, saisissez la fiche et retirez-la de la
prise ou de tout autre dispositif. Ne débranchez pas l’appareil en tirant
sur le cordon.
• Faites glisser le couvercle du fusible, situé sur le dessus de la fiche, vers
les broches de la fiche. (Fig. 1)
Fig. 1
• Retirez soigneusement le fusible grillé et insérez un nouveau fusible.
Pour réduire le risque d’incendie, ne remplacez le fusible que par un
fusible de 2,5 A, 125 volts. Fermez complètement la porte du fusible
en la faisant glisser. (Fig. 2) Jetez le fusible grillé. La fiche devrait
maintenant être prête pour un usage normal.
• Pour réduire le risque d’incendie, ne remplacez pas la fiche de
branchement. La fiche contient un dispositif de sécurité (fusible) qu’il
ne faut pas enlever. Jetez l’appareil si la fiche de branchement est
Fig. 2
endommagée.
• S’il vous faut de plus amples renseignements en ce qui concerne le
remplacement du fusible de la fiche de sécurité, veuillez communiquer
avec le Service à la clientèle de Kaz ou visiter notre site Web au
www.honeywellpluggedin.com/fans ou appeler le 1-800-477-0457.
DIRECTIVES D’ASSEMBLAGE POUR LA SÉRIE DYF012
REMARQUE : Sortir tout ce qui se trouve à l’intérieur de la boîte en
prenant soin de ne pas jeter le manuel et le matériel nécessaire à
l’assemblage. Un tournevis à pointe cruciforme (Phillips) (
pour l’assemblage de l’appareil; il n’est pas inclus.
) est requis
Fig. 1
A. Assemblage de la base
• Tourner avec précaution le ventilateur à l’envers.
• Insérer le cordon d’alimentation dans la rainure située au centre
de la pièce arrière de l’assemblage de la base (Fig. 1).
• Aligner les parties avant et arrière de l’assemblage de la base et les
emboîter fermement l’une dans l’autre en poussant les
4 protubérances rondes dans les cercles adjacents des pièces
de fixation (Fig. 2).
Fig. 2
B. Fixation du ventilateur vertical à la base
• À l’aide des 3 vis (M5 x 12) et d’un tournevis à pointe cruciforme
( ), fixer solidement la base à la partie inférieure du boîtier du
ventilateur en alignant les 3 trous de vis de la base et les 3 trous
de vis sous le boîtier du ventilateur (Fig. 3).
• Tirer doucement sur le cordon
d’alimentation pour qu’il soit
tendu et l’insérer solidement
dans la rainure de fixation
(Fig. 4).
• Remettre le ventilateur à
l’endroit. Le ventilateur est
maintenant prêt à utiliser.
INSTRUCTIONS DE FONCTIONNEMENT POUR LA SÉRIE DYF012
• Placer le ventilateur sur
une surface sèche et bien
horizontale.
• Brancher le cordon
d’alimentation dans une prise
de courant polarisée de
120 volts c.a.
• Pour faire fonctionner le
ventilateur, appuyer sur le
bouton de vitesse approprié :
élevée ( ), moyenne ( ) ou basse ( ) (Fig. 5).
• Pour activer ou désactiver l’oscillation du ventilateur, appuyer sur le bouton d’oscillation (
• Pour arrêter le ventilateur, appuyer une fois sur le bouton d’arrêt (
Fig. 3
Fig. 5
Fig. 4
Fig. 6
).
) (Fig. 6).
10 11
Page 7

DIRECTIVES D’ASSEMBLAGE POUR LA SÉRIE HYF023
REMARQUE : Sortir tout ce qui se trouve à l’intérieur de la boîte en prenant soin de ne pas jeter le manuel et le
matériel nécessaire à l’assemblage. Un tournevis à pointe cruciforme (
) est requis pour l’assemblage de
l’appareil; il n’est pas inclus avec l’achat du ventilateur.
A. Assemblage du socle
Fig. 7
• Placer le cordon d’alimentation au centre des pièces avant et
arrière de l’assemblage du socle, les ouvertures pour les trous de
vis face au ventilateur.
• Aligner les pièces avant et arrière de l’assemblage du socle, puis
les emboîter fermement l’une dans l’autre (Fig. 7).
B. Fixation du ventilateur vertical au socle
• Tourner avec précaution le ventilateur à l’envers.
• Aligner les 3 trous de vis du socle et les 3 trous de vis sous
le boîtier du ventilateur. Utiliser les 3 vis (M5 x 12) incluses
dans la boîte et un tournevis à pointe cruciforme (
) pour fixer
Fig. 8
solidement le socle au boîtier du ventilateur (Fig. 8).
C. Assemblage de la base
• Placer le ventilateur à l’envers, puis insérer le cordon
d’alimentation dans la rainure située au centre de la pièce arrière
de l’assemblage de la base (Fig. 9).
• Aligner les parties avant et arrière de l’assemblage de la base et
les emboîter fermement l’une dans l’autre en poussant les
4 protubérances rondes dans
les cercles adjacents des
Fig. 9
Fig. 10
pièces de fixation (Fig. 10).
D. Fixation du ventilateur
vertical à la base
• Aligner les 3 trous de vis
sous le socle et les 3 trous
de vis de la base. À l’aide
des 3 vis (M5 x 12) et d’un
tournevis Phillips (
solidement la base à la
partie inférieure du boîtier
du ventilateur (Fig. 11).
• Insérer le cordon
d’alimentation dans la
rainure sous la base. Tirer
doucement sur le cordon
d’alimentation pour qu’il
soit tendu et l’insérer
solidement dans la rainure
de fixation. (Fig. 12)
• Remettre le ventilateur à l’endroit. Le ventilateur est maintenant prêt à utiliser.
), fixer
Fig. 11 Fig. 12
INSTRUCTIONS DE FONCTIONNEMENT POUR LA SÉRIE HYF013
• Placer le ventilateur sur une surface sèche et bien horizontale.
• Brancher le cordon d’alimentation dans une prise de courant polarisée
de 120 volts c.a.
• Pour faire fonctionner le ventilateur, tournez le bouton et
sélectionnez la vitesse appropriée : Élevé ( ) Moyen ( ),
ou Faible ( ) (Fig. 13).
• Pour activer ou désactiver l’oscillation du ventilateur, appuyer sur le
bouton d’oscillation (
• Pour activer la minuterie d’arrêt automatique, tourner le bouton de
) (Fig. 14).
la minuterie jusqu’au réglage désiré, soit entre 10 et 120 minutes
(Fig. 15).
• Pour remettre en marche
le ventilateur après
Fig. 14
qu’il s’est éteint
automatiquement, tourner
le bouton dans le
sens antihoraire, jusqu’à la
position de marche.
•
Pour éteindre le
ventilateur, tournez le
bouton à la position
Arrêt
( ).
INSTRUCTIONS DE FONCTIONNEMENT POUR LA SÉRIE HYF023
Placer le ventilateur sur une surface sèche et bien horizontale.
•
•
Brancher le cordon d’alimentation dans une prise de courant
polarisée de 120 volts c.a.
• Pour mettre le ventilateur en marche, appuyer sur le bouton
d’alimentation (
• Pour régler la vitesse, le bouton de vitesse (
) à gauche du tableau de commande.
) jusqu’à ce
que la vitesse voulue soit sélectionnée :
élevée
( ),
moyenne
( ),
ou basse
( ) (Fig. 16).
•
Pour activer ou désactiver l’oscillation du ventilateur, appuyer
sur le bouton d’oscillation
( ). Appuyer de nouveau sur le
bouton met l’oscillation hors fonction (Fig. 17).
Fig. 13
Fig. 15
Fig. 16
Fig. 17
12 13
Page 8

INSTRUCTIONS DE FONCTIONNEMENT POUR LA SÉRIE HY-023, HY-024 ET HY-025 (SUITE)
SERVICE À LA CLIENTÈLE
• Activer la minuterie en appuyant sur le bouton de la minuterie
) (Fig 18).
(
Fig. 18
Sélectionner les réglages 1, 2, 4 et 8 heures en agissant
comme suit :
• 1 heure – presser le bouton de la minuterie une fois.
• 2 heures – presser le bouton de la minuterie deux fois.
• 4 heures – presser le bouton de la minuterie trois fois.
• 8 heures – presser le bouton de la minuterie quatre fois.
Presser le bouton de la minuterie une cinquième fois désactive
la minuterie.
• Pour éteindre le ventilateur en fin d’emploi, appuyer une fois sur
le bouton d’alimentation (
).
INSTRUCTIONS D’ENTRETIEN DESTINÂES À L’UTILISATEUR
ENTRETIEN ET RANGEMENT
• Débrancher le ventilateur avant de le nettoyer.
• N’utiliser qu’un linge doux et humide pour nettoyer délicatement la surface externe du ventilateur.
• Ne pas plonger le ventilateur dans l’eau ou de laisser de l’eau s’infiltrer dans le boîtier du moteur.
• Ne pas utiliser de l’essence, du diluant pour peintures ou un autre produit chimique pour nettoyer le
ventilateur.
• Essuyer délicatement les grilles avec un linge. Pour nettoyer entre les grilles, utiliser un cure-pipe, un
plumeau flexible, un aspirateur ou de l’air comprimé pour enlever délicatement la poussière. NE PAS
PLONGER LE VENTILATEUR DANS L’EAU OU DE LAISSER DE L’EAU S’INFILTRER DANS LE BOÎTIER DU
MOTEUR. ÉVITER D’UTILISER DE L’ESSENCE, DU DILUANT POUR PEINTURES OU UN AUTRE PRODUIT
CHIMIQUE POUR NETTOYER LE VENTILATEUR.
• Au moment d’entreposer le ventilateur, le nettoyer soigneusement tel que spécifié. Entreposer le ventilateur
dans son emballage d’origine ou le couvrir pour le protéger de la poussière. Entreposer le ventilateur dans un
endroit frais et sec.
Adresser questions et commentaires à :
Kaz USA, Inc.
Consumer Relations Dept.
250 Turnpike Road
Southborough, MA 01772
Nous téléphoner sans frais au : 1-800-477-0457
Courriel : consumerrelations@kaz.com
Ou visiter notre site Web à :
www.honeywellpluggedin.com/fans
Prière de mentionner le numéro de modèle.
REMARQUE : EN CAS DE PROBLÈME, COMMUNIQUER D’ABORD AVEC LE SERVICE À LA CLIENTÈLE OU
CONSULTER LA GARANTIE. NE PAS RETOURNER L’APPAREIL AU LIEU D’ACHAT. NE PAS ESSAYER D’OUVRIR
LE BOÎTIER DU MOTEUR, SOUS PEINE DE RISQUER L’ANNULATION DE LA GARANTIE, L’ENDOMMAGEMENT
DU VENTILATEUR OU DES BLESSURES CORPORELLES.
CET APPAREIL (SÉRIE HYF023 SEULEMENT) EST CONFORME À LA SECTION 15 DES RÈGLEMENTS
DE LA FCC
REMARQUE : Cet appareil a été testé et déclaré conforme aux limites pour des appareils numériques
de classe B, selon la section 15 des règlements de la FCC. Ces limites sont conçues pour procurer une
protection raisonnable contre les interférences nuisibles dans une installation résidentielle. Cet appareil
produit, utilise et peut émettre de l’énergie radio et, s’il n’est pas installé et utilisé conformément aux
instructions, peut causer des interférences nuisibles aux communications radio. Toutefois, il n’y a pas de
garantie qu’aucune interférence ne se produira dans une installation particulière. Si l’appareil cause des
interférences nuisibles à la réception radio ou télévision, qui peuvent être déterminées en éteignant et en
allumant l’appareil, l’utilisateur peut tenter de corriger l’interférence au moyen de l’une ou plusieurs des
mesures suivantes :
• Réorientez ou relocalisez l’antenne de réception.
• Augmentez la distance séparant l’appareil du récepteur.
• Branchez l’appareil dans une prise électrique sur un circuit différent de celui sur lequel le récepteur
est branché.
• Consultez le détaillant ou un technicien radio TV d’expérience pour obtenir de l’aide.
Veuillez noter que les changements ou modifications apportés à cet appareil ne sont pas expressément
approuvés par la partie responsable de la conformité puisque cela pourrait annuler l’autorisation de
l’utilisateur de faire fonctionner l’appareil.
14 15
Page 9

GARANTIE LIMITÉE DE 1 AN
Manual del usario
Prière de lire toutes les instructions avant de
tenter d’utiliser ce produit.
A. Cette garantie limitée de 1 an s’applique à la
réparation ou au remplacement d’un produit
comportant un vice de matière ou de maind’œuvre. Cette garantie ne s’applique pas aux
dégâts découlant d’un usage commercial,
abusif ou déraisonnable, ni aux dégâts
supplémentaires. Les défaillances résultant
de l’usure normale ne sont pas considérées
comme des vices de fabrication en vertu de la
présente garantie.
KAZ USA, INC. N’EST NULLEMENT
RESPONSABLE POUR LES DOMMAGES
FORTUITS OU INDIRECTS, QUELS QU’ILS
SOIENT. TOUTE GARANTIE IMPLICITE DE
QUALITÉ MARCHANDE ET DE CONVENANCE
RELATIVE À CE PRODUIT A LA MÊME DURÉE
LIMITÉE QUE LA PRÉSENTE GARANTIE.
Certaines régions ne permettent pas
l’exclusion ou la limitation des dommages
fortuits ou indirects, ni les limites de durée
applicables à une garantie implicite; par
conséquent, il est possible que ces limitations
ou exclusions ne s’appliquent pas dans votre
cas. Cette garantie vous confère des droits
précis, reconnus par la loi. Ces droits diffèrent
d’une région à l’autre, et il est possible
que vous en ayez d’autres. Cette garantie
s’applique uniquement à l’acheteur initial de
ce produit, à compter de la date de l’achat
initial.
B. À sa discrétion, Kaz USA, Inc. réparera ou
remplacera ce produit si l’on constate qu’il
comporte un vice de matière ou de maind’œuvre.
C. Cette garantie ne couvre pas les dommages
découlant des tentatives de réparation non
autorisées ou de toute utilisation non conforme
au présent manuel.
D. Retourner tout produit défectueux à Kaz USA,
Inc., accompagné d’une brève description du
problème. Inclure une preuve d’achat et un
chèque ou un mandat de poste de 10,00 $
US/15,50 $ Can pour les frais de manutention,
d’emballage de retour et d’expédition. Prière
d’indiquer nom, adresse et numéro de
téléphone durant la journée.
Vous devez payer d’avance les frais
d’expédition. Nous vous suggérons de
demander une confirmation de suivi ou
de livraison. Adresser à :
Aux États-Unis :
Attn: Returns Department
1 Helen Of Troy Plaza
El Paso, TX 79912
USA
Au Canada :
Kaz Canada, Inc.
Attn : Returns Department
510 Bronte Street South
Milton, ON L9T 2X6
CANADA
Veuillez aller au
www.honeywellpluggedin.com/register pour
faire enregistrer votre produit sous « SUPPORT »
puis « Register Product » et recevoir des
renseignements quant aux réactualisations
et aux nouvelles offres promotionnelles.
IMPORTANTES
INSTRUCCIONES
DE SEGURIDAD
LEA ESTAS INSTRUCCIONES
ANTES DE USAR SU VENTILADOR
Y CONSÉRVELAS
Cuando use artefactos eléctricos, siga siempre
las precauciones básicas para disminuir el
riesgo de incendio, choque eléctrico y lesiones
a las personas, incluyendo:
SÓLO PARA MODELOS DE EUA - Este producto
utiliza protección contra sobrecarga (fusible).
Un fusible quemado indica una situación
de sobrecarga o corto circuito. Si el fusible
se quema, desconecte el producto del
tomacorriente. Reemplace el fusible de acuerdo
a las instrucciones de servicio (siga las marcas
del producto para una adecuada clasificación
del fusible) y revise el producto. Si el fusible
de reemplazo se quema, puede haber un corto
circuito y el producto debe ser desechado o
regresado a una tienda de servicio autorizado
para revisión y/o reparación.
1. Siempre que utilice el ventilador,
confórmese al presente manual, de lo
contrario podría provocar incendios,
choques eléctricos o daños.
2. Este producto está diseñado ÚNICAMENTE
para uso doméstico. No es apto para uso
comercial, industrial ni a la intemperie.
VENTILADOR TIPO TORRE
Serie DYF012
Serie HYF013
Serie HYF023
3. Para evitar choques eléctricos, no coloque
el ventilador en una ventana, ni sumerja el
aparato, el cable o el enchufe en el agua.
Tampoco debe vaporizar ningún líquido
sobre el aparato.
4. Este producto está dotado de un enchufe
polarizado (el enchufe tiene una patilla
más ancha que otra). Para minimizar el
riesgo de choque eléctrico, sólo hay una
forma de introducir el enchufe en la toma
de corriente polarizada. Si el enchufe no
entra completamente en la toma, gírelo. Si
aún así no logra introducir el enchufe en la
toma, llame a un electricista profesional.
El enchufe polarizado es un dispositivo
de seguridad, NO trate de suprimir este
dispositivo de seguridad.
5. Se recomienda la vigilancia de un adulto
cuando un aparato electrodoméstico sea
manipulado por niños o en presencia de
éstos.
6. Apague el ventilador y desenchúfelo cuando
no lo use y antes de moverlo o limpiarlo.
7. Para desenchufar el ventilador, apáguelo y
tome el enchufe para sacarlo de la toma.
Nunca tire del cable.
8 No use el ventilador en presencia de
vapores explosivos o inflamables.
9. No ponga el ventilador ni ninguna de sus
piezas cerca de una llama o de un aparato
de cocina o de calefacción
10. No use el ventilador si el enchufe o el cable
de alimentación están dañados. Tampoco
debe usar el aparato si muestra señales
de mal funcionamiento, si se ha caído o ha
sufrido algún daño (consulte la garantía).
11.
No use un cable de extensión con este
ventilador.
16 17
La marca registrada Honeywell es utilizada por Kaz USA, Inc. bajo licencia de Honeywell International Inc.
Honeywell International Inc. no hace ninguna declaración o garantía con respecto a este producto.
Page 10

12. Evite todo contacto con las piezas móviles
del ventilador.
13. El uso de accesorios no recomendados por
el fabricante puede ser peligroso.
14. Coloque el ventilador sobre una superficie
seca y plana.
15. No debe suspender el ventilador ni fijarlo a
una pared ni al techo.
16. No lo utilice si la cubierta del ventilador
está dañada.
17. Una mala conexión entre la toma de
corriente CA y el enchufe puede provocar
recalentamiento y la consecuente
deformación del enchufe. Llame a un
electricista profesional para que cambie la
toma de corriente defectuosa.
18. No opere ningún ventilador con el cable
o enchufe dañados. Deseche cualquier
ventilador dañado, regréselo a la tienda
donde fue comprado, o solicite una
autorización de devolución y regrese a
Kaz USA, Inc. para revisión y/o reparación.
19. No pase el cable del ventilador debajo de
alfombras. No cubra el cable con tapetes,
alfombrillas o cubiertas similares. No
pase el cable por debajo de muebles o
electrodomésticos. Acomode el cable lejos
de las áreas de tráfico y donde no pueda
causar tropiezos.
ADVERTENCIA: Para reducir el riesgo de
incendio o choque eléctrico, NO USE este
ventilador con ningún dispositivo de control
de velocidad transistorizado.
ENCHUFE CON FUSIBLE DE SEGURIDAD - SÓLO MODELOS PARA EE.UU.
Este ventilador cuenta con un enchufe con fusible de seguridad el cual está diseñado para cortar la
corriente eléctrica del ventilador si ocurre una falla eléctrica. Por favor vea en la parte de abajo para
mayor información de cómo utilizar propiamente su ventilador y cambiar el fusible de seguridad del
enchufe, si es necesario.
USUARIO LAS INSTRUCCIONES DE SERVICIO
INSTRUCCIONES DE SERVICIO DEL USUARIO
• Si su ventilador pierde potencia y sospecha que se ha fundido el fusible
de su ventilador, sujete el enchufe y retire del tomacorriente u otro
dispositivo del salida. No desconecte tirando del cable.
• Deslice la cubierta del fusible, ubicada en la parte superior del enchufe,
hacia la clavijas del enchufe. (Fig. 1)
• Retire cuidadosamente el fusible fundido y coloque un nuevo fusible
Fig. 1
en su lugar. Para Reducir el Riesgo de Incendio, reemplace el fusible
sólo con un fusible de 2.5 Amp, 125 voltios. Cierre completamente la
cubierta del fusible deslizando nuevamente en su lugar. (Fig. 2) Deseche
el fusible fundido. El enchufe debe estar listo para uso normal.
• Para Reducir el Riesgo de Incendio, no reemplace el enchufe
proporcionado. Contiene un dispositivo de seguridad (fusible)
que no se debe retirar. Deseche el producto si el enchufe adjunto
está dañado.
Fig. 2
• Si necesita mayor informes de cómo o cuándo debe cambiar el fusible
de seguridad de su enchufe, por favor contacte al Departamento
de Servicio al Consumidor de Kaz visitando nuestro sitio web
en www.honeywellpluggedin.com/fans o pueden llamar al
1-800-477-0457.
INSTRUCCIONES DE ENSAMBLAJE DE LA SERIE DYF012
NOTA: Remueva todo el contenido de la caja. Conserve el manual
y las herramientas necesarias para el ensamblaje. Necesitará un
destornillador estrella (
con el ventilador.
) para el ensamblaje. Éste no viene incluido
Fig. 1
A. Ensamblaje de la Base
• Voltee cuidadosamente el ventilador de arriba hacia abajo.
• Coloque el cable de alimentación eléctrica a través del canal
encastrado ubicado en el centro de la base posterior (Fig. 1).
• Alinee las partes posterior y delantera de la base y únalas empujando
firmemente las cuatro extrusiones redondas dentro de los círculos
adyacentes de las piezas de conexión (Fig. 2).
Fig. 2
B. Asegurando el Ventilador a la Base
• Utilice tres (3) tornillos M5 x 12 y un destornillador estrella ( ) para
asegurar la base en la parte inferior del cajetín del
ventilador. Alinee los tres orificios en la base con los tres orificios en
la parte inferior del cajetín del ventilador (Fig. 3).
• Tire suavemente el cable de alimentación eléctrica y colóquelo
firmemente dentro de su
soporte (Fig. 4).
• Vuelva a colocar el
ventilador en posición de
pie. Estará listo para ser
usado.
INSTRUCCIONES DE OPERACIÓN DE LA SERIE DYF012
• Coloque el ventilador en una
superficie plana y seca.
• Enchufe el cable de
alimentación eléctrica en
un tomacorriente polarizado
de 120 Voltios c.a.
• Para ponerlo en marcha,
pulse el botón de control
de velocidad adecuado:
alta ( ), media ( ),
o baja ( ) (Fig. 5).
• Para activar o desactivar el modo Oscilación, pulse el botón de oscilación (
• Para apagar el ventilador, pulse una vez el botón OFF (
Fig. 3
Fig. 5
).
Fig. 4
Fig. 6
) (Fig 6).
18 19
Page 11

INSTRUCCIONES DE ENSAMBLAJE DE LA SERIE HYF023
INSTRUCCIONES DE OPERACIÓN DE LA SERIE HYF023
NOTA: Remueva todo el contenido de la caja. Conserve el manual
y las herramientas necesarias para el ensamblaje. Necesitará un
destornillador estrella (
) para el ensamblaje. Éste no viene incluido
con el ventilador.
A. Ensamblaje del Pedestal
• Coloque el cable de alimentación eléctrica a través del centro de las
partes delantera y posterior del pedestal. Los orificios de los tornillos
deben apuntar en dirección del ventilador.
• Alinee las partes delantera y posterior del pedestal y únalas
empujando firmemente (Fig. 7).
B. Asegurando el Ventilador al Pedestal
• Voltee cuidadosamente el ventilador de arriba hacia abajo.
• Alinee los tres orificios en el pedestal con los tres orificios en la parte
inferior del cajetín del ventilador. Utilice los tres (3) tornillos (M5 x 12)
incluidos en la caja y un destornillador estrella (
pedestal al cajetín del ventilador (Fig. 8).
) para asegurar el
Fig. 7
Fig. 8
• Coloque el ventilador en una superficie plana y seca.
• Enchufe el cable de alimentación eléctrica en un tomacorriente
polarizado de 120 Voltios c.a.
• Para operar, gire la perilla y seleccione la velocidad adecuada del
ventilador: Alta (
) Media ( ), o Baja ( ) (Fig. 13).
• Para activar o desactivar el modo Oscilación, pulse el botón de
oscilación (
) (Fig. 14).
• Active el dispositivo automático de cierre del temporizador girando
la perilla para programar el tiempo desead (entre 10 y 120 minutos)
(Fig. 15).
• Si desea encender
nuevamente el ventilador,
Fig. 14
gire el botón hacia la
izquierda a la posición ON.
•
Para Apagar el
ventilador, gire la
perilla a la posición
Off (apagado)
( ).
Fig. 13
Fig. 15
C. Ensamblaje de la Base
• Voltee cuidadosamente el ventilador de arriba hacia abajo. Coloque
el cable de alimentación
eléctrica a través del canal
Fig. 9
encastrado ubicado en el
centro de la base posterior
(Fig. 9).
• Alinee las partes posterior y
delantera de la base y únalas
empujando firmemente las
cuatro extrusiones redondas
dentro de los círculos
adyacentes de las piezas de
conexión (Fig. 10).
Fig. 11 Fig. 12
D. Asegurando el
Ventilador a la Base
• Alinee los tres orificios en
la parte inferior del pedestal
con los tres orificios en
la base. Utilice los tres
(3) tornillos M5 x 12 y el
destornillador estrella (
) para asegurar la base a la
parte inferior del cajetín del ventilador (Fig. 11).
• Coloque el cable de alimentación eléctrica a través de la ranura en la parte inferior de la base. Tire
suavemente el cable de alimentación eléctrica y colóquelo firmemente dentro de su soporte (Fig. 12).
• Coloque el ventilador en posición de pie. Estará listo para ser usado.
20 21
Fig. 10
INSTRUCCIONES DE OPERACIÓN DE LA SERIE HYF023
Coloque el ventilador en una superficie plana y seca.
•
•
Enchufe el cable de alimentación eléctrica en un tomacorriente
polarizado de 120 Voltios c.a.
• Para encender el ventilador, presione el botón de Encendido
(
) localizado en el lado izquierdo del panel de control.
• Para seleccionar la velocidad del ventilador, presione el
botón de Control de Velocidad hasta que se seleccione la
velocidad deseada:
•
Para activar o desactivar el modo Oscilación, pulse el botón
de oscilación
alta
( ),
media
( ),
o baja
( ) (Fig. 16).
( ). Presione de nuevo el botón de Oscilación
para apagar la función de Oscilación (Fig. 17).
Fig. 16
Fig. 17
Page 12

INSTRUCCIONES DE OPERACIÓN DE LA SERIE HYF023 (CONTINUACIÓN)
• Active la función del Temporizador al presionar el botón del
Temporizador (
) (Fig 18).
Escoja entre los ajustes de 1, 2, 4 y 8 horas al realizar las
siguientes funciones:
• 1 hora: Presione una vez el botón del Temporizador.
• 2 horas: Presione dos veces el botón del Temporizador.
• 4 horas: Presione tres veces el botón del Temporizador.
• 8 horas: Presione cuatro veces el botón del Temporizador.
Presione por quinta vez el botón del Temporizador para la
función del Temporizador.
• Para apagar el ventilador después de su uso, presione una vez
el botón de Encendido (
).
USUARIO LAS INSTRUCCIONES DE SERVICIO
Fig. 18
ESTE DISPOSITIVO (SÓLO LAS SERIES HYF023) CUMPLE CON LA PARTE 15 DE LAS NORMAS FCC
NOTA: Este equipo ha sido probado y cumple con los límites para un dispositivo digital de Clase B,
según la Parte 15 del reglamento FCC. Estos límites están diseñados para proporcionar protección
razonable contra interferencia dañina en una instalación residencial. Este equipo genera, utiliza y puede
irradiar energía de radiofrecuencia y, si no instalado y utilizado según las instrucciones, puede causar
interferencia perjudicial a comunicaciones de radio. Sin embargo, no hay ninguna garantía de que no
habrá interferencias en una instalación en particular. Si este equipo causa interferencia dañina a la radio o
la recepción de televisión, que puede determinarse apagando y encendiendo el equipo, se recomienda al
usuario intentar corregir la interferencia por uno o más de las siguientes medidas:
• Reoriente o reubique la antena receptora.
• Aumente la separación entre el equipo y el receptor.
• Conecte el equipo a un tomacorriente de un circuito diferente al cual está conectado el receptor.
• Consulte al distribuidor o un técnico experimentado de radio TV para obtener ayuda.
Por favor observe que los cambios y modificaciones de este producto no estén aprobados de forma expresa
por la parte responsable del cumplimiento podrían invalidar el derecho del usuario a usar este equipo.
LIMPIEZA Y ALMACENAMIENTO
• Desenchufe el ventilador antes de proceder a limpiarlo.
• Para limpiar la superficie exterior del ventilador, utilice únicamente un lienzo suave humedecido.
• NO sumerja el ventilador en el agua. No permita que el agua se infiltre en el cajetín del motor.
• NO utilice gasolina, disolventes de pintura ni otros productos químicos para limpiar el ventilador.
• Limpie suavemente las rejillas con un lienzo. Para limpiar entre las rejillas y remover el polvo,
recomendamos utilizar un limpiatubos, un desempolvador flexible, una spiradora o presión de aire.
NO SUMERJA EL VENTILADOR EN EL AGUA. NO PERMITA QUE EL AGUA SE INFILTRE EN EL CAJETÍN
DEL MOTOR. NO UTILICE GASOLINA, DISOLVENTES DE PINTURA NI OTROS PRODUCTOS QUÍMICOS PARA
LIMPIAR EL VENTILADOR.
• Antes de guardar el ventilador, límpielo cuidadosamente, tal como se indica en el manual de instrucciones.
Almacénelo en su embalaje original o cúbralo para protegerlo del polvo. Almacene el ventilador en un lugar
fresco y seco.
SERVICIO A LA CLIENTELA
Envíe sus preguntas comentarios a:
Kaz USA, Inc.
Consumer Relations Dept.
250 Turnpike Road
Southborough, MA 01772
NOTA: EN CASO DE PROBLEMA, CONTACTO SERVICO A LA CLIENTELA PRIMERO O CONSULTE LA
GARANTÍA. NO DEVUELVA EL VENTILADOR AL COMERCIO DONDE LO COMPRÓ. NO INTENTE ABRIR LA
CARCASA DEL MOTOR USTED MISMO. SI LO HACE PUEDE ANULAR LA GARANTÍA Y PUEDE DAÑAR EL
VENTILADOR O PROVOCAR LESIONES PERSONALES.
22 23
Llame gratis al 1-800-477-0457
Correo electrónico : consumerrelations@kaz.com
O visite nuestro sitio Web :
www.honeywellpluggedin.com/fans
Por favor, especifique el número de modelo.
GARANTÍA LIMITADA DE 1 AÑO
Antes de usar este producto, por favor lea
completamente las intrucciones.
A. La presente garantía limitada de 1 año cubre
la reparación o remplazo del producto si éste
presenta un defecto de fábrica o de mano de
obra. Esta garantía excluye todo daño resultante
del uso comercial, abusivo o inadecuado
del producto, o de daños asociados. Las
defectos resultantes del desgaste normal no se
consideran defectos de fábrica en virtud de la
presente garantía.
KAZ USA, INC. NO SERÁ CONSIDERADA
RESPONSABLE DE DAÑOS FORTUITOS
O INDIRECTOS DE NINGÚN TIPO. TODA
GARANTÍA IMPLÍCITA DE CALIDAD
COMERCIAL O DE CONVENIENCIA CON UN
FIN ESPECÍFICO RELACIONADA CON ESTE
PRODUCTO TENDRÁ LA MISMA VIGENCIA
QUE LA PRESENTE GARANTÍA. En ciertos
lugares no se permite la exclusión o limitación
de daños fortuitos o indirectos, ni los límites de
duración aplicables a una garantía implícita. Por
consiguiente, es posible que estas limitaciones
o exclusiones no se apliquen en su caso. Esta
garantía le confiere ciertos derechos legales
específicos. Es posible que usted también tenga
otros derechos legales, los que varían según la
jurisdicción. La presente garantía sólo es válida
para el comprador inicial del producto a partir
de la fecha de compra.
B. A su discreción, KazUSA, Inc. reparará o
remplazará el presente producto si se constata
que presenta un defecto de fábrica o de mano
de obra.
C. Esta garantía no cubre los daños ocasionados
por tentativas de reparación no autorizadas o
por todo uso que no esté en concordancia con
el presente.
D. Para devolver un producto defectuoso a Kaz
USA, Inc., adjunte una breve descripción del
problema e incluya la prueba de compra y un
cheque o giro postal de US$10.00 o CAN$15.50
para cubrir los gastos de manutención,
embalaje y reenvío. Sírvase indicar su nombre,
dirección y un número de teléfono donde se le
pueda ubicar durante el día.
Debe pagar los gastos de envío por adelantado.
Pida confirmación del seguimiento o de la
entrega. Enviar a:
En los EE.UU.NA.:
Attn: Returns Department
1 Helen Of Troy Plaza
El Paso, TX 79912
USA
En Canadá:
Kaz Canada, Inc.
Attn: Returns Department
510 Bronte Street South
Milton, ON L9T 2X6
CANADA
Por favor visite
www.honeywellpluggedin.com/register y
registre su producto en el Centro de Atención al
Cliente y reciba información y actualizaciones de
su productos y nuevas ofertas promocionales.
Page 13

For Responsible recycling, please visit:
Para reciclar responsablemente, por favor visite:
www.1800recycling.com
© 2015 Kaz USA, Inc.
All Rights Reserved./Tous droits réservés./Todos los derechos reservados.
P/N: 31IMDYHY190
01SEP15
Page 14

CREATIVE DEPARTMENT
ARTWORK SPECIFICATIONS
Brand: Honeywell
Category: Fans
Model:
Artwork Part #: 31IMDYHY190
Die Line Part #: N/A
Oracle Desc. :
Folded Size:
Page count: 24
Release Date: 09SEP15
Rerelease Date:
Colors:
Dielines (Do not print)
Molded In
Quality Requirement of Artwork and Quality
Clarification Process of Artwork Printing:
Meet Eng-QS-06&02
Kaz USA, Inc.
Creative Services, 250 Turnpike Road
Southborough, 01772 MA, USA
+1 508 490 7000
DYF012 HYF013 HYF023
OM, DYF012W SERIES, HYF013W
SERIES, HYF023W SERIES,
ENGLISH/FRENCH/SPANISH, 2015
Subject: Owners Manual
Region: US
Flat Size:
IN: W 11 x H 8
MM: W x H
W 5.5 x H 8
Scale: 1/1
Material:
70# Matte text
Revision: 1
Date:
01SEP15
 Loading...