

Page 1

C437D,E,F,G,H,J,K and C637B Gas
GENERAL
The C437 and C637 Gas Pressure Switches are pressureactuated switching devices used in industrial gas system
applications for safety shutoff, pressure control, and
differential-pressure control.
Pressure Switches
PRODUCT DATA
FEATURES
• C437 models have direct- and reverse-acting (spst)
switching; C637B has single-pole, double-throw (spdt)
switching.
• Pressure ranges: 1/2 to 5-1/2 in. of water (10 to 140 mm
of water, or 0.1 to 1.4 kPa); 1 to 26 in. of water (50 to
700 mm of water, or 0.5 to 7 kPa); 1/2 to 5 psi (300 to
3500 mm of water, or 3 to 35 kPa); 1 to 10 psi (500 to
7000 mm of water, or 5 to 70 kPa).
• Models intended for lockout applications must be
manually reset before resuming operation.
• Trip-free mechanism on manual reset models ensures
that the limit function of the switch cannot be defeated
by jamming the reset lever.
• External manual reset button on side of lockout
models.
• Enclosed setting impedes tampering and provides
dust-resistant operation.
• Buna-N fiber-reinforced material for increased
strength of control diaphragm.
• Two Buna-N fiber-reinforced seal-off diaphragms for
added reliability.
• Clear glass cover allows observation of interior
mechanism to aid setting and checkout.
• Mercury switch provides visual indication of switch
position.
• Heavy die-cast case increases durability and
resistance to corrosion.
• Main control diaphragm completely enclosed a leakproof chamber can be vented to a safe area.
• Models with a pressure range of 1 to 26 in. of water
(50 to 700 mm of water, or 0.5 to 7 kPa) have a
restrictive orifice in the inlet pressure channel to
compensate for momentary surges in gas pressure.
• Field-addable orifices of various sizes are available.
• Models available with rainproof, dustproof, sleet- and
ice-resistant enclosure; meets NEMA 3R specification.
Copyright © 1995 Honeywell Inc. • All Rights Reserved
Contents
General ............................................................................... 1
Features .............................................................................. 1
Specifications ...................................................................... 2
Ordering Information ........................................................... 2
Recycling Notice ................................................................. 4
Installation ........................................................................... 4
Setting and Checkout .......................................................... 6
60-2320-9
Page 2
C437D,E,F,G,H,J,K AND C637B GAS PRESSURE SWITCHES
SPECIFICATIONS
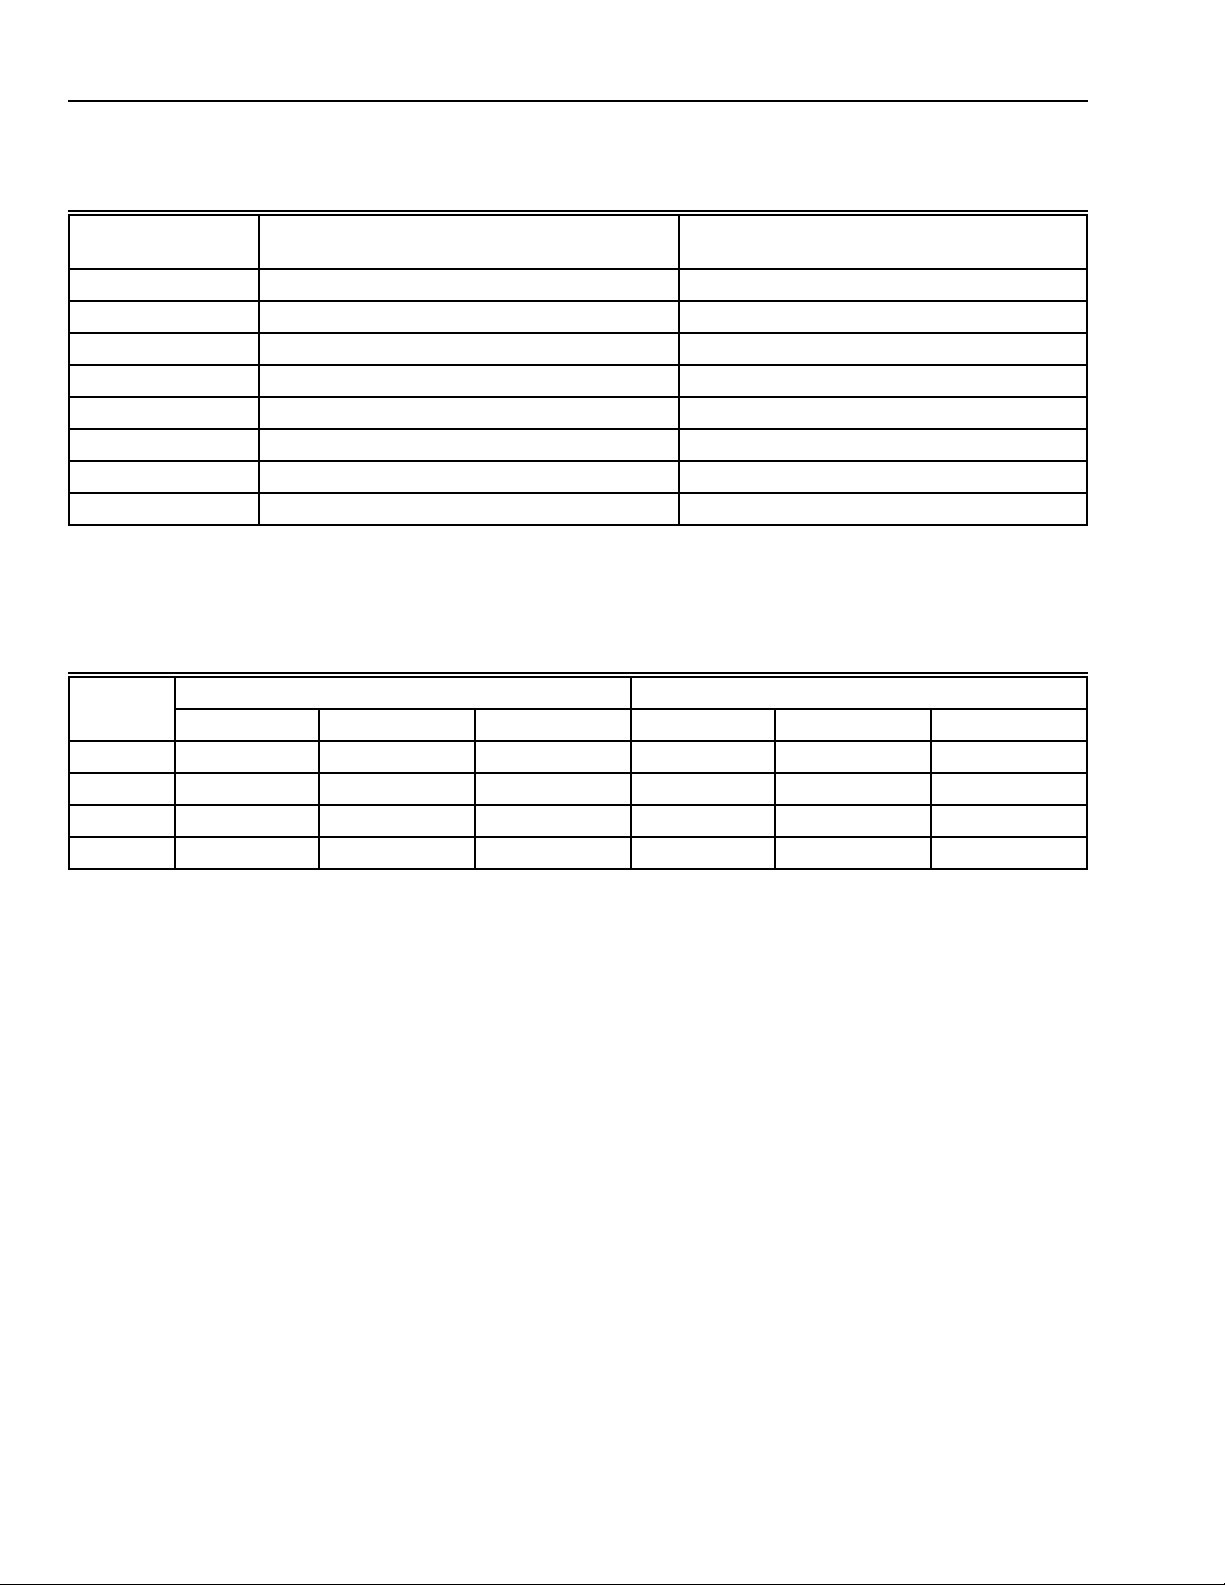
Models:
Model
Number
(Response at Setpoint to Pressure Change)
Switch Action
Manual Reset
(Locks Out on Switch Break)
C437D spst, breaks on rise yes
C437E spst, breaks on fall yes
b
C437F
C437G
C437H
a
a
2 spst circuitsc, breaks one, makes one no
spst, breaks on rise no
spst, breaks on fall no
C437J 2 spst circuitsc, breaks one, makes one yes (lockout on rise)
C437K 2 spst circuitsc, breaks one, makes one yes (lockout on fall)
C637B spst, breaks R-W and makes R-B on fall no
a
Designated Manual Reset 2; the trip-free reset mechanism does not permit the switch to function as an automatic-reset device
when the manual reset lever is held in the Reset position.
b
Weatherproof enclosure (NEMA 3R) available.
c
Two separate switches are contained in the same mercury bulb.
a
Switch Ratings (In Amperes):
C437E,G and H C437F,J,K
Voltage Full Load Locked Rotor Resistive Load Full Load Locked Rotor Resistive Load
120 Vac 8.0 48.0 10.0 8.0 48.0 10.0
240 Vac 5.1 30.6 5.0 5.1 30.6 5.0
120 Vdc 2.4 24.0 5.0 2.0 20.0 8.0
240 Vdc 1.2 12.0 2.0 1.0 10.0 3.0
C637B—62.5 VA at 120 and 240 Vac, pilot duty.
ORDERING INFORMATION
When purchasing replacement and modernization products from your TRADELINE® wholesaler or your distributor, refer to the
TRADELINE® Catalog or price sheets for complete ordering number, or specify—
1. Order number.
2. Pressure range.
3. Replacement parts, if desired.
4. Accessories, if desired.
If you have additional questions, need further information, or would like to comment on our products or services, please write or phone:
1. Your local Honeywell Home and Building Control Division Sales Office (check white pages of phone directory).
2. Home and Building Control Division Customer Logistics
Honeywell Inc., 1985 Douglas Drive North
Minneapolis, Minnesota 55422-4386
In Canada—Honeywell Limited/Honeywell Limitée, 35 Dynamic Drive, Scarborough, Ontario M1V 4Z9. International Sales
and Service offices in all principal cities of the world. Manufacturing in Australia, Canada, Finland, France, Germany, Japan,
Mexico, Netherlands, Spain, Taiwan, United Kingdom, U.S.A.
60-2320—9
2
Page 3
C437D,E,F,G,H,J,K AND C637B GAS PRESSURE SWITCHES
Switch:
Mercury switch (C437F,J and K have two spst switches in one mercury bulb).
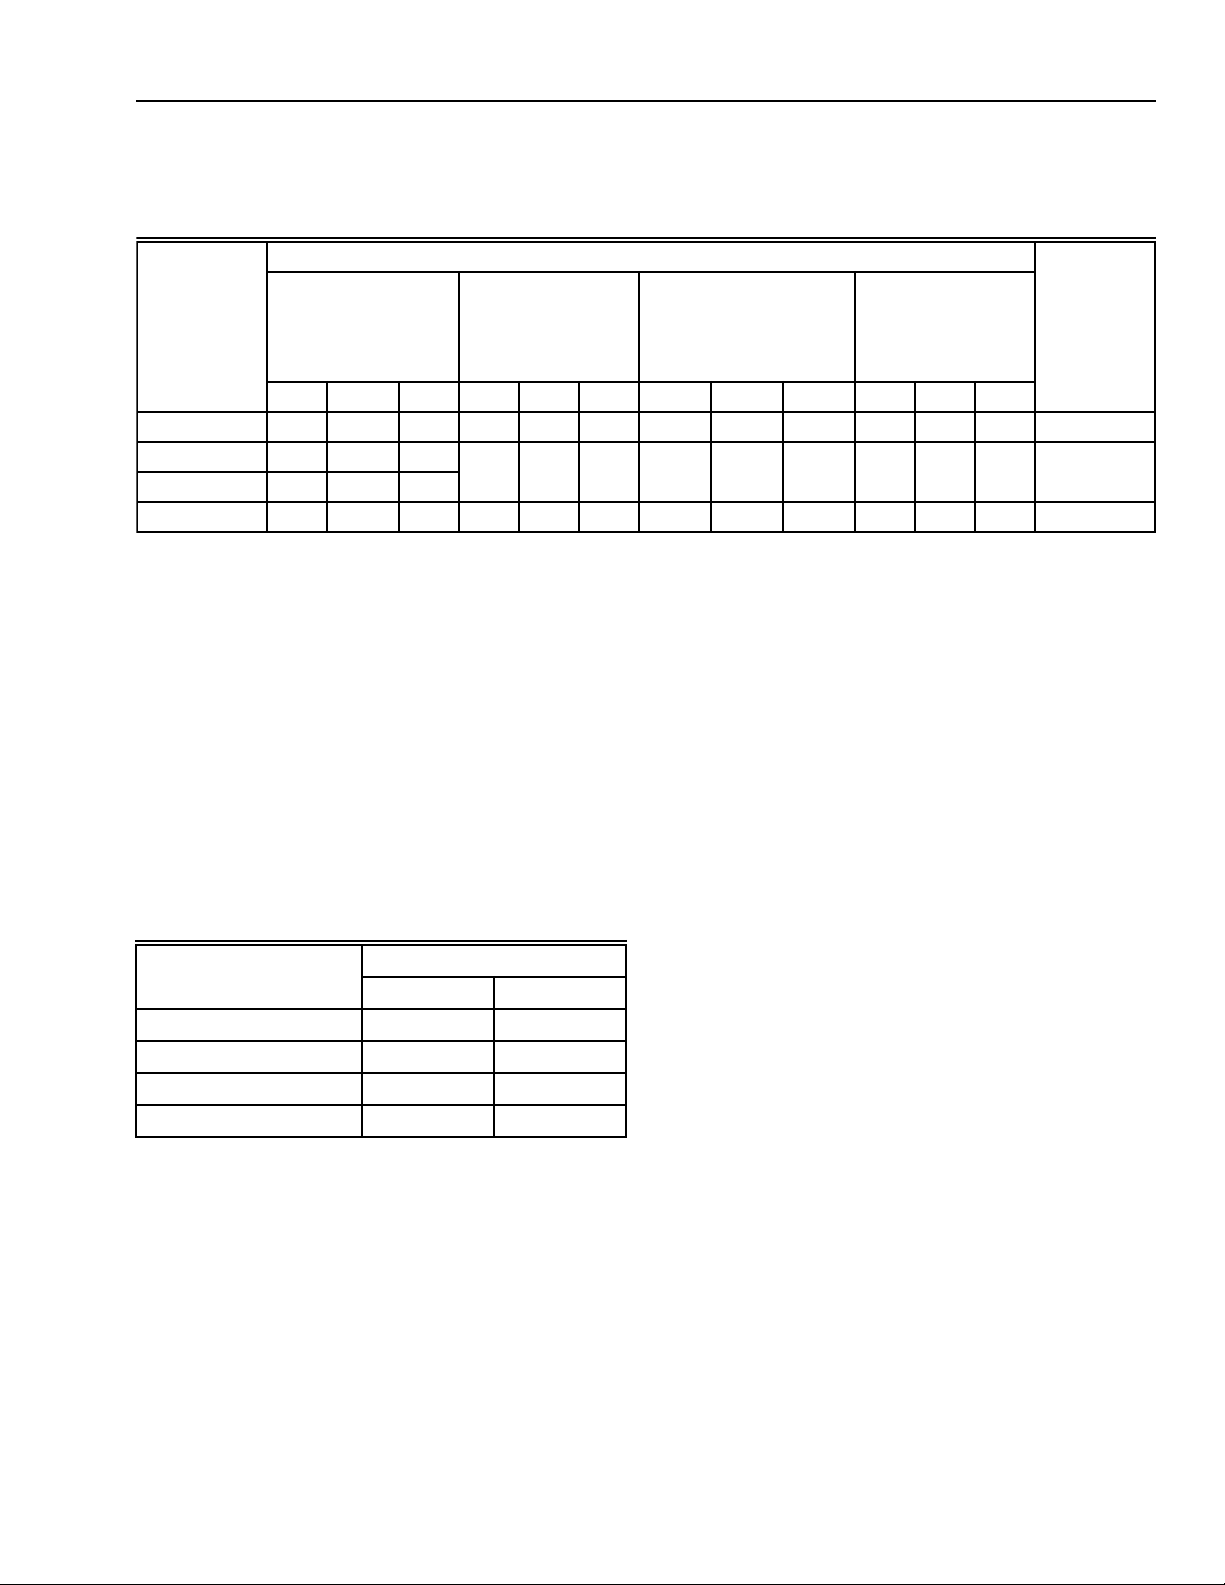
Differentials:
Fixed, nominal; measured at pressure indicated:
Pressure Range
b
Model
Numbers
1/2 to 5-1/2 in.
(10-140 mm, or
0.1-1.4 kPa)
Differential Measured
at 1/2 in.
1 to 26 in.
(50-700 mm, or
0.5-7 kPa)
differential
measured at 15 in.
in. mm kPa in. mm kPa psi mm kPa psi mm kPa Type
C437D,J — — — 1-3/4 44.5 0.44 1/2 352 3.45 1c703c6.89cSubtractive
C437E,F,H,K 0.25e6.4e0.06e1-1/4 31.8 0.31 1/4 176 1.72 1/2e352e3.45eAdditive
C637B 0.15 3.8 0.04
C437G — — — 1-1/4 31.8 0.31 1/4 176 1.72 1/2 352 3.45 Subtractive
a
in. = inches of water; mm = millimeters of water.
b
Restrictive orifice in inlet pressure channel to compensate for momentary surges in gas pressure.
c
Not available for C437J.
d
Subtractive models: switching action occurs on pressure rise to the setpoint.
e
Not available for C437K.
f
Additive models: switching action occurs on pressure fall to the setpoint.
a
1/2 to 5 psi
(300-3500 mm, or
3-35 kPa) differential
measurement at
midscale
1 to 10 psi
(500-7000 mm,
or 5-70 kPa)
differential
measurement
a
d
f
Pressure Ranges (Scale Range):
Specify one:
1/2 to 5-1/2 inches of water (10 to 140 mm of water, or
0.1 to 1.4 kPa).
1 to 26 inches of water (50 to 700 mm of water, or 0.5 to
7 kPa).
1/2 to 5 lb per sq in. (300 to 3500 mm of water, or 3 to
35 kPa).
1 to 10 lb per sq in. (500 to 7000 mm of water, or 5 to
70 kPa).
Maximum Sustained Operating Pressure:
Maximum Pressure
Pressure Range psi kPa
1/2 to 5-1/2 in. of water 3.0 20.7
1 to 26 in. of water 5.0 34.5
1/2 to 5 psi 15.0 103.4
1 to 10 psi 30.0 206.8
Pipe Connections:
Main or High Pressure: 1/2 in. NPT, female.
Vent or Low Pressure: 1/8 in. NPT, female.
Electrical Wiring: Hole tapped for 1/2 in. conduit.
Maximum Ambient Temperature:
125°F (52°C).
Minimum Temperature:
32°F (0°C).
Approvals:
Underwriters Laboratories Inc. Listed: File No. MP2168,
Guide No. MFHX.
Canadian Standards Association Certified: File No. 1620,
Guide No. 380-W-1.16.
Factory Mutual Approved: Report No. 13031-S5 and
19291.
Replacement Parts:
106729 Cover Glass, 6 in. (152.4 mm) diameter.
139870A Cover Glass, for rainproof enclosures.
106747 Cover Retaining Ring, for models manufactured
before 1973.
118733-21 Retaining Clip, for models manufactured since
1975.
Accessories:
4074BWK Bag Assembly: Contains two 137755 Mounting
Brackets and four self-tapping screws: for surface
mounting (standard on C437G and H). Mounting
brackets are shown by dashed lines in Fig. 1.
Field-addable Orifices:
124674: 0.011 in. (0.28 mm) diameter.
122160: 0.018 in. (0.46 mm) diameter.
3
60-2320—9
Page 4

C437D,E,F,G,H,J,K AND C637B GAS PRESSURE SWITCHES
5/16 (7.9) (4)
5/8
(15.9)
(4)
7-11/16
DIA.
(195.3)
2
45°
1/8–27 NPT
1
137755 MOUNTING BRACKET (2), IN 4074BWK BAG ASSEMBLY – STANDARD
ON C437G AND H; OPTIONAL ON OTHER MODELS.
2
VENT TAPPING. REMOVE DUST-SEAL LABEL BEFORE MOUNTING.
6-1/4 (158.8)
7-3/8 (187.3)
1/2–14 NPT
1
45°
TAPPED FOR 1/2 IN.
CONDUIT
7-3/4
(196.9)
6-1/2
(165.1)
3-7/16 (87.3)
2 (50.8)
1-5/16
(33.3)
1/8
(3.2)
1
(25.4)
M7192
Fig. 1. Installation dimensions of the C437 and C637 gas pressure switches, in in. (mm).
RECYCLING NOTICE
This control contains mercury in a sealed tube. Do
place control in the trash at the end of its useful life.
If this control is replacing a control that contains
not
mercury in a sealed tube, do
place your old
control in the trash.
Contact your local waste management authority for
instructions regarding recycling and the proper
disposal of this control, or of an old control containing
mercury in a sealed tube.
not
INSTALLATION
When Installing this Product…
Read these instructions carefully. Failure to follow them
could damage the product or cause a hazardous
condition.
Check the ratings given in the instructions and on the
product to make sure the product is suitable for your
application.
Installer must be a trained, experienced, flame
safeguard control technician.
After installation is complete, check out product
operation as provided in these instructions.
60-2320—9
4
Page 5

C437D,E,F,G,H,J,K AND C637B GAS PRESSURE SWITCHES
CAUTION
Disconnect all power to the pressure switch before
beginning installation to prevent electrical shock and
equipment damage.
IMPORTANT
1. Remove the dust-seal label from the vent tapping
before mounting.
2. Accurately level the pressure switch for proper
operation.
3. The C637B pressure switch is a low differential
device. Mount it in a vibration-free location to prevent
chattering.
4. Do not hand tighten the pressure switch by holding
the case.
Follow local codes or ordinances
from these recommendations.
Fig. 1 shows the mounting dimensions for the C437 and C637
models, and for the accessory mounting bracket (standard on
C437G and H). See Fig. 2 for the individual components.
in all cases
when different
Use nipple and T for pipe mounting or the mounting
bracket for surface mounting. If a mounting bracket is
used, install the bracket before making piping
connections (standard on C437G and H). Mount the
bracket horizontally with the four 10-24 flathead tapping
screws provided.
Level the device carefully.
a. Level the device so that the point of leveling
pendulum is aligned with the mark on the inside
of the case.
b. When pipe mounting, install the device at right
angles to the pipe so that it can be leveled by
additional tightening of the pipe fittings.
c. The surface mounting bracket has elongated
holes that allow limited leveling after the mounting
screws are started.
d. Accurate leveling is most essential at very low
pressure settings.
e. If necessary, make arrangements to hold pipe-
mounted units steady and level with bracing.
Location
Mount the gas pressure switch downstream from the pressure
regulator. Mount low gas pressure switches upstream of any
shutoff valve. Mount high gas pressure switches just
upstream from the burner. When pipe mounting, locate the
device on the portion of the pipe that is most level because
the mercury switch requires level orientation. See step 4 in
the Mounting section.
PRESSURE SETTING
INDICATOR
SCALEPLATE
TERMINAL
STRIP
VENT
TAPPING
(ON SIDE
NOT SHOWN)
MAIN PRESSURE TAPPING
1
1
REMOVE DUST-SEAL LABEL BEFORE MOUNTING
MERCURY SWITCH
CONDUIT
TAPPING
LENS GASKET
(G,H ONLY)
SETTING
SCREW
UNDER
RETAINER
MANUAL
RESET
BUTTON
(CC437D,
E,J,K)
RETAINER
LEVELING
PENDULUM
M7630
Fig. 2. Principal parts of the gas pressure switch.
Mounting
Remove the dust-seal label from the vent tapping.
Remove the screws and retainers, and the cover glass.
Mount the device on the pipe or nearby vertical surface.
PENDULUM
LEVEL
LINE
M7196A
Fig. 3. Properly leveled C437/637.
IMPORTANT
To avoid leaks and case damage, use a parallel jaw
wrench on the hexagonal part of the case close to
the pipe. Carefully make all connections and test for
leakage. Do not tighten the pressure switch by
holding the case.
Complete the main piping.
Connect the piping to the pressure switch. Select the
application from the following, and proceed as
instructed.
a. Hazardous-gas applications: Install a 1/8 in. NPT
pipe at the vent tapping on all hazardous-gas
applications.
WARNING
The vent must be installed so that any gas leakage is
vented into a safe place in event of a diaphragm
failure.
b. Differential-pressure applications:
5
60-2320—9
Page 6

C437D,E,F,G,H,J,K AND C637B GAS PRESSURE SWITCHES
(1) Connect the high-pressure side of the
system to the 1/2 in. NPT main pressure
tapping on the gas pressure switch.
(2) Connect the low pressure side to the 1/8 in.
NPT vent tapping.
WARNING
No venting is possible in this case. Do not use this
device for differential pressure control with the
hazardous gases.
c. Negative-pressure applications: Connect the low
pressure side to the 1/8 in. NPT vent tapping.
WARNING
This application is for use only with nonhazardous
gases. Do not use this device for negative-pressure
applications with hazardous gases.
Install other controls in the system. Connect wiring, and
complete setting and checkout before replacing the
cover glass and retainers. See Setting and Checkout
section.
Wiring
CAUTION
1. Disconnect all power to the pressure switch
before connecting wiring to prevent electrical
shock and equipment damage.
2. When using a C437F,J, or K, both ends of the
switch (W-R and B-R) must be used at the same
voltage in the same branch circuit.
All wiring must comply with local electrical codes, ordinances,
and regulations. Do not exceed the switch ratings given in the
Specifications section.
Wiring diagrams for the different models are shown in Fig. 4,
5 and 6. The switches make or break as indicated in the
diagrams. Connect the wiring to the screw terminals on the
terminal strip after removing the cover glass. Route the wires
through the conduit tapping.
C437D,G: BREAKS ON PRESSURE RISE
C437E,H: BREAKS ON PRESSURE FALL
TERMINAL
STRIP
M7195
Fig. 4. Wiring diagram for C437D,E,G,H.
MAKES ON
PRESSURE
FALL
1
BOTH ENDS OF THE SWITCH (W-R AND B-R) MUST BE USED
AT THE SAME VOLTAGE IN THE SAME BRANCH CIRCUIT.
RISE
W
1
R
R
B
1
MAKES ON
PRESSURE
RISE
TERMINAL
STRIP
C437F,J,K
M7193
Fig. 5. Wiring diagram for C437F,J,K.
MAKES R TO B
ON PRESSURE
FALL
RISE
W
R
B
MAKES R TO W
ON PRESSURE
RISE
TERMINAL
STRIP
C637B
M7194
Fig. 6. Wiring diagram for C637B.
SETTING AND CHECKOUT
Setting
In the C437D,G and J models, the differential is
upper
The
the
operating point is determined by the
lower
operating point is determined by the setpoint
the differential. In the C437E,F,H,K and C637B models, the
differential is
by the
additive
setpoint
by the setpoint
. The
lower
operating point is determined
, while the
plus
upper
operating point is determined
the differential. Operating points are
shown in Fig. 7.
Remove the retainer and adjust the
setpoint
operating pressure (cutout pressure on a C437D,E,G, or H
spst model) by turning the setting screw (Fig. 2) clockwise
to increase the setpoint and counterclockwise to
decrease it.
Trip-Free Manual Reset Feature
(C437D,E,J and K only)
The C437D breaks and the C437J breaks R-B and makes
R-W when the pressure rises to the setpoint. The C437E
breaks, and the C437K breaks R-W and makes R-B when the
pressure falls to the setpoint. None of these pressure
switches will automatically return to their former positions.
subtractive
setpoint
, while
minus
for the desired
.
60-2320—9
6
Page 7

C437D,E,F,G,H,J,K AND C637B GAS PRESSURE SWITCHES
To reset one of these pressure switches, wait until the
pressure
J), or
falls
rises
to the setpoint minus the differential (C437D or
to the setpoint plus the differential (C437E or K).
Then depress the manual reset button (Fig. 2) and release it.
The pressure switch will not be reset until you release the
manual reset button
an automatic-reset device if the reset button is stuck, held in,
or tied down.
. This prevents the switch from becoming
Checkout
Adjust the setpoint for normal operation and check to see that
the gas pressure switch performs as intended. Use a
manometer or accurate pressure gauge connected upstream
from the switch to measure the actual pressure.
The most likely cause of inaccurate operation is off-level
mounting. Refer to step 4 in the Mounting section and correct
any installation that does not check out satisfactorily.
C437D,G or J (Subtractive Differential)
Put the system into normal operation, and set the
pressure switch at the normal setpoint (above the
normal operating pressure).
Turn the setting screw (Fig. 2) slowly toward a lower
pressure setting (counterclockwise ) to simulate a
pressure increase.
When the setpoint is approximately equal to the
pressure indicated on the pressure gauge, the C437D
or G should break contact and turn off the controlled
equipment; the C437J should break R to B and make R
to W.
The C437D or J should lock out.
SET POINT
(SWITCH BREAKS,
C437D,G
PRESSURE
RISE
C437J
C437E,H
C437F,K
C637B
PRESSURE
RISE
PRESSURE
FALL
PRESSURE
FALL
C437D AND J ARE MANUAL RESET MODELS; THEY CAN BE
1
MANUALLY RESET WHEN THE PRESSURE FALLS TO THE SET
POINT MINUS THE DIFFERENTIAL.
2
C437E AND K ARE MANUAL RESET MODELS; THEY CAN BE
MANUALLY RESET WHEN THE PRESSURE RISES TO THE SET
POINT PLUS THE DIFFERENTIAL.
C437D LOCKS OUT)
SUBTRACTIVE
DIFFERENTIAL
SET POINT MINUS
DIFFERENTIAL (SWITCH MAKES)
SET POINT
(BREAKS R-B MAKES R-W
AND LOCKS OUT)
SUBTRACTIVE
DIFFERENTIAL
SET POINT MINUS
DIFFERENTIAL (BREAKS R-W,
MAKES R-B)
SET POINT PLUS
DIFFERENTIAL (SWITCH MAKES)
ADDITIVE
DIFFERENTIAL
SET POINT
(SWITCH BREAKS,
C437E LOCKS OUT)
SET POINT PLUS
DIFFERENTIAL (BREAKS R-B
MAKES R-W)
ADDITIVE
DIFFERENTIAL
SET POINT
(BREAKS R-W, MAKES R-B,
C437K LOCKS OUT)
1
1
2
2
M7197
Turn the setting screw toward a high pressure setting
(clockwise ) to simulate a pressure decrease
greater than the differential
. The C437G should make
contact and turn on the controlled equipment.
Push the manual reset button (Fig. 2) on the C437D or
J; the C437D should make, and the C437J should
break R to W and make R to B.
C437E,F,H,K or C637B
(Additive Differential)
Put the system into normal operation and gradually
close the upstream gas shutoff valve to cause a
pressure decrease.
When the pressure gauge indicates that the pressure is
approximately equal to the setpoint, the C437E or H
should break contact and turn off the controlled
equipment; the C437F,K or C637B should break R to W
and make R to B.
The C437E or K should lock out.
Open the gas shutoff valve to increase the pressure
again. When the pressure rises to the setpoint
differential
, the C437H should make contact and turn on
plus the
the controlled equipment; the C437F or C637B should
break R to B and make R to W.
Push the manual reset button (Fig. 2) on the C437E or
K; the C437E should make, and the C437K should
break R to B and make R to W.
Completing the Installation
Remove the pressure gauge or manometer used for
testing. Visually recheck the piping, wiring, and setting.
Replace the cover glass and retainers.
Return the system pressure to normal.
Push the manual reset button (C437D,E,J or K only).
Installing a Pressure Orifice (Fig. 8)
To compensate for momentary surges in gas pressure, install
a restrictive orifice in the inlet pressure channel of the
pressure switch. (Refer to Accessories in the Specification
section for the orifice sizes available.)
Align pressure orifice into reset located inside of the main
pressure tapping at the bottom. Press orifice into place using
1/8 in. dowel rod.
MAIN PRESSURE
TAPPING
PRESSURE
ORIFICE
(SELECTED)
1/8 IN. DOWEL ROD
Fig. 8. Installing a pressure orifice to compensate for
pressure surges.
M7191A
Fig. 7. C437 and C637 operating points.
7
60-2320—9
Page 8

C437D,E,F,G,H,J,K AND C637B GAS PRESSURE SWITCHES
Automation and Control Solutions
Honeywell International Inc. Honeywell Limited—Honeywell Limitée
1985 Douglas Drive North 35 Dynamic Drive
Golden Valley, MN 55422 Scarborough, Ontario M1V 4Z9
60-2320—9 L.Z. Rev. 9-95
60-2320—9
8
customer.honeywell.com
 Loading...