

HON HBXRISER Installation Manual
Item No.:HBXRISER
Installation guide
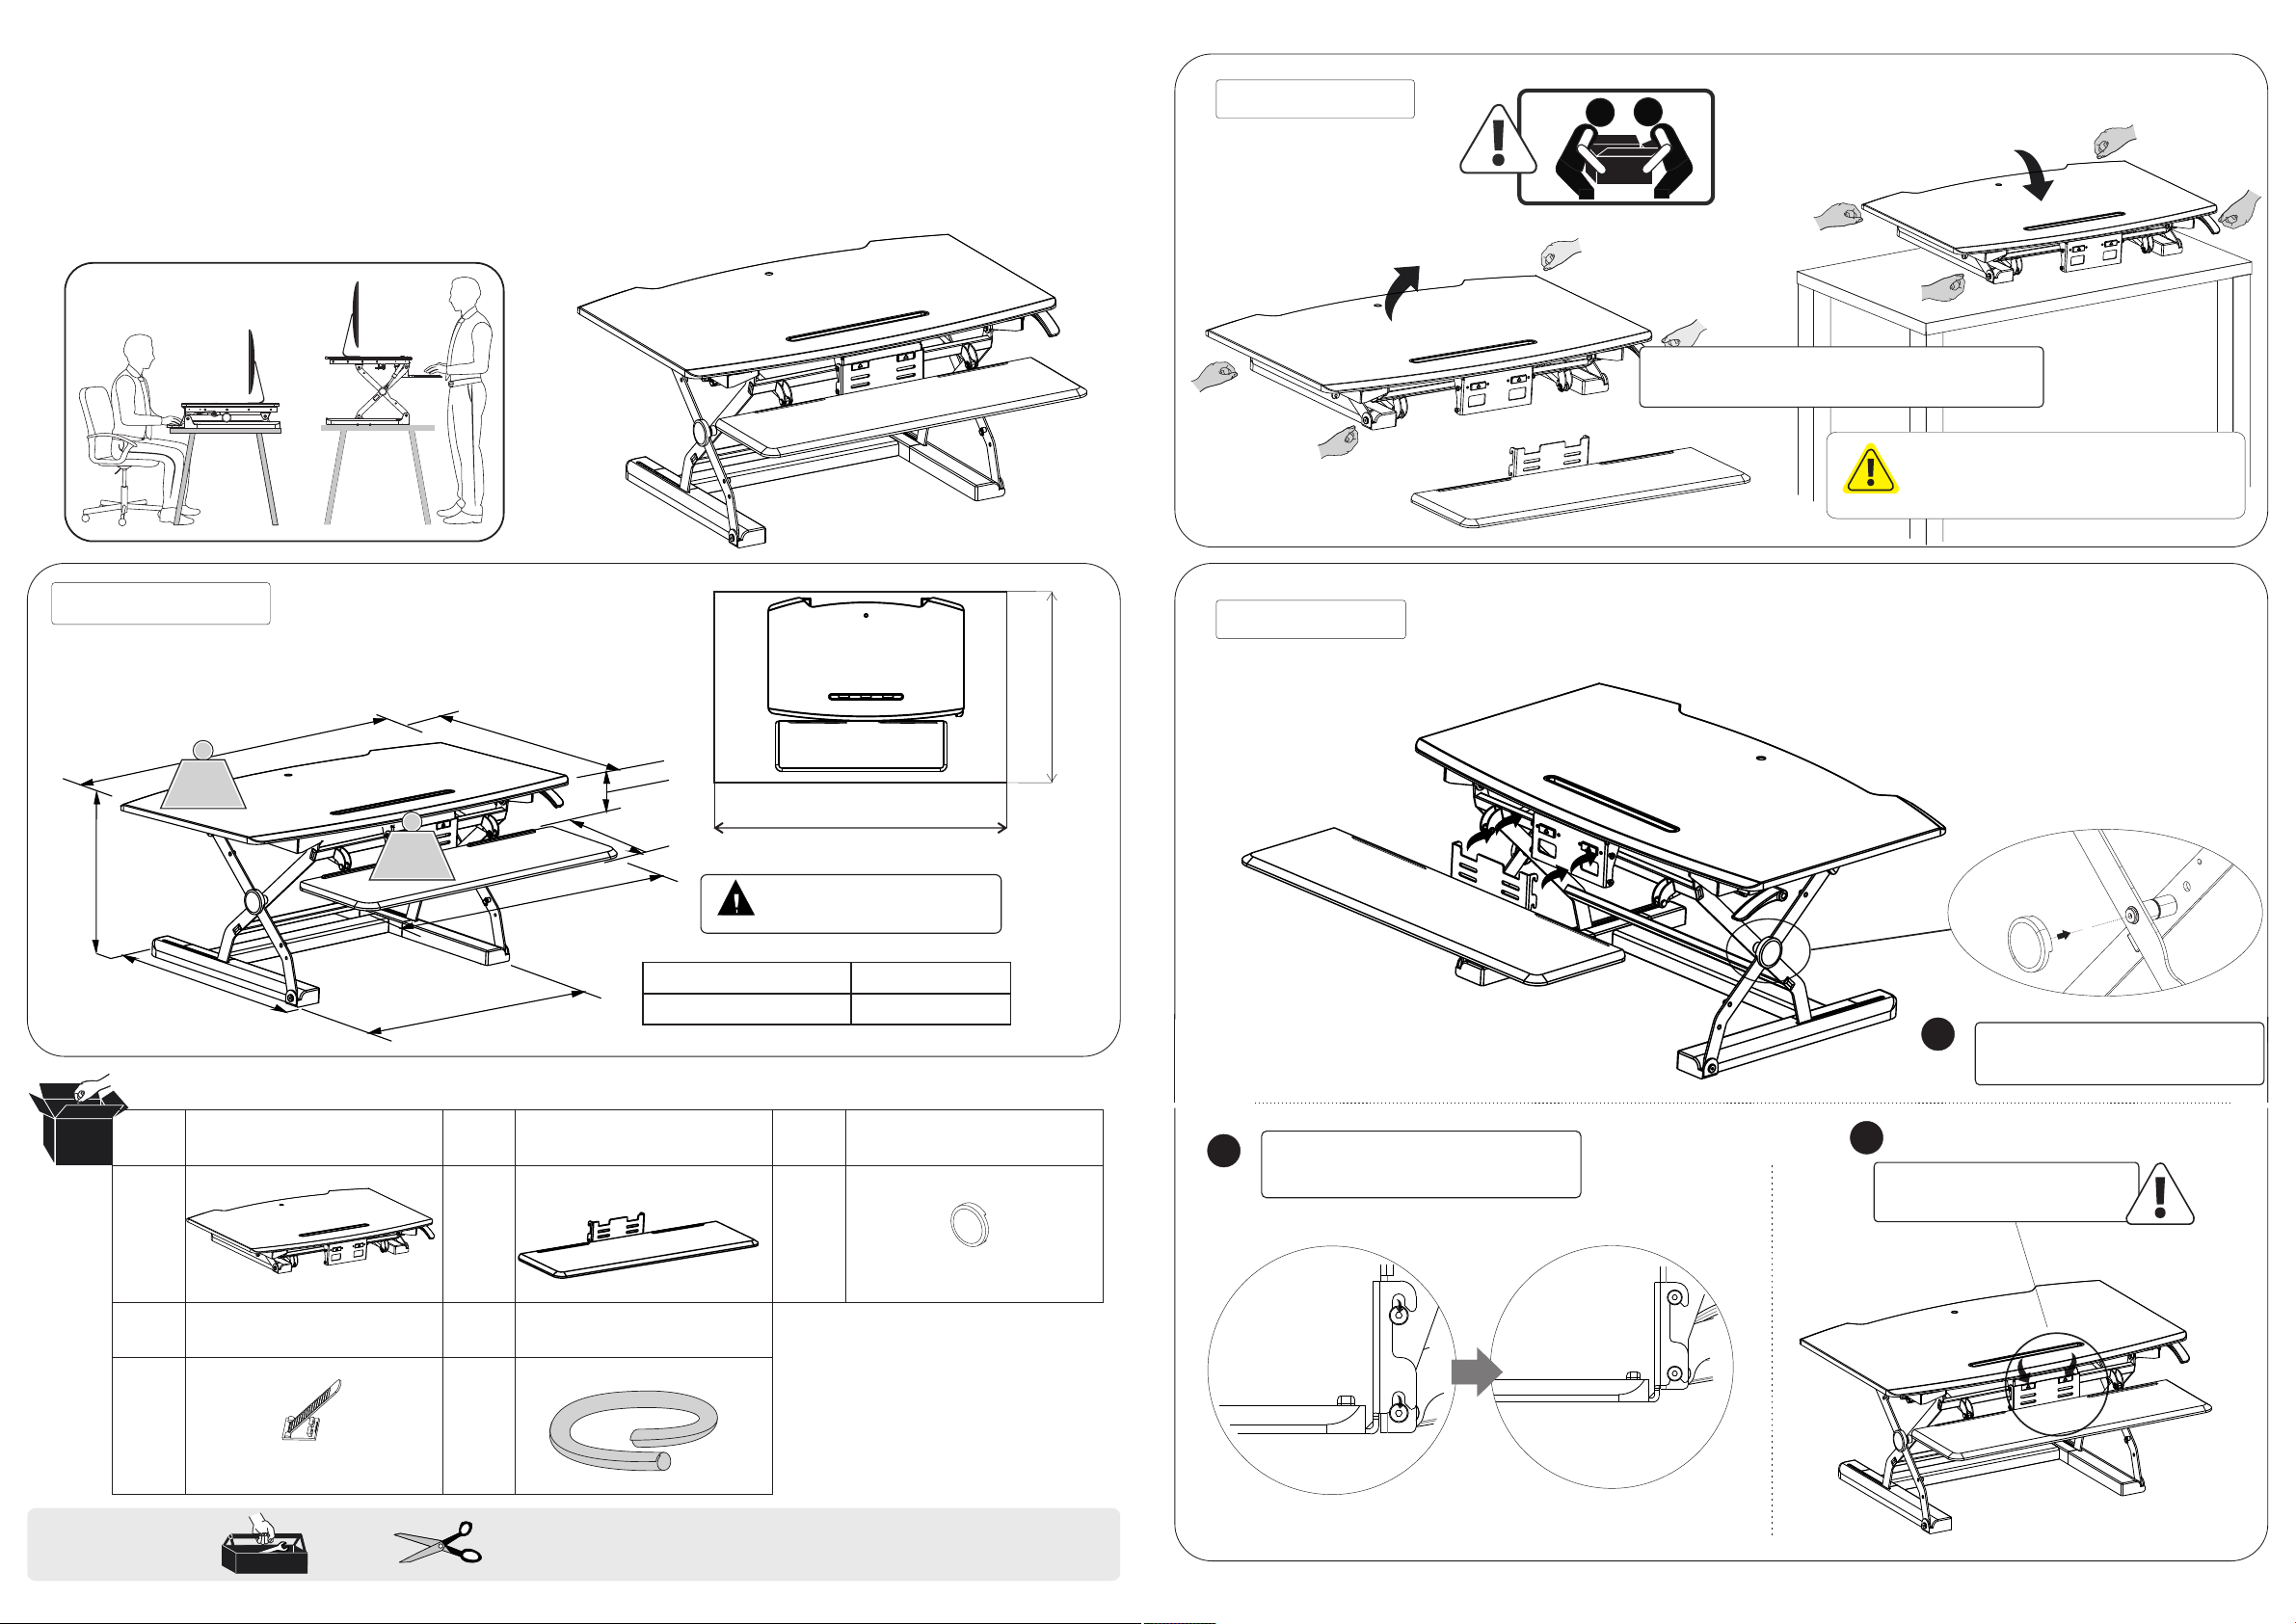
Assembly Step 1
+
Remove all contents f rom the pack aging
and place onto sturdy t able.
Please place the prod uct proper ly
accordi ng to size of su rface, or it
CAUTION
may cause h arm or damag e.
Technical Data
35
Max
33lbs
4.7 2- 16. 54in
1
9
.
88
i
n
Accessor y Package List
No. No. No.
A B C
n
i
04
.
Max
4.4lbs
24.52 in
Part Part
22.0
5i
n
n
i
4
.9
3
9
.
06
i
n
in
1
7
.
0
3
WAR NIN G
Max Loading capacity
Height adj ustable range
>37.40i n
Plea sedonotexc eedthe
maxi mumbeari ngweight
4.72-16.54in
Part
33lbs
>24.02i n
Assembly Step 2
Connect the keyboar d tray to the
b
pre-ins talled scr ews
a
Attach de corative c over to
the conne cting arm.
c
Press the t wo buttons t o
release the keyboar d tray
b
TOOLS
x1 x1
No.No.
D E
x4
x2
PartPart
x1
0560041300
6/17
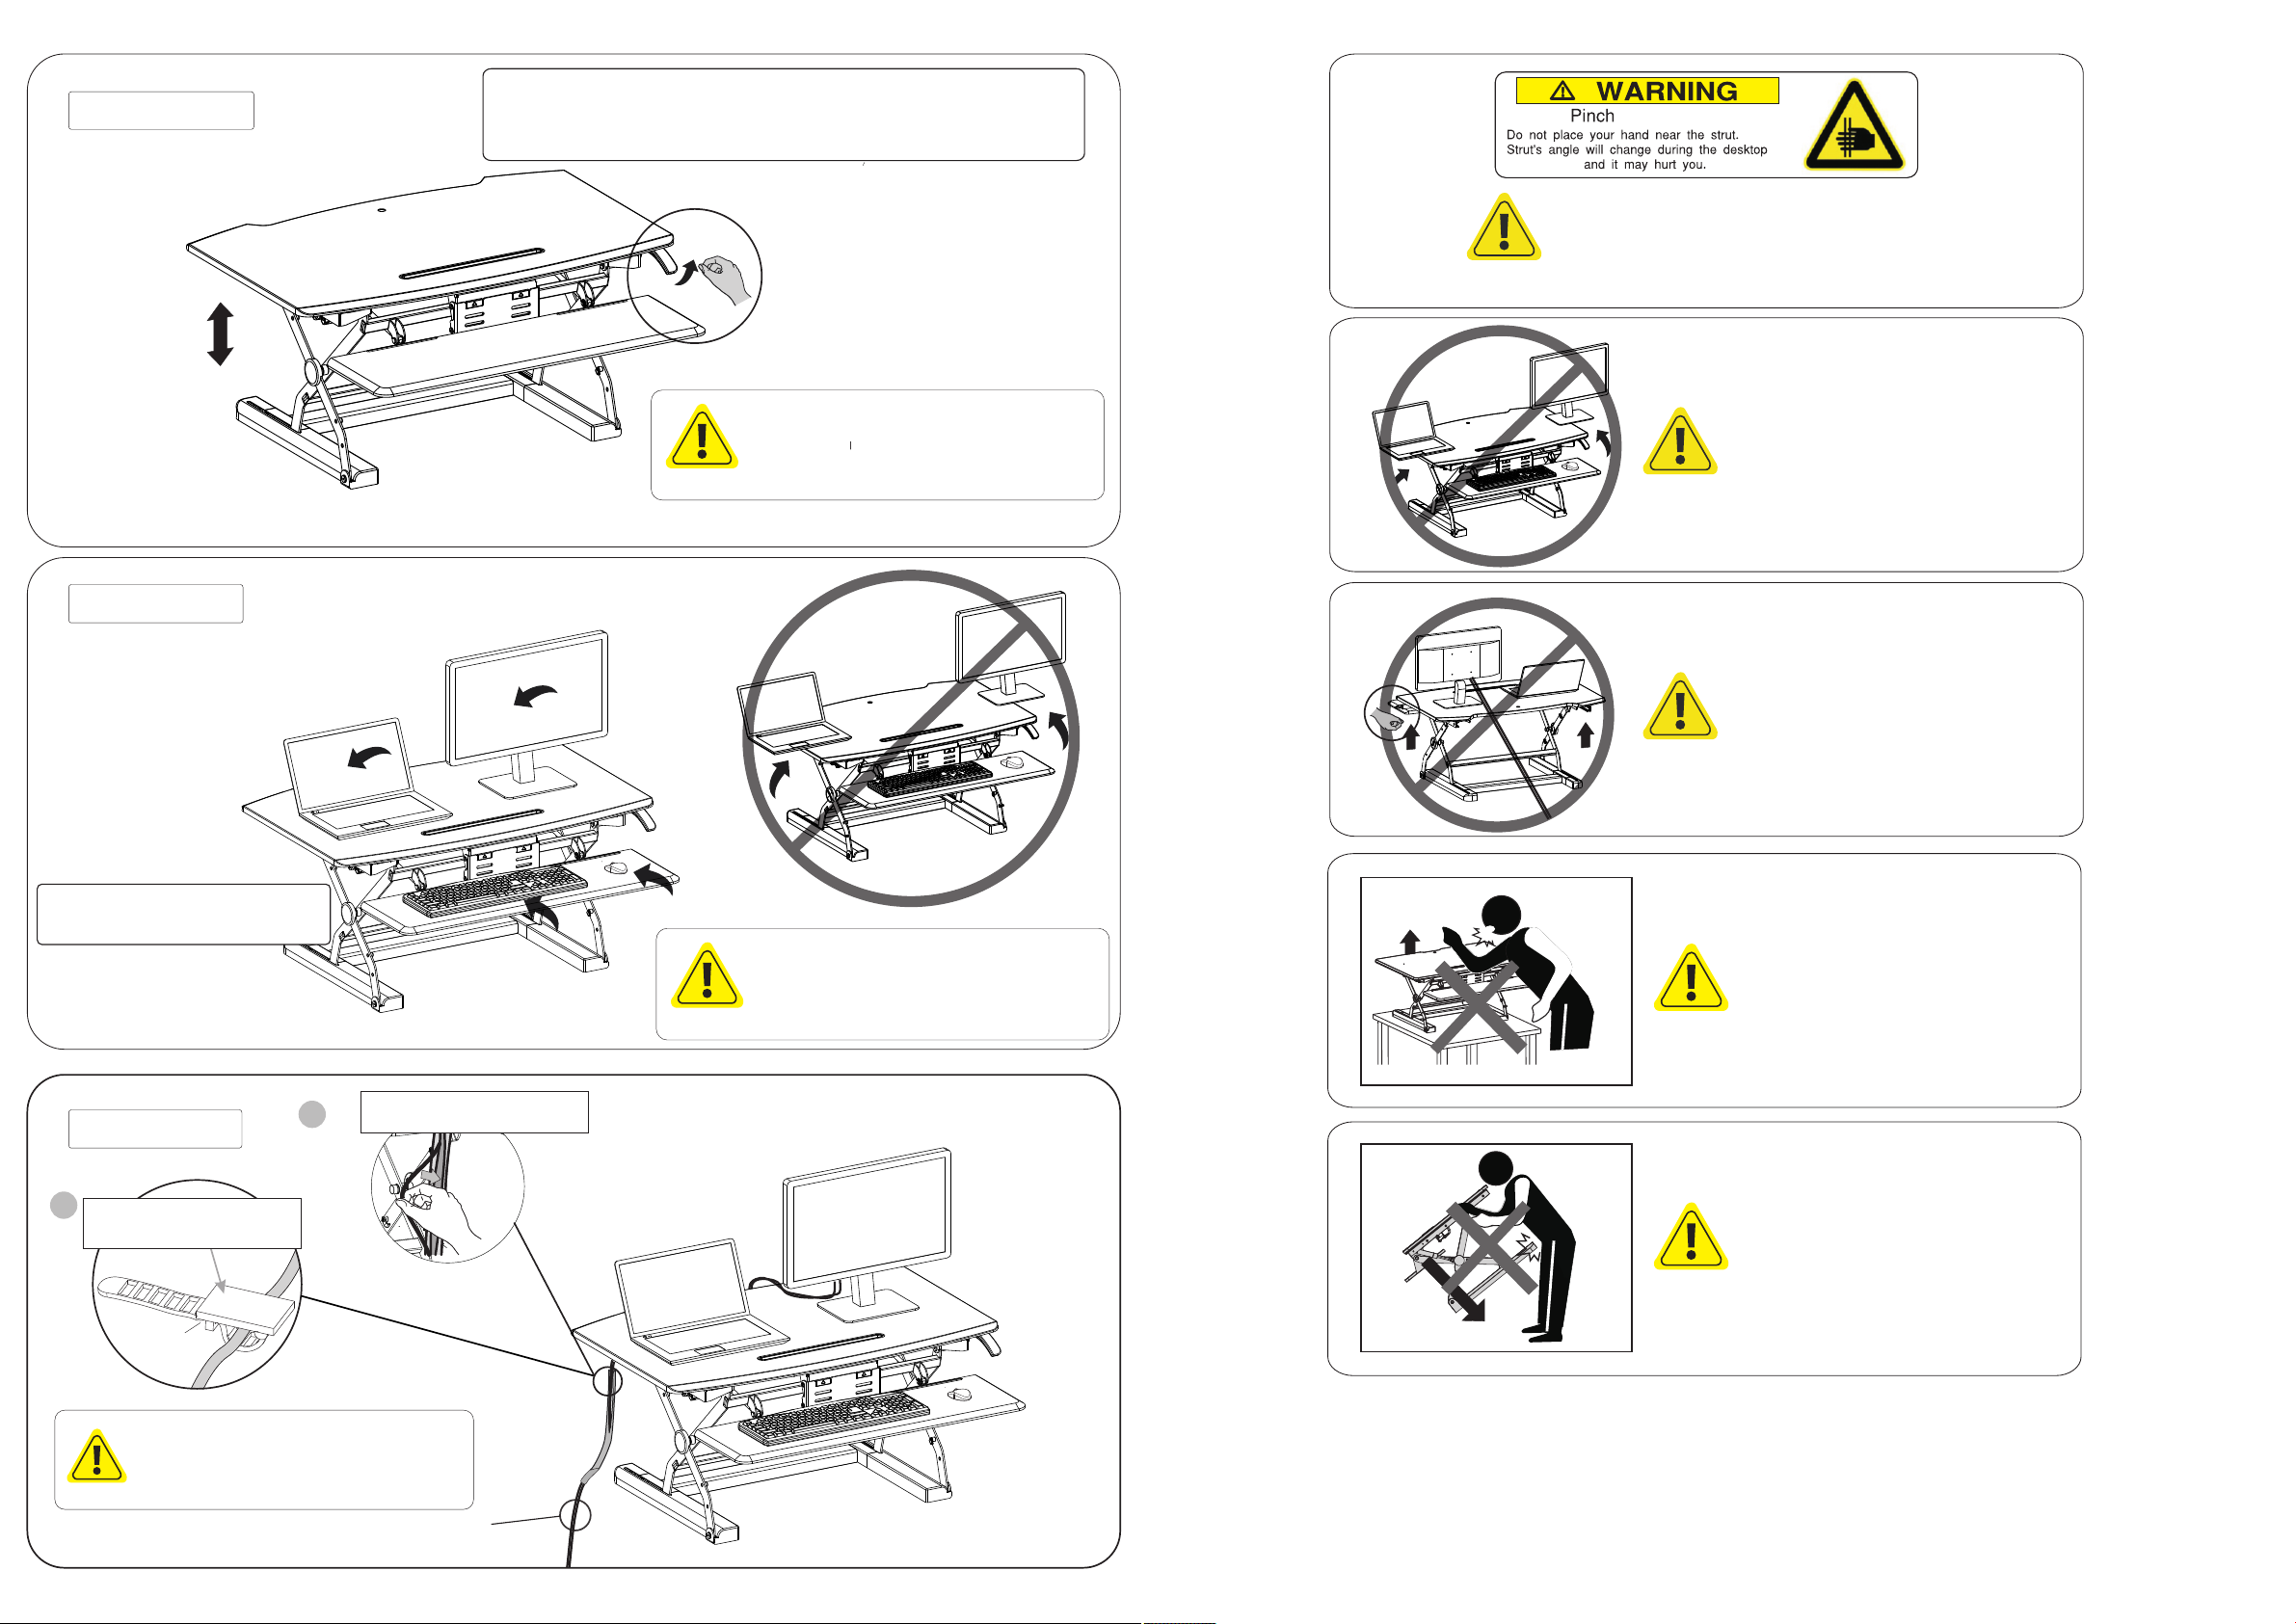
Assembl y Step 3
To raise a nd lower th e unit, put dow nward press ure on the wo rksurface
top, a nd then activ ate the han dle on the fron t right cor ner. Upon init ial
use, p lease raise t he unit and r emove the pac king foam i nserts from
unde r the struts.
Points
adjus tm ent
Please do no t put hands near the suppor ting bars,
as they chan ge during adjusting
Warning
Assembl y Step 4
Placedevicesontoth etop
ofthework station.
WAR NING
CAUTI ON
Please do not put hands n ear the
supporting bars, as t hey change
during adjusting an d may hurt you .
Please ma ke sure all in stalled
equipment is on the tab le, and do
not hang ov er table edg e as this may
cause harm or damage.
Attention
Attention
Warning
Please make sure all insta lled equipment
is on the tabl e, and not sticking out of
the edge, or i t may cause harm or damage.
Please lea ve e nough length of cable for
height adj ustment function, oth erw ise it
may cause un expected loss.
When removing eq uipment, please fir st
adjust it to the h ig hest, then remove
equipmen t to a vo id harm or damage.
Assembl y Step 5
This su rf ac e conta in s adhes iv e,
2
helping t o fi x the cab le
managem en t on the ta bl e
Nylo n ties
Please leave enough length of cable for
height adjustment function, otherwise it
may cause unexpected loss.
CAUTI ON
1
Use the cable m an agement to
guide and bun dl e the cables
Please move by t wo p ersons, or
part s may collide and cause d am age.
Warning
Cable
0560041300
6/17
 Loading...