

Homecast T8000PVR User Manual


User’s Manual
2
TABLE OF CONTENTS
Notice 4
Safety Information 5
1 Before You Begin 7
1.1 Features ................................ ...... .......................................... ...... ......................7
1.2 Accessories ................................. ...... .......................................... ......................8
2 Controls and Functions 9
2.1 Front Panel........................................................................................................9
2.2 Rear Panel................................................................................... ...... ..............10
2.3 Remote Control Unit........................................... ...... ............ ............ ...... ........11
3 Connections 13
3.1 Connecting to TV & VCR .................................................................................13
3.2 Connecting to Signal ........................................................................ ..............16
4. Menu Overview 17
4.1 Menu Instruction .................................................................. ..........................17
4.2 Menu Help......................................... ...... ........................................................17
4.3 Menu Structure ...............................................................................................18
5. Menu Operation 19
5.1 First Installation........................................... ...... .......................................... ..19
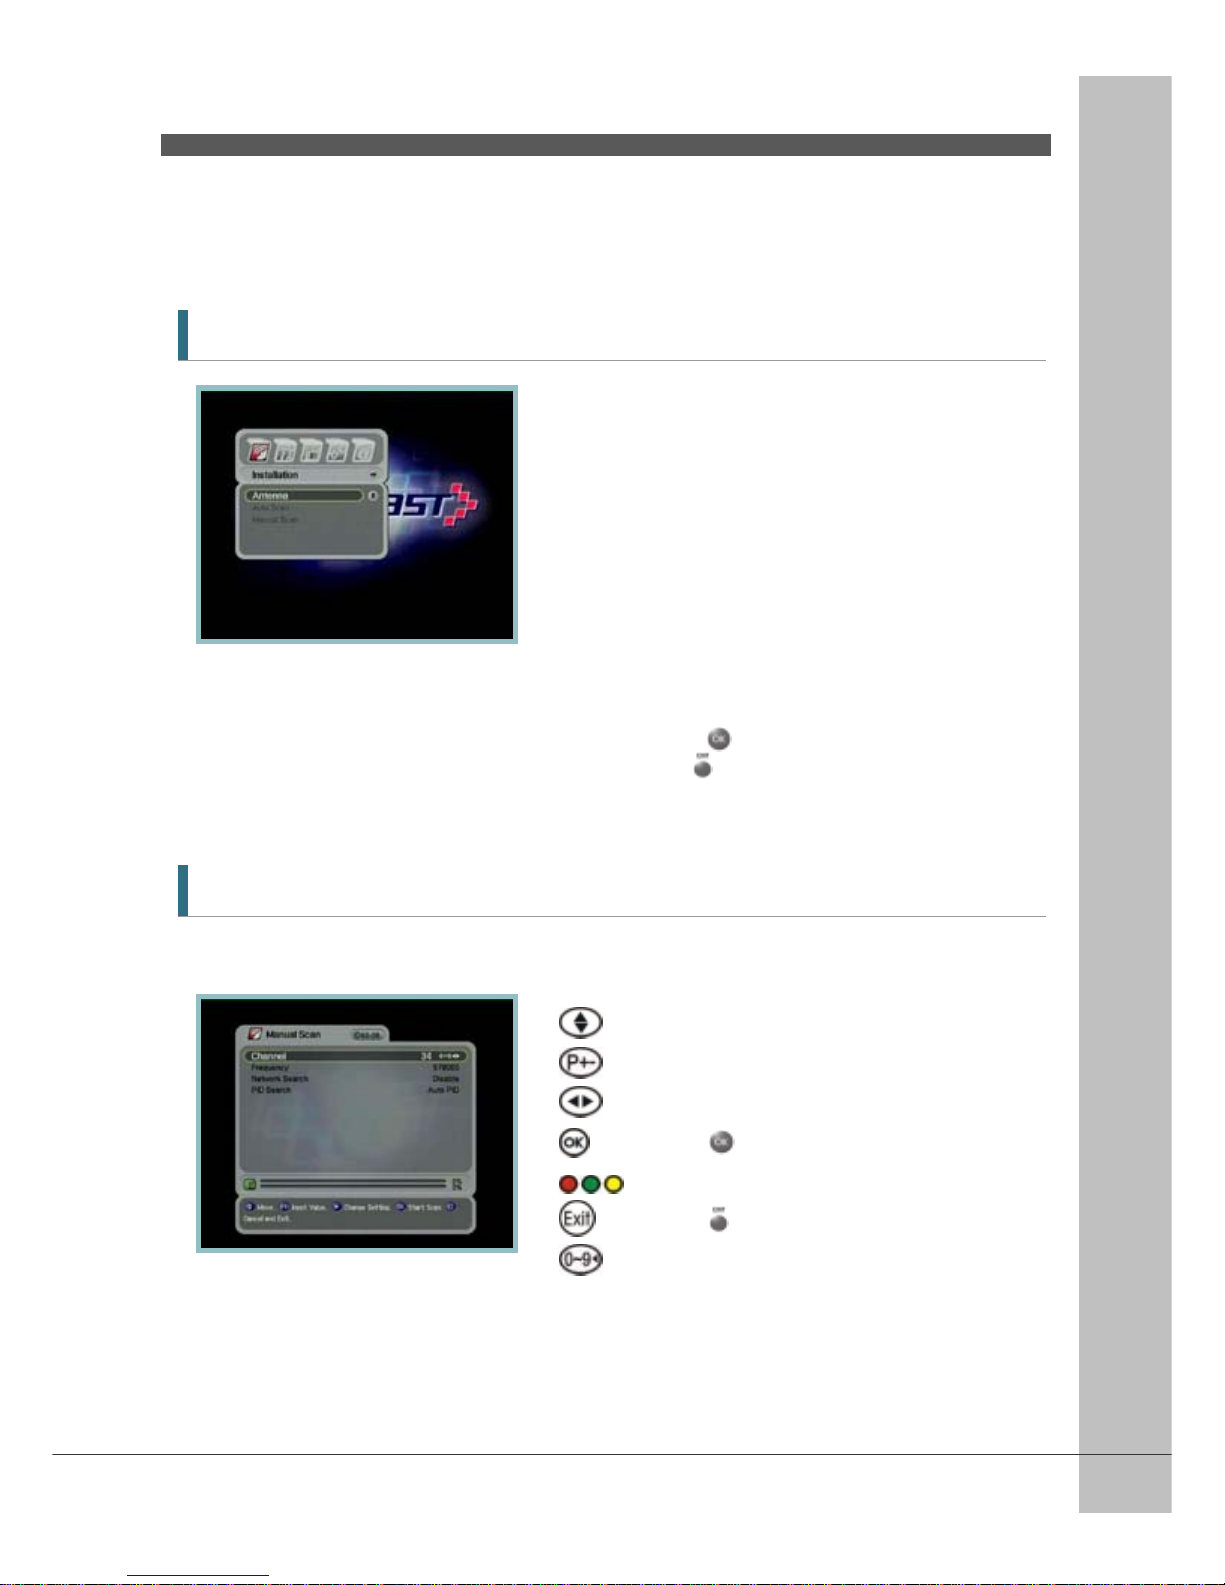
5.2 Installation ....................................... ..............................................................20
5.3 Option .............................................................................................................22
5.4 Channel ...........................................................................................................24
5.5 Advanced ................................................ ........................................................26
5.6 Status.............................. ................................................................................27
5.7 PVR.................................. ...... .......................................... ...... ..........................28

User’s Manual
3
6. Banner Information 29
6.1 First Installation .............................................................................................29
6.2 TV & Radio changing ......................................................................................30
6.3 TV or Radio Channel Lists...............................................................................30
6.4 Option .............................................................................................................34
6.5 A/V+ ...............................................................................................................36
6.6 Fav............................... ....................................................................................36
6.7 A-Z........................................... .......................................... ...... ........................37
6.8 EPG...................................................... ...... .......................................... ...... ......37
7. PVR 38
7.1 File List...................................................... ...... .......................................... ......38
7.2 PVR Banner..................................................... ...... ..........................................40
7.3 PIP(Picture In Picture)..................................................... ...... ............ ...... ......46
7.4 JUKEBOX playback.......................................... .......................................... ......46
7.5 USB 2.0............................................................................................................47
Additional Information 48
A.1 Troubleshooting .............................................................................................48
A.2 Technical Specifications.................................................................................49
A.3 Glossary of Terms................................................. ..........................................54
A.4 Menu Structure................................................................. ..............................55
User’s Manual
4
Notice
Read this manual carefully and make sure you understand the provided instructions. For
your safety, check what the result each action will be.
Warnings, Cautions and Notes
Throughout he whole manual, pay special attention to the following marks that indicate hazardous
situations.
Caution
Indicates a situation which, if not avoided, could damage the
equipment or apparatus.
Warnings
Indicates a hazardous situation which, if not avoided, could result in
serious injury.
Note
Indicates additional information to the user to make the user aware of
possible problems and information of any importance to help the user
to understand, to use and to maintain the installation.
User’s Manual
5
Safety Infor m a tio n
This digital satellite receiver has been manufactured to comply with international safety standards.
Please read the following safety precautions carefully.
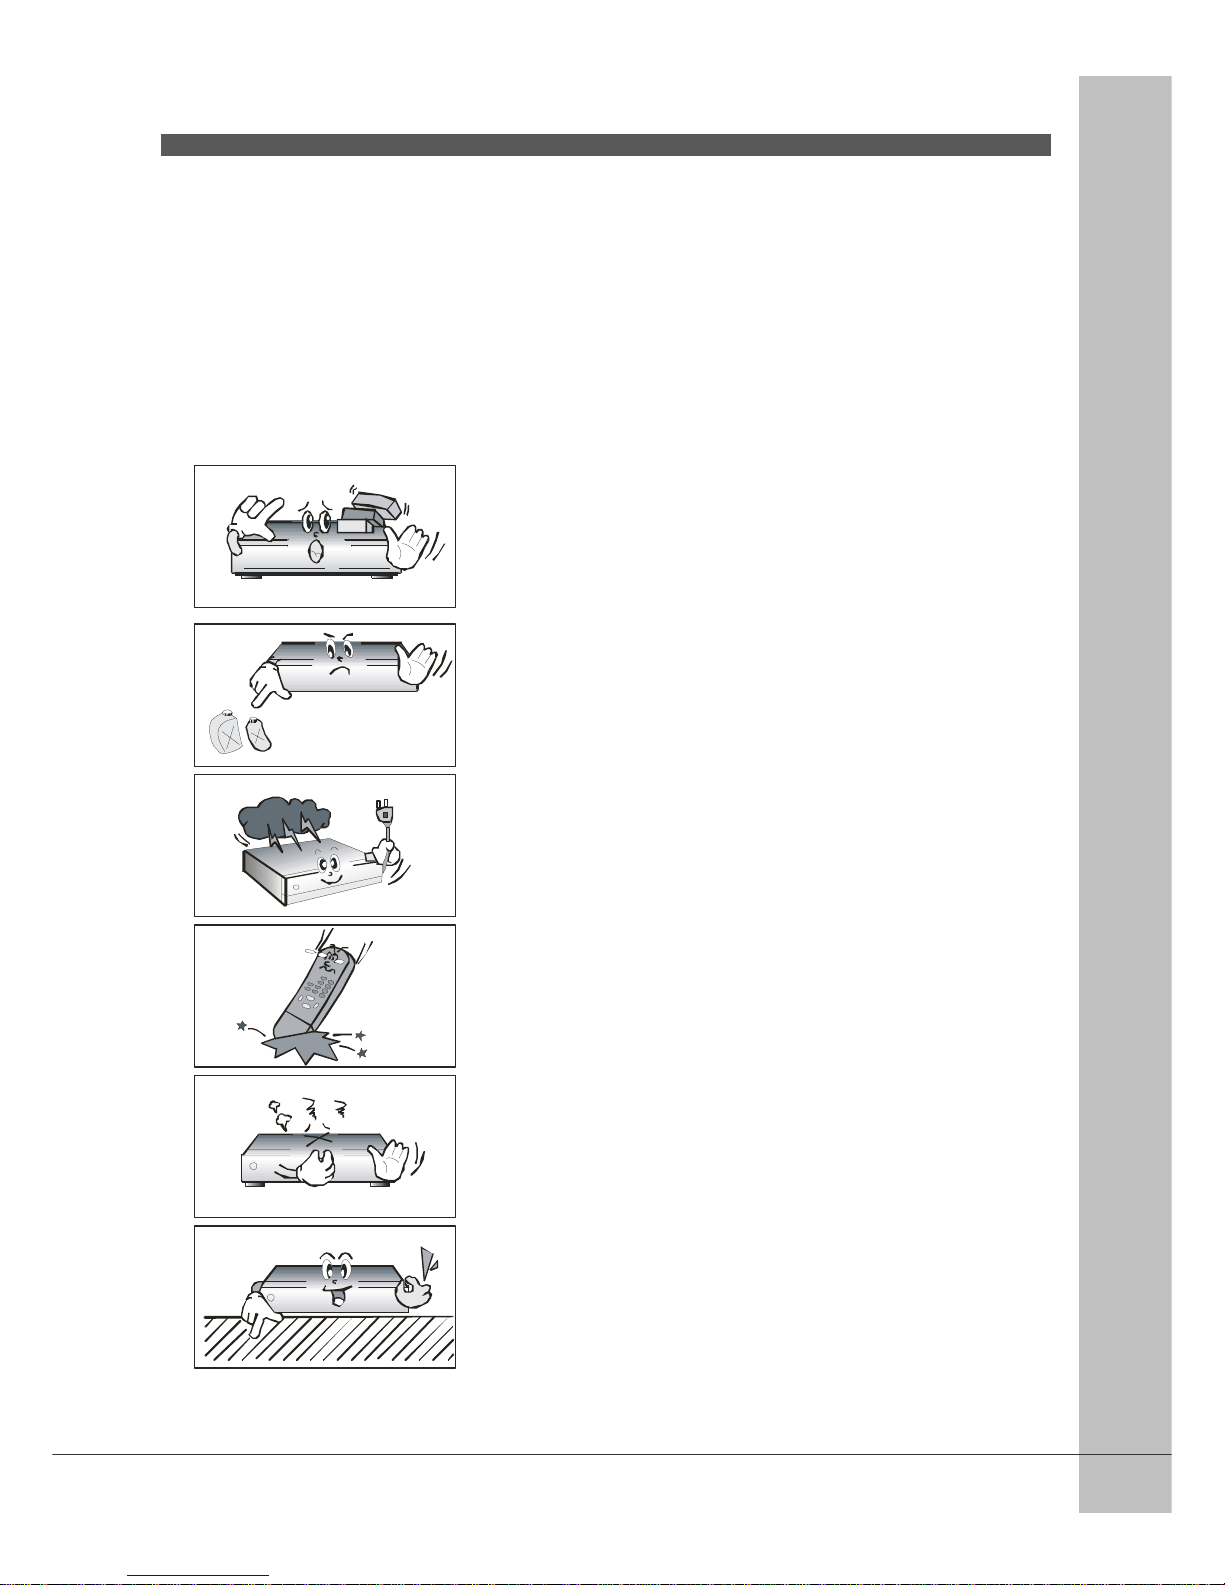
Safety Instructions and Precautions
Avoid placing heavy things and blocking ventilation passage.
(Passage blocking can cause fire)
Avoid scrubbing the surface with Benzene or Volatile gasoline. Color
can be damaged.
Leave the power and the antenna off for the ling absence or during
thunder storm.
Avoid dropping and damaging Remote Control Unit.
If there is smoke or buring smell, turn off & un-plug the set
immediately. Contact your local repair center for advice.
Avoid pleace the set on slippery and slant surface.
User’s Manual
6
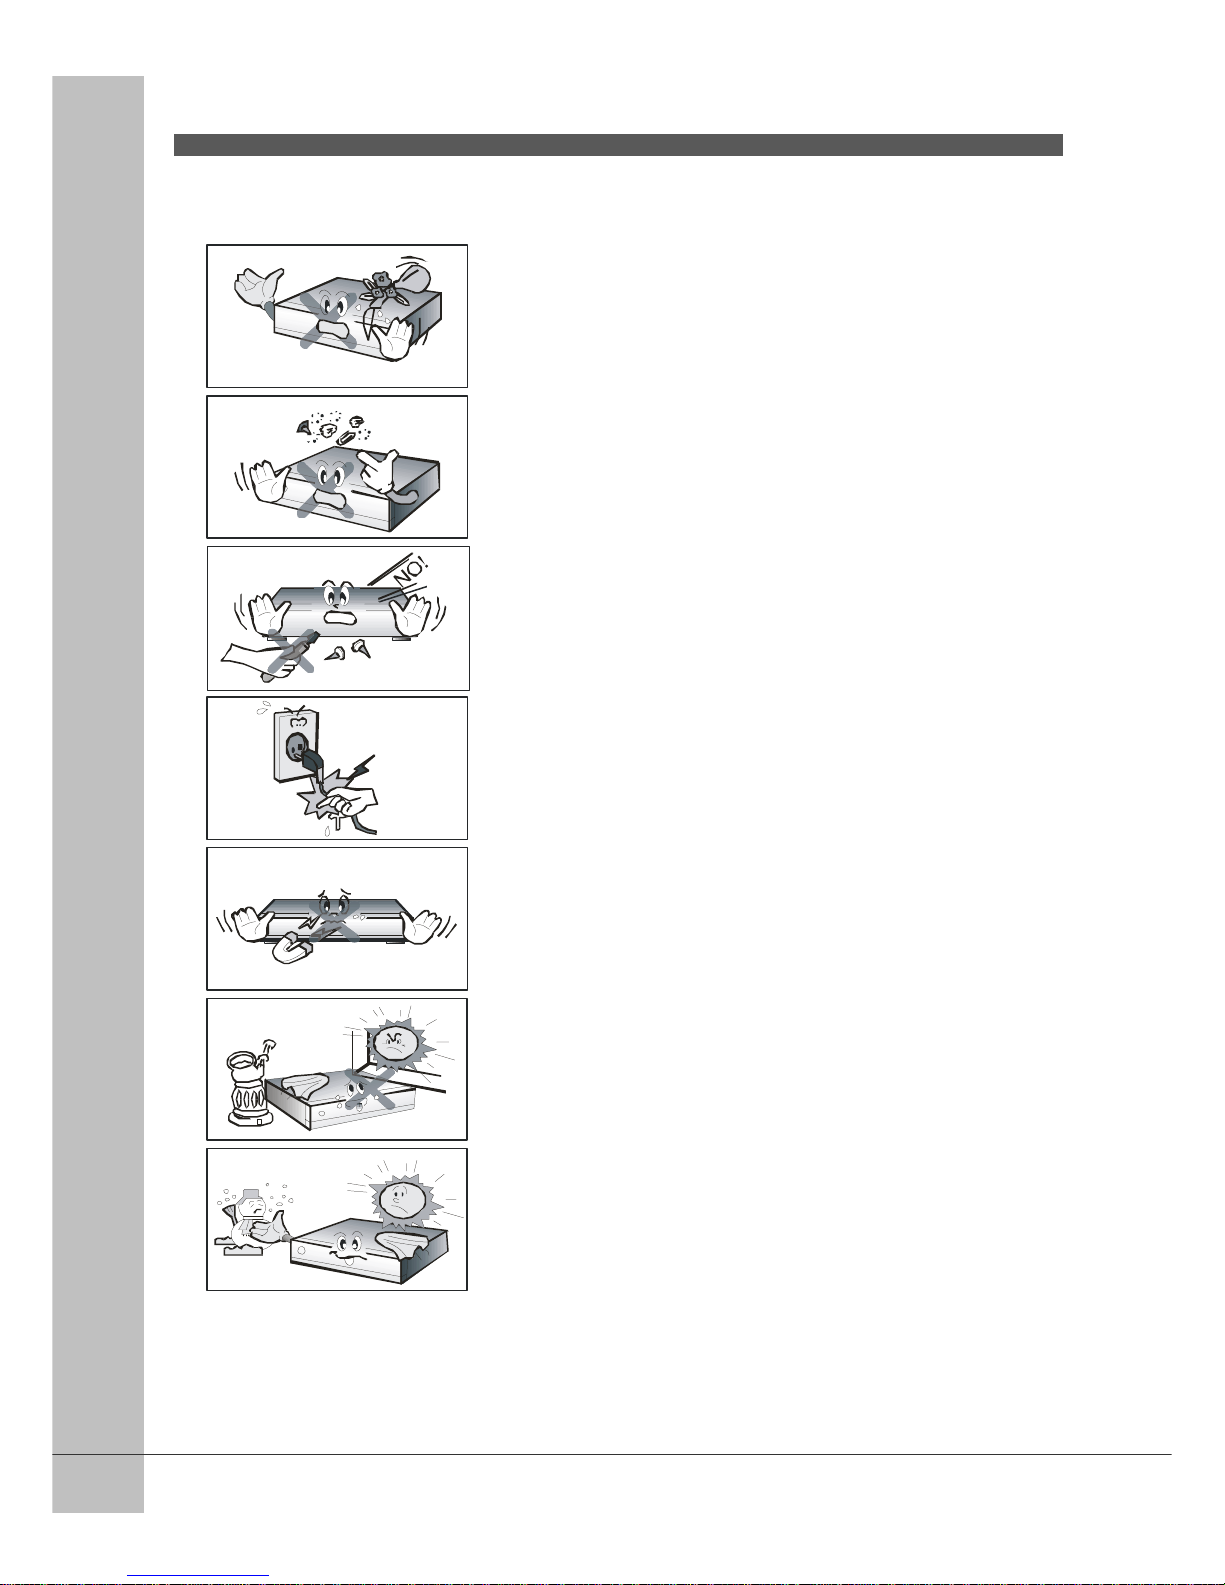
Keep away from the water.
Clear off the dust. Dust or Metallic particles inside the set can cause
fire and electric shock.
Avoid dissembling and assembling. Do not open the set.
Do not snatch the cable to plug out.
Keep the distance from Magnetic items and Audio Speaker.
Place the set with the good ventilation and away from the direct
sunlight and humidity.
Avoid the temperature of over 30C and below 5C.

User’s Manual
7
1 Before You Begin
1.1 Features
Two Tuners
One recording and playback simultaneously
PIP supported
VFD(Vaccum Fluorescent Display)
Trick mod e supported
USB 2.0 supported
Jukebox(music box) supported
Brilliant OSD(On Screen Display)
MPEG-2 & Fully DVB compliant
MPEG-2 Video(MP@ML), MPEG-1 Audio Layer1, Layer2
RF-Modulator UHF 21~69 with P AL
Digital Tuner with Loop-through
S/PDIF AC3 audio
User friendly OSD menu with full function
256 color GUI(Graphic User Interface)
Multi-language menu
Variable aspect ratio(4:3, 16:9) with Pan Vector or Letter Box
EPG(Electronic Program Guide) supported
Teletext and Subtitle supported(VBI & OSD)
Installation by Easy Setup Guide
Capacity for storing mult i channel(4000 channels, 1000 transponders)
RS232C port and OTA(Over-The-Air) for upgrading system software
User’s Manual
8
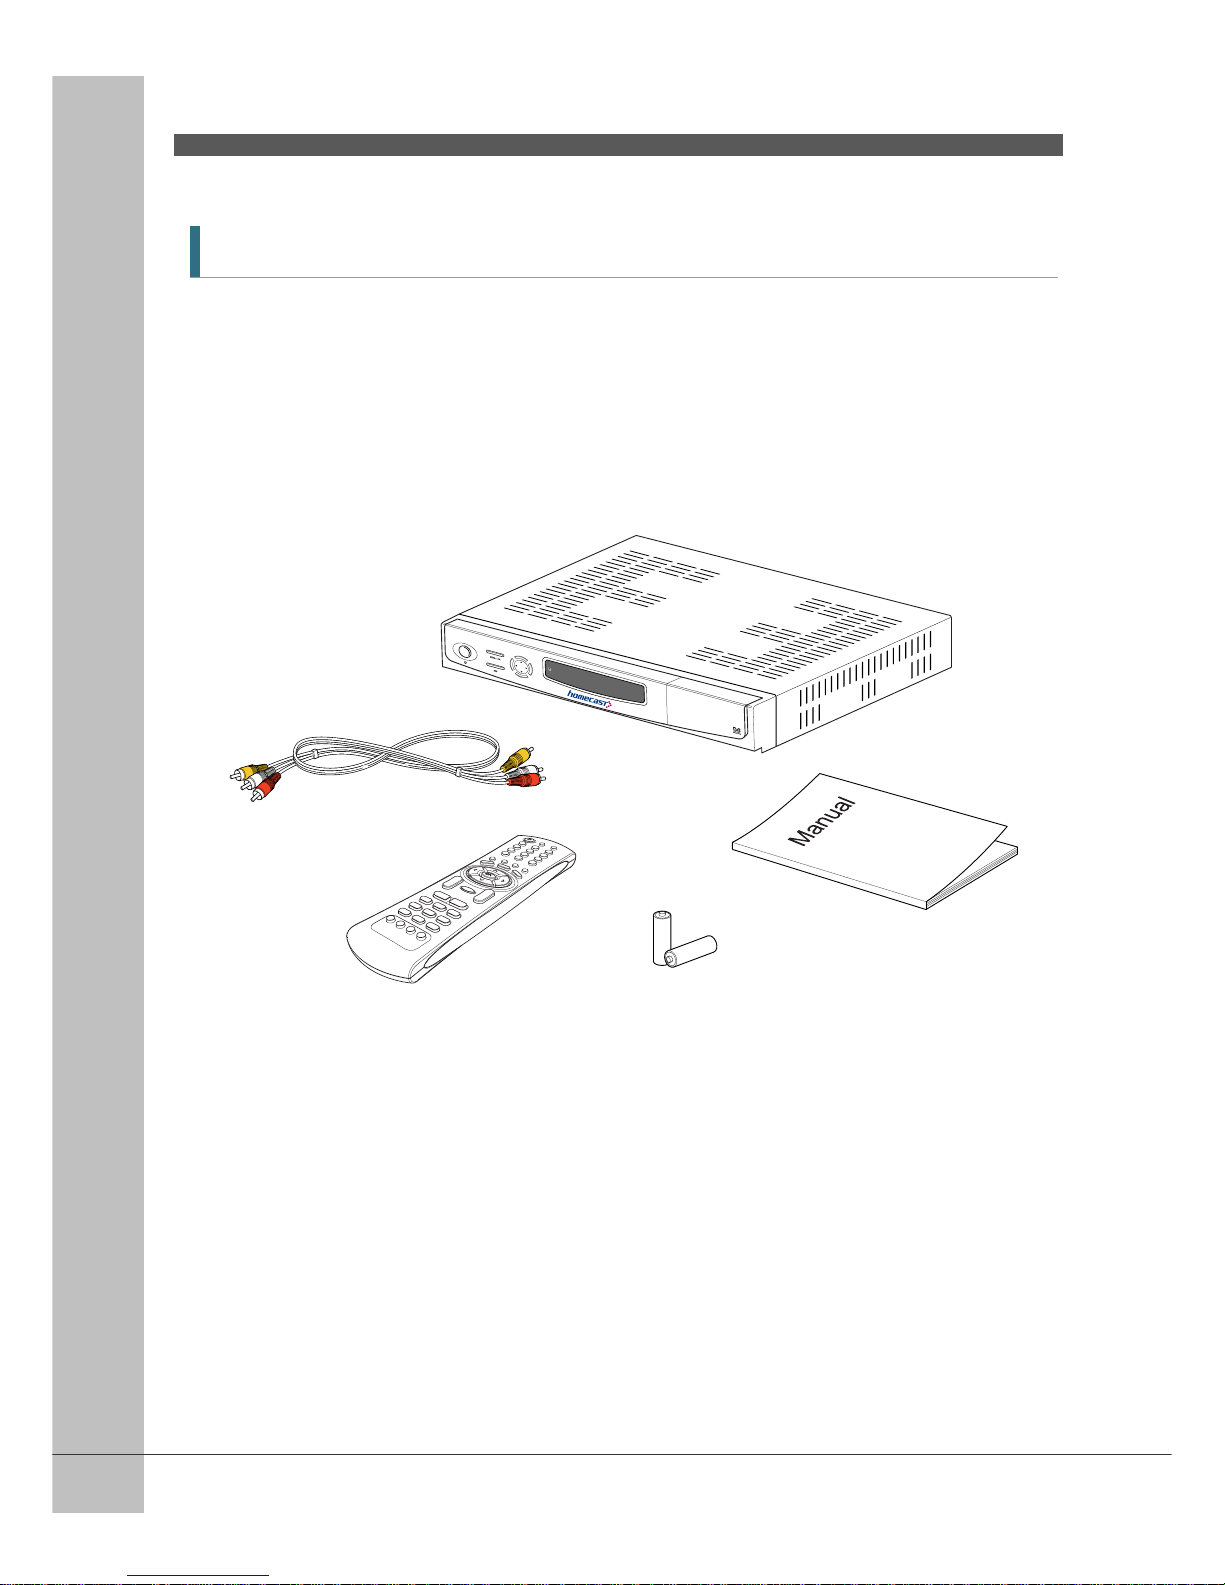
1.2 Accessories
Audio/Video cable
Operating instruction (this Manual)
Remote Control
AAA dry cell batteries x 2
User’s Manual
9
2 Controls and Functions
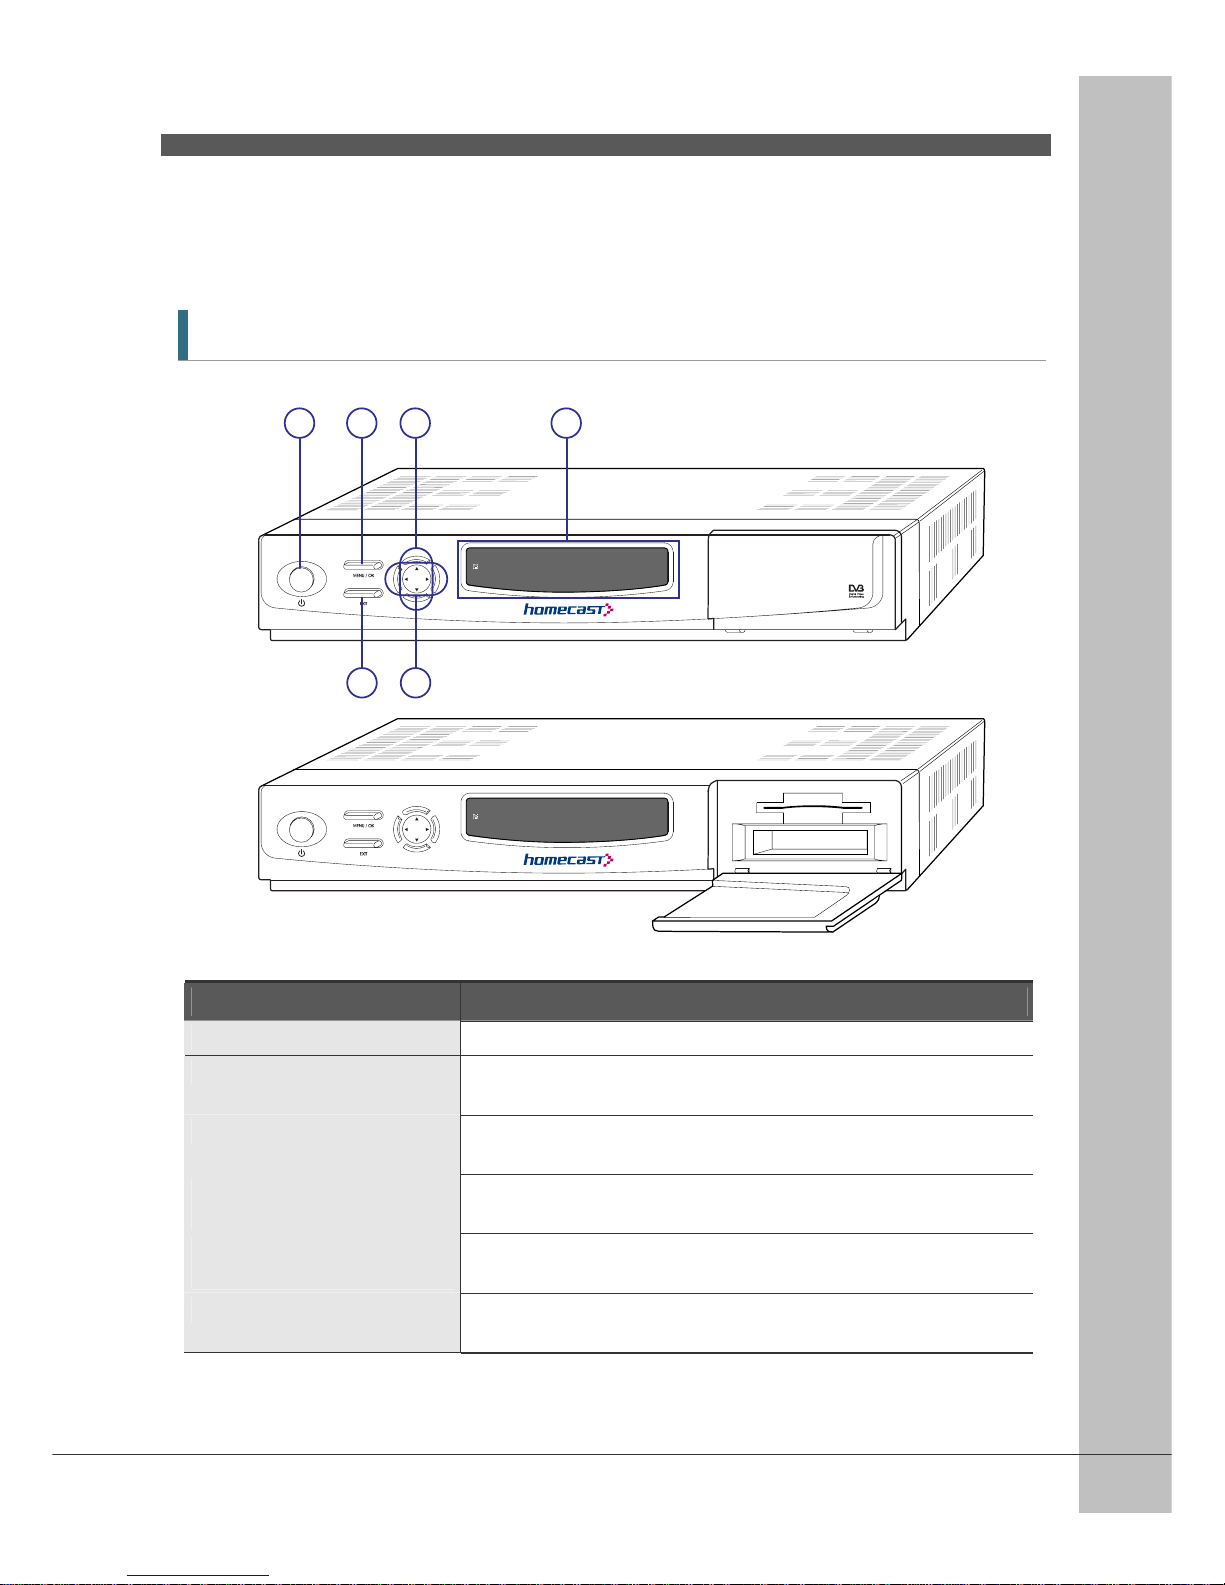
2.1 Front Panel
Item Description
1. Power Button Turns the receiver On/ O ff.
2 Menu/OK Button Shows the Main menu in viewing mode. Activa te s the highlighted men u
item in menu mode.
3. EXIT Button Exit from the current menu or cancels the current progressing
operation if applicable.
4. CH Up/Down Buttons
(▲/▼)
Changes channels i n viewing mode and moves the cursor up/down in
menu mo d e.
5. Volume Up/Down Buttons
(◀/▶)
Increases/ decreases the volume levels in viewing mode and changes
settings in menu mode.
6. Display (VFD module) The VFD digit displa ys c h a nne l in for mation.
(5 X 7 Dot Matrix with Icons).
1 2
3 5
4 6
User’s Manual
10
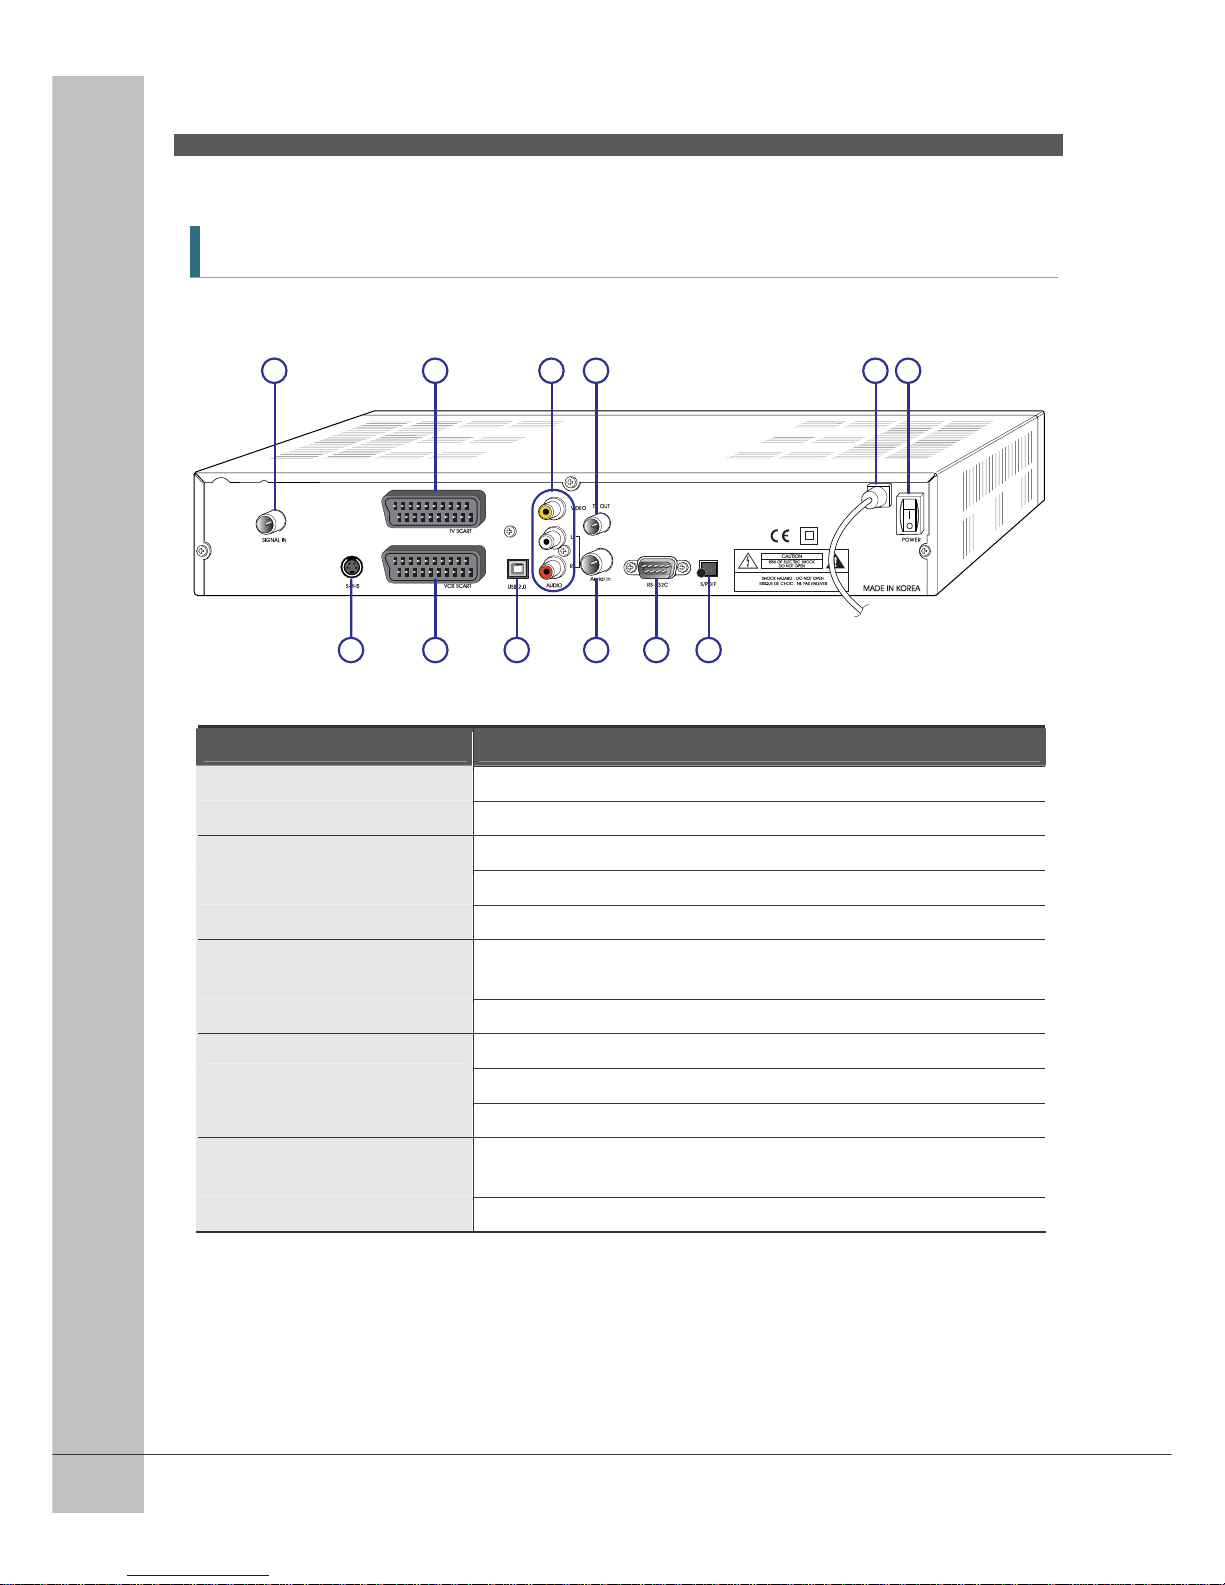
2.2 Rear Panel
Item Description
1. SIGNAL IN Connect the digital signal cable.
2. S-VIDEO One 4-pin mini-DIN female connector for s-video output.
3. TV SCART Connects to the TV port of your TV with a SCART cable.
4. VCR SCART Connects to the VCR port of your VCR with a SCART cable.
5. USB 2.0 USB 2.0 Connector.
6. AUDIO, VIDEO Connect the AUDIO/VIDEO of TV to AUDIO/VIDEO. Connect Red and
White connector to Audio L/R, and Yellow into Video port respectively.
7. TV OUT Connect a conventional TV.
8. AERIAL IN Connect the TV antenna to the Aerial IN.
9. RS-232C Connect a Set-top box or a serial port of PC.
10. S/PDIF Connect the S/PDIF to a Dolby Digital decoder for AC3 audio.
11. Electric Inlet Lead 90~240V AC(Auto-selectable),50~60Hz. Make sure to check the power
specification.
12. Power Cord Connect the Power outlet.
1 3 6 7 11 12
2 4 5 8 9 10
User’s Manual
11
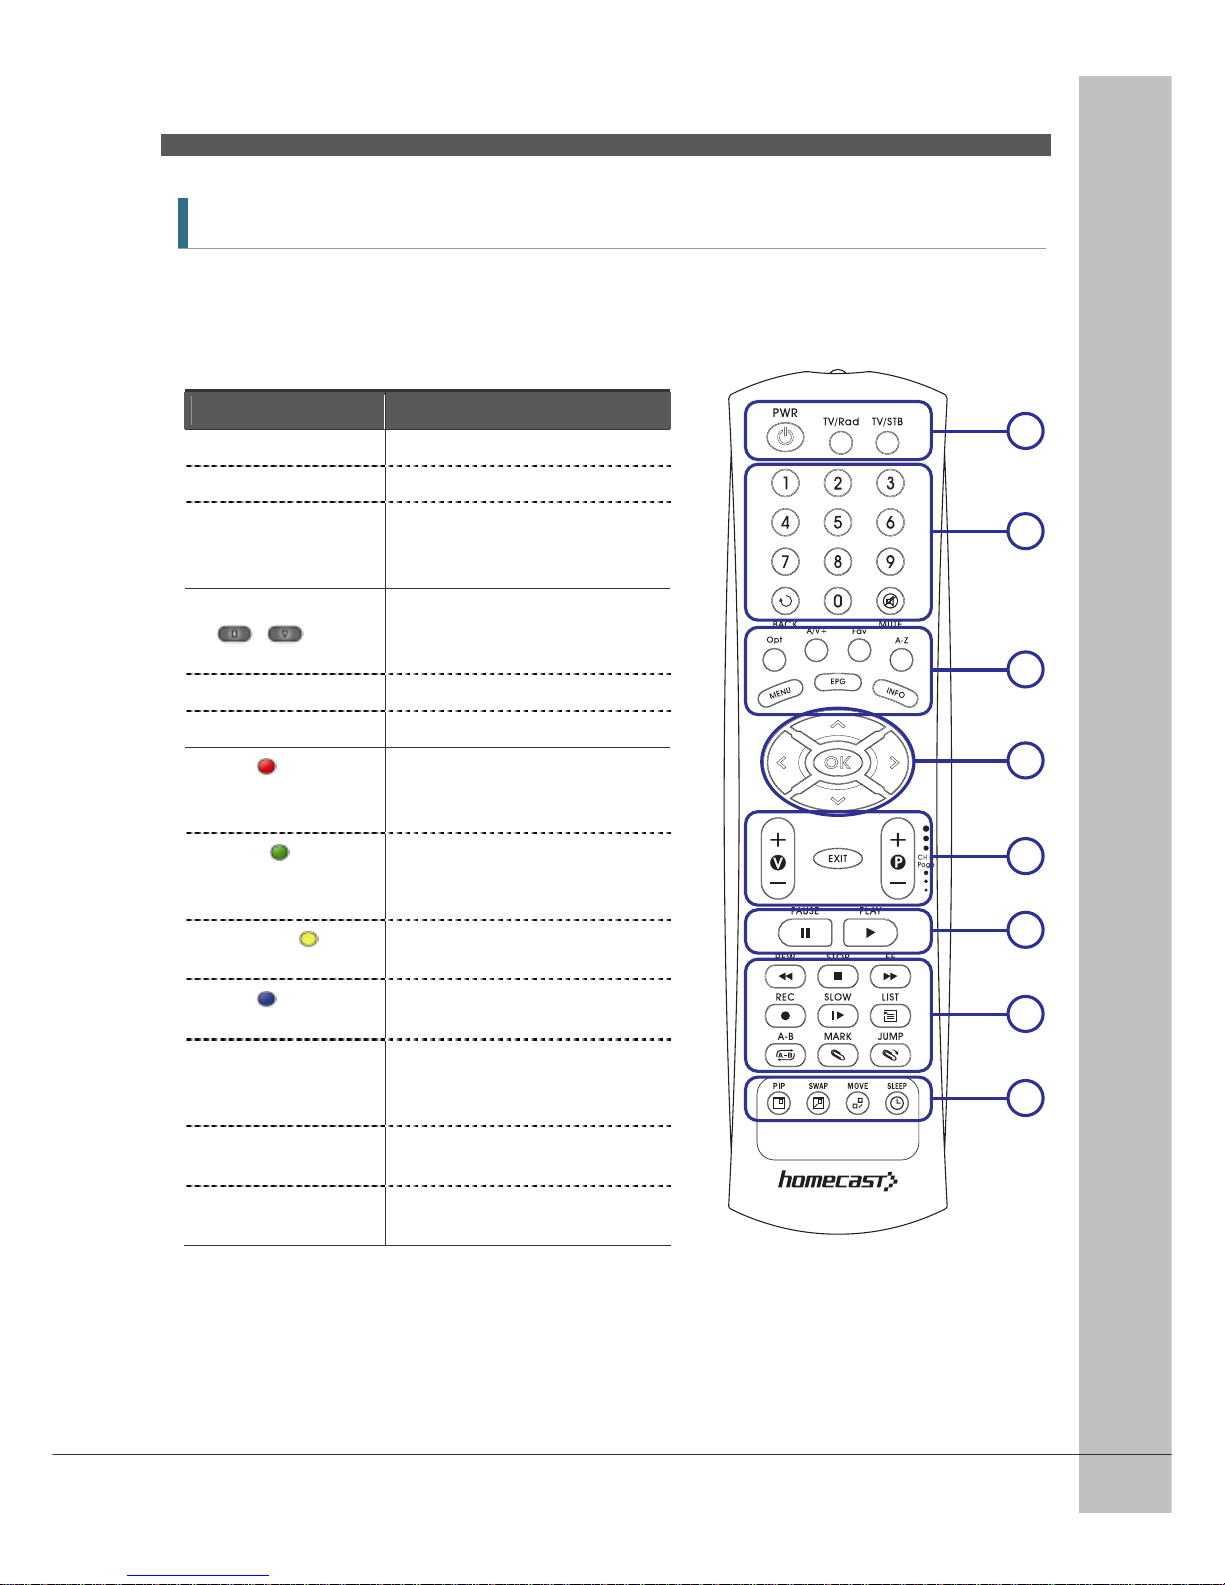
2.3 Remote Control Unit
All receiver features can be controlled with the remote cont roller.
Button Description
1. POWER
Turns the receiver On/Off.
TV/Rad
Switches between TV and Radio.
TV/STB
The TV/STB button is use d to
switch between TV and STB
mode.
2. NUMERIC Buttons
(
~ )
Select channels or can use as a
alphabetic search key in the
sorted channel lists.
BACK
Move to the previous channel.
MUTE
Turns the sound on/off.
3. OPT( )
Select the option such as Audio
Language, Teletext Language and
Subtitle Language .
A/V+( )
Select video mode (4:3, 4:3 Letter
Box, 16:9) and audio mode (Left,
Right, Stereo, Joint).
Favorite ( )
Select the group of satellite or
favorite.
A-Z ( )
Sort the channels automatically in
alphabetical order.
MENU
Display the main menu of the
receiver and come out from inner
level to viewing mode(Exit all).
EPG
Shows the TV/Radio Cha n n e l
guide.
Information
Shows the in for mation of th e
Banner and EPG.
1
2
3
4
5
6
7
8
User’s Manual
12
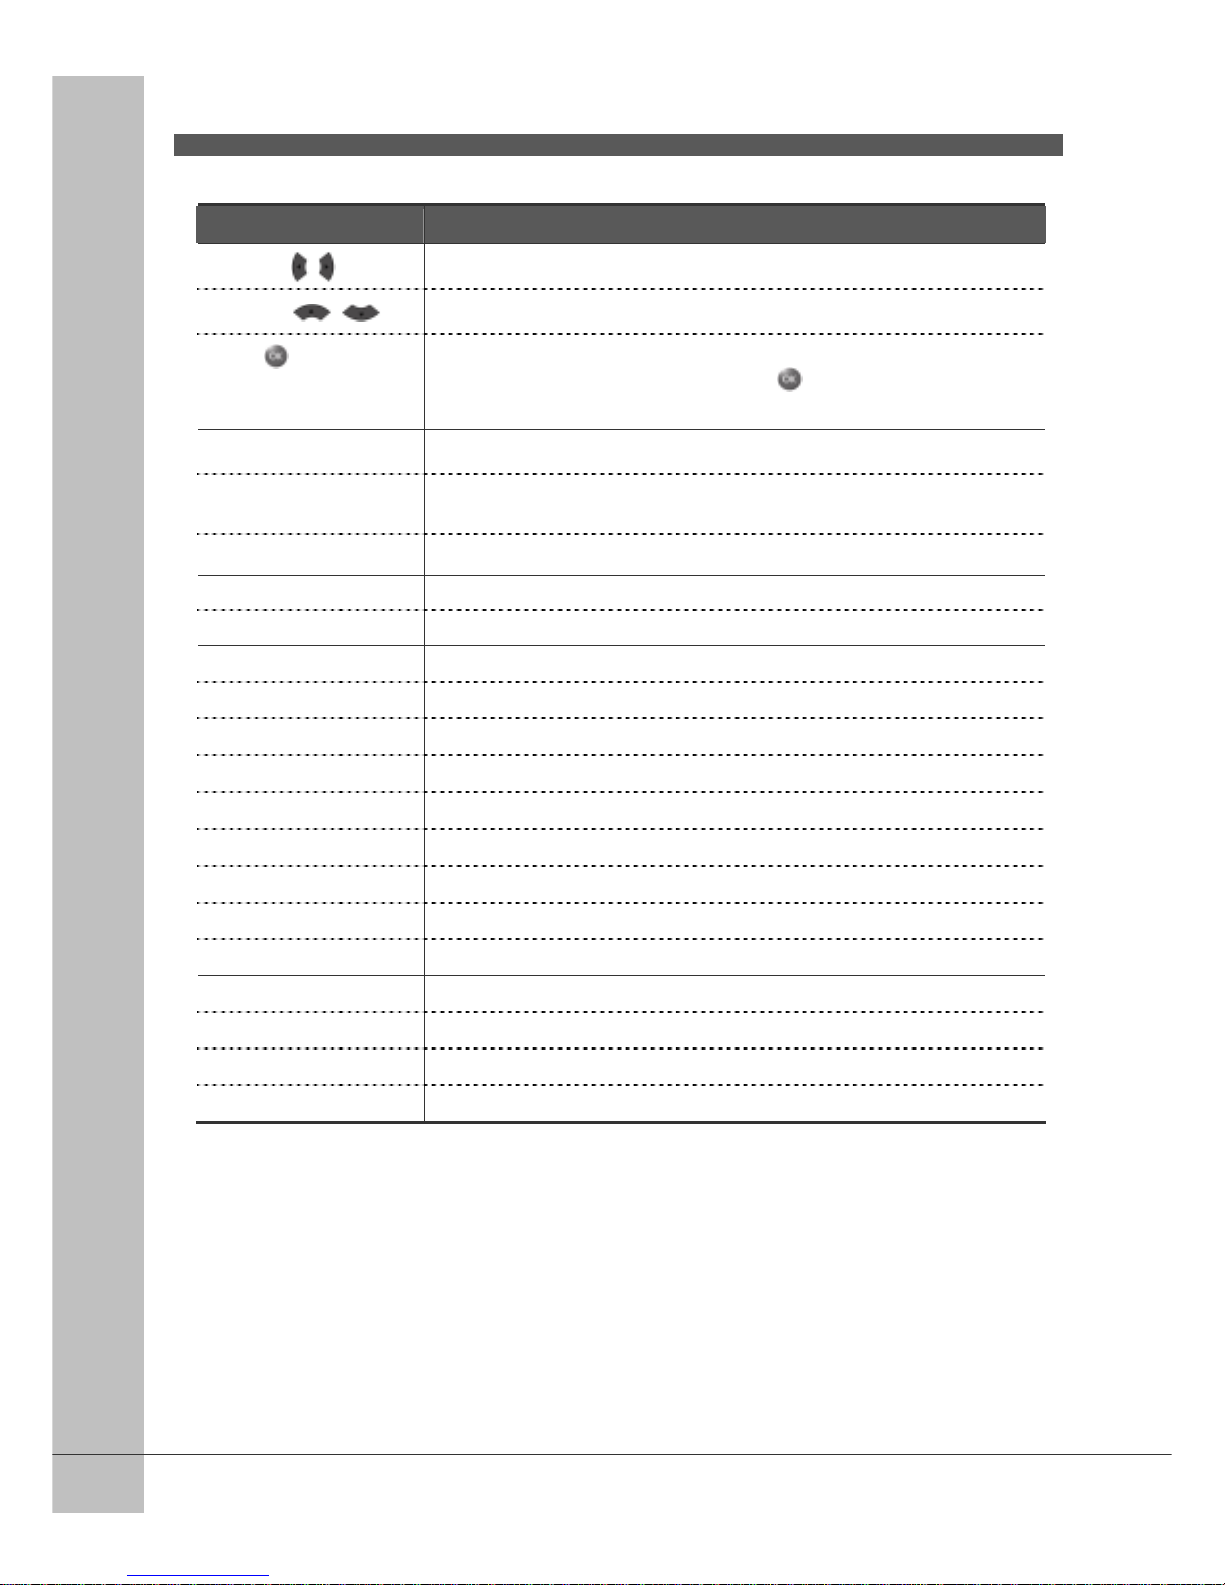
Button Description
4. ◀/▶ ( / )
Moves left/right or change settings in menu mode.
▲/▼ ( / )
Moves up/down in menu mode.
OK( )
Confirms the choices and/or selections the highlighted menu item. While
watching TV or listening to Radio, press the
button and the channel list
will appear.
5. V+/-
Changes the volume level in viewing mode.
P+/-
Changes channels in viewing mode.
Selects other menu pages wit h sub-pages.
EXIT
Go back step or exit from the menu o f the receiver.
6. PAUSE Pause playing mode, recording mode and Time Shift.
PLAY Play the recorded file.
7. REW
Rewind playback.
STOP
Stop playing mode, recording mode and Time Shift.
FF
Fast forward playback.
REC
Record the channe l.
SLOW Playback in slow mode
LIST
Display the filelist.
A-B
Set the block to repeat, copy and cut.
MARK
Set the bookmark.
JUMP
Jump to bookmarked point.
8. PIP
Watch the two channel at the same time.
SWAP
Switch between main-picture and sub-picture.
MOVE
Move sub-p icture on the PIP screen.
SLEEP
You can turn the STB off after minutes set.
User’s Manual
13
3 Connec ti ons
Install the receiver in a horizontal position.
Do not place any heavy object - such as a TV set - on the receiver.
Do not install the receiver in following environments: vibration, direct sunrays, excessive
humidity, extreme high or low temperature s, no ventilation, etc.
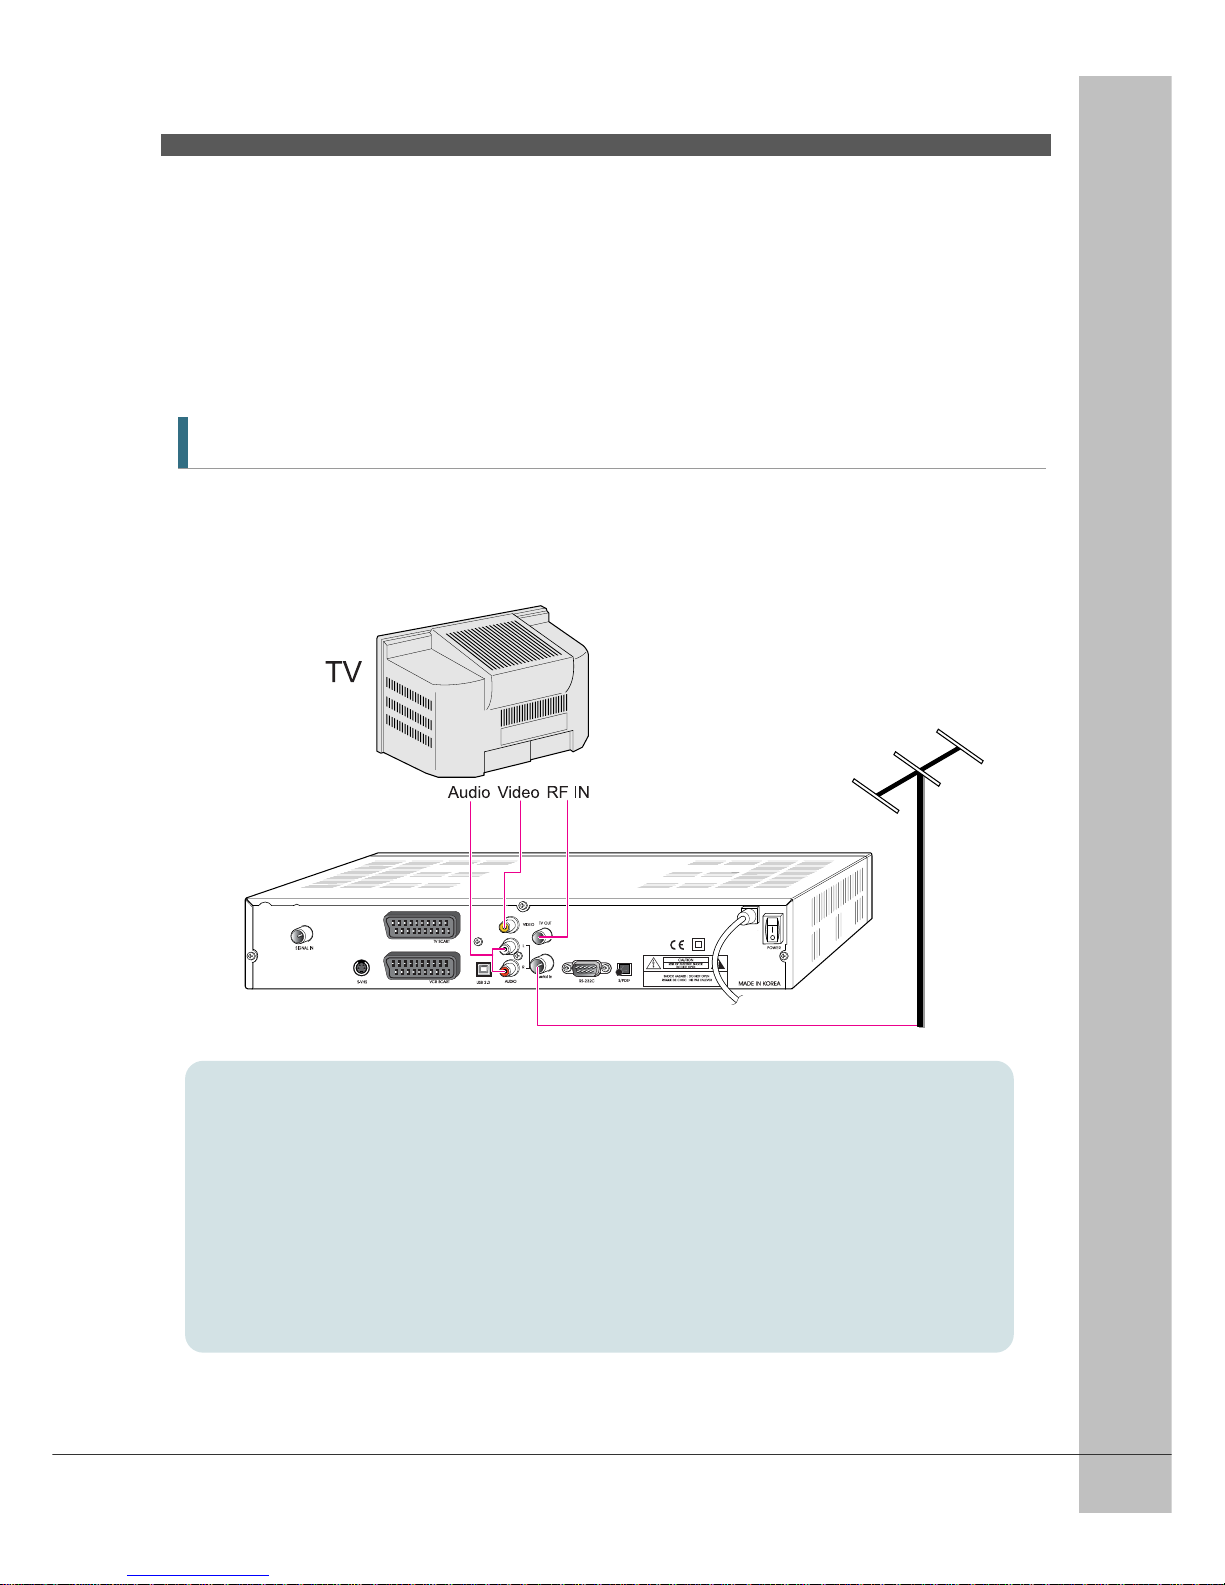
3.1 Connecting to TV & VCR
<Receiver to TV with RF>
1.
Connect the TV antenna to SIGNAL IN.
2.
Connect the RF-IN of TV to TV -OU T.
3.
Connect the Video and Audio of TV to the Video and Audio. Connect Red and White
connector to Audio R and Audio L, and Yellow into Video port respectively.
4.
Go to section 3.2, Connecting to Antenna, t hen connect your signal.
User’s Manual
14
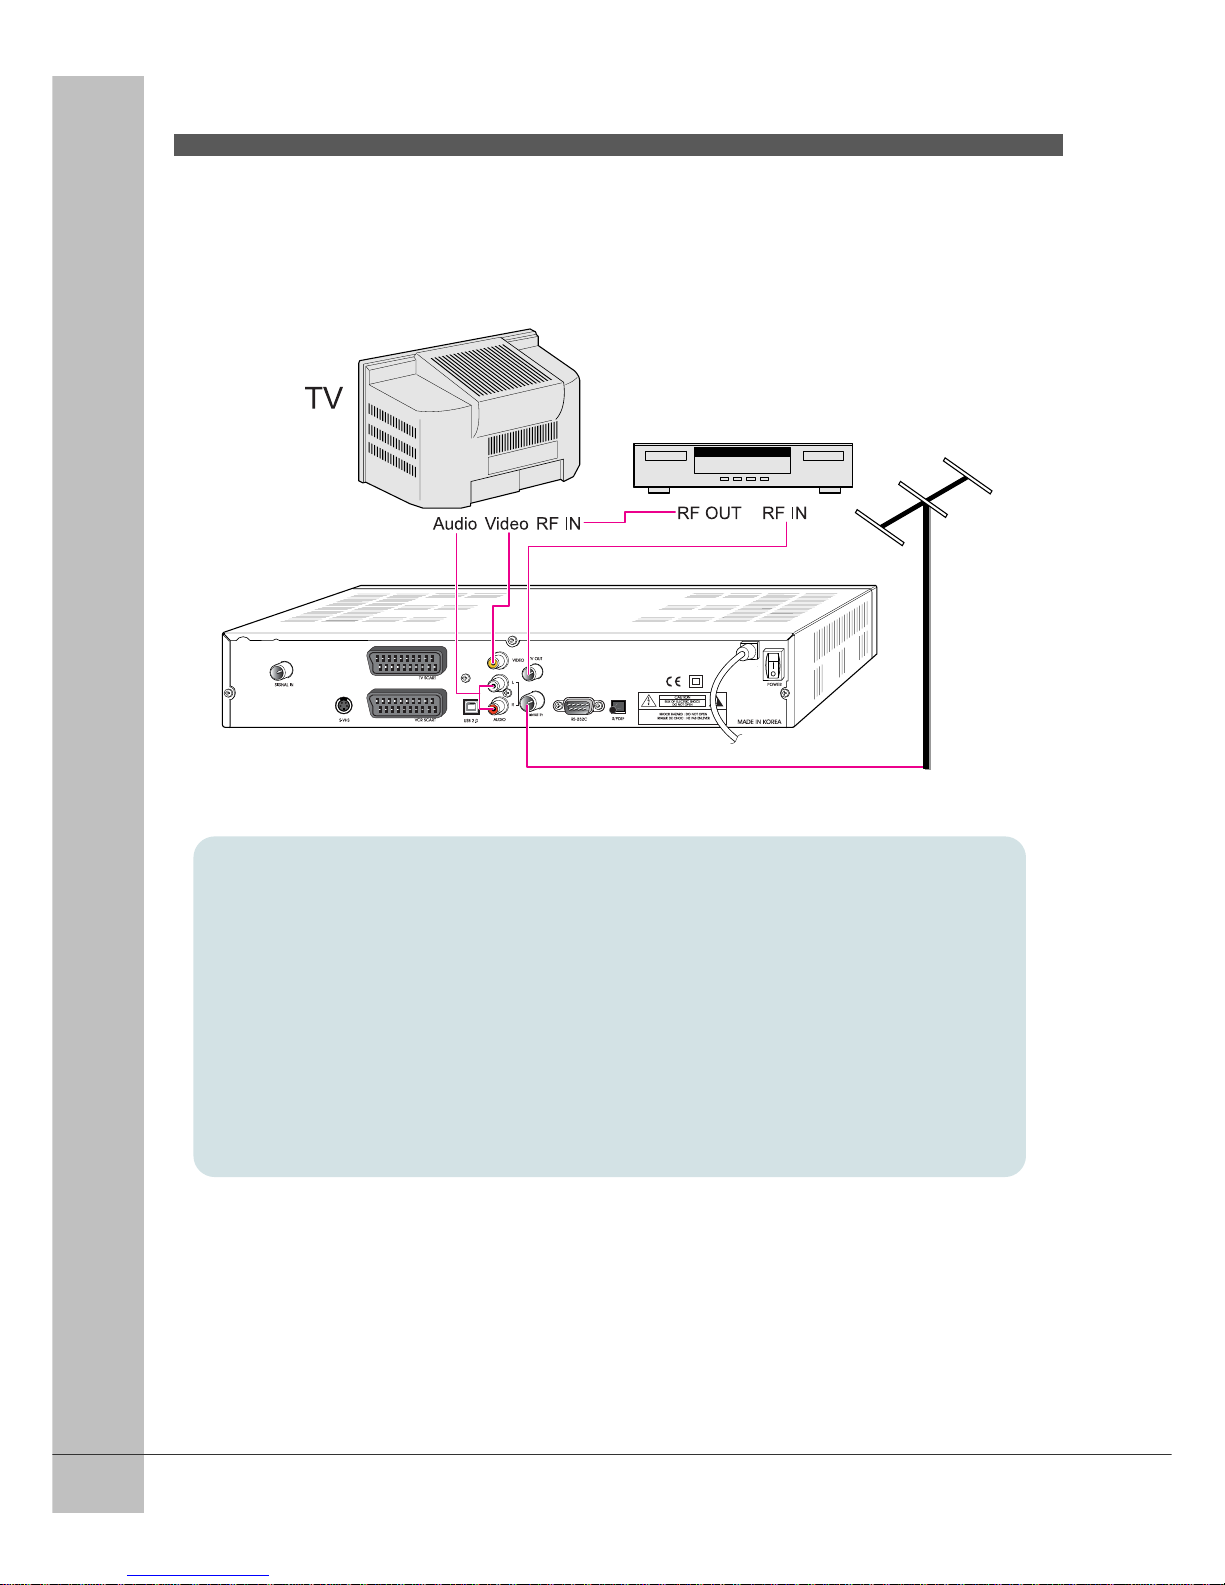
<Receiver to TV and VCR with RF>
1.
Connect the TV antenna to SIGNAL IN.
2.
Connect the RF IN of VCR to TV-OUT with RF cable.
3.
Connect the RF OUT of VCR to the RF IN of TV.
4.
Connect the Video and Audio of TV to the Video and Audio. Connect Red and White
connector to Audio R and Audio L, and Yellow into Video port respectively.
5.
Go to section 3.2, Connecting to A ntenna, then connect your signal.
User’s Manual
15
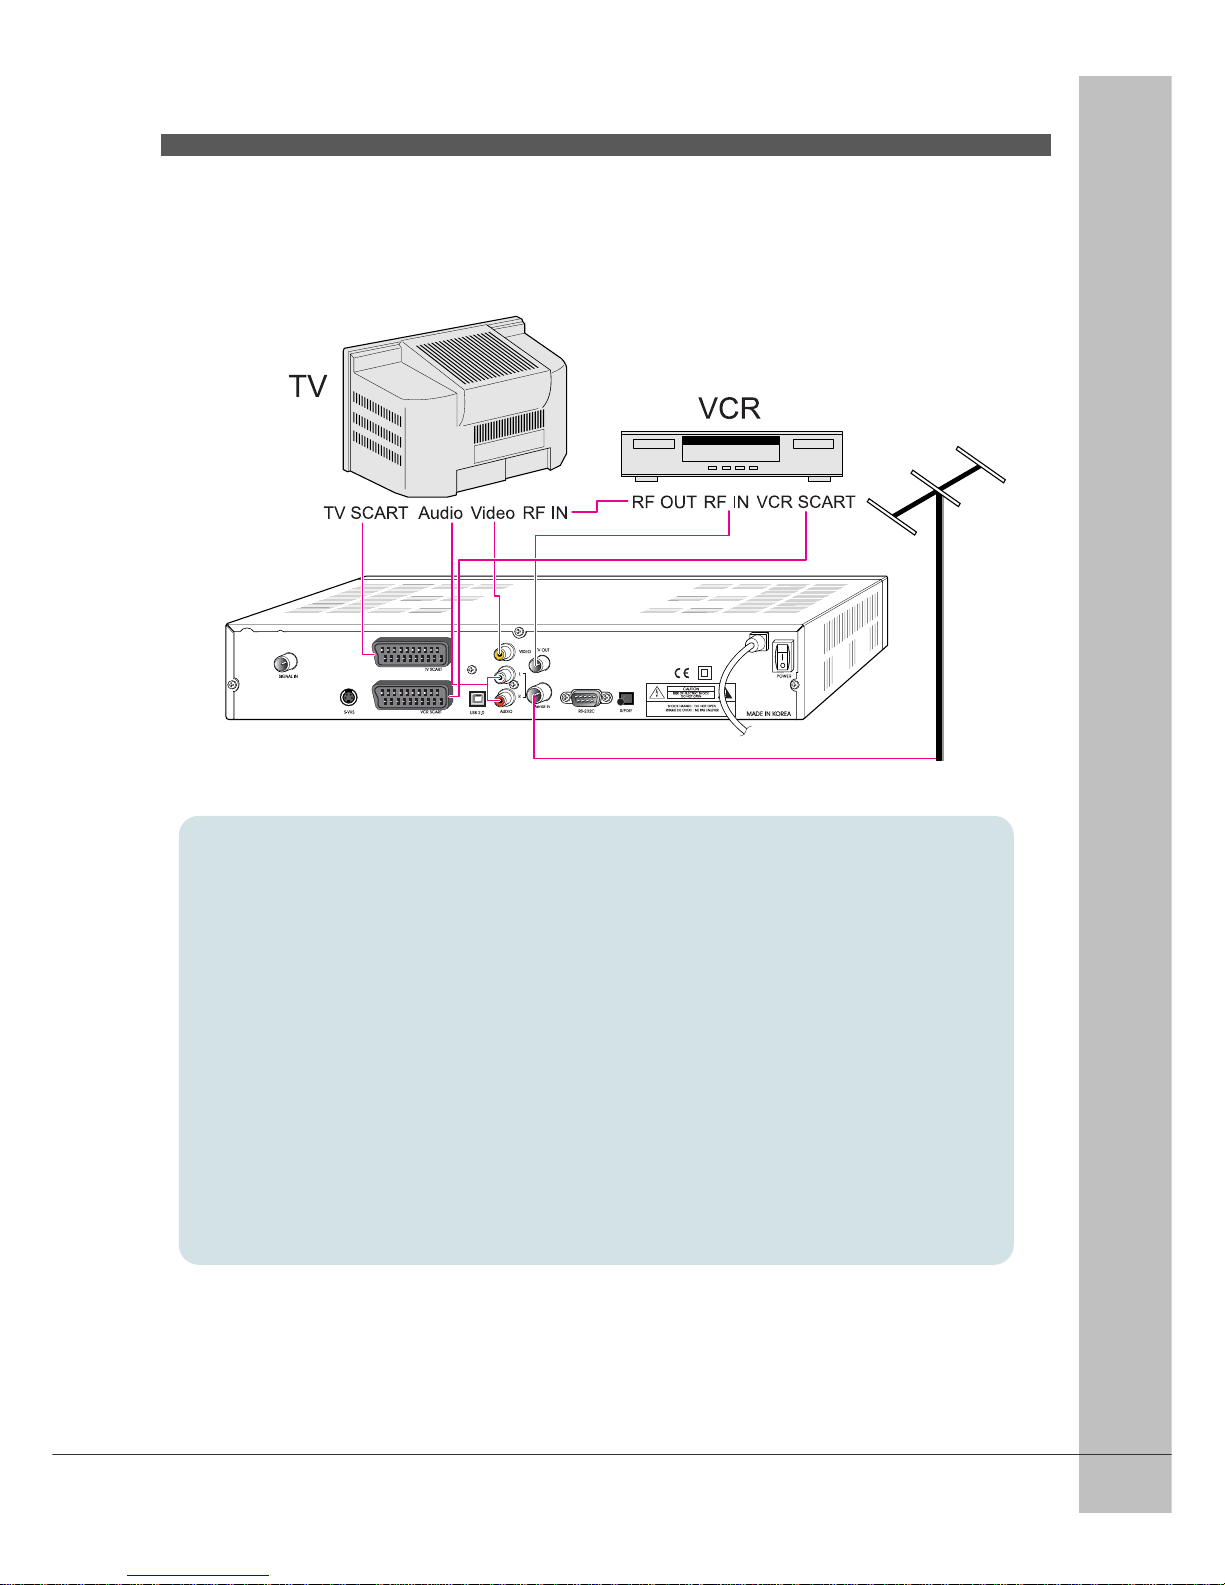
<Receiver to TV and VCR with SCART Cables>
1.
Connect the TV antenna to SIGNAL IN.
2.
Connect the RF IN of VCR to TV-OUT with the RF cable.
3.
Connect the RF OUT of VCR to the RF IN of TV.
4.
Connect the Video and Audio of TV to the Video and Audio. Connect Red and White
connector to Audio R and Audio L, and Yellow into Video port respectively.
5.
Connect the TV SCART of TV to TV with fully featured SCART cable.
6.
Connect the VCR SCART of VCR to VCR with full y featured SCART cabl e.
7.
Go to section 3.2, Connecting to Antenna, t hen connect your signal.
User’s Manual
16
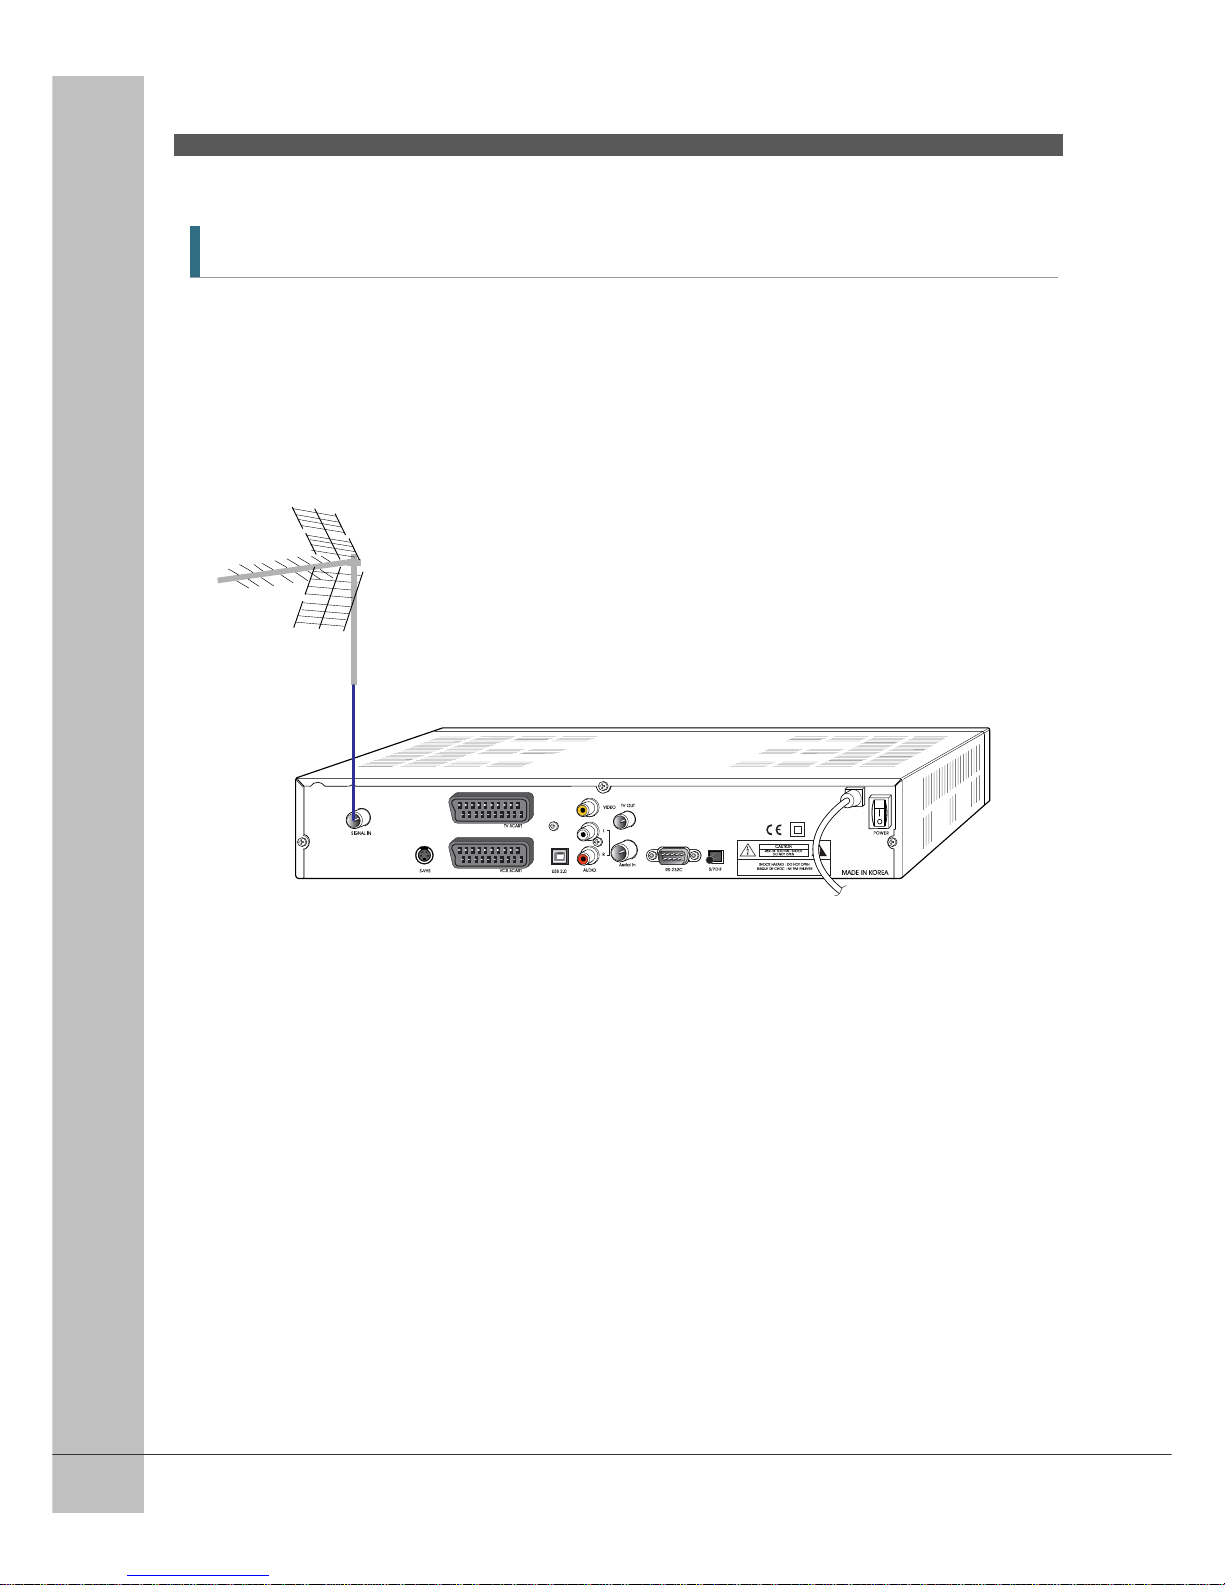
3.2 Connecting to Signal
<Signal and Tuner connection>
Connect the digital signal cable to the SIGNAL IN.
User’s Manual
17
4. Menu Overview
4.1 Menu Instruction
Press the MENU button to display the menu. You can select the sub menu using ▲/▼/◀/▶
button. The selected sub menu becomes highlighted.
When you have selected the sub menu you want, press the
button.
When you want to retur n to the pr evious menu, press the
button.
When you want to return to the live screen, press the Menu button.
4.2 Menu Help
In the menu, short information is displayed at the bottom of the screen.
: Using ▲/▼ button.
: Using P+/P- button.
: Using ◀/▶button.
: Using
button.
: Using Opt, A/V+, Fav button.
: Using button.
: Numerical button or ◀ Button.
 Loading...