

Homecast HT3000 User Manual

1
TABLE OF CONTENTS
Notice 3
Safety Information 4
1. Before You Begin 6
1.1 Features 6
1.2 A ccessories 7
2. Controls and Functions 8
2.1 Front Panel 8
2.2 Rear Panel 9
2.3 Remote Contr ol Unit 10
3. Connections 12
3.1 Connecting to the Antenna 12
3.2 Connecti ng to TV 13
4. Menu Overview 16
4.1 Menu Instructi on 16
4.2 Menu Help 16
4.3 Menu Str ucture 17
5. Menu Operation 18
5.1 First Installation 18
5.2 Installation 18
5.3 Option 20
5.6 Reset 25
5.7 Status 25
6 . View ing Gen er a l I n fo r m atio n 26
6.1 Banner Information 26
6.2 TV & Radio changing 27
6.3 TV or Radio Channel Lists 27

2
6.4 A UD Button 31
6.5 MODE Button 32
6.6 TTX Button 33
6.7 SUB Button 33
6.8 MHEG-5 EPG (Freeview Guide) 34
A dditional Informat ion 36
A .1 Troubles hooti ng 36
A.2 Technical Specifications 38
A .3 Glossary of T er ms 40

3
Notice
Read thi s manual carefully and mak e sure you underst and th e prov ided in struction s. For your
safety, check what th e r esult each action w ill be.
Wa r ning s , Ca ut io ns an d No te s
Throughout he whole manu al, pay sp ecial attent ion to the following mark s that indicate hazardou s
si t u a t i o n s .
Caution
Indicates a situation which, if not avoided, could damage the
equipment or apparatus.
Warnings
Indicates a hazardous situation which, if not avoided, could result in
s erious i njury.
Note
In dicates ad di ti onal in formatio n to the user to m ake the use r aware o f
possible probl ems and information of any importance to help the user
to understand, to use and to maintain the installation.
4
Safety Information
This digit al terrestrial receiver has been manufactured to comply with international safety standards.
Please r e ad the following saf et y p r ecautio n s car efully.
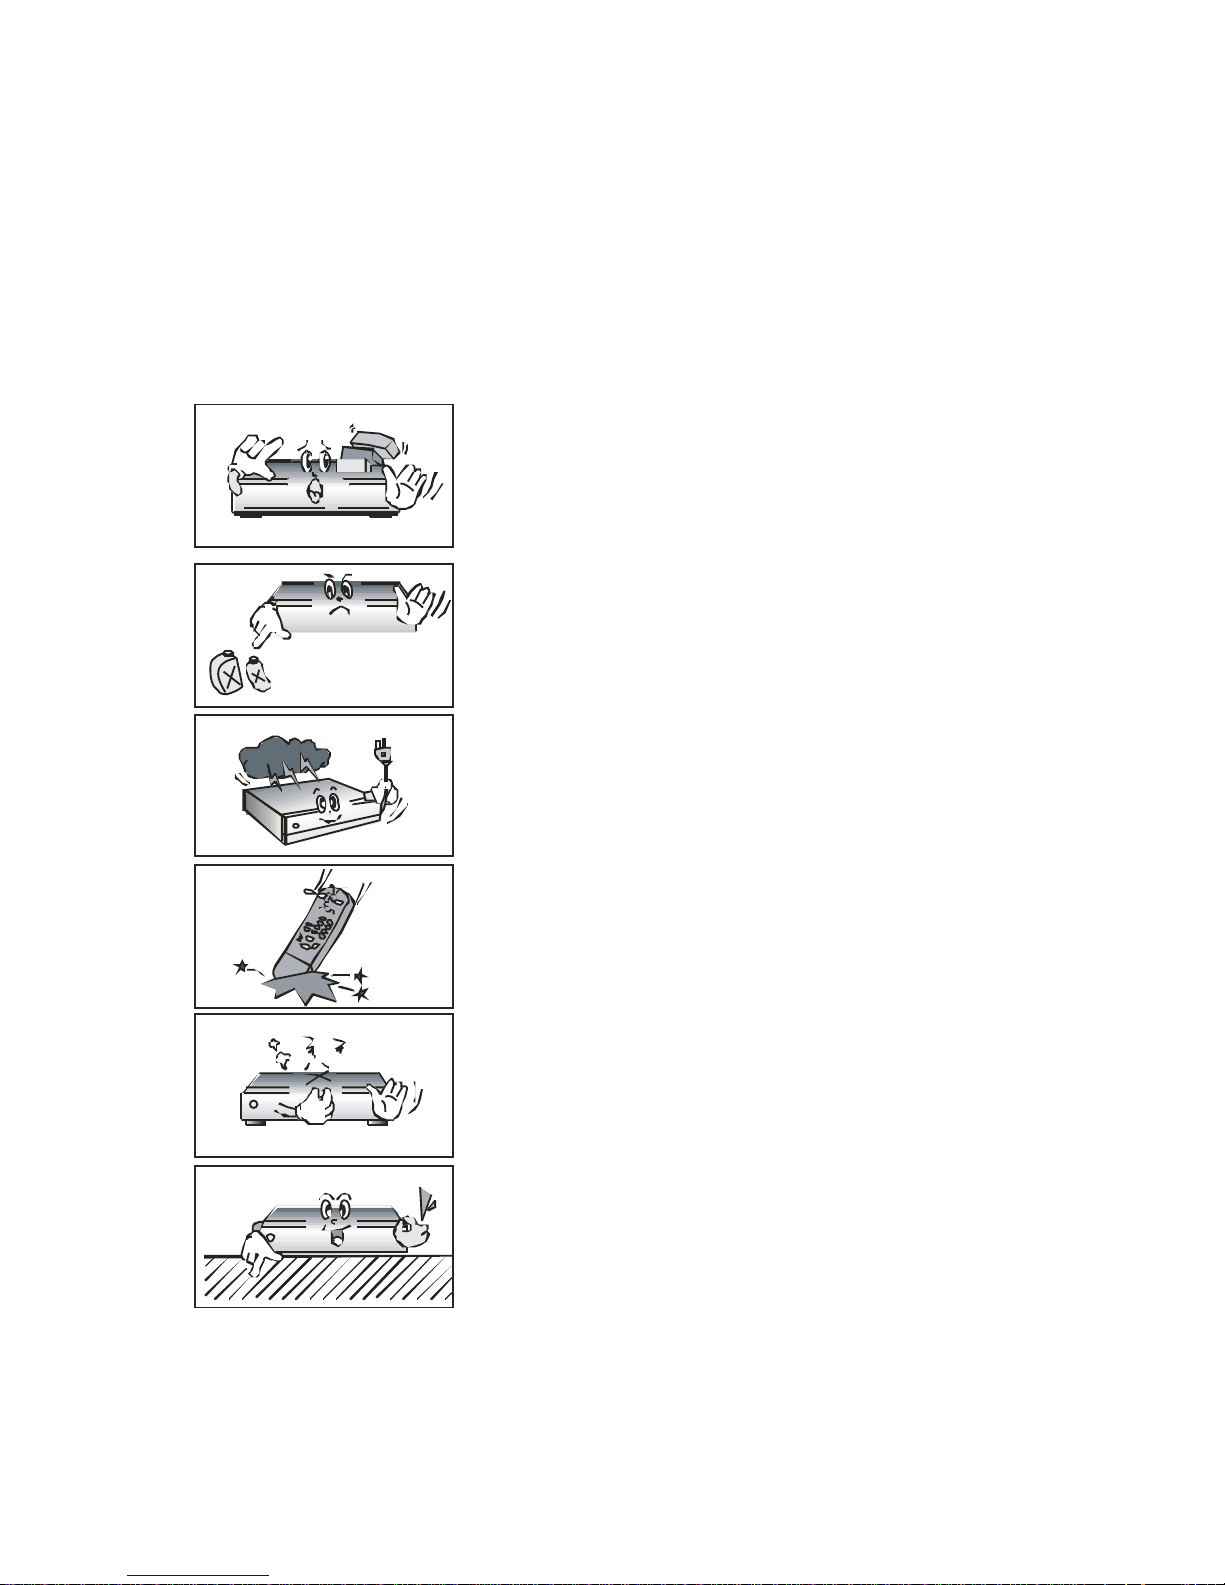
Safety Instructions and Precautions
A v oi d p la ci ng h e av y t hi ngs a n d bl o cki n g v e nt i la t i o n pa s sa ge.
(P assage bl ocki ng can ca use fir e)
Av oid scrubbing t he surf ace wi th B enzene or V olat ile gasoline. C olor
can be d a m a ge d .
Leav e the power and the ant enna off for the ling absence or during
thunder storm .
Av oid dropping and damaging Remote C ontrol U nit.
If there is smoke or burning smell, turn off & un-plug the set
immediately. C ontact your local r epair center for adv ice.
Av oid placing t he set on slippery and sla nt surf ace.
5
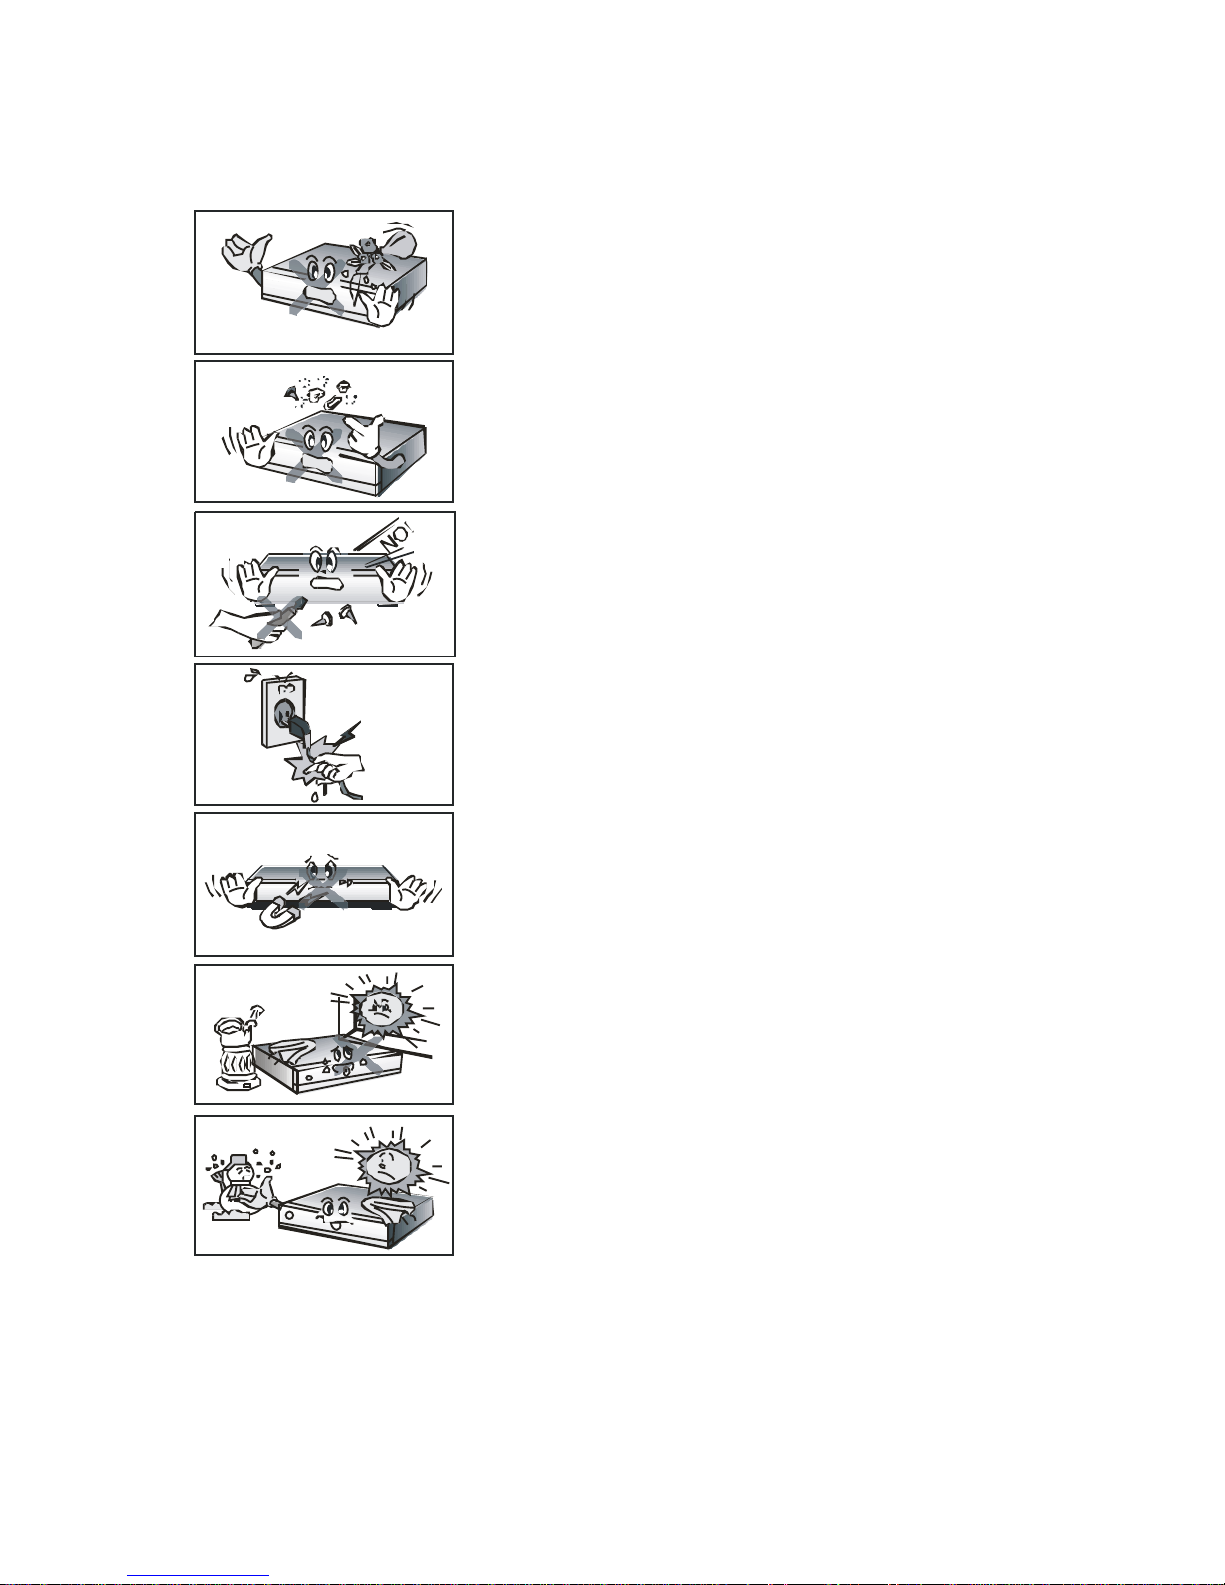
K e ep aw ay f rom t he w at er.
C lear off the dust. D ust or M etallic particles inside t he set can cause
fire and elect ric shock.
Av oid dissembling an d assembling. Do not open the set.
Do not snatch the cable to plug out.
Do not mov e t he set while power cord is plugged in.
K e ep the dist a n c e f rom M a gnet ic it em s and A udi o S pea ker.
Place the set with the good ventilation and away from the direct
sun l i ght an d h umi di t y .
Av oid the temperature of ov er 30C and below 5C.

6
1. Before You Begin
1.1 Features
MPEG-2 Video(MP@ML), MPEG-1 Audio Lay er1, Lay er2, H.264/AVC, HE-AAC, AC3(Dolby
Digital)
High Definition Digital Tuner with Loop-through
W ide Symbol Rate 8Mbps & Frequency Input 474~858MHz
S/ P DIF AC3 audio
Vector Font and 256 color GUI (G raphi c User Interface)
Multi-language menu
Variable aspect ratio with full screen, Centre Cut, Letter Box
Teletext and Subtitle supported(VBI & OSD)
In st al l at io n b y E a sy S et u p G u id e
Favorite Channel and P ar ental Lock Function
USB2.0 port or RS232C port for upgrading system software
O TA supported
HDMI (High Definition Multimedi a Interface) supported
MHEG-5 (V1.06 NZ profile): Access to a f r ee 8-d ay Freeview EPG and abili ty to acc ess
interactive TV content
7
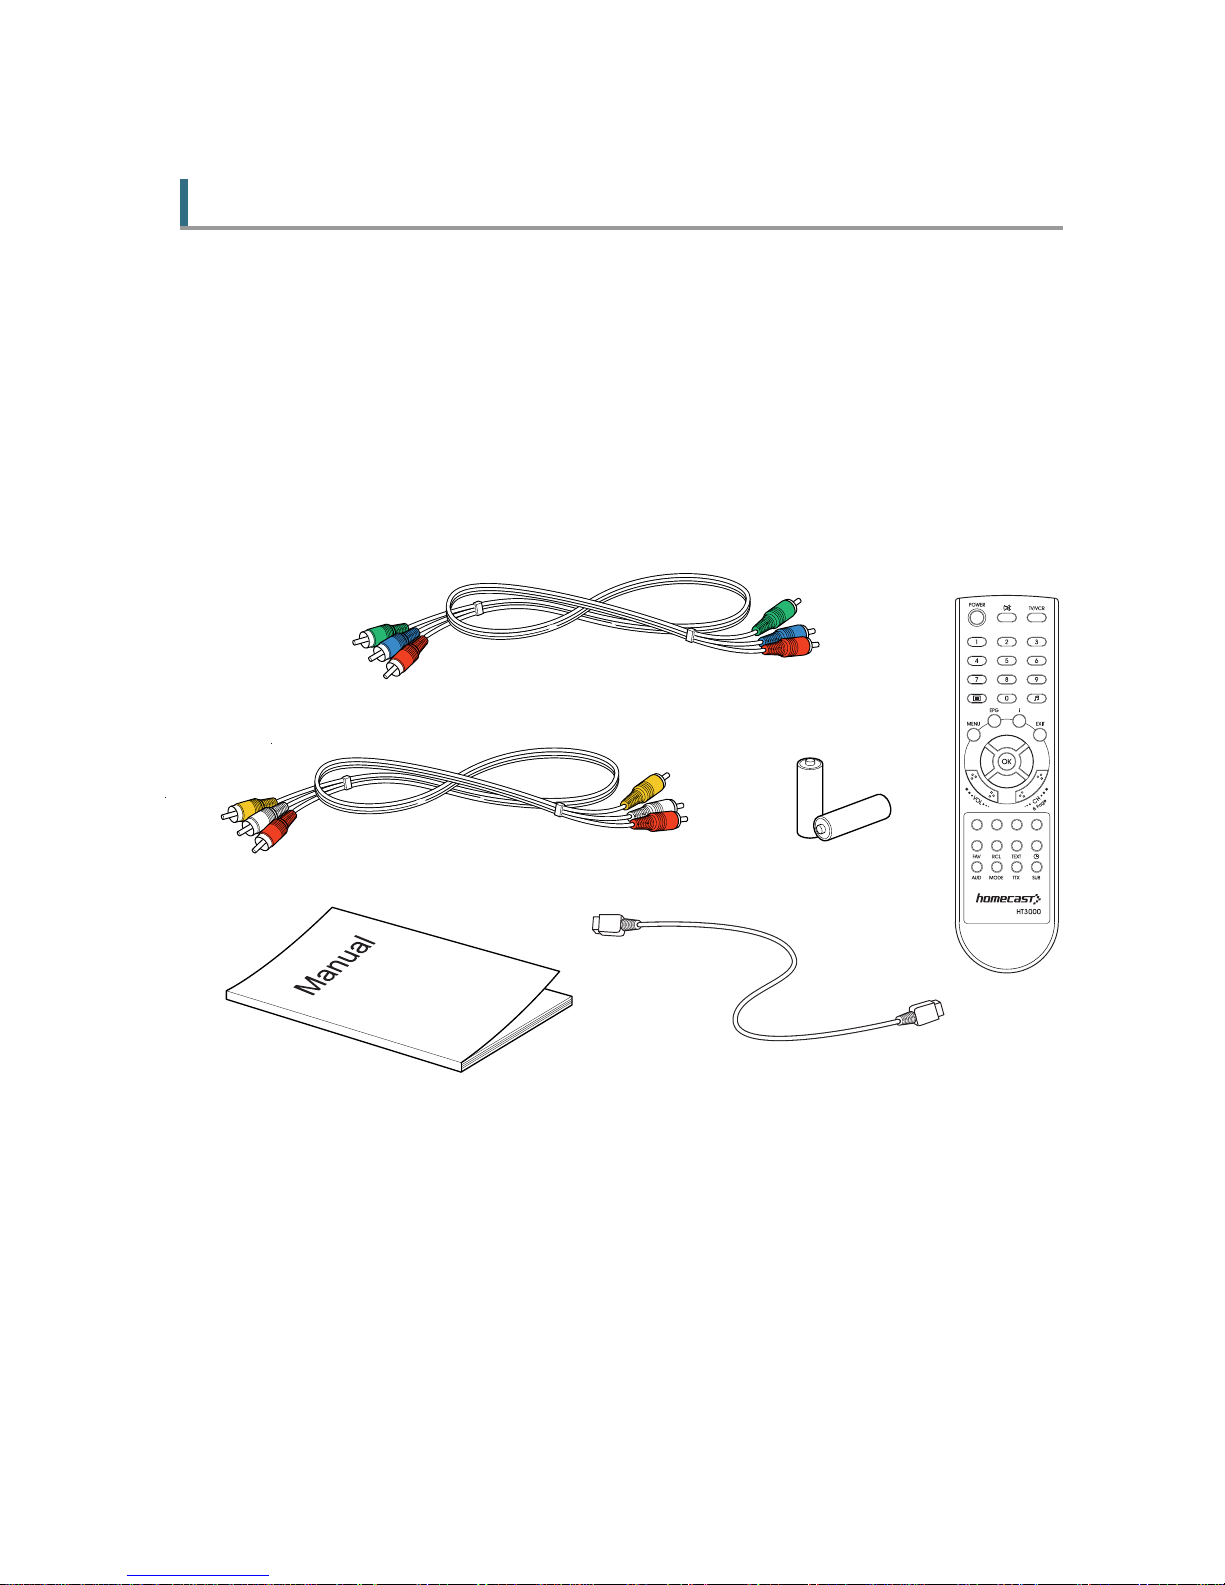
1.2 Accessories
HDMI cable
Component Cable (Red, Green, Blu e RCA co n nector s)
Composit e Cable( Yellow- Vid eo, W hite/R ed –L/ R audio )
Operating in struction (this Manual)
Re mo t e C o n t r ol
AAA dry cell batteries x 2
8
2. Controls and Functions
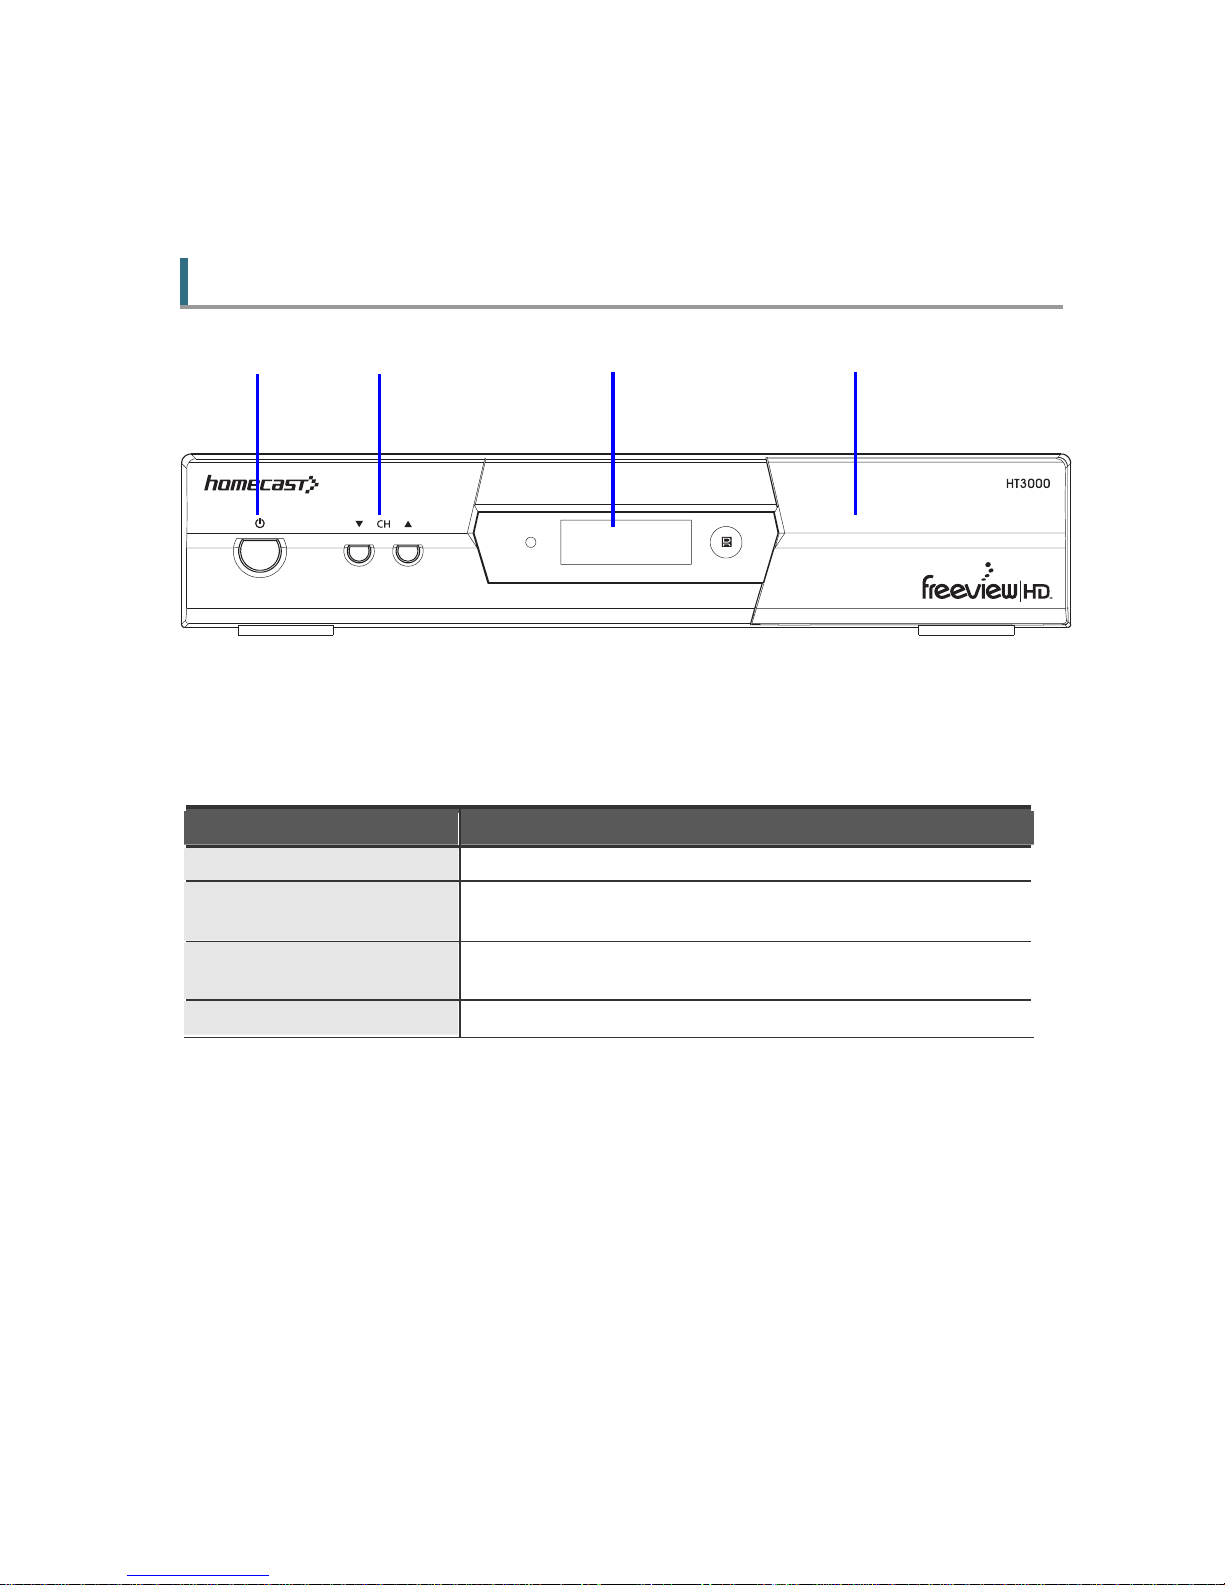
2.1 Front Panel
① ② ③ ④
Item Description
1. Power Button Turns the receiver O n/Off.
2. CH Up/Down Buttons
(▲ /▼ )
C hanges channels in operation mode
3. Display Show s channel number and indi cate operating status. In STAND BY
mode, the display show s local tim e.
4. USB port U SB Host port f or the fi rmw are upgrade i s be hind p anel
9
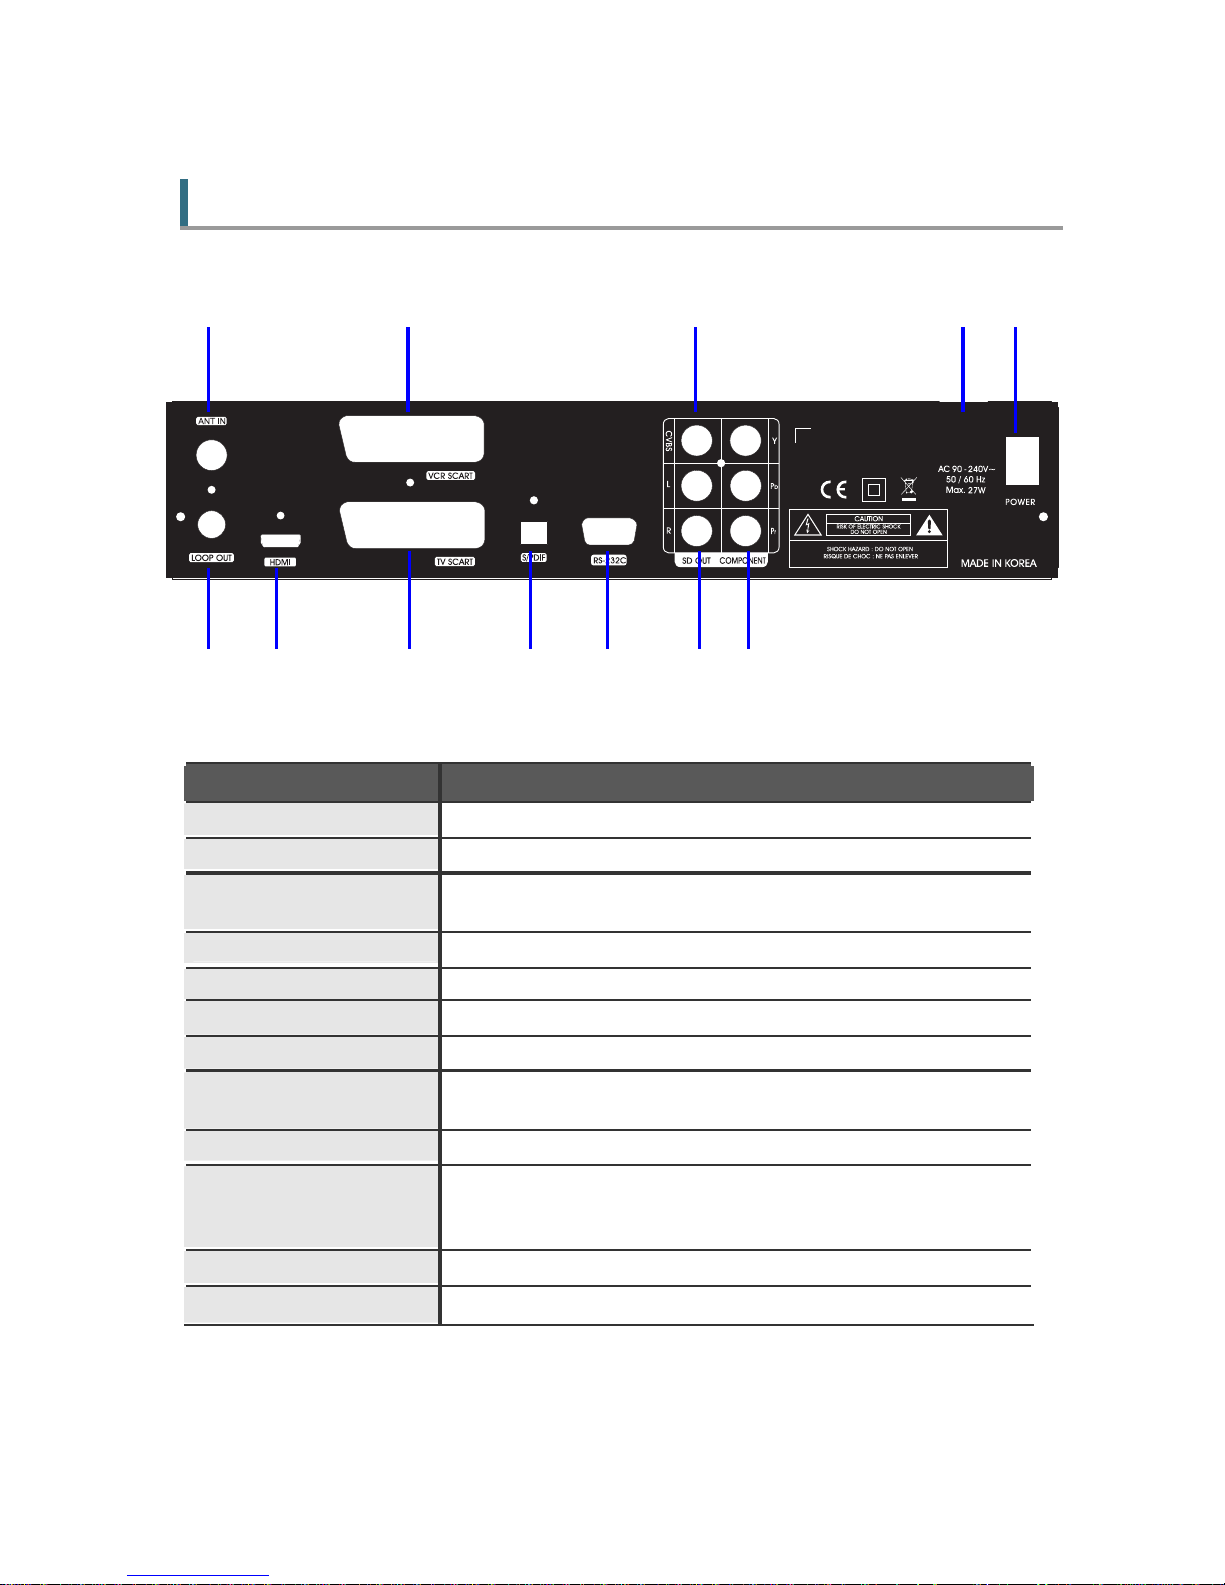
2.2 Rear Panel
① ④ ⑧ ⑪ ⑫
② ③ ⑤ ⑥ ⑦ ⑨ ⑩
Item Description
1. A NT IN C onnect A ntenna In cable.
2 . LOOP OUT Loop Out is pass-through conne ctor for A ntenna IN
3. HDMI OUT Connect to an HDMI input of TV or PC monitor.
1080i, 720 p, 576p, 576i r esolution supported.
4. VCR SCA RT Connect to a SCART to VCR
5. TV SCART Connect to a SCART to TV
6. S/PDIF Digital Audio output for connection to an amplifier.
7. RS-232C C onnect s to anot her HT3000 or a PC serial port.
8. CVBS OUT U s e t h is t o co n ne c t a co m p o si te v i de o ca b l e (C V BS -Y e l l ow ). S t an d ar d
Defi nition only (576i resolution).
9. A udio OUT Connect L/R (White, Red) analog audio cables to your TV or amplifier.
10. YPbPr OUT Use these j acks to connect Y /Pb/Pr (Green, Blue, Red) component cables
to a compone nt v ideo input on your TV. (576p and 576i resolution only
supported due to copy protection specification).
11. Power Lead 90~24 0V AC (A uto-selectable), 50~60Hz.
12. Power Switch
Turn power to the unit on/off.
10
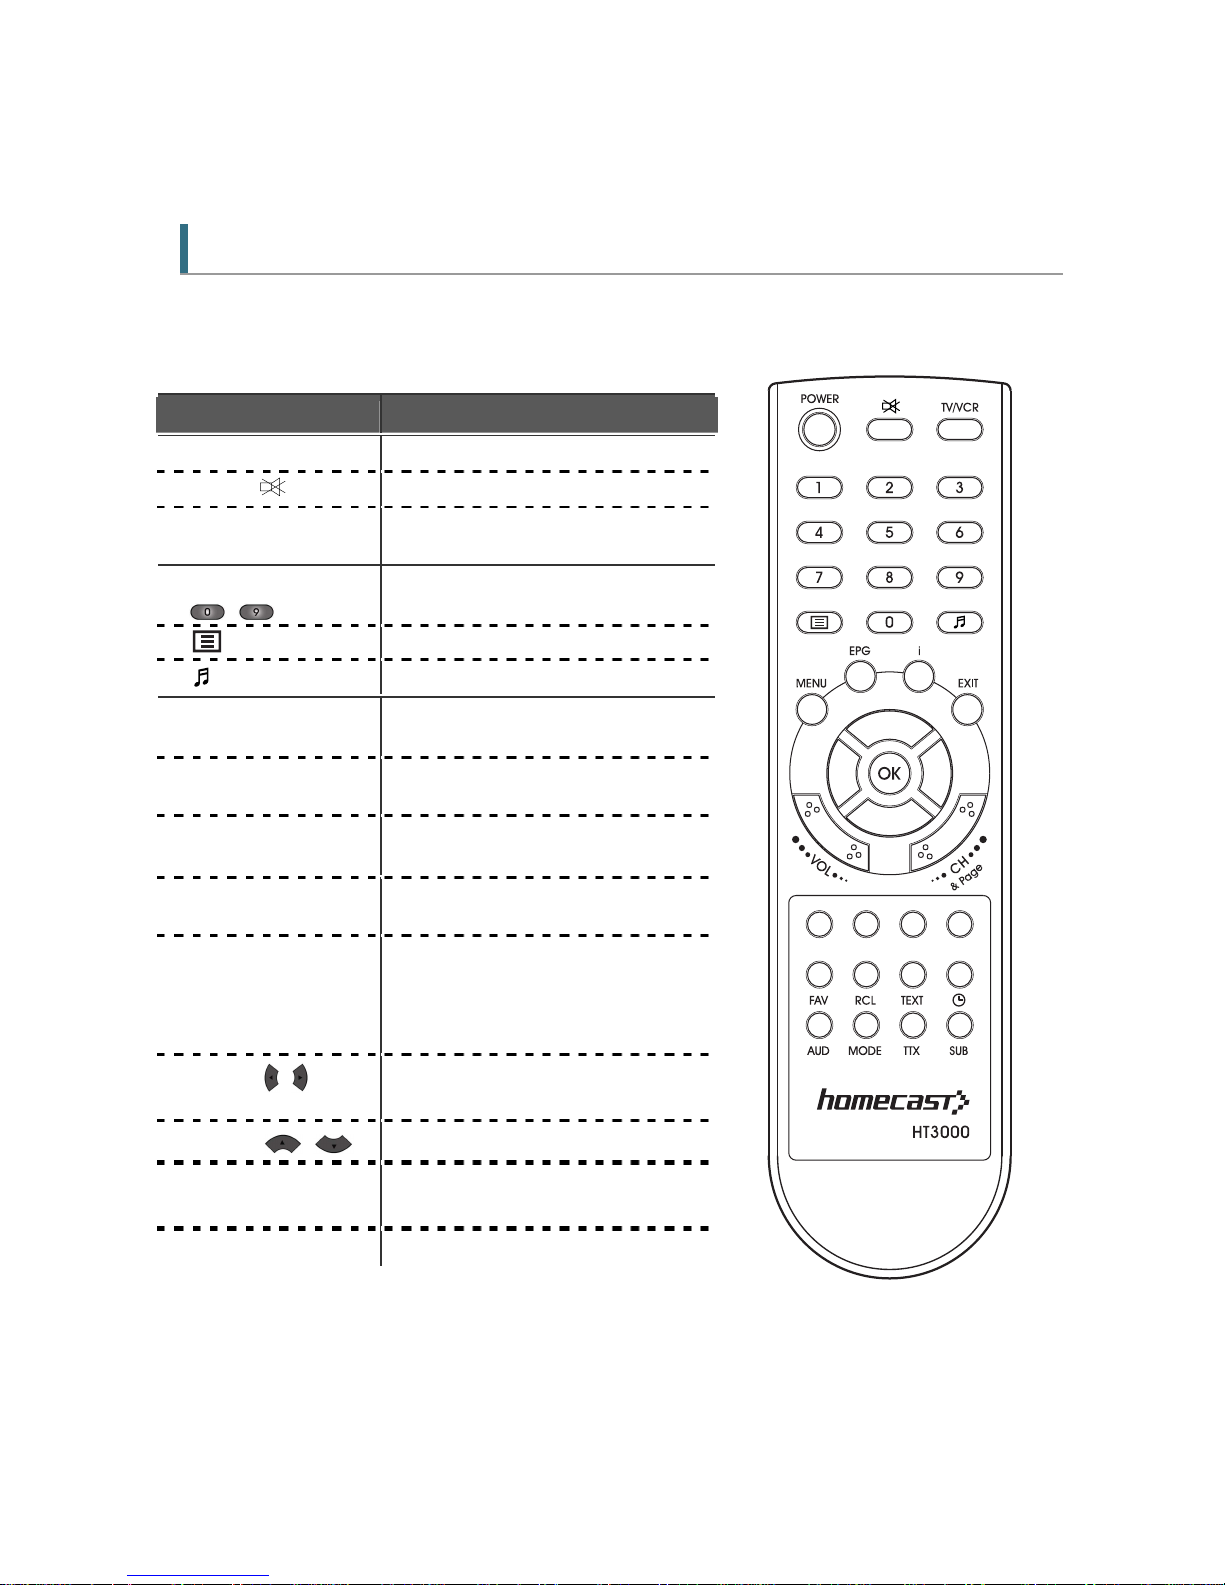
2.3 Remote Control Unit
All receiver features can be controlled with the r emote controller.
Button Description
1. POWER
Turns the receiver O n/Off.
2. MUTE
Tu r n s t he s o un d o n / o f f.
3. TV/VCR
Swi tches betw een TV and VC R mode
when connect ing TV and VCR by Scart
4. NUMERIC Buttons
(
~ )
Selects channels or use as an alphabetic
se ar ch ke y i n th e s or t e d c ha n nel li st s.
5.
Sh o w s t h e c han n el li st
6.
Tur ns o n R a di o m ode
6. MENU
Display s /Exits the main menu and E xits
to main menu from the sub-menu
7. EPG
Shows MHEG Electronic Program Guide
(EPG) - The Freeview Guide.
8. i
Shows the Channel information bar and
exte nded program inform ation
9. EXIT
Goes back on Menu level, Cancel an
O peration, or Exi t from menu
10 . O K
C onfirms the choice s and/or sele cts the
highlight ed menu item. While wat ching
TV or li st eni ng t o R a di o, p re ss t he
button to display the channel li st.
11 . ◀ /▶ ( / )
Mov es left /right or chan ge settings i n
menu & EPG
12 . ▲ /▼ ( / )
M ov e s up / do w n i n m e nu & E P G
13 . V OL +/-
Changes the volume level in viewing
mode.
14 . CH L +/ -
C hanges channel s in v iewing mode.

11
15 . C o l or butt on
(
)
Mov es in MH EG EPG Menu
16 . FA V
Selects from the group of f avorite channels.
17 . RC L
Rev erts to t he previous channel
18 . T EXT
O perates MHEG functions w hen Service is av ailable
19 .
Puts STB in Standby mode. Press repeatedly t o adjust in 30 minutes increments.
20 . A UD
Selects A udio, Teletext, S ubtitle Langua ge
21 . MO DE
Select A udio, V ideo Mode and Vi deo Format (1080i 720p, 576p, 576i )
22. TTX
Show s Teletext
23 . SU B
Shows DVB Subtitle
12
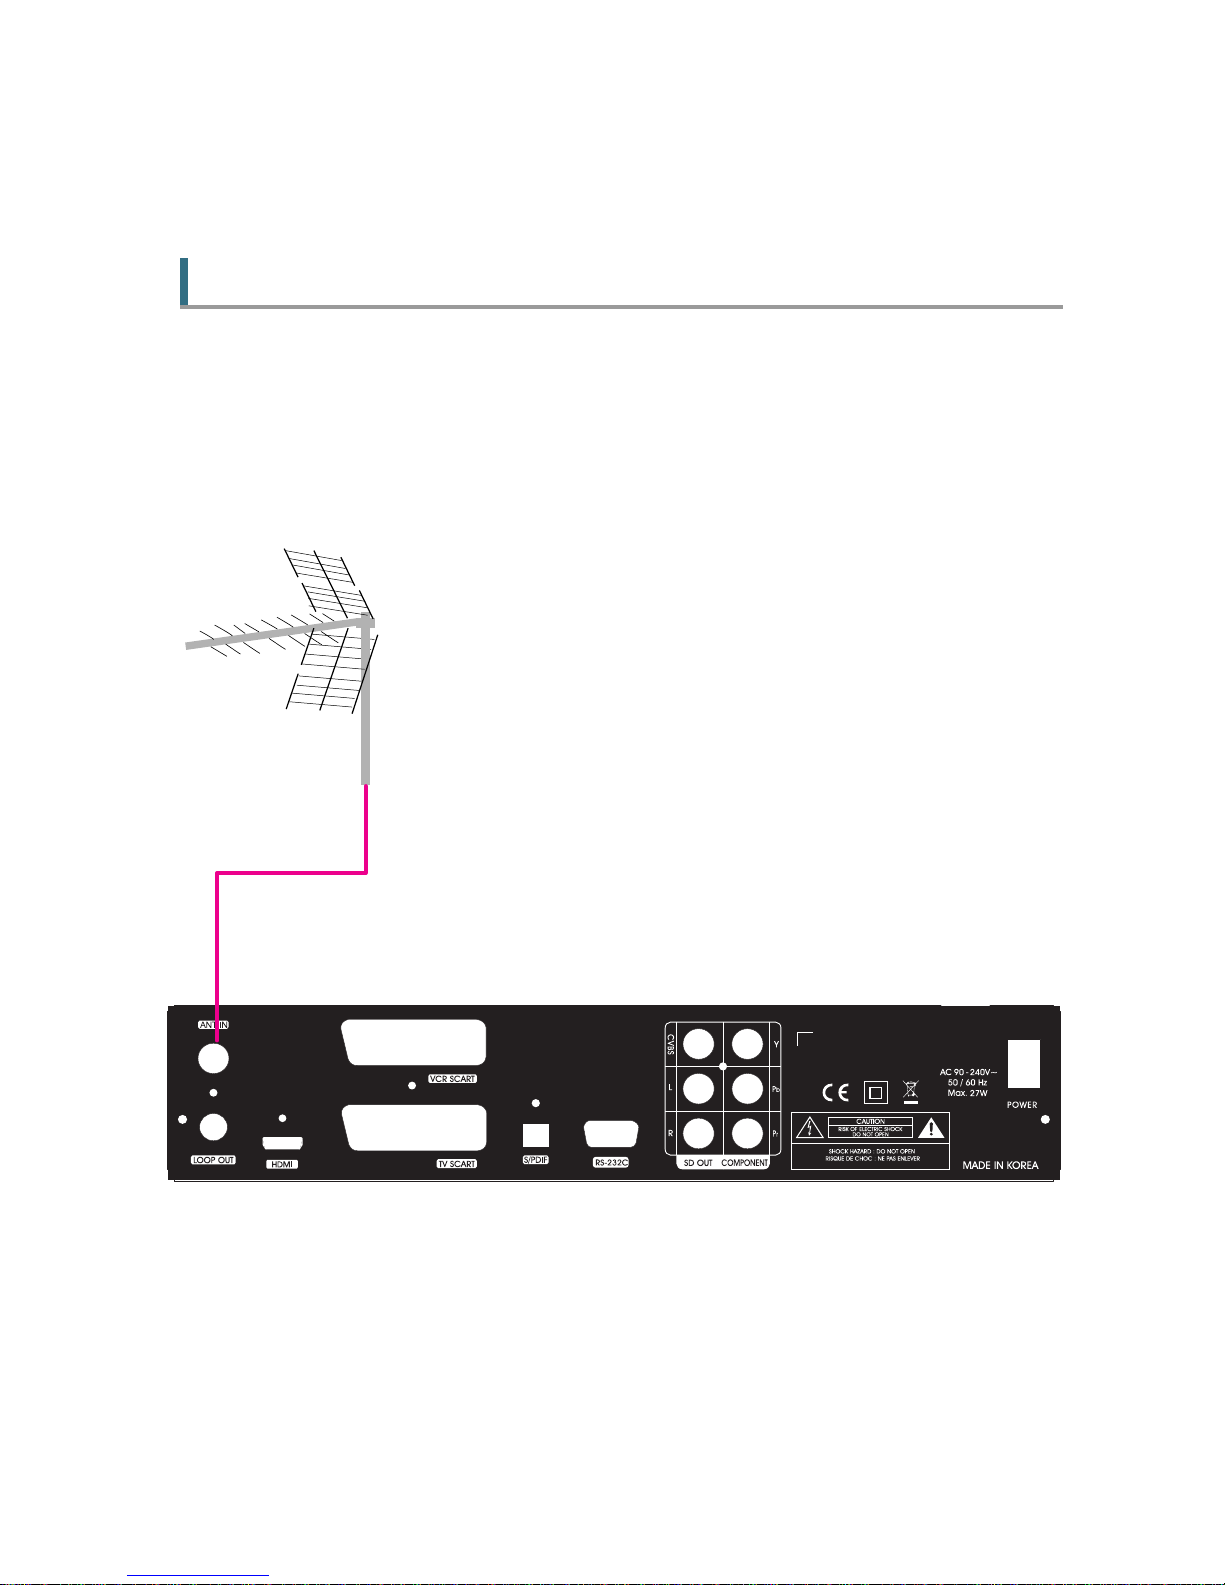
3. Connections
3.1 Connecting to the Antenna
<Making A ntenna connections>
1. Connect the antenna c able (75 ohm co-axi al) to the SIGNAL IN connector.
2. For passing the antenna signal through to another device (such as a VCR and your TV),
connect an appropriat e 75 ohm co-axi al cable from the Loop Out connector of HT3000
(The Loop Out connection will pass the antenna signal through to your device-even when
HT3000 is in Standby mode (or Tu rn off at the switch)
 Loading...