

Hollywood Sport Rider HR1000 Instruction Manual
Sport Rider
1
P
WHEEL TUBE STOP SCREWS 2
O
HOLLYWOOD RACKS
Pour instructions en Français, continuer aux pages 6 et 7.
B
Instruction Manual
Model HR1000 – 2 Bike Hitch Rack with ratcheting hooks
Not to be used on any trailer, fifth
wheel or vehicle being towed by
another vehicle
Weight Limit 45lbs/20 kg per bike
2 bike maximum capacity
Optional locking kits available
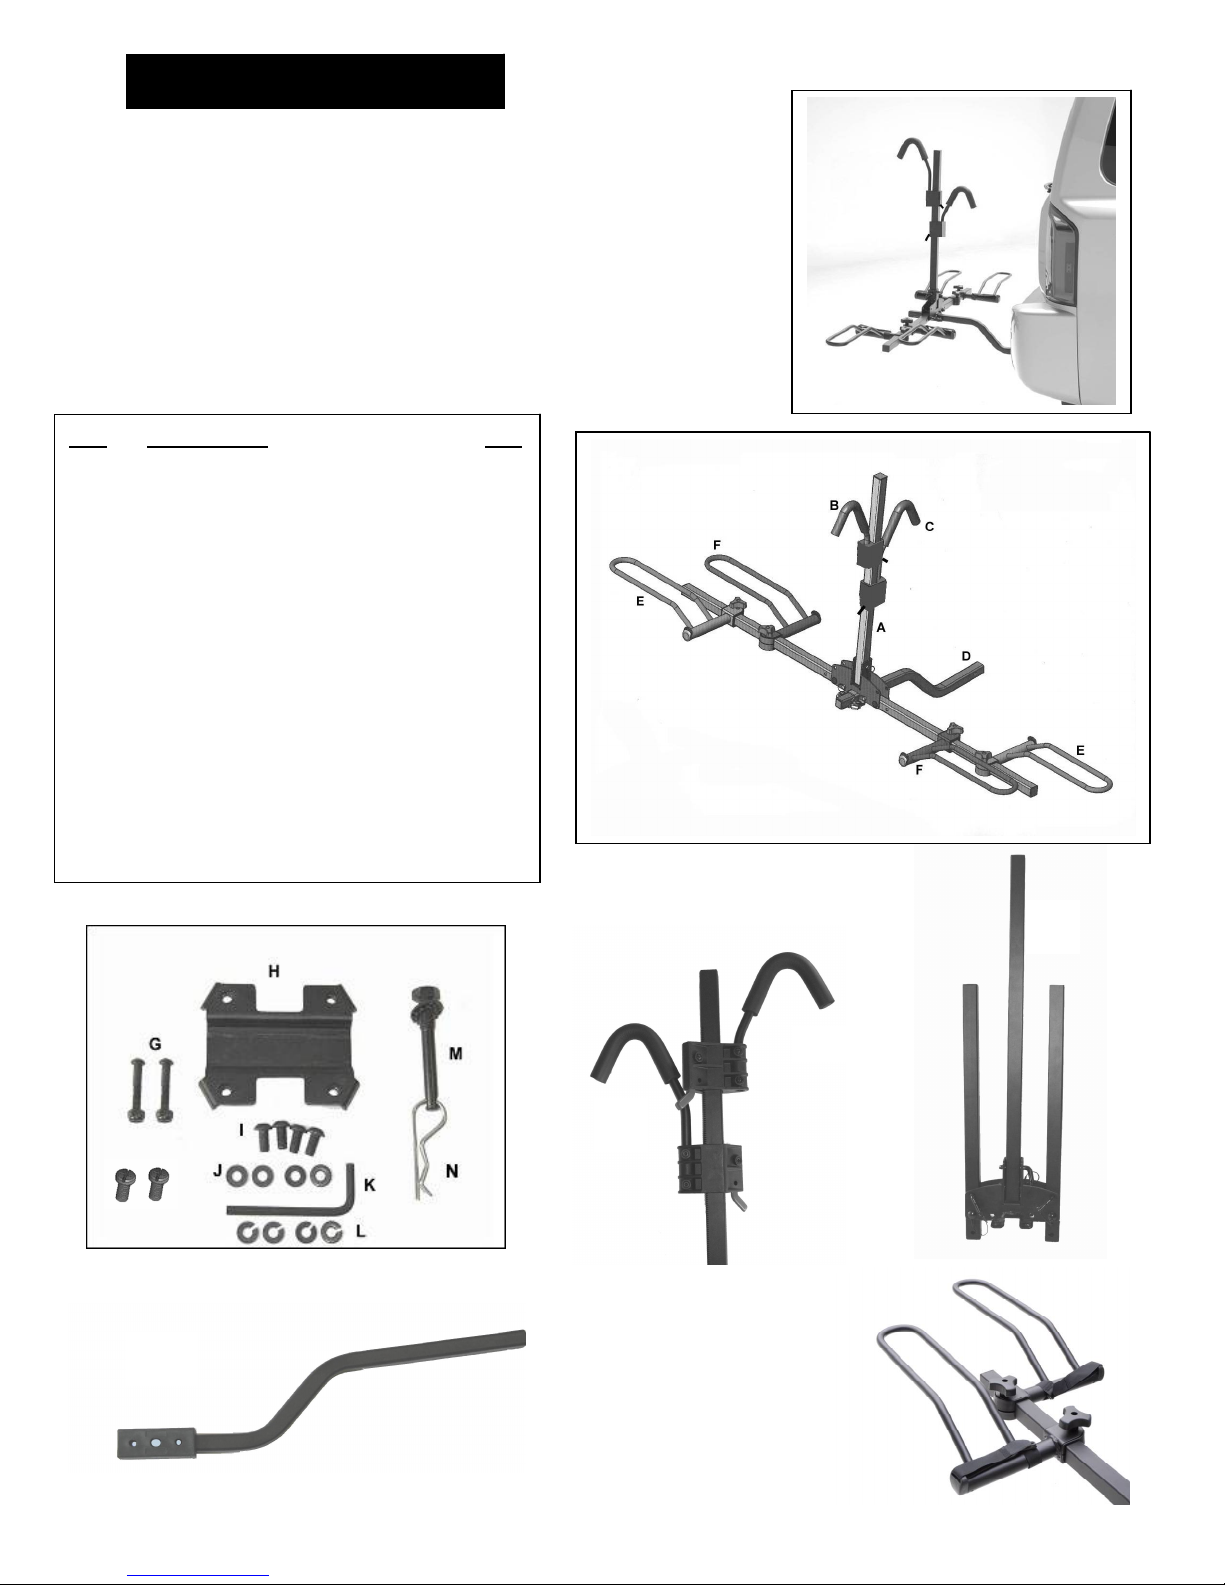
ID# Description Qty
A MAIN RACK ASSY 1
B SHORT FRAME HOOK 1
C LONG FRAME HOOK 1
D RECEIVER TUBE & SPACER
E LEFT SIDE WHEEL TRAY 2
F RIGHT SIDE WHEEL TRAY 2
G REC. TUBE STOP BOLTS 2
H LOWER BRACKET 1
I 8MM BOLTS 4
J FLAT WASHERS 4
K 5MM HEX KEY 1
L LOCK WASHERS 2
M ½-13 THREADED HITCH PIN 1
N HITCH PIN CLIP 1
D
A
C
F
E
1
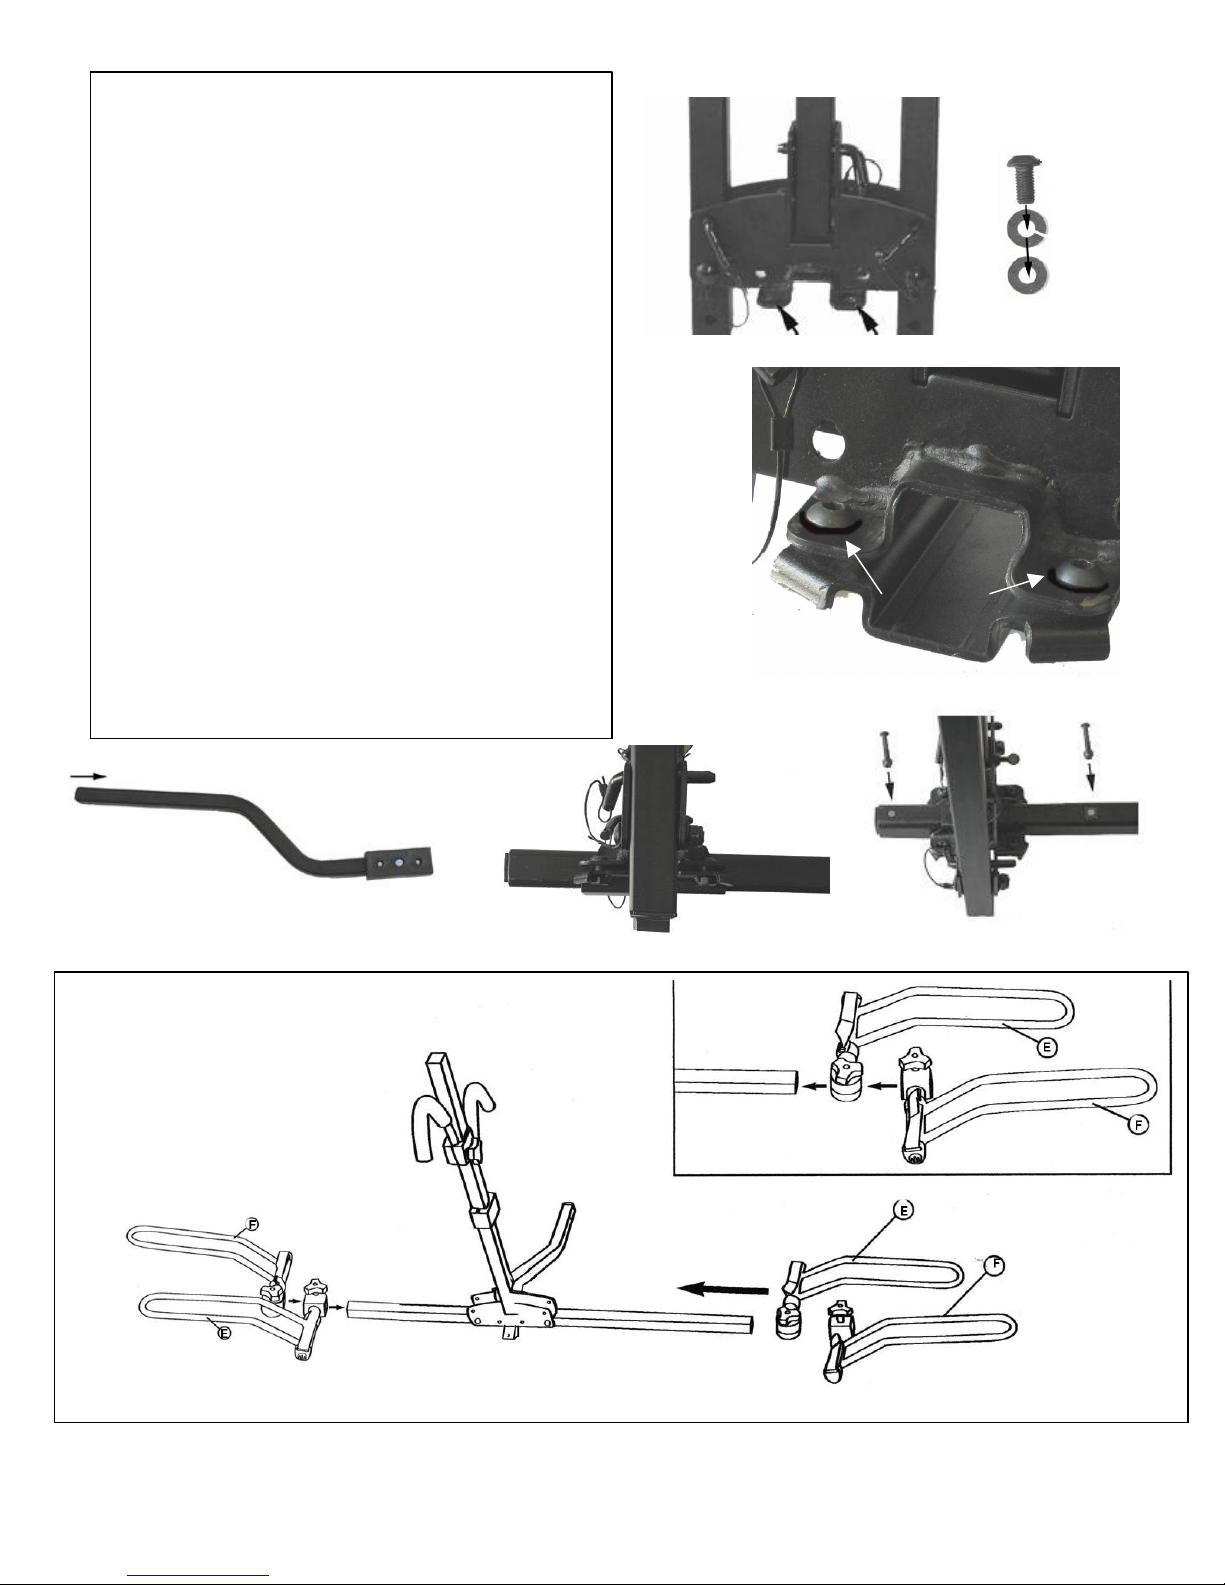
Fig. 1
Assembly & Installation Procedure:
Step 1: Locate holes on main rack assembly,
bracket and hardware (Fig. 1)
Step 2: Loosely assemble bracket to main
rack as shown in Fig. 2 & 3. Bolts (I) inserts
through lock washer (L), then flat washer (J),
then top plate and into bottom plate Do Not
tighten!
Step 3: Slide main rack assembly onto
Receiver tube as shown in Fig. 4 & 5.
Adjust position so that is 3 or 4 inches
between the end of the rack and end of the
receiver tube. Tighten using hex wrench
provided or equivalent. Note: Final position
of vertical portion of the rack can be readjusted after you have installed the rack on
your vehicle
Step 4. Insert “stop bolts” (G) through hole in
receiver tube as indicated.
See Fig. 6.
Fig. 2
Fig. 3
washers
Fig. 4
Step 5a: Install Wheel holders:
Fig. 5
Fig. 6
Fig. 7

Step 6: Install frame hooks:
vehicle. You should hear be able
Step 6A:
Installing into a 1 ¼” trailer
Note: The receiver tube comes
washer and flat washer
hitch pin bolt and tighten securely
using a ¾” wrench.
bolt as indicated. Insert the receiver tube into the
Fig. 13
Fig. 14
Fig. 15
Important! When inserting the hitch pin
plastic spacer.
Slide long frame hook down
vertical post facing vehicle.
Then slide short frame hook
onto post, facing away from
to hear the spring loaded lever
engaging the teeth on the post
as shown in fig. 8.
ready for installation into a 2”
hitch. If you have a 1 ¼” hitch,
use the provided hex wrench to
remove the plastic spacer as
shown in Fig. 9.
Place lock
onto hitch pin bolt as indicated.
Insert the receiver tube into the
hitch. Align the holes, insert the
Fig. 9
Fig. 8
Fig. 10
Step 6 B: Installing into a 2”trailer hitch
Place lock washer and flat washer onto hitch pin
hitch. Align the holes, insert the hitch pin bolt
and tighten securely using a ¾” wrench.
Fig. 12
Fig. 11
bolt, the bolt should pass through the
receiver tube first then through the
Install Hitch pin clip
after tightening bolt
3
 Loading...