

Hollywood Elevator Rack F10 Installation Instructions Manual
Hollywood Racks
F10 Elevator Rack Instructions
When using your Elevator Rack, always remember the following points:
Install this rack on structurally sound boot lids and/or bumpers only.
Never install upper hooks to plastic, glass or fiberglass.
Clean surface of the boot lid and bumper prior to installation.
Tighten all straps both before and after placing bikes on the rack.
Never place more than 45kg / 100 lbs. on the Elevator Racks.
Use at least 2 tie-down straps or shock (bungee) cords for each bike when securing bikes
to rack.
Keep bicycle tires at least 30cm away from the exhaust pipe of the vehicle.
Check the rack, bikes and strap tension regularly during use.
Drive slowly when on bumpy or dirt roads.
safety strap
1
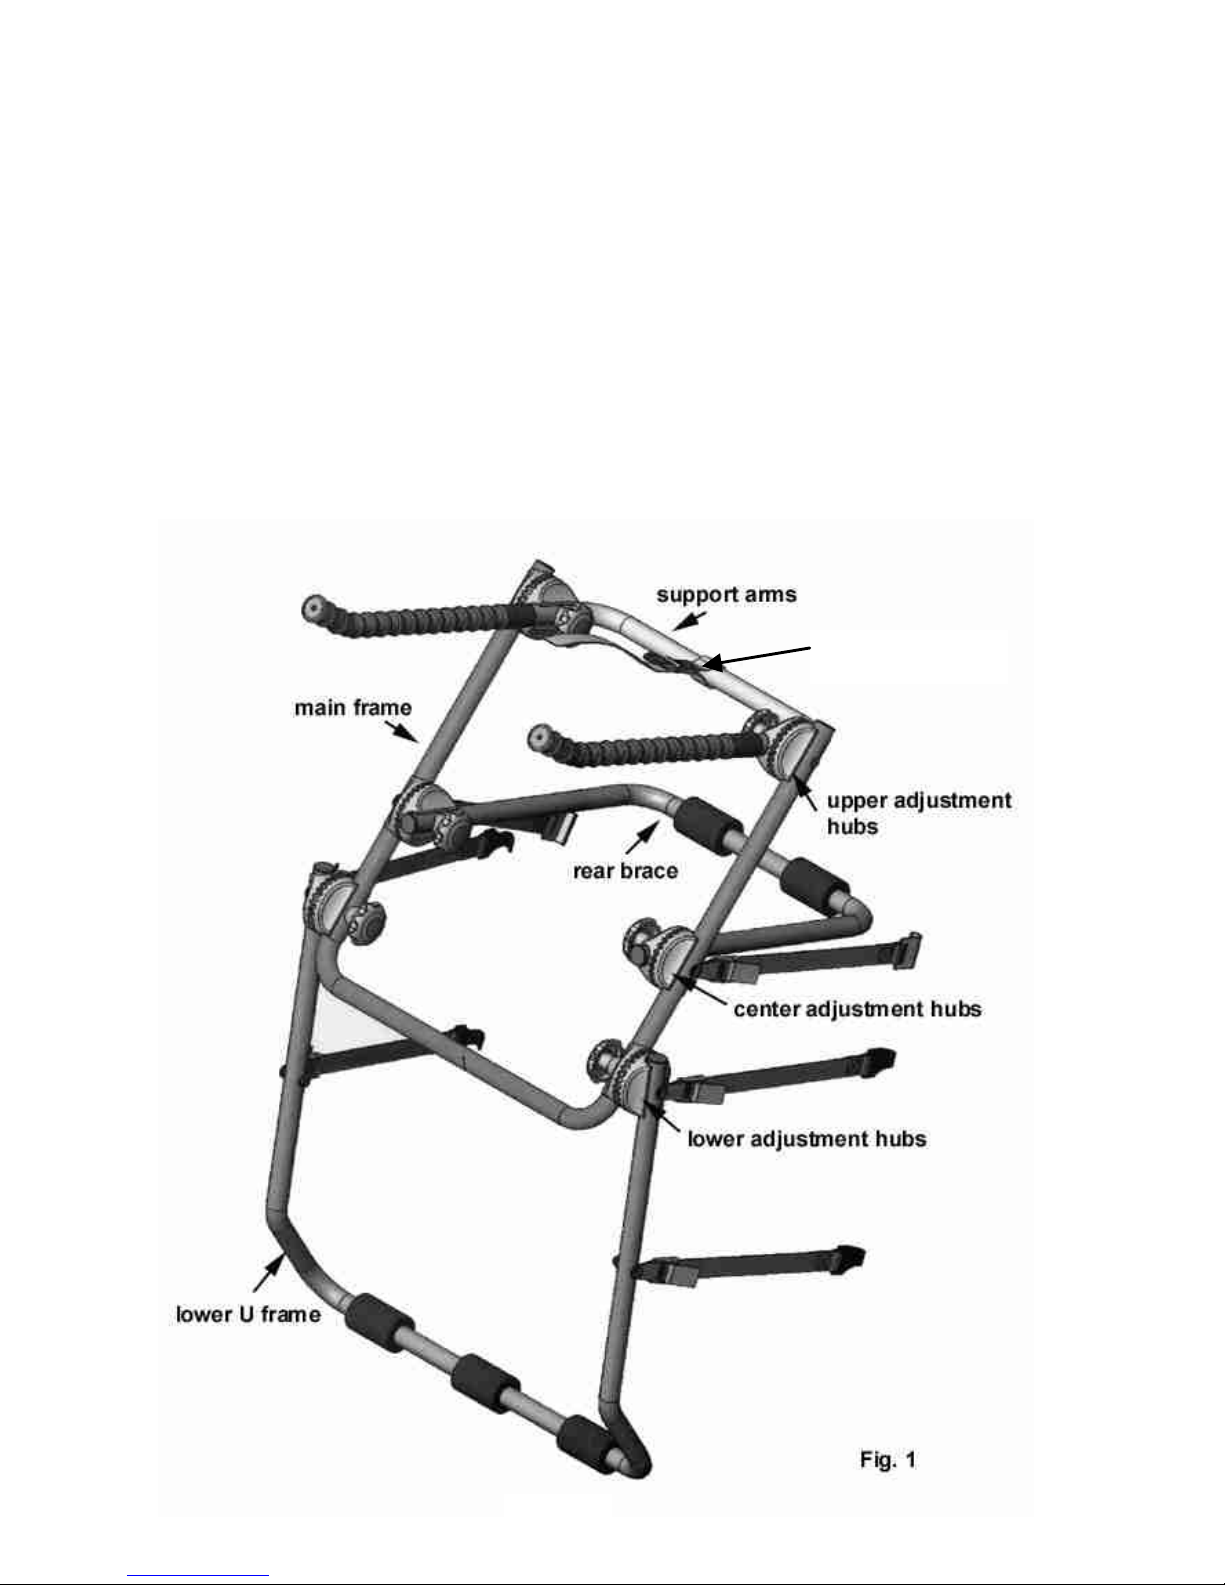
1. Installing the Hollywood Elevator Rack on your vehicle:
After removing the Elevator Rack from the box, rotate the lower U frame such that it aligns
with the main frame approximately as indicated in Fig. 1. Use the lower adjustment hubs &
knobs.
A. Place the rack on the vehicle’s bumper so that the rack is perpendicular to the ground.
Rotate and position the rear brace of the rack such that it rests on the boot lid or rear door
of the vehicle. The main frame should remain in a mostly vertical position. Now, tighten
the center adjustment hubs.
.
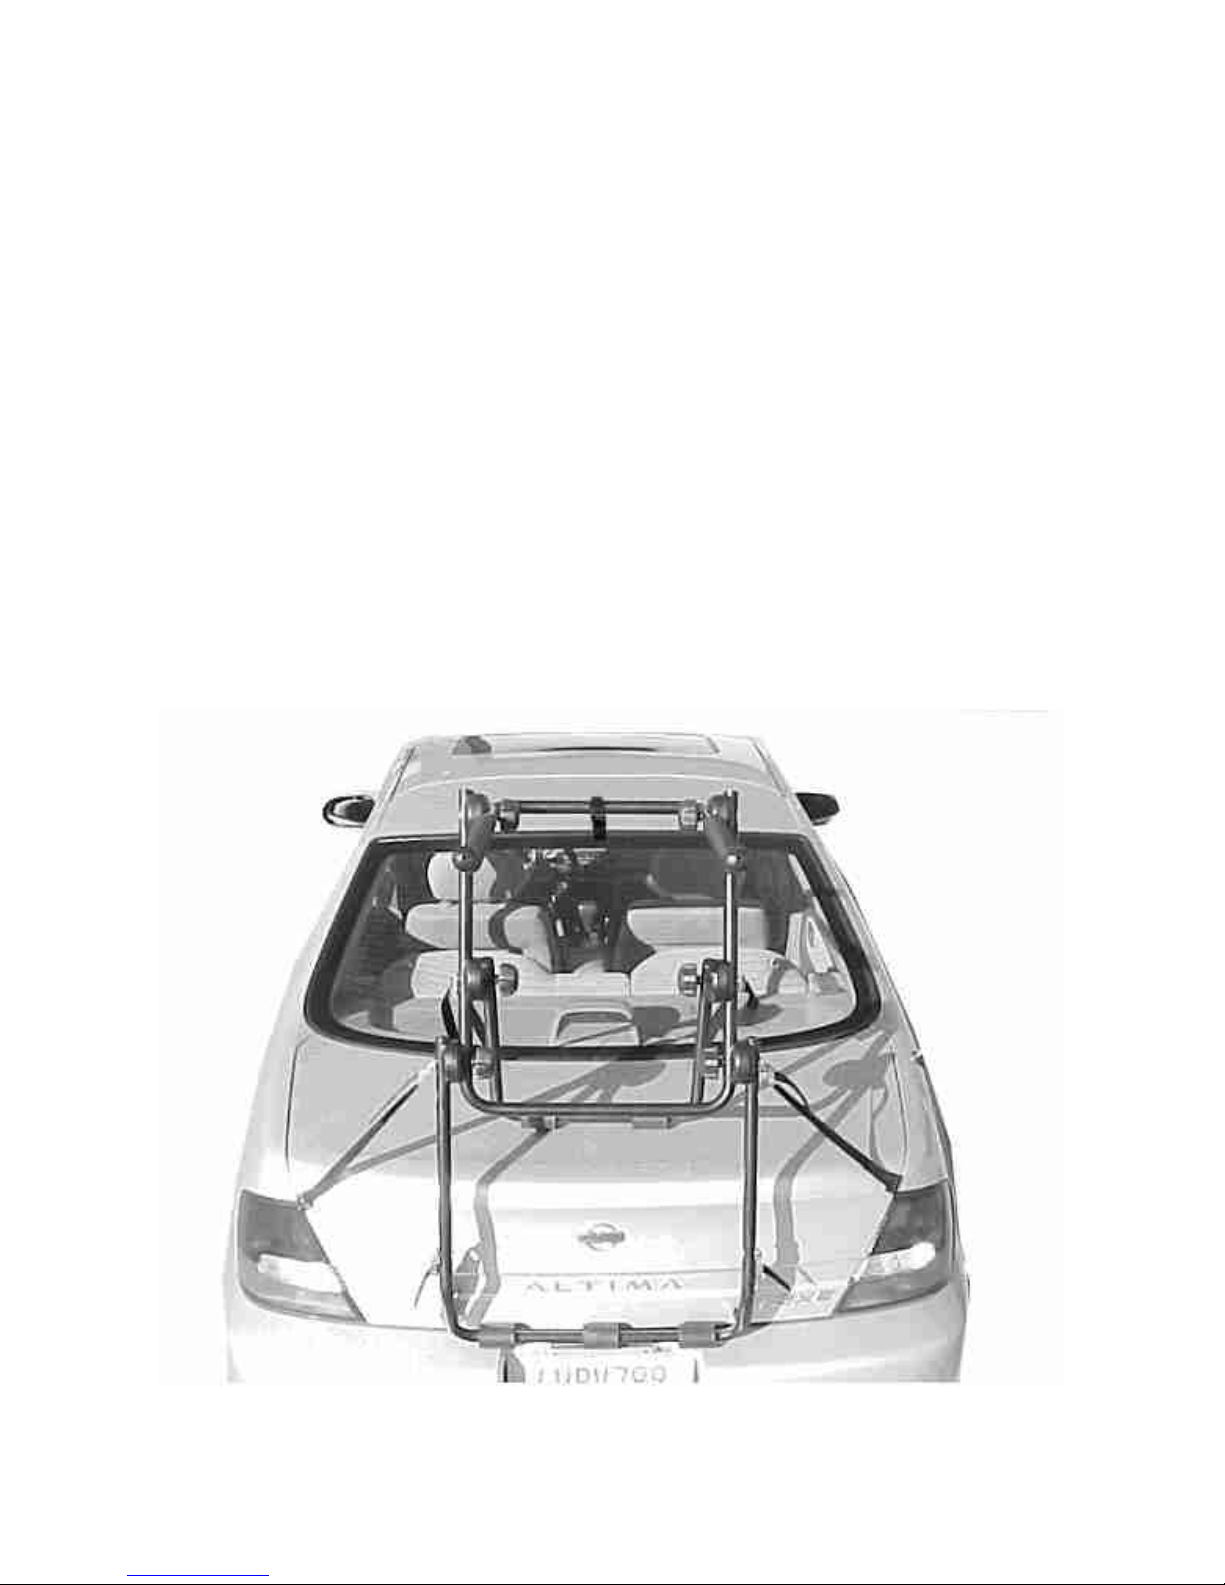
B. Attach the upper straps to the top of the boot lid, hatch, rear door, or roof rack cross bar.
Pull the loose strap end and tighten the strap securely. Place the lowest strap) under the
bumper or at the bottom edge of the rear door. Pull down on the straps to tighten. Install
the center (side) straps horizontally from the rack to the boot lid or rear door. Pull ends to
tighten securely, and tie off extra strap length so the end of the strap will not get caught
on anything, or drag on the ground.
C. Raise the bicycle support arms such that they are parallel to the ground or angled just
slightly upward. You may need to loosen the upper set of knobs.
Fig. 2
2
 Loading...