

Page 1

HobbyZone®products are distributed exclusively by
Horizon Hobby, Inc.
4105 Fieldstone Road
Champaign, IL 61822
©2004 Horizon Hobby, Inc.
6503
hobbyzonesports.com
HBZ3412
6
05482 14372 8
Page 2
Instruction
™
Instruction Manual
TM
Page 3

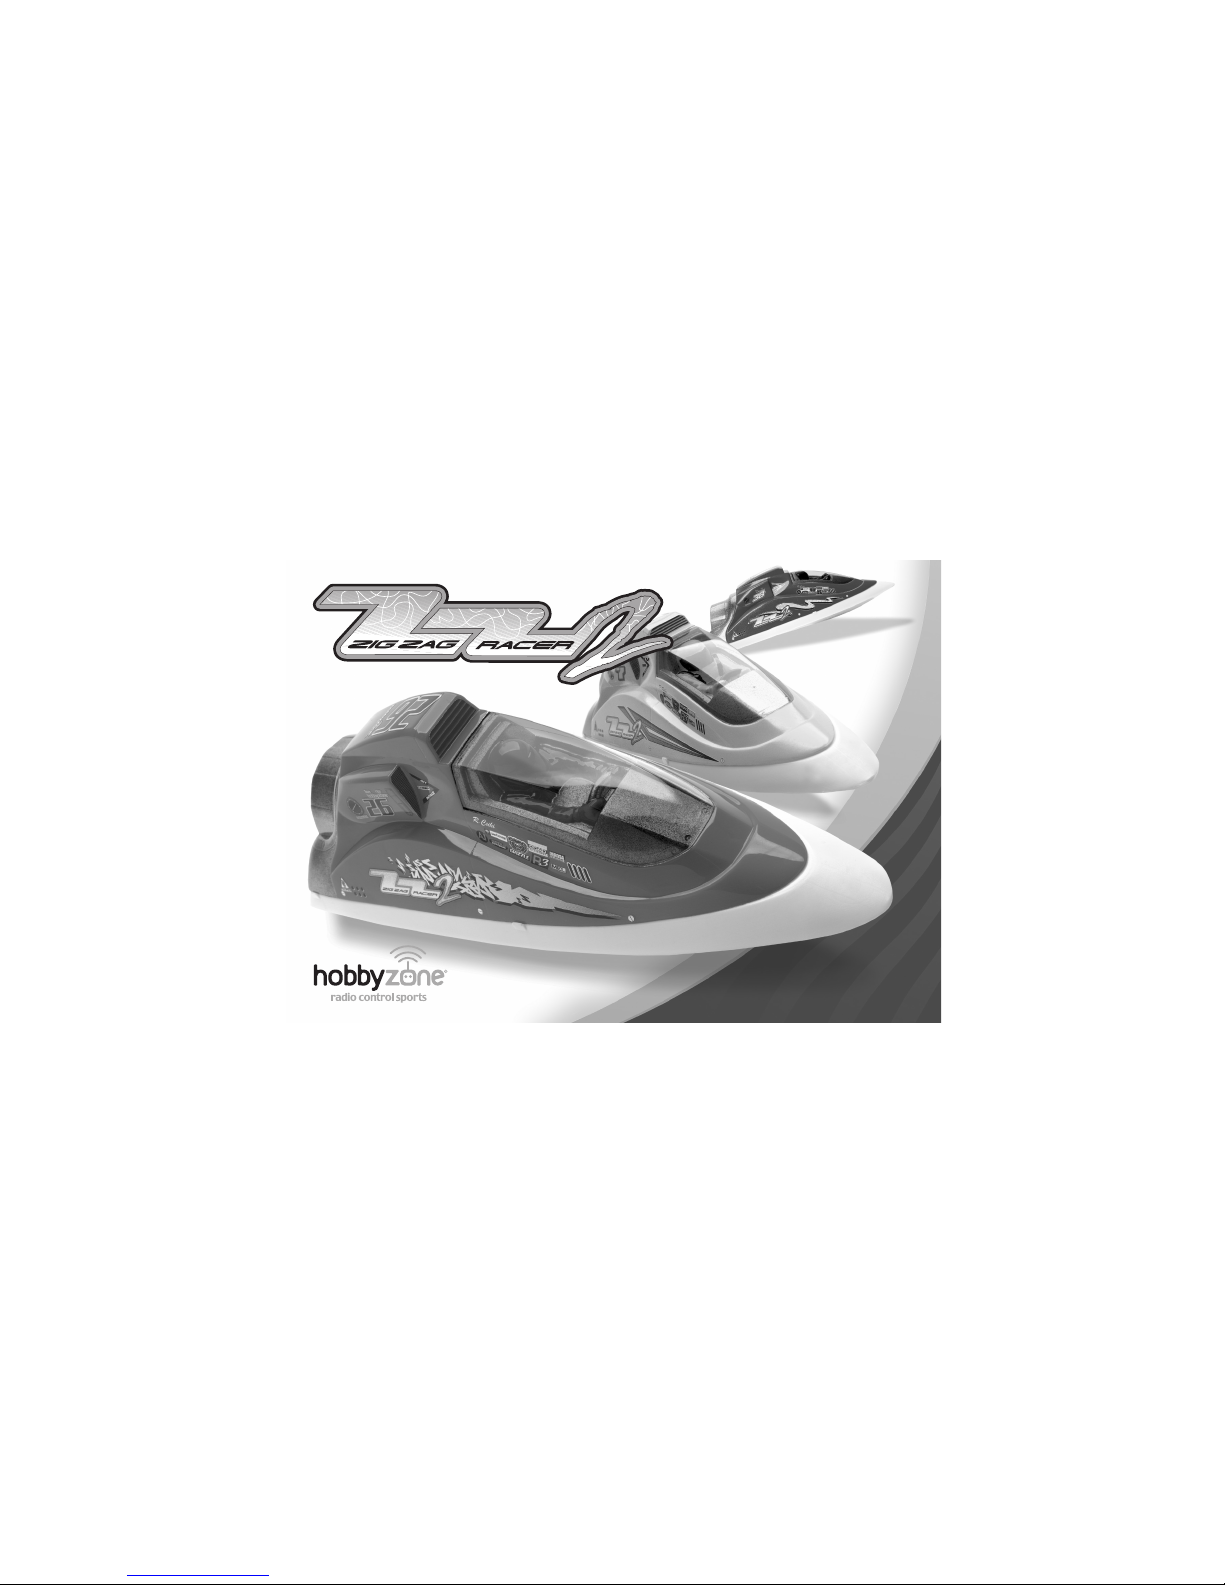
Get ready to have a BLAST with
your ZIG ZAG RACER 2™
—the high-performance, highly maneuverable, self-righting
speedboat from HobbyZone®. You'll have hours of fun zipping across the water, racing with friends and playing Zig Zag
Water Soccer. But before the fun begins, it’s very important
that you read this manual completely and follow the directions
carefully. That way you'll be sure your Zig Zag fun is safe
and successful.
Page 4

Welcome
to the World of
Crash damage is not covered
under the warranty.
Be sure to read the warranty
on page 26 and "Warnings and
Safety" on page 24 before you
proceed to Step 1.
Page 5
Step 1
4
1. Remove transmitter back cover by
pushing down with thumbs, as indicated
by the arrows.
2. Install batteries. Use fresh 1.5V “AA”
batteries only.
3. Watch polarity. Replace cover.
4. To test, switch on transmitter—LED should
glow brightly.
5. Replace batteries when you hear
low-battery alarm (beeping sound).
Needed for Step 1
"AA" Heavy-Duty Batteries
(x8 included)
Transmitter
Page 6
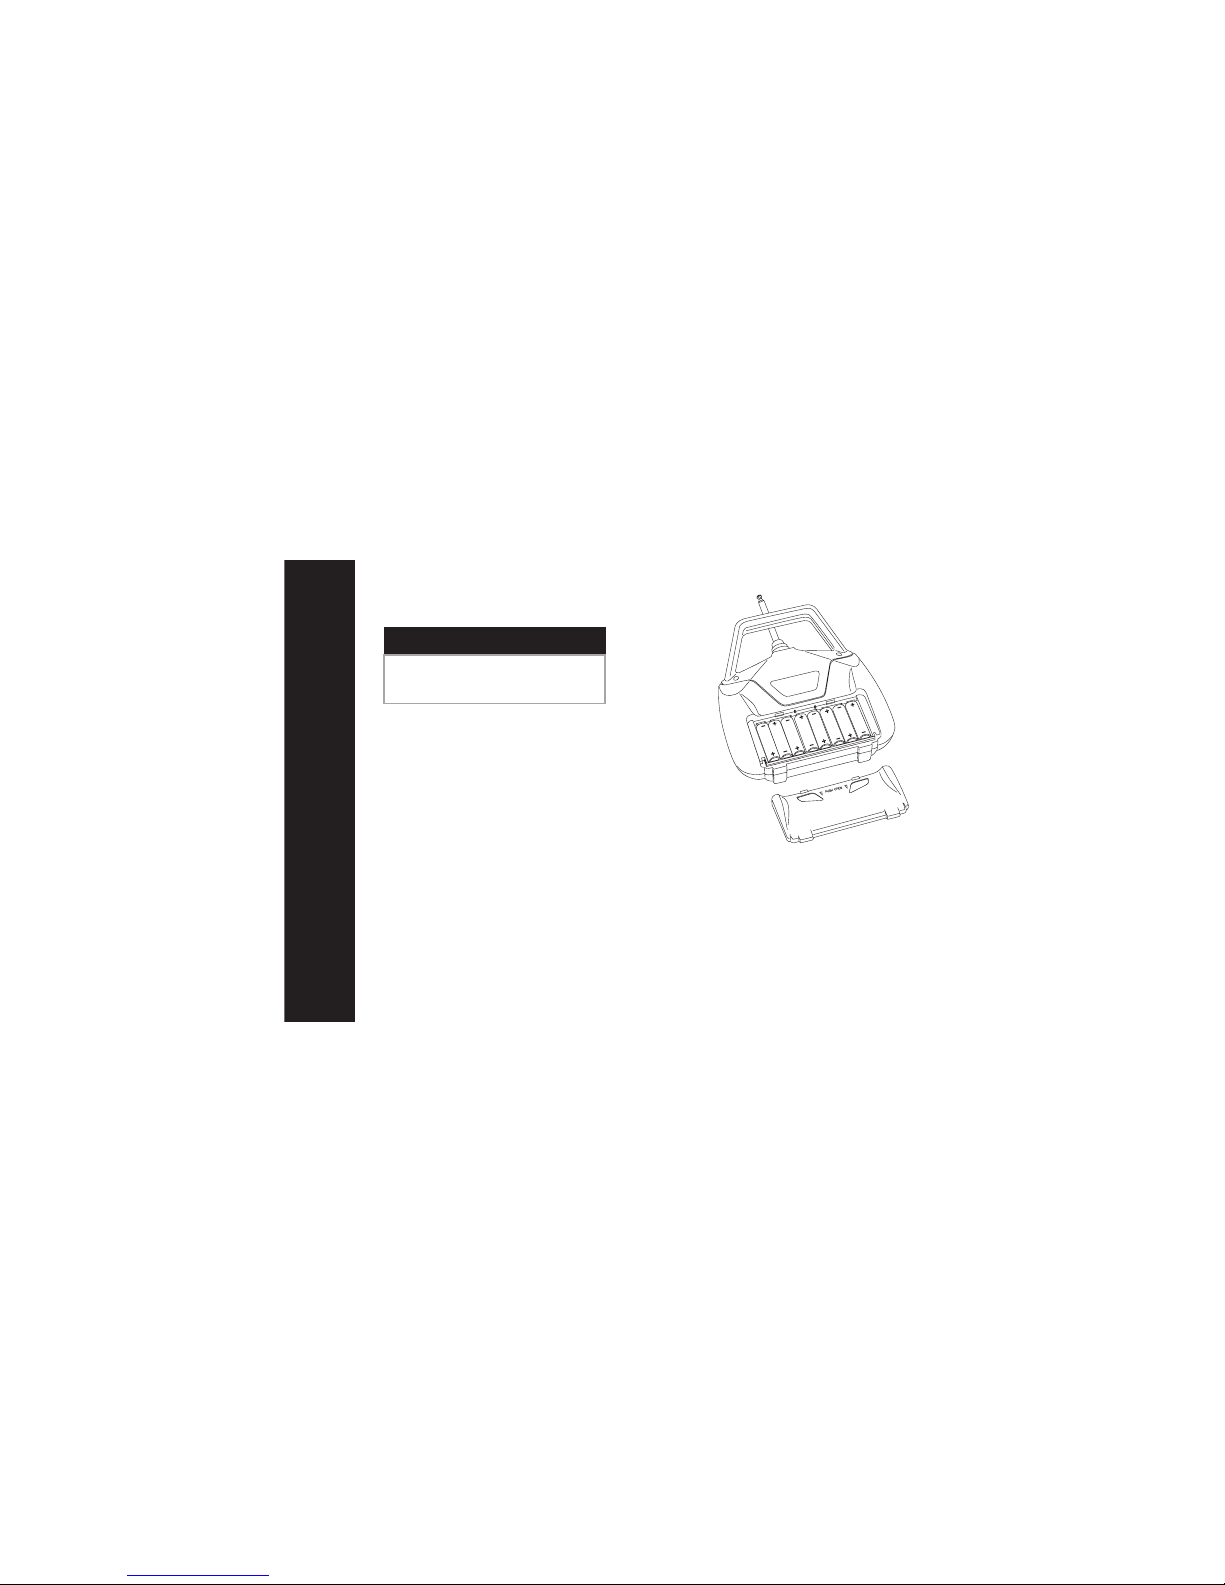
Step 2
5
Install Battery
IMPORTANT – Prior to installing battery, the
transmitter must be turned on and your
Zig Zag boat placed on the included stand.
1. Lift canopy slightly and turn sideways to uncover
battery compartment.
2. Attach battery to connector in boat and place
battery in compartment.
3. To secure battery, stretch rubber band over the
top of the battery and connect to hook.
4. Make sure battery and connectors do not interfere with movement of wire pushrod.
5. Reposition canopy and secure it by fitting
canopy peg into the front alignment cavity in the
hull and inside the five hull alignment posts.
Note: Always make sure your transmitter is on
before you install the battery. After you are done,
make sure the battery is unplugged prior to turning
off the transmitter.
Hull Alignment Posts
Rubber Band
Page 7

Step 3
6
Motor Test and Battery Discharge
CAUTION: Keep everything clear of the propeller.
A moving propeller can cause injury.
1. The small lever next to the throttle stick (left
stick on transmitter) is called a throttle trim
lever. With your boat on the stand, transmitter
turned on, and battery installed, make sure
the throttle trim lever is in the center
(neutral) position.
2. If motor is running, gradually move the trim
lever down until the motor stops.
3. Move throttle stick (left stick on transmitter)
up. Motor speed will increase as this
stick is moved up.
4. In order to fully discharge the battery, run
the motor at high speed until it shuts off. If
there is not enough charge in the battery to
power the propeller, then proceed to Step 4
(on next page).
5. When finished with the motor test, be sure to
disconnect the battery first then turn off the
transmitter.
Throttle Stick
Throttle
Trim Lever
Rudder Stick
Rudder
Trim Lever
Page 8

Step 4
7
Important: Charge the battery shortly before
running the Zig Zag Racer 2. If you charge the
battery 12–48 hours before use, charge again for
30 minutes right before you run. Stop charging
immediately when the battery becomes warm,
indicating it is fully charged.
Charging the Zig Zag Battery
Note: Never charge a hot battery or a battery
that is already charged. Always discharge before
every charge. See Step 3 for instructions on
discharging.
See "Warnings and Safety" on page 24.
1. The charger supplied with the Zig Zag Racer 2™
has a built-in timer. Plug the battery into the
charger, and then plug the charger into the
wall. The LED indicator should glow constantly.
After about 3 hours, the LED will turn off. At
this time, the battery is charged and ready
to use.
2. To charge another battery, the charger must
first be unplugged from both the wall and the
battery to reset the timer.
Page 9
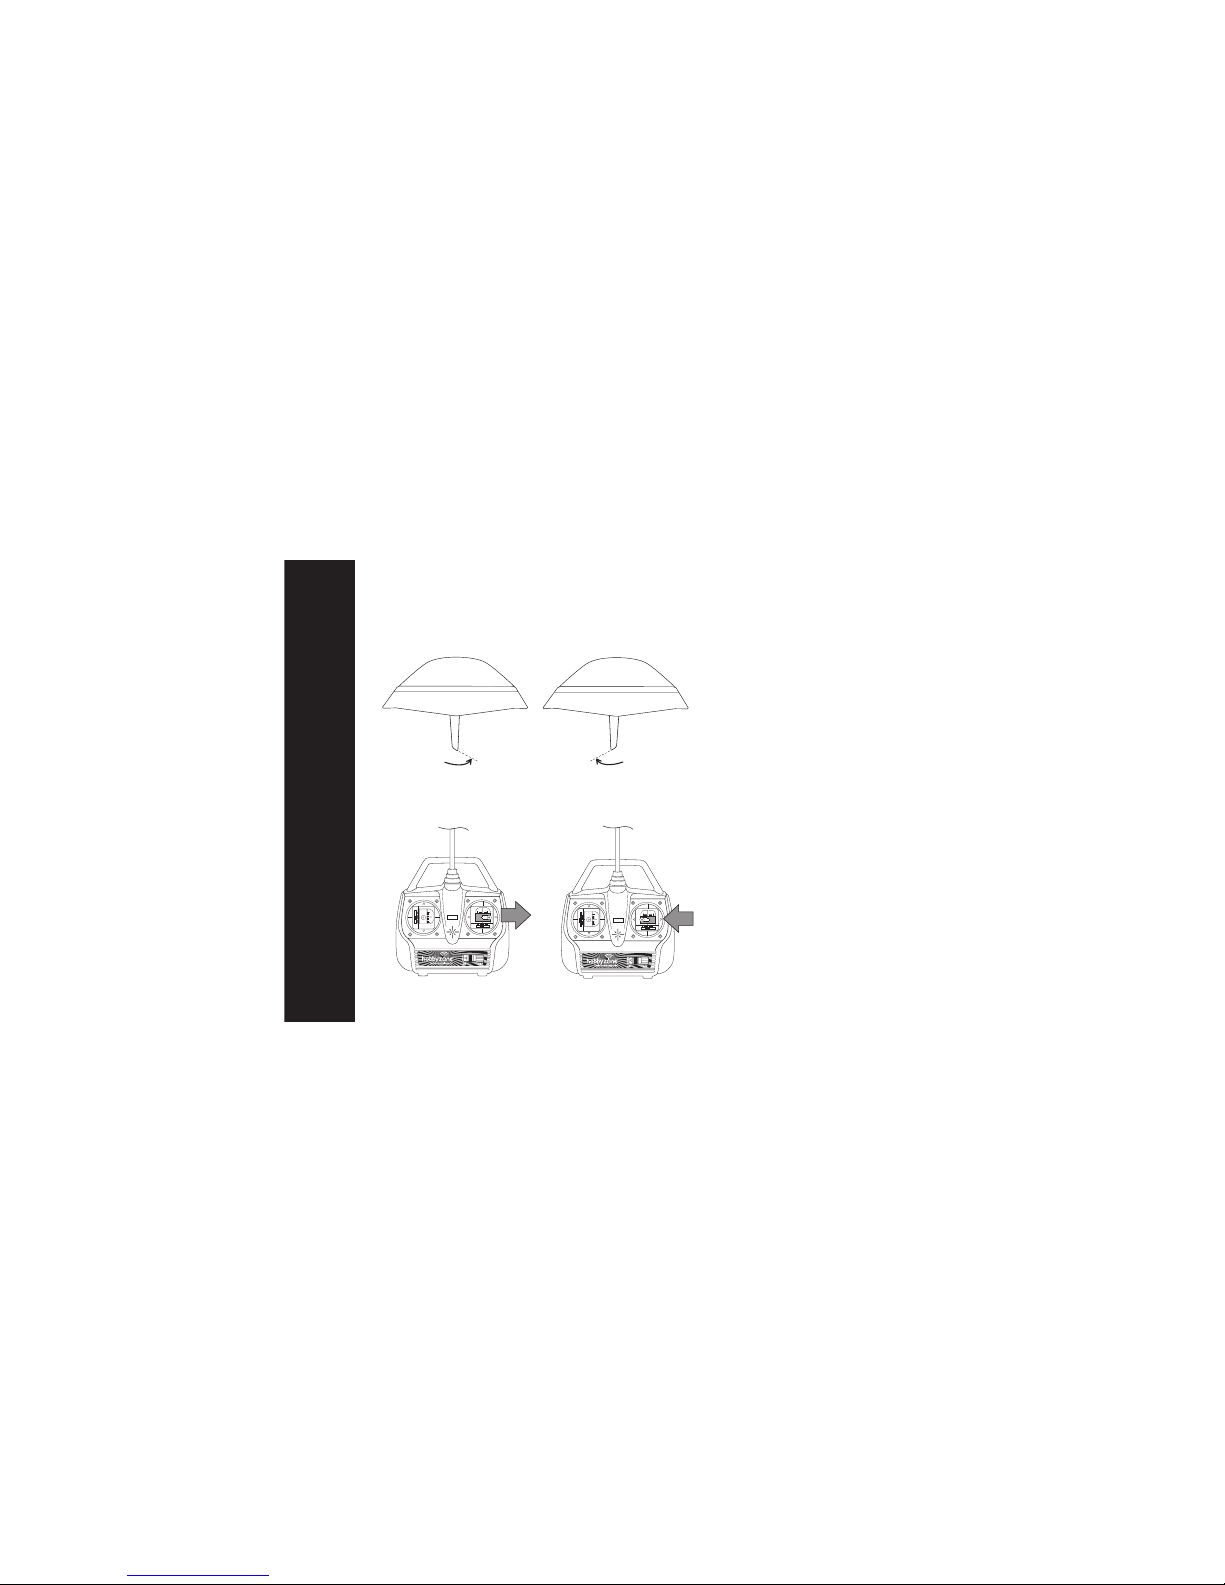
Step 5
8
Right Rudder
Left Rudder
Back of Boat
Back of Boat
Rudder Test
NOTE:
The small lever under the rudder stick is
called a trim lever and is used to adjust
the "neutral" point of your control stick.
To do this, place the rudder stick in
neutral (center) position. If rudder is
not aligned straight ahead, use the
rudder trim lever to center it.
Move the rudder stick
(right stick on transmitter)
side to side. The rudder should
move as shown in the drawings.
Page 10

Step 6
9
Choosing Your Location
CAUTION: Parents, do not allow young children to
go the lake or pool unsupervised. Be safe and
stay away from steep grades near shorelines
where you or those with you could slip and fall
into the water.
1. Choose a location that is not being used by
swimmers when you are running your boat.
2. If you choose a lake, be sure there is no moss,
grass, weeds or debris present that could get
wrapped around the propeller or trap your boat
offshore.
3. Make sure the shoreline is clear and relatively
flat so you can easily launch, operate and
retrieve your boat.
DO NOT mix radio control
boating and swimming.
DO NOT swim to retrieve
your boat.
Do not operate your boat near
moss, grass, weeds, brush, etc.
Page 11

Step 7
10
Range Test
You will need two people to do the range test:
one to hold the transmitter and one to hold the
Zig Zag Racer 2™.
1. One person holds the transmitter; the other
person walks 100 paces away with the boat.
2. Extend the transmitter antenna completely and
turn the transmitter on.
3. Plug in the battery and close the hatch cover.
4. As the first person moves both of the transmitter controls at the same time, the other
person watches to be sure the boat's motor
and rudder controls operate smoothly.
WATCH OUT! The person holding the boat should
hold it so that the propeller does not come in
contact with any part of their body.
If model does not range test correctly, do not run.
Call Horizon Hobby Product Support Staff tollfree at 1-877-504-0233 for directions on how
to proceed.
WATCH OUT! The person holding the airplane
should hold it so that the propeller does not come
in contact with any part of their body.
Page 12

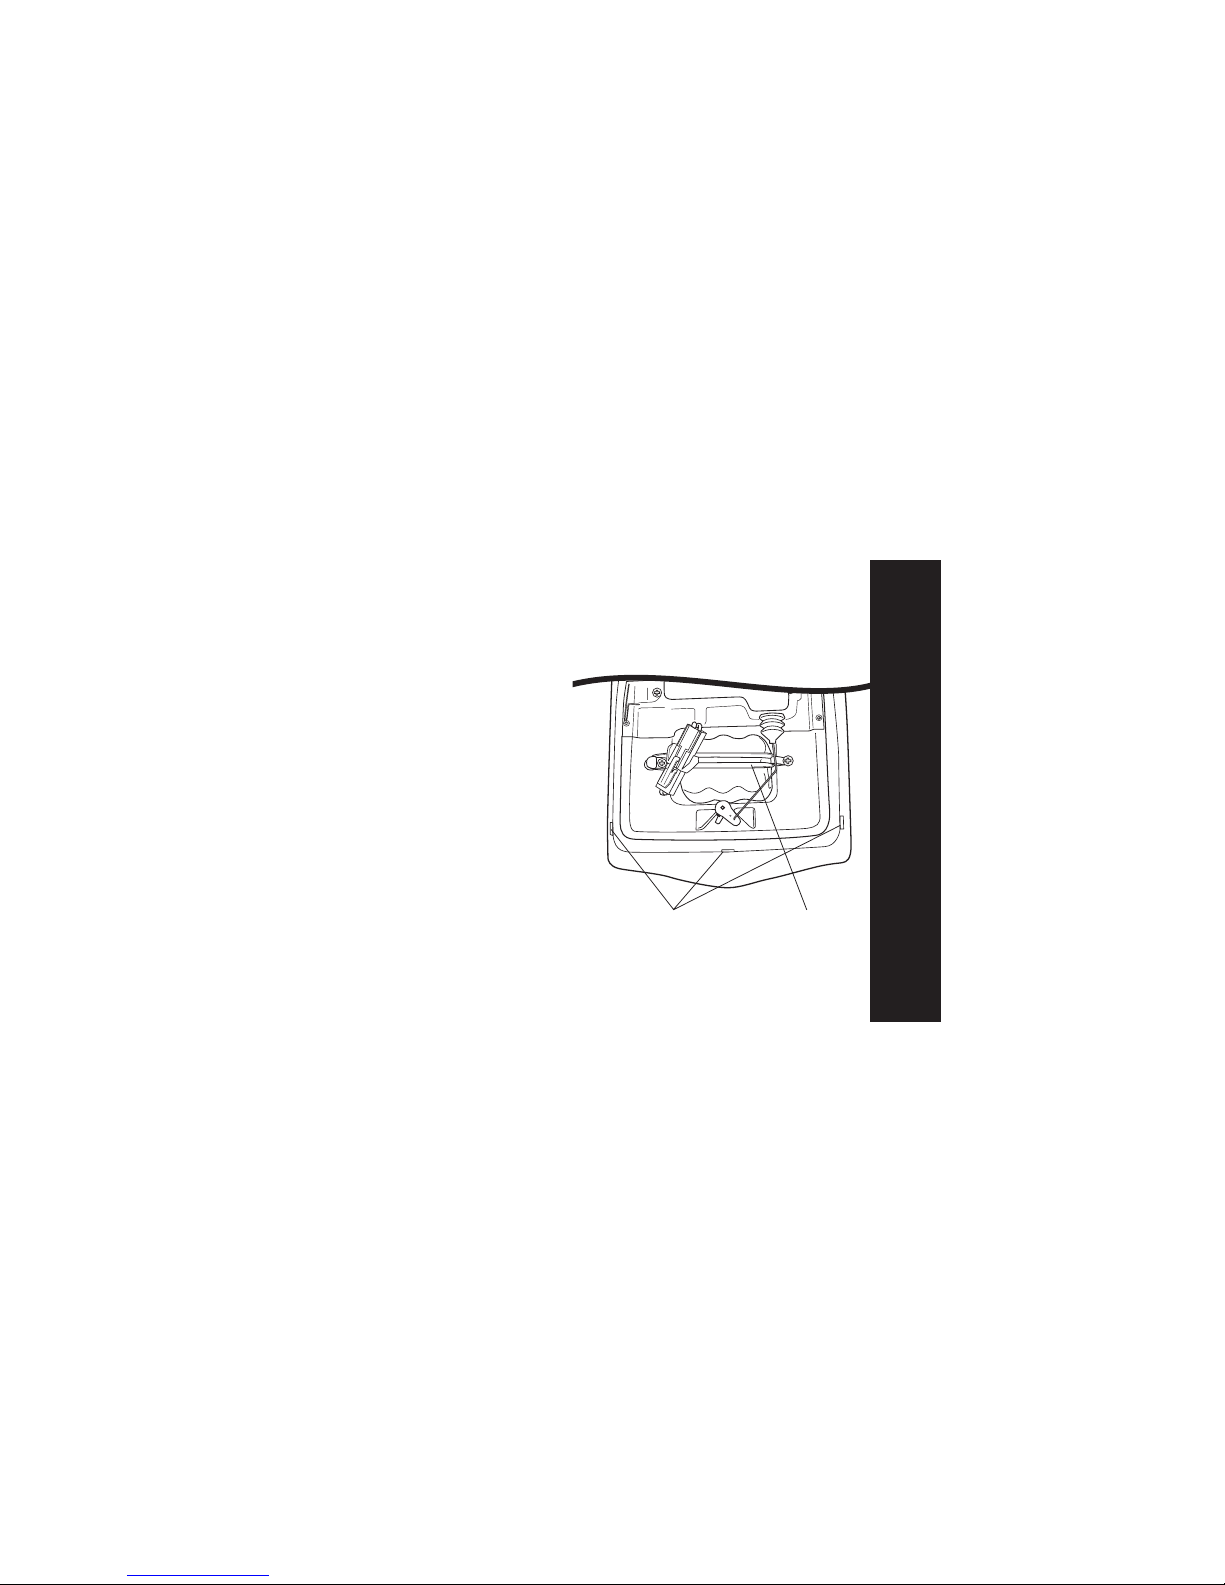
Step 8
11
Launching and Running
Before launching, make sure no one in the area is
operating another radio control vehicle on the
same frequency. Your frequency is marked on the
back of your transmitter and under the boat canopy.
1. To launch your Zig Zag Racer 2™, turn transmitter on, install charged battery and place and
release the boat in the water.
2. Advance throttle (left) stick partially so boat
moves slowly. Move rudder (right) stick to
right to turn the boat to the right. Move rudder
stick to left to turn the boat to the left.
3. Practice running the boat at slow speed,
making right, left, and figure-eight turns. As
your ability to control the boat improves, gradually increase the speed. With a bit of practice,
you'll see your driving skills improve quickly.
Left Turn
Right Turn
Page 13

Launching and Running (continued)
•Your Zig Zag Racer 2™ has no reverse. Be sure
to plan ahead while driving so you don’t get
your boat stuck in a dead end.
• Running time with a fully charged battery will
be approximately 10–15 minutes, depending
on your driving speed.
NOTE: When you notice your boat running much
slower even at full throttle, it’s time to bring your
boat to shore. Slower speed indicates the battery
is low, and you have only 2 or 3 minutes of
running time before it completely stops. Make
sure you allow the motor to cool for 5 minutes
between battery exchanges.
CAUTION
• Do not run your boat into hard objects or
onto shore or the rudder and propeller can
be damaged.
• Keep hands and fingers away from the
moving propeller when launching or retrieving
your boat.
• Do not swim to retrieve your boat.
• If the canopy of the boat becomes dislodged,
you may need to remove water from inside the
boat. Remove the drain plug at the back of the
boat and drain the water, then replace the plug.
Step 8
12
Page 14

Trimming the Rudder Control
Step 9
13
If moving
left, then
move trim
lever to the
right.
If moving
right, then
move trim
lever to the
left.
#1
#2
If boat veers to
the right, bend
this way.
Bend Point
• After launching your boat, check to see that it
is running straight.
• If your Zig Zag Racer 2™ always turns to the
right when rudder stick is at neutral (centered),
move the trim lever below the stick to the left
until it drives straight. See drawing #1.
• If the boat always turns to the left when the
rudder stick is at neutral, move the trim lever to
the right until it drives straight. See drawing #2.
• If the boat still turns in one direction after
moving the trim lever the full amount in the
opposite direction, you will need to adjust the
rudder linkage wire.
If the boat still turns to the left, use your fingers
to bend a greater angle in the wire.
If the boat still turns to the right, use your fingers
or a pair of pliers to slightly straighten the wire.
If boat veers to
the left, bend
this way.
Page 15

RACING AND GAMES WITH THE ZIG ZAG
14
Racecourse Setup
The Zig Zag Racer 2TMis available on six different frequencies (channels). This means that up to six people can
race at the same time.
You can use the orange buoys that come with
your Zig Zag Racer 2 to set up a racecourse.
1. Attach butterfly-shaped steel anchor to orange
ball by first removing the tape that holds the
fishing line in place.
2. Push the white plastic plug firmly into the hole
in the ball.
3. Toss this assembly into the water in the
desired location. The line will unwind on its
own until the anchor hits bottom, and the buoy
will float on top of the water.
CAUTION: Do not swim to retrieve buoys.
For retrieval method, see page 18.
4To mark the course, use two or three buoys set
in a line or in the shape of a triangle. You
should allow 20 to 30 feet between them if
possible. See drawings below. Vary the
racecourse shape to sharpen your skills.
Setup Options
#1. Oval
#2. Triangle
#3. Figure 8
#4. Slalam
#5. Zig Zag
Page 16

15
Racing Options
1. After you've set up your course, drivers launch
their boats and then stand in a line on the
shore a minimum of 6 feet apart. Do not walk
between a driver and his boat or you may
cause radio interference.
2. To start, boats should be launched and lined up
together near the racecourse (see drawing A),
ready for the starter's "Go!"
3. Another way to start is for each driver to hold
his or her boat at water’s edge. At "Go,” drivers
release boats and head for the first buoy
(see drawing B).
Note:
Race length is determined in advance by the
number of laps or by the amount of time (10
laps or 5 minutes, for example).
1
2
3
4
5
6
1
2
3
4
5
6
6'
6'
6'
6'
6'
6'
6'
B.
A.
Page 17

Zig Zag Water Soccer Setup
16
When you can consistently maneuver your Zig
Zag Racer 2™ at both low and high speeds, you
can add to your racing fun by playing Zig Zag
Water Soccer. Here’s how you set up your boat
and "playing field."
1. Attach bumper to front of boat using the three
screws provided. Secure the screws but do not
over-tighten.
2. To set up your playing field, place two buoys
(with anchor attached) in water approximately
50 feet apart to mark the two goal lines.
50 feet
Page 18

17
Playing Zig Zag Water Soccer
Zig Zag Water Soccer can be played with one,
two, or three players on each team with each boat
on a different frequency.
• Game begins by tossing the third orange ball
(w/o anchor) into the middle of the "playing field."
• Each team tries to score by using their bumper
to push the ball past the goal line.
•To make the game more challenging, the
bumpers have been designed so the ball pops
loose when you exceed 4–5 mph. Because of
this, easy "sprints" to the goal line are not possible, and your competitor has time to catch up
with you and steal the ball. Just as in real
soccer, each team will be most effective when
using strategic offensive and defensive plays
and teamwork.
• Game length is made up of two 4-minute
halves. The team scoring the most goals wins.
If neither team scores, there is a third 1-minute
playing period. After one minute, the team
that scores the most points or is closest to the
goal line is declared winner.
Goal line marker buoy
NOTE: For best results, it is easiest to move the
ball when the throttle is in low position.
1
2
3
4
5
6
Orange ball
Goal line marker buoy
50 feet
Team #1
Drivers
Team #2
Drivers
Page 19

Retrieving Buoys
18
The bumper provided for Water Soccer can also
be used to retrieve the orange buoys.
Remember—do not swim to retrieve the buoys.
1. Attach bumper to front of boat using the three
screws provided. Secure the screws but do not
over-tighten.
2. Re-launch your Zig Zag and steer it to catch a
buoy in the bumper.
3. Carefully pull the buoy towards shore. The
anchor will create some drag that will slow
your speed and hamper maneuverability.
CAUTION: Do not swim to retrieve the buoys.
Page 20

19
Small Crack
Maintaining the Zig Zag Racer 2
• The Zig Zag Racer 2TMis designed to be selfrighting if it is tipped over during racing or
while playing water soccer, as long as the
canopy is fitted properly to the hull. If the
canopy is knocked out of place, immediately
drive to shore, empty any water from the boat
and put the canopy back into place.
• Be careful not to hit other boats or objects
broadside at full throttle with the nose of your
Zig Zag or you can damage the canopy. Small
cracks can be taped, but if you get a large
crack or break a piece out of the canopy, it
must be replaced with a new one.
• The rudder shaft can be damaged if you run
over an object, another boat or hit the shore.
Be careful when bending it back into position.
• After each run, drain any water out of the boat
before running again.
• Be sure to allow motor to cool for 5 minutes
after a run, between battery exchanges.
Carefully bend rudder
back to original position.
Page 21

Note: The motor is secured to the hull with
aggressive servo tape, so it may take a small
amount of force, as well as prying with a screwdriver, to free the motor.
8. When the motor is free, pull the motor out and
remove the rubber drive shaft coupler. This
should expose the drive shaft coupler cap.
Propeller/Shaft Replacement
20
I
If you damage the propeller, you may need to
purchase a replacement propeller/propeller shaft.
Follow these steps to replace the propeller. Adult
supervision is recommended.
1. Remove the canopy by unhooking the rubber
band that attaches the canopy to the hull.
2. Use a small flathead screwdriver to loosen the
black set screw that secures the rudder.
3. Remove rudder carefully and make certain not
to lose the two spacers that allow the rudder
to move freely.
4. Remove the 4 small Phillips screws that
secure the front of the plastic deck cover and
the antenna.
5. Push the antenna out of your way.
6. Pull up on the top (front) of the plastic deck
cover to reveal the motor and drive shaft coupler.
7. Remove the two screws that secure the motor
bracket. Carefully pull the motor out, making
certain not to accidentally detach the motor
leads from the solder joints.
Step 6 —Fold Step 7—Remove Motor Screws (2
)
Step 4 —Remove Screw (4
)
Step 2 —Remove Screw
Rudder Arm
Antenna
Motor Bracket
Page 22

21
9. Re-install the rudder. Be certain to include the
spacers below the rudder arm.
Re-install the deck cover. Make certain
the antenna is secured.
If you have any questions regarding the
replacement of the prop/prop shaft, please call
product support at 877-504-0233
Step 1—Remove CapStep 2—Remove Shaft
Propeller Shaft CapPropeller Shaft
Rudder
Propeller/Shaft Replacement (continued)
Follow these steps to replace the prop/prop shaft:
1. Remove prop/prop shaft from cap by
unscrewing it.
2. Slide propeller and shaft out of drive tube.
3. Locate the new prop/prop shaft.
4. Slide the new prop/prop shaft into the boat.
5. Thread the prop/prop shaft into the threaded
cap. It may be necessary to use small pliers
to hold cap while shaft is being tightened.
6. Slide rubber coupler back onto motor cap.
7. Slide rubber coupler back onto the new drive
shaft cap.
8. Re-install motor and motor bracket. Make sure
that the motor leads are once again placed
inside the molded hook to keep the leads
secured and out of the way.
10.
Page 23

22
Troubleshooting Guide
PPRROOBBLLEEMM PPOOSSSSIIBBLLEE CCAAUUSSEE SSOOLLUUTTIIOONN
Unit doesn’t operate
The boat will not drive
straight when the steering
stick is centered
1. Transmitter “AA” batteries are depleted or
installed incorrectly.
2. The connector inside the boat may not be
fully plugged in to the battery.
3. The battery is not charged.
4. The radio electronics are wet.
1. The steering trim is not adjusted properly.
2. The steering linkage is bent by the battery
or battery wires moving it out of the
correct position.
1. Check that the batteries are installed as per
the illustration inside the transmitter back
(see page 5). Replace the batteries with new
fresh “AA”s. The LED indicator on the transmitter will be bright if the batteries are good
and installed correctly.
2. Push the connector together until a click is
heard to ensure a solid connection
(see page 4).
3. Fully charge the battery per the instructions
(see page 4).
4. Carefully dry the inside of the boat with a
warm (not hot) hair dryer.
1. Drive the boat away from yourself slowly
and adjust the steering trim until the boat
tracks straight.
2. Readjust the battery position to properly
clear the steering linkage.
Page 24

23
Troubleshooting Guide (continued)
PPRROOBBLLEEMM PPOOSSSSIIBBLLEE CCAAUUSSEE SSOOLLUUTTIIOONN
The boat goes much
slower than normal
The radio has poor or
no range
1. The battery isn’t charged.
2. Weeds, moss, or trash may be caught on
the prop or rudder.
3. The motor or battery is old and
wearing out.
4. Water has entered the hull.
1. The batteries in the transmitter are weak.
2. The transmitter is on a different frequency
from the boat.
3. Antenna is not extended.
1. Fully charge the battery per the instructions
(see page 4).
2. Take the boat out of the water. Unplug the
battery inside the boat to make sure the
prop is not running. Remove the item from
the prop or rudder.
3. After approximately 300–500 runs the motor
and battery will need to be replaced.
4. Pull the drain at the rear of the boat and
drain out the water.
1. Replace the batteries with fresh
“AA” batteries.
2. Check that the channel number matches the
channel on the back of the transmitter.
3. Extend antenna fully.
Page 25

1. Read and follow this manual completely, observing
all instructions, Warnings, Notes, Cautions, and
safety directions; otherwise serious injury and
damage can occur. Think: Safety First.
2. Keep propeller away from body parts, even when it
isn’t spinning, as you or someone else might turn the
boat on by accident. Beware of hair becoming entangled in the propeller, especially when launching the
Zig Zag Racer 2™, or injury may occur.
3. NEVER SWIM to retrieve your boat or buoys. Do not
operate your Zig Zag Racer 2 near people, as injury
may occur. Never allow anyone to attempt to catch
the Zig Zag Racer 2 while it is running or serious
injury can result.
4. Adult supervision is recommended for ages 12
and under.
5. Battery Charging: Only use a battery charger intended
for use with the Zig Zag battery. Never leave a
charger unattended while charging. Before charging,
always be sure to deplete the power from the battery
24
Warnings and Safety
by running it in the Zig Zag Racer 2 until the pro
peller stops. This will help prevent overcharging.
While charging, place the battery on a heat-resistant
surface. DO NOT lay it on carpet while charging.
NEVER charge the battery with the included charger
for more than 3 hours, as overcharging may cause
excessive heat in the battery, causing injury, damage
and poor battery life and performance—voiding
the warranty.
6. Never cut into the battery, charger, or boat wires, or
serious injury can occur. Causing the battery to
“short out” (crossing negative and positive bare
wires) can cause a fire, serious injury and damage.
7. When operating your Zig Zag Racer 2, ALWAYS turn
on the transmitter BEFORE you plug the battery into
the Zig Zag Racer 2. When you finish running your
Zig Zag, always unplug the battery BEFORE you turn
off the transmitter.
8. Never operate on the same frequency as another
boater in your area. The frequency of your Zig Zag
Racer 2 is shown on stickers on the back of the
transmitter and on top of the radio box inside
the canopy.
Page 26

25
Replacement Parts
HBZ1012 7.2V 900mAh Battery $24.99
HBZ2519 3 Hour Wall Charger $9.99
HBZ3315 3” Orange Balls (2) $3.99
HBZ3317 Buoy Anchor w/Line $3.99
HBZ3319 Bumper w/Screws $4.99
HBZ3323 Hook for Canopy (2) $0.79
HBZ3324 Drain Plugs (5) $1.25
HBZ3325 Rudder & Steering Arm $3.99
HBZ3327 Propeller w/Shaft $3.99
HBZ3328 Rubber Coupler/Plastic Spline: ZZR, ZZR2 $1.25
HBZ3329 Electric Motor $9.99
HBZ3412 Instruction Manual: ZZR2 $0.99
HBZ3413 Decal Sheet: ZZR2 Yellow $3.99
HBZ3418 Decal Sheet: ZZR2 Red $3.99
HBZ3419 Decal Sheet: ZZR2 Blue $3.99
HBZ3414 Canopy w/Hook, Yellow: ZZR2 $7.99
HBZ3415 Canopy w/Hook, Red: ZZR2 $7.99
HBZ3416 Canopy w/Hook, Blue: ZZR2 $7.99
HBZ3417 Cockpit Window: ZZR2 $1.99
HBZ3351 TX: Channel 1: ZZR, FBC, IIST, FTB, ZZR2 $24.99
HBZ3352 TX: Channel 2: ZZR, FBC, IIST, FTB, ZZR2 $24.99
HBZ3353 TX: Channel 3: ZZR, FBC, IIST, FTB, ZZR2 $24.99
HBZ3354 TX: Channel 4: ZZR, FBC, IIST, FTB, ZZR2 $24.99
HBZ3355 TX: Channel 5: ZZR, FBC, IIST, FTB, ZZR2 $24.99
HBZ3356 TX: Channel 6: ZZR, FBC, IIST, FTB, ZZR2 $24.99
HBZ1058 TX Antenna: All HBZ Birds, ZZR, ZZR2 $4.99
HBZ1060 Transmitter Battery Cover $2.49
HBZ3336 Hull W/PCB,PRP, MTR & RDR:
ZZR CH 1 $49.99
HBZ3337 Hull W/PCB,PRP, MTR & RDR:
ZZR CH 2 $49.99
HBZ3338 Hull W/PCB,PRP, MTR & RDR:
ZZR CH 3 $49.99
HBZ3339 Hull W/PCB,PRP, MTR & RDR:
ZZR CH 4 $49.99
HBZ3340 Hull W/PCB,PRP, MTR & RDR:
ZZR CH 5 $49.99
HBZ3341 Hull W/PCB,PRP, MTR & RDR:
ZZR CH 6 $49.99
HBZ3331 ZZR PC Board: CH 1 $22.99
HBZ3342 ZZR PC Board: CH 2 $22.99
HBZ3343 ZZR PC Board: CH 3 $22.99
HBZ3344 ZZR PC Board: CH 4 $22.99
HBZ3345 ZZR PC Board: CH 5 $22.99
HBZ3346 ZZR PC Board: CH 6 $22.99
Item Description Suggested Retail Item Description Suggested Retail
HobbyZone
Accessories
HBZ1026 DC Peak Charger
Charge your battery from your car in about 40 minutes
with our DC Peak Charger, including adapter to charge
most HobbyZone
®
Aircraft and ZigZag Boat batteries.
Retail: $19.99
Page 27

26
Warranty & Non-Warranty Replacement Parts
Warranty: Horizon Hobby, Inc. guarantees this kit
to be free of defects in material and workmanship
at the date of purchase. This warranty does not
cover any parts damaged by use, crashes
or modification.
In the event that you’re requesting Horizon to
replace Zig Zag Racer 2TMparts, please follow the
instructions below.
1. Make sure the battery is unplugged from the
Zig Zag Racer 2. Please pack the complete Zig
Zag Racer 2 (all components) in the original
box and put into a sturdy shipping carton for
protection. Include complete name and
address information inside the carton, as well
as clearly writing it on the outer label/return
address area.
2. Include detailed information explaining the
nature of the problem(s) encountered. Please
date your correspondence and be sure your
complete name and address appear on this
enclosure. Within your letter, advise us of the
payment method you prefer to use. The
Horizon Service Center accepts VISA or
Mastercard, or you can pay cash in advance
with a cashier's check or money order. If you
prefer to use a credit card, please include your
card number and expiration date.
Warranty Parts Replacement.
Providing that warranty conditions have been met,
defective parts will be replaced without charge.
Sorry, crash damage is not covered under
warranty. To receive warranty service, include
your original dated sales receipt.
Non-Warranty Parts Replacement.
Should your parts replacement costs exceed $50,
you will be provided an estimate advising you of
your options.
Page 28

27
Warranty & Non-Warranty Replacement Parts (continued)
Mail your Zig Zag Racer 2TMto:
Horizon Service Center
ATTN: HobbyZone Dept.
4105 Fieldstone Road
Champaign, IL 61822
Phone: (217) 355-9511
 Loading...