

HobbyZone Sportsman S+ Addendum
1
Sportsman S+
Addendum
EN
®
B
6
2
3
B
A
Assembly
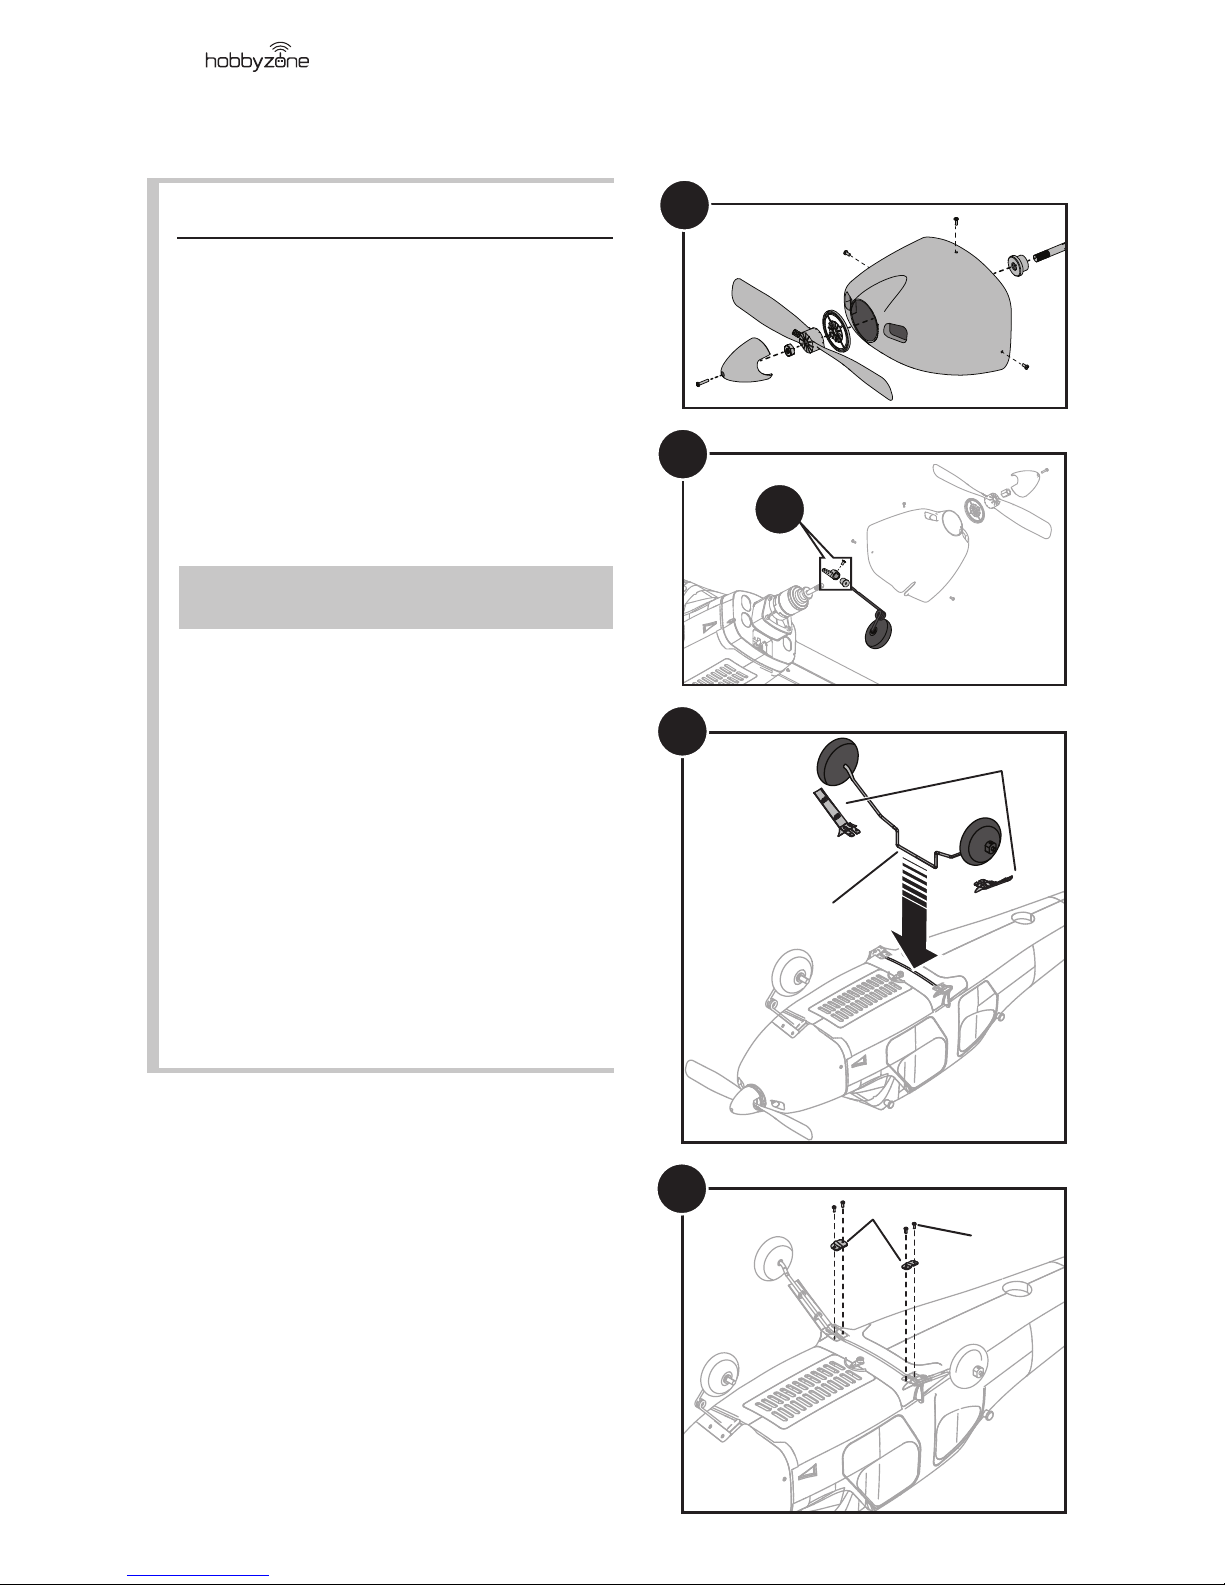
Installing the Grass Field Landing Gear
If you fly in high or rough grass, install the grass
field landing gear.
1. Trim the pre-installed stickers on each side
of the fuselage where the cowl meets the
fuselage.
2. Remove the cowl using the Disassembly
instructions on page 21 of the original manual.
3. Loosen the set screw from the steering arm
and remove the nose gear.
Tip: Turn the nose gear all the way to the left
to access the set screw.
4. Install the grass field nose gear and tighten the
set screw. Fully tighten the steering arm screw
against the flat surface of the nose gear strut.
5. Assemble the spinner, propeller, cowling, and
nose in reverse order.
6. Turn the model so you can see the bottom of
the fuselage.
- Install the left and right fairings (A) on the
respective sides of the landing gear strut as
shown.
- Install the main landing gear by inserting
the main gear strut (B) into the slot in the
fuselage as shown.
7. Install the left and right plates (C) on the
fuselage using 4 screws (D) as shown.
7
D
C
4
2
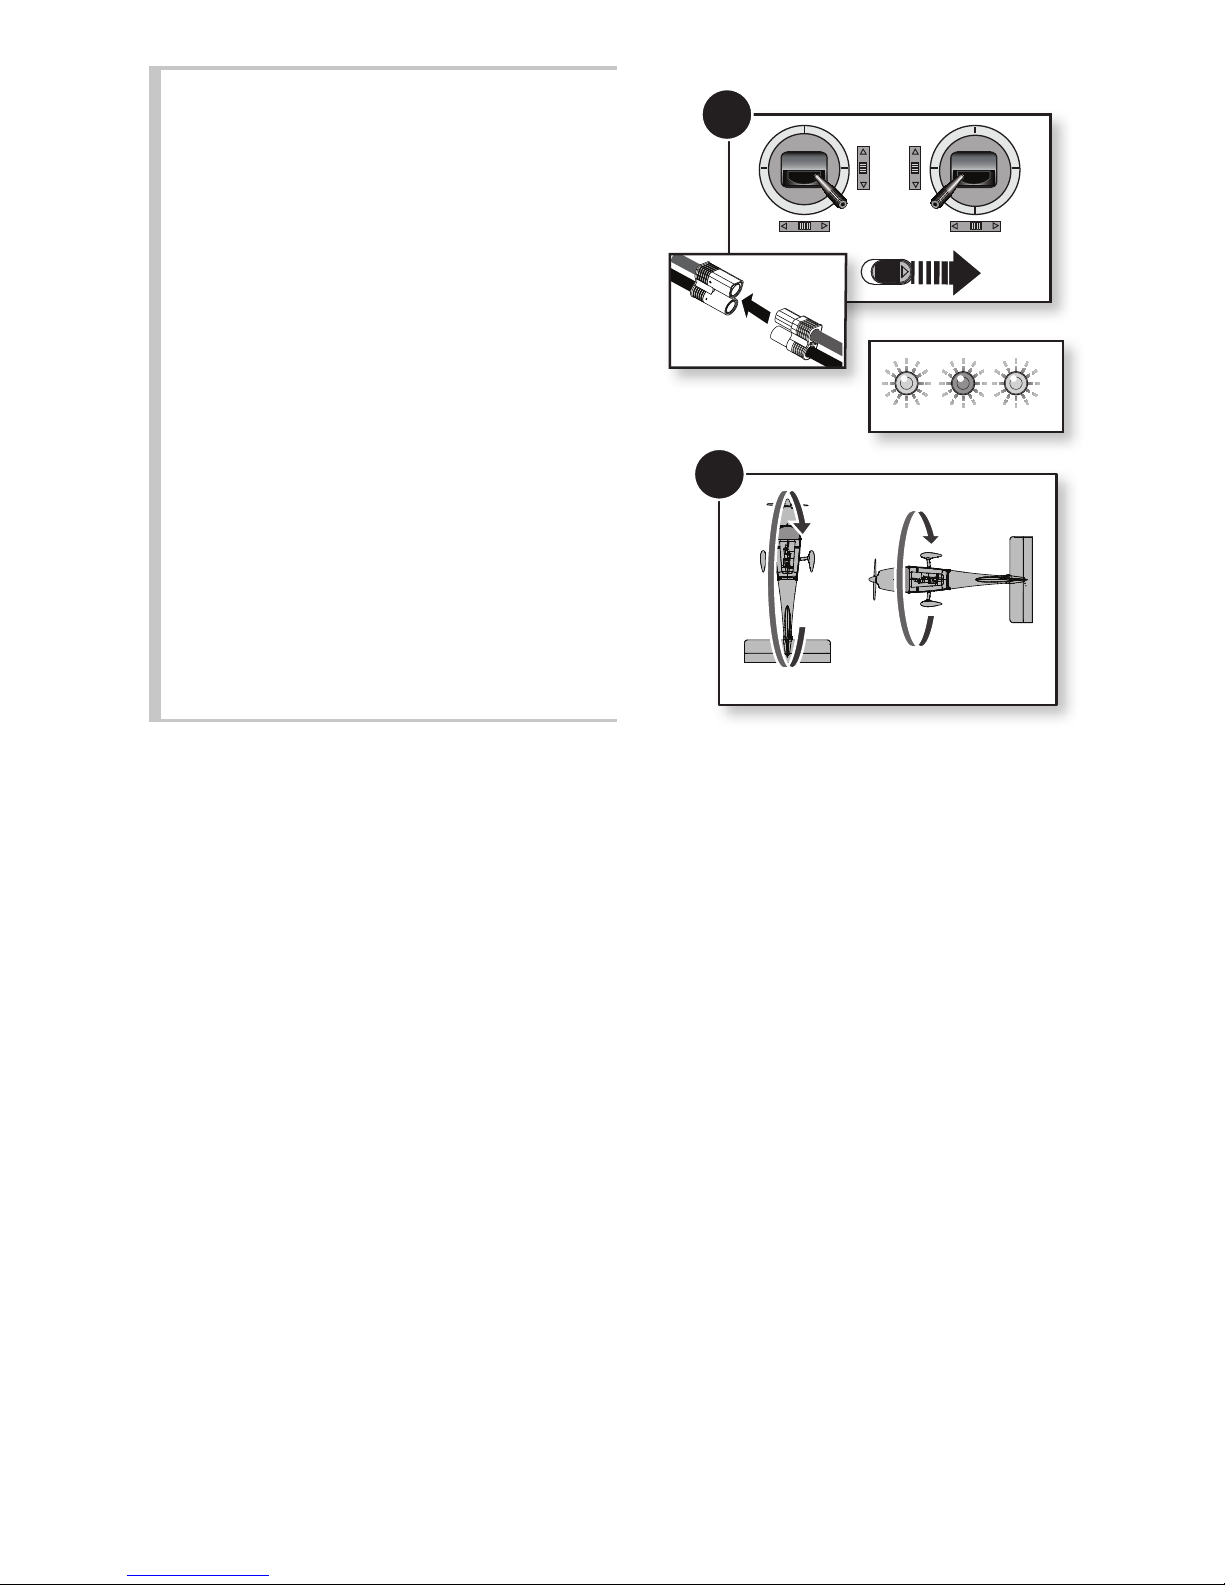
Compass Calibration Procedure
Perform compass calibration before first flight or to
correct the heading during Auto Landing if it differs
significantly from the heading set during takeoff.
1. Power on receiver and set the model on the
ground on its wheels.
2. With the transmitter trims centered, power ON
the transmitter and the aircraft while holding
the transmitter sticks as show until the ESC
sounds to enter compass calibration mode.
3. Wings on: The ESC will sound and the ailerons
will move up and down continuously, indicating
that compass calibration is activated.
Wings off: The visible blue and red LEDs on
the receiver will flash alternately indicating that
compass calibration is activated.
Once in calibration mode, the throttle is not
active and the transmitter sticks can be released.
The transmitter must remain powered on.
4. Once in calibration mode, rotate the plane twice
in position 1, then turn it 90 degrees and rotate
it twice in position 2.
5. Turn off the transmitter, then wait 3 seconds
and disconnect the flight battery.
2
2x
2x
2
4
1
©2016 Horizon Hobby, LLC. HobbyZone and the HobbyZone logo are registered trademarks of Horizon Hobby, LLC.
Sportsman and the aircraft body design are trademarks of Glasair Aviation USA, LLC and are used with permission.
www.hobbyzonerc.com
Created 04/16 53311

3
Sportsman S+
Addendum
DE
®
Montage des Models
Montage des Graspistenfahrwerks
Für den Start von Graspisten montieren Sie bitte
das Graspistenfahrwerk.
1. Schneiden Sie die Aufkleber auf jeder
Rumpfseite an der Stelle ein wo die
Motorhaube auf den Rumpf trifft.
2. Entfernen Sie der Demontageabteilung auf
Seite 21 folgend die Motorhaube.
3. Lösen Sie die Madenschraube vom Lenkhebel
und entfernen das Bugrad.
Tipp: Drehen Sie das Bugrad ganz nach links
um an die Madenschraube zu gelangen.
4. Montieren Sie das Graspistenfahrwerk und
ziehen die Madenschrauben an. Ziehen Sie die
Schraube des Lenkhebels auf der flachen Seite
der Fahrwerksstrebe an.
5. Montieren Sie den Spinner, Propeller,
Motorhaube in umgekehrter Reihenfolge.
6. Drehen Sie das Modell auf den Rücken, so
dass die Unterseite nach oben zeigt.
- Setzen Sie wie abgebildet die beiden
Fahrwerksverkleidungen auf die linke und
rechte Strebe.
- Setzen Sie das Fahrwerk wie abgebildet in
den Schlitz am Rumpfboden ein.
7. Schrauben Sie beiden Halter (C) mit den vier
Schrauben (D) am Rumpf fest.
B
6
2
3
B
A
7
D
C
4
 Loading...