

Owner’s Guide
Model L32C205
32” Class (31.51” Diagonal)
Thank you for purchasing this Hitachi product. Please read these instructions carefully.
For additional assistance please call 1-888-333-1899(U.S.A. or Puerto Rico), or 01-800-700-4321(Mexico)
Record the model number and serial number of your LCD Television for future reference.
MODEL NUMBER SERIAL NUMBER
IMPORTANT SAFETY INSTRUCTIONS ....................................................................... 2-6
HOW TO ATTACH / REMOVE THE STAND ..................................................................... 7
FIRST TIME USE
TV OPERATION ........................................................................................................14-18
CONNECTIONS TO OTHER EQUIPMENT .............................................................. 19-21
TROUBLESHOOTING ................................................................................................... 22
SPECIFICATIONS .......................................................................................................... 23
LIMITED WARRANTY ............................................................................................... 24-25
END USER LICENCE AGREEMENT FOR HITACHI DTV SOFTWARE ..................26-27
APPENDIXES................................................................................................................. 28
or visit our website at www.hitachi.us/tv.
Keep this owner’s guide for future reference.
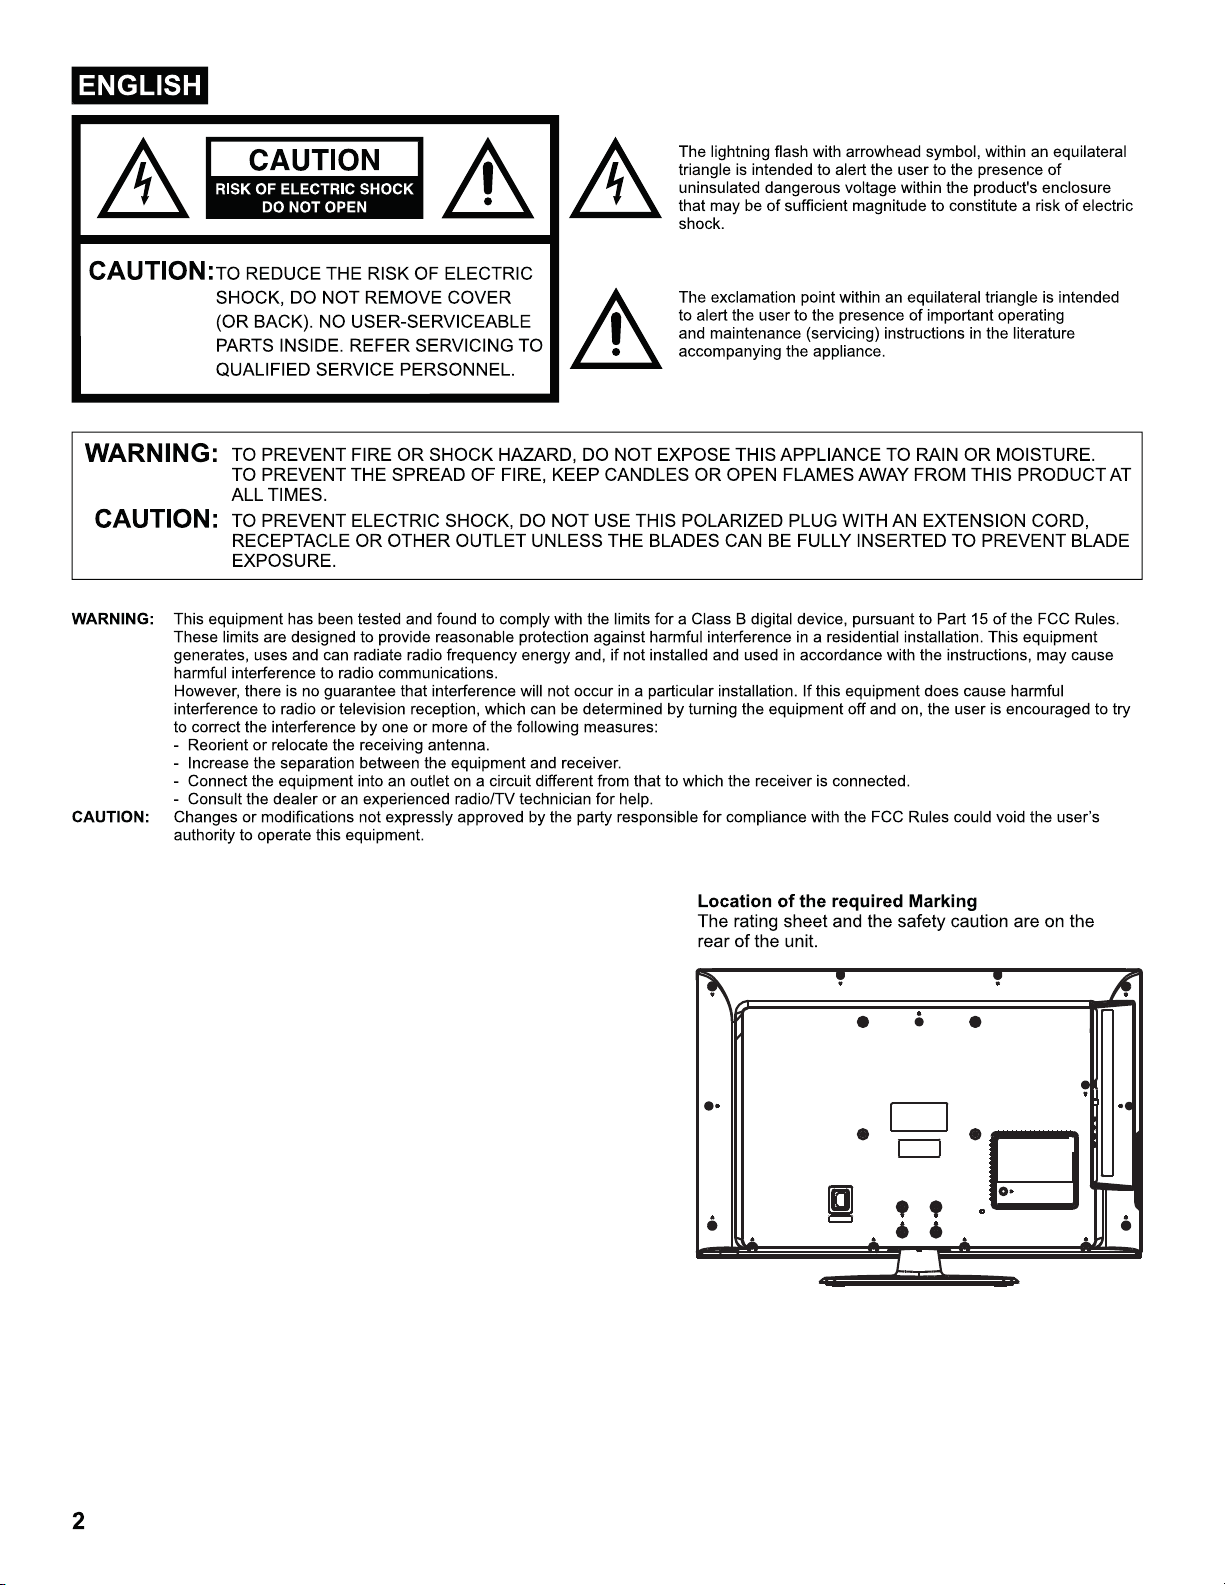
This information is located on the back of the television.
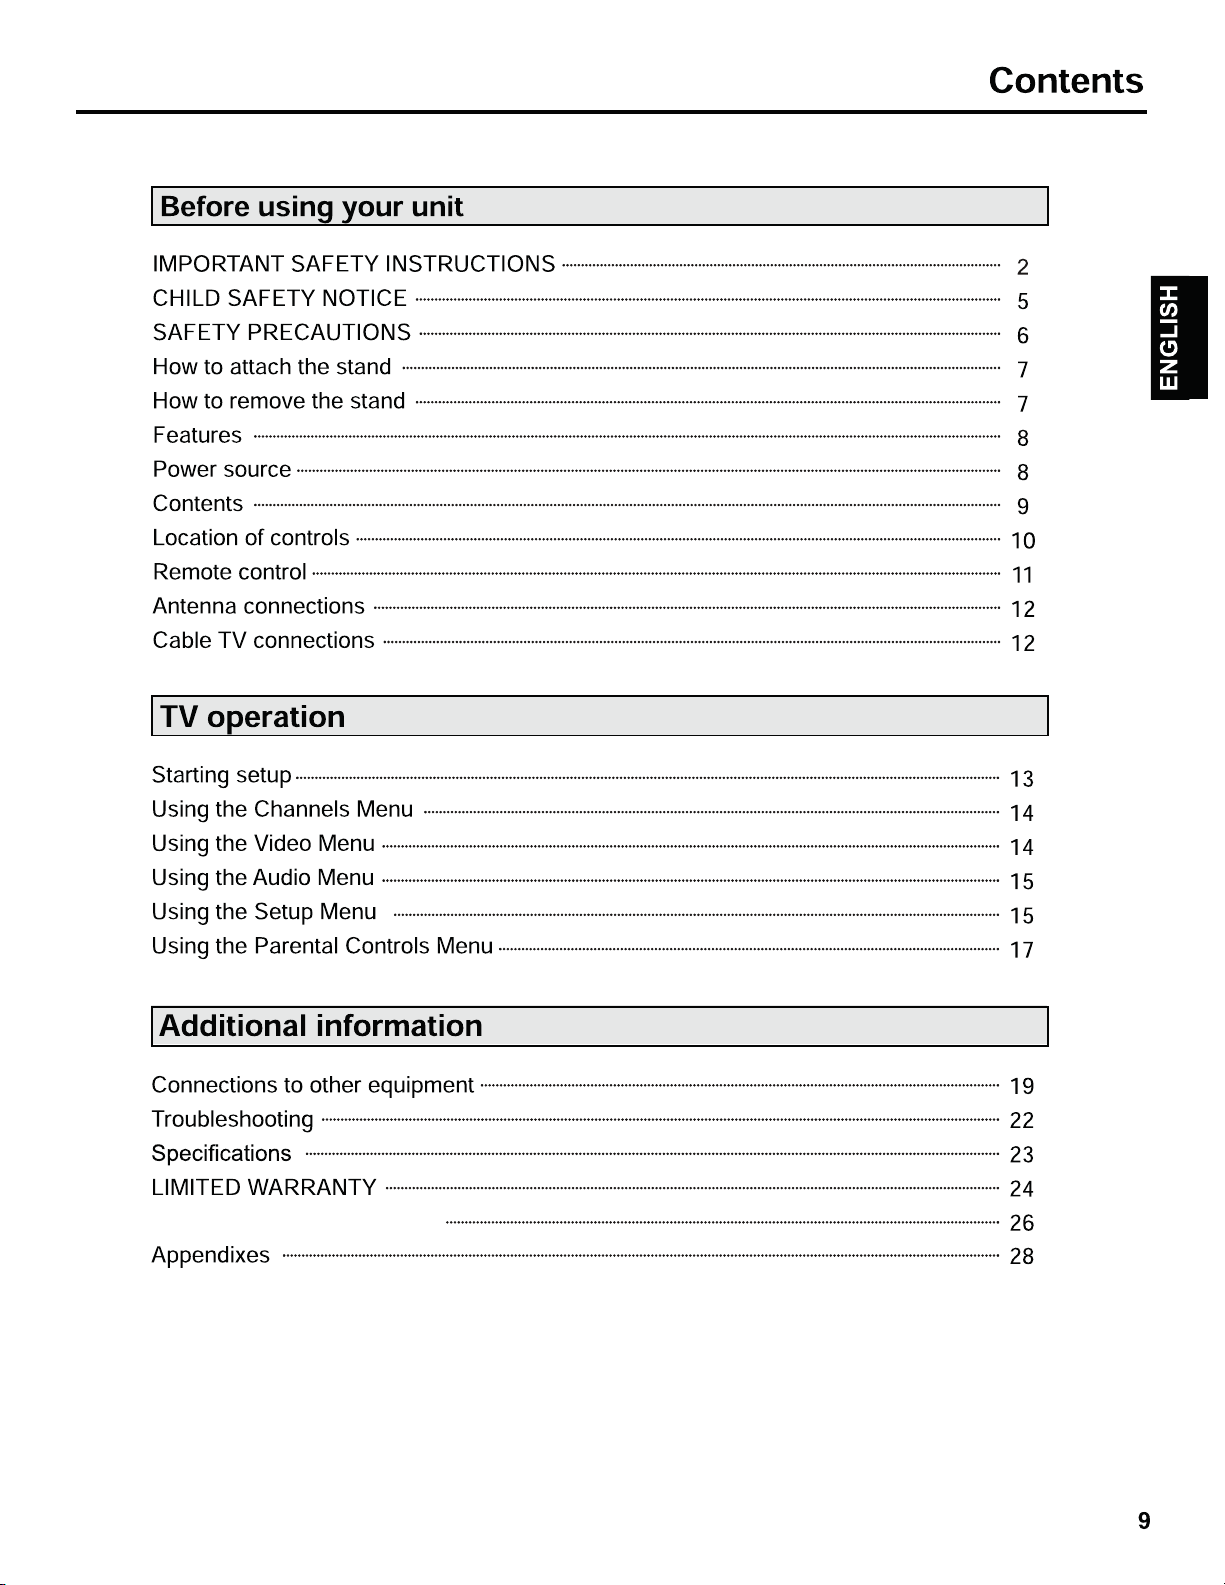
TABLE OF CONTENTS
.......................................................................................................
10-13
L32C205_OR-OG_cover.indd 6 7/5/11 3:03:36 PM

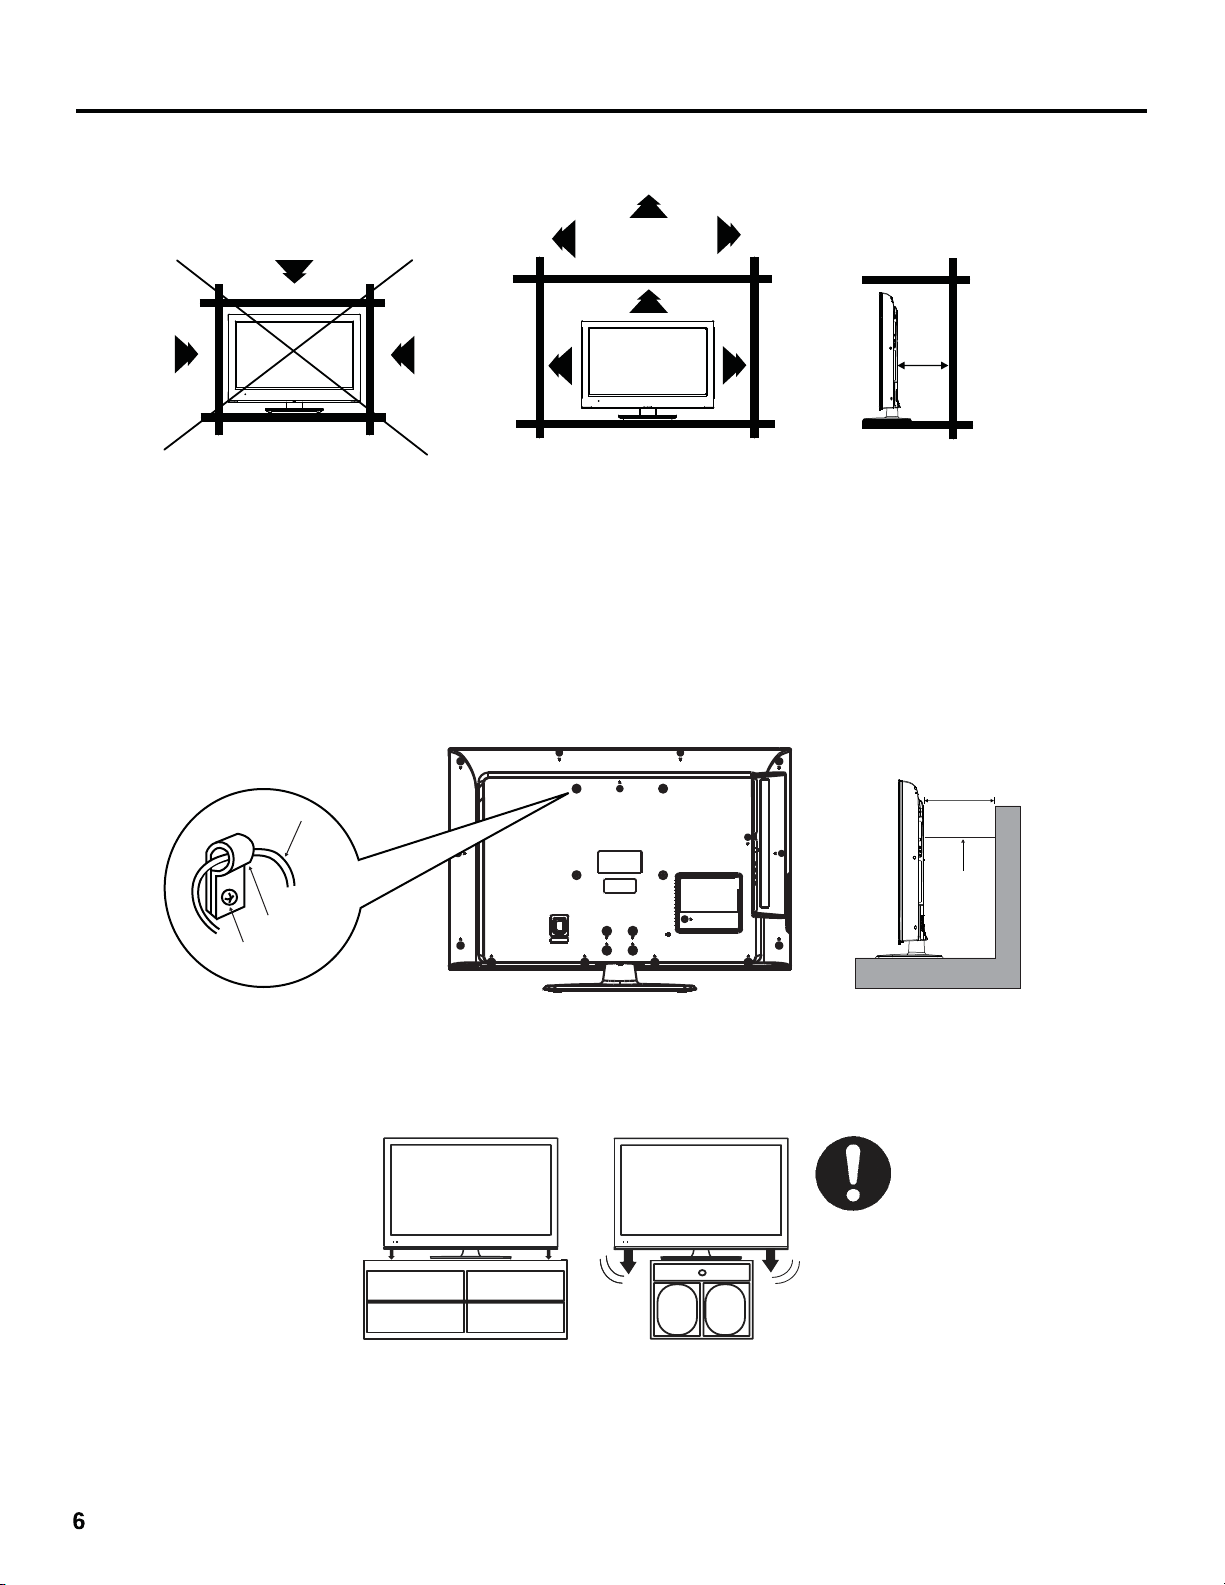
SAFETY PRECAUTIONS
The unit emits heat when in operation. Do not place any covers or blankets on the unit, this may cause overheating. Do not block
ventilation holes, or set up near radiators. Do not place in direct sunlight. When placing on a shelf leave 4 inches (10 cm) free space
around the entire unit.
4 inches
4 inches
Notes when mounting the LCD TV on a wall
If the unit is to be mounted on the wall, contact the retailer where you purchased the LCD TV for advice, and have the equipment professionally installed. Incomplete or improper installation may cause injury to you, and/or damage to the LCD TV.
The screws ISO M6 thread type should be used. The insertion length must be within 12 - 16mm.
If the insertion length is less than 12mm, the weight can not be maintained.
If the insertion length is more than 16mm, a space is created between the Wall Mount Bracket and the Television.
(Insertion Length) = (Screw Length) - (Washers Thickness) - (Mounting Bracket Thickness)
Securing to a Wall
1. Use metallic wire, clamp and screw (not provided) on the rear of the LCD TV as shown below.
2. Use proper hardware (drywall anchor, masonry screw, etc) to secure other end of wire to wall.
2.
4 inches
Wire
Wire
Clamp
Screw(M6×12)
NOTICE FOR TV CABINET
If the unit is to be mounted on a cabinet smaller than the length of the unit, it could result in an unstable location and the unit may tumble
over, making a risk of personal, possibly fatal injury. Also, this would damage the product seriously. Accordingly, Hitachi accepts no
responsibility or liability for any injuries or property damage resulting from the improper installation.
YES !!
YES!!
NO !!
NO!!
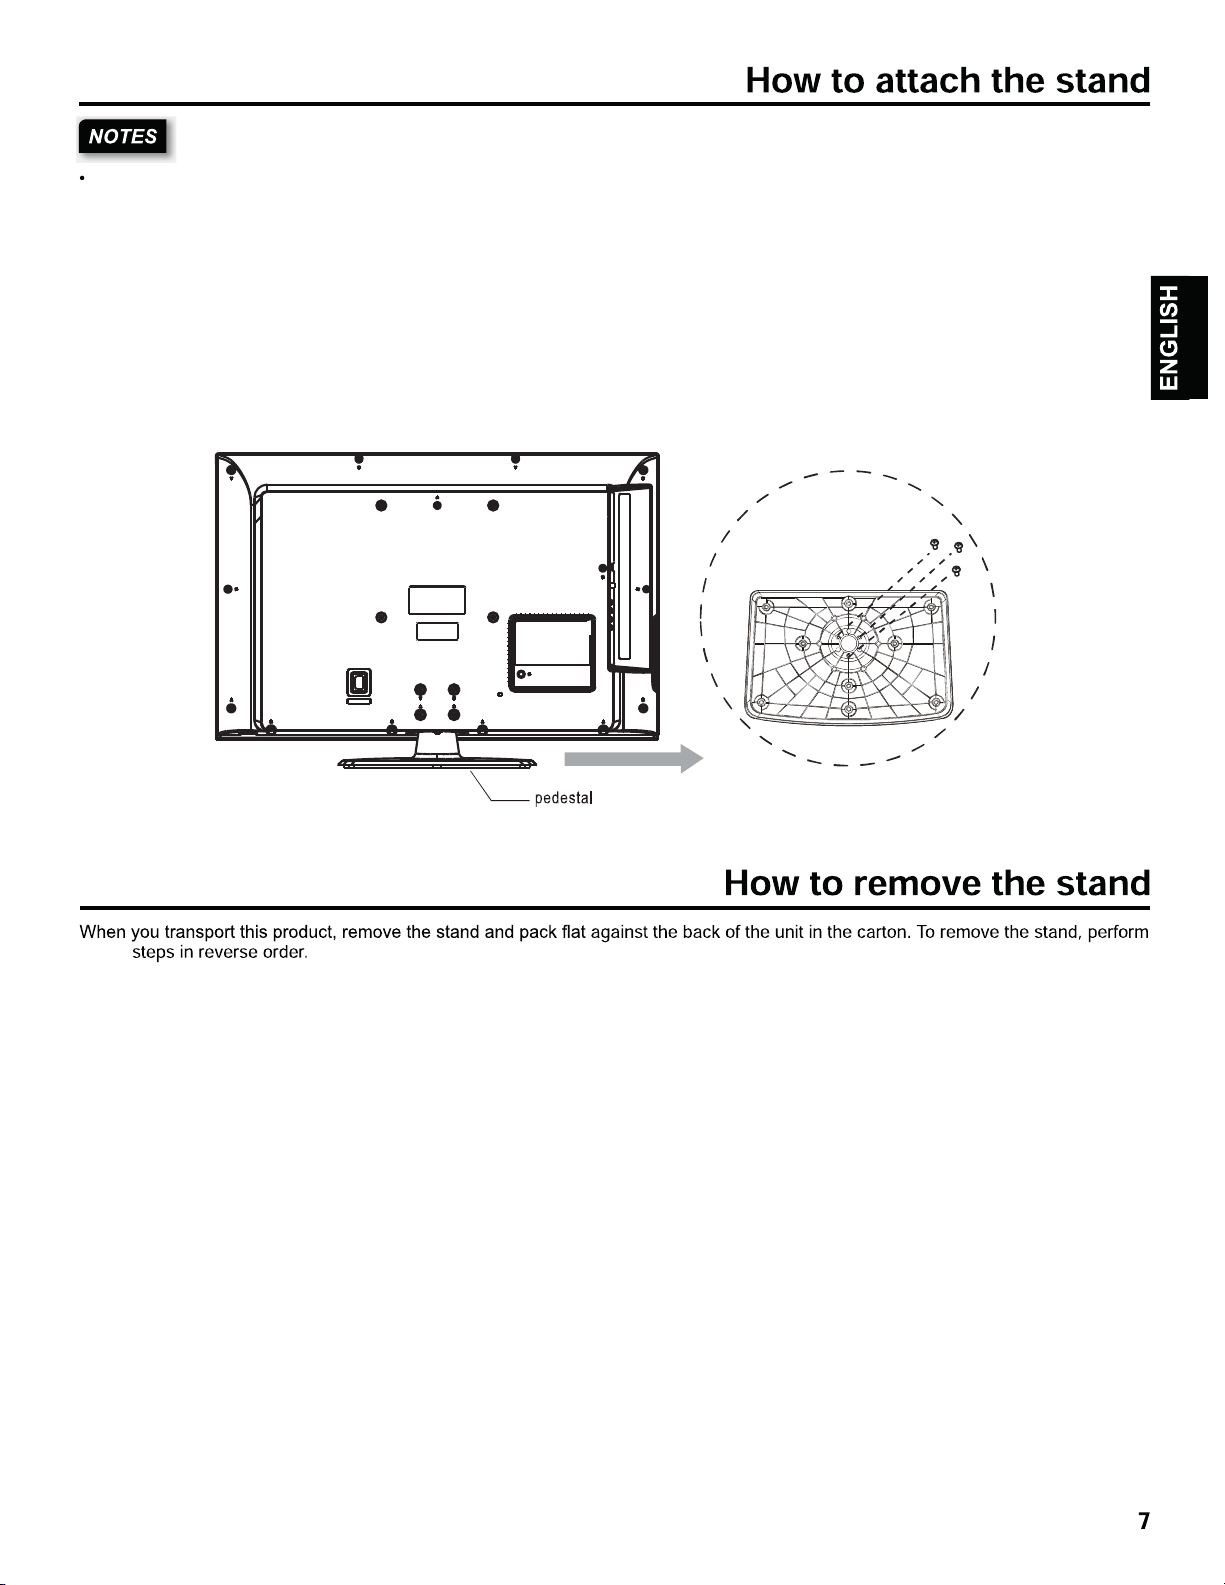
The below figures are for reference only,please refer to the actual units to determine the appearances.
Every hole of the pedestal must be fastened with screws!
1.Lay the soft cloth on a table which can hold the weight of the whole TV.
2.Put the TV on the cloth with its back upwards and the LCD downwards.
3.Take out the pedestal,and insert the pedestal into the TV then put the pedestal,to relevant position of the TV set,until all
the holes match each other completely.
4. Fasten the pedestal and the TV set together with screws.
5. Erect the TV set,and put it on the proper position for watching.
above
End User License Agreement

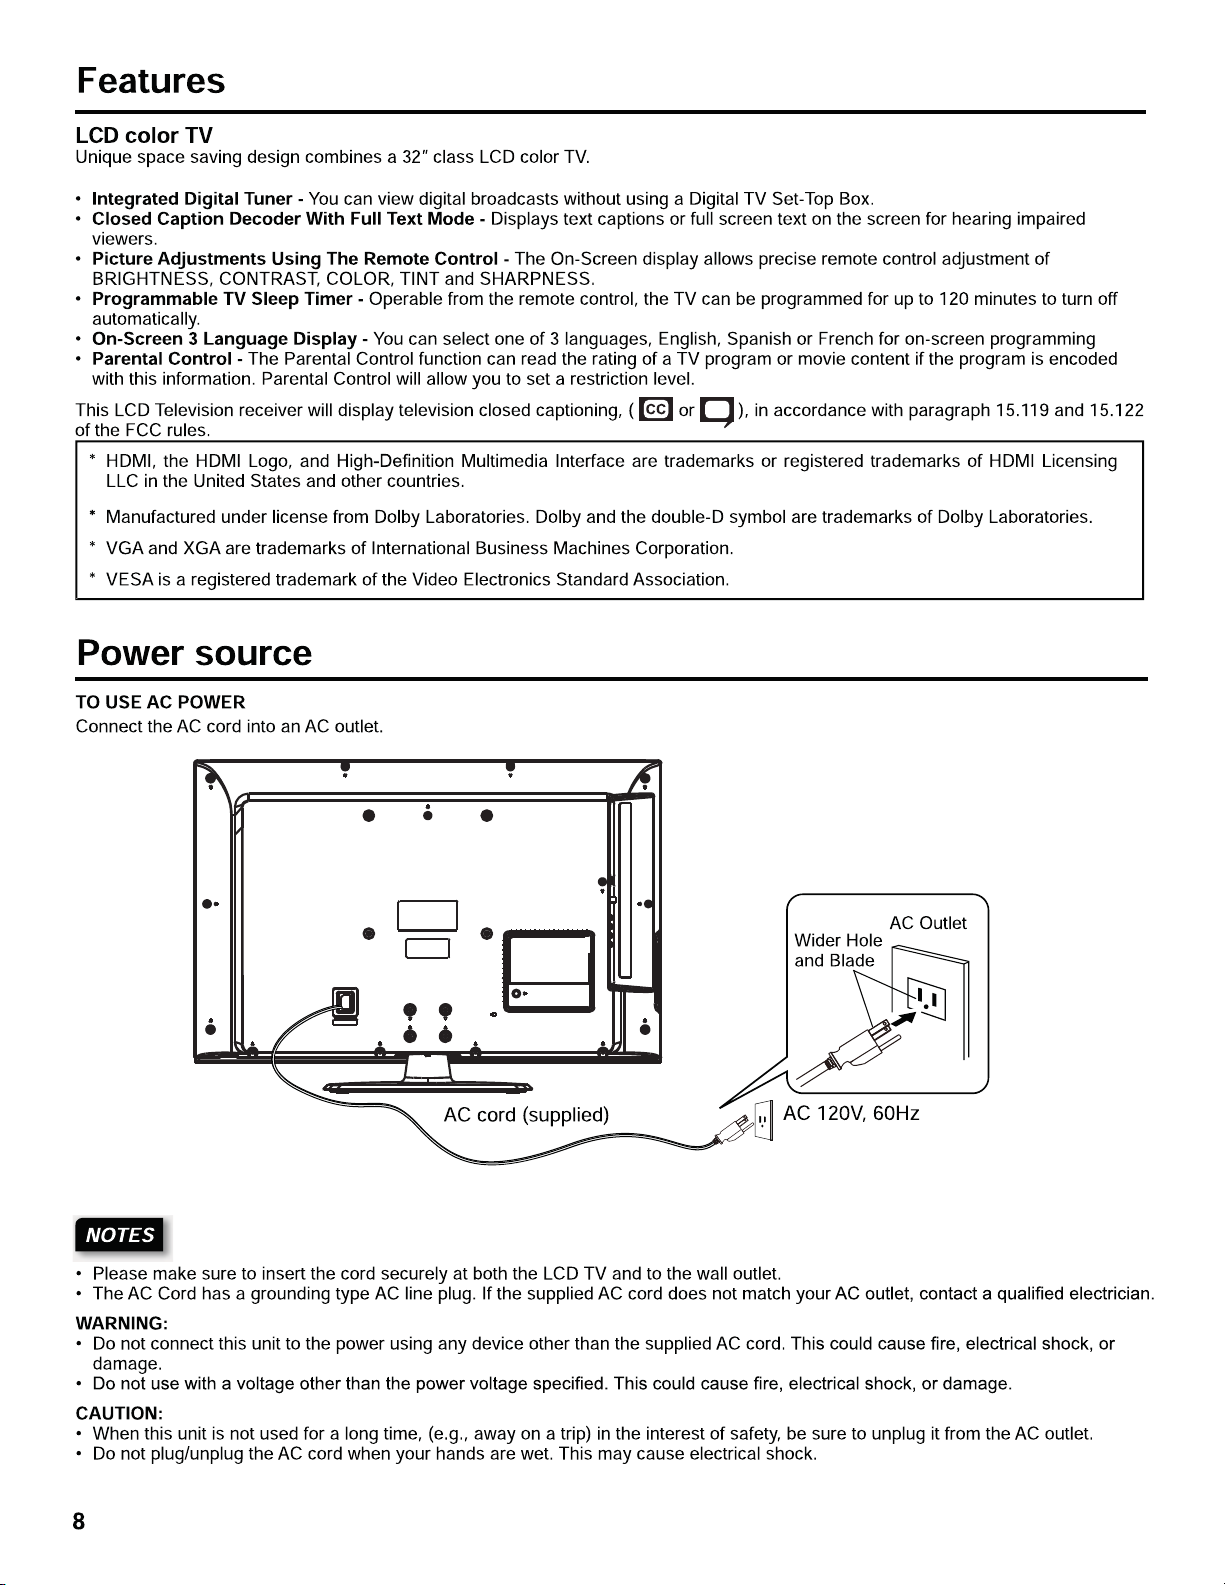
POWER
COMPONENT


Antenna connections
If you are using an indoor or outdoor antenna, follow the instructions below that correspond to your antenna system. If you
are using a Cable TV service, see Cable TV connections.
Combination VHF/UHF Antenna (Single 75 ohm cable)
Antenna
Jack
75 ohm
Coaxial
Cable
Cable TV connections
This TV has an extended tuning range and can tune most cable channels without using a Cable TV Converter box. Some
cable companies offer “premium pay channels” where the signal is scrambled. Descrambling these signals for normal
viewing requires the use of a descrambler device which is generally provided by the Cable TV company.
For subscribers to basic Cable TV service
For basic Cable TV service not requiring a Converter/Descrambler box, connect the
Antenna
Jack
75 ohm Coaxial Cable directly to the Antenna Jack on the back of the TV.
75 ohm
Coaxial Cable
For subscribers to scrambled Cable TV service
If you subscribe to a Cable TV service which requires the use of a Converter/Descrambler box, connect the incoming 75 ohm Coaxial
Cable to the Converter/Descrambler box. Using another 75 ohm Coaxial Cable, connect the output jack of the Converter/Descrambler
box to the Antenna Jack on the TV. Follow the connections shown below. Set the TV to the output channel of the Converter/
Descrambler box (usually channel 3 or 4) and use the Converter/Descrambler box to select channels.
Antenna
Incoming 75 ohm Cable TV Cable
Converter/
Descrambler
75 ohm Cable to TV
Jack
For subscribers to unscrambled Cable TV service with scrambled premium channels
If you subscribe to a Cable TV service in which basic channels are unscrambled and premium channels require the use of a
Converter/Descrambler box, you may wish to use a signal Splitter and an A/B Switch box (available from the Cable TV company
or an electronics supply store). Follow the connections shown below. With the switch in the “B” position, you can directly tune any
nonscrambled channels on your TV. With the switch in the “A” position, tune your TV to the output of the Converter/Descrambler box
(usually channel 3 or 4) and use the Converter/Descrambler box to tune scrambled channels.
Incoming
75 ohm
Cable TV
Cable
Splitter
Converter/
Descrambler
A/B Switch
75 ohm Cable to TV
A
B
Antenna
Jack

Starting setup
will assist you to specify the Air/Cable setting and program
your channels automatically.
IMPORTANT: Make sure that the antenna or cable TV system
connection is made.
To turn on the TV, touch POWER (POWER indicator on the
1
front of the unit changes blue. It may take approx. 10 seconds
for a picture to appear on screen.). The
begins.
Setup Wizard
Please select your tuner mode:
Move
Press ▲ or ▼ to select “Source”, then press or to select
2
“Cable” or “Air”.
Press ▲ or ▼ to select “Scan”, then press or SELECT.
3
“Setup Wizard” will begin. After the Setup Wizard is
4
completed, the TV channel appears on the screen.
Depending on the reception condition, it may take up to 25
•
minutes or more to complete memorizing digital cable
channels. Please allow the process to complete without
interruption.
SEL Select
Setup Wizard
Tuner
Air
Cable
Return
function
TO SELECT DIGITAL CHANNELS
the remaining number.
Example, to select channel 15-1, press 1, 5, –, 1, then press
SELECT.
• If a channel is selected with only audio content, “Audio
only” will be displayed on the screen.
• If a channel is selected with a weak digital signal, “Weak
Signal or Channel not available.” will be displayed on the
screen.
• The same program may be available on either an analog
channel or a digital channel. You may choose to watch
either format.
• If a channel is selected to which you have not subscribed,
“Scrambled ” will be displayed on the screen.
VHF/UHF/CABLE CHANNELS
Air Cable
VHF
2-13
UHF
14-69
CATV
Digital Terrestrial Broadcast(8VSB):2-69
Digital cable(64/256 QAM):1-135
1-125
VHF
2-13
– button followed by
NOTES
• If a channel with no broadcast is selected, the sound will
automatically be muted.
• It may take a few seconds for a digital channel picture to
appear on screen after being selected.
ENGLISH
NOTE
•
If you press EXIT in the process of “Setup Wizard”, the Setup
Wizard stops and changes to the normal screen. When you
make a menu selection, your changes occur
do not have to press EXIT to see your changes.
immediately. You
TV operation
To turn on the TV, press POWER.
1
(POWER indicator on the front of the unit changes blue.
It may take approx. 10 seconds for a picture to appear on
screen.)
Adjust the volume level by pressing VOL or . The
2
volume level will be indicated on the screen by volume bars.
As the volume level increases, so do the number of bars.
If the volume decreases, the number of volume bars also
decreases.
Set the Source option to the appropriate position.
3
Press the Direct Channel Selection (0-9, –) buttons to
4
select the channel.
(If you press only the channel number, channel selection will
be delayed for a few seconds.)
TO SELECT ANALOG CHANNELS
1-9: Press 1-9 as needed. Example, to select channel
10-99: Press the 2 digits in order. Example, to select
100-135: Press the 3 digits in order. Example, to select
2, press 2, then press SELECT .
channel 12, press 1, 2, then press SELECT.
channel 120, press 1, 2, 0, then press SELECT.
To select the video input source
To view a signal from another device connected to your LCD TV,
such as a VCR player, press INPUT, then press ▲ or ▼, then
press SELECT.You can select TV, Video, Component, HDMI or
RGB depending on which input jacks you used to connect your
devices.
Input
TV
AV
Component
RGB
HDMI 1
HDMI 2
SEL Select
Move
MENU Return
CH /
Press and release CH / . The channel automatically stops at
the next channel set into memory.
For proper operation, before selecting channels, they should be
set into the memory. Refer to the Channels Menu on page 14.

EXIT
EXIT
EXIT
EXIT

Aspect Ratio
EXIT
EXIT
EXIT
EXIT

RGB
( "PC Standby" being only available in RGB input.)


To connect a HDMI or a DVI device to the unit
The HDMI/DVI input receives digital audio and uncompressed video from a HDMI device or uncompressed digital video from a DVI
device.
When you connect to a DVI device with a HDMI-to-DVI adapter cable, it transfers only video signal. Separate analog audio cables are
required.
Back of the unit
RGB/DVI AUDIO Input
Audio cord (not supplied)
To DVI output
DVI device
HDMI - to - DVI adapter cable
(HDMI type A connector) (not supplied)
To HDMI/DVI IN
HDMI cable (type A connector) (not supplied)
When using a HDMI input from a Set-Top-Box, it is recommended to use a 1080p, 1080i or 720p input signal.
When the HDMI input is a 1080p signal, it is recommended that the length of the cable should be less than 5 meters.
or
HDMI device
To HDMI out


31.51
184 48.6 7.2 1.9 0.821.5

Limited Warranty
Subject to the terms and conditions of this Limited Warranty (this “Warranty”), this Hitachi Television Product, including any
accessories included in the packaging) (this “Product”), is warranted by Hitachi America, Ltd. (“Hitachi”) to the original
consumer purchaser against defects in materials and workmanship as follows:
1. LABOR: For a period of one year from date of original consumer purchase, if this Product or any functional part
is determined by Hitachi, or any authorized servicer specified by Hitachi (“Authorized Servicer”) , to be defective,
Hitachi will repair the Product or, at Hitachi’s option, replace the Product with a Hitachi refurbished television
product of similar or better quality, at no charge to the original consumer. After the expiration of the one year
Warranty period, consumer is responsible for all repairs and repair-related labor charges.
LIMITED WARRANTY TO
ORIGINAL CONSUMER
LCD TV
Up to 32”: Carry-in or ship-in service only
Above 32”: In-home service
2. PARTS: For a period of one year from t
he date of original consumer purchase, Hitachi will supply, at no charge
to the original consumer new, rebuilt, or refurbished functional replacement parts in exchange for defective parts.
After the expiration of the one year Warranty period, consumer is responsible for the costs of all parts.
3. TRANSPORTATION: Except to the extent the Product qualifies for in-home service, customer assumes
responsibility for all applicable transportation or shipping
charges related to delivering Product to an Authorized
Servicer during the aforementioned warranty period; provided that, if Product is shipped to an Authorized Servicer
by customer, Hitachi will pay the cost of shipping the Product back to the consumer. Product 32” or below is not
eligible for in-home service.
4. IN-HOME SERVICE: In-home service requires clear, complete and easy access to the Product by the Authorized
Servicer and does not include removal or re-installation of an installed Product. It is possible
that certain in-home
repairs will not be completed on-site, but will require that the Product or parts of the Product, at the Authorized
Servicer’s discretion be removed for shop diagnosis and/or repair. The Product or parts will then be returned to the
consumer.
To obtain Warranty Service and Troubleshooting information:
Call our Electronics Consumer Care Center at 1-888-333-1899(U.S.A. or Puerto Rico), or 01-800-700-4321(Mexico)..
Hours: 9am to 6 pm EST Monday Friday (excluding holidays)
To receive Warranty service, the original consumer purchaser must contact Hitachi at the above telephone number for problem
determination and service procedures. Proof of purchase in th
that the Product is within the applicable Warranty period(s), MUST be presented to Hitachi, or an Authorized Servicer, in order
to obtain the requested service.
Exclusions and Limitations: This Warranty covers manufacturing defects in materials and workmanship encountered in the
normal, noncommercial use of the Product, and does not cover consumer instruction, delivery, insta
signal reception problems (including antenna), cosmetic damage or damage due to acts of nature, accident, misuse, abuse,
negligence, commercial use or modification of, or to any part of the Product. In addition, this Warranty does not cover “ghosting”
or image retention the Product’s screen caused by extended and/or repeated display of fixed on-screen content. This Warranty
applies to the original consumer only and does not cover Products sold to consumers in used, “AS ISā or “WITH ALL FAULTS”
condition, or consumables
been altered or removed from the Product. Damage occurring to any Product returned for service that is caused by improper or
unsecure packaging or shipping by the original consumer purchaser is excluded from coverage under this Warranty. This
Warranty is valid only in the United States and Puerto Rico, and only applies to Pr
(e.g., fuses, batteries, bulbs etc.), and the Warranty is invalid if the factory-applied serial number has
e form of an original bill of sale or receipted invoice, evidencing
llation, set-up, adjustments,
oducts purchased and serviced in the United

Limited Warranty
States and Puerto Rico. Warranty will be voided if attempts of repair are performed by the consumer or any servicers that are
NOT authorized by Hitachi.
________________________________________________________________________________________________________
THERE ARE NO EXPRESS WARRANTIES OTHER THAN THOSE EXPRESSLY DESCRIBED ABOVE, AND NO
WARRANTIES WHETHER EXPRESS OR IMPLIED, INCLUDING, BUT NOT LIMITED TO, ANY IMPLIED
WARRANTIES OF MERCHANTABILITY
THE EXPRESS WARRANTY PERIOD STATED ABOVE, AND NO OTHER EXPRESS WARRANTY OR
GUARANTY GIVEN BY ANY PERSON, FIRM OR ENTITY WITH RESPECT TO THE PRODUCT SHALL BE
BINDING ON HITACHI. THIS WARRANTY IS THE EXCLUSIVE WARRANTY WITH RESPECT TO THE
PRODUCT AND HITACHI IS THE EXCLUSIVE WARRANTY PROVIDER FOR THE PRODUCT. REPAIR OR
REPLACEMENT IS THE EXCLUSIVE REMEDY OF THE CONSUMER. HITACHI SHALL NOT BE LIABLE FOR
ANY INCIDENTAL OR CONSEQUENTIAL DAMAGES CAUSED B
THE PRODUCT. NOTWITHSTANDING THE FOREGOING, CONSUMER’S RECOVERY AGAINST HITACHI
SHALL NOT EXCEED THE PURCHASE PRICE OF THE PRODUCT SOLD BY HITACHI. THIS WARRANTY
SHALL NOT EXTEND TO ANYONE OTHER THAN THE ORIGINAL CONSUMER WHO PURCHASED THE
PRODUCT AND IS NOT TRANSFERABLE.
Some states do not allow the exclusion or limitation of incidental or consequential damages, or allow limitations on warranties,
so the above limitations or exclusions may not apply to you. This Warranty gives you specific rights, and you may
rights, which vary from state to state.
CUSTOMER RECORD
(Please Retain for your records)
Date of Purchase:_______________________ Store/Dealer:___________________________________
Model No.:____________________________ Serial No.:_____________________________________
Important: Keep all original Product packaging materials and the original receipt in the event Product needs service.
OR FITNESS FOR A PARTICULAR PURPOSE, SHALL APPLY AFTER
Y THE USE, MISUSE OR INABILITY TO USE
have other


 Loading...