

Hitachi DV-P788A Instruction Manual
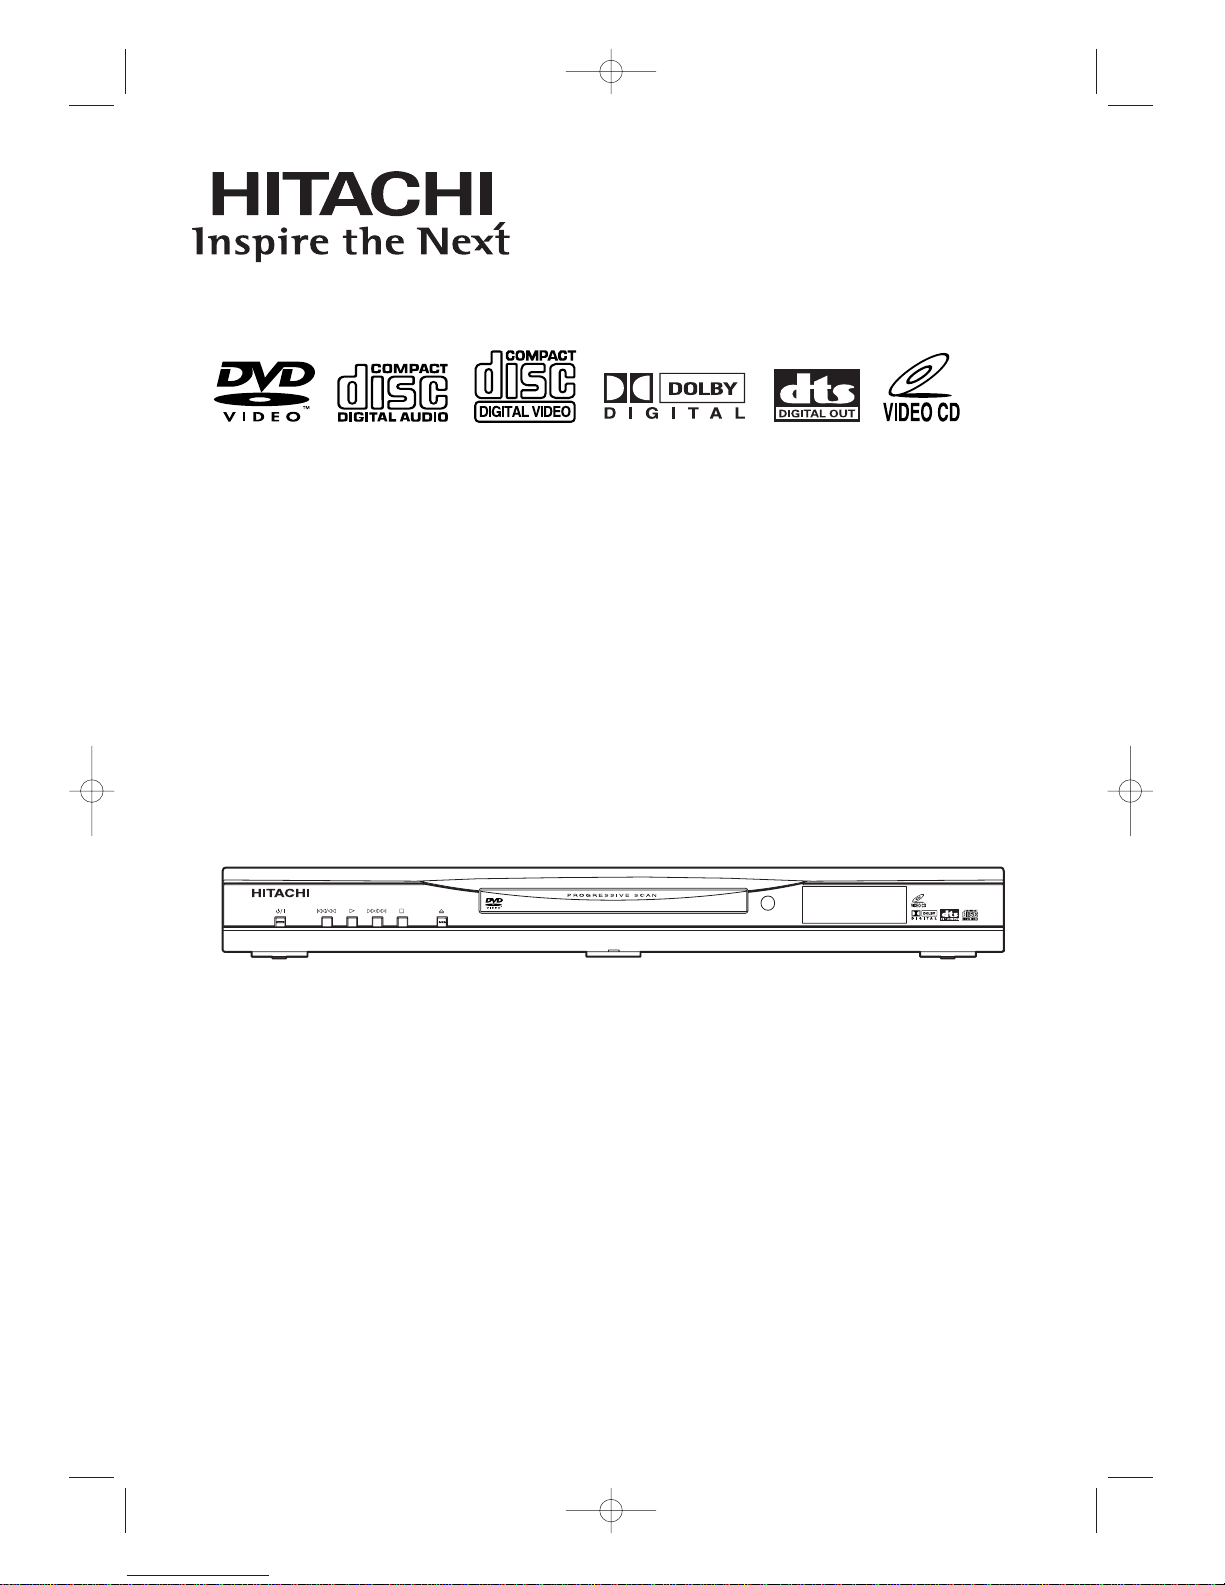
DVD PLAYER
INSTRUCTION MANUAL
Instruction manual
To obtain the best performance and ensure years of troublefree use, please read this instruction manual completely.
MODEL
DV-P788A(AU)
DVD PLAYER DV-P788A(AU)
MP3 / JPEG PLAYBACK DVD / DVD-R / VIDEO CD / CD / CD-R / CD-RW COMPATIBLE
E5918AD(EN).qx3 04.4.2 6:49 PM Page 1
–2–
EN
A NOTE ABOUT RECYCLING
This product’s packaging materials are recyclable and can be reused.Please dispose of any materials in accordance with your
local recycling regulations.
Batteries should never be thrown away or incinerated but disposed of in accordance with your local regulations concerning chemical wastes.
PRECAUTIONS
This player employs a laser. Only a qualified service person should remove the cover or attempt to service this device, due to possible eye injury
.
CAUTION: USE OF CONTROLS OR ADJUSTMENTS OR PERFORMANCE OF PROCEDURES OTHER THAN THOSE SPECI-
FIED HEREIN MAY RESULT IN HAZARDOUS RADIATION EXPOSURE.
CAUTION:
VISIBLE AND INVISIBLE LASER RADIATION WHEN OPEN AND INTERLOCK DEFEATED. DO NOT STARE INTO BEAM
.
LOCATION: * PRINTED ON THE BACK
Laser Safety
WARNING
: TO REDUCE THE RISK OF FIRE OR ELECTRIC SHOCK, DO NOT EXPOSE THIS
APPLIANCE TO RAIN OR MOISTURE.
The lightning flash with arrowhead symbol, within an
equilateral triangle, is intended to alert the user to the
presence of uninsulated “dangerous voltage” within the
product’s enclosure that may be of sufficient magnitude
to constitute a risk of electric shock to persons.
The exclamation point within an equilateral triangle is
intended to alert the user to the presence of important
operating and maintenance (servicing) instructions in
the literature accompanying the appliance.
CAUTION
:
TO REDUCE THE RISK OF ELECTRIC SHOCK, DO NOT REMOVE
COVER (OR BACK).NO USER SERVICEABLE PARTS INSIDE.REFER
SERVICING TO QUALIFIED SERVICE PERSONNEL.
CAUTION
RISK OF ELECTRIC SHOCK
DO NOT OPEN
Power Supply
The main power supply is engaged when the main plug is plugged in a 240V~ 50Hz AC outlet.To operate the
unit, press the
STANDBY button to turn on the unit.
Warning
To avoid fire or electric shock, do not expose this unit to rain or moisture.
Dew Warning
Moisture condensation may occur inside the unit when it is moved from a cold place to a warm place, or after
heating a cold room or under conditions of high humidity. Do not use the DVD Player at least for 2 hours until its
inside is dry.
WARNING: LIVE PARTS INSIDE.
DO NOT REMOVE ANY SCREWS.
Caution
1) Do not attempt to open the cabinet.There are no par ts you can service inside. Refer all servicing to qualified service personnel.
2) Slot and openings in the cabinet and at the side or bottom are provided for ventilation.To ensure reliable operation and to
protect the unit from overheating these opening must not be blocked or covered.Avoid enclosed spaces such as book
cases unless proper ventilation is provided.
3) Keep the unit away from the radiator heat sources.
4) Avoid using near strong magnetic fields.
5) Do not push objects of any kind into this through the cabinet slot as they could touch current carrying parts or short circuit
parts resulting in a fire or electric shock.
6) Never spill liquid of any kind on this unit.
If liquid is spilled into the unit, consult qualified service engineer.
7) Use this unit in a horizontal (flat) position only.
8) This equipment is in Stand-by mode when it turns off whilst the power cord is connected.
CLASS 1 LASER PRODUCT
KLASSE 1 LASER PRODUKT
KLASS 1 LASER APPARAT
CLASSE 1 PRODUIT LASER
E5918AD(EN).qx3 04.4.2 6:49 PM Page 2

–3–
EN
TABLE OF CONTENTS
■
PRECAUTIONS . . . . . . . . . . . . . . . . . . . . . . . . . . . . . . 2
Power Supply . . . . . . . . . . . . . . . . . . . . . . . . . . . . . . . . 2
Warning. . . . . . . . . . . . . . . . . . . . . . . . . . . . . . . . . . . . . 2
Dew Warning. . . . . . . . . . . . . . . . . . . . . . . . . . . . . . . . . 2
Caution . . . . . . . . . . . . . . . . . . . . . . . . . . . . . . . . . . . . . 2
Laser Safety . . . . . . . . . . . . . . . . . . . . . . . . . . . . . . . . . 2
About Copyright. . . . . . . . . . . . . . . . . . . . . . . . . . . . . . . 3
Notice for the progressive scan outputs . . . . . . . . . . . . . 3
■
INTRODUCTION. . . . . . . . . . . . . . . . . . . . . . . . . . . . . . 4
Supplied Accessories . . . . . . . . . . . . . . . . . . . . . . . . . . 4
Symbols Used in this Manual. . . . . . . . . . . . . . . . . . . . . 4
■
ABOUT THE DISCS . . . . . . . . . . . . . . . . . . . . . . . . . . . 4
Playable Discs. . . . . . . . . . . . . . . . . . . . . . . . . . . . . . . . 4
Unplayable Discs. . . . . . . . . . . . . . . . . . . . . . . . . . . . . . 5
■
FEATURES. . . . . . . . . . . . . . . . . . . . . . . . . . . . . . . . . . 5
■
FUNCTIONAL OVERVIEW . . . . . . . . . . . . . . . . . . . . . . 6
FRONT PANEL . . . . . . . . . . . . . . . . . . . . . . . . . . . . . 6
REAR PANEL . . . . . . . . . . . . . . . . . . . . . . . . . . . . . . 6
Display . . . . . . . . . . . . . . . . . . . . . . . . . . . . . . . . . . . . . 6
Displays During Operation. . . . . . . . . . . . . . . . . . . . . . . 7
Remote Control. . . . . . . . . . . . . . . . . . . . . . . . . . . . . . . 7
Loading the Batteries. . . . . . . . . . . . . . . . . . . . . . . . . . . 7
Tour of the remote control . . . . . . . . . . . . . . . . . . . . . . . 8
■
CONNECTIONS . . . . . . . . . . . . . . . . . . . . . . . . . . . . . 10
Connection to an audio system . . . . . . . . . . . . . . . . . . 10
Connection to a TV (for video). . . . . . . . . . . . . . . . . . . 11
■
PLAYING A DISC . . . . . . . . . . . . . . . . . . . . . . . . . . . . 12
Basic Playback . . . . . . . . . . . . . . . . . . . . . . . . . . . . . . 12
CANCELLING AND CALLING BACK
THE PBC FUNCTION . . . . . . . . . . . . . . . . . . . . . . . 12
General Features. . . . . . . . . . . . . . . . . . . . . . . . . . . . . 12
Disc Navigation . . . . . . . . . . . . . . . . . . . . . . . . . . . . . . 12
Pause . . . . . . . . . . . . . . . . . . . . . . . . . . . . . . . . . . . . . 12
Disc Menus . . . . . . . . . . . . . . . . . . . . . . . . . . . . . . . . . 12
Title Menu . . . . . . . . . . . . . . . . . . . . . . . . . . . . . . . . . . 12
CALLING UP A MENU SCREEN DURING
PLAYBACK . . . . . . . . . . . . . . . . . . . . . . . . . . . . . . . 12
Step by Step Playback. . . . . . . . . . . . . . . . . . . . . . . . . 13
Resume. . . . . . . . . . . . . . . . . . . . . . . . . . . . . . . . . . . . 13
Fast Forward / Reverse Search . . . . . . . . . . . . . . . . . . 13
Slow Forward / Slow Reverse . . . . . . . . . . . . . . . . . . . 13
Zoom. . . . . . . . . . . . . . . . . . . . . . . . . . . . . . . . . . . . . . 13
Track Search . . . . . . . . . . . . . . . . . . . . . . . . . . . . . . . . 13
Title / Chapter Search . . . . . . . . . . . . . . . . . . . . . . . . . 13
Time Search . . . . . . . . . . . . . . . . . . . . . . . . . . . . . . . . 13
Repeat . . . . . . . . . . . . . . . . . . . . . . . . . . . . . . . . . . . . 14
REPEAT TITLE / CHAPTER . . . . . . . . . . . . . . . . . . . 14
REPEAT TRACK . . . . . . . . . . . . . . . . . . . . . . . . . . . 14
A-B REPEAT . . . . . . . . . . . . . . . . . . . . . . . . . . . . . . 14
Program Playback (CD). . . . . . . . . . . . . . . . . . . . . . . . 14
Random Playback (CD). . . . . . . . . . . . . . . . . . . . . . . . 14
MP3 / JPEG Playback . . . . . . . . . . . . . . . . . . . . . . . . . 14
Slide Show Mode (JPEG) . . . . . . . . . . . . . . . . . . . . . . 15
On-Screen Information. . . . . . . . . . . . . . . . . . . . . . . . . 15
Program Playback (MP3 / JPEG) . . . . . . . . . . . . . . . . . 15
Random Playback (MP3 / JPEG). . . . . . . . . . . . . . . . . 15
Audio Language . . . . . . . . . . . . . . . . . . . . . . . . . . . . . 15
Stereo Sound Mode. . . . . . . . . . . . . . . . . . . . . . . . . . . 15
Subtitle Language . . . . . . . . . . . . . . . . . . . . . . . . . . . . 15
Camera Angle . . . . . . . . . . . . . . . . . . . . . . . . . . . . . . . 16
Changing the On-Screen Display. . . . . . . . . . . . . . . . . 16
Ratings Control . . . . . . . . . . . . . . . . . . . . . . . . . . . . . . 16
RATING LEVEL . . . . . . . . . . . . . . . . . . . . . . . . . . . . 16
IF YOU FORGET THE PASSWORD. . . . . . . . . . . . . 16
CONTROL LEVELS. . . . . . . . . . . . . . . . . . . . . . . . . 16
Marker Setup Screen. . . . . . . . . . . . . . . . . . . . . . . . . . 16
■
DVD SETUP . . . . . . . . . . . . . . . . . . . . . . . . . . . . . . . . 17
Audio Setting . . . . . . . . . . . . . . . . . . . . . . . . . . . . . . . . 17
Virtual Surround . . . . . . . . . . . . . . . . . . . . . . . . . . . . . 17
Display Setting. . . . . . . . . . . . . . . . . . . . . . . . . . . . . . . 17
Language Setting . . . . . . . . . . . . . . . . . . . . . . . . . . . . 18
To Return All Selections of SETUP (except for RATINGS
CONTROL and VIDEO OUT) to their Default Settings . 18
Language Code List . . . . . . . . . . . . . . . . . . . . . . . . . . 19
■
TROUBLESHOOTING GUIDE. . . . . . . . . . . . . . . . . . . 20
■
SPECIFICATIONS. . . . . . . . . . . . . . . . . . . . . . . . . . . . 21
■
MAINTENANCE . . . . . . . . . . . . . . . . . . . . . . . . . . . . . 21
Unauthorized copying, broadcasting, public performance and lending of discs are prohibited.
This product incorporates copyright protection technology that is protected by method claims of certain U.S.
patents and other intellectual property rights owned by Macrovision Corporation and other rights owners. Use of
this copyright protection technology must be authorized by Macrovision Corporation, and is intended for home
and other limited viewing uses only unless otherwise authorized by Macrovision Corporation.Reverse engineering or disassembly is prohibited.
About Copyright
PRECAUTIONS
Consumers should note that not all high definition television sets are fully compatible with this product and may
cause artifacts to be displayed in the picture.In case of 625 progressive scan picture problems, it is recommended that the user switch the connection to the “standard definition”output.If there are questions regarding
our TV set compatibility with this model 625p DVD player, please contact our customer service center.
Notice for the progressive scan outputs
E5918AD(EN).qx3 04.4.2 6:49 PM Page 3
–4–
EN
As shown on the right symbols appear below in some headings and notes in this manual, with the following meanings!
• Remote control DV-RM745E(TS18854)
• Two AA batteries
•
VIDEO/AUDIO cables
approx.3 feet(100cm) long(TE14751)
Supplied Accessories
Symbols Used in this Manual
INTRODUCTION
ABOUT THE DISCS
Playable Discs
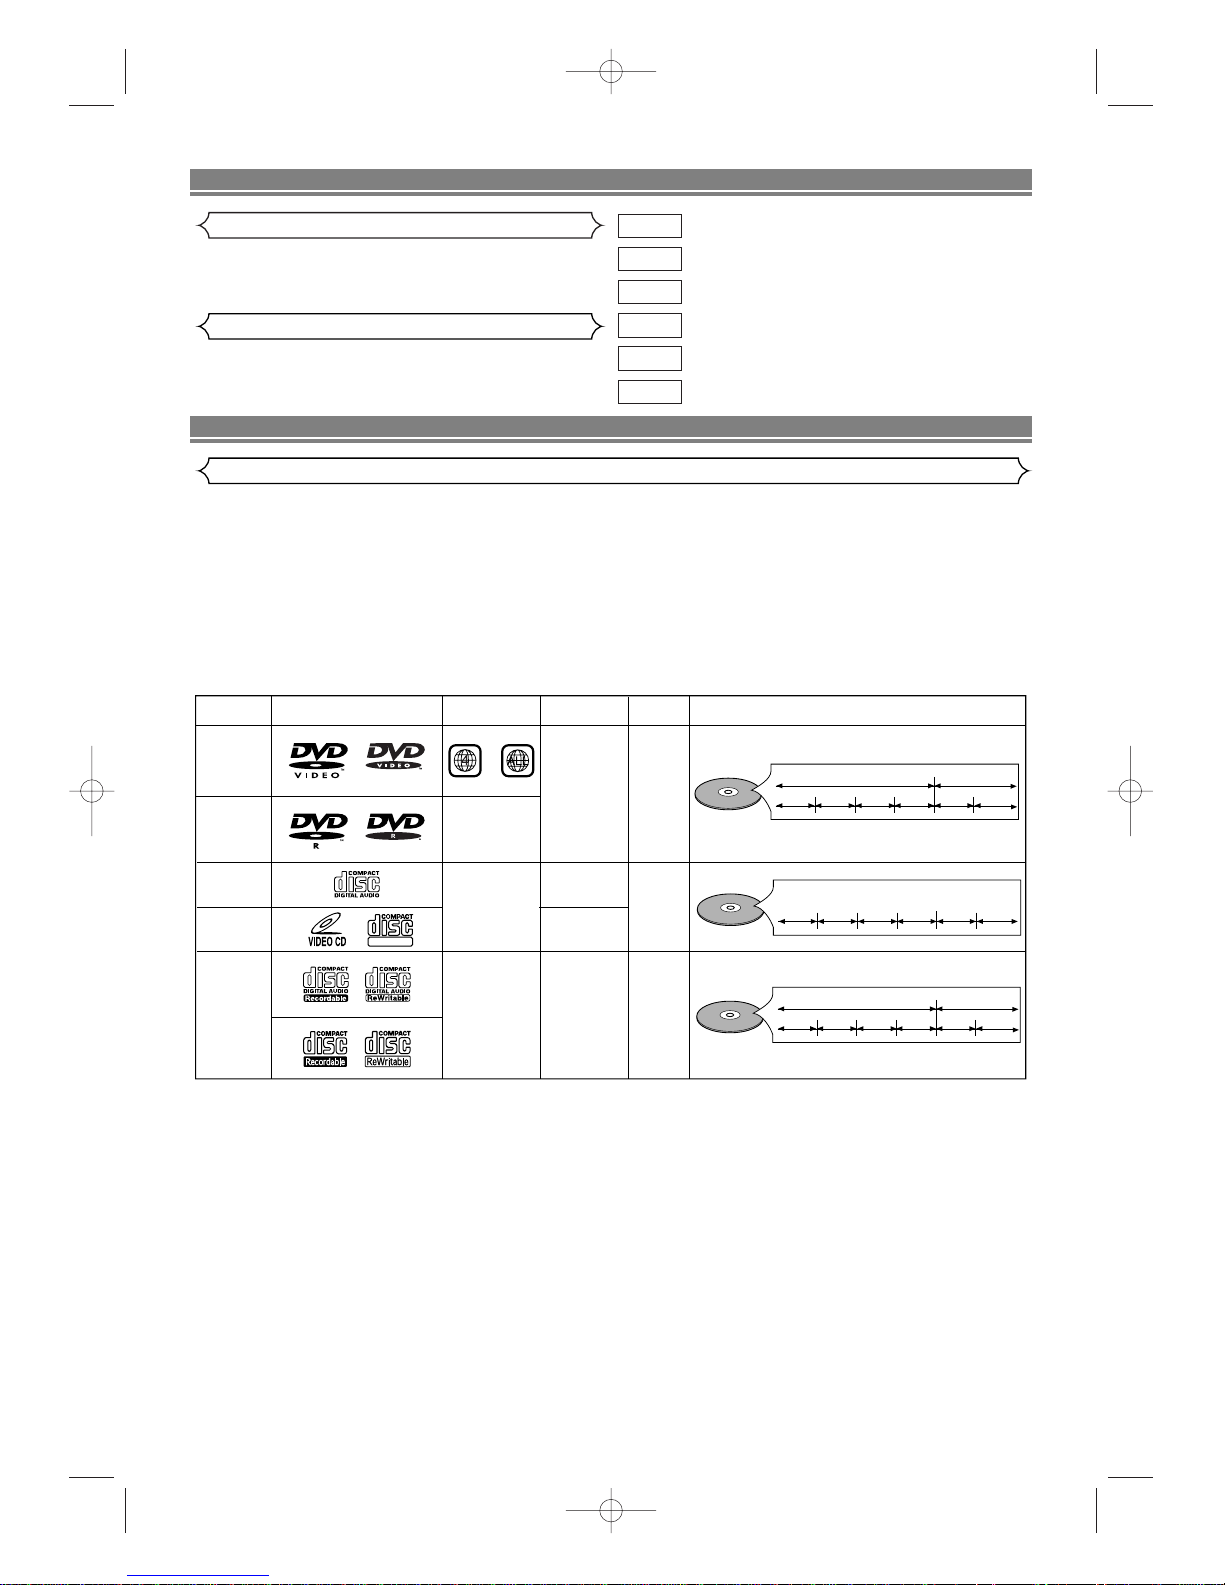
The following discs can be played back on this DVD player.
*
Depending on the types or the writing method of the medium, some discs can not be played.
• Some DVD-R or CD-R/RW discs made on personal computers, or on DVD recorders may not be played back properly due
to factors such as scratches, dirt or special properties of the disc.
• Discs made on personal computers may not be played back properly due to different environments or the settings of the
application you use.We recommend always to use the standardized, properly formatted discs.(Please contact your Hitachi
dealer for more detail).
• Some discs include region codes as shown below.
• The number inside the symbol refers to a region of the world, and a disc encoded in a specific region format can only be
played back on DVD player with the same region code.
DVD-Video
* 1,2,4,6
* 4,6
* 4,5,6
or
* 1,2,3,4,5,6
DVD-R
* 1,4,6
Video CD
Audio CD
CD-R
CD-RW
Digital video
(MPEG2)
_
_
_
Digital audio
MP3
or
JPEG
Region code
Mark (logo)
Playable
discs
Recorded
signals
Disc size
Disc types
12 cm
or
8cm
12 cm
or
8cm
12 cm
or
8cm
Example
Title 1 Title 2
Chapter 1 Chapter 2 Chapter 1
Chapter 2
Chapter 3 Chapter 4
Example
Group 1 Group 2
Tra ck 1
Tra ck 2 Track 5
Tra ck 6
Tra ck 3
Tra ck 4
Example
Tra ck 1 Tra ck 2 Track 5
Tra ck 6
Tra ck 3 Track 4
Audio CD,
Video CD
MP3, JPEG
Sound
and
Pictures
DIGITAL VIDEO
If you cannot play back a disc which bears one of the marks above, check the following notes.
*1:This unit conforms to the PAL colour system.Also you can play discs recorded with the NTSC colour systems via a PAL sys-
tem TV set.
*2:
Certain DVD-Video discs do not operate as described in this manual due to the intentions of the disc’s producers.
*3: Only the discs which have been recorded in the video format and finalized can be played back.
Discs unfinalized or recorded in the video recording format cannot be played back.
Depending on the recording status of a disc, the disc may not be played back at all or normally
(the picture or sound may be not be smooth, etc.).
*4: Scratched or stained discs may not be played back.
*5: Some discs cannot be played back because of incompatible recording conditions, characteristics of the recorder or special
properties of discs.
*6:You can play back discs which bear the marks above. If you use nonstandardized discs, this unit may not play them back.
Even if they are played back, the sound or video quality will be compromised.
: Description refers to playback of DVD video discs.
: Description refers to playback of Video CDs.
: Description refers to playback of audio CDs.
: Description refers to playback of MP3 discs.
: Description refers to viewing of JPEG discs.
:
Description refers to the items to be set in the QUICK mode.
QUICK
JPEG
MP3
CD
VCD
DVD
E5918AD(EN).qx3 04.4.2 6:49 PM Page 4

–5–
EN
ABOUT THE DISCS
Unplayable Discs
FEATURES
¡Progressive Scan system
¡Dolby Digital sound
By connecting this player to a Multi-channel Dolby Digital
decoder, you can enjoy high-quality 5.1ch Dolby Digital
surround sound as heard in the movie theatres.
¡Pause/fast/slow/step playback
¡Random playback for Audio CD, MP3 and JPEG
¡Program playback for Audio CD, MP3 and JPEG
¡DVD menus in a desired language
¡Screen saver/Auto power-off functions
The screen saver program starts when there is no input from
the player for five minutes in the stop mode. When the
screen saver program is activated for 30 minutes, the power
is automatically turned off.
¡Subtitles in a desired language
¡Selecting a camera angle
¡Choices for audio language and sound mode
¡Ratings Control
¡Automatic detection of discs
This player automatically detects if a loaded disc is DVD,
Audio CD, Video CD, MP3 or JPEG on disc.
¡Playing an MP3 disc
¡Viewing a CD-ROM with JPEG files
¡Direct Search
¡On-screen display
Information about the current operation can be displayed
on the TV screen, allowing you to confirm the currently
active functions (such as program playback) by the remote
control.
¡DTS (Digital Theater System)
You can enjoy 5.1channel surround system developed by
the Digital Theater System co. which reproduces the original sound as truthfully as possible.
¡Search
Chapter search / Title search / Track search / Time search
¡Repeat
Chapter / Title / Track / Group / All / A-B
¡Zoom
¡Marker
Electronic references point designated by user can be
called back.
¡Disc Navigation
Displays the first scenes of each chapter in a title.
¡Resume Play
¡Virtual Surround
¡MPEG sound
This player can handle a disc that supports MPEG audio
and the DVDplayer is connected to a MPEG decoder.
¡Dimmer
Dim the display brightness.
¡Bit rate indication
¡DRC (Dynamic range control)
You can control the range of sound volume.
For Customer Use:
Read carefully the information located on the back of your DVD player and enter below the Serial No. Retain this information
for future reference.
Model No.DVD player __________________________
Serial No. __________________________
Manufactured under license from Dolby
Laboratories.“Dolby” and the double-D symbol
are trademarks of Dolby Laboratories.
“DTS” and “DTS Digital Out” are trademarks of
Digital Theater Systems,Inc.
¡
On the following discs, only the sound can be heard (picture cannot be viewed).
¡
NEVER play back the following discs.Otherwise , malfunction may result!
¡
On the following disc, the sound MAY NOT be heard.
Super Audio CD
Note: Only the sound recorded on the normal CD layer can be delivered.
The sound recorded on the high density Super Audio CD layer cannot be delivered.
¡
Any other discs without compatibility indications.
CD-I
DVD-RAM
Photo CD
DVD with region codes other than 4 or ALL
DVD-ROM for personal computers
CD-ROM for personal computers
CDV CD-G
ABOUT THE PBC FUNCTION OF VIDEO CD
This unit conforms to ver.1.1 and ver.2.0 of Video CD standard, with PBC function.
Ver.1.1 (without PBC function):You can enjoy playback picture as well as music CD.
Ver.2.0 (with PBC function): While using a Video CD with
PBC function, “PBC” appears on the screen and the display.
NOTE:
When playing Video CDs with the PBC function, some
operations (e.g., select and track repeat) cannot be performed
unless the function is cancelled temporarily (refer to page 12).
What is PBC? “PBC” stands for Playback Control. You
can play interactive software using menu screens. Refer
to the instructions accompanying the Video CD.
E5918AD(EN).qx3 04.4.2 6:49 PM Page 5

–6–
EN
DVD PLAYER DV-P788A
MP3 / JPEG PLAYBACK DVD / DVD-R / VIDEO CD / CD / CD-R / CD-RW COMPATIBLE
1 6
7
8
2 3 4 5
FUNCTIONAL OVERVIEW
–
6–
FRONT PANEL
9. MAIN (AC Power Cord)
Connect to a standard AC plug.
10. DIGITAL AUDIO OUT JACKS
Use either an optical or coaxial digital cable to connect
to a compatible Dolby Digital receiver. Use to connect to
a Dolby Digital decoder, DTSdecoder or MPEG
decoder.
11. AUDIO OUTJACKS (ANALOG Left/Right)
Connect to the Audio input jacks of A/V-compatible TV
or wide screen TV, Stereo system.
12. VIDEO OUT JACK
Use a video cable to connect one of the jack to Video
input on your A/V-compatible TV or wide screen TV,
Stereo system.
13. COMPONENT VIDEO OUT JACKS
Use these jacks if you have a TV with Component Video
in jacks.These jacks provide C
R/PR
, CB/PBand Y video.
Together with S-Video, Component Video provides the
best picture quality.
14. S-VIDEO OUT JACK
Use the S-Video cable to connect this jack to the SVideo jack on your A/V-compatible TV or wide screen
TV for a higher quality picture.
Caution: Do not touch the inner pins of the jacks on the rear
panel. Electrostatic discharge may cause permanent damage to the player.
AUDIO OUT
DIGITAL AUDIO OUT
COAXIAL
LY
VIDEO
OUT
C
B / PB S-VIDEO
OUT
C
R / PR
COMPONENT
VIDEO OUT
R
10 11 12 1413
9
REAR PANEL
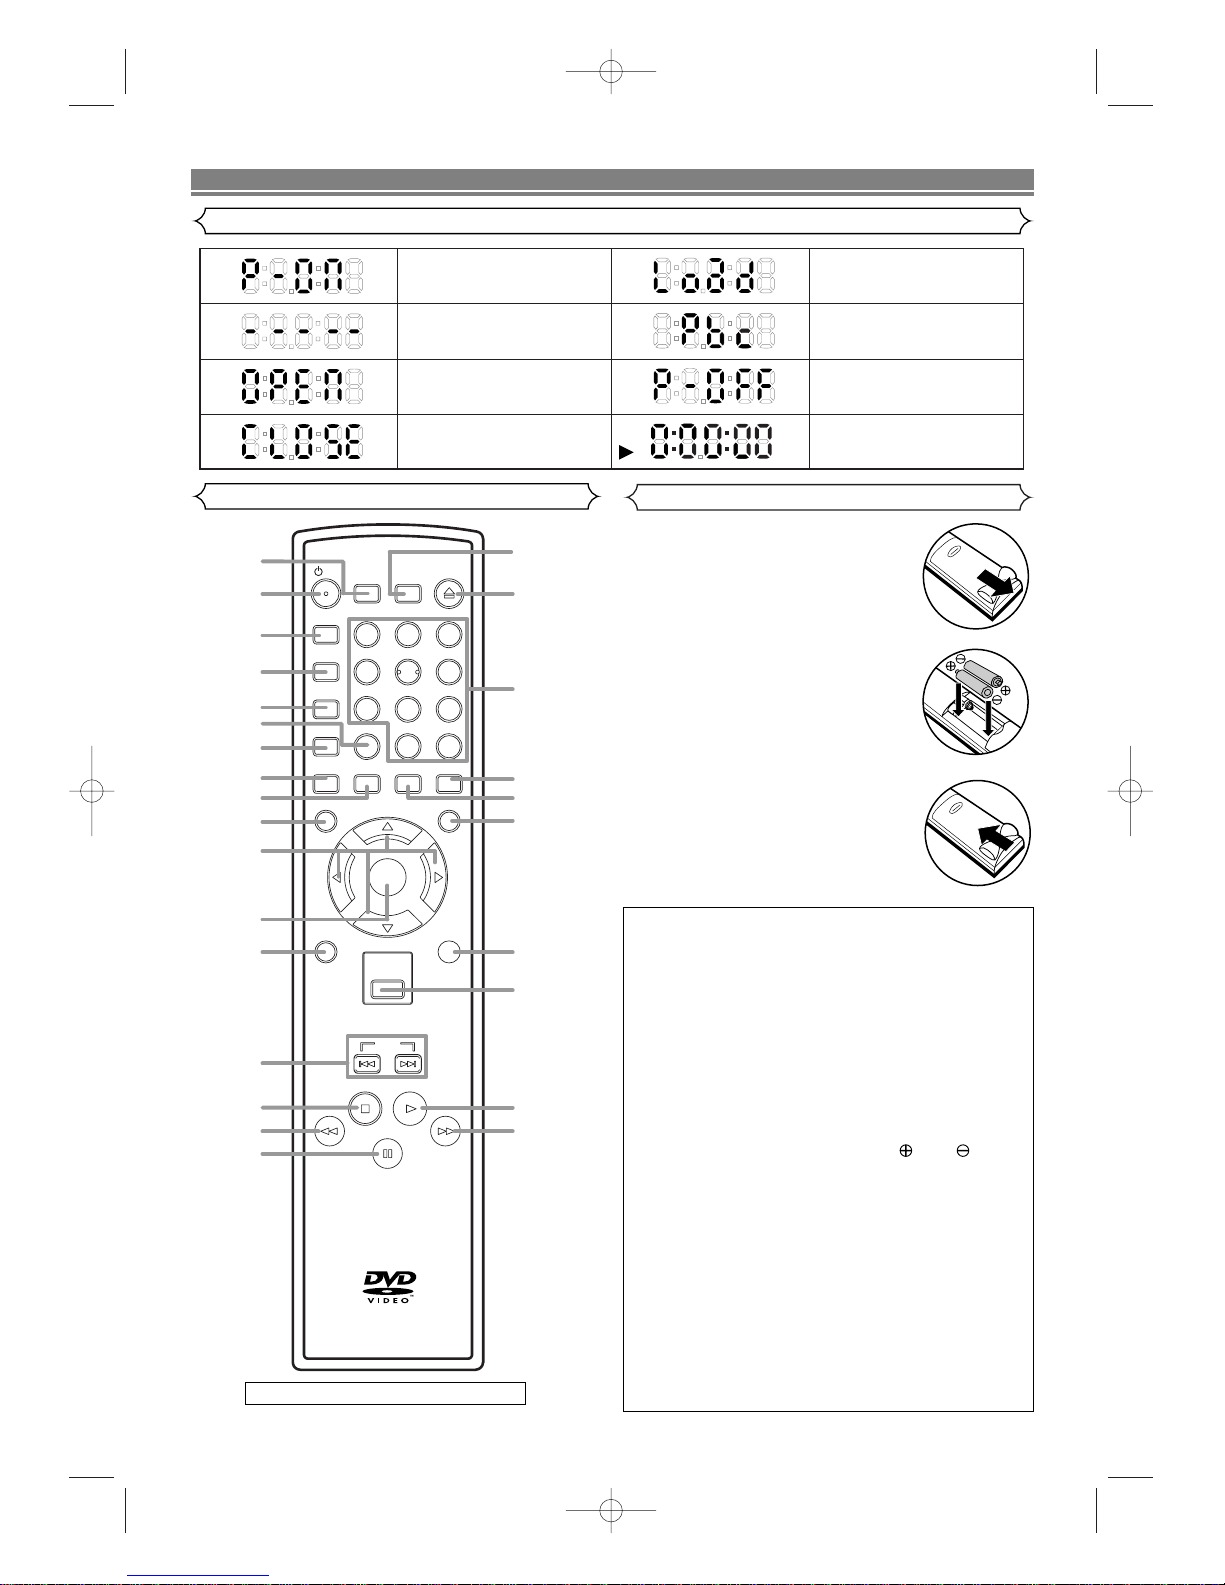
1.yy/I (POWER/STANDBY)
Switch the player to ON or OFF.
(As to the indication of the Operate switch, “I”indicates
ON and “yy” indicates electrical power STANDBY.)
2. H / hh(SKIP/FR)
Go to previous chapter or track during playback.
Press and hold for 1.5 seconds for a reverse search.
3.BB(PLAY)
Start or resume disc playback.
4.
gg
/ G (FF/SKIP)
Go to next chapter or track during playback.
Press and hold for 1.5 seconds for a forward search.
5.CC(STOP)
Stop playback.
6.AA(OPEN/CLOSE)
Open/close the disc tray.
7. Disc tray
8. Display
Lights up when the inserted
disc is being played back.
Displays a type of the disc
which is inserted on the tray.
• DVD: DVD
• CD: Audio CD, MP3, JPEG
• VCD: Video CD
Lights up when the
inserted disc comes
to a pause.
Lights up when the
A-B repeat function is on.
Lights up when the
repeat function is on.
Lights up when playing back
in slow mode. (DVD or Video CD)
Displays the elapsed time of the title
or track. The number of a new title,
chapter, or track is displayed when
a chapter or track is switched.
Lights up when the ALL
repeat function is on.
GROUP P.SCAN
DVD
VCD
Lights up when the
progressive scan
system is activated.
Display
E5918AD(EN).qx3 04.4.2 6:49 PM Page 6
–7–
EN
FUNCTIONAL OVERVIEW
HITACHI
DV-RM745E
/ I
DISPLAY
213
45
6
7
89
+10
0
SUBTITLE
ANGLE
REPEAT
A-B REPEAT
CLEAR
AUDIO
SEARCH
MODE
SKIP
MENU
TOP MENU
SETUP
MODE
ZOOM
ENTER
RETURN
DISC
NAVIGATION
OPEN /
CLOSE
SURROUND
2
3
24
26
25
21
20
22
19
18
8
10
12
13
11
14
4
7
5
9
16
15
6
1
17
27
23
Remote Control
1. Open the battery compartment
cover.
2. Insert two AA batteries, with
each one oriented correctly.
3. Close the cover.
Loading the Batteries
Displays During Operation
Power on
Tray open
Tray closed
Power off
When a disc is being
played back
DVD
Loading the Disc
Lights up when the playback
control is activated
No disc inserted or cannot
read
Cautions On Batteries
• Use “AA” (R6P) batteries in this remote control unit.
• Replace the batteries with new ones approximately
once a year, though this depends on the frequency
with which the remote control unit is used.
• If the remote control unit does not operate from
close to the main unit, replace the batteries with
new ones, even if less then a year has passed.
• The included battery is only for verifying operation.
Replace it with a new battery as soon as possible.
• When inserting the batteries, be careful to do so in
the proper direction, following the and marks
in the remote control unit’s battery compartment.
• To prevent damage or battery fluid leakage:
• Do not use a new battery with an old one.
• Do not use two different types of batteries such
as alkaline and manganese.
• Do not short-circuit, disassemble, heat or dispose
of batteries in flames.
• Remove the batteries when not planning to use the
remote control unit for a long period of time.
• If the batteries should leak, carefully wipe off the
fluid from the inside of the battery compartment,
then insert new batteries.
Details are on pages 8 and 9.
E5918AD(EN).qx3 04.4.2 6:49 PM Page 7
 Loading...