

Hitachi DJNA-352500, DJNA-352030, DJNA-351520, DJNA-351010, DJNA-372200 Quick installation guide
...Page 1
drive. Match the connector bevels.
IBM storage products
IBM Hard Disk Drive Technical Support Center
version
4
.0
Quick installation guide
Deskstar 25GP & 22GXP
ATA/IDE
Models:
DJNA-352500 DJNA-352030
DJNA-351520 DJNA-351010
DJNA-372200 DJNA-371800
DJNA-371350 DJNA-370910
Handling precautions
Ÿ Do not open the ESD (electro-static discharge) bag
containing the drive until required.
Ÿ Do not apply pressure on the drive during handling
or installation.
Ÿ Always handle the drive with care to prevent dam-
age from shock, vibration, or electrostatic discharge
Ÿ Handle the drive carefully by the edges. Do not
touch any exposed printed circuit board.
Ÿ Do not cover the breather hole! Covering the
breather hole may result in loss of
Quick installation procedure
1. Save the packaging materials including the ESD
bag in the event that the drive must be returned.
2. Backup all data before beginning installation.
3. Record the serial number and part number of your
IBM Deskstar drive for future reference.
4. Turn off the computer and remove the system
cover.
5. Discharge the static electricity from the package
and from your body. With one hand touch an
unpainted metal surface on your computer chassis,
then touch the ESD bag with the other hand for at
least 2 seconds.
6. Remove the drive from the ESD bag.
7. Unplug the computer.
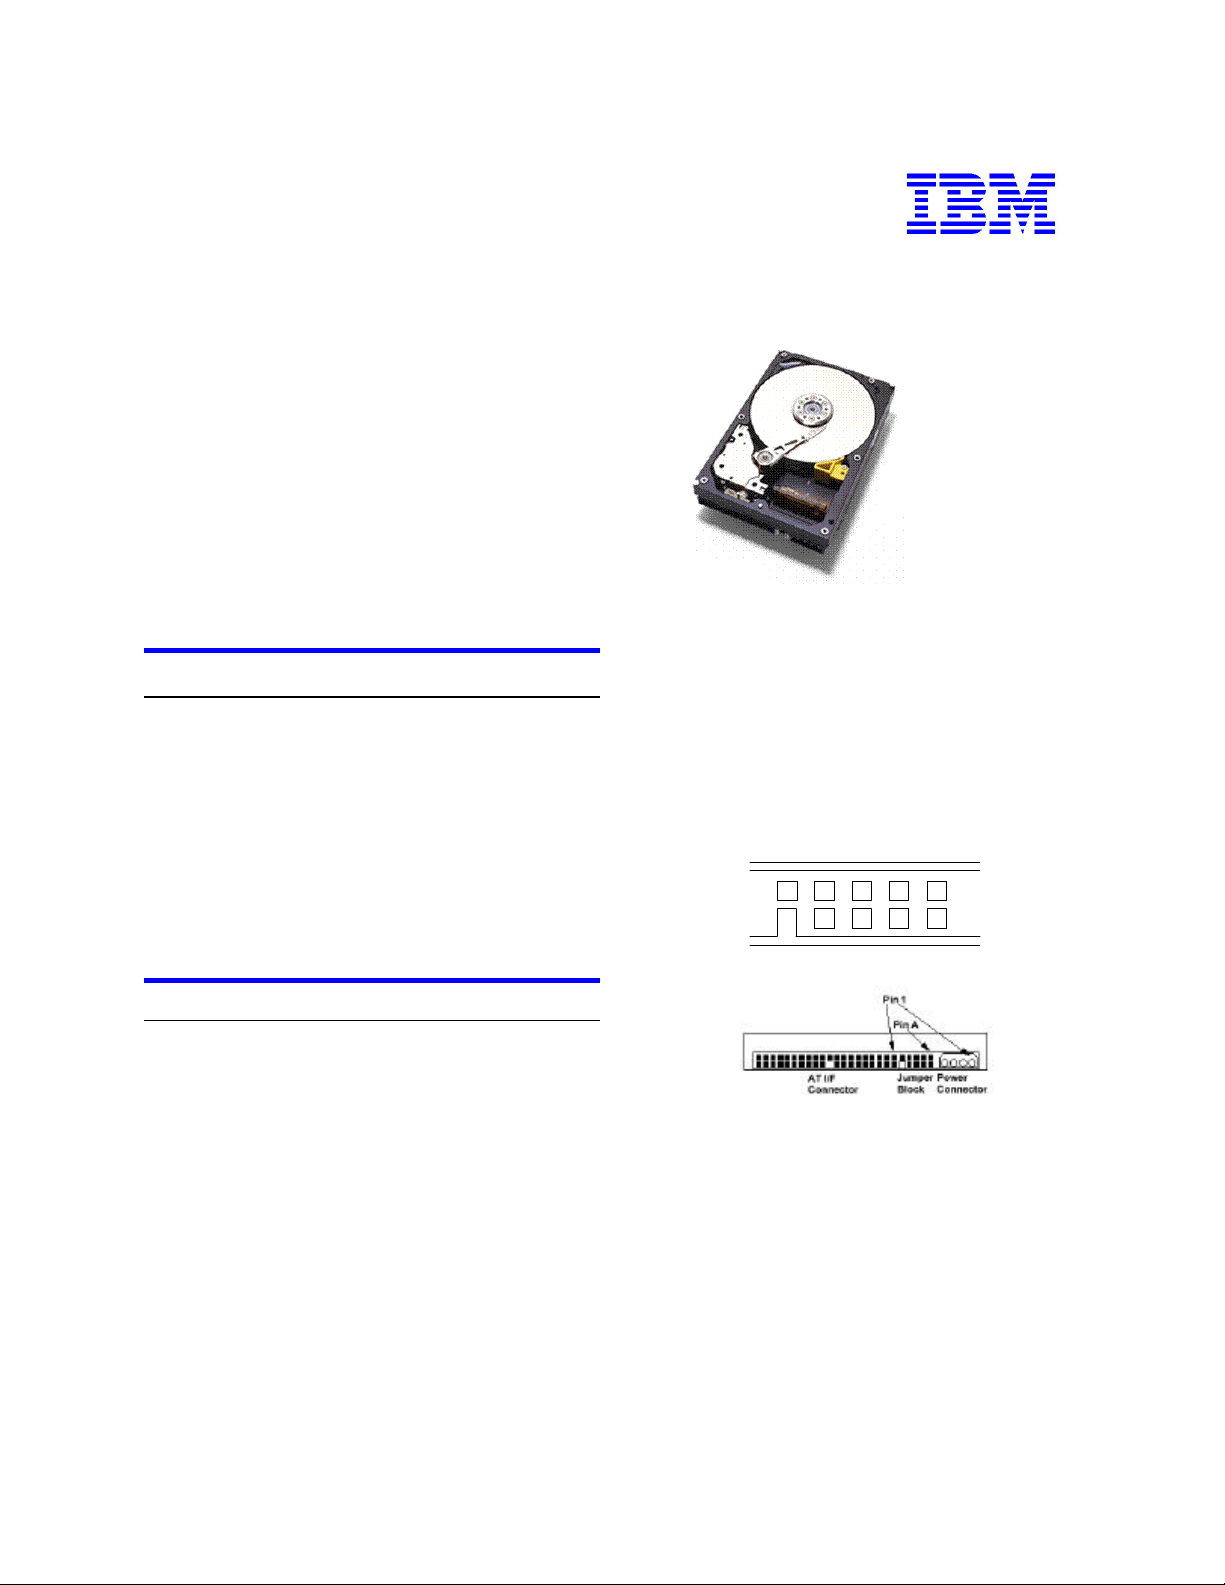
8. Set the jumpers. Refer to the diagram below.
data.
• If the drive is the only drive on the cable, set the
jumpers at A-B and G-H for 16 logical head
architecture. This is the Master setting.
• If the drive is the "Slave" drive on a two-drive
cable, set the jumpers at A-B and C-D for 16
logical head architecture. This is the Slave
setting.
The shipping default setting is Master 16 logical head
architecture.
Jumper block
IAG
9. Attach the IDE cable.
E C
H F D B
• If you have a 40 pin, 40 conductor cable, attach
the system connector of the cable to the IDE port
on the motherboard or controller card. The pin 1
side of an IDE cable is marked with a stripe. The
connectors are keyed to insert one way only.
• If you have a 40 pin, 80 conductor cable, attach
the drive to the appropriate color coded connector. ATA/66 cables are color coded for the
Master, Slave, and system connectors. The
Master connector is black, the Slave connector is
gray, and the system connector is blue.
10. Attach the power supply cable to the hard disk
Page 1
Page 2
software from your operating system)
IBM storage products
IBM Hard Disk Drive Technical Support Center
version
4
.0
11. Using the appropriate brackets or rails, mount the
drive with any side or end in a vertical or horizontal
position. (Do not mount the drive in a tilted position.)
12. Ensure proper routing of the cable(s).
13. Retrieve any loose screws or parts from within the
computer.
14. Verify all settings and replace the cover.
15. Plug in your computer. Do not turn it on.
16. Insert the DriveGuide or OS setup diskette in the
floppy drive.
17. Turn on the computer.
18. Boot your system.
Ÿ If the system boots up, turn off your computer
and replace the cover.
Ÿ If the system does not boot up, check all
settings.
Ÿ If the system still fails to boot up, remove the
new drive to return the system to its original
configuration. Call the IBM Hard Disk Drive
Technical Support Center.
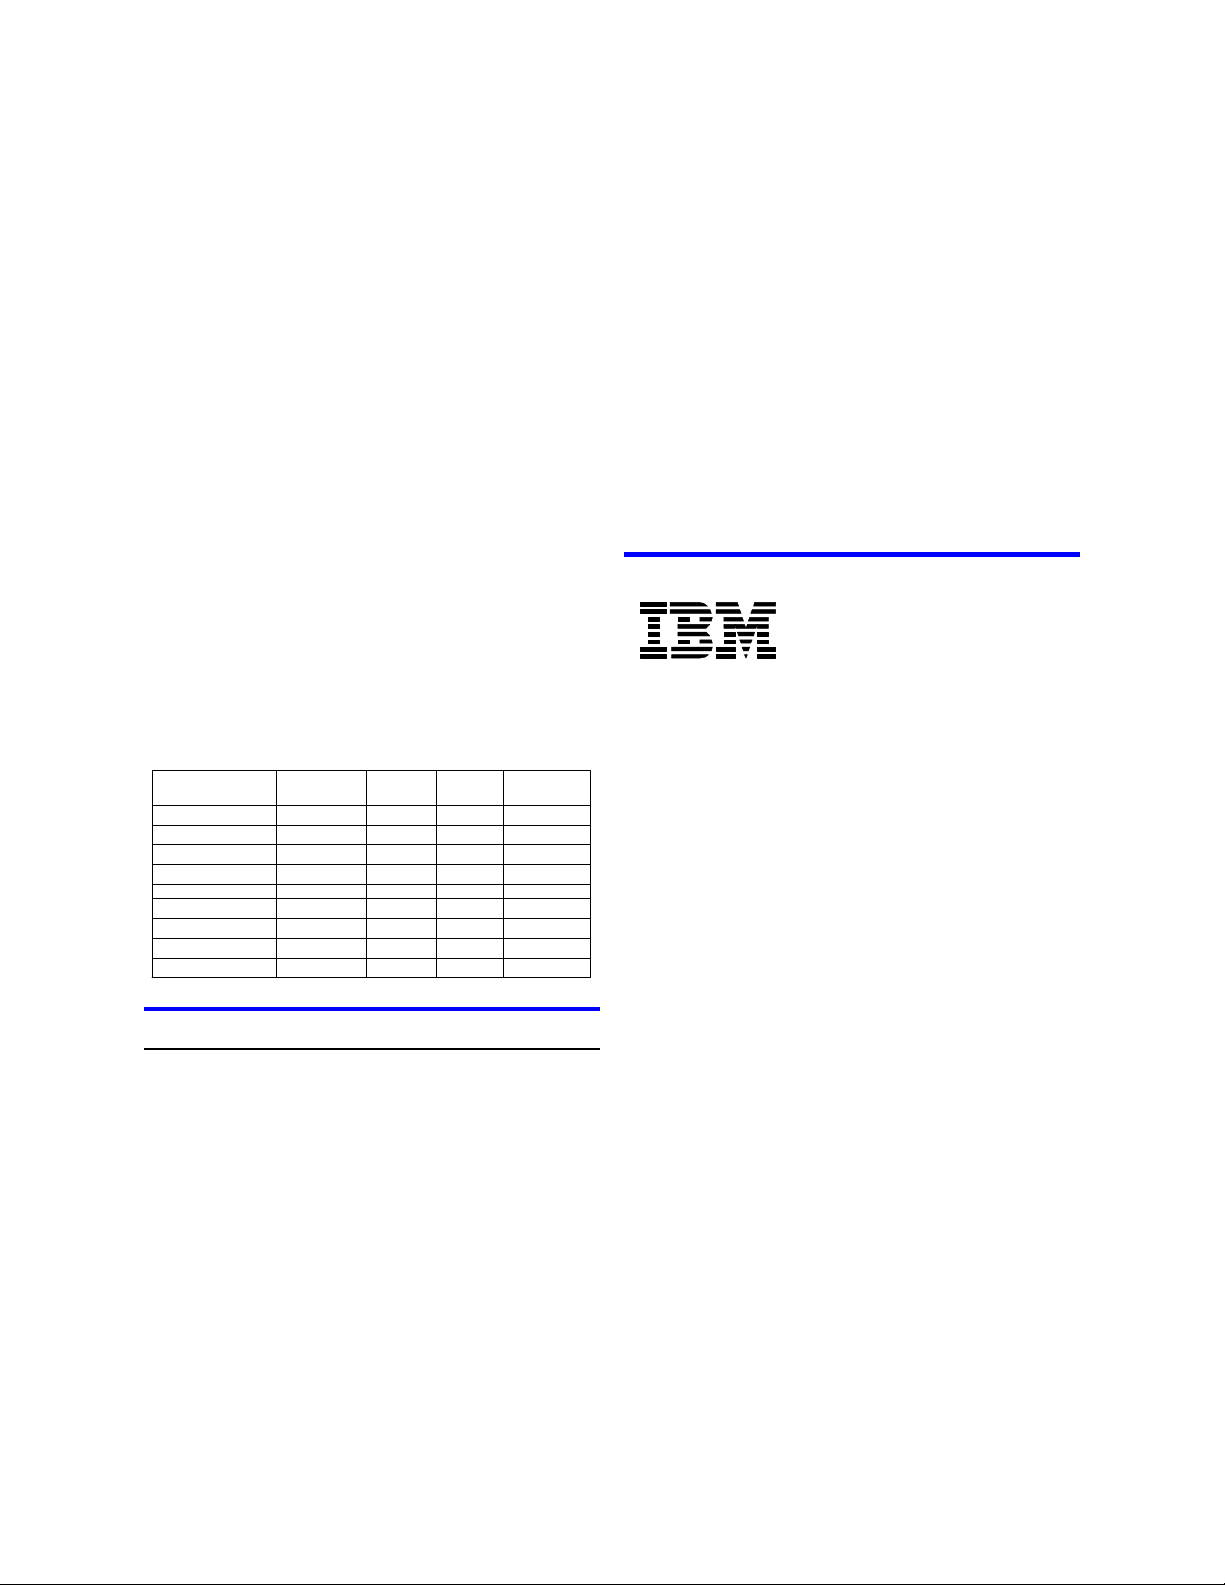
19. Set the BIOS options of your computer system to
Auto Detection and LBA mode if available. Key
sequences for accessing your BIOS can be found
in your computer system manual. The following
chart lists true LBA sector counts and drive
capacities. Translated schemes are derived from
the LBA count of a drive.
number
HeadsCylindersIBM model
/Track
Partitioning and formatting
Partition and format your drive with one of these two
methods:
DriveGuide
1. Boot the DriveGuide installation utility.
2. If the DriveGuide configuration matches your new
system configuration, continue. If the system configuration is not a match, or you want to proceed
manually, select no. Then verify BIOS settings,
cabling, and jumpers and run DriveGuide again.
3. Drive Guide determines available partition sizes
based on the operating system to be installed.
Select the partition sizes for your installation.
4. Click “Finish” to complete the partitioning and
formatting of your drive.
FDISK.EXE and FORMAT.EXE (or a similar partitioning
CapacitySector
25GB631616,383DJNA-352500
20GB631616,383DJNA-352030
15GB631616,383DJNA-351520
10GB631616,383DJNA-351010
22GB631616,383DJNA-372200
18GB631616,383DJNA-371800
13.5GB631616,383DJNA-371350
9GB631616,383DJNA-370910
1. Follow the instructions provided with your operating
system to partition the drive. If FDISK.EXE does not
recognize more than 8.4 gigabytes and your drive is
larger than 8.4 gigabytes, your BIOS may not be
supporting Interrupt 13 Extensions.
2. Format the drive by following the instructions provided with FORMAT.EXE. Formatting will verify the
hard disk media and create file allocation tables for
the partition.
Install an operating system. Consult your operating
system manual.
For additional information on the drive and its installation see
http://www.storage.ibm.com/hardsoft/diskdrdl/
prod/deskstar.htm
®
© International Business Machines Corporation 1999
www.ibm.com/harddrive
IBM Hard Disk Drive Technical Support Center
Dept. WCN
3605 Highway 52 North
Rochester, MN 55901
Telephone: 888.IBM.5214 or 507.286.5825
Fax: 507.253.DRIVE
E-mail: drive@us.ibm.com
Singapore Technical Support Center
Telephone: (65)6418.9595 or 1800.418.9595
E-mail: drive@sg.ibm.com
IBM Systems Storage Division
5600 Cottle Road
San Jose, CA 95193
www.ibm.com/storage
Printed in the United States of America
09-99
All Rights Reserved
IBM is the registered trademark of International Business Machines Corporation.
Other company, product, and service names may be trademarks or service marks of others.
Produced by the IBM Hard Disk Drive Technical Support Center.
OEM Hard Disk Drive Specifications for DJNA-3xxxxx, revision 1.0
Product Description data represents IBM’s design objectives and is provided for comparative
purposes; actual results may vary based on a variety of factors. This product data does not
constitute a warranty. Questions regarding IBM’s warranty terms or methodology used to
derive this data should be referred to the IBM Hard Disk Drive Technical Support Center.
Data subject to change without notice.
Date: 01 September 1999
Page 2
 Loading...