


© 2005 Ricoh Printing Systems America, Inc.
2635-A Park Center Drive
Simi Valley, CA 93065
October, 2005
338193-003, Revision C
Web Utilities

© 2005 Ricoh Printing Systems America, Inc. All rights reserved.
No part of this document may be reproduced without the express permission of Ricoh Printing
Systems America, Inc.
The material in this document is for informational purposes and is subject to change without
notice. Ricoh Printing Systems America, Inc. assumes no responsibility for errors or omissions
in this document. No liability is assumed for any damages resulting from the use of the
information it contains.
TRADEMARK
Digital Document Publisher, DDP, DDP 70, DDP 70e, DDP 92, and their associated logo marks
are trademarks of Ricoh Printing Systems America, Inc. All rights reserved.
All other terms and product names may be trademarks or registered trademarks of their
respective owners, and are hereby acknowledged.
NOTICE TO USER
In an effort to meet the demands of a rapidly changing technology, the manufacturer is
continually developing new features and functions to meet your changing printing or printer
needs. Please be sure to consult all manual updates or addenda when using this product’s
documentation.

Table of Contents
Overview . . . . . . . . . . . . . . . . . . . . . . . . . . . . . . . . . . . . . . . . . . . . . . . . . . . . . . . . . . . . . 1
Access and Security . . . . . . . . . . . . . . . . . . . . . . . . . . . . . . . . . . . . . . . . . . . . . . . . . . . . . . . 3
Accessing the Web Utilities . . . . . . . . . . . . . . . . . . . . . . . . . . . . . . . . . . . . . . . . . . . . . . . . . 4
Web Page Organization . . . . . . . . . . . . . . . . . . . . . . . . . . . . . . . . . . . . . . . . . . . . . . . . . . . . 5
Top Bar Options . . . . . . . . . . . . . . . . . . . . . . . . . . . . . . . . . . . . . . . . . . . . . . . . . . . . . . . 5
Home . . . . . . . . . . . . . . . . . . . . . . . . . . . . . . . . . . . . . . . . . . . . . . . . . . . . . . . . . . . . . . . 5
Vendor . . . . . . . . . . . . . . . . . . . . . . . . . . . . . . . . . . . . . . . . . . . . . . . . . . . . . . . . . . . . . . 5
Links . . . . . . . . . . . . . . . . . . . . . . . . . . . . . . . . . . . . . . . . . . . . . . . . . . . . . . . . . . . . . . . . 6
Drivers . . . . . . . . . . . . . . . . . . . . . . . . . . . . . . . . . . . . . . . . . . . . . . . . . . . . . . . . . . . . . . 6
Documentation . . . . . . . . . . . . . . . . . . . . . . . . . . . . . . . . . . . . . . . . . . . . . . . . . . . . . . . . 6
Site Map . . . . . . . . . . . . . . . . . . . . . . . . . . . . . . . . . . . . . . . . . . . . . . . . . . . . . . . . . . . . . 7
Left Bar Options . . . . . . . . . . . . . . . . . . . . . . . . . . . . . . . . . . . . . . . . . . . . . . . . . . . . . . . 8
Printer Display . . . . . . . . . . . . . . . . . . . . . . . . . . . . . . . . . . . . . . . . . . . . . . . . . . . . . . . . 8
Manage-Status Options . . . . . . . . . . . . . . . . . . . . . . . . . . . . . . . . . . . . . . . . . . . . . . . . . 9
Status-General . . . . . . . . . . . . . . . . . . . . . . . . . . . . . . . . . . . . . . . . . . . . . . . . . . . . . . . . . . 10
Status-Tray . . . . . . . . . . . . . . . . . . . . . . . . . . . . . . . . . . . . . . . . . . . . . . . . . . . . . . . . . . . . . 12
Status-Finisher . . . . . . . . . . . . . . . . . . . . . . . . . . . . . . . . . . . . . . . . . . . . . . . . . . . . . . . . . . 13
Advanced Finisher . . . . . . . . . . . . . . . . . . . . . . . . . . . . . . . . . . . . . . . . . . . . . . . . . . . . 13
Publishing Finisher . . . . . . . . . . . . . . . . . . . . . . . . . . . . . . . . . . . . . . . . . . . . . . . . . . . 14
Container Stacker . . . . . . . . . . . . . . . . . . . . . . . . . . . . . . . . . . . . . . . . . . . . . . . . . . . . . 15
Status-Consumables . . . . . . . . . . . . . . . . . . . . . . . . . . . . . . . . . . . . . . . . . . . . . . . . . . . . . . 16
Status-Errors . . . . . . . . . . . . . . . . . . . . . . . . . . . . . . . . . . . . . . . . . . . . . . . . . . . . . . . . . . . . 17
Status-Usage . . . . . . . . . . . . . . . . . . . . . . . . . . . . . . . . . . . . . . . . . . . . . . . . . . . . . . . . . . . . 18
Status-Network . . . . . . . . . . . . . . . . . . . . . . . . . . . . . . . . . . . . . . . . . . . . . . . . . . . . . . . . . . 19
Status-Reports . . . . . . . . . . . . . . . . . . . . . . . . . . . . . . . . . . . . . . . . . . . . . . . . . . . . . . . . . . . 20
Status-Revision . . . . . . . . . . . . . . . . . . . . . . . . . . . . . . . . . . . . . . . . . . . . . . . . . . . . . . . . . . 21
Manage System Options . . . . . . . . . . . . . . . . . . . . . . . . . . . . . . . . . . . . . . . . . . . . . . . 22
System-General . . . . . . . . . . . . . . . . . . . . . . . . . . . . . . . . . . . . . . . . . . . . . . . . . . . . . . . . . 23
PostScript . . . . . . . . . . . . . . . . . . . . . . . . . . . . . . . . . . . . . . . . . . . . . . . . . . . . . . . . . . . 23
Options . . . . . . . . . . . . . . . . . . . . . . . . . . . . . . . . . . . . . . . . . . . . . . . . . . . . . . . . . . . . . 24
System-Tray . . . . . . . . . . . . . . . . . . . . . . . . . . . . . . . . . . . . . . . . . . . . . . . . . . . . . . . . . . . . 25
Paper Source . . . . . . . . . . . . . . . . . . . . . . . . . . . . . . . . . . . . . . . . . . . . . . . . . . . . . . . . 25
Inserter 1,2 . . . . . . . . . . . . . . . . . . . . . . . . . . . . . . . . . . . . . . . . . . . . . . . . . . . . . . . . . . . . . 26
System-Finisher . . . . . . . . . . . . . . . . . . . . . . . . . . . . . . . . . . . . . . . . . . . . . . . . . . . . . . . . . 27
Stapler . . . . . . . . . . . . . . . . . . . . . . . . . . . . . . . . . . . . . . . . . . . . . . . . . . . . . . . . . . . . . 27
Stapler Adjustment (Booklet Maker) . . . . . . . . . . . . . . . . . . . . . . . . . . . . . . . . . . . . . . 28
Folder Adjustment (Booklet Maker) . . . . . . . . . . . . . . . . . . . . . . . . . . . . . . . . . . . . . . 29
Stapler (Publishing Finisher) . . . . . . . . . . . . . . . . . . . . . . . . . . . . . . . . . . . . . . . . . . . . 30
i

Trimmer (Publishing Finisher) . . . . . . . . . . . . . . . . . . . . . . . . . . . . . . . . . . . . . . . . . . .31
Folder (Publishing Finisher) . . . . . . . . . . . . . . . . . . . . . . . . . . . . . . . . . . . . . . . . . . . . .32
Booklet . . . . . . . . . . . . . . . . . . . . . . . . . . . . . . . . . . . . . . . . . . . . . . . . . . . . . . . . . . . . . 33
Stacking Mode . . . . . . . . . . . . . . . . . . . . . . . . . . . . . . . . . . . . . . . . . . . . . . . . . . . . . . .34
System-Virtual Printer . . . . . . . . . . . . . . . . . . . . . . . . . . . . . . . . . . . . . . . . . . . . . . . . . . . . .35
General . . . . . . . . . . . . . . . . . . . . . . . . . . . . . . . . . . . . . . . . . . . . . . . . . . . . . . . . . . . . . 36
Paper Handling . . . . . . . . . . . . . . . . . . . . . . . . . . . . . . . . . . . . . . . . . . . . . . . . . . . . . . .37
PCL . . . . . . . . . . . . . . . . . . . . . . . . . . . . . . . . . . . . . . . . . . . . . . . . . . . . . . . . . . . . . . . .38
PostScript . . . . . . . . . . . . . . . . . . . . . . . . . . . . . . . . . . . . . . . . . . . . . . . . . . . . . . . . . . .38
Netware . . . . . . . . . . . . . . . . . . . . . . . . . . . . . . . . . . . . . . . . . . . . . . . . . . . . . . . . . . . . .39
AppleTalk . . . . . . . . . . . . . . . . . . . . . . . . . . . . . . . . . . . . . . . . . . . . . . . . . . . . . . . . . . .39
Options . . . . . . . . . . . . . . . . . . . . . . . . . . . . . . . . . . . . . . . . . . . . . . . . . . . . . . . . . . . . . 40
System-Accounting . . . . . . . . . . . . . . . . . . . . . . . . . . . . . . . . . . . . . . . . . . . . . . . . . . . . . . .41
System-Jobs . . . . . . . . . . . . . . . . . . . . . . . . . . . . . . . . . . . . . . . . . . . . . . . . . . . . . . . . . . . . .43
System-Test Print . . . . . . . . . . . . . . . . . . . . . . . . . . . . . . . . . . . . . . . . . . . . . . . . . . . . . . . .44
System-Serial Number . . . . . . . . . . . . . . . . . . . . . . . . . . . . . . . . . . . . . . . . . . . . . . . . . . . . .45
Manage Configuration Options . . . . . . . . . . . . . . . . . . . . . . . . . . . . . . . . . . . . . . . . . . 46
Configuration-General . . . . . . . . . . . . . . . . . . . . . . . . . . . . . . . . . . . . . . . . . . . . . . . . . . . . . 47
Configuration-Events . . . . . . . . . . . . . . . . . . . . . . . . . . . . . . . . . . . . . . . . . . . . . . . . . . . . . .48
Address Book Pop-Up . . . . . . . . . . . . . . . . . . . . . . . . . . . . . . . . . . . . . . . . . . . . . . . . . 49
Configuration-Configuration . . . . . . . . . . . . . . . . . . . . . . . . . . . . . . . . . . . . . . . . . . . . . . . .50
Password . . . . . . . . . . . . . . . . . . . . . . . . . . . . . . . . . . . . . . . . . . . . . . . . . . . . . . . . . . . .50
Miscellaneous . . . . . . . . . . . . . . . . . . . . . . . . . . . . . . . . . . . . . . . . . . . . . . . . . . . . . . . .51
Calendar . . . . . . . . . . . . . . . . . . . . . . . . . . . . . . . . . . . . . . . . . . . . . . . . . . . . . . . . . . . .52
PCL Input Tray Mapping . . . . . . . . . . . . . . . . . . . . . . . . . . . . . . . . . . . . . . . . . . . . . . .53
Tray Map . . . . . . . . . . . . . . . . . . . . . . . . . . . . . . . . . . . . . . . . . . . . . . . . . . . . . . . . . . . .54
Ordered Sets . . . . . . . . . . . . . . . . . . . . . . . . . . . . . . . . . . . . . . . . . . . . . . . . . . . . . . . . .55
Configuration - Communication . . . . . . . . . . . . . . . . . . . . . . . . . . . . . . . . . . . . . . . . . . . . .56
Parallel . . . . . . . . . . . . . . . . . . . . . . . . . . . . . . . . . . . . . . . . . . . . . . . . . . . . . . . . . . . . .56
TCP/IP . . . . . . . . . . . . . . . . . . . . . . . . . . . . . . . . . . . . . . . . . . . . . . . . . . . . . . . . . . . . . .57
10/100 B-T AUX . . . . . . . . . . . . . . . . . . . . . . . . . . . . . . . . . . . . . . . . . . . . . . . . . . . . . 58
10/100 B-T NIC (NetWare) . . . . . . . . . . . . . . . . . . . . . . . . . . . . . . . . . . . . . . . . . . . . . 59
10/100 B-T NIC (AppleTalk) . . . . . . . . . . . . . . . . . . . . . . . . . . . . . . . . . . . . . . . . . . . .60
Service-Service Options . . . . . . . . . . . . . . . . . . . . . . . . . . . . . . . . . . . . . . . . . . . . . . . . 61
Service-Consumables . . . . . . . . . . . . . . . . . . . . . . . . . . . . . . . . . . . . . . . . . . . . . . . . . . . . .62
Printer . . . . . . . . . . . . . . . . . . . . . . . . . . . . . . . . . . . . . . . . . . . . . . . . . . . . . . . . . . . . . .62
Advanced Finisher . . . . . . . . . . . . . . . . . . . . . . . . . . . . . . . . . . . . . . . . . . . . . . . . . . . .63
Publishing Finisher . . . . . . . . . . . . . . . . . . . . . . . . . . . . . . . . . . . . . . . . . . . . . . . . . . . . 64
Container Stacker . . . . . . . . . . . . . . . . . . . . . . . . . . . . . . . . . . . . . . . . . . . . . . . . . . . . .65
Service-Page Counter . . . . . . . . . . . . . . . . . . . . . . . . . . . . . . . . . . . . . . . . . . . . . . . . . . . . . 66
Service-Documentation . . . . . . . . . . . . . . . . . . . . . . . . . . . . . . . . . . . . . . . . . . . . . . . . . . . .67
Service-Engine Config . . . . . . . . . . . . . . . . . . . . . . . . . . . . . . . . . . . . . . . . . . . . . . . . . . . .68
Tray Calibration . . . . . . . . . . . . . . . . . . . . . . . . . . . . . . . . . . . . . . . . . . . . . . . . . . . . . .68
ii

Print Density . . . . . . . . . . . . . . . . . . . . . . . . . . . . . . . . . . . . . . . . . . . . . . . . . . . . . . . . .69
HR Temperature . . . . . . . . . . . . . . . . . . . . . . . . . . . . . . . . . . . . . . . . . . . . . . . . . . . . . .70
Toner Density . . . . . . . . . . . . . . . . . . . . . . . . . . . . . . . . . . . . . . . . . . . . . . . . . . . . . . . .71
Transfer Current . . . . . . . . . . . . . . . . . . . . . . . . . . . . . . . . . . . . . . . . . . . . . . . . . . . . . .72
Detach Voltage . . . . . . . . . . . . . . . . . . . . . . . . . . . . . . . . . . . . . . . . . . . . . . . . . . . . . . .73
Service-Finisher Configuration . . . . . . . . . . . . . . . . . . . . . . . . . . . . . . . . . . . . . . . . . . . . . .74
Service-Reset . . . . . . . . . . . . . . . . . . . . . . . . . . . . . . . . . . . . . . . . . . . . . . . . . . . . . . . . . . . .75
Service-Log . . . . . . . . . . . . . . . . . . . . . . . . . . . . . . . . . . . . . . . . . . . . . . . . . . . . . . . . . . . . .76
Service-Configuration Options . . . . . . . . . . . . . . . . . . . . . . . . . . . . . . . . . . . . . . . . . . 77
Password . . . . . . . . . . . . . . . . . . . . . . . . . . . . . . . . . . . . . . . . . . . . . . . . . . . . . . . . . . . . . . .78
Configuration-License Keycode . . . . . . . . . . . . . . . . . . . . . . . . . . . . . . . . . . . . . . . . . . . . .79
Configuration-Events . . . . . . . . . . . . . . . . . . . . . . . . . . . . . . . . . . . . . . . . . . . . . . . . . . . . . .80
Address Book Pop Up . . . . . . . . . . . . . . . . . . . . . . . . . . . . . . . . . . . . . . . . . . . . . . . . . .80
Configuration-Address Book . . . . . . . . . . . . . . . . . . . . . . . . . . . . . . . . . . . . . . . . . . . . . . . . 81
Configuration-Dealer . . . . . . . . . . . . . . . . . . . . . . . . . . . . . . . . . . . . . . . . . . . . . . . . . . . . . .82
Using the Accounting File . . . . . . . . . . . . . . . . . . . . . . . . . . . . . . . . . . . . . . . . . . . . . . 83
Index
iii

iv

Overview
The Web Utilities give you the power to access the printer through the Internet or your
company’s Intranet. You can use the Web Utilities to perform many functions, which
are divided into two main areas: Manage and Service. The options available in each
area are listed below.
Manage
Status
Web Utilities
General
Tray
Finisher
Consumables
Errors
Usage
Network
Reports
Revisions
System
General
Tray
Finisher
Virtual Printer
Accounting
Jobs
Test Print (DDP70e only)
Serial No.
Configuration
General
Events
Configuration
Communication
Web Utilities 1

Service
Consumables
Page Counter
Documentation
Engine Config
Finisher Config
Reset
Log
Configuration
Passwords
License Keycode
Events
Address Book
Dealer
The options available to you depend on the features installed on your system, so some
of the options shown here may not be available to you. For example, if the Publishing
Finisher is not installed on your system, any options and Web pages relating to the
Publishing Finisher will not be displayed.
Often, the status of an item is indicated with a colored button or graphic. Three colors
are used throughout the Web Utilities to graphically display the status of various
items.
Green indicates a normal condition.
Yellow indicates a warning condition (e.g., low paper, low toner, consumable near
end of life).
Red indicates an obstacle to printing, such as an empty condition, consumable at
end of life, paper jam, or door open.
2 Web Utilities

Access and Security
Not all Web Utilities are available to every type of user. Access to certain utilities is
limited by a password. Passwords provide security to the System and Service areas of
the system. The Web Utilities provide three levels of access: Status, System, and
Service, which are described below.
Status Access
Access to the Status area of the system does not require a password. It allows the
user to view all Status options and print Status, Summary, Demo, and font reports.
System Access
System access requires a password and enables the user to perform System
functions. System functions include modifying the printer configuration,
displaying all jobs in the system, and changing the system password. All useraccessible items are available as well.
Service Access
Service access requires a password and enables unrestricted access to the system.
Service access allows you to display and modify the system configuration,
counters, license keycode, and both system and service passwords. All user- and
system-accessible items are available as well.
NOTES:
It is the responsibility of the servicing dealer and/or system administrator
to set and secure passwords in the Web Utilities.
To access the System area, enter the User Name system. To access the
Service area, enter the User Name service. The default password for both
areas is blank and should be changed when the printer is installed.
Web Utilities 3
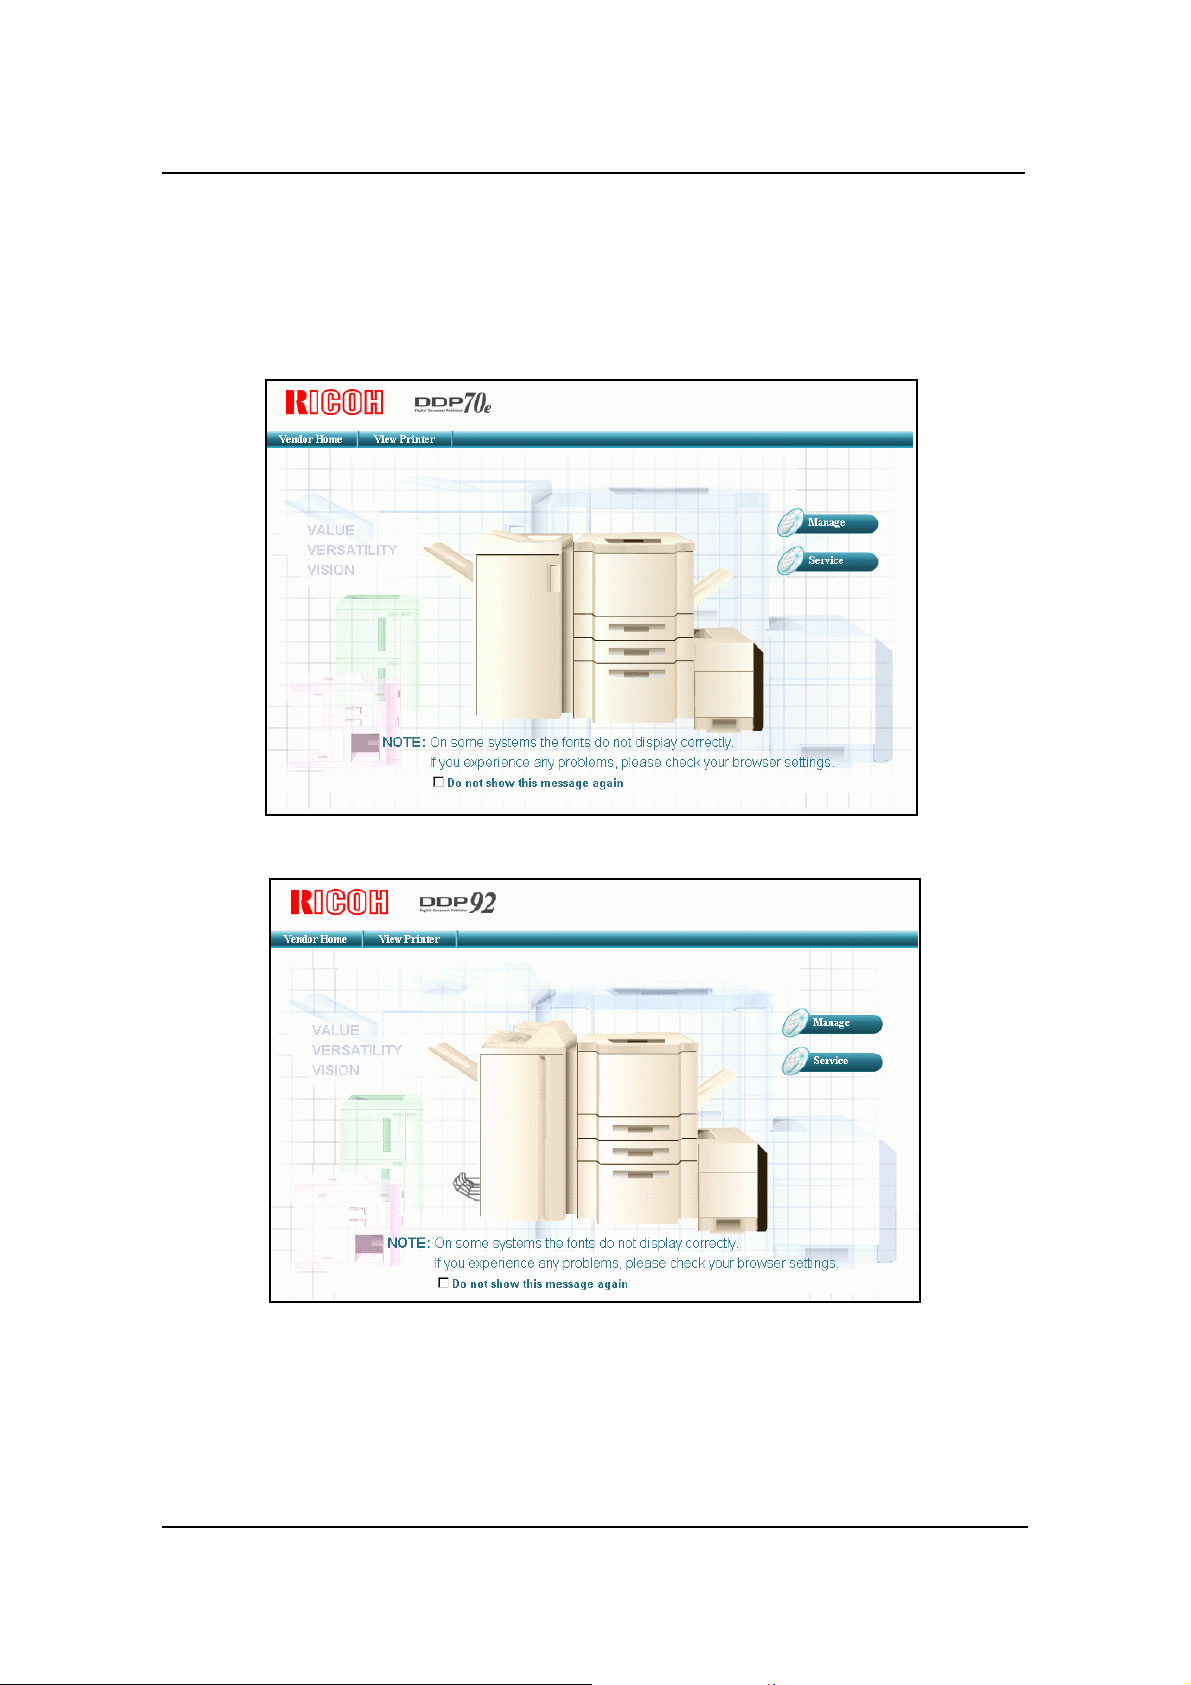
Accessing the Web Utilities
To access the Web Utilities, enter the IP address or DNS name of the printer in the
address bar of your Internet browser. The Home Page is the first page that will be
displayed.
DDP 70e
DDP 92
You can make a selection from the Home Page or wait 90 seconds for the Status-
General page to be automatically displayed.
4 Web Utilities
Web Page Organization
All Web pages have a common Top and Left bar. A description of these common areas
follows.
Top Bar Options
Option Description
Language
Home Click to return to the Home page.
Vendor Displays vendor information including name, address, phone and URL address.
Links Displays links to the manufacturer’s web sites.
Drivers Provides downloadable printer drivers and a link to the latest drivers.
Documentation Lists the available User’s Documentation. Selected documents will open in pdf format.
Site Map
The Web page default language is the language set on the Operator Control Panel. Select
English, Deutsch, Frençais, Español, or Portuguêse.
Displays the overall layout of the Web pages. The Site Map is a useful tool for locating
information.
Home
Click to return to the Home page. A sample is shown on page 4.
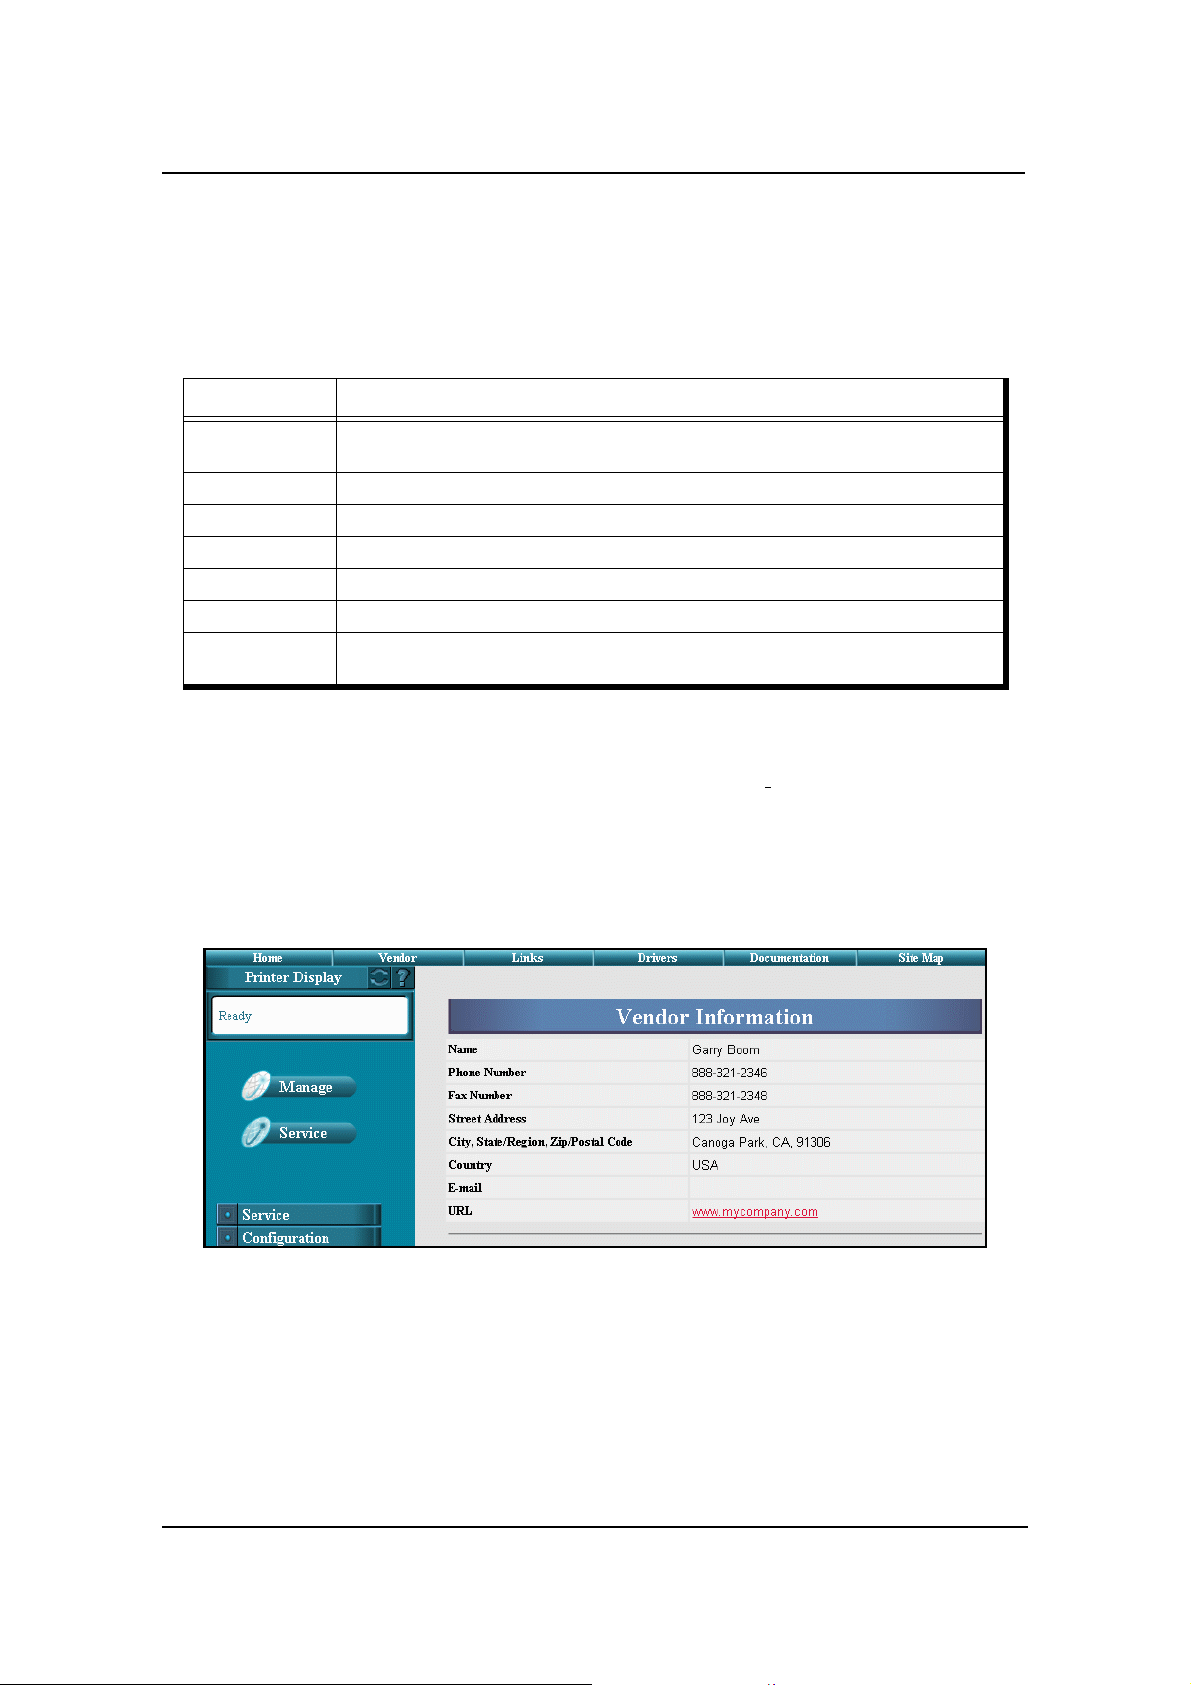
Vendor
Displays dealer information including, name, address, phone number and URL
address.
Web Utilities 5
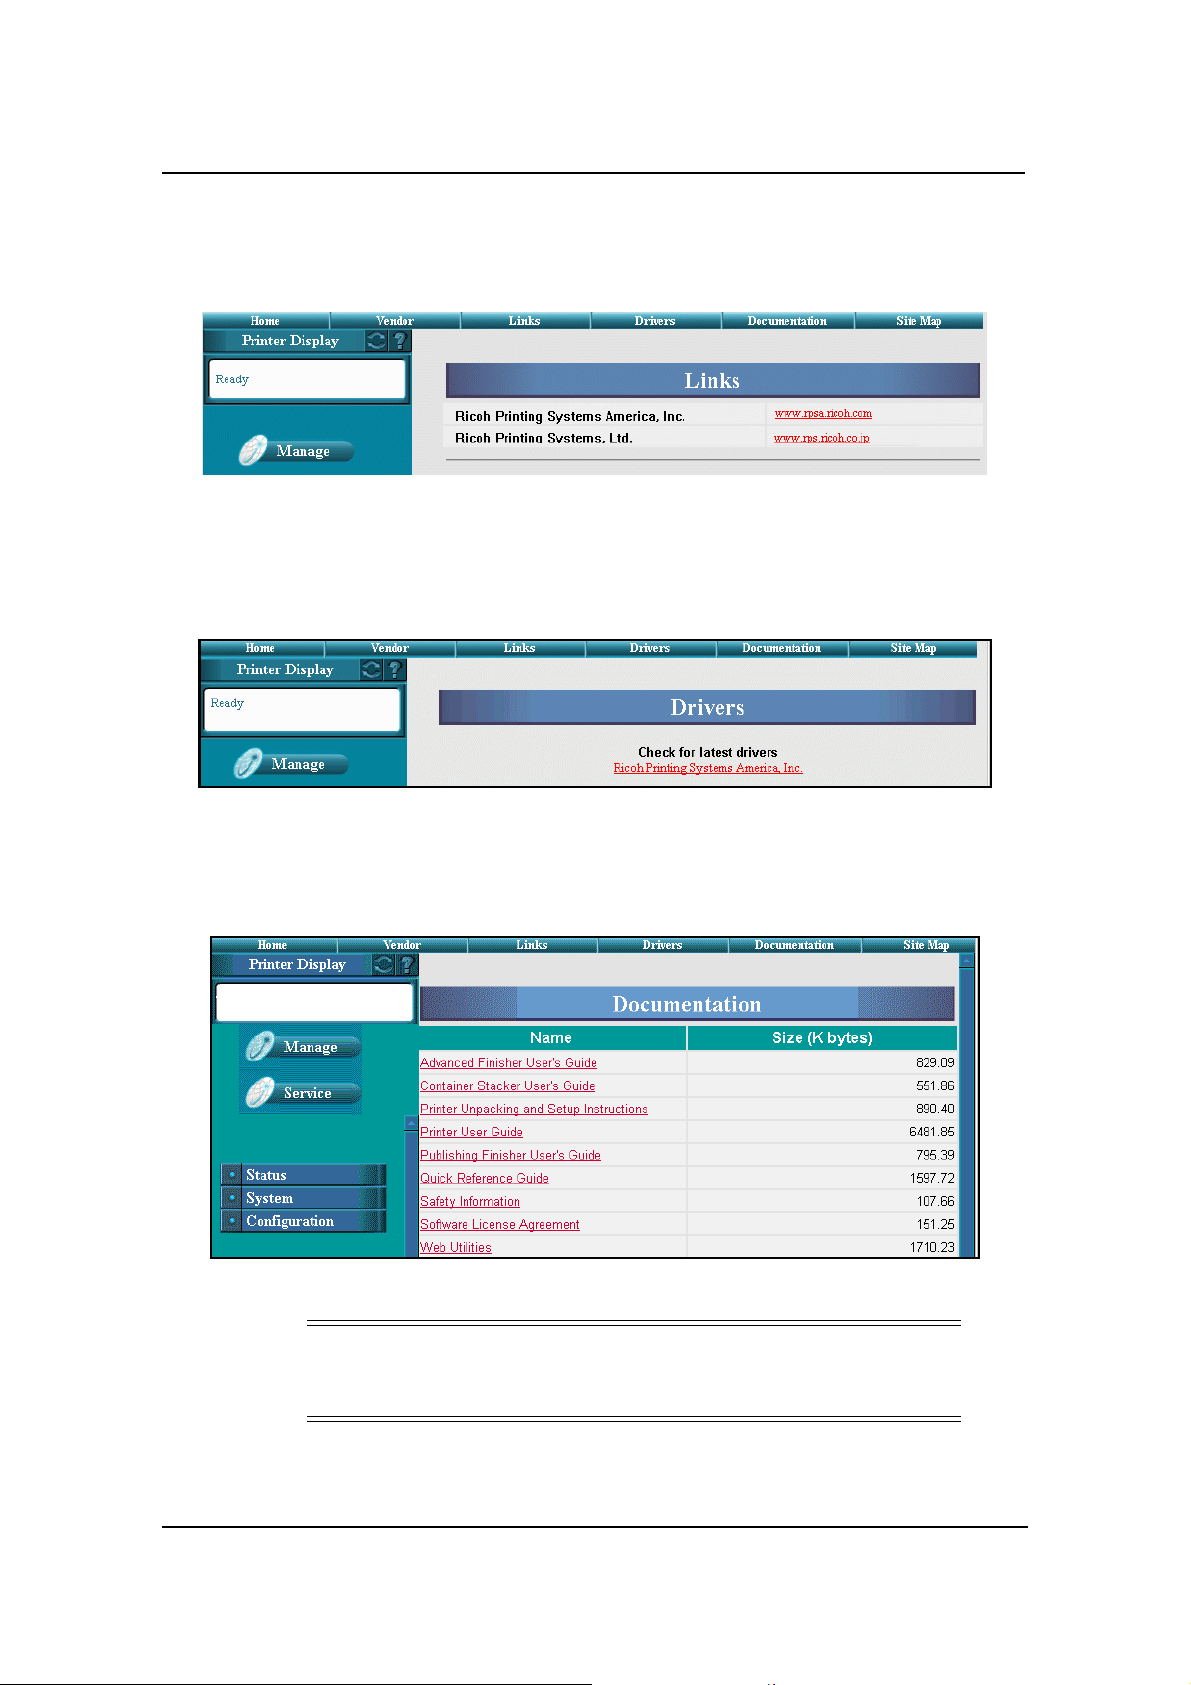
Links
Drivers
Click to display links manufacturer’s web sites.
Use this page to link to the latest drivers available for your printer model.
Documentation
This page displays a list of User’s Documentation, such as the Printer User’s Guide.
NOTE:
The Documentation Web Page shown above is the DDP 70e. Some
differences in document titles will be seen on the DDP 92.
6 Web Utilities

Site Map
This page displays the overall layout of the Web pages and is useful for locating
information. The DDP70e is shown. The DDP92 will have slight differences.
DDP70e
Web Utilities 7
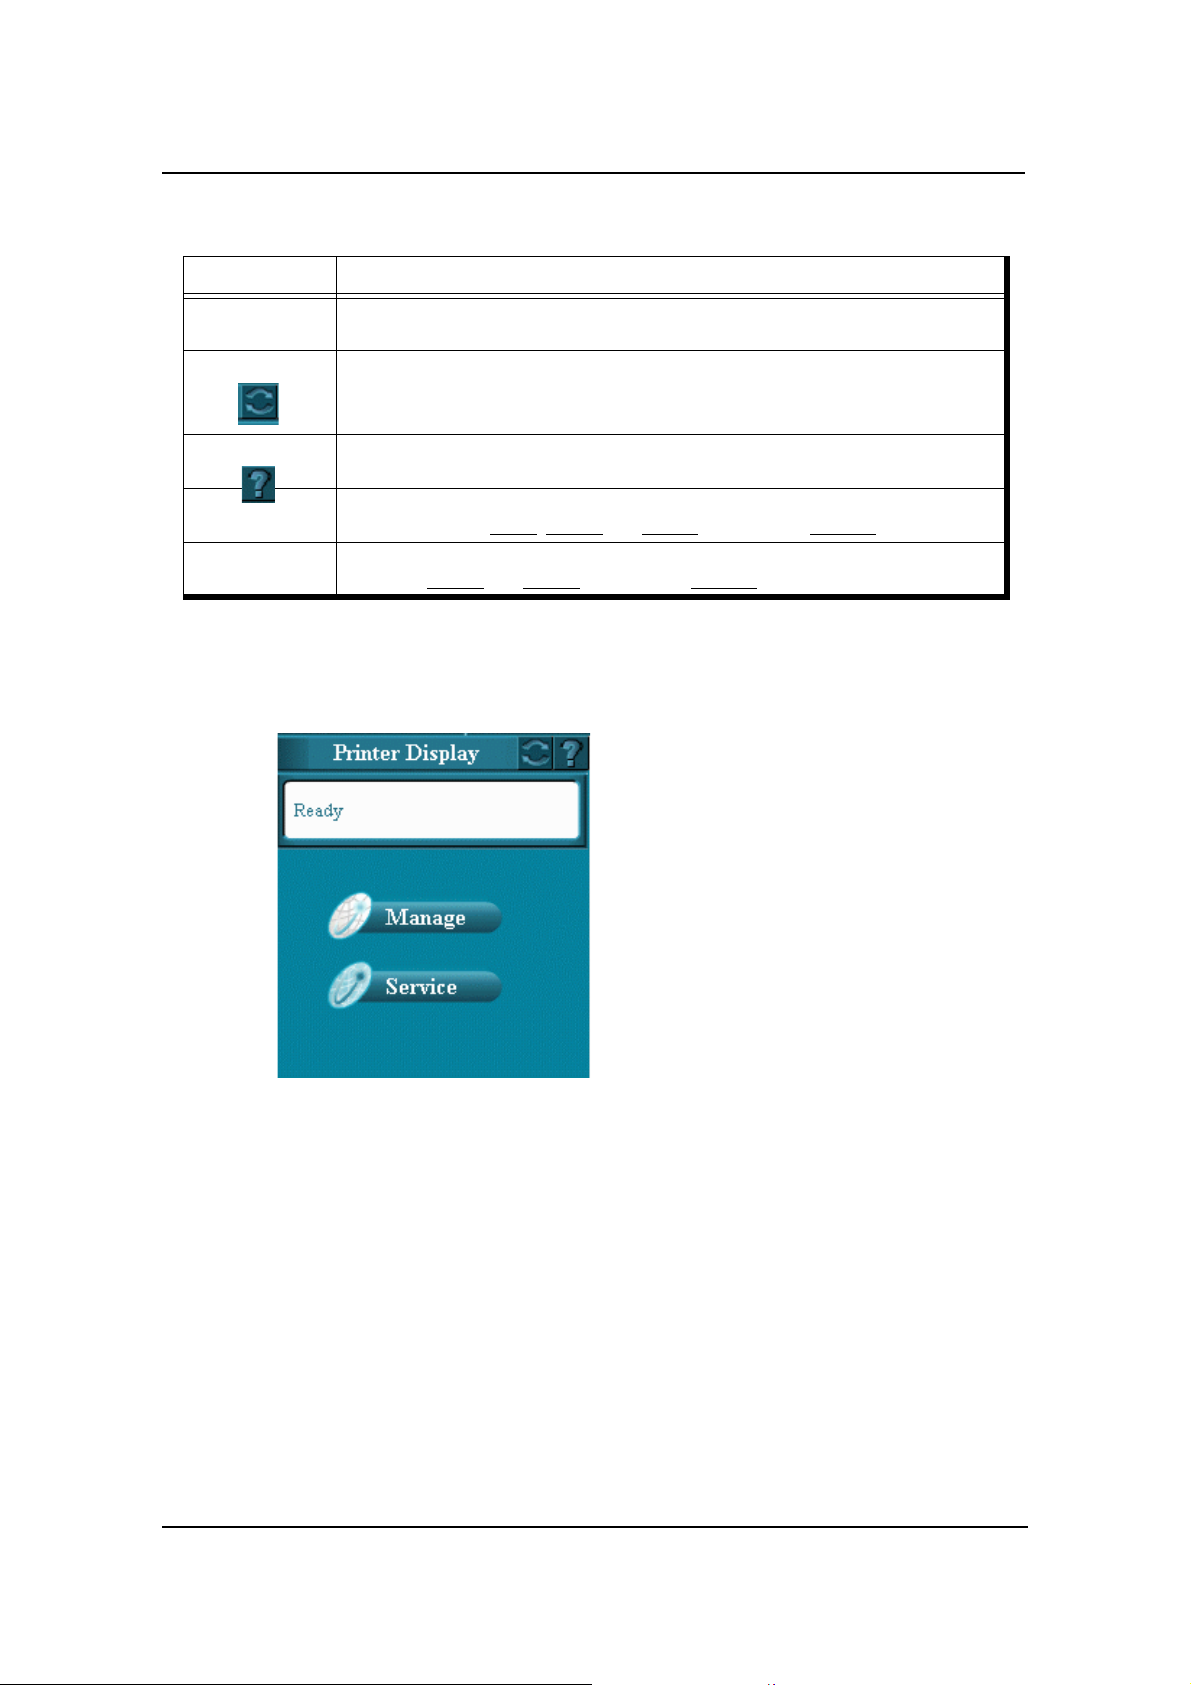
Left Bar Options
Option Description
Printer OCP
Display
Refresh
Error Information Click this icon for a description of an error reported on the Printer OCP Display. If you click
Manage
Service
Displays the current printer Operator Control Panel (OCP) message including printer status
and error messages.
Click to refresh the current Web page.
this icon when there is no error the message will state “There is no error to report.”
Click to display the Manage Status, System and Configuration Web pages. For a list of
Manage options see page 9
Click to display the Service and Service Configuration Web pages. For a list of Service
options see page 60
, page 22, and page 45, or refer to the Site Map.
, and page 77, or refer to the Site Map.
Printer Display
8 Web Utilities

Manage-Status Options
Each of the options available under Manage Status are described in the following
table. Access to the Status options is not restricted by a password.
Option Description
General
Tray
Finisher
Consumables Displays the status of the toner, developer mix, fuser web, fuser unit, and drum unit.
Errors Displays the error counts for the printer.
Usage
Network
Reports
Revision Displays revision information for the engine firmware and controller software.
Displays printer configuration and status. Displays information on the printer, contact,
printer location, printer name, and printer uptime.
Displays the size, type, and weight of the paper in each tray. Graphically displays the
amount of paper in each tray.
Displays information on installed finishers. Depending on the finisher installed, the
status of elements such as cover, stacker, and staple cartridges may be displayed.
Displays paper usage information, toner coverage percentages, and preventative
maintenance (PM) page counts. Displays page counts for all available paper sizes, for the
current period and the life of the printer.
Displays the MAC address, IP address, and subnet mask of the onboard network
controller. If installed, this information is displayed for the Network Interface Card
(NIC) as well.
Lists all available reports as links. For example, Status, Summary, Demo, PCL Directory,
PCL Fonts, etc. Prints the relevant report when the link is clicked.
Web Utilities 9
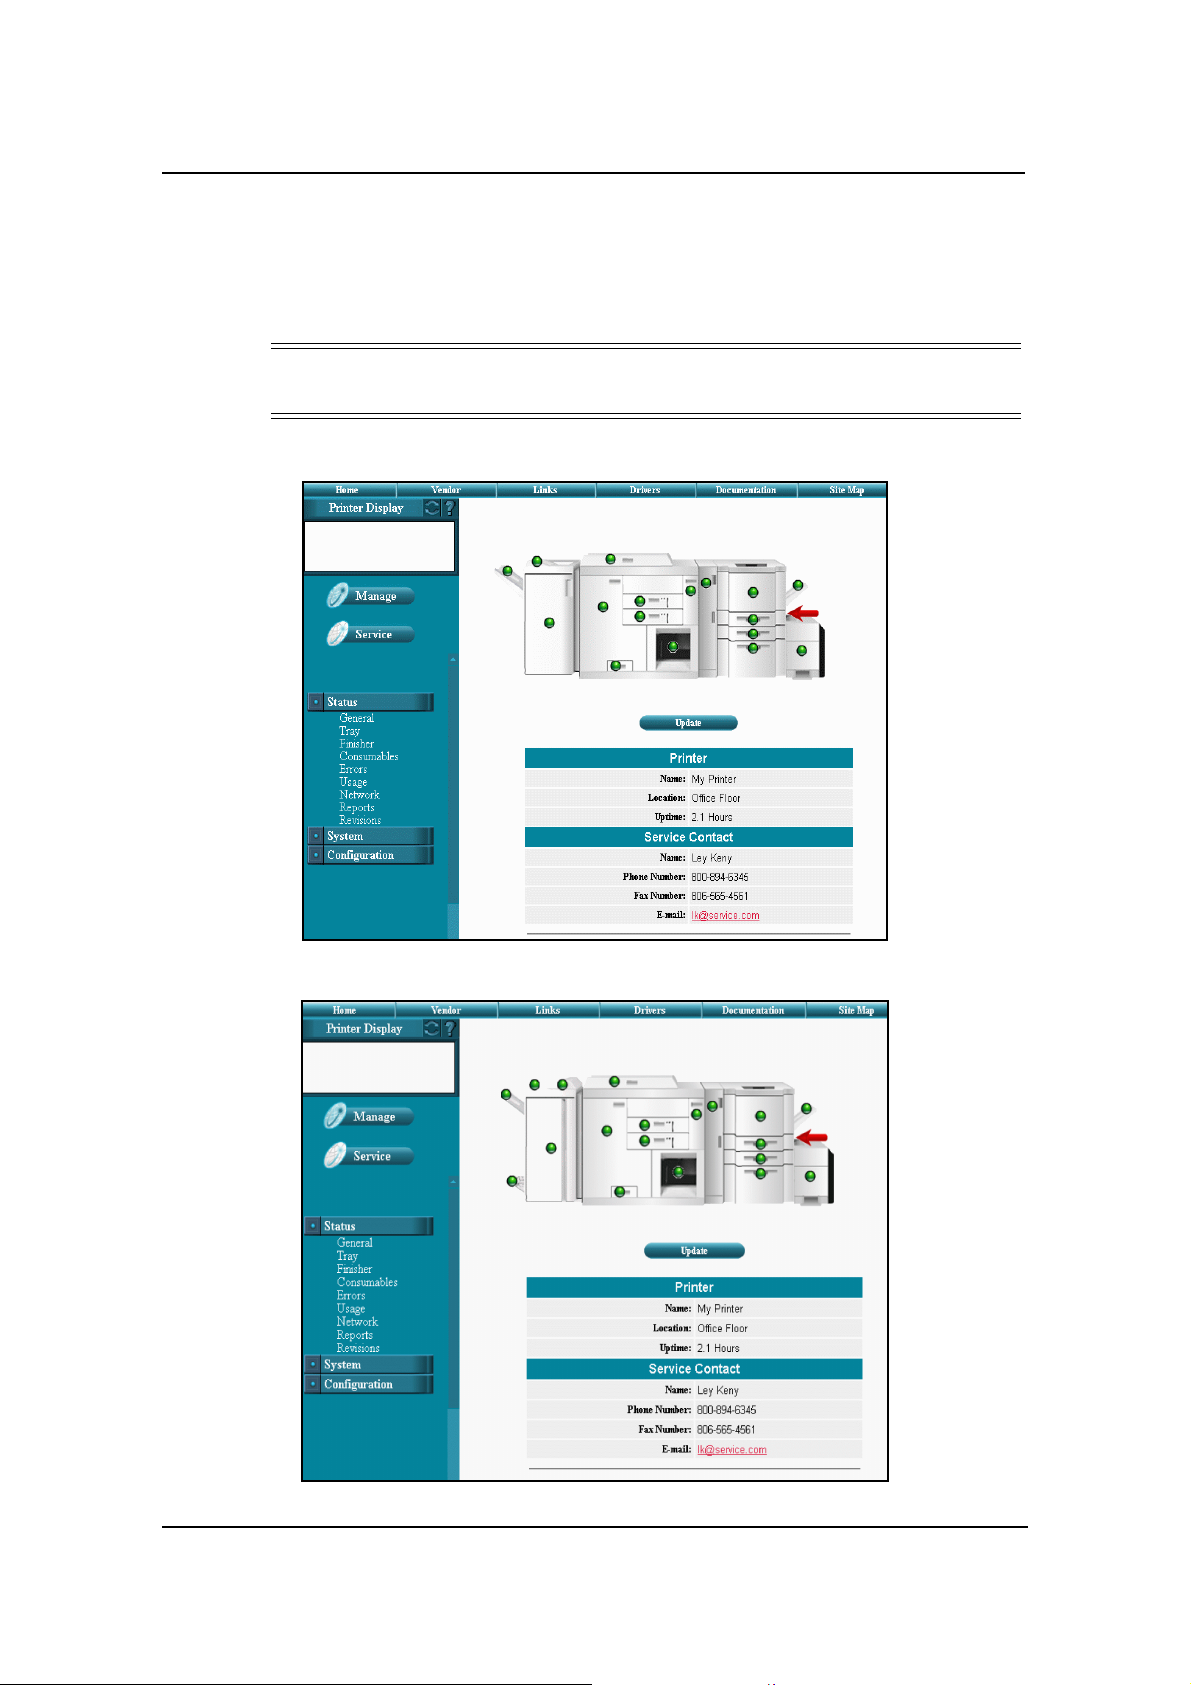
Status-General
The Status-General page displays the status of the print engine, paper trays, finisher,
consumables, and all installed options. It also displays printer, and service contact
information.
NOTE:
Only the options that are installed will be displayed on the Status-General page.
DDP70e
DDP92
10 Web Utilities

A colored button is located on each part of the printer to graphically indicate the
condition of the item.
Green indicates a normal condition.
Yellow indicates a warning condition (e.g., low paper, low toner, consumable near
end of life).
Red indicates an obstacle to printing, such as an empty condition, consumable at
end of life, paper jam, or door open.
Click a button to display information on that part of the printer. For example, if you
click on the MBT button, the Status-Tray page is displayed with detailed paper tray
information.
This page refreshes automatically every 90 seconds. Optionally, you can click the
Update button to refresh the display on demand.
Web Utilities 11
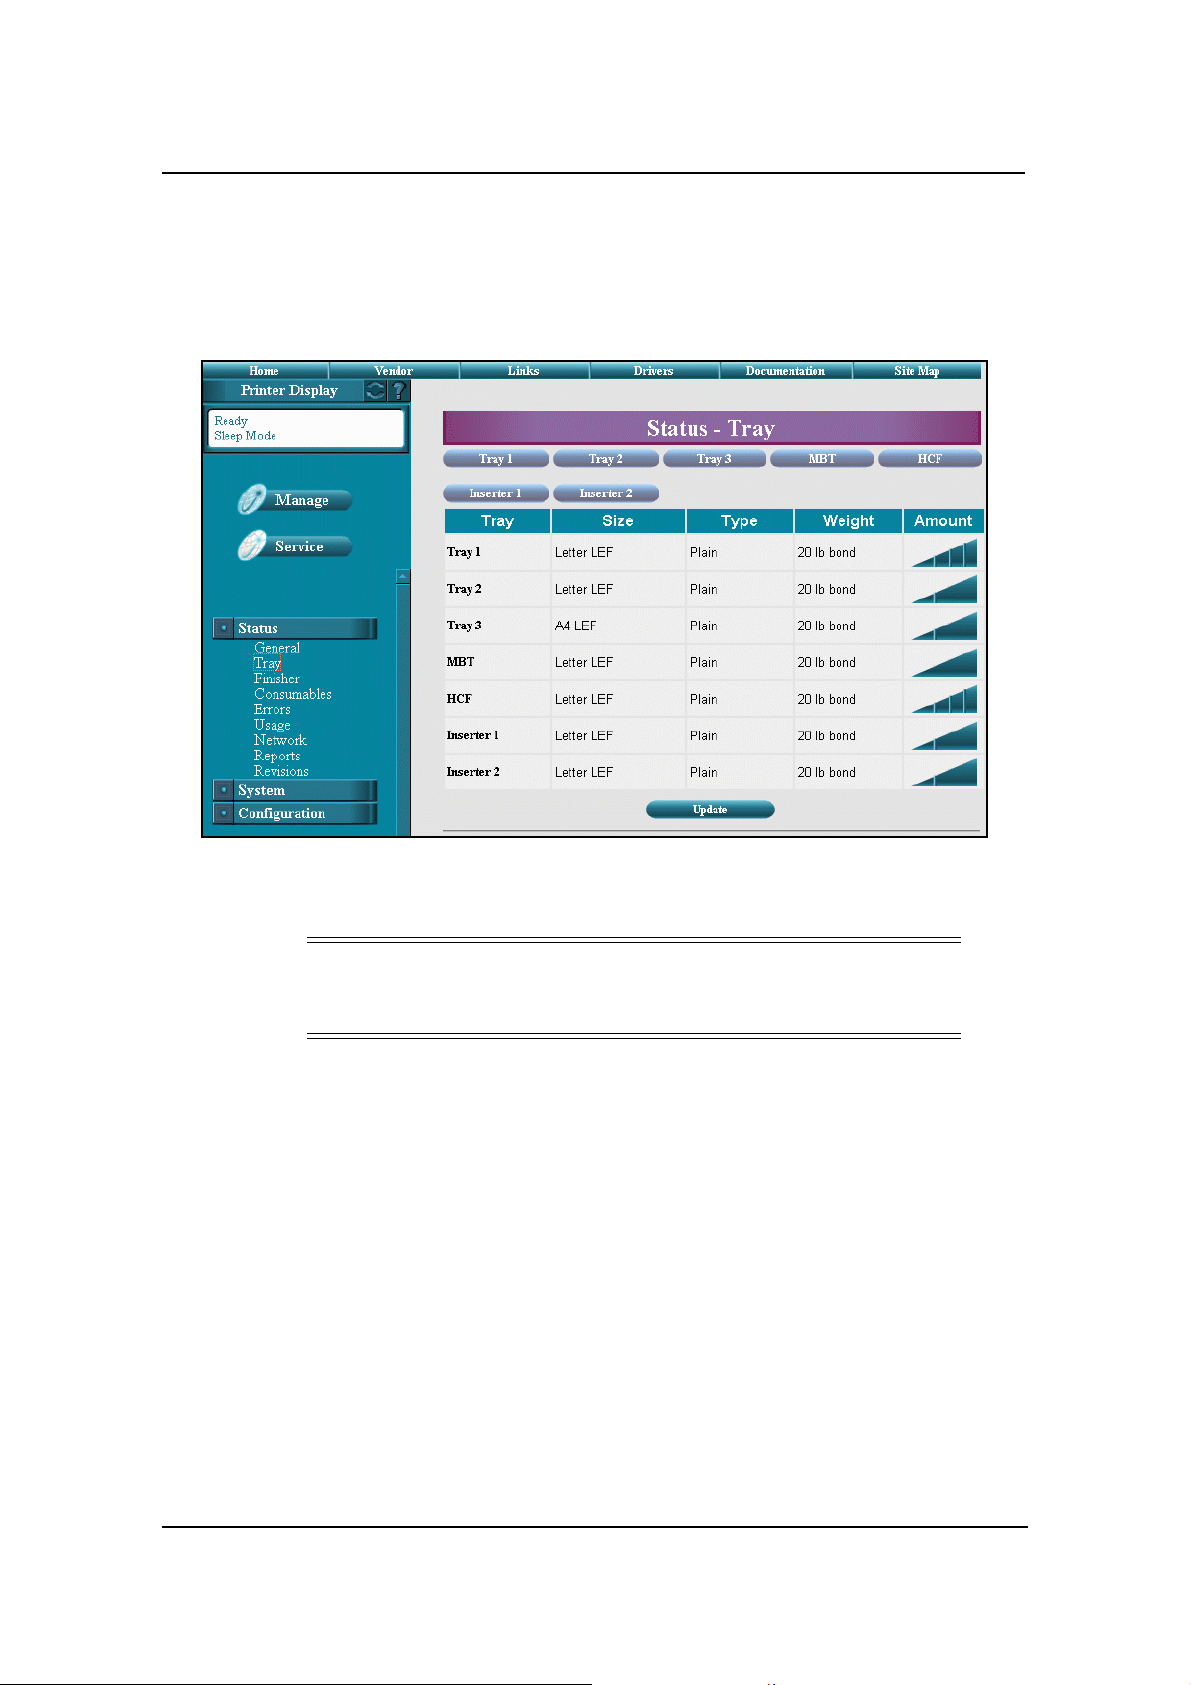
Status-Tray
The Status-Tray page displays the status of the paper trays. For each paper tray, the
size, type, and weight of the paper is noted. The amount of paper in each tray is
graphically displayed in the far right column.
This page refreshes automatically every 90 seconds. Optionally, you can click the
Update button to refresh the display on demand.
NOTE:
Some functions available from this page can only be accessed by users
with the System or Service password.
12 Web Utilities
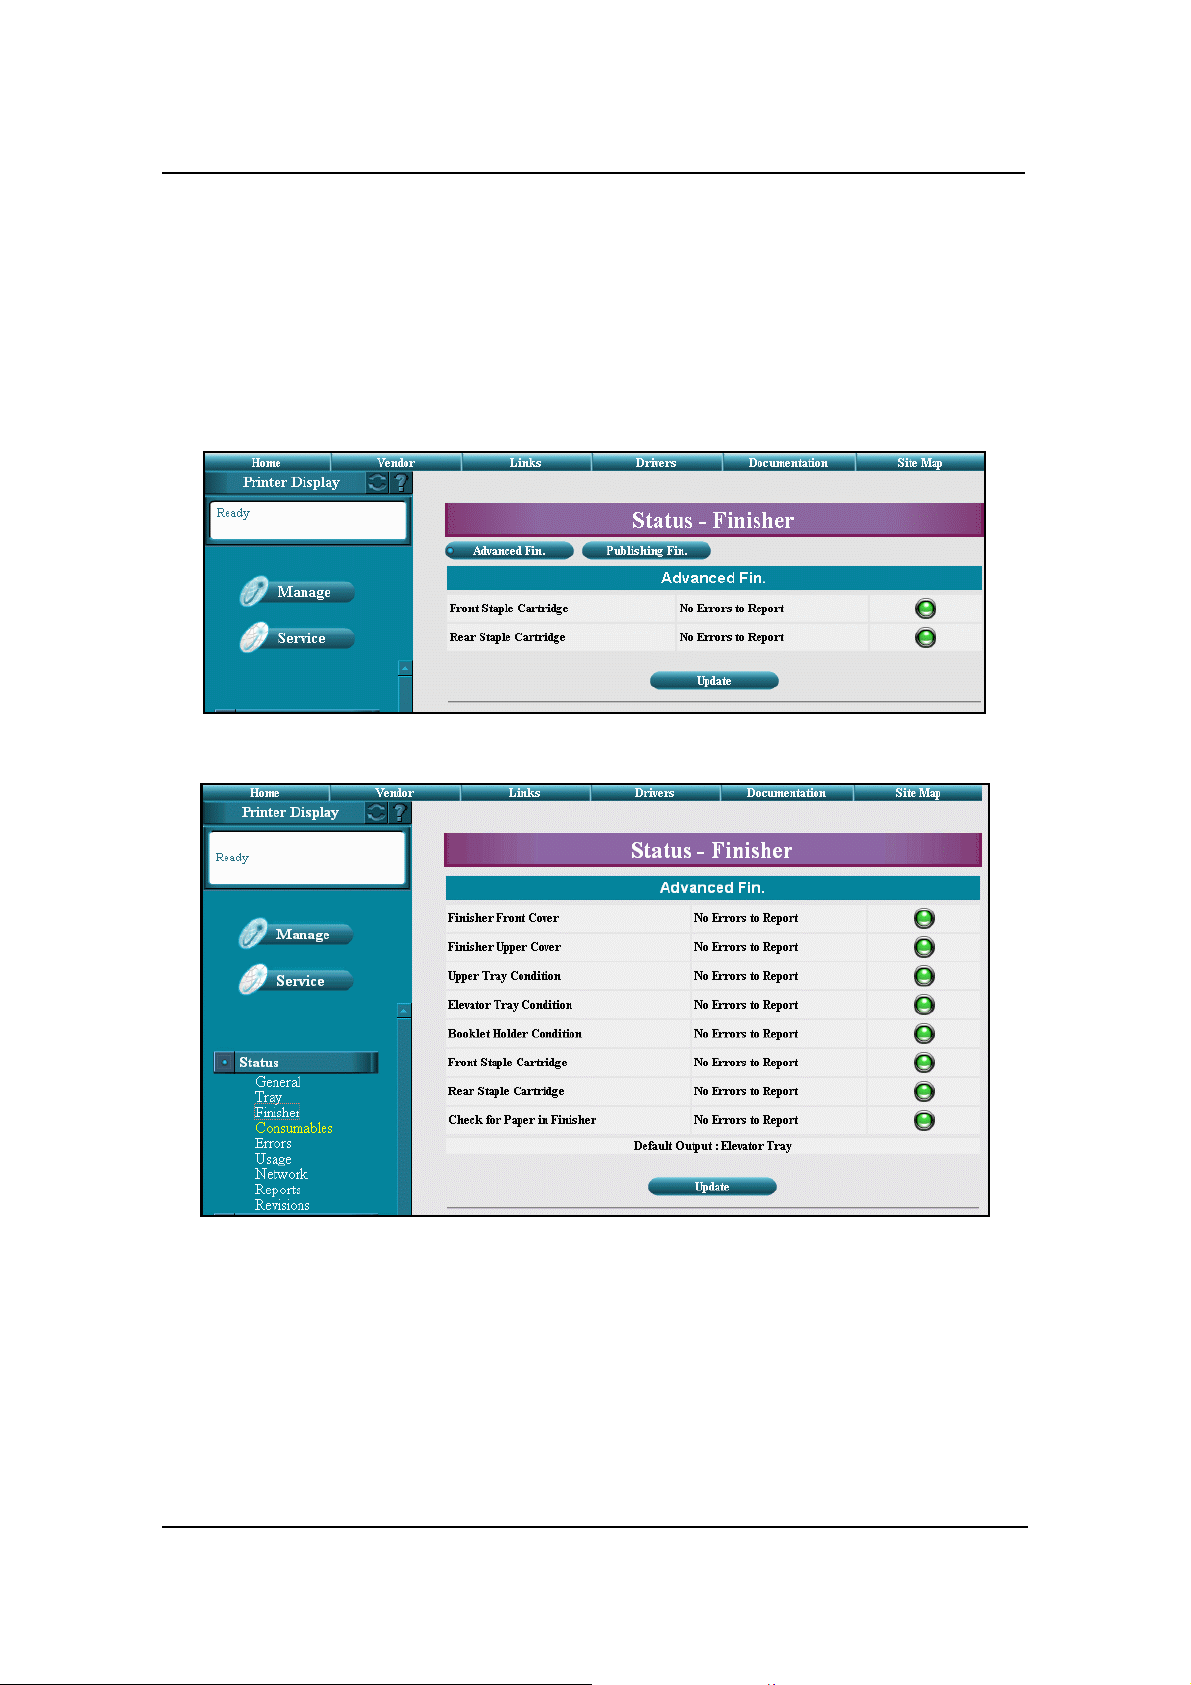
Status-Finisher
Advanced Finisher
The Status-Finisher page for the optional Advanced Finisher displays the status of the
finisher elements, such as the position of the cover, and the condition of the stacker
and staple cartridges.
DDP70e
DDP92
A colored button graphically indicates the condition of each element.
Green indicates a normal condition.
Yellow indicates a warning condition (e.g., consumable near end of life).
Red indicates an obstacle to printing, such as an empty condition, consumable at
end of life, paper jam, or door open.
This page refreshes automatically every 90 seconds. Optionally, you can click the
Update button to refresh the display on demand.
Web Utilities 13
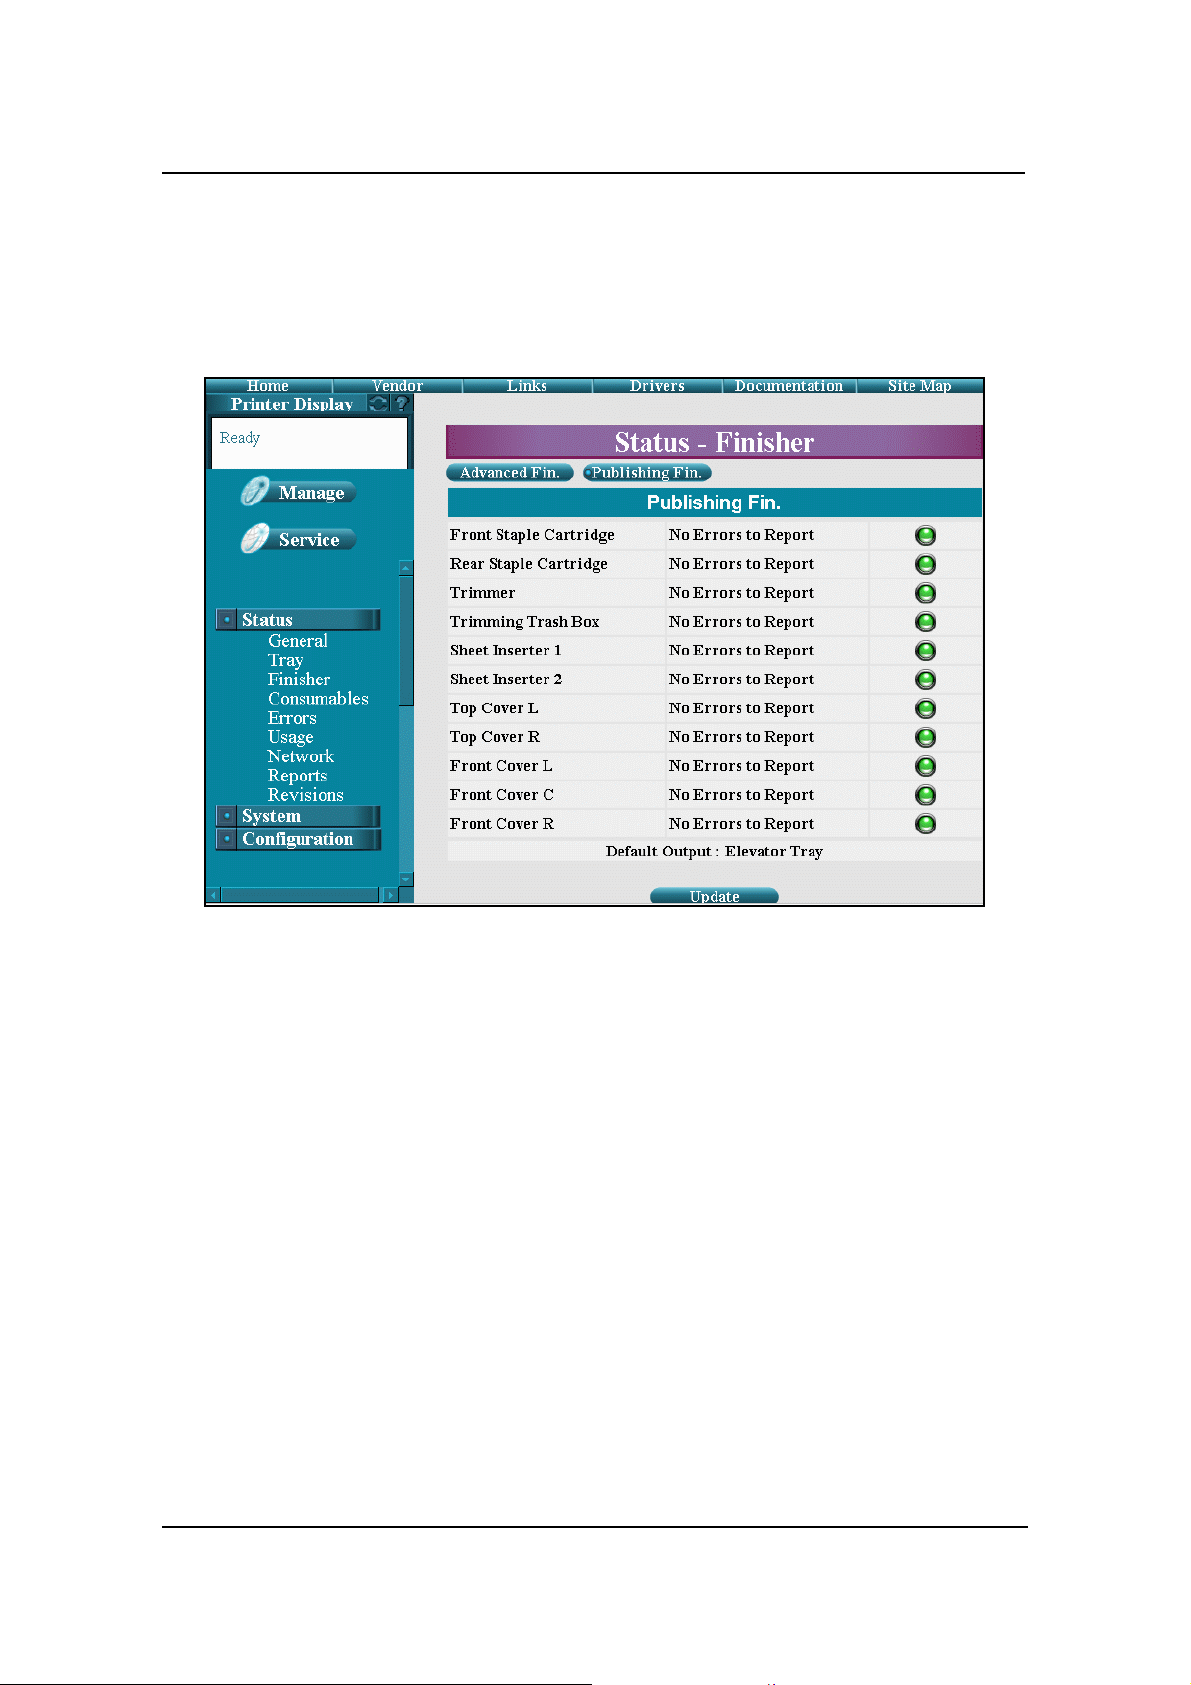
Publishing Finisher
The Status-Finisher page for the Publishing Finisher option displays the status of the
Publishing Finisher elements, such as the type and amount of paper in the inserter
trays. The page also shows the status of the staple cartridges and other elements of the
Publishing Finisher.
A colored button graphically indicates the condition of each element.
Green indicates a normal condition.
Yellow indicates a warning condition (e.g., consumable near end of life).
Red indicates an obstacle to printing, such as an empty condition, consumable at
end of life, paper jam, or door open.
This page refreshes automatically every 90 seconds. Optionally, you can click the
Update button to refresh the display on demand.
14 Web Utilities
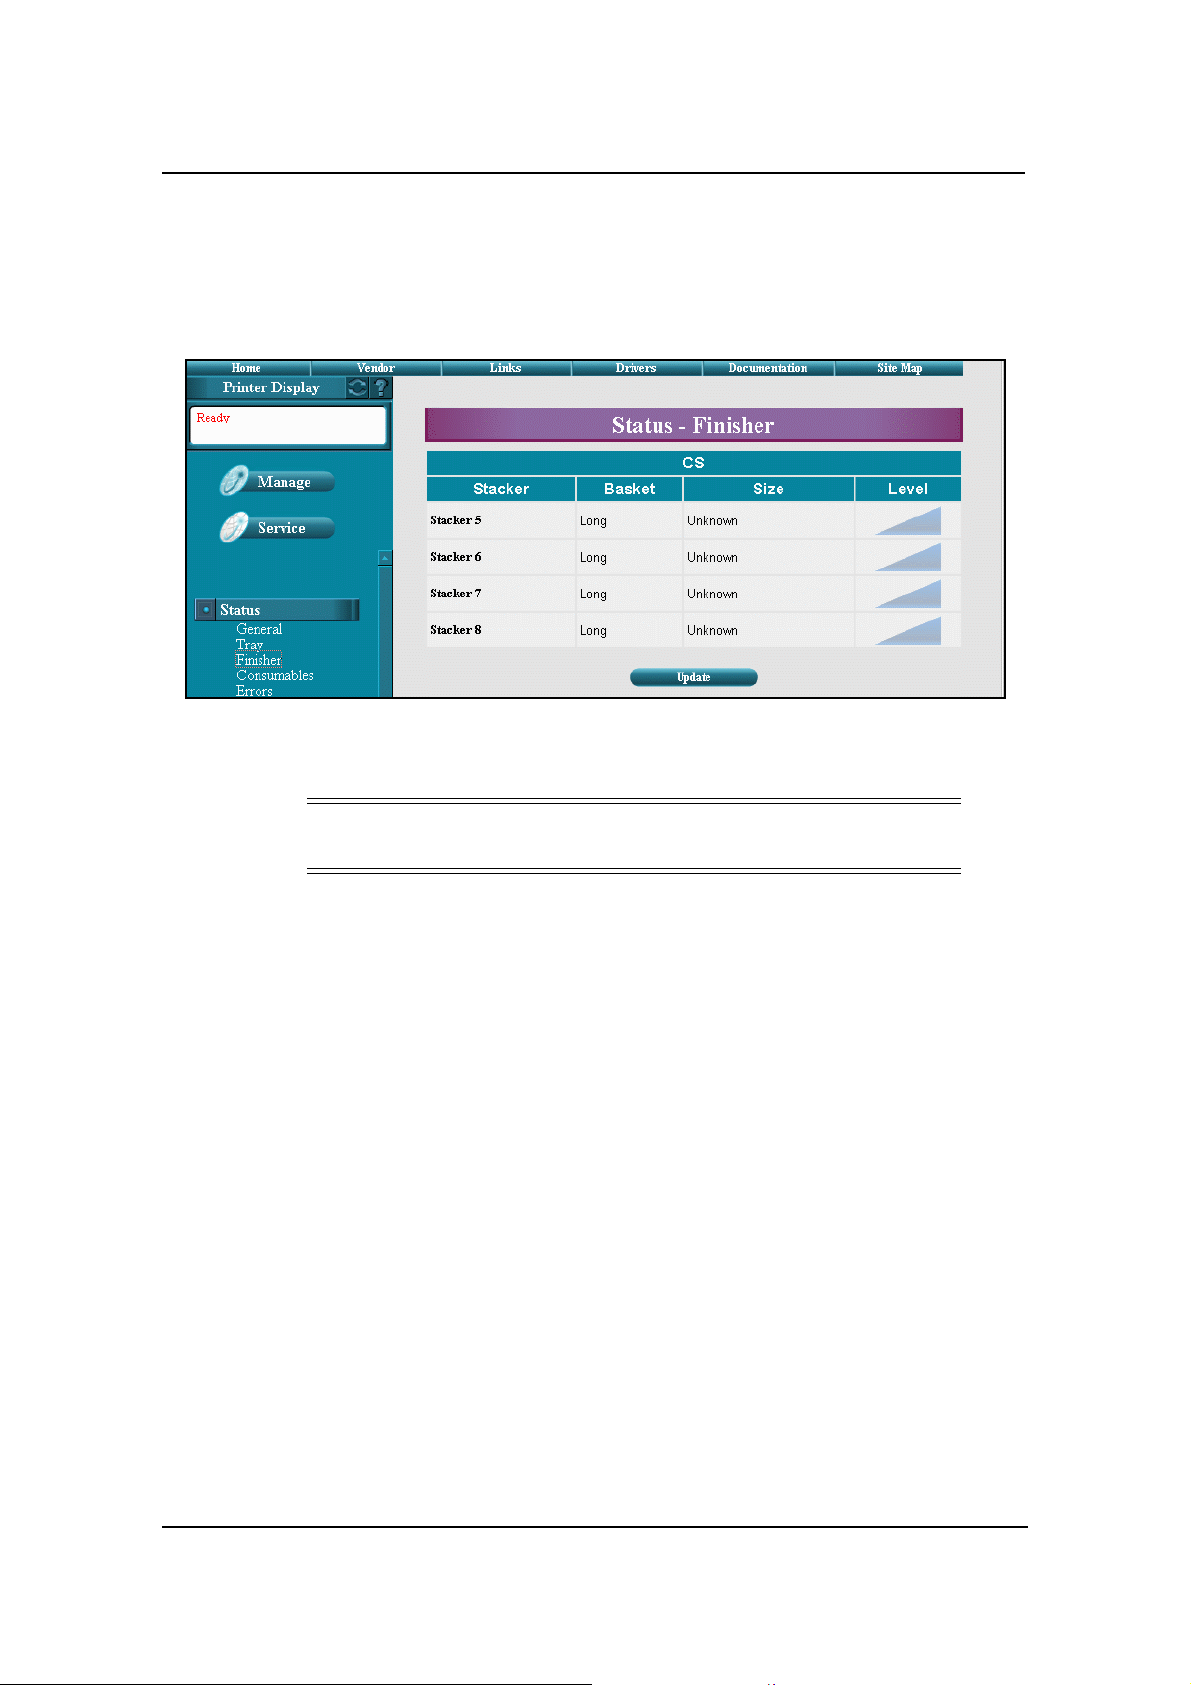
Container Stacker
The Status-Finisher page for the Container Stacker option displays information on
each stacker installed. For each stacker, the basket size and paper size is displayed.
The amount of paper in each stacker is graphically displayed in the far right column.
This page refreshes automatically every 90 seconds. Optionally, you can click the
Update button to refresh the display on demand.
NOTE:
Unknown means there is no paper in the Container Stacker.
Web Utilities 15
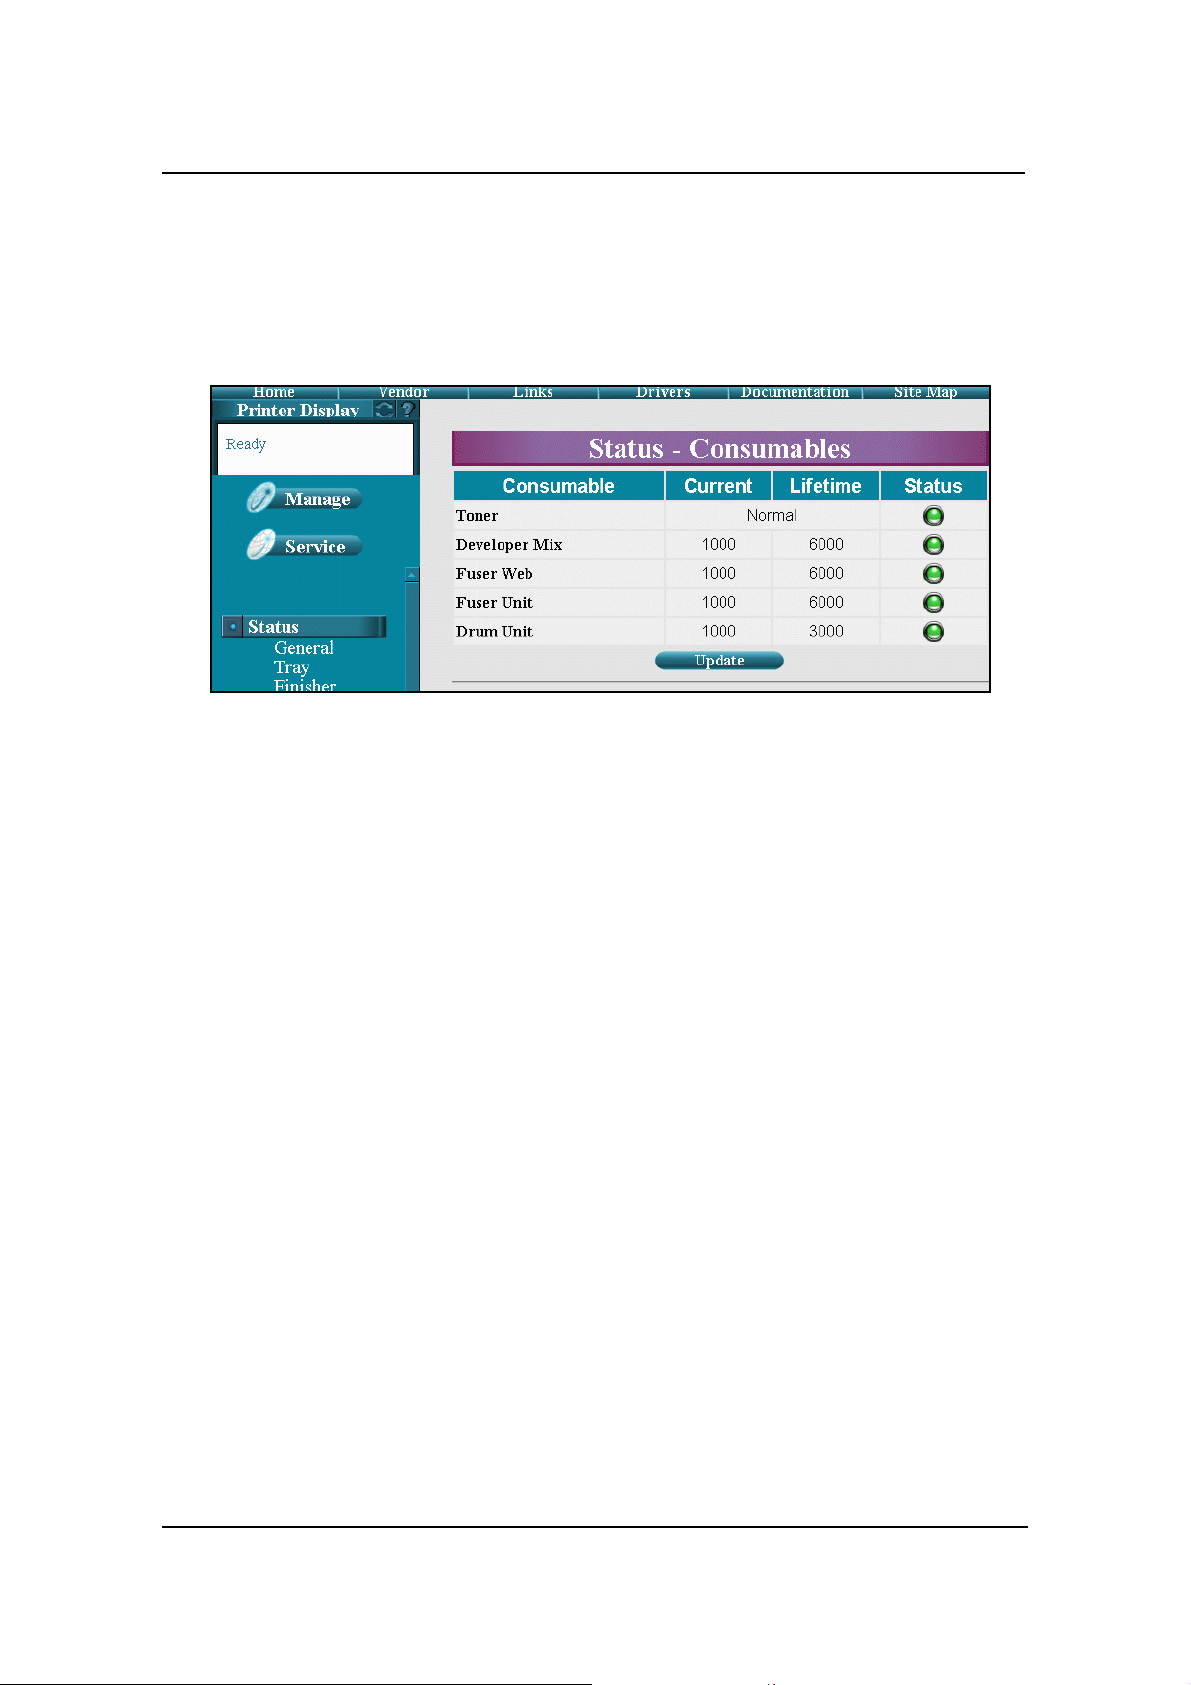
Status-Consumables
The Status-Consumables page graphically displays the status of the printer
consumables. This includes the status of the toner, developer mix, fuser unit, and drum
unit.
A colored button graphically indicates the condition of each element.
Green indicates a normal condition.
Yellow indicates a warning condition (e.g., low toner, consumable near end of life).
Red indicates an obstacle to printing, such as an empty condition, consumable at
end of life, paper jam, or door open.
This page refreshes automatically every 90 seconds. Optionally, you can click the
Update button to refresh the display on demand.
16 Web Utilities
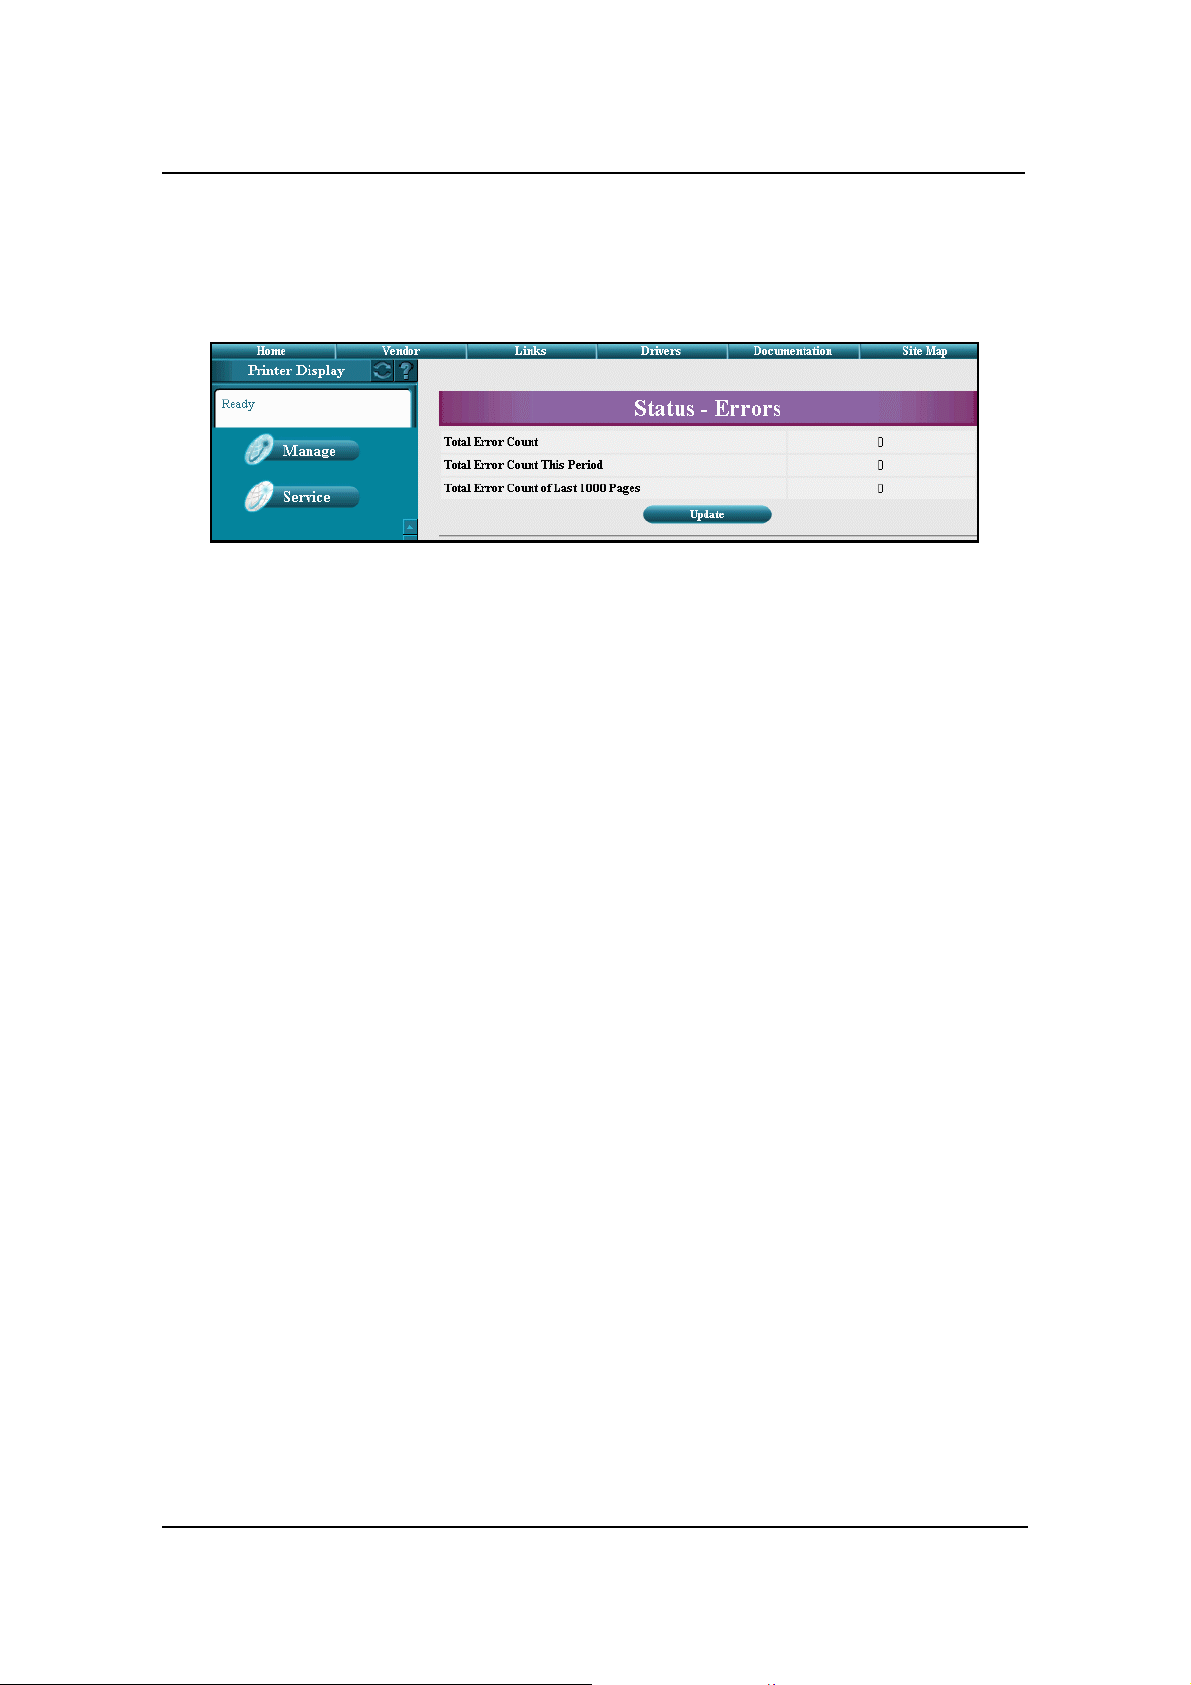
Status-Errors
The Status-Errors page displays the error counts for the printer. This information is
useful to Service and Technical Support personnel.
This page refreshes automatically every 90 seconds. Optionally, you can click the
Update button to refresh the display on demand.
Web Utilities 17
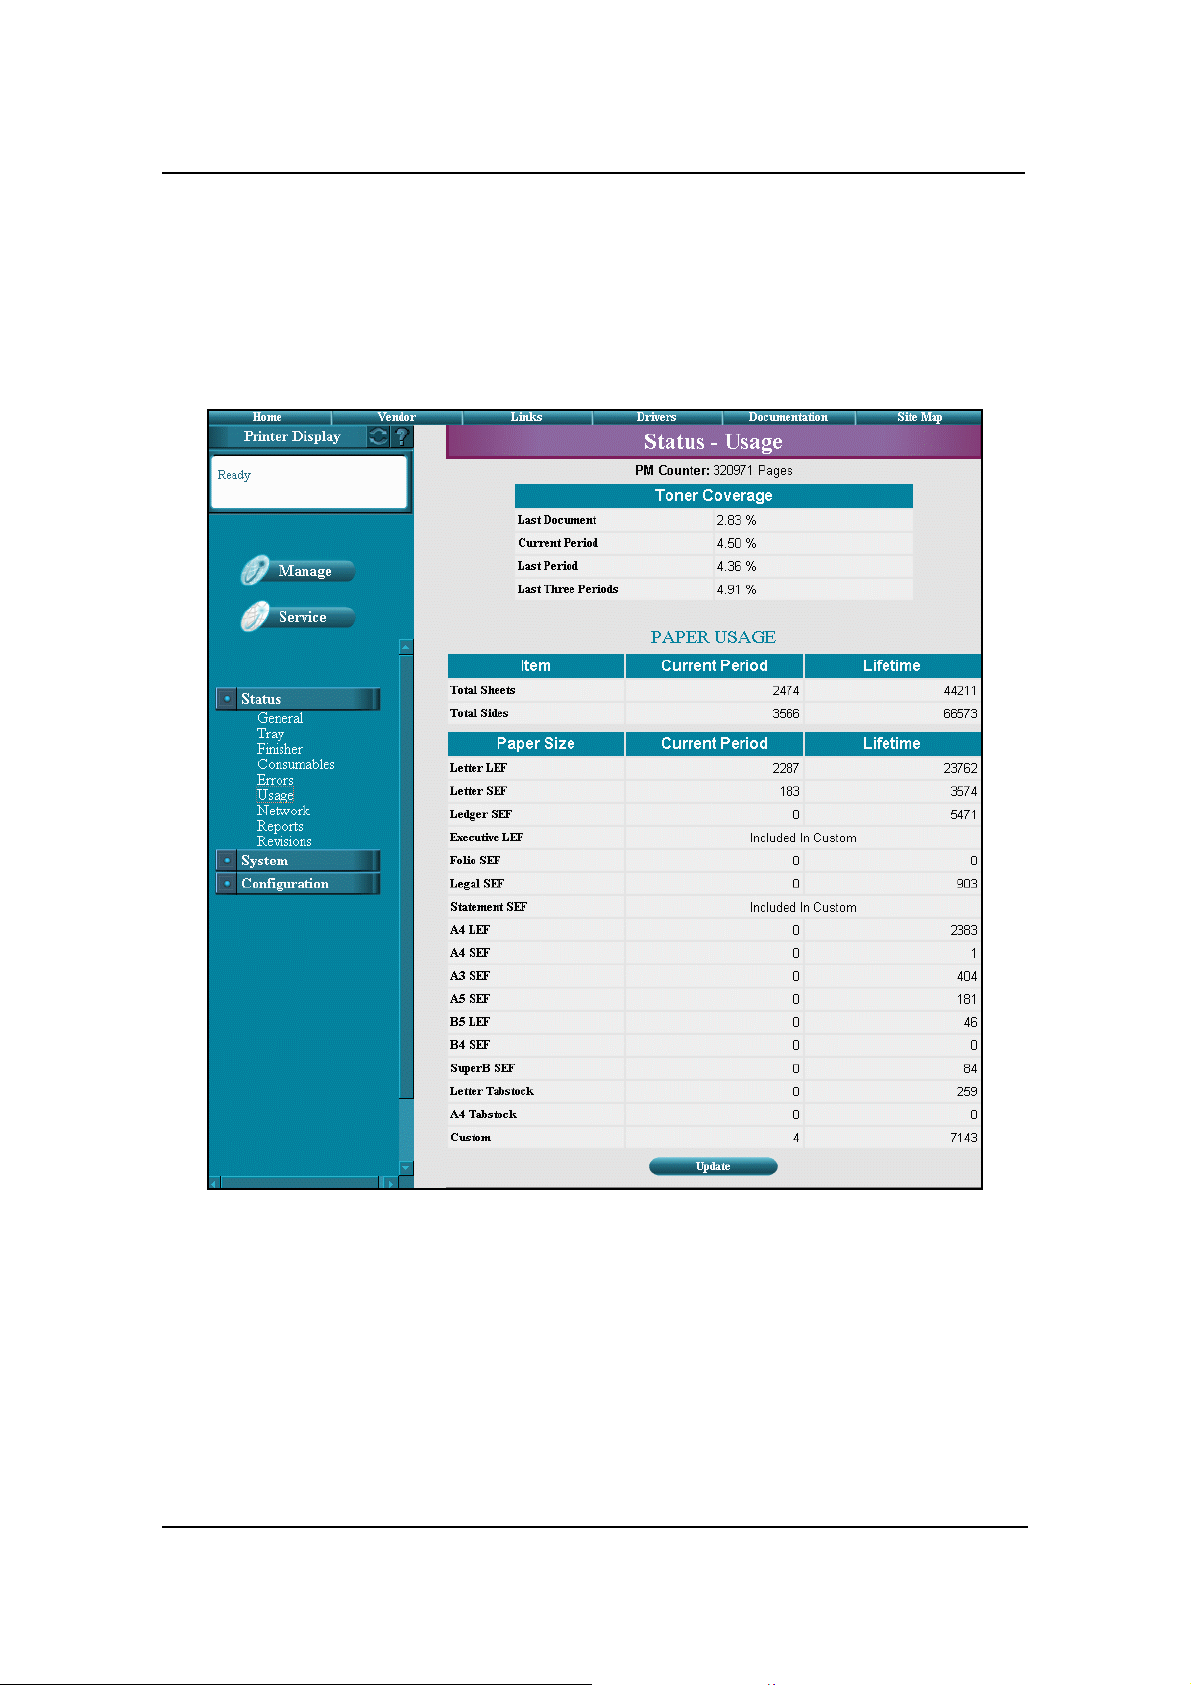
Status-Usage
The Status-Usage page displays the number of pages left before the next preventative
maintenance (PM) service, as well as toner coverage and paper usage information.
The Current Period value is increased when a page is printed. The Lifetime value is
increased when the engine picks up a paper from an input tray.
This page refreshes automatically every 90 seconds. Optionally, you can click the
Update button to refresh the display on demand.
18 Web Utilities
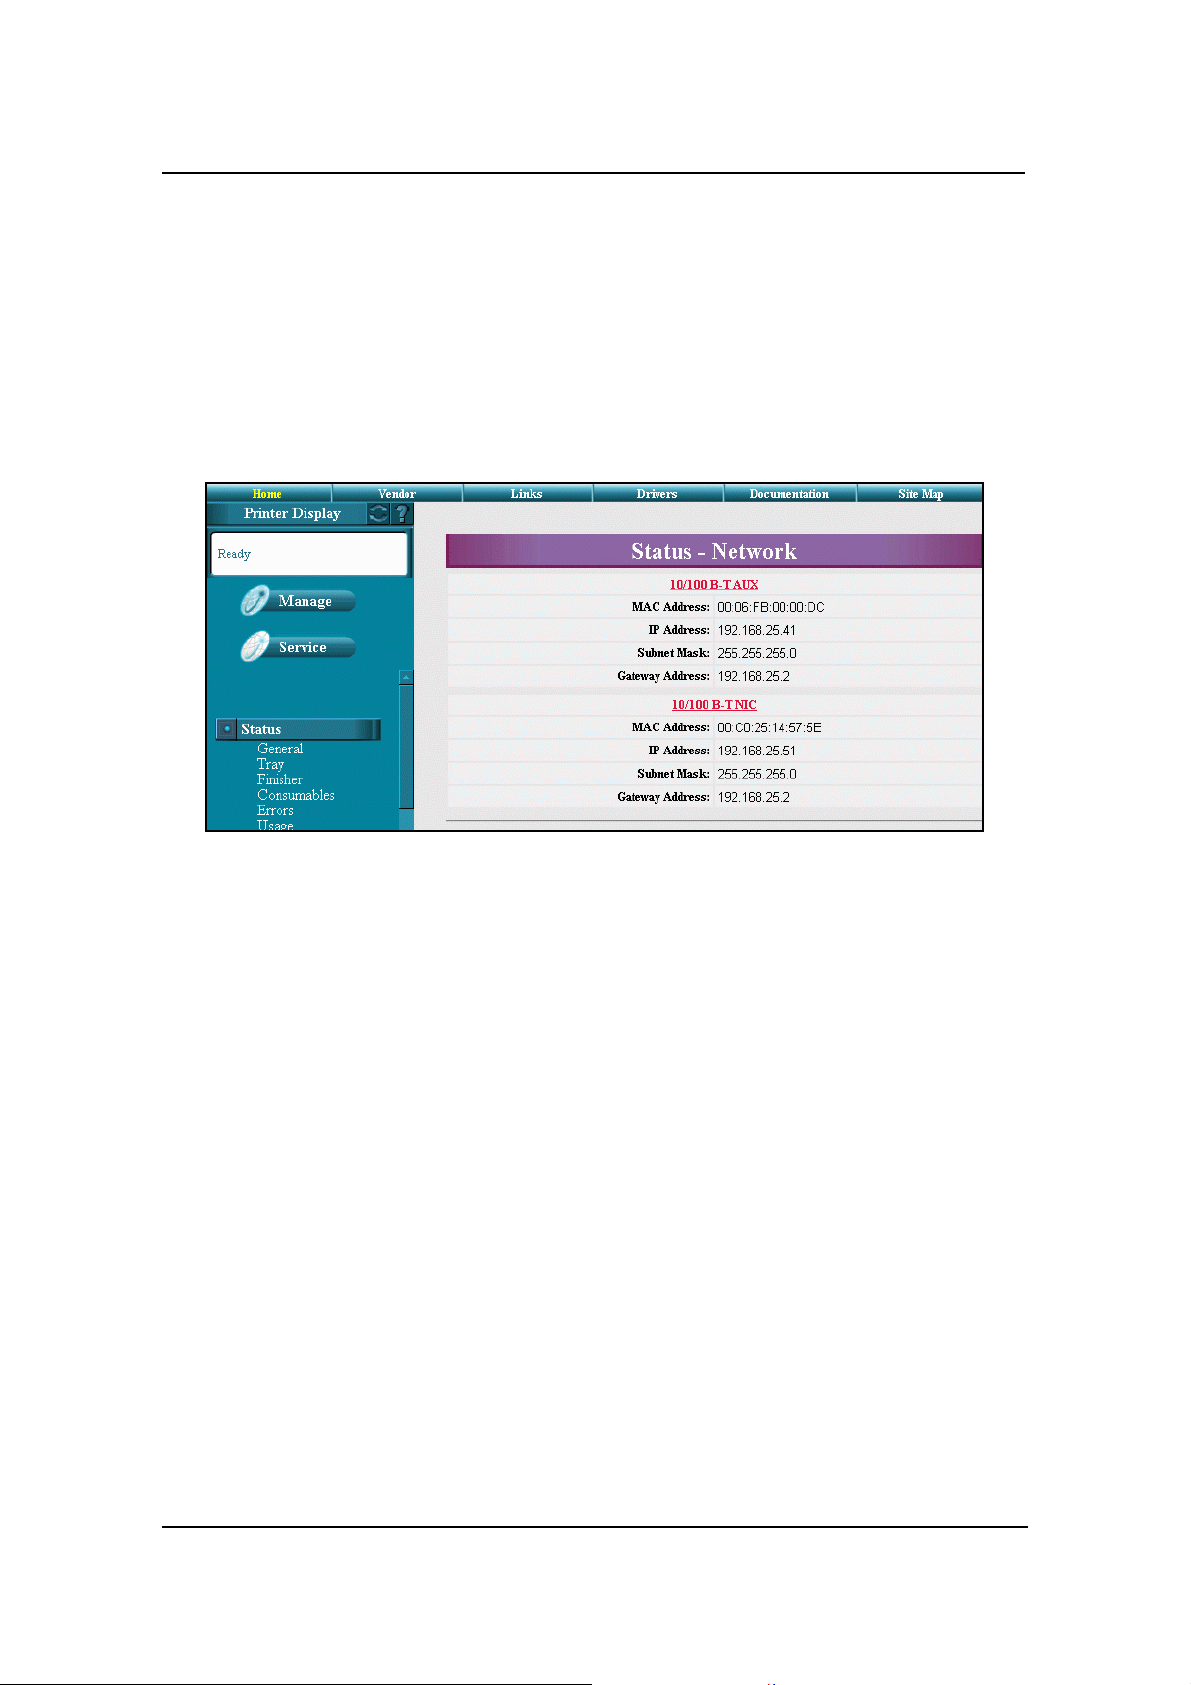
Status-Network
The Status-Network page displays network address information. The example below
shows a system with the optional Network Interface Card (NIC) installed. The address
information for the NIC is shown first, followed by information for the onboard
network controller
The onboard network controller is labeled 10/100 Base-T AUX in this example. If the
optional NIC is not installed, only information for the onboard network controller is
displayed.
Web Utilities 19
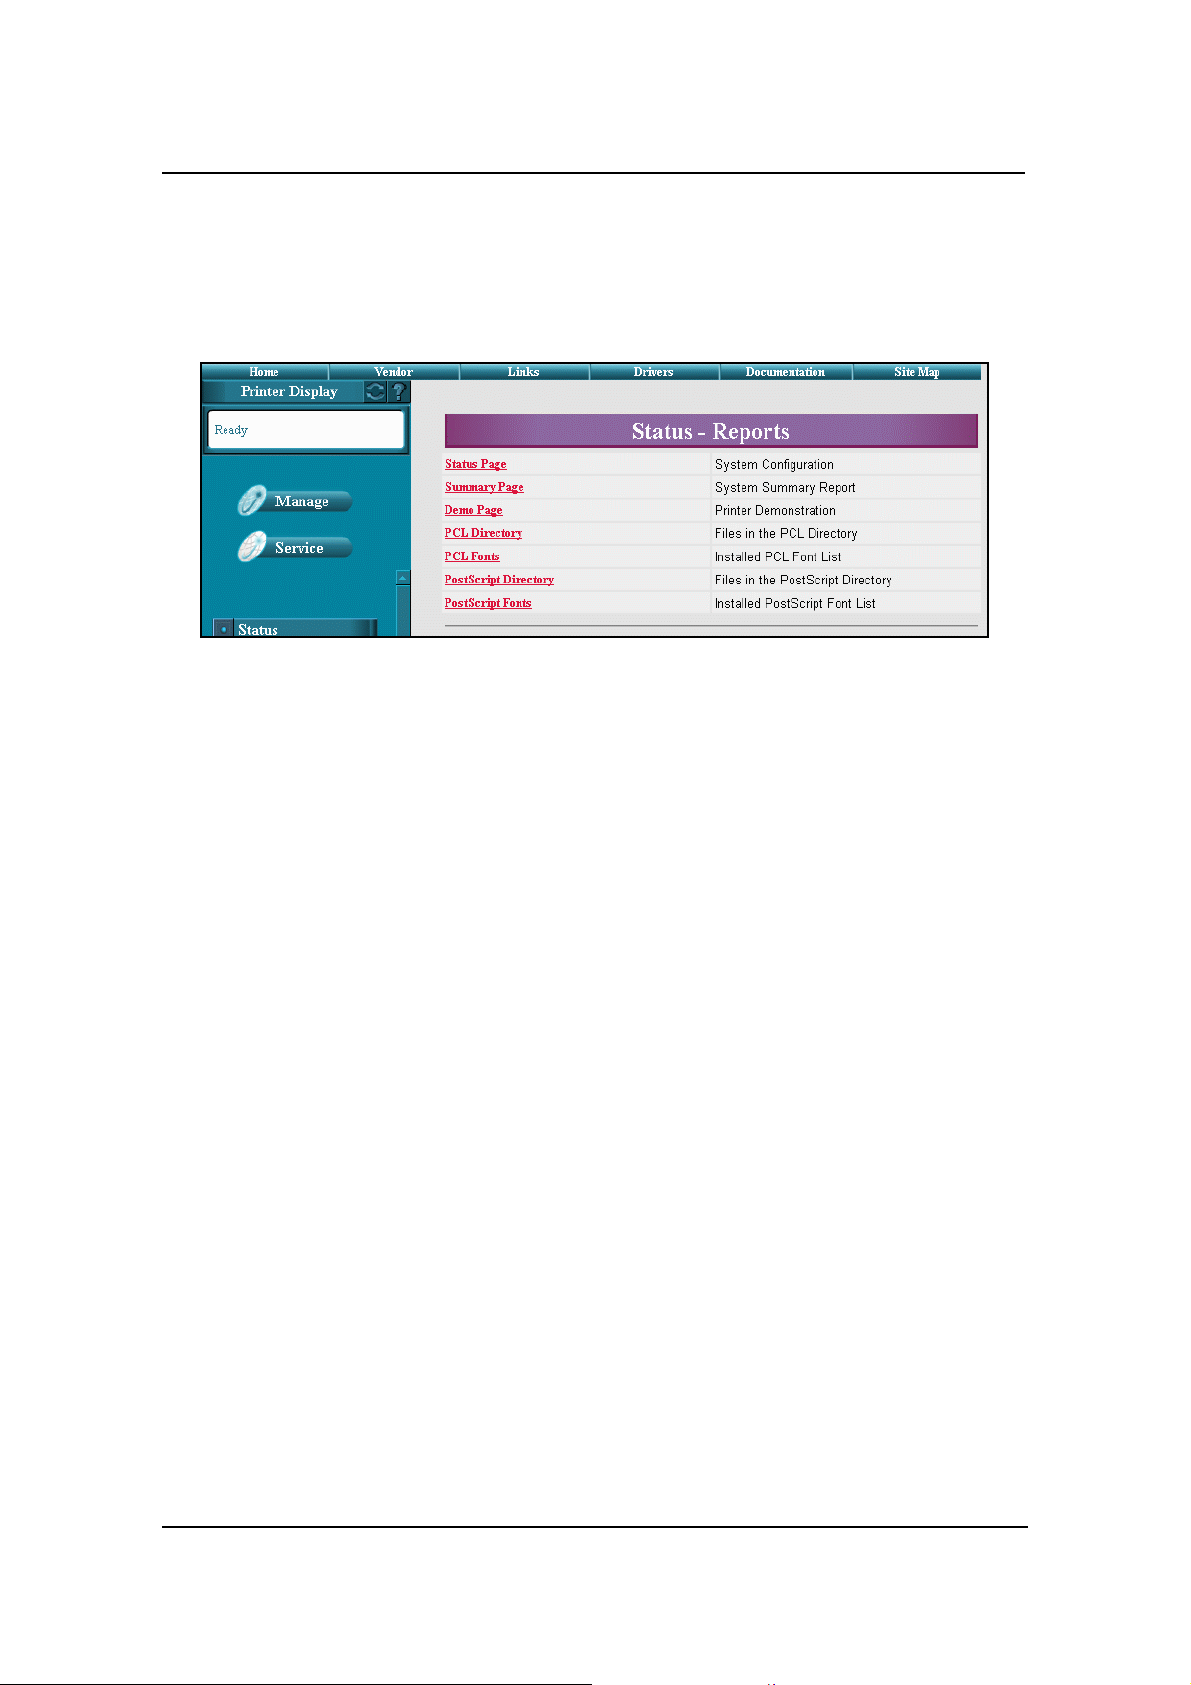
Status-Reports
The Status-Reports page displays all available printer reports as links. If the PostScript
option is not installed on your system, the PostScript reports are not displayed. Simply
click on the desired report to print it.
20 Web Utilities
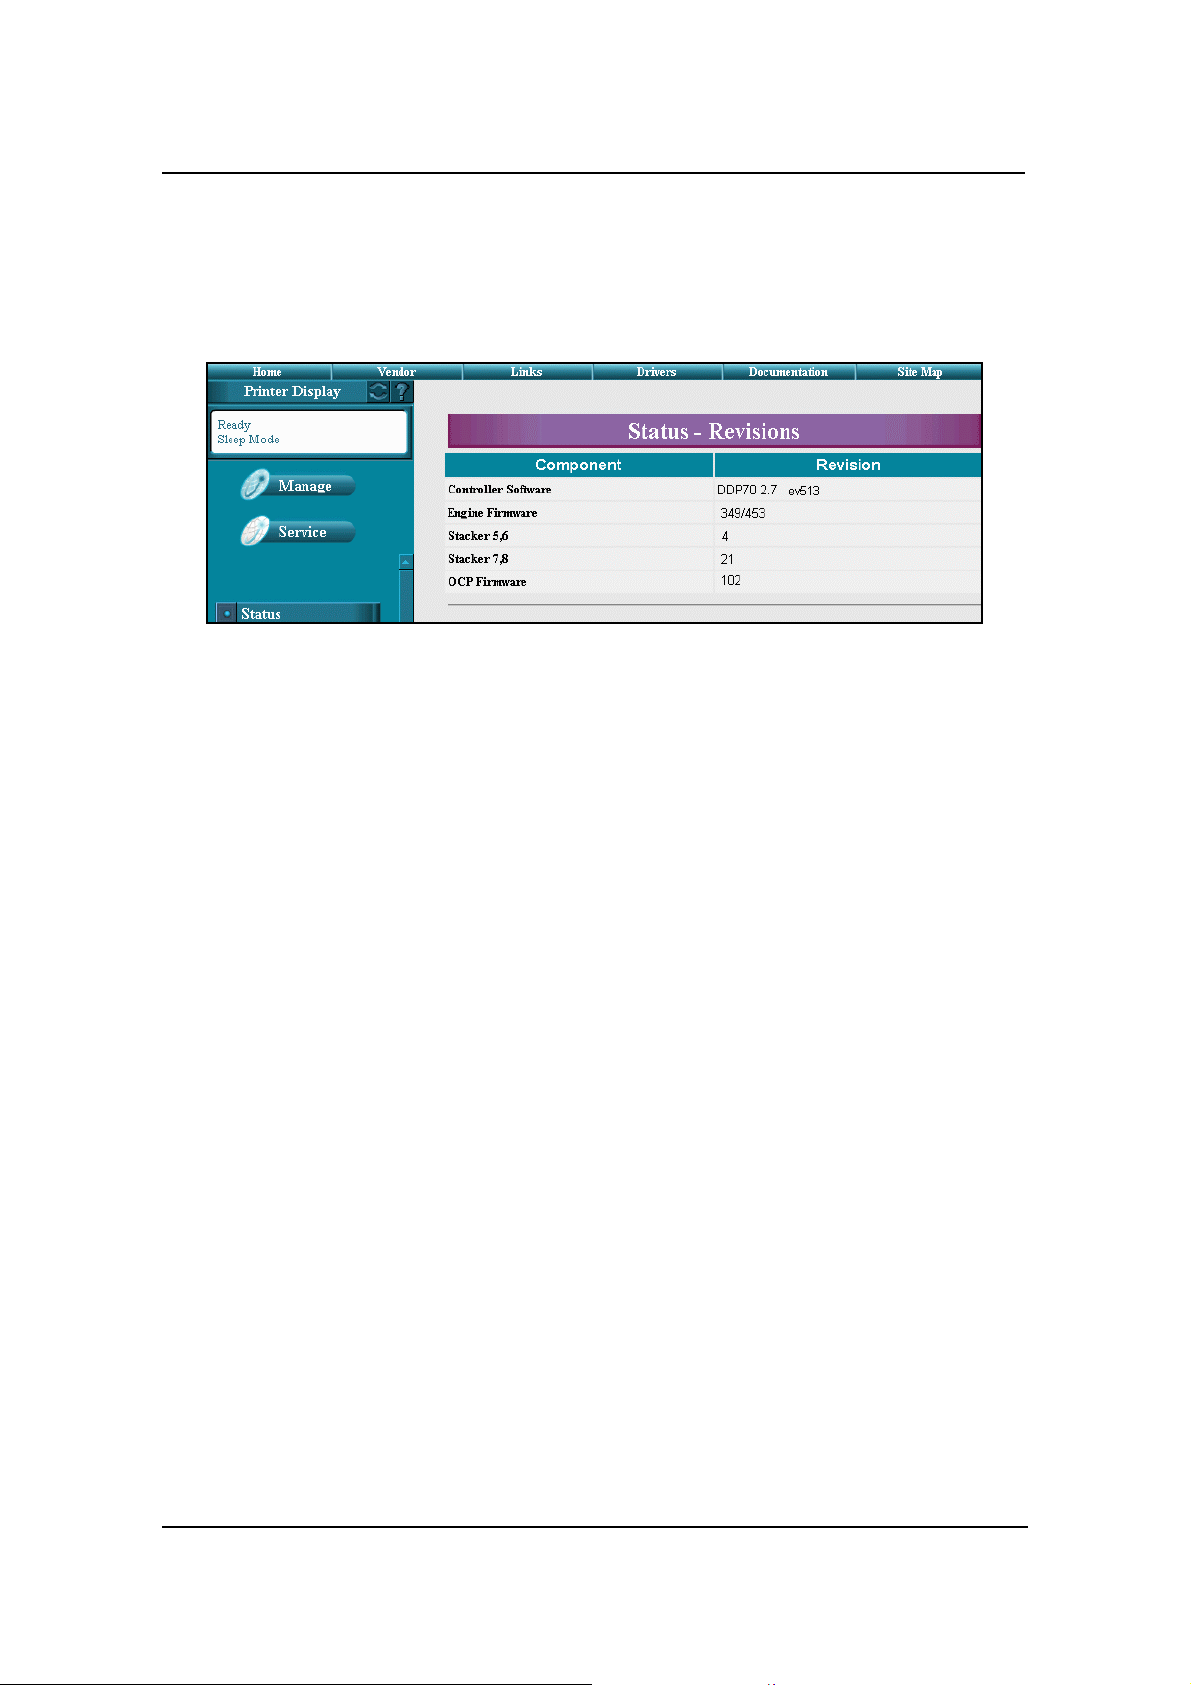
Status-Revision
The Status-Revision page displays revision information for each component of the
printer (Engine Firmware and Controller Software). This information is useful to
Service and Technical Support personnel.
Web Utilities 21

Manage System Options
Each of the options available under Manage System are described in the following
table. You must have the System password to access or update these Web pages.
NOTES:
It is the responsibility of the servicing dealer and/or system administrator
to set and secure passwords in the Web Utilities.
To access the System area, enter the User Name system. The default
password is blank and should be changed when the printer is installed.
Option Description
General
Tray
Finisher
Virtual Printer
Accounting
Jobs Displays all jobs in the system. Jobs can be monitored or cancelled from this page.
Test Print Allows you to print engine test patterns.
Serial Number Displays the controller and engine serial number.
Displays the customer name, mailing address, printer name, printer location, and service
contact information.
Displays the paper size, type, weight, and tray adjust information for the selected paper
source.
Provides access to the Finisher Web pages for any installed finishers. Depending on the
finisher installed on your system, the pages may include access to staple, inserter tray,
trim, folder, and stack options.
This option provides access to the System-Channel configuration Web pages. These
pages give you the power to configure your default printer and VPT network printers.
Displays accounting information such as page counts, toner coverage, and billing data.
Also lists all paper sizes with current period and lifetime counts for each. Optionally, the
accounting reports can be downloaded to your computer.
NOTE:
Test Print is not available on the DDP 92.
22 Web Utilities
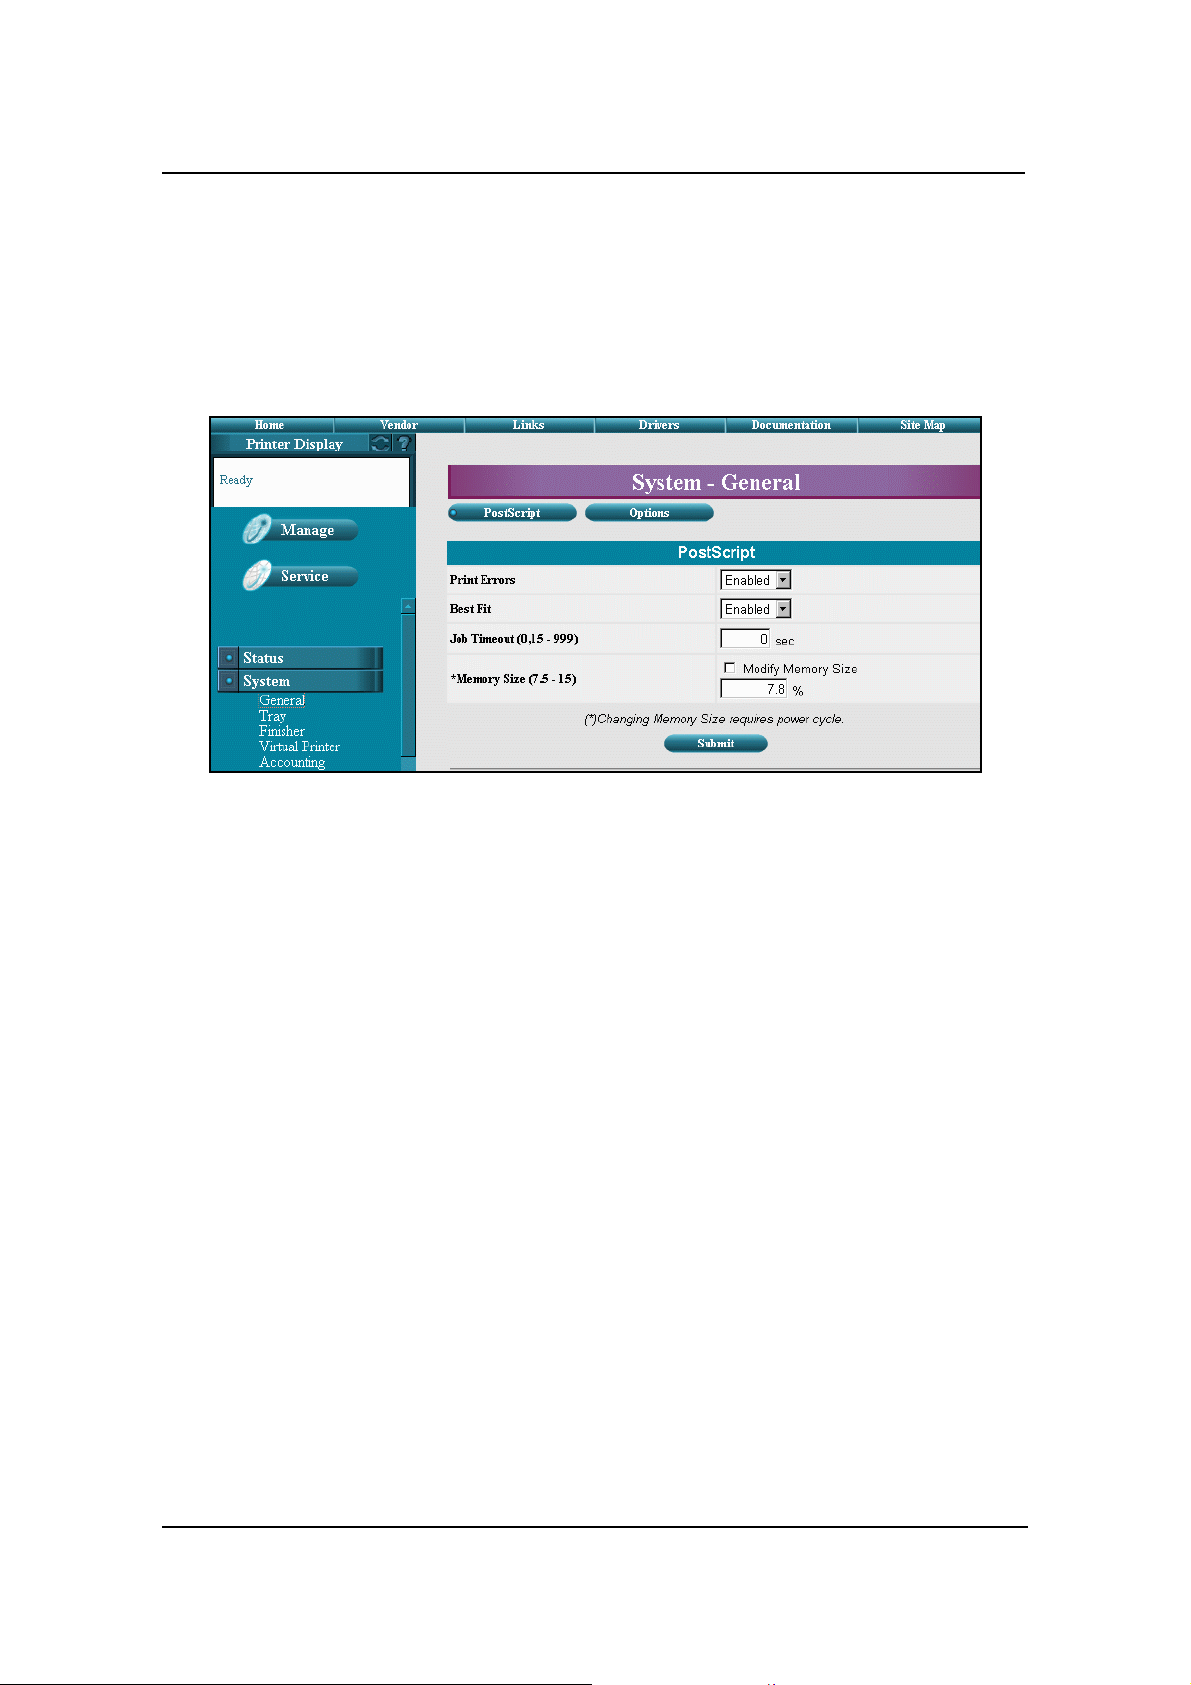
System-General
PostScript
If the PostScript option is installed, this page allows you to modify the PostScript
parameters. After making the desired changes, click Submit to update the settings.
Print Errors enables or disables automatic printing of PostScript errors.
Best Fit - When enabled, if the requested paper size is not present in any tray, the
printer will select the closest available paper size and scale the image to fit.
Job Timeout - Sets the job timeout value. Values are 0, or 15-999 seconds.
Memory Size - Sets the PostScript memory size as a percentage of the total system
memory. Values are 7.5 to 15.0%. Use only 1 digit after the decimal point.
Web Utilities 23

Options
The Options page contains additional printer parameters that you can modify. After
making the desired changes, click Submit to update the settings.
Memory Size - Sets the PDL memory size as a percentage of the total system memory.
Values are 6.0 to 50.0%. Use only 1 digit after the decimal point.
24 Web Utilities

System-Tray
Paper Source
The Paper Source page displays the paper size, paper type, paper weight, and tray
adjust information for the selected paper source. To select a paper source, click on
Tray 1, Tray 2, Tray 3, MBT, or HCF, near the top of the page.
The settings on this page reflect what is set on the Operator Control Panel. If you
make changes to this page and click the Submit button, the changes will be reflected
on the Operator Control Panel.
Web Utilities 25

Inserter 1,2
If the Publishing Finisher is installed, the Inserter 1 and Inserter 2 pages provide
information on the paper in the inserter trays. For each inserter tray, the paper size,
type, and weight is noted. From this page you can also enter custom paper size
settings.
After making any desired changes, click Submit to update the settings.
26 Web Utilities

System-Finisher
Stapler
The Stapler option lets you specify the action the printer should take when the finisher
runs out of staples during a staple job. After making any desired changes, click Submit
to update the setting.
NOTE:
The Stapler page shown is from the DDP 70e. The DDP 92 Stapler page
appears slightly different.
Web Utilities 27

Stapler Adjustment (Booklet Maker)
If the Finisher has a Booklet Maker installed, adjustments to the staple position are
allowed for specific size paper. After making any desired changes, click Submit to
update the setting.
NOTE:
The Booklet Maker option is only available on the DDP 92.
28 Web Utilities

Folder Adjustment (Booklet Maker)
If the Finisher has a Booklet Maker installed, adjustments to the fold position are
allowed for specific size paper. After making any desired changes, click Submit to
update the setting.
NOTE:
The Booklet Maker option is only available on the DDP 92.
Web Utilities 29

Stapler (Publishing Finisher)
If the Publishing Finisher is installed, the Stapler option lets you modify the booklet
stapling position. After making any desired changes, click Submit to update the
setting.
30 Web Utilities

Trimmer (Publishing Finisher)
If the Publishing Finisher is installed, the Trimmer option lets you modify the
trimming position for booklets. After making any desired changes, click Submit to
update the setting.
Web Utilities 31

Folder (Publishing Finisher)
If the Publishing Finisher is installed, the Folder option lets you modify the folding
position for booklets. After making any desired changes, click Submit to update the
setting.
32 Web Utilities

Booklet
If the Publishing Finisher is installed, this page lets you remove the paper weight
restrictions when creating booklets. Values are Standard or Unrestricted. After making
your selection, click Submit to update the setting. Comments appearing on the page
apply to the selected value.
Web Utilities 33

Stacking Mode
If the Container Stacker is installed, this page lets you set the stacking mode of each
container stacker. After making any desired changes, click Submit to update the
setting.
34 Web Utilities

System-Virtual Printer
The System-Virtual Printer page provides access to the System-Virtual Printer
configuration Web pages. These pages give you the power to configure your default
printer and VPT network printers.
The virtual printers available to you depend on the options installed on your system;
therefore, all of the examples shown on these five pages may not be applicable.
Click the appropriate button to configure, delete, or add a virtual printer.
For additional information, refer to the VPT Configuration and Installation manual.
Web Utilities 35

General
When you press Configure on the Virtual Printer page, this screen appears. Use it to
edit the Channel Name, Emulation, Protocol, Spooling and LPD Banner Page. Note
that if the selected printer is Default, the channel name cannot be edited. The
PostScript buttonis only displayed if your printer has the PostScript option. There can
be more than one protocol for a channel; however; NetWare, AppleTalk and Options
are only available if the NIC option is installed. The Maximum File Size edit box is
shown whenever Raw Socket or LPD and Raw Socket is selected. The maximum
value is 2,000,000,000 (2GB). LPD Banner Page can be set to Enable or Disable.
36 Web Utilities

Paper Handling
Use this page to set up the paper handling features of your Virtual Printer. Netware,
AppleTalk, and Options are only displayed if the optional NIC card is installed.
Web Utilities 37

PCL
PostScript
38 Web Utilities

Netware
This page is only displayed when the optional NIC card is installed.
AppleTalk
This page is only displayed when the optional NIC card is installed.
Web Utilities 39

Options
This page is only available for Appletalk when the optional NIC card installed.
40 Web Utilities

System-Accounting
The System Accounting page displays detailed accounting information that you can
use to monitor and control your printer resourses.
NOTE:
The Accounting page shown is from the DDP 70e. The DDP 92 page has
minor differences.
Web Utilities 41

The accounting information displayed on the web page includes:
the number of pages left before the next PM service
the closing date of the period
the percent of toner coverage
1
for the last printed document, the current billing
period, and the last three billing periods
current period and lifetime counts for all paper sizes
NOTE:
The Current Period value is increased when a page is printed. The Lifetime
value is increased when the engine picks up a paper from an input tray.
For details on using the Accounting information, refer to page 83
1. Toner coverage may be disabled at your installation. See you Service Technician if you need
additional information.
42 Web Utilities

System-Jobs
The System-Jobs page displays all of the jobs in the system. For each job, all available
information is displayed.
Jobs can be monitored or cancelled from this page. To cancel individual jobs, check
the box in the Mark column for the job(s) you want to cancel, then click Cancel Job.
To cancel all pending jobs click Clear All Jobs. Click Update to refresh the display.
Web Utilities 43

System-Test Print
The System-Test Print page allows you to print engine test patterns. The types of test
patterns available are listed on the page. Click on the desired test to print the test page.
NOTE:
This page is not available on the DDP 92.
44 Web Utilities

System-Serial Number
The System Serial Number page displays the serial number for the controller board
and the engine (not shown in this example).
Web Utilities 45

Manage Configuration Options
The Manage Configuration menu allows access to configuration pages. It is designed
for System Administrator use and is password protected.
Option Description
General
Events
Configuration
Communication
Displays the customer name, mailing address, printer name, printer location, and service
contact information.
Provides access to the Event reporting setup for Paper Jams, Toner Low, Stapler Empty,
and Accounting.
Provides access to the System Configuration pages including Password, Miscellaneous
(Country Code, Calendar, Tray Mapping and Ordered Sets.
Provides access to the System Communication pages including Parallel and Network
configuration.
46 Web Utilities

Configuration-General
The Configuration General page lets you set up or modify the customer name and
address, printer name and location, service contact, and accounting information. Enter
information and click submit.
Web Utilities 47

Configuration-Events
The Configuration Events page lets you select events that will generate e-mail
notification. It also allows you to set the value of the paper jam warning. Use the
checkbox to select E-mail notification for a specific event, then click the Rolodex icon
to select the e-mail recipients. Each event can have its own list of recipients. Click
Submit to enter.
48 Web Utilities

Address Book Pop-Up
The Address Book pop-up is displayed when the Rolodex-icon on the Events page is
clicked. Use the checkbox to select the recipients of an event notification. You can
also modify or delete names and addresses on this page. Use the trash can icon to
delete an individual name, or the checkbox to delete multiple names.
NOTE:
Names appearing in light blue cannot be removed or modified.
Web Utilities 49

Configuration-Configuration
Password
The Configuration Password page lets you modify the configuration password. After
filling in the required information, click Submit to update the password.
NOTE:
The Password page shown above is from the DDP 70e. The DDP 92 has
minor differences.
50 Web Utilities

Miscellaneous
The Miscellaneous page allows you to view or modify the country code. It also allows
you to Specify and enable or disable energy save time. After making the desired
change, click Submit to update the setting.
Web Utilities 51

Calendar
The Calendar page lets you view or modify the system date and time information. To
modify any of these settings, make the desired changes, and click Submit to update the
settings.
52 Web Utilities

PCL Input Tray Mapping
PCL Input Tray Mapping allows you to set and select an individual tray mapping for
the printer. You may override the default printer Input Tray Mapping for a job by
using the Input Tray Selection mode command. See the ESC |X[#]J command and the
Tray Group Code sections in the PCL Programming Guide.
The submit button at the bottom will transfer your new selections to the printer. These
selections will become active the next time the PJL environment values are set to their
default values. This happens when:
PJL mode is entered with a Universal Exit Language (UEL) command.
a PJL End Of Job (EOJ) command is processed.
a PJL INITIALIZE command is processed.
a PJL RESET command is processed.
the printer is reset to the Factory default from the OCP or SNMP.
Web Utilities 53

Tray Map
There are five fixed and two custom tray mappings available. The fixed tray mappings
are selected by the ESC |X{#]J command with a parameter in the range 100-105 or
200-205. The custom Input Tray Mappings are selected with a parameter in the range
106-107 or 206-207. All of the PCL Input Tray Mappings are displayed on the PCL
Input Tray Mapping web page and the custom Input Tray Mappings may be modified
using this interface. Clicking the trash can icon at the top of one of the custom Input
Tray Mappings will clear all entries to zero. The “ID” value on the page is the
parameter for the PCL command ESC &|[#]H (range 0..69) used to select a tray or
group of trays.
Clicking on the “...” icon for an “ID” will activate a pop-up window to help you
configure the tray mapping for that ID
For detailed information on tray mapping and grouping, refer to the PCL
Programming Guide, “Paper Source”.
54 Web Utilities

Ordered Sets
Use this page to define an ordered set by specifying the number of pages (12 max.) in
the set along with the paper source tray(s) containing the ordered set pages. Click
Submit to update the setting.
NOTE:
If the Publishing Finisher and/or BookletMaker Finisher are installed, the
Inserter trays will also be displayed.
The printer will support input tray cascading for ordered sets based on paper size and
media type.
NOTE:
The printer can support only one ordered set size at a time; therefore, make
sure the paper size and media type for each tray in the cascade are the same.
PCL tray grouping is also supported for ordered sets. All trays in a group must have the
same configuration to allow cascading. Trays not included in the group must have a
different configuration.
Web Utilities 55

Configuration - Communication
Parallel
The Parallel page allows you access to the parallel port settings. After making any
desired changes, click Submit to update the settings.
56 Web Utilities

TCP/IP
The TCP/IP page allows you to view and modify the configuration settings for the
onboard network controller. After making any desired changed, click Submit to
update the settings.
The page is available when the optional NIC is not installed.
Web Utilities 57

10/100 B-T AUX
This page allows you to view and modify the configuration settings for the onboard
network controller. After making any desired changes, click Submit to update the
settings.
This page is only available when the optional NIC is installed.
58 Web Utilities

10/100 B-T NIC (NetWare)
This page allows you to view and modify the configuration settings for the optional
Network Interface Card (NIC) in a NetWare environment. After making any desired
changes, click Submit to update the settings.
This page is only available when the optional NIC is installed.
Web Utilities 59

10/100 B-T NIC (AppleTalk)
This page allows you to view and modify the configuration settings for the optional
Network Interface Card (NIC) in an AppleTalk environment. After making any
desired changes, click Submit to update the settings.
This page is only available when the optional NIC is installed.
60 Web Utilities

Service-Service Options
Each of the options available under Service are described in the following table. You
must have the Service password to access or update these Web pages.
NOTES:
It is the responsibility of the servicing dealer and/or system administrator
to set and secure passwords in the Web Utilities.
To access the Service area, enter the User Name service. The default
password is blank and should be changed when the printer is installed.
Option Description
Consumables
Page Counter
Documentation Provides the location of the Service documentation.
Engine Config
Finisher Config Provides the ability to modify the Container Stacker jog adjustment.
Reset
Log
Displays all of the lifetime counters for the printer and consumables for installed
finishers. A status button graphically displays the condition of each consumable.
Displays counters for each paper size and each input tray. Also displays counts for total
sheets, total simplex sheets, and total duplex sheets.
Provides the ability to display or modify system configuration values such as toner
density, transfer current, detach voltage, tray calibration, heat roller temperature, and
print density.
Provides the ability to reset the system configuration and preventative maintenance
counter.
Provides access to Service, Error and Event logs. Allows you to enter a detailed
description of a service visit, displays date and time of last modification, and allows
download of the various logs.
Web Utilities 61

Service-Consumables
Printer
The Service-Consumables page for the printer displays all of the lifetime counters for
the printer. The status buttons graphically display the condition of each consumable.
After you replace a consumable in the Item list, check the box in the Select column
and click the Reset Counter button. This procedure resets the counter for the
Preventative Maintenance cycle.
62 Web Utilities

Advanced Finisher
The Service-Consumables page for the Advanced Finisher displays the lifetime
counters for the optional Advanced Finisher. The status buttons graphically display
the condition of each consumable.
After you replace a consumable in the Part list, check the box in the Select column and
click the Reset Counter button. This procedure resets the counter for the Preventative
Maintenance cycle.
DDP70e
DDP92
Web Utilities 63

Publishing Finisher
This page displays the lifetime counters for the optional Publishing Finisher. The
status buttons graphically display the condition of each consumable.
After you replace a consumable in the Part list, check the box in the Select column and
click the Reset Counter button. This procedure resets the counter for the Preventative
Maintenance cycle.
64 Web Utilities

Container Stacker
This page displays the lifetime counters for the Container Stacker. The status buttons
graphically display the condition of each consumable. After you replace a consumable
in the Part list, check the box in the Select column and click the Reset Counter button.
This procedure resets the counter for the Preventative Maintenance cycle.
Web Utilities 65

Service-Page Counter
The Service-Page Counter page displays counters for each paper size and each input
tray of the printer. This page also displays counts for total sheets, total simplex sheets,
and total duplex sheets.
NOTE:
The sample shown above is from the DDP 70e. The DDP 92 may contain
different paper sizes.
66 Web Utilities

Service-Documentation
Service documentation, such as the Engine Maintenance Manual, is not available
through the Web pages. Service documentation can be found on the Software &
Documentation CD-ROM that shipped with the printer.
To display links to User’s documentation, such as the Printer User’s Guide and this
manual, click Documentation on the top menu bar.
Web Utilities 67

Service-Engine Config
Tray Calibration
The Tray Calibration page provides the ability to display or modify tray calibration
settings. After making the desired changes, click Submit to update the settings.
The values for Tray Calibration can alternatively be set using the Maintenance Panel.
For information on the Maintenance Panel and this engine configuration setting,
please refer to your service documentation.
68 Web Utilities

Print Density
The Print Density page provides the ability to display or modify print density setting.
After making the desired change, click Submit to update the setting.
The Print Density value can alternatively be set using the Maintenance Panel. For
information on the Maintenance Panel and this engine configuration setting, please
refer to your service documentation.
Web Utilities 69

HR Temperature
The HR Temperature page provides the ability to display or modify heat roller
temperature setting. After making the desired change, click Submit to update the
setting.
The HR Temperature value can alternatively be set using the Maintenance Panel. For
information on the Maintenance Panel and this engine configuration setting, please
refer to your service documentation.
70 Web Utilities

Toner Density
The Toner Density page provides the ability to display or modify the toner density
configuration settings. After making the desired changes, click Submit to update the
settings.
WARNING!
Do not change the Toner Density settings unless advised to do so by
Technical Support.
Web Utilities 71

Transfer Current
The Transfer Current page provides the ability to display or modify transfer current
configuration settings. After making the desired changes, click Submit to update the
settings.
WARNING!
Do not change the Transfer Current settings unless advised to do so by
Technical Support.
72 Web Utilities

Detach Voltage
The Detach Voltage page provides the ability to display or modify the detach voltage
settings. After making the desired changes, click Submit to update the settings.
The values for Detach Voltage can alternatively be set using the Maintenance Panel.
For information on the Maintenance Panel and this engine configuration setting,
please refer to your service documentation.
Web Utilities 73

Service-Finisher Configuration
This page is available when the optional Container Stacker is installed. From this page
you can display or modify the Container Stacker Jog Adjustment value. After making
any desired changes, click Submit to update the setting.
74 Web Utilities

Service-Reset
The Service-Reset/Log page provides the ability to reset the system configuration and
the Preventative Maintenance counter.
DDP70e
DDP92
Web Utilities 75

Service-Log
From this page you can log the details of a service visit and download the error, event,
software, and service logs. (Software and Service not shown.)
76 Web Utilities

Service-Configuration Options
Option Description
Password Allows you to set or change the Service password.
Keycode Allows you to enter a License Keycode.
Events
Address Book Displays the Address Book page used to set up E-mail recipients for event notification.
Dealer
Use the Configuration Events page to set the value for preventive maintenance; engine
page count; and accounting, error and event log reporting.
Use this page to set up Dealer contact information. This information is displayed when
the Vendor button is selected from the top bar.
Web Utilities 77

Password
The Configuration Password page provides the ability to enter or modify the service
password. The service password provides security to restrict access to the Service area
of the Web Utilities. Failure to set these passwords reduces the security of these
sensitive areas, possibly allowing end users to gain access to servicing options.
78 Web Utilities

Configuration-License Keycode
The License Keycode page provides the ability to enter or modify the keycode. The
printer will reboot if the keycode is changed and any print data left in the printer will
be lost.
Web Utilities 79

Configuration-Events
Use the Configuration Events page to set the value for preventive maintenance; engine
page count; and accounting, error and event log reporting. Use the checkbox to select
E-mail notification for a specific event, then click the Rolodex icon to select the
e-mail recipients. Each event can have its own list of recipients. Click Submit to enter.
Address Book Pop Up
The Address Book pop-up is displayed when the Rolodex-icon on the Events page is
clicked. Use the checkbox to select the recipients of an event notification.
You can also modify or delete names and addresses on this page. Use the trash can
icon to delete an individual name, or the checkbox to delete multiple names.
NOTE:
Names appearing in light blue cannot be removed or modified.
Use the Service-Configuration-Address Book page to add, remove or
modify e-mail recipients.
80 Web Utilities

Configuration-Address Book
Use the Address Book page to set up E-mail recipients for event notification. Use the
checkbox to designate the corresponding name as a recipient that can be deleted only
in the “Service/Configuration/Address Book” window. This will cause the name to
appear light blue in other displays of the Address Book. Click the trash can icon to
delete a single name, or use the checkbox to select multiple names for deletion, then
click the Delete Selected button.
The maximum number of entries is 20. The maximum number of characters before
and after the @ sign is 32.
Web Utilities 81

Configuration-Dealer
The Configuration Dealer page contains the dealer’s contact information. The
information entered here is displayed on the Vendor page which is available to all
users.
82 Web Utilities

Using the Accounting File
The System-Accounting web page, displays actual usage information for the latest job
1
and for specific time periods. Authorized users can monitor paper and toner usage
, as
well as the number of pages left in the current PM cycle. The web page also displays
comprehensive totals of current period counts and lifetime counts for all paper sizes,
as well as the total number of sheets and total number of sides printed.
You can also download the accounting file to your desktop computer. The file is ideal
for use in accounting programs to track and control printing resources.
The accounting file is updated each time a job enters the system. First, a detailed
accounting record is created for each job. Then the accounting record is saved in the
accounting file on the printer’s hard drive. The file is in comma-delimited (.csv)
format and can be imported into Excel or any accounting package that supports
comma-delimited or ASCII formats.
To download the file, right-click on the Download Reports icon (if you are using
Internet Explorer) and save the file with a new name in a new location.
The sample below shows the accounting file imported into an Excel worksheet. The
fields in the accounting file are described on the following page.
1. Toner coverage data may be disabled at your installation. See your Service Technician if you need
additional information.
Web Utilities 83

Fields in the Accounting Record
Field Name Description
Job Id Internal ID.
Record Version Accounting file format version.
Status End of print status.
Session Id Internal ID.
0 Parallel channel.
1 VPT channel.
Channel Source
VPT VPT number.
PDL Source Postscript, etc.
File Size File size in bytes.
User Name User name.
Document Name Document name.
Priority Reserved.
Completed Sides Completed side count.
PDL Sides Expected side count.
Total Sets Number of sets in the job.
Total Sheets Number of paper sheets used.
Added Sides Number of back sides generated for simplex pages (Duplex-Always mode only).
Toner Coverage
Date Created Date of record creation.
Time Created Time of record creation (i.e., end of job).
Duration Duration of job in seconds (from start of job to Time Created).
Media n Size*
2 Port 9100 channel through onboard LAN.
3 Disk I/O channel.
4 Spooled LPD channel.
Average toner coverage. (May be disabled at your installation. See your Service
Technician for additional information.)
0A5 SEF.
2 12” x 18” SEF.
3B5 LEF.
4Letter SEF.
5Letter LEF.
6B4 SEF.
7 A4 Tabstock.
8A4 SEF.
9A4 LEF.
10 A3 SEF.
11 8.5" x 12.4" SEF.
12 8.5" x 13" SEF (folio).
13 Legal SEF.
14 Ledger SEF.
15 Letter Tabstock.
16 Custom size.
17 Statement SEF.
18 Executive LEF.
84 Web Utilities

Fields in the Accounting Record
1Plain.
2 Bond.
3 Color.
4 Label.
5 Letterhead.
Media n Type*
Media n Weight* Media weight in lbs or g/m
Media n Hopper*
(Input paper tray)
Media n Stacker*
(Output paper tray)
Media n Sheet Count* Number of sheets for this media selection.
Media n Side Count* Number of sides for this media selection.
* Media fields are repeated for each media selection in the job (10 maximum).
6 Pre-printed.
7 Pre-punched.
8 Recycled.
9 Special.
10 Transparency.
11 Pre-punched Transparency.
12 Other.
2
.
0 No tray.
1Tray 1.
2Tray 2.
4Tray 3.
8MBT.
16 HCF.
32 Insert tray 1 (Publishing Finisher only).
64 Insert tray 2 (Publishing Finisher only).
255 Auto tray selection.
0 No stacker.
1 Stacker 1 (no finisher, default output).
2 Stacker 2 (Elevator tray with Advanced Finisher or Publishing Finisher)
4 Stacker 3 (Upper tray, Advanced Finisher).
8 Stacker 4 (Booklet stacker, Publishing Finisher).
16 Stacker 5 (Container Stacker)
32 Stacker 6 (Container Stacker)
64 Stacker 7 (Container Stacker)
128 Stacker 8 (Container Stacker)
255 Auto stacker selection.
Web Utilities 85

86 Web Utilities

Index
Numerics
10/100 Base-T AUX 19
10/100 Base-T NIC 19, 57, 58, 59, 60
A
accounting file 83
creating 83
fields 84
updating 83
accounting information 83
address book 77, 81, 1
address book, pop up 80
Advanced Finisher
consumables 63
status 13
amount of paper 12
B
booklets
cover sheets 33
folding position 32
paper weight restrictions 33
staple position 30
trimming 31
C
calendar configuration 52
cancelling jobs 43
colored buttons 2
configuring printers 35
consumables
Advanced Finisher 63
Container Stacker 65
printer 16
Publishing Finisher 64
resetting counters 62, 63, 64, 65
usage data 83
Container Stacker
consumables 65
jog adjustment 74
short stacking 34
stacking mode 34
status 15
controller software revision number 21
counters 62, 63, 64, 65, 66
country code 51
cover sheets 33
custom size paper 25
D
date and time configuration 52
Dealer information 82
default password 3
Demo Page report 20
detatch voltage 73
developer mix status 16
DNS name 4
Documentation page 6
Drivers page 6
drum unit status 16
Duplex-Always mode 84
E
energy save time 51
engine revision number 21
error count 17
Error Information button 8
error log 75
event log 75
Events page 77, 80
exit jam recovery 24
F
folding position, booklets 32
font reports 20
fuser unit status 16
fuser web status 16
G
green button 2
H
heat roller temperature 70
Home page 4, 5
I
inserter tray information 26
IP address 19
network 19
network interface card 57
onboard network controller 56
printer 4
J
jobs in the system 43
jog adjustment 74
Index 1

K
Keycode 79
L
License Keycode 79
lifetime counters 62, 63, 64, 65
Links page 6
log period 75
M
Manage-Status pages
Advanced Finisher 13
Consumables 16
Container Stacker 15
Errors 17
General 10
Network 19
Publishing Finisher 14
Reports 20
Revision 21
Tray 12
Usage 18
Manage-System options 22
Manage-System pages
10/100 B-T NIC 57
Booklet - Publishing Finisher 33
Calendar 52
Configuration, Miscellaneous 51
Date and Time 52
Folder, Publishing Finisher 32
Inserter 1, 2 26
Jobs 43
Options 24
Paper Source 25
PostScript 23
Stacking Mode, Container Stacker 34
Stapler, Publishing Finisher 30
TCP/IP 56
Test Print 44
Trimmer, Publishing Finisher 31
Virtual Printer 35
P
page counters 66
paper amount 12
paper size 12, 25
custom 25
paper source 25
paper tray status 12
paper type 12, 25
accounting file 85
paper usage 18, 42
accounting file 83, 84
paper weight 12, 25
accounting file 85
booklets 33
passwords 3
changing 78
default 3
PCL reports 20
PM counters 18, 42, 62, 63, 64, 65
PostScript parameters 23
PostScript reports 20
preventative maintenance counters 18, 42, 62, 63,
64, 65
print density 69
print engine test patterns 44
print jobs 43, 83
printer
accounting file 83
configuration 35
reports 20
usage data 83
Printer Display 8
Publishing Finisher
consumables 64
cover sheets 33
folding booklets 32
inserter trays 26
paper weight restrictions 33
stapling booklets 30
status 14
trimming booklets 31
N
NetWare 58, 59, 60
network addresses 19, 56
Network Interface Card 19
O
onboard network controller 19, 56
Options page 24
Ordered Sets 55
2 Index
R
red button 2
Refresh button 8
replacing consumables 62, 63, 64, 65
reports 20
Reset
10/100 B-T NIC 75
Complete 75
Error Log 75
Event Log 75
Factory Defaults 75

PM Counter 75
System 75
resetting counters 62, 63, 64, 65
resetting the system 75
revision information 21
S
security 3
Service Configuration pages
Address Book 1
service contact information 10
Service options 61
Consumables 62
Engine Config 71
Finisher Config 74
Page Counter 66
Passwords 78
Reset 75
service password 3
changing 78
Service-Configuration pages
Address Book 77, 81
Dealer 82
Events 77, 80
Keycode 79
password 78
Service-Consumables pages
Advanced Finisher 63
Container Stacker 65
Printer 62
Publishing Finisher 64
Service-Engine Config pages
Detach Voltage 73
HR Temperature 70
Print Density 69
Toner Density 71
Transfer Current 72
Tray Calibration 68
Service-Finisher Config page 74
Service-Page Counter page 66
Service-Reset page 75
short stacking 34
Site Map 7
software log 75
software revision number 21
stacking mode 34
staple position, booklets 30
Status options
Advanced Finisher 13
Consumables 16
Container Stacker 15
Errors 17
General 10
Network 19
Publishing Finisher 14
Reports 20
Revision 21
Tray 12
Usage 18
Status Page report 20
Status-Consumables page 16
Status-Errors page 17
Status-Finisher pages
Advanced Finisher 13
Container Stacker 15
Publishing Finisher 14
Status-General page 10
Status-Network page 19
Status-Reports page 20
Status-Revision page 21
Status-Tray page 12
Status-Usage page 18
subnet mask 19
Summary Page report 20
system configuration 75
System options 22
Finisher 26, 33
Jobs 43
Options 24
PostScript 23
Printer 25
Test Print 44
Virtual Printer 35
system password 3
changing 78
System-Accounting page 83
System-Configuration pages
10/100 B-T NIC (NetWare) 58, 59, 60
10/100 B-T NIC (TCP/IP) 57
Calendar 52
Misc. 51
Network 56
System-Finisher pages
Booklet 33
Folder 32
Inserter Trays 26
Stacking Mode 34
Stapler (Publishing Finisher) 30
Trimmer 31
System-Jobs page 43
System-Printer page 25
System-Test Print page 44
System-Virtual Printer page 35
T
TCP/IP 56, 57
Index 3

test patterns 44
test print 44
time configuration 52
time zone 52
toner coverage 18, 42
accounting file 83
toner density 71
toner status 16
transfer current 72
tray adjust 25
tray calibration 68
trimming booklets 31
U
User Name 3
User’s documentation 6
V
Vendor information 82
Vendor page 5
Virtual Printer 35
VPT network printers 35
W
wait timeout 24
Web page organization 5
left bar options 8
top bar options 5
Web Utilities
accessing 3, 4
colored buttons 2
options 1
overview 1
security 3
starting 4
Y
yellow button 2
4 Index
 Loading...