

Page 1
SERVICE MANUAL
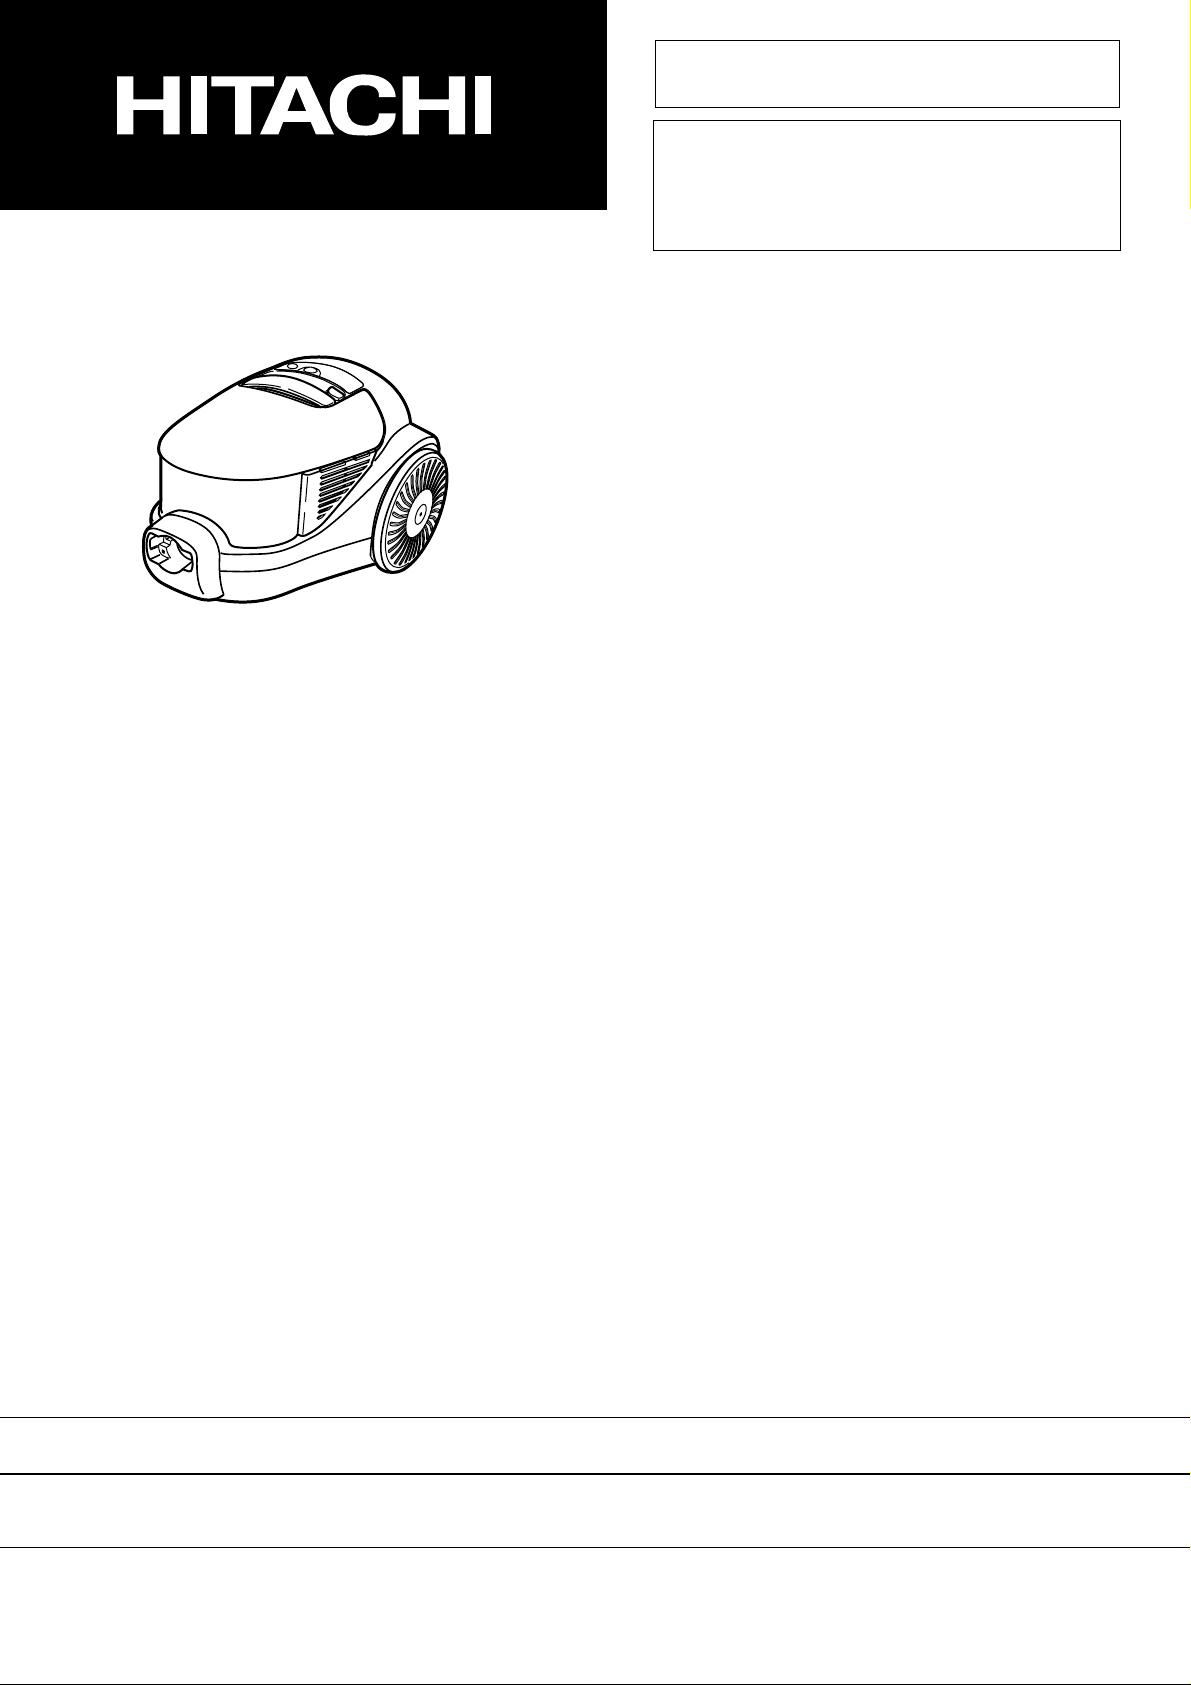
CVSF8BS
No. 0177
SPECIFICATIONS AND PARTS ARE SUBJECT TO CHANGE FOR IMPROVEMENT
CONTENTS
1.Attachments ・・・・・・・・・・・・・・・・・・・・・・・・・・・・・2
2.Replacement instructions
・・・・・・・・・・・・・・・・・・2
3.How to empty the dust case
・・・・・・・・・・・・・・・4
4.Maintenance
・・・・・・・・・・・・・・・・・・・・・・・・・・・・5
5.Final test
・・・・・・・・・・・・・・・・・・・・・・・・・・・・・・・・8
6.General instructions for
operation and maintenance
・・・・・・・・・・・・・・・・8
7.Parts list
・・・・・・・・・・・・・・・・・・・・・・・・・・・・・・・・9
8.Construction diagram and
connection diagram
・・・・・・・・・・・・・・・・・・・・・・11
SPECIFICATIONS
Rated voltage :AC230V, 50Hz
Rated input :900W, MAX 1000W
Motor :Commutator motor
Fan :Turbo type 1 stage
Speed :39,000rpm
Insulation class of materials :Class E
Weight(Without attachment) :3.6kg(7.9lbs)
Dimensions :330mm(L)x255mm(W)x208mm(H)
VACUUM CLEANER
JUNE 2003 Hitachi Home & Life Solutions, lnc.
Page 2
-2-
1. Attachments
2. Replacement Instructions
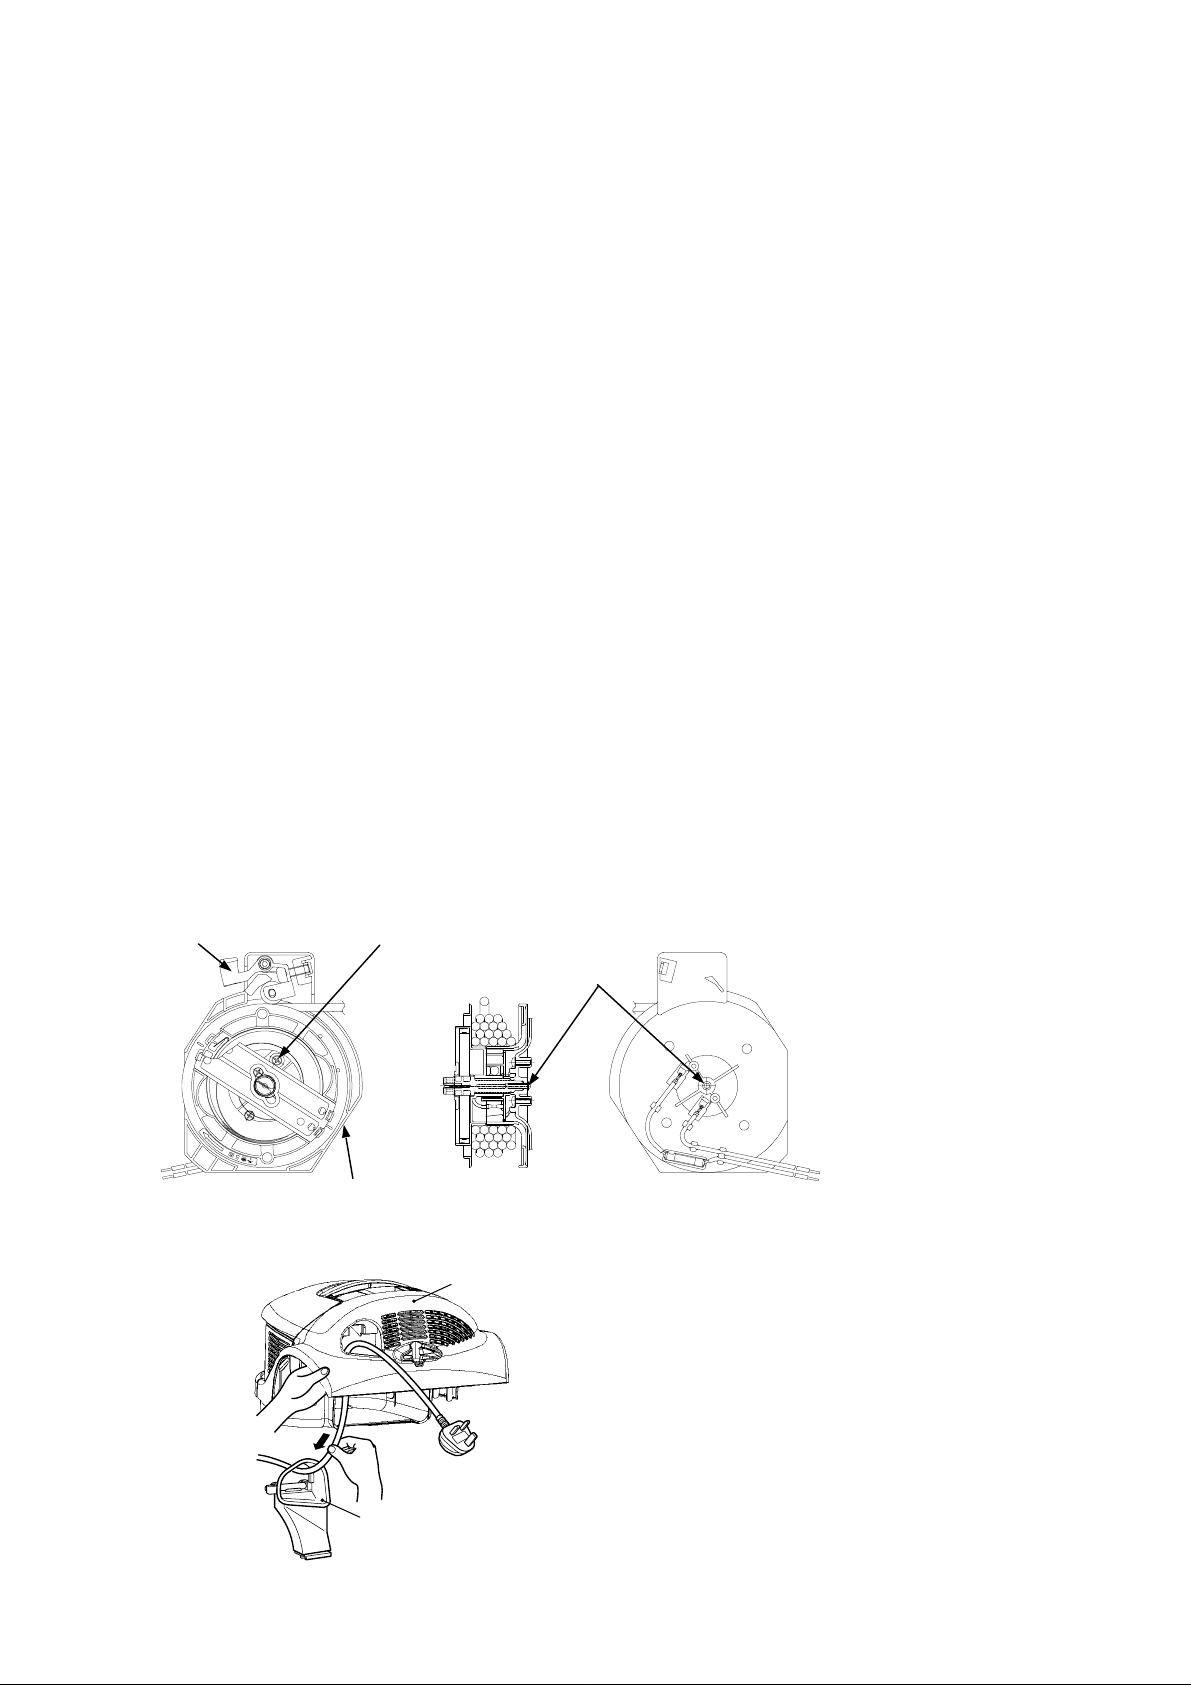
2.1 How to replace the power control board assembly, motor assembly and lead wire
assembly (include triac PWB assembly).
(1)Open the transparent case cover while pressing the button of dust case, and lift out the dust case
from cleaner body.
(2)Take off three tapping screws 4x20(7)(8)and two tapping screws 4x12(9), then the upper case
assembly can be removed.
(3)Take out the power control board assembly(13), motor assembly(18) and lead wire assembly(16)
from the lower case .
(4)Release the triac PWB assembly by taking off the lower case.
2.2 How to replace the power cord
(1)Open the transparent case cover while pressing the button of dust case,and lift out the dust case
from cleaner body.
(2)Take off three tapping screws 4x20(7)(8) and two tapping screws 4x12(9), then the upper case
assembly can be removed.
(3)Take out the cord reel assembly from the lower case .
(4)After rotate the cord reel assembly anticlockwise several times by pushing the C pedal to release prewind
of cord reel, take of a tamper proof screw 4x16 and three tapping screws 4x16 can be taken out.
Hose ass'y (With control panel handset and joint pipe)
・・・・1
Rug & floor nozzle
・・・・・・・・・・・・・・・・・・・・・・・・・・・・・・・・・・・1
Extension pipe
・・・・・・・・・・・・・・・・・・・・・・・・・・・・・・・・・・・・・・1
Crevice nozzle
・・・・・・・・・・・・・・・・・・・・・・・・・・・・・・・・・・・・・・1
C pedal
Cord reel assembly
Tamper proof screw 4x16
Three tapping screws 4x16
(5)Pass the power cord through the upper case assembly and cord inlet.
(6)After assembly, wind a spring 5 times before set.
Upper case assembly
Cord inlet
Page 3
-3-
2.3 How to replace the dust indicator assembly
(1)Take off the inner case(15) can be removed.
(2)Take out the dust indicator assembly.
2.4 How to disassemble the rug and floor tool
(1)How to replace roller ass'y(F)
Insert a blade of cutter between the roller shaft cover and lower case of rug & floor nozzle
(2positions, both edges off the rug & foolr nozzle), cut the projection of roller ass'y cover(F). And
detach the roller shaft cover(F) from the rug &floor nozzle with a screwdriver. (When you
maintenance the roller ass'y, please settle the rug & floor nozzle firmly, and be careful the blade of
cutter not to be broken.)
Detach the roller shaft and roller ass'y(F) from the rug & flooer nozzle.
Insert a roller shaft into new roller ass'y(F) and install it into lower case of rug & flooer nozzle.
Please assemble the roller shaft while facing flat face toward inside.
Push the roller shaft inside and put the roller shaft cover on it.Assure that the roller ass'y dosen't
take off from the rug & floor nozzle while pulling it with your fingers.
(2)How to replace roller ass'y(R)
Undo the screw and the roller shaft cover, and take off the wasted roller ass'y(R).
Replace to new roller ass'y(R), return the roller shaft cover to original position and screw it.
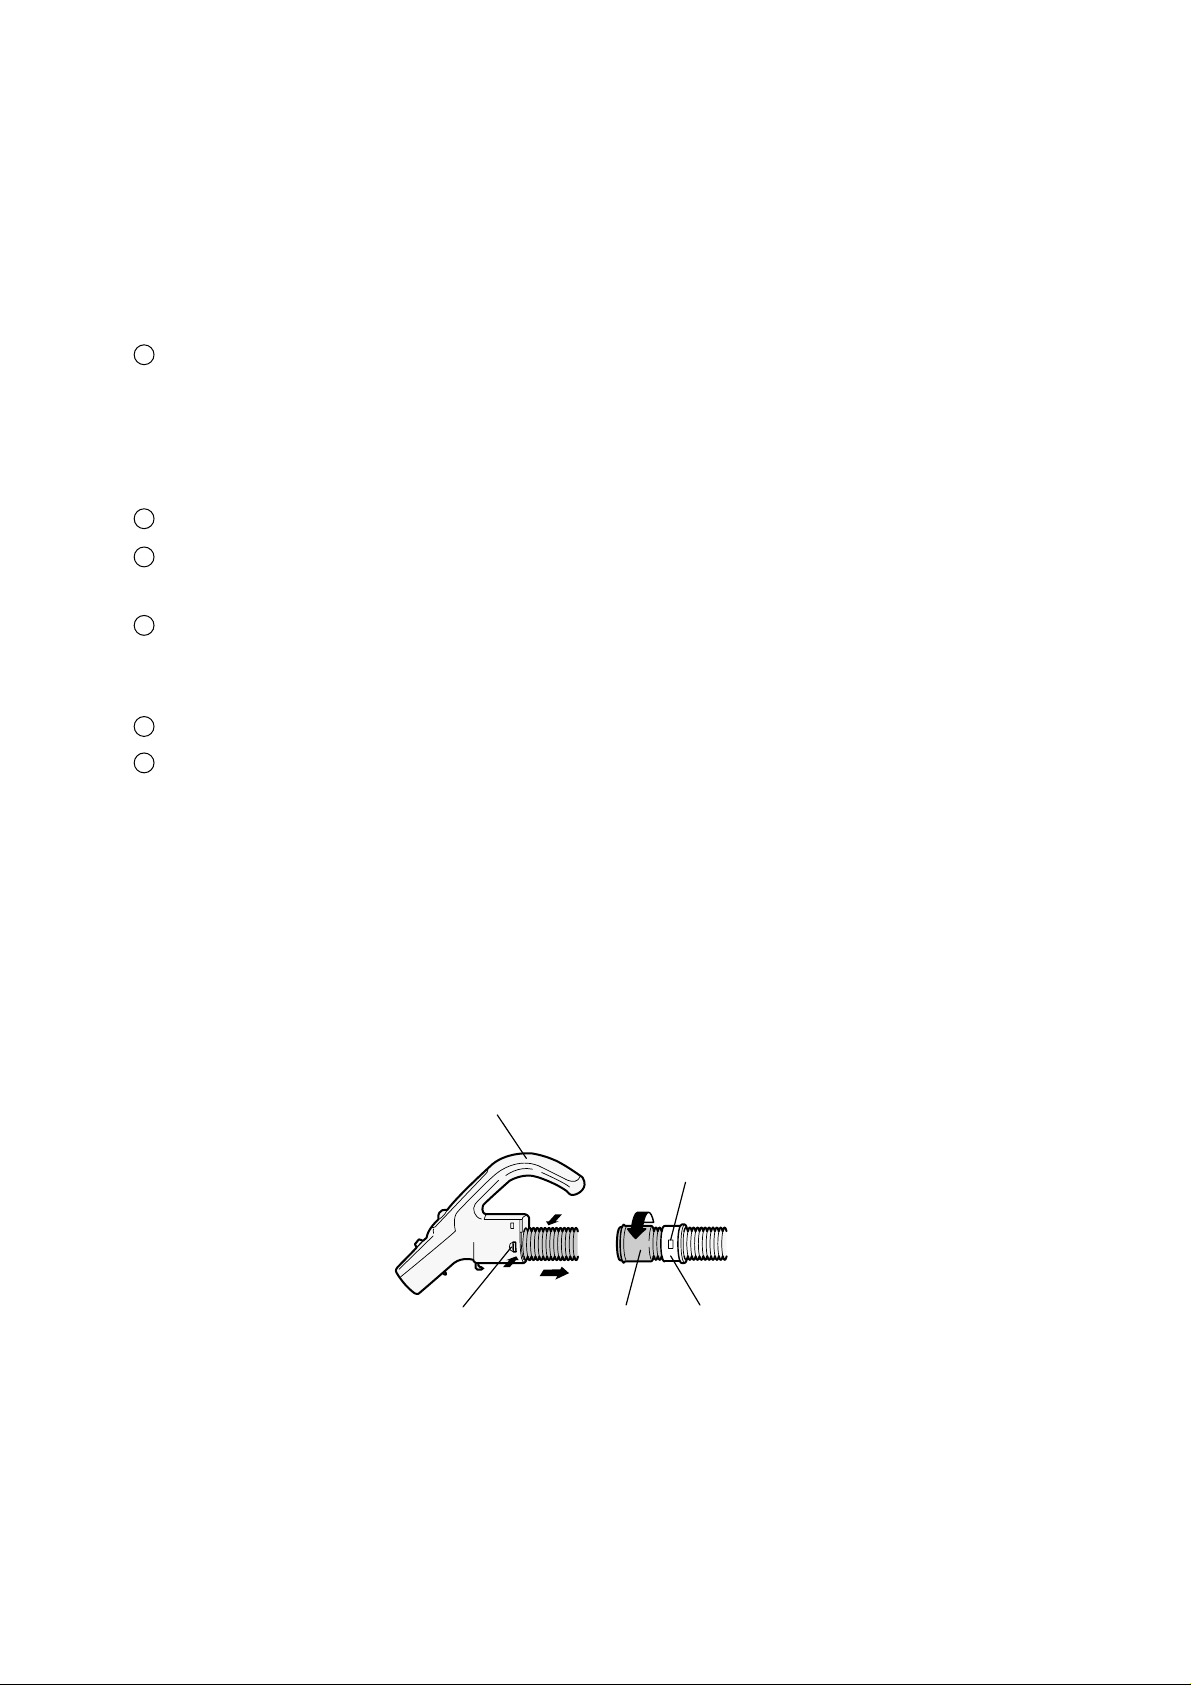
2.5 How to replace the hose
(1)You can separate the control panel handset from the hose.
(2)Pull the hose pressing two claws clicked into the holes on both sides of the control panel handset.
(3)Remove the seal ring and the stopper ring from the hose end by turning the seal ring (left-handed
screw).
(4)As to removing the joint pipe assembly(40) from the other side's hose end, do it as same as the
control panel handset removal.
2
1
4
3
2
1
Control panel handset
Claws Seal ring Stopper ring
Claws
Page 4
-4-
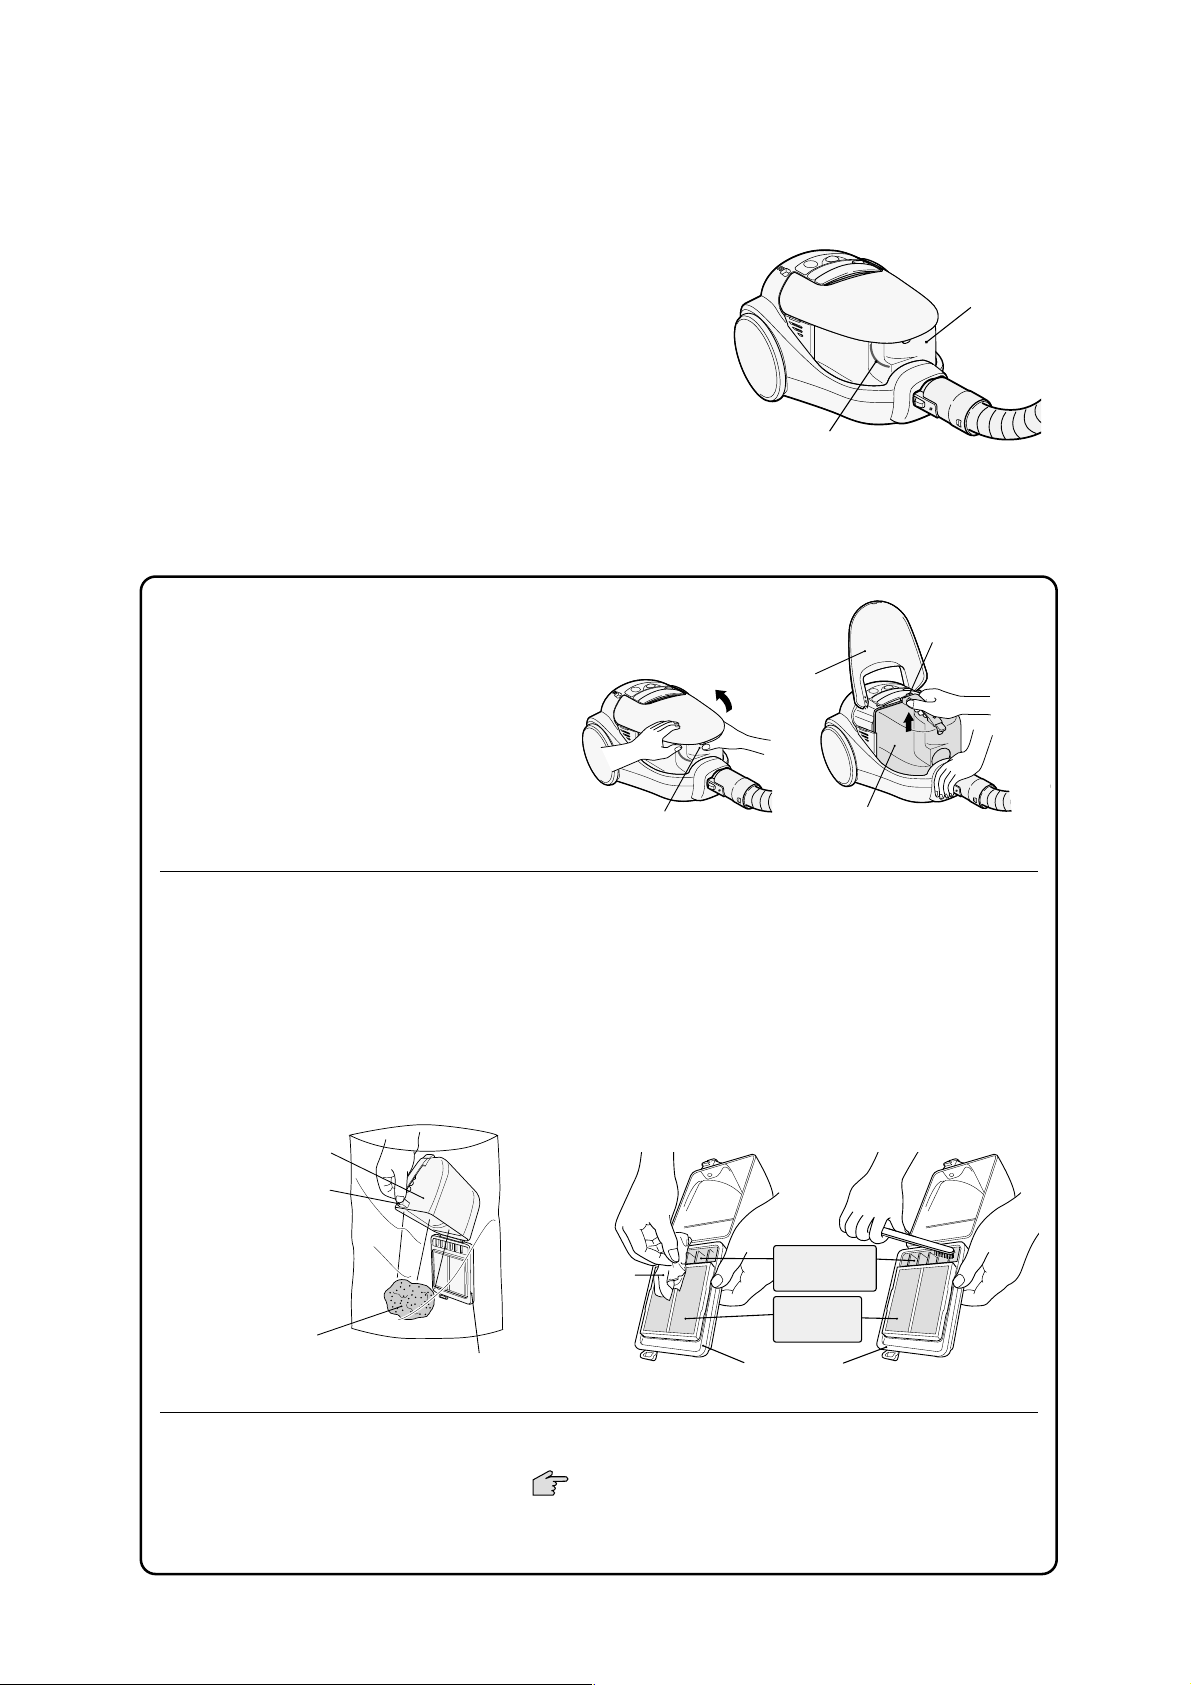
1) Empty the dust case before the dust reaches the
max line. If you continue using the cleaner with a full
dust case, the suction power will be decreased.
2) Empty the dust case periodically.
3) When emptying the dust case also remove the dust
around the filters.
1
Open the dust case cover while pressing
the button of dust case, and lift out the
dust case from cleaner body.
2
Put the dust case into a big vinyl bag, and press the open button in the bag.
Notes :
¡When you lift out the dust case from cleaner
body, be careful not to press the open button
of the dust case.
¡Do not lift out the dust case from the body
while the cleaner is in use.
¡The dust case should be kept upright when
removing it from the body to prevent dust
spillage.
How to Dispose of the Dust
Note :
¡Before you empty the dust case, be sure to turn off the power and
unplug the cleaner from the mains socket.
¡Turn the dust case downward and push the open button on the lid of the dust case to release
dust into a vinyl bag.
¡To remove stubborn dust adhesion inside the dust case, pat the side of dust case.
¡Dust around the mesh filter and under the mesh filter can be removed with tissue paper and
an old toothbrush.
Notes :
¡Some types of dust may cause the suction power to become weak before max line is reached, in that
case, empty the dust and clean the filters.
¡If the rug & floor nozzle sucks some sharp items such as pieces of broken glass, pins, take care not to
touch them.
6
3.How to Empty the Dust Case
Max line
Dust
case
Dust case
Open button
for lid of dust
collection case
Button for the
dust case
Transparent
case cover
Dust
case
Open button
for lid of dust
collection case
Tissue
paper
Dust
The lid of dust case
Under mesh
filter
mesh
filter
The lid of
dust case
Page 5

-5-
4.Maintenance
3
Close the lid of dust case until the button clicks.
5
Close the top cover until the button clicks.
Note :
¡Please be careful not to be put your fingers between the
top cover and dust case.
When the orange indicator appears in the window continuously, the cleaner requires emptying.
Check the dust indicator by lifting suction tool from the floor and removing the crevice nozzle when it
is used.
Note :
¡If the cleaner is used in such a condition that the orange indicator appears in the window, air to the motor
will be reduced and the motor will eventually burn out.
¡When suction power is weak, the operation noise level is higher and the filter maintenance sign
operates, the dust case should be emptied and the filters cleaned (inside mesh filter and under
mesh filter).
Filter Maintenance Sign
How to Empty Dust Case
Warning :
Before maintaining, the mains plug should be removed from the mains socket.
4
Push the dust case into the
cleaner body firmly so that there
is not a gap between the lid of the
dust case and cleaner body.
Click
Dust case
Lid of dust case
Dust case Body
Transparent
case cover
Click
Page 6

-6-
Maintenance
Dust Case Filters
(The filters are washable.)
1
Remove the dust case and empty the dust.
4
2
1) Turn the dust case upside-down, press the
button with thumb,
2) Remove the cyclone chamber by pulling the
base of cyclone chamber with two fingers
(the forefinger and the middle finger).
3) Remove the dust around the inside mesh
filter. (The mesh filter is washable.)
3
Open the lid of the dust case and remove the
mesh filter, you can wash the mesh filter,
urethane filter, black filter and under mesh
filter with water.
1
2
4
Return the lid of dust case to the
original position until it clicks and put
the base of cyclone chamber on the
dust case. Align the
「」
mark of the
base of cyclone chamber to the
‖」
mark of the dust case.
5
Install the dust case into cleaner
body.
5
Note :
¡Be sure to set each filter in its correct position firmly, otherwise suction
power will be decreased.
HEPA clean filter (Required maintenance once a month)
(The HEPA clean filter is not washable.)
1
Remove the HEPA clean filter from the
dust case as shown in the illustration.
2
Remove dust around HEPA clean
filter by patting it gently.
3
Reinstall the HEPA clean filter into
dust case with grips facing the upward.
Notes :
¡Only pat the filter gently. If you pat it strongly, its shape may be changed and this will cause dust leakage.
¡Do not use a brush with hard bristles , it may cause damage to the filter.
¡Make sure that the HEPA clean filter is seated correctly. Otherwise you cannot install the dust case correctly.
If you use the cleaner without HEPA clean filter, it will eventually cause motor failure.
Mesh
filter
Lid of the dust case
Mesh filter
Urethane filter
Black filter
Under mesh filter
The base of
cyclone chamber
Cyclone chamber
3
Dust case
Under mesh
filter
Black filter
1
2
Inside mesh
filter
The base of
cyclone
chamber
Press the
button
Urethane filter
Click
Dust case
Lid of the dust case
HEPA clean
filter
Knob
The base
of cyclone
chamber
▲mark
合わせ位置
HEPA clean
filter
Page 7

-7-
How to wash filters with water
Notes :
¡After washing the filters with water, please dry up them naturally and install them in their correct
positions. Do not use wet filters, as this may damage your cleaner and render it unsafe.
¡Do not wash the filters with hard hairbrush, do not wash the mesh filter vigorously, it may damage
the filter.
¡Do not wash the filters with detergent, bleach, benzene, thinner and alcohol, do not wash them in a
washing machine. And also do not dry the filters with hair dryer, otherwise we can not guarantee the
cleaner performance and quality.
Remove the mesh filter, the urethane filter and the cyclone chamber from the dust case,
and wash them with water. After drying the filters completely, fit them in their correct
positions and use the cleaner.
Mesh filter, urethane filter
¡Gently wash the mesh filter with water and an old toothbrush.
¡Wash and rub the urethane filter well with water until the water is clear, and lay it out flat to dry
naturally.
¡It can take a long time for the urethane filter to dry up, so please use a replacement one alternately.
Inside mesh filter
¡Gently wash the inside mesh filter of cyclone chamber
with water and an old toothbrush.
Maintenance for cleaner body
Unplug the cleaner from the mains and wipe the body
with a soft cloth slightly moistened with water.
Note :
¡Do not wash the cleaner with benzene, thinner and
detergent, it may cause colour change and transformation.
Black filter, under mesh filter and dust case
¡Gently wash the under mesh filter and black filter with
water and an old toothbrush.
Notes :
¡When suction power is weak, even though all the filters have been cleaned in the dust case and dust
has been removed from the HEPA clean filter, the filters will need to be replaced. When you need to
replace the filters, these should be purchase from a Hitachi dealer.
¡Replacement of HEPA clean filter is required every 4 years.
Maintenance
Mesh
filter
Urethane
filter
Mesh
filter
Inside mesh
filter
The base of
cyclone
chamber
Urethane
filter
Dust case
Under mesh
filter
Black filter
Page 8

-8-
5. Final Test
(1)After reassembly,run the cleaner for at least 15 minutes without joining the hose to its main body and
be certain that there is no abnomal vibration.
(2)Measure the insulation resistance between the power supply plug and the metal surface by 500V DC
insulation resistance tester and be certain that the insulation resistance is not less than 10M ohm.
6.
General Instructions for Operation and Maintenance
(1)Always disconnect cord from electrical outlet before servicing the cleaner.
(2)Do not pick up matches, fireplace ashes or smoking material with the vacuum cleaner as a possible
fire hazard may result.
(3)Avoid picking up sharp objects. They may damage the vacuum cleaner.
(4)Do not use the cleaner to pick up wet dirt, and avoid using it in a wet and moist place as moisture
may damage the motor and other mechanical parts.
(5)Do not block the air flow. Any blockages or obstructions to the nozzle, hose, etc. or the exhaust air
outlet can cause loss of power and motor overheating.
(6)Do not run the cleaner over cord. It may damage insulation.
(7)Avoid cleaning the swich and receptacle parts with wet cloth and splashing water on it as moisture
may cause a short circuit.
(8)Your vacuum cleaner is not a toy. Do not allow children to play with it. Do not leave the vacuum
cleaner connected to an electrical outlet unattended.
¡Warning: Electric shock could occur if used outdoors or on wet surfaces.
Page 9

THE UPDATED PARTS LIST
FOR THIS MODEL IS
AVAILABLE ON ESTA
Page 10

-11-
8. CONSTRUCTION DIAGRAM AND CONNECTION DIAGRAM
13
11
8
1
9
10
6
12
14
24
7
7
26
25
23
34
33
38
37
35
41
36
39
37
38
39
40
31
32
28
29
16
15
21
20
27
19
22
43
17
18
13
2
24
4
42
20
18
30
5
3
Page 11

Hitachi, Ltd. Tokyo, Japan
International Sales Division
THE HITACHI ATAGO BUILDING,
No. 15 –12 Nishi Shinbashi, 2 – Chome,
Minato – Ku, Tokyo 105-8430, Japan.
Tel: 03 35022111
HITACHI EUROPE LTD,
Whitebrook Park
Lower Cookham Road
Maidenhead
Berkshire
SL6 8YA
UNITED KINGDOM
Tel: 01628 643000
Fax: 01628 643400
Email: consumer-service@hitachi-eu.com
HITACHI EUROPE GmbH
Munich Office
Dornacher Strasse 3
D-85622 Feldkirchen bei München
GERMANY
Tel: +49-89-991 80-0
Fax: +49- 89-991 80-224
Hotline: +49-180-551 25 51 (12ct/min)
Email: HSE-DUS.service@hitachi-eu.com
HITACHI EUROPE srl
Via Tommaso Gulli N.39, 20147
Milano, Italia
ITALY
Tel: +39 02 487861
Tel: +39 02 38073415 Servizio Clienti
Fax: +39 02 48786381/2
Email: customerservice.italy@hitachi-eu.com
HITACHI EUROPE S.A.S
Lyon Office
B.P. 45, 69671 BRON CEDEX
FRANCE
Tel: 04 72 14 29 70
Fax: 04 72 14 29 99
Email: france.consommateur@hitachi-eu.com
HITACH EUROPE AB
Egebækgård
Egebækvej 98
DK-2850 Nærum
DENMARK
Tel: +45 43 43 6050
Fax: +45 43 60 51
Email: csgnor@hitachi-eu.com
Hitachi Europe Ltd
Bergensesteenweg 421
1600 Sint- Pieters-Leeuw
BELGIUM
Tel: +32 2 363 99 01
Fax: +32 2 363 99 00
Email: sofie.van.bom@hitachi-eu.com
www.hitachidigitalmedia.com
HITACHI EUROPE S.A.
364 Kifissias Ave. & 1, Delfon Str.
152 33 Chalandri
Athens
GREECE
Tel: 1-6837200
Fax: 1-6835964
Email: service.hellas@hitachi-eu.com
HITACHI EUROPE S.A.
Gran Via Carlos III, 101- 1
08028 Barcelona
SPAIN
Tel: 93 409 2550
Fax: 93 491 3513
Email: atencion.cliente@hitachi-eu.com
HITACHI Europe AB
Box 77 S-164 94 Kista
SWEDEN
Tel: +46 (0) 8 562 711 00
Fax: +46 (0) 8 562 711 13
Email: csgswe@hitachi-eu.com
HITACHI EUROPE LTD (Norway) AB
STRANDVEIEN 18
1366 Lysaker
NORWAY
Tel: 67 5190 30
Fax: 67 5190 32
Email: csgnor@hitachi-eu.com
HITACHI EUROPE AB
Neopoli / Niemenkatu 73
FIN-15140 Lahti
FINLAND
Tel : +358 3 8858 271
Fax: +358 3 8858 272
Email: csgnor@hitachi-eu.com
HITACHI EUROPE LTD
Na Sychrove 975/8
101 27 Praha 10 – Bohdalec
CZECH REPUBLIC
Tel: +420 267 212 383
Fax: +420 267 212 385
Email: csgnor@hitachi-eu.com
 Loading...