

Page 1

PRELIMINARY RELEASE
Hitachi Freedom Storage™
Lightning 9900™ V Series
LUN Expansion and Virtual LVI/LUN
User’s Guide
Page 2

PRELIMINARY RELEASE
Page 3

PRELIMINARY RELEASE
© 2002 Hitachi Data Systems Corporation, ALL RIGHTS RESERVED
Notice: No part of this publication may be reproduced or transmitted in any form or by any
means, electronic or mechanical, including photocopying and recording, or stored in a
database or retrieval system for any purpose without the express written permission of
Hitachi Data Systems Corporation.
Hitachi Data Systems reserves the right to make changes to this document at any time
without notice and assumes no responsibility for its use. Hitachi Data Systems products and
services can only be ordered under the terms and conditions of Hitachi Data Systems’
applicable agreements. All of the features described in this document may not be currently
available. Refer to the most recent product announcement or contact your local Hitachi
Data Systems sales office for information on feature and product availability.
This document contains the most current information available at the time of publication.
When new and/or revised information becomes available, this entire document will be
updated and distributed to all registered users.
Hitachi Lightning 9900™ V Series LUN Expansion and Virtual LVI/LUN User’s Guide iii
Page 4

Trademarks
Hitachi Data Systems is a registered trademark and service mark of Hitachi, Ltd. The Hitachi
Data Systems design mark is a trademark and service mark of Hitachi, Ltd.
Hi-Track is a registered service mark of Hitachi Data Systems Corporation. Graph-Track,
Freedom Storage, Lightning 9900V are trademarks of Hitachi Data Systems Corporation.
VMS is a registered trademark of Compaq Computer Corporation. Tru64 is a trademark of
Compaq Computer Corporation.
Emulex is a registered trademark of Emulex Corporation. Lightpulse is a trademark of Emulex
Corporation.
HP-UX is a registered trademark of Hewlett-Packard Company.
S/390, AIX, and FICON, DYNIX/ptx and ESCON are registered trademarks of International
Business Machines Corporation.
JNI is a registered trademark of Jaycor Systems Inc.
PRELIMINARY RELEASE
Internet Explorer, Windows 95, Windows 98, Windows ME, Windows NT, Windows XP, and
Windows 2000 are trademarks or registered trademarks of Microsoft Corporation.
NetWare is a registered trademark of Novell, Inc.
IRIX is a registered trademark of Silicon Graphics, Inc.
Solaris, Java, Java Virtual Machine (JVM) and Java Runtime Environment (JRE) are
trademarks or registered trademarks of Sun Microsystems, Inc.
All other brand or product names are or may be registered trademarks, trademarks or
service marks of and are used to identify products or services of their respective owners.
iv Preface
Page 5

Notice of Export Controls
Export of technical data contained in this document may require an export license from the
United States government and/or the government of Japan. Contact the Hitachi Data
Systems Legal Department for any export compliance questions.
Document Revision Level
Revision Date Description
MK-92RD104-P April 2002 Preliminary Release
Source Documents for This Revision
RSD- Vlm45d1b (February, 2002)
RSD- Vll45d0 (March, 2002)
RSD - Vll45d0a (April,2002)
PRELIMINARY RELEASE
Referenced Documents
Hitachi Lightning 9900V documentation referenced in this document:
Hitachi Freedom Storage™ Lightning 9900™ V Series User and Reference Guide
(MK-92RD100)
Hitachi Freedom Storage™ Lightning 9900™ V Series Remote Console – Storage Navigator
User’s Guide (MK-92RD101)
Hitachi Freedom Storage™ Lightning 9900™ V Series LUN Manager User’s Guide
(MK-92RD104)
Hitachi Freedom Storage™ Lightning 9900™ V Series FlashAccess User’s Guide
(MK-92RD102)
Hitachi Lightning 9900™ V Series LUN Expansion and Virtual LVI/LUN User’s Guide v
Page 6

PRELIMINARY RELEASE
vi Preface
Page 7

Preface
This Hitachi Freedom Storage™ Lightning 9900™ V Series LUN Expansion Virtual LVI/LUN
User’s Guide provides instructions for using these options on the 9900V Remote Console,
using the web client Java™ applet program for the 9900V subsystem.
This user’s guide assumes that:
The user has a background in data processing and understands direct-access storage
PRELIMINARY RELEASE
device (DASD) subsystems and their basic functions,
The user is familiar with the Hitachi 9900V array subsystem, and the user is familiar with
the Windows NT
For further information on the 9900V Remote Console and Java™ applet, please refer to the
Hitachi Freedom Storage™ Lightning 9900™ V Series Remote Console – Storage Navigator
User’s Guide (MK-92RD100), or contact your Hitachi Data Systems account team.
For further information on the 9900V subsystem, please refer to the Hitachi Freedom
Storage™ Lightning 9900™ V Series User and Reference Guide (MK-92RD100), or contact your
Hitachi Data Systems account team.
Note: The term “9900V” refers to the entire Lightning 9900™ V Series subsystem family,
unless otherwise noted. The use of the Lightning 9900™ V Series Remote Console, the web
client Java™ applet and any other optional functions is governed by the terms of the
applicable license and other agreement(s) with Hitachi Data Systems.
Note: This product includes software developed by the Apache Group for use in the Apache
HTTP server project (http://www.apache.org/)
Microcode Level
This document revision applies to 9900V microcode versions 21-01-XX and higher.
or Windows 2000 operating systems.
COMMENTS
Please send us your comments on this document: doc.comments@hds.com.
Make sure to include the document title, number, and revision.
Please refer to specific page(s) and paragraph(s) whenever possible.
(All comments become the property of Hitachi Data Systems Corporation.)
Thank you!
Hitachi Lightning 9900™ V Series LUN Expansion and Virtual LVI/LUN User’s Guide vii
Page 8

PRELIMINARY RELEASE
viii Preface
Page 9

PRELIMINARY RELEASE
Contents
Chapter 1 Overview of LUN Expansion and Virtual LVI/LUN............................................................... 1
1.1 Overview of LUSE Operations ...................................................................1
1.2 Overview of Virtual LVI/LUN ....................................................................4
1.2.1 Virtual LVI/LUN Parameters ...........................................................4
1.2.2 Virtual LVI/LUN Size Calculation......................................................9
1.2.3 SSID Requirements).................................................................... 10
Chapter 2 Preparing To Use LUN Expansion or Virtual LVI/LUN ...................................................... 11
2.1 Set Up the 9900V Subsystem and Remote Console PC(s) ................................. 11
2.2 Launch LUN Expansion or Virtual LVI/LUN .................................................. 11
2.3 Changing to Modify Mode ...................................................................... 13
Chapter 3 LUN Expansion (LUSE) Operations.................................................................................... 15
3.1 The LUSE/VLL Panel, LUSE Tab Components ............................................... 15
3.2 LUSE Operations................................................................................. 19
3.2.1 Creating a LUSE Volume .............................................................. 19
3.2.1.1 Creating a LUSE Volume From the LDEV Operation Detail .......... 19
3.2.1.2 Creating a LUSE Volume From the LDEV Table........................ 21
3.2.2 Releasing a LUSE Volume............................................................. 23
3.2.3 Changing LUSE Capacities ............................................................ 25
Chapter 4 Virtual LVI/LUN (VLL) Operations....................................................................................... 27
4.1 The Virtual LVI/LUN Panels ................................................................... 27
4.1.1 LUSE/VLL Panel, VLL Tab ............................................................ 27
4.1.2 Set SSID Panel .......................................................................... 30
4.2 Virtual LVI/LUN Operations ................................................................... 32
4.2.1 Converting Logical Volumes to Space .............................................. 32
4.2.2 Creating VLL volumes ................................................................. 35
4.2.3 Deleting a VLL volume ................................................................ 40
4.2.4 Initializing a Virtual LVI/LUN Volume .............................................. 40
Chapter 5 Troubleshooting................................................................................................................... 45
5.1 Troubleshooting ................................................................................. 45
5.2 Calling the Hitachi Data Systems Technical Support Center............................. 47
Glossary, Acronyms, and Abbreviations................................................................................................. 49
Hitachi Lightning 9900™ V Series LUN Expansion and Virtual LVI/LUN User’s Guide ix
Page 10

List of Figures
Figure 1.1 LUSE configuration ......................................................................... 3
Figure 1.2 Illustration of Virtual LVI/LUN Operations ............................................. 4
Figure 1.3 Volume Configuration ..................................................................... 6
Figure 2.1
Figure 2.2 View Mode..................................................................................14
Figure 2.3 Mode Changing Confirmation Message .................................................14
Figure 2.4 Modify Mode................................................................................14
Figure 3.1
Figure 3.2 LDEV Information Outline Detail (From the LUSE/VLL Panel, LUSE Tab).........16
Figure 3.3 LDEV Detail Table (From the LUSE/VLL Panel, LUSE Tab) ..........................17
Figure 3.4 LDEV Operation Detail (From the LUSE/VLL Panel, LUSE Tab) ....................18
Figure 3.5 Set LUSE Confirmation Panel ............................................................20
Figure 3.6 Apply Confirmation Message.............................................................20
Figure 3.7 Cancel Confirmation Message ...........................................................20
Figure 3.8 Selecting Free LDEVs for LUSE Volume ................................................22
Figure 3.9 Set LUSE Volume Pop-Up Menu .........................................................22
Figure 3.10 Selecting LUSE Volume(s) To Be Released ............................................24
Figure 3.11 Release LUSE Volume Pop-Up Menu ....................................................24
Figure 3.12 Release LUSE Confirmation Panel ......................................................25
Figure 4.1
Figure 4.2 Parity Group - LDEV Outline (From the LUSE/VLL Panel, VLL Tab) ...............28
Figure 4.3 LDEV Information Table (From the LUSE/VLL Panel, VLL Tab) ....................29
Figure 4.4 Set SSID Panel..............................................................................30
Figure 4.5 Volume to Space Pop-Up Menu..........................................................34
Figure 4.6 Volume to Space Confirmation Panel ..................................................34
Figure 4.7 Install CV Pop-Up Menu ..................................................................37
Figure 4.8 Install CV Panel (1)........................................................................37
Figure 4.9 Clear Pop-Up Menu........................................................................37
Figure 4.10 Install CV Panel (2)........................................................................38
Figure 4.11 Set SSID Panel (Installing VLL Volumes) ...............................................38
Figure 4.12 Install CV Confirmation Panel ...........................................................39
Figure 4.13 Volume Initialize Pop-Up Menu .........................................................42
Figure 4.14 Volume Initialize Panel...................................................................43
Figure 4.15 Clear Pop-Up Menu........................................................................43
Figure 4.16 Set SSID Panel (Volume Initialize) ......................................................44
Figure 4.17 Volume Initialize Confirmation Panel ..................................................44
Remote Console Main Panel, Information Tab........................................12
LUSE/VLL Main Panel, LUSE Tab ........................................................15
LUSE/VLL Panel, VLL Tab ................................................................27
PRELIMINARY RELEASE
x Contents
Page 11

List of Tables
Table 1.1 LUSE Specifications.........................................................................2
Table 1.2 VLL LUSE Specifications ...................................................................2
Table 1.3 Virtual LVI/LUN Specifications ...........................................................7
Table 1.4 Minimum and Maximum Virtual LUN Volume Capacities (Open Systems)..........8
Table 1.5 Control Cylinders/Control Area for Each LVI/LU Type................................8
Table 1.6 SSID Requirements........................................................................ 10
Table 4.1
Table 5.1
Emulation Groups......................................................................... 29
General Error Conditions ................................................................ 46
PRELIMINARY RELEASE
Hitachi Lightning 9900™ V Series LUN Expansion and Virtual LVI/LUN User’s Guide xi
Page 12

PRELIMINARY RELEASE
xii Contents
Page 13

PRELIMINARY RELEASE
Chapter 1 Overview of LUN Expansion and Virtual LVI/LUN
1.1 Overview of LUSE Operations
LUSE operations allow hosts that can only use a limited amount of LUs per fibre interface to
have access to larger amounts of data using expanded LUs. LUSE operations include the
following:
Creating new expanded LUs (LUSE volumes) (see section 3.2).
Releasing expanded LUs (LUSE volumes) to individual LUs (see section 3.2.2).
Changing the size of a LUSE volume (see section 3.2.3).
The following guidelines apply to LUN Expansion:
A maximum of 256 expanded LUs can be configured on the same port.
LDEVs that are to be combined into LUSE volumes must have no assigned SCSI paths and
be unmounted from the host. These are known as free (or available) LDEVs. For
instructions on deleting SCSI paths, please see Hitachi Freedom Storage™ Lightning
9900™ LUN Manager User’s Guide (MK-92RD105).
Combining non-sequential LDEVs into a LUSE is supported, provided they are on the same
CU.
Combining Virtual LVI/LUN volumes into a LUSE is supported, provided they are the same
size and emulation type and on the same CU. The order of operations is important: you
must first create one or more Virtual LVI/LUN volumes, and then combine those volumes
into a LUSE volume. You cannot perform Virtual LVI/LUN operations on an existing LUSE
volume because a LUSE volume must have a SCSI path already specified.
Combining Virtual LVI/LUN volumes and normal volumes into the same LUSE is not
supported.
Combining command devices, Just In Time and CruiseControl volumes into a LUSE is not
supported.
Combining RAID 1 and RAID 5 into the same LUSE is not supported.
Combining emulation types (OPEN-3, OPEN-8, OPEN-9, OPEN-E, or OPEN-L) into the same
LUSE is not supported.
Some operating systems may experience slow disk access times with large logical units,
if they contain a large number of high usage files.
The size of a LUSE can affect the amount of time required to perform backups.
Note: The queue depth for open systems can vary, depending on the type of platform. Please
contact your Hitachi Data Systems Customer Support Center for assistance.
Warning: Except for systems running Windows NT
®
or Windows® 2000, creating and releasing
expanded LUs is a destructive process. Be sure to back up your data before proceeding.
Hitachi Lightning 9900™ V Series LUN Expansion and Virtual LVI/LUN User’s Guide 1
Page 14
PRELIMINARY RELEASE
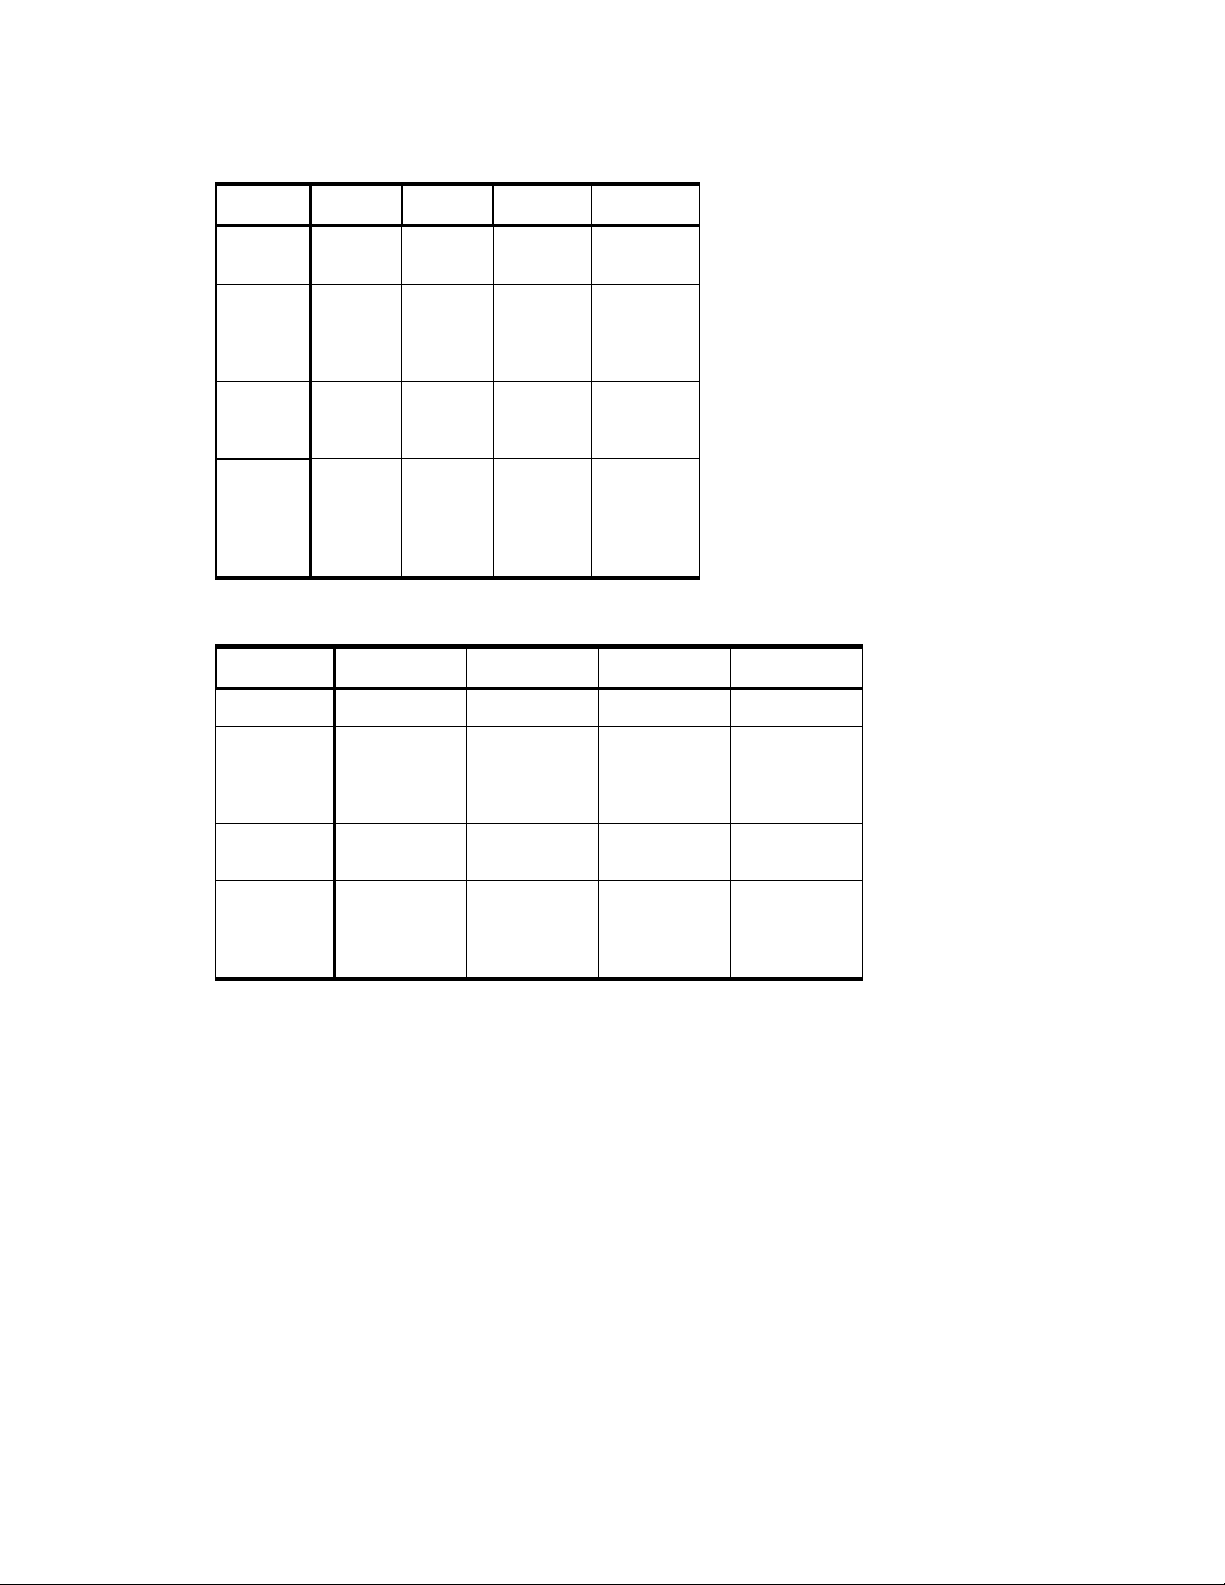
Table 1.1 LUSE Specifications
Parameter OPEN-8 OPEN-9 OPEN-E OPEN-L
LU
Capacity
Possible
number of
expanded
LUs
Expanded
LU
Capacity
Product
Name
7.3 GB 7.3 GB 14.5 GB 36.4 GB
2 - 36 LUs 2 - 36 LUs 2 - 36 LUs 2 - 36 LUs
14.6 GB -
264.4 GB
OPEN-8*n
(n = # of
LUs in the
expanded
LU)
14.7 GB -
265.8 GB
OPEN-9*n
(n = # of
LUs in the
expanded
LU)
29.1 GB -
524.4 GB
OPEN-E*n
(n = # of
LUs in the
expanded
LU)
72.9 GB -
1312.2 GB
OPEN-L*n
(n = # of LUs
in the
expanded
LU)
Table 1.2 VLL LUSE Specifications
Parameter OPEN-3 OPEN-8
LU Capacity 35 MB - 2.4 GB 35 MB - 7.3 GB 35 MB - 7.3 GB 35 MB - 14.5 GB
Possible
number of
connected
LUs
2 - 36 LUs 2 - 36 LUs 2 - 36 LUs 2 - 36 LUs
OPEN-9 OPEN-E
Capacity of
expanded LUs
Product Name OPEN-3*n-VLL
70 MB - 84.2 GB 70 MB - 250.2
GB
OPEN-8*n-VLL
(n = # of LUs in
the expanded
LU)
(n = # of LUs in
the expanded
LU)
70 MB - 252.6
GB
OPEN-9*n-VLL
(n = # of LUs in
the expanded
LU)
Note: Virtual LVI/LUN is not applicable to OPEN-L.
70 MB - 524.4
GB
OPEN-E*n-VLL
(n = # of LUs in
the expanded
LU)
2 Chapter 1 Overview of LUN Expansion and Virtual LVI/LUN
Page 15

PRELIMINARY RELEASE
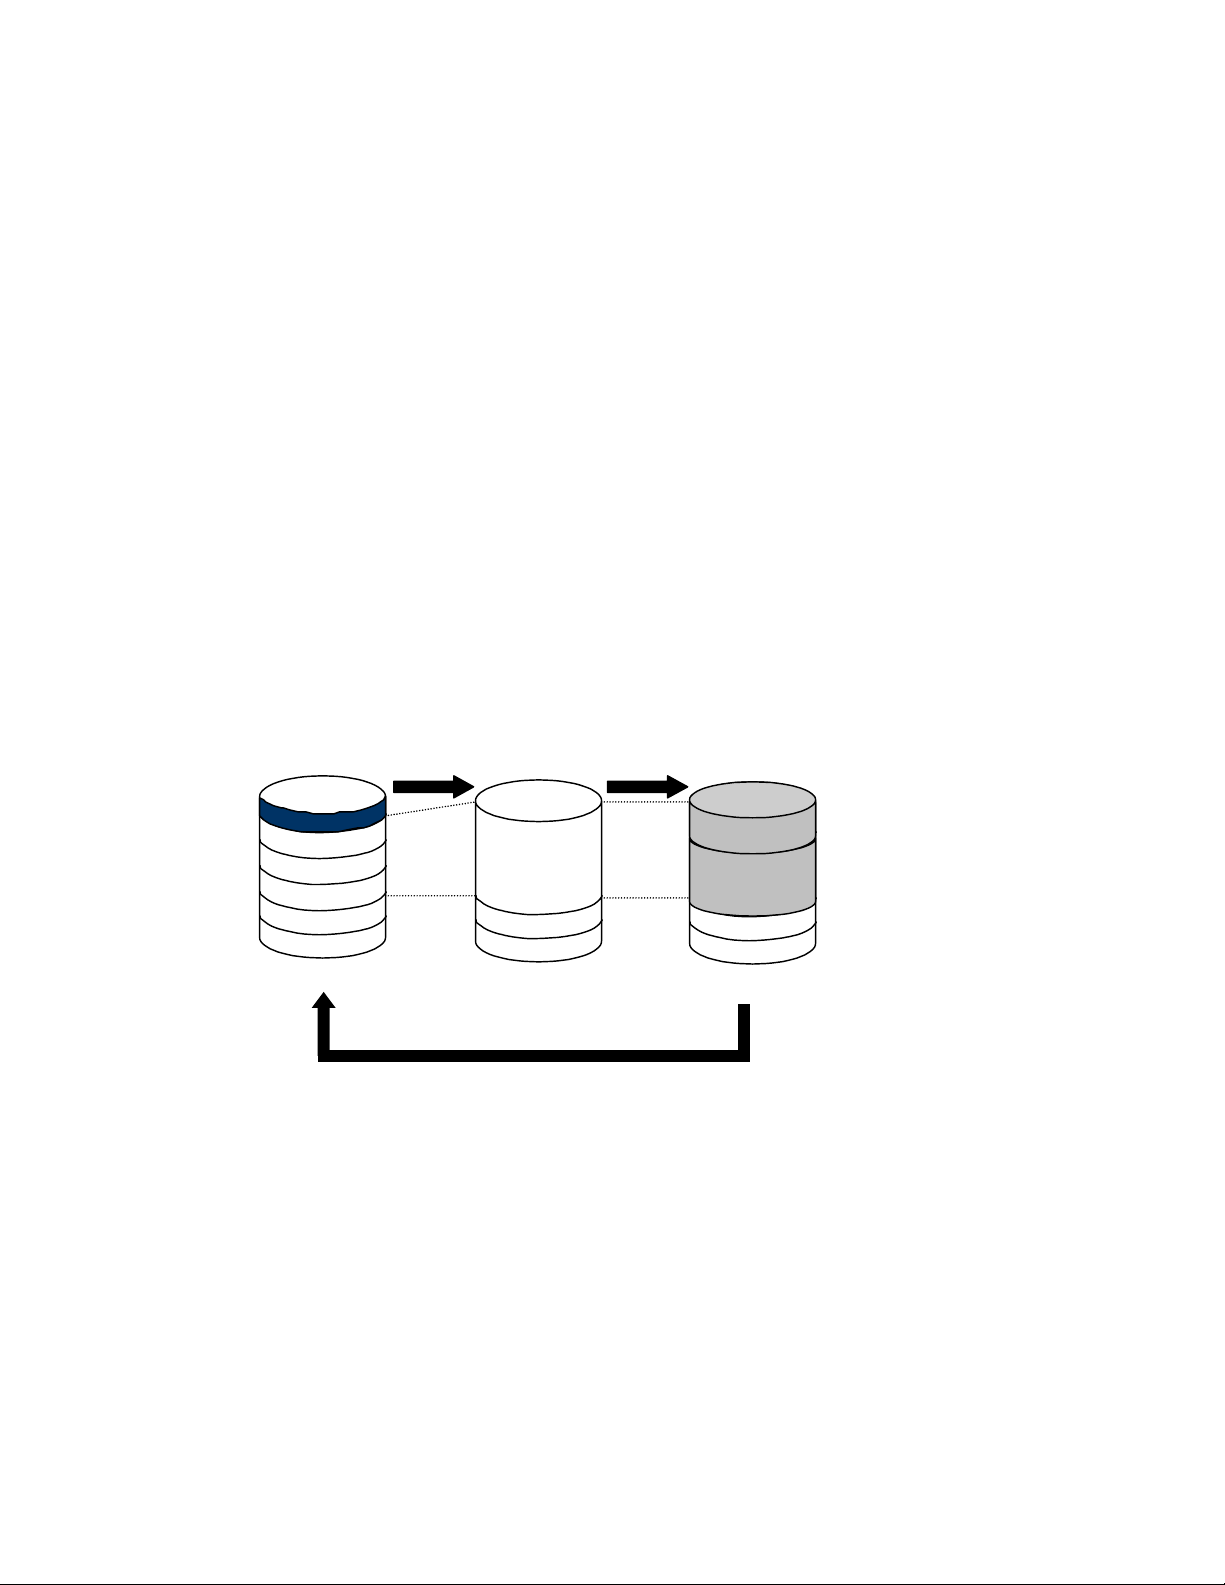
The host recognizes a set
of LDEVs as one big LDEV.
Host
Figure 1.1 LUSE Configuration
LUSE (1:00)
LDEV (1:00)
LDEV (1:01)
LDEV (1:03)
LDEV (1:04)
LDEV (1:05)
Hitachi Lightning 9900™ V Series LUN Expansion and Virtual LVI/LUN User’s Guide 3
Page 16
1.2 Overview of Virtual LVI/LUN
1.2.1 Virtual LVI/LUN Parameters
The Virtual LVI/LUN (VLL) option allows you to configure variable-size volumes, which are
usually smaller than normal (fixed-size) volumes. Virtual LVI/LUN improves data access
performance by reducing logical device contention and host I/O queue times, particularly
when several frequently accessed files are located on the same volume. Virtual LVI/LUN
enables better utilization of the physical storage capacity of the 9900V, and reduces the
amount of administrative effort required to balance I/O workloads.
Virtual LVI/LUN allows you to perform the following types of operations:
Converting a normal volume into free space (see section 4.2.1),
Defining and installing a Virtual LVI/LUN (customized) volume (see section 4.2.2),
Deleting a Virtual LVI/LUN volume (see section 4.2.3), and
Initializing a Virtual LVI/LUN volume (see section 4.2.4).
PRELIMINARY RELEASE
Figure 1.2 illustrates the available Virtual LVI/LUN functions:
LDEV
LDEV
LDEV
LDEV
LDEV
Normal Volume
Volume to Space
Volume Initialize
Space
LDEV
LDEV
Install VLL
VLL
VLL
LDEV
LDEV
VLL volume
Figure 1.2 Illustration of Virtual LVI/LUN Operations
4 Chapter 1 Overview of LUN Expansion and Virtual LVI/LUN
Page 17

PRELIMINARY RELEASE
Note: Virtual LVI/LUN used in conjunction with FlashAccess can achieve greater performance
improvements than when either of these options is used individually. For more information
on FlashAccess, see Hitachi Freedom Storage™ Lightning 9900™ V Series FlashAccess User’s
Guide (MK-92RD102).
A parity group is called a normal or fixed-size volume (FV) when all of its member LDEVs are
fixed-size. In a normal volume, the size of the member LDEVs is determined by type of
device that is being emulated, and the number of LDEVs is determined by the physical size
of the parity group.
Generally, each array group will have a certain amount of free space available after the
standard LDEVs for the array group have been defined. On the 9900V, Virtual LVI/LUN
formats one or more of the LDEVs on a selected volume into free space. That free space can
either be used to install one or more variable-sized volumes, or left as free space for future
use. Note: At least one LDEV must remain defined as a normal volume in each array group.
The following parameters apply to Virtual LVI/LUN operations:
S/390
®
volumes must be offline from the host OS, and open volumes must be either
offline or unmounted from the host OS with no SCSI paths assigned to them. For more
information on configuring SCSI paths, please see Hitachi Freedom Storage™ Lightning
TM
9900
V Series LUN Manager/SANtinel User’s Guide (MK-92RD104).
Multiple LDEVs can be selected for conversion to Virtual LVI/LUN volumes but they must
be in the same parity group.
When space in an LDEV is converted to a Virtual LVI/LUN volume, an LDEV address is
assigned to that Virtual LVI/LUN volume automatically. For mainframes, each Virtual
LVI/LUN volume will also have its own assigned unit control block (UCB). The UCB can be
assigned either automatically or manually, at the user’s option.
LUSE, volumes secured by LUN Security, and Hitachi SANtinel – S/390
®
volumes are not
available for Virtual LVI/LUN operations, because these volumes must have SCSI paths
already defined. To create a VLL/LUSE volume, you must first create two or more Virtual
LVI/LUN volumes with the same size, emulation type and CU number, and then combine
those volumes into a LUSE device. For more information on creating LUSE devices see
Chapter 3.
Virtual LVI/LUN operations are not available for OPEN-L volumes.
When you convert a normal volume to a Virtual LVI/LUN volume, you can use all or part
of the space previously assigned to that volume (e.g., 3339 cylinders for a 3390-3) for
use in Virtual LVI/LUN volumes. Each array group can support a total of 256 volumes,
including both fixed-size and Virtual LVI/LUN volumes.
WARNING: The Virtual LVI/LUN function is destructive. Be sure to back up your data before
performing Virtual LVI/LUN operations.
Hitachi Lightning 9900™ V Series LUN Expansion and Virtual LVI/LUN User’s Guide 5
Page 18
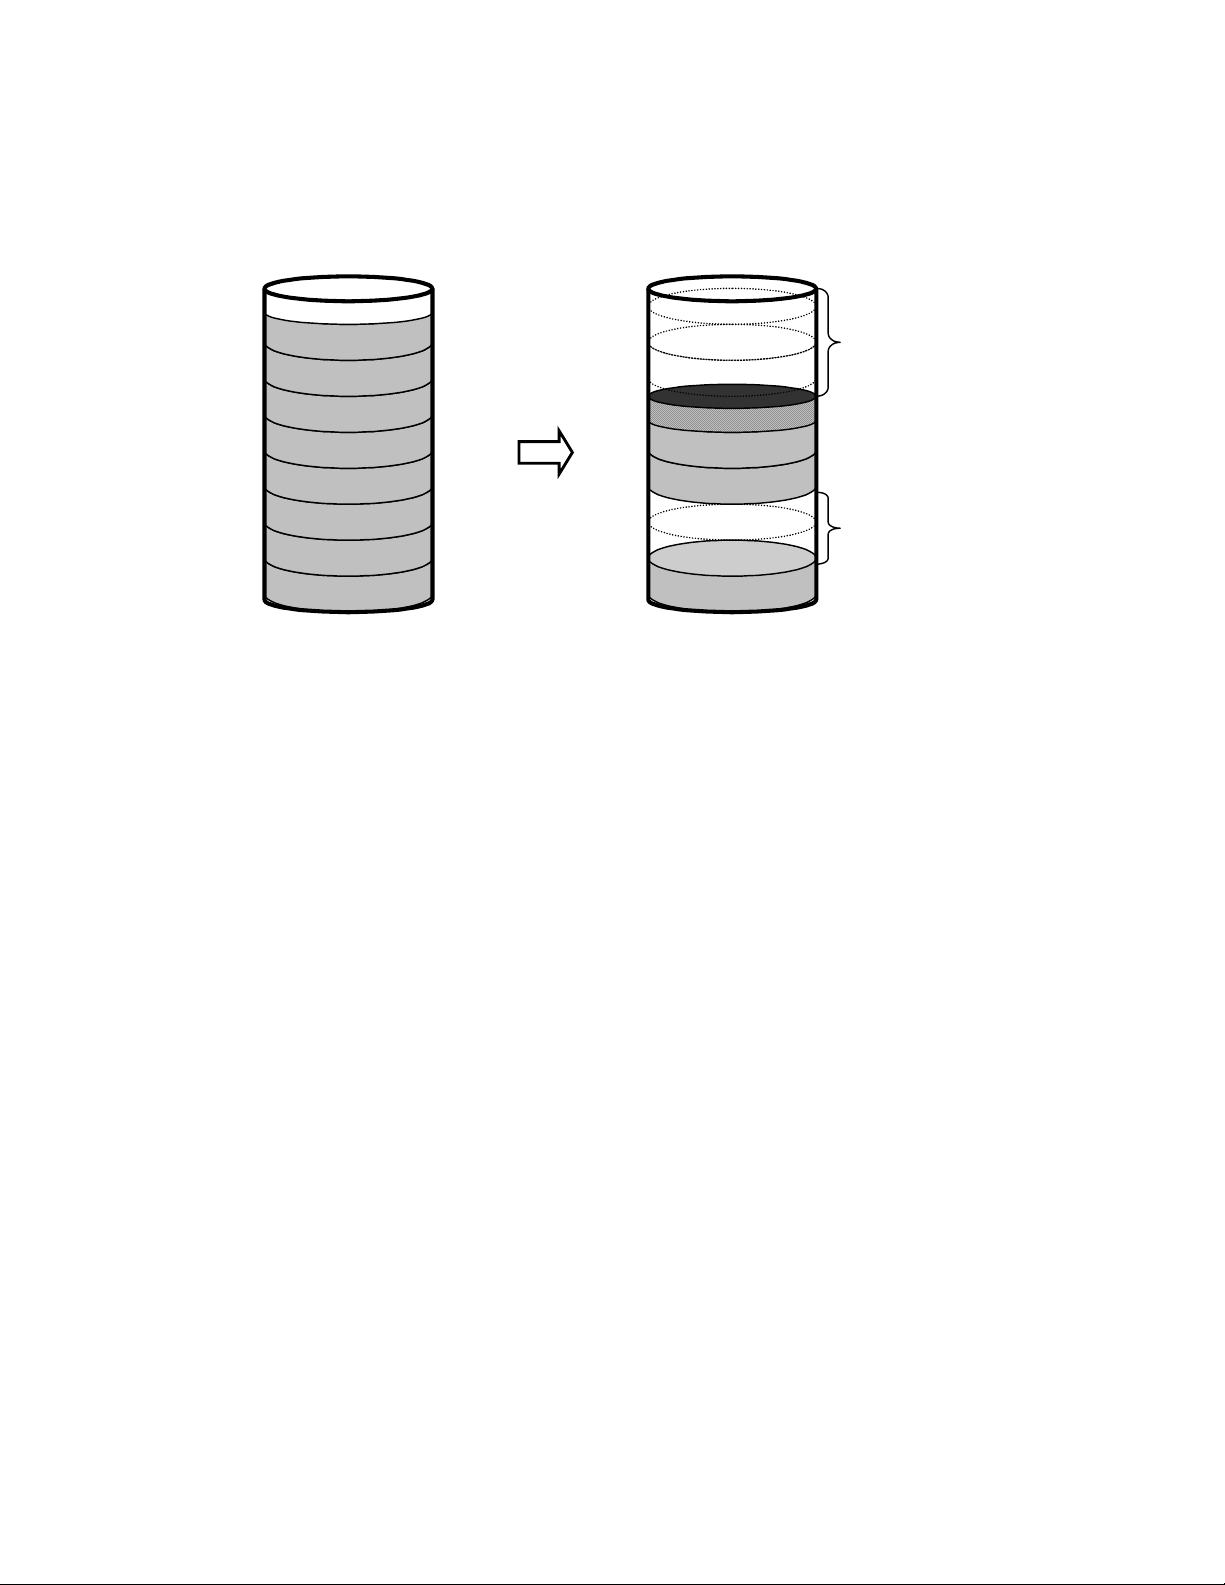
PRELIMINARY RELEASE
A normal volume consists of a certain number of fixed volumes, depending on the emulation
type, and some free space. A Virtual LVI/LUN volume usually consists of at least one fixed
volume (FV), customized volumes (CV or VLL volumes), and free space (see Figure 1.3).
Space
FV
Space
FV
FV
FV
FV
FV
FV
FV
Normal Configuration
Figure 1.3 Volume Configuration
CV
FV
FV
Space
FV
Sample Customized Volume Configuration
6 Chapter 1 Overview of LUN Expansion and Virtual LVI/LUN
Page 19

PRELIMINARY RELEASE
Table 1.3 lists the Virtual LVI/LUN specifications, and Table 1.4 lists the minimum and
maximum Virtual LVI/LUN volume capacities for open systems. Each Virtual LVI/LUN volume
has its own assigned unit control block (UCB), and multiple LVI/LUN types can be configured
within each Virtual LVI/LUN volume, so long as the device type is from the same device
family (e.g. all open volumes, or all 3390s). Open and 3390 volumes are not allowed in the
same parity group because they have different formats.
Table 1.3 Virtual LVI/LUN Specifications
Parameter Mainframe Open Systems
Track format 3390 OPEN-3, OPEN-8, OPEN-9, OPEN-E
Emulation type
3390-3, -3A, -3B, -3C, -3R, -9, -L
OPEN-3, OPEN-8, OPEN-9, OPEN-E
Ability to intermix emulation type Yes, for 3390. No for open-system volumes
or Hitachi SANtinel - S/390
Maximum number of volumes (normal
and Virtual LVI/LUN) per parity group
Maximum number of volumes (normal
and Virtual LVI/LUN) per subsystem
Minimum size for one Virtual LVI/LUN
volume
Maximum size for one Virtual LVI/LUN
volume
Size increment 1 user cylinder 1 MB
Disk location for Virtual LVI/LUN
volumes
256 256
8,192 8,192
1 user cylinder (+ control cylinders) 35 MB (+ control area)
See Table 1.5 See Table 1.5
Anywhere Anywhere
®
volumes
Yes, by track geometry (except for
AIX®). No for 3390® volumes.
Note: VLL functions are not applicable to OPEN-L volumes.
Hitachi Lightning 9900™ V Series LUN Expansion and Virtual LVI/LUN User’s Guide 7
Page 20
PRELIMINARY RELEASE
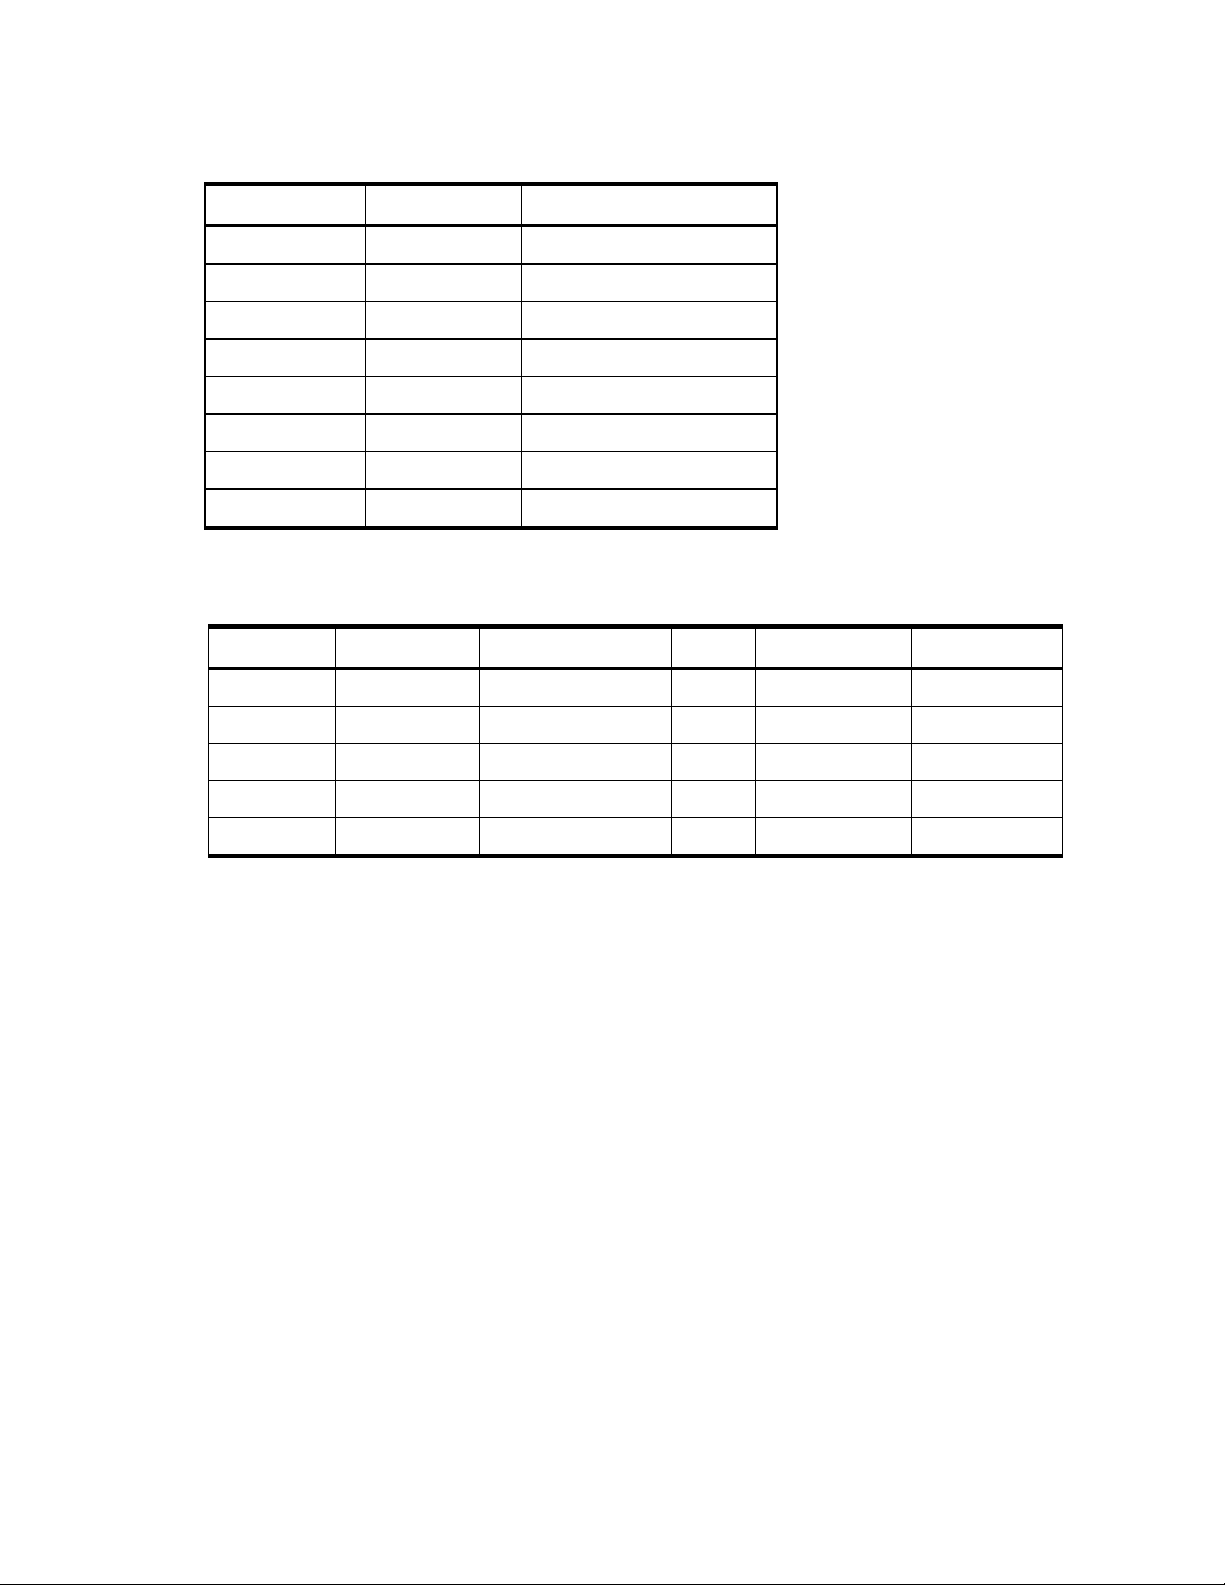
Table 1.4 Minimum and Maximum Virtual LUN Volume Capacities (Open Systems)
Setting size (MB) Actual Size (MB) Notes
35 35.15625 Minimum VLL volume capacity
500 500.625
1000 1000.546875
2000 2000.390625
2347 2347.03125 Maximum OPEN-3 volume size
7007 7007.34375 Maximum OPEN-8 volume size
7042 7042.5 Maximum OPEN-9 volume size
13893 13893.04688 Maximum OPEN-E volume size
Table 1.5 shows maximum VLL volume capacities of each emulation type.
Table 1.5 Control Cylinders/Control Area for Each LVI/LU Type
LVI Type Control Cylinders Maximum User Cylinders LU Type Maximum User MB Control Area (MB)
3390-3 (A/B/C) 6 3339 OPEN-3 2347 5
3390-3R 6 3339 OPEN-8 7007 19
3390-9 25 10017 OPEN-9 7042 19
3390-L 23 32,760 OPEN-E 13893 13
OPEN-L Not applicable
Note: VLL functions are not applicable to OPEN-L volumes.
8 Chapter 1 Overview of LUN Expansion and Virtual LVI/LUN
Page 21

1.2.2 Virtual LVI/LUN Size Calculation
The Virtual LVI/LUN Remote Console function enables you to configure LDEVs by dividing
them into several devices. Virtual LVI/LUN allows you to assign a specific number of physical
cylinders or MB to each Virtual LVI/LUN volume for maximum control over the volume size.
PRELIMINARY RELEASE
For S/390
®
, each Virtual LVI volume contains the user-specified number of user cylinders
plus a predetermined number of control cylinders, which is calculated as follows:
# Physical Tracks = (# User Cylinders) × 15 + (# Control Cylinders) × 15 + Adjustment
Tracks
1 Cylinder = 15 Tracks
Where:
# Control Cylinders =4, 5, 6, 7, 8, 9, 25, or 27, depending on LVI type
(see Table 1.5)
Adjustment Tracks
(( # User Cylinders ) + ( # Control Cylinders ))
48
-(( # User Cylinders ) + ( # Control Cylinders )) × 15
(↑↑ means round up to the next integer, e.g. ↑ 3.96 ↑ = 4.00)
× 15 ×48
For example, if you specify 1015 user cylinders for a 3390-3 Virtual LVI volume, the total
number of physical cylinders allocated for that device is 1015
× 15 + 6 × 15 + 45 = 15360
tracks (1024 cylinders).
In open systems, the size of the Virtual LUN volume is expressed in MB. The total size of the
Virtual LUN volume consists of the user-specified size plus an amount for the control area
(see Table 1.5). The amount for the control area is automatically assigned by the Virtual
LVI/LUN software. The size calculation is as follows:
X = User specified MB × 1024 ÷ 720 (Any remainder is rounded up to the next whole number).
Y=(X× 96 × 15 × 512) ÷ 1024 ÷ 1024
X is a value of converting the capacity specified by user into number of cylinders.
Y is a value of converting value X into capacity (MB).
For example, if an open-systems user specifies a Virtual LUN volume size of 100 MB, the
software will calculate the actual size of the volume as follows: 100 × 1024 ÷ 720 = 142.2222
(rounded up to 143). (143
× 96 × 15 × 512) ÷ 1024 ÷ 1024 = 100.546875 (MB).
Hitachi Lightning 9900™ V Series LUN Expansion and Virtual LVI/LUN User’s Guide 9
Page 22

1.2.3 SSID Requirements)
The 9900V subsystem is configured with one SSID for each of 256 devices and up to four SSIDs
per CU image. Each SSID must be unique within each host system. Table 1.6 shows the
relationship between emulation types of controllers and SSIDs.
Table 1.6 SSID Requirements
PRELIMINARY RELEASE
Controller emulation
type
3990-6, 3390-6E (0104)x - (FFFD)x 3390, OPEN-3, OPEN-8 and OPEN-9 volumes
2105-F20 (0104)x - (FFFD)x 3390, OPEN-3, OPEN-8 and OPEN-9 volumes
SSID requirement LVI/LUN Support
10 Chapter 1 Overview of LUN Expansion and Virtual LVI/LUN
Page 23

PRELIMINARY RELEASE
Chapter 2 Preparing To Use LUN Expansion or Virtual LVI/LUN
2.1 Set Up the 9900V Subsystem and Remote Console PC(s)
Before launching LUN Expansion or Virtual LVI/LUN, you must take several preliminary steps.
For detailed instructions, please refer to Hitachi Freedom Storage™ Lightning 9900™ V Series
Remote Console – Storage Navigator User’s Guide (MK-92RD101). These include the
following:
Install the 9900 subsystem.
Install the PC(s) that you intend to use as Remote Consoles, and connect them to the
9900V internal LAN.
Enable LUN Expansion and/or Virtual LVI/LUN on each subsystem where you intend to
use these options.
2.2 Launch LUN Expansion or Virtual LVI/LUN
To use LUN Expansion or Virtual LVI/LUN, you must first log on to the primary SVP. For
detailed instructions on the login process, see Hitachi Freedom Storage™ Lightning 9900™ V
Series Remote Console – Storage Navigator User’s Guide (MK-92RD101).
If you successfully log on to the primary SVP, the Remote Console Main panel opens (see
Figure 2.1). The Option buttons are displayed vertically on the left side of the panel. The
LUN Expansion (LUSE) Virtual LVI/LUN (VLL) button (
Figure 3.1).
) opens the LUSE/VLL panel (see
Hitachi Lightning 9900™ V Series LUN Expansion and Virtual LVI/LUN User’s Guide 11
Page 24

PRELIMINARY RELEASE
Figure 2.1 Remote Console Main Panel, Information Tab
12 Chapter 2
Preparing to Use LUN Expansion or Virtual LVI/LUN
Page 25

2.3 Changing to Modify Mode
If you are going to implement any changes for LUN Expansion or Virtual LVI/LUN, you must
be in Modify mode. The subsystem information icons (see Figure 2.2) are on the upper right
corner of the Remote Console Main panel, and they appear on all option panels as well.
These icons are described in detail in Hitachi Freedom Storage™ Lightning 9900™ V Series
Remote Console – Storage Navigator (MK-92RD101). If you want to change from View mode
to Modify mode and back, two of the icons are important:
The exclusive lock icons indicate the operation mode of all currently logged-in users. If
all users are operating in View mode, the Unlocked icon (
operating in Modify mode, or if subsystem maintenance or SNMP operations are being
performed, the Locked icon (
The Mode-Changing buttons allow users to change the operation mode between View
mode (
To change between View mode to Modify mode:
1. You must have administrator or write access for the option that you want to use. For
details on assigning user access, see Hitachi Freedom Storage™ Lightning 9900™ V Series
Remote Console – Storage Navigator (MK-92RD101).
) and Modify mode ( ). Note: Only one user at a time can be in Modify mode.
PRELIMINARY RELEASE
) is displayed. If a user is
) is displayed.
2. Verify that the subsystem is unlocked. If all users are operating in View mode, the
Unlocked icon (
) and the View Mode icon ( ) are displayed (see Figure 2.2). If a user
is operating in Modify mode, or if subsystem maintenance is being performed, the
Locked icon (
) is displayed, and you will not be able to change to Modify mode.
3. Select the Mode Changing icon, which should be in View mode ( ). Select on the icon,
and a confirmation message will display (see Figure 2.3). Select OK.
4. The Mode Changing icon will change from View mode to Modify mode (
Locked icon (
) will be displayed (see Figure 2.4).
), and the
5. Once you have applied your desired changes, you need to change back to View mode.
Select the Mode Changing icon (
). The confirmation message will display (see Figure
2.3). Select OK, and you will be back in View mode.
Hitachi Lightning 9900™ V Series LUN Expansion and Virtual LVI/LUN User’s Guide 13
Page 26

PRELIMINARY RELEASE
Figure 2.2 View Mode
Figure 2.3 Mode Changing Confirmation Message
Figure 2.4 Modify Mode
14 Chapter 2
Preparing to Use LUN Expansion or Virtual LVI/LUN
Page 27

PRELIMINARY RELEASE
Chapter 3 LUN Expansion (LUSE) Operations
3.1 The LUSE/VLL Panel, LUSE Tab Components
The LUN Expansion (LUSE)/Virtual LVI/LUN (VLL) button ( ) opens the LUSE/VLL panel.
The LUSE tab is the default view (see Figure 3.1).
Figure 3.1 LUSE/VLL Main Panel, LUSE Tab
Hitachi Lightning 9900™ V Series LUN Expansion and Virtual LVI/LUN User’s Guide 15
Page 28

PRELIMINARY RELEASE
The LDEV Information outline (see Figure 3.2) is on the upper left of the panel.
Figure 3.2 LDEV Information Outline Detail (From the LUSE/VLL Panel, LUSE Tab)
LDEV Information outline displays an outline view of the CU and LDEV numbers installed on
the subsystem (e.g., CU 00 and has a number of LDEVs, including 00:00). The format of the
LDEV number changes if the LDEV is an expanded (LUSE) volume, e.g., if LDEV volume 00:00
consisted of five concatenated LDEVs, its number would change to 00:00*5. The icon will be
one of the following:
indicates a normal (free) LDEV
indicates an expanded (LUSE) volume
16 Chapter 3 LUN Expansion (LUSE) Operations
Page 29

PRELIMINARY RELEASE
The LDEV table is on the upper right corner of the LUSE tab, and displays data for the LDEV
that you have selected in the LDEV Information outline.
Figure 3.3 LDEV Detail Table (From the LUSE/VLL Panel, LUSE Tab)
The LDEV Detail table displays detailed information for all open-system LDEVs in the
selected CU. If you have selected a normal LDEV, the information in this section is for the
top LDEV. If you have selected a LUSE volume, the information in this table is for all of the
LDEVs in the LUSE volume. The table displays the following information:
LDEV: shows an LDEV status icon, and the CU and LDEV number. If the selected LDEV is a
LUSE volume, the LDEV number of the top LDEV in the LUSE volume is displayed.
Emulation: shows the emulation type. If the selected LDEV is a LUSE volume, the
emulation type is displayed together with an asterisk and the number of volumes in the
LUSE volume (e.g., OPEN-E*5)
Capacity: shows the LDEV capacity, displayed in either MB or GB, depending on which
unit is selected in the Capacity Unit box.
RAID: shows the RAID level.
PG: shows a combination of the disk group, the parity group, and the CU number.
Paths: shows the number of paths (n) that is set for the LDEV.
Selected LDEVs: shows the number of LDEVs selected in the LDEV table
The Capacity Unit box allows you to select the capacity of the LDEV for display, in
either Gbyte (default view) or MByte.
Hitachi Lightning 9900™ V Series LUN Expansion and Virtual LVI/LUN User’s Guide 17
Page 30

PRELIMINARY RELEASE
The LDEV Operation detail is on the lower right of the LUSE tab.
Figure 3.4 LDEV Operation Detail (From the LUSE/VLL Panel, LUSE Tab)
The LDEV Operation detail has the following features:
The Select a Free LDEV drop-down box lists the free LDEVs of the selected CU.
The Expanded LDEVs list displays LDEVs that are selected as LUSE volume components.
An LDEV is added to this list when the <<Add button is selected (see below).
The<<Add button is used to move an LDEV that has been selected on the Free LDEVs list
to the Expanded LDEVs list.
The Delete>> button is used to move an LDEV that has been selected on the Expanded
LDEVs list to the Free LDEVs list.
The Free LDEVs table displays the free LDEVs that are eligible to become part of a LUSE
volume.
The Set button is used to set a LUSE volume to be created out of the volumes currently
in the Expanded LDEVs list. The new LUSE is displayed in blue on the LDEV table (on the
upper right corner of the LUSE tab; refer to Figure 3.3), but is not actually created until
you select the Apply button (see below).
The Apply button implements the settings to the subsystem.
The Cancel button cancels the setting on the LUSE operation panel.
18 Chapter 3 LUN Expansion (LUSE) Operations
Page 31

3.2 LUSE Operations
LUSE operations include the following:
Creating LUSE volumes (see section 3.2.1),
Releasing LUSE volumes (see section 3.2.2), and
Changing LUSE capacities (see section 3.2.3).
3.2.1 Creating a LUSE Volume
WARNING: LUSE creation is a destructive operation. Move and/or back up your data before
proceeding.
There are two ways to create a LUSE volume:
Using the LDEV Operation detail (on the lower right of the panel; refer to Figure 3.4), or
Using the LDEV table (on the upper right corner of the LUSE tab; refer to Figure 3.3).
PRELIMINARY RELEASE
3.2.1.1 Creating a LUSE Volume From the LDEV Operation Detail
1. Change to Modify mode (refer to section 2.3 if you need instructions). Select the LUN
Expansion (LUSE)/Virtual LVI/LUN (VLL) button (
The LUSE tab is the default view (refer to Figure 3.1).
2. Select a CU number from the LDEV Information outline (on the upper left corner of the
LUSE tab; refer to Figure 3.2).
3. Select the arrow button in the Select an LDEV drop-down box (on the lower right of the
panel; refer to Figure 3.4). Select the first LDEV for the LUSE from the list. A free LDEV
for a LUSE volume is displayed in the Free LDEVs list.
4. Select one or more LDEVs for the LUSE volume in the Free LDEVs list.
5. Select <<Add button to move the selected LDEVs from the Free LDEVs list to the
Expanded LDEVs list.
6. If you want to delete an LDEV from the Expanded LDEVs list and move it back to the
Free LDEVs list, select one or more volumes and then select the Delete>> button.
7. Select the Set button to display the Set LUSE Confirmation panel (see Figure 3.5). Select
OK if you want to create the LUSE as indicated. Select Cancel if you want to cancel.
Note: The new settings will appear on the panel in blue but are not yet implemented.
8. If you want to apply the changes to the subsystem, select Apply and then select OK on
the confirmation message (see Figure 3.6).
) to open the LUSE/VLL panel.
9. If you want to cancel the changes and not apply them to the subsystem, select Cancel
and then select OK on the confirmation message (see Figure 3.7).
Hitachi Lightning 9900™ V Series LUN Expansion and Virtual LVI/LUN User’s Guide 19
Page 32

PRELIMINARY RELEASE
Figure 3.5 Set LUSE Confirmation Panel
Figure 3.6 Apply Confirmation Message
Figure 3.7 Cancel Confirmation Message
20 Chapter 3 LUN Expansion (LUSE) Operations
Page 33

PRELIMINARY RELEASE
3.2.1.2 Creating a LUSE Volume From the LDEV Table
1. Change to Modify mode (refer to section 2.3 if you need instructions). Select the LUN
Expansion (LUSE)/Virtual LVI/LUN (VLL) button (
The LUSE tab is the default view (refer to Figure 3.1).
2. Select a CU number from the LDEV Information outline (on the upper left corner of the
LUSE tab; refer to Figure 3.2). The LDEV table (on the upper right corner of the LUSE
tab; refer to Figure 3.3) shows all LDEVs in the selected CU.
3. In the LDEV table, select and then right click the free LDEVs that you want to for the
LUSE volume. This will to display the Set LUSE Volume pop-up menu.
4. Select Set LUSE Volume to display the Set LUSE Confirmation panel (refer to Figure
3.5).
5. Select the OK button to create the LUSE volume, or select Cancel to cancel. Note: The
settings appear on the panel in blue but are not yet implemented.
6. If you want to apply the changes to the subsystem, select Apply and then select OK on
the confirmation message (refer to Figure 3.6).
7. If you want to cancel the changes and not apply them to the subsystem, select Cancel
and then select OK on the confirmation message (refer to Figure 3.7).
) to open the LUSE/VLL panel.
Hitachi Lightning 9900™ V Series LUN Expansion and Virtual LVI/LUN User’s Guide 21
Page 34

PRELIMINARY RELEASE
Figure 3.8 Selecting Free LDEVs for LUSE Volume
Figure 3.9 Set LUSE Volume Pop-Up Menu
22 Chapter 3 LUN Expansion (LUSE) Operations
Page 35

3.2.2 Releasing a LUSE Volume
WARNING: Releasing LUSE volumes is a destructive operation. Move and/or back up your data
before proceeding.
1. Change to Modify mode (refer to section 2.3 if you need instructions). Select the LUN
Expansion (LUSE)/Virtual LVI/LUN (VLL) button (
The LUSE tab is the default view (refer to Figure 3.1).
2. Select a CU number from the LDEV Information outline (on the upper left corner of the
LUSE tab; refer to Figure 3.2). The LDEV table (on the upper right corner of the LUSE
tab; refer to Figure 3.3) shows all LDEVs in the selected CU.
3. Select a LUSE volume in the LDEV table (on the upper right corner of the LUSE tab; refer
to Figure 3.3). Right-click the LUSE volume to display the Release LUSE Volume pop-up
menu.
4. Select Release LUSE Volume. The Release LUSE volume confirmation panel will display.
5. Verify that the LUSE volumes(s) listed in the confirmation panel are the one(s) that you
want to release. Note: The settings appear on the panel in blue but are not yet
implemented.
PRELIMINARY RELEASE
) to open the LUSE/VLL panel.
6. If you want to apply the changes to the subsystem, select Apply and then select OK on
the confirmation message (refer to Figure 3.6).
7. If you want to cancel the changes and not apply them to the subsystem, select Cancel
and then select OK on the confirmation message (refer to Figure 3.7).
Hitachi Lightning 9900™ V Series LUN Expansion and Virtual LVI/LUN User’s Guide 23
Page 36

PRELIMINARY RELEASE
Figure 3.10 Selecting LUSE Volume(s) To Be Released
Figure 3.11 Release LUSE Volume Pop-Up Menu
24 Chapter 3 LUN Expansion (LUSE) Operations
Page 37

PRELIMINARY RELEASE
Figure 3.12 Release LUSE Confirmation Panel
3.2.3 Changing LUSE Capacities
You may not change the capacity of an existing LUSE volume. If you want a LUSE volume to
have a different capacity, you must release the LUSE volume (refer to section 3.2.2) and
then re-define the LUSE volume (refer to section 3.2.1).
Hitachi Lightning 9900™ V Series LUN Expansion and Virtual LVI/LUN User’s Guide 25
Page 38

PRELIMINARY RELEASE
26 Chapter 3 LUN Expansion (LUSE) Operations
Page 39

PRELIMINARY RELEASE
Chapter 4 Virtual LVI/LUN (VLL) Operations
4.1 The Virtual LVI/LUN Panels
4.1.1 LUSE/VLL Panel, VLL Tab
The LUN Expansion (LUSE)/Virtual LVI/LUN (VLL) button ( ) opens the LUSE/VLL panel.
The LUSE tab is the default view. Select the VLL tab (see Figure 4.1).
Figure 4.1 LUSE/VLL Panel, VLL Tab
Hitachi Lightning 9900™ V Series LUN Expansion and Virtual LVI/LUN User’s Guide 27
Page 40

PRELIMINARY RELEASE
The Parity Group - LDEV outline (on the upper left of the VLL tab; see Figure 4.2) shows the
hierarchical structure of the subsystem, including a disk group number (e.g., Box 1), the
parity group number (e.g., 1-1), the RAID level (e.g., 3D+1P), and the CU number (e.g., 1-1(1).
Figure 4.2 Parity Group - LDEV Outline (From the LUSE/VLL Panel, VLL Tab)
The icon indicates that there are no pending VLL actions on that CU.
The icon indicates that VLL actions have been stored, but not yet implemented on
the subsystem.
28 Chapter 4 Virtual LVI/LUN Operations
Page 41

PRELIMINARY RELEASE
When you select a Control Unit in the Parity Group – LDEV outline, the LDEV Information
table (on the upper right of the VLL tab; see Figure 4.3) displays information about the
logical volumes in that control unit.)
Figure 4.3 LDEV Information Table (From the LUSE/VLL Panel, VLL Tab)
The No column shows the volume number. Note: Only 24 volumes will fit on a page. The
th
25
and higher volumes can be displayed by scrolling.
The CU:LDEV column shows an icon and the CU and LDEV number. Free indicates a free
space. The icon will be one of the following:
indicates a normal LDEV
indicates a LUSE volume
indicates an LDEV reserved for Hitachi CruiseControl
indicates a VLL volume
indicates a VLL volume that is reserved for Hitachi CruiseControl
indicates free space
The Emulation column shows the emulation type.
The Capacity column shows the capacity of the volume, in MB for open-system volumes
and in cylinders (Cyl) for mainframe volumes.
The Paths column shows the number of LU paths. Blank indicates no LU paths.
The Apply button implements the settings that have been made in this panel.
The Cancel button cancels the settings that have been made in this panel.
Table 4.1 shows how emulation types are grouped.
Table 4.1 Emulation Groups
Emulation Group Emulation Type
Group 1 3390-3, 3A, 3B, 3C, -L
Group 2 3390-3R
Group 3 OPEN-3, 8, 9, E
Hitachi Lightning 9900™ V Series LUN Expansion and Virtual LVI/LUN User’s Guide 29
Page 42

4.1.2 Set SSID Panel
PRELIMINARY RELEASE
Figure 4.4 Set SSID Panel
30 Chapter 4 Virtual LVI/LUN Operations
Page 43

PRELIMINARY RELEASE
The Set SSID panel has the following features:
The SSID outline displays CU numbers (e.g., CU 00), SSID boundary areas (e.g., 00-3F),
and SSID (e.g., 0004).
---- indicates a boundary area with no SSID
indicates that the CU number is not extracted.
indicates that the CU number is extracted.
indicates the LDEV boundary area.
The SSID table is used to set the SSID boundary area.
– The CU column shows a CU number that contains an LDEV boundary with no SSID.
– The LDEV boundary column shows the boundary area of the LDEV number with no
SSID.
– The SSID field shows the smallest available SSID.
The Input SSID field is used to change the available SSID given in the SSID setting area.
The Set button will input the selected SSID in the "Input SSID" entry box.
The <<Before button will cancel the SSID setting and return you to one of the following:
If you are installing CVs, the Install CV Panel (2) (see Figure 4.10) will display or
if you are initializing VLL volumes, the Volume Initialize Panel (see Figure 4.14) will
display.
The Next>> button will take you to one of the following:
If you are installing CVs, the Install CV Confirmation Panel (see Figure 4.12) will display,
or
If you are initializing VLL volumes, the Volume Initialize Confirmation Panel (see
Figure 4.17) will display.
The Cancel button will cancel the SSID setting and return you to the VLL tab.
Hitachi Lightning 9900™ V Series LUN Expansion and Virtual LVI/LUN User’s Guide 31
Page 44

PRELIMINARY RELEASE
4.2 Virtual LVI/LUN Operations
Before starting a VLL operation on a selected disk subsystem, be sure to disconnect the
mainframe volumes from the host and/or remove the LU paths to the open volumes. For
instructions on removing LU paths, see Hitachi Freedom Storage™ Lightning 9900™ V Series
LUN Manager User’s Guide (MK-92RD104).
Virtual LVI/LUN operations include:
Converting logical volumes to free space (see section 4.2.1),
Creating VLL volumes (see section 4.2.2),
Deleting VLL volumes (see section 4.2.3)
Initializing VLL volumes (see section 4.2.4).
4.2.1 Converting Logical Volumes to Space
WARNING: The volume to space function is a destructive operation. The data on the logical
volume(s) being converted will be lost when the operation is complete. The user is
responsible for backing up the data as needed before performing this operation.
The Volume to Space function allows you to convert one or more logical volumes (LDEVs) to
space, which deletes the selected LDEVs from that parity group. Note: The deleted LDEV(s)
will remain as space in that parity group. Any normal or Virtual LVI/LUN volume can be
deleted (made into space). To delete the last Virtual LVI/LUN volume, you must use the
Volume Initialize function (see section 4.2.4). You cannot convert the last normal volume
into space because this defines the emulation of the parity group.
The Volume to Space operation has the following restrictions:
The LDEV should not have a path definition (including Hitachi TrueCopy-S/390
TrueCopy, ShadowImage-S/390
The LDEV should not be a component of a LUSE volume.
The LDEV should not be reserved for Hitachi CruiseControl.
, and ShadowImage pair volumes).
, Hitachi
32 Chapter 4 Virtual LVI/LUN Operations
Page 45

PRELIMINARY RELEASE
To convert a normal volume to free space:
1. Change to Modify mode (refer to section 2.3 if you need instructions). Select the LUN
Expansion (LUSE)/Virtual LVI/LUN (VLL) button (
) to open the LUSE/VLL panel.
The LUSE tab is the default view (refer to Figure 3.1). Select the VLL tab (refer to
Figure 4.1).
2. On the Parity Group – LDEV Outline (on the upper left corner of the panel; refer to
Figure 4.2) Select the LDEV folder to open a list of Control Units. Select a Control Unit,
and the LDEV information table (on the upper right of the panel; refer to Figure 4.3)
displays detailed information about the LDEVs of the selected Control Unit.
3. Select one or more LDEVs from the CU:LDEV list. Note: You must leave at least one
normal or VLL volume on each LDEV.
4. Right-click on the selected LDEV to display the Volume to Space pop-up menu (see
Figure 4.5). Select Volume to Space in the pop-up menu to display the Volume to Space
Confirmation panel (see Figure 4.6).
5. If the listed volumes are correct, Select OK on the confirmation panel.
6. The change is not yet implemented in the subsystem, but the following changes will
appear in the VLL tab:
a) The selected LDEVs will be listed as Free
b) The figures in the Capacity column will not yet be updated.
c) The color of the CU icon that you manipulated in the Parity Group - LDEV outline
view changes from red to yellow. You cannot manipulate yellow CUs until you select
the Apply button or the Cancel button (see below), but you can perform additional
Volume to Space operations CUs with red icons.
7. If you want to apply the changes to the subsystem, select Apply and then select OK on
the confirmation message (refer to Figure 3.6). Note: When LDEV formatting is in
progress, a panel appears and indicates the progress.
8. If you want to cancel the changes and not apply them to the subsystem, select Cancel
and then select OK on the confirmation message (refer to Figure 3.7).
Hitachi Lightning 9900™ V Series LUN Expansion and Virtual LVI/LUN User’s Guide 33
Page 46

PRELIMINARY RELEASE
Figure 4.5 Volume to Space Pop-Up Menu
Figure 4.6 Volume to Space Confirmation Panel
34 Chapter 4 Virtual LVI/LUN Operations
Page 47

4.2.2 Creating VLL volumes
The Install VLL volume function allows you to define and install one or more Virtual LVI/LUN
volumes under an existing volume.
Note: The Install VLL volume Function allocates VLL volumes in the order in which the
function finds sufficient free space for the VLL volumes, so for optimum space allocation you
should allocate VLL volumes in descending order of capacity.
1. Change to Modify mode (refer to section 2.3 if you need instructions). Select the LUN
Expansion (LUSE)/Virtual LVI/LUN (VLL) button (
The LUSE tab is the default view (refer to Figure 3.1). Select the VLL tab (refer to
Figure 4.1)
2. On the Parity Group – LDEV Outline (on the upper left corner of the panel; refer to
Figure 4.2) Select the LDEV folder to open a list of Control Units. Select a Control Unit,
and the LDEV information table (on the upper right of the panel; refer to Figure 4.3)
displays detailed information about the LDEVs of the selected Control Unit.
3. Double-click any part of the Parity Group - LDEV outline view to display the Install CV
pop-up menu (see Figure 4.7).
PRELIMINARY RELEASE
) to open the LUSE/VLL panel.
4. Select Install CV to display the Install CV Panel (1) (see Figure 4.8). On this panel, do
the following:
a) In the Emulation Type drop-down box, select the emulation type.
b) In the Size field enter the capacity of the VLL volume you want to create, either in
MB for open systems or in cylinders (Cyl) for mainframe volumes. The available
capacity range (minimum - maximum) is shown to the right of the Size field. The
value can be incremented by one MB (open systems) or by one Cylinder (mainframe
systems)
c) Select the Set button, and the selected volume will be displayed
d) Repeat the above steps to create more VLL volumes.
e) If you make a mistake, right-click on the volume to display the Clear pop-up menu,
and select Clear.
f) To delete a VLL volume, select the DV in the setting list and select the Delete
button.
Instructions continue on the following page.
Hitachi Lightning 9900™ V Series LUN Expansion and Virtual LVI/LUN User’s Guide 35
Page 48

PRELIMINARY RELEASE
5. After creating all of the VLL volumes you want to create, select the Next button to
display the Install CV Panel (2) (see Figure 4.10), which will display the VLL volumes to
be created in the table on the top. In this panel:
a) Select one or more VLL volume numbers to which you want to assign a CU number
and an LDEV number.
b) Select a desired CU number from the Select CU Number pull-down menu.
c) Select a desired LDEV number from the white LDEV numbers in the Select LDEV
Number: table. Gray indicates LDEV numbers that are not selectable, white
indicates unused LDEV numbers, and blue indicates available LDEV numbers. The CU
and LDEV number appear in the CU:LDEV field of the VLL volume setting information
table.
d) If you want to change a CU:LDEV number that is already assigned, you must remove
the CU:LDEV number and then assign a new CU:LDEV number. Select one or more
VLL volume numbers corresponding to the CU:LDEV numbers that you want to
remove, then Right-click the mouse button and then select Clear from the pop-up
menu (see Figure 4.9).
e) To set two or more VLL volumes, repeat the above steps.
6. After setting all CU numbers and LDEV numbers, select the Next button.
7. If the boundary area of the selected LDEV number does not have an SSID, the SSID
setting panel appears (see Figure 4.11). In this panel:
a) Select the CU number.
b) Enter a new SSID in the Input SSID entry box.
c) Select the Set button. The SSID is displayed in the SSID field of the SSID setting area.
d) Repeat the above steps to set two or more SSIDs.
8. After setting all of the SSIDs, select the Next button to display the Install CV
Confirmation panel (see Figure 4.12).
9. Select OK, and you will be returned to the VLL tab.
10. The change is not yet implemented in the subsystem, but the following changes will
appear in the VLL tab:
a) The figures in the Capacity column will not yet be updated.
b) The color of the CU icon that you manipulated in the Parity Group - LDEV outline
view changes from red to yellow. You cannot manipulate yellow CUs until you select
the Apply button or the Cancel button (see below), but you can install additional
CVs in CUs with red icons.
11. If you want to apply the changes to the subsystem, select Apply and then select OK on
the confirmation message (refer to Figure 3.6). Note: When LDEV formatting is in
progress, a panel appears and indicates the progress.
12. If you want to cancel the changes and not apply them to the subsystem, select Cancel
and then select OK on the confirmation message (refer to Figure 3.7).
36 Chapter 4 Virtual LVI/LUN Operations
Page 49

PRELIMINARY RELEASE
Figure 4.7 Install CV Pop-Up Menu
Figure 4.8 Install CV Panel (1)
Figure 4.9 Clear Pop-Up Menu
Hitachi Lightning 9900™ V Series LUN Expansion and Virtual LVI/LUN User’s Guide 37
Page 50

PRELIMINARY RELEASE
Figure 4.10 Install CV Panel (2)
Figure 4.11 Set SSID Panel (Installing VLL Volumes)
38 Chapter 4 Virtual LVI/LUN Operations
Page 51

PRELIMINARY RELEASE
Figure 4.12 Install CV Confirmation Panel
Hitachi Lightning 9900™ V Series LUN Expansion and Virtual LVI/LUN User’s Guide 39
Page 52

PRELIMINARY RELEASE
4.2.3 Deleting a VLL volume
To delete an individual Virtual LVI/LUN volume within an LDEV or parity group, use the
volume to space operation (refer to section 4.2.1).
To convert a Virtual LVI/LUN volume to a normal volume, you must initialize the volume (see
section 4.2.4).
4.2.4 Initializing a Virtual LVI/LUN Volume
WARNING: The Volume Initialize function is a destructive operation. The data on the Virtual
LVI/LUN volume being converted will be lost when the operation is complete. The user is
responsible for backing up the data as needed before performing this operation.
The Volume Initialize function allows you to convert a Virtual LVI/LUN volume back to a
normal volume. This operation de-installs all variable sized volumes under a Virtual LVI/LUN
volume and then reformats the Virtual LVI/LUN volume as a normal volume (e.g., 3390-3).
The Volume Initialize operation has the following restrictions:
The LDEV should not have a path definition (including Hitachi TrueCopy-S/390
TrueCopy, ShadowImage-s/390
, and ShadowImage pair volumes).
, Hitachi
The LDEV should not be a component of a LUSE volume.
The LDEV should not be reserved for Hitachi CruiseControl.
40 Chapter 4 Virtual LVI/LUN Operations
Page 53

PRELIMINARY RELEASE
To initialize a VLL volume:
1. Change to Modify mode (refer to section 2.3 if you need instructions). Select the LUN
Expansion (LUSE)/Virtual LVI/LUN (VLL) button (
) to open the LUSE/VLL panel.
The LUSE tab is the default view (refer to Figure 3.1). Select the VLL tab (refer to
Figure 4.1)
2. On the Parity Group – LDEV Outline (on the upper left corner of the panel; refer to
Figure 4.2), select the LDEV folder to open a list of Control Units. Select a Control Unit,
and the LDEV information table (on the upper right of the panel; refer to Figure 4.3)
displays detailed information about the LDEVs of the selected Control Unit.
3. Right-click any part of the Parity Group - LDEV outline view to display the Volume
Initialize pop-up menu (see Figure 4.13).
4. Select Volume Initialize to display the Volume Initialize panel (see Figure 4.14). On this
panel:
c) Select one or more VLL volume numbers.
d) Select a desired CU number from the Select CU Number drop-down list.
e) Select a desired LDEV number from white LDEV numbers in the Select LDEV
Number: table. The CU and LDEV number appear in the CU:LDEV field.
f) If you want to change a CU:LDEV number that is already assigned, select one or
more volume numbers corresponding to the CU:LDEV numbers that you want to
remove, then right-click the mouse button to display the Clear Pop-Up Menu (see
Figure 4.15). Select Clear.
5. After setting all CU numbers and LDEV numbers, select the Next button.
6. If the boundary area of the selected LDEV number does not have a SSID, the SSID setting
panel (see Figure 4.16). On that panel:
a) Select the CU number.
b) Enter a new SSID in the Input SSID entry box.
c) Select the Set button.
7. After setting all SSIDs, select the Next button.
8. The Volume Initialize Confirmation Panel (see Figure 4.17) displays. Verify that the
information is correct, then select OK.
Instructions continue on the next page.
Hitachi Lightning 9900™ V Series LUN Expansion and Virtual LVI/LUN User’s Guide 41
Page 54

PRELIMINARY RELEASE
9. You will be returned to the VLL tab. The change is not yet implemented in the
subsystem, but the following changes will appear in the VLL tab:
a) The figures in the Capacity column will not yet be updated.
b) The color of the CU icon that you manipulated in the Parity Group - LDEV outline
view changes from red to yellow. You cannot manipulate yellow CUs until you select
the Apply button or the Cancel button (see below), but you can initialize additional
VLL volumes in CUs with red icons.
10. If you want to apply the changes to the subsystem, select Apply and then select OK on
the confirmation message (refer to Figure 3.6). Note: When LDEV formatting is in
progress, a panel appears and indicates the progress.
11. If you want to cancel the changes and not apply them to the subsystem, select Cancel
and then select OK on the confirmation message (refer to Figure 3.7).
Figure 4.13 Volume Initialize Pop-Up Menu
42 Chapter 4 Virtual LVI/LUN Operations
Page 55

PRELIMINARY RELEASE
Figure 4.14 Volume Initialize Panel
Figure 4.15 Clear Pop-Up Menu
Hitachi Lightning 9900™ V Series LUN Expansion and Virtual LVI/LUN User’s Guide 43
Page 56

PRELIMINARY RELEASE
Figure 4.16 Set SSID Panel (Volume Initialize)
Figure 4.17 Volume Initialize Confirmation Panel
44 Chapter 4 Virtual LVI/LUN Operations
Page 57

PRELIMINARY RELEASE
Chapter 5 Troubleshooting
5.1 Troubleshooting
For troubleshooting information on the 9900V subsystem, please refer to the Hitachi
Freedom Storage™ Lightning 9900™ V Series User and Reference Guide (MK-92RD100).
For information on the 9900V Remote Console software error codes, please refer to the
Hitachi Freedom Storage™ Lightning 9900™ V Series Hitachi Remote Console – Storage
Navigator Error Codes (MK-92RD132).
The user is responsible for the operation and normal maintenance of the PC(s), which host
the 9900V Remote Console software. Here are some guidelines for troubleshooting 9900V
Remote Console software operations:
Check the cabling and the LAN. Verify that both the computer and LAN cabling are
firmly attached, and that the LAN is operating properly.
Reboot the PC. Close any programs that are not responding. If necessary, reboot the PC
and restart the 9900V Remote Console – Storage Navigator Java™ applet program.
Check for any General Error Conditions. Check the troubleshooting information in the
Hitachi Lightning 9900V Hitachi Remote Console – Storage Navigator User’s Guide. The
document lists general error conditions and provides recommended resolution for each
condition. If you are still unable to resolve an error condition, please call the Hitachi
Data Systems Support Center for assistance (see section 5.2 for contact information).
Check the status lamp on the Remote Console Main Panel (Status tab). If the lamp
becomes yellow (
) or red ( ), confirm the severity level of the error. If you are
unable to resolve an error condition, please contact the Hitachi Data Systems Support
Center (see section 5.2).
Download the Remote Console trace files using the FD Dump Tool. If you are unable to
resolve an error condition, copy the 9900V Remote Console configuration information
onto diskette using the FD Dump Tool. See Hitachi Freedom Storage™ Lightning 9900™ V
Series Remote Console – Storage Navigator User’s Guide (MK92RD101) for instructions on
using the FD Dump tool. Contact the Hitachi Data Systems Support Center (see section
5.2), and give this information to the Hitachi Data Systems service personnel.
Hitachi Lightning 9900™ V Series LUN Expansion and Virtual LVI/LUN User’s Guide 45
Page 58

PRELIMINARY RELEASE
Table 5.1 General Error Conditions
Error Condition Probable Cause / Recommended Action
The Remote Console experiences an
error.
Only the Exit and Refresh buttons are
effective when accessing the SVP
from the Remote Console.
Abnormal End / No Response
An internal error occurs, or a browser
ends abnormally (forcibly).
A network error occurred. There is no
response to an operation even after
30 minutes passed.
Incorrect Display/ Disoperation
After dragging and dropping objects to
another location or area, the scroll bar
on that location becomes unusable.
A focus disappears from the edit box. Close all panels including the Storage Device List panel, and then log on to the
The display of the browser becomes
incorrect, because some GUI items
such as labels and icons cannot be
downloaded properly.
Save the Java™ log file on the Remote Console, and report to the Hitachi Data
Systems Technical Support Center.
For Windows
c:\Documents and Settings\login user ID\plugin131.trace
Restart the Remote Console.
The SVP might not be ready or perform some write processes from the other system.
Wait for a while, and then select the Refresh button.
Close all panels including the Storage Device List panel, and then log on to the
Remote Console again. If the same error occurs, restart the Remote Console.
Restart the Remote Console.
Close all panels including the Storage Device List panel, and then log on to the
Remote Console again.
Remote Console again.
Log off from the Remote Console and then re-log in.
®
2000, the Java™ log file is in the following place:
A Remote Console panel is closed by:
– Selecting the
panel,
– Using the commands such as File
and Exit on the browser, or
– Pressing the Alt and F4 keys.
Maintenance / Others
The program on the SVP is updated. Exit all browsers on the Remote Console, and then restart the viewers. If in doubt, you
The time of the clock on the Remote
Console is reset.
Remote Console processing is
temporarily delayed.
If you are unable to resolve an error
condition.
button on the
Wait for an RMI™ time-out (default is 1 min.), and then restart the Remote Console.
should exit and restart the viewers.
Clear cache (the existing temporary Internet files) of the browser before logging on to
the Remote Console.
An internal processing (e.g., configuration change, Program Product. check,
operational information acquisition, etc.) might be being executed on the SVP (web
server).
Copy the 9900V Remote Console configuration information onto floppy disk(s) using
the FD Dump Tool and contact the Hitachi Data Systems Technical Support Center
(see section 5.2).
46 Chapter 5 Troubleshooting
Page 59

PRELIMINARY RELEASE
5.2 Calling the Hitachi Data Systems Technical Support Center
If you need to call the Hitachi Data Systems Technical Support Center, be sure to provide as
much information about the problem as possible. Include the circumstances surrounding the
error or failure, the 9900V Remote Console configuration information saved in the floppy
diskette(s) by the FD Dump Tool, the exact content of any messages displayed on the
Remote Console, and the severity levels and reference codes displayed on the Status tab of
the Remote Console Main panel. The worldwide Hitachi Data Systems Technical Support
Centers are:
Hitachi Data Systems North America/Latin America
San Diego, California, USA
1-800-348-4357
Hitachi Data Systems Europe
Contact Hitachi Data Systems Local Support
Hitachi Data Systems Asia Pacific
North Ryde, Australia
011-61-2-9325-3300
Hitachi Lightning 9900™ V Series LUN Expansion and Virtual LVI/LUN User’s Guide 47
Page 60

PRELIMINARY RELEASE
48 Chapter 5 Troubleshooting
Page 61

PRELIMINARY RELEASE
Glossary, Acronyms, and Abbreviations
Command
Control
Interface (CCI)
CruiseControl CruiseControl performs automatic relocation of volumes to optimize
CU Control Unit. The 9900V subsystem supports a maximum of 16 logical
Custom Access A feature that allows a non-administrator to be assigned write access to
DASD Direct-Access Storage Device
DKC Disk Controller. The 9900V disk controller provides up to sixteen logical
DKU Disk Array Unit. The 9900V subsystem has up to six disk array frames
ESCON
Export File The Export File function allows you to export data (e.g., monitoring data
®
Enterprise System Connection
System administrators can enter Command Control Interface (CCI)
commands from open-system hosts to perform Hitachi TrueCopy and
ShadowImage operations on logical devices.
performance.
control unit (CU) images, numbered sequentially from 0 to F. Each CU
image controls up to 256 LDEVs.
one or more of the restricted Remote Console functions.
control unit (CU) images and supports 3990-6, 3990-6E, and 2105-F20 disk
controller emulation.
containing the storage components (disk drive arrays) of the subsystem.
used by Performance Monitor or Hitachi TrueCopy) to data files.
FD floppy disk
FD Dump Tool This function downloads the 9900V Remote Console configuration
information onto a floppy diskette or a hard disk drive, and is generally
used for troubleshooting purposes.
FICON™ Fibre Connection
FlashAccess FlashAccess (Dynamic Cache Residence) enables you to store specific high-
usage data directly in cache memory to provide virtually immediate data
availability.
GB gigabyte(s)
Hi-Star™ Hierarchical Star Network architecture improves the total performance of
internal data transfer by using high-speed crossbar changes.
HMBR Hitachi Multiplatform Backup/Restore
Java™ applet
program
JVM™ Java Virtual Machine™ is the web client Java™ applet program that is
The web client Java™ applet program runs on a browser on the Remote
Console. When a Remote Console user accesses and logs on to the desired
SVP, the web client Java™ applet is downloaded from the SVP to the
Remote Console. The web client Java™ applet program runs on a browser
on the Remote Console.
installed in each SVP and runs using a browser to provide a user-friendly
interface for the 9900V Remote Console functions.
Hitachi Lightning 9900™ V Series LUN Expansion and Virtual LVI/LUN User’s Guide 49
Page 62

PRELIMINARY RELEASE
kB kilobyte(s)
LAN local-area network
LBA logical block address
LDEV logical device. An LDEV used by mainframe hosts can be called a device,
logical volume image (LVI) or a volume. An LDEV used by open-system
hosts is called a logical unit (LU).
LU An LDEV used by open-system hosts is called a logical unit (LU). Open-
system fibre interfaces access LUs that are mapped to one or more LDEVs.
LUN logical unit number is an identifying number for an LU.
LUN Manager Remote Console software option that enables you to configure the 9900V
fibre-channel ports for operational environments, and restrict host access
to LUs.
LUSE LUN Expansion. This function allows you to concatenate two or more
volumes into a larger volume.
LVI Logical Volume Image (also called device emulation)
MB
MIB
Open Volume
Management
Parity group A set of hard disk drives that have the same capacity and are treated as
RMI™ Remote Method Invocation. RMI™ is a remote procedure call, which allows
R-SIM remote service information message (generated by the 9900Vwhen it
SIM service information message (generated by a subsystem when it detects an
ShadowImage An option that allows you to maintain subsystem-internal copies of all user
SNMP simple network management protocol (part of the TCP/IP protocol suite)
SSID storage subsystem ID. The 9900Vis configured with one SSID for each 64
SVP Service Processor (this is the notebook computer that is inside the
megabyte(s)
message information block
A suite of options that includes Virtual LVI/LUN and LUSE (LUN Expansion).
Virtual LVI/LUN divides a logical volume for open-system into two or more
volumes. LUN Expansion allows you to concatenate two or more volumes
into a larger volume.
one group. A parity group contains both user data and parity information,
which allows the user data to be accessed in the event that one or more of
the drives within the group are not available.
Java™ objects stored in the network to be run remotely.
detects an error or service requirement).
error or service requirement).
data for purposes such as data backup and duplication.
devices, and up to four SSIDs for each CU image.
RAID450).
TCP/IP transmission control protocol/internet protocol
TID target ID
Trap An SNMP agent initiates trap operations when R-SIMs occur, in order to
send the R-SIMs to the SNMP manager (see Figure 4.1). An SNMP agent can
be configured to deliver traps to more than one SNMP manager.
TrueCopy TrueCopy is an option product that allows you to perform host-free remote
50 Glossary, Acronyms and Abbreviations
Page 63

PRELIMINARY RELEASE
copy operations between 9900V subsystems in different locations for data
backup and disaster recovery purposes.
UCB unit control block
User account
list
The user account list includes user information such as user ID, password,
and write permission for each 9900V option.
VLL Virtual LVI/ LUN is an option that enables you to configure custom-size
logical device images and logical units, which are smaller than standardsize devices.
Volser volume serial number (mainframe volume identifier, not related to the
LDEV ID)
Remote
Console
The Remote Console communicates directly with the service processor
(SVP) of each attached subsystem to obtain subsystem configuration and
status information and send user-requested commands to the subsystem.
WWN Worldwide Name is a unique identifier for a particular open-system host
bus adapter, consisting of a 64-bit physical address (the IEEE 48-bit format
with 12-bit extension and 4-bit prefix).
Hitachi Lightning 9900™ V Series LUN Expansion and Virtual LVI/LUN User’s Guide 51
Page 64

PRELIMINARY RELEASE
52 Glossary, Acronyms and Abbreviations
 Loading...