

Page 1
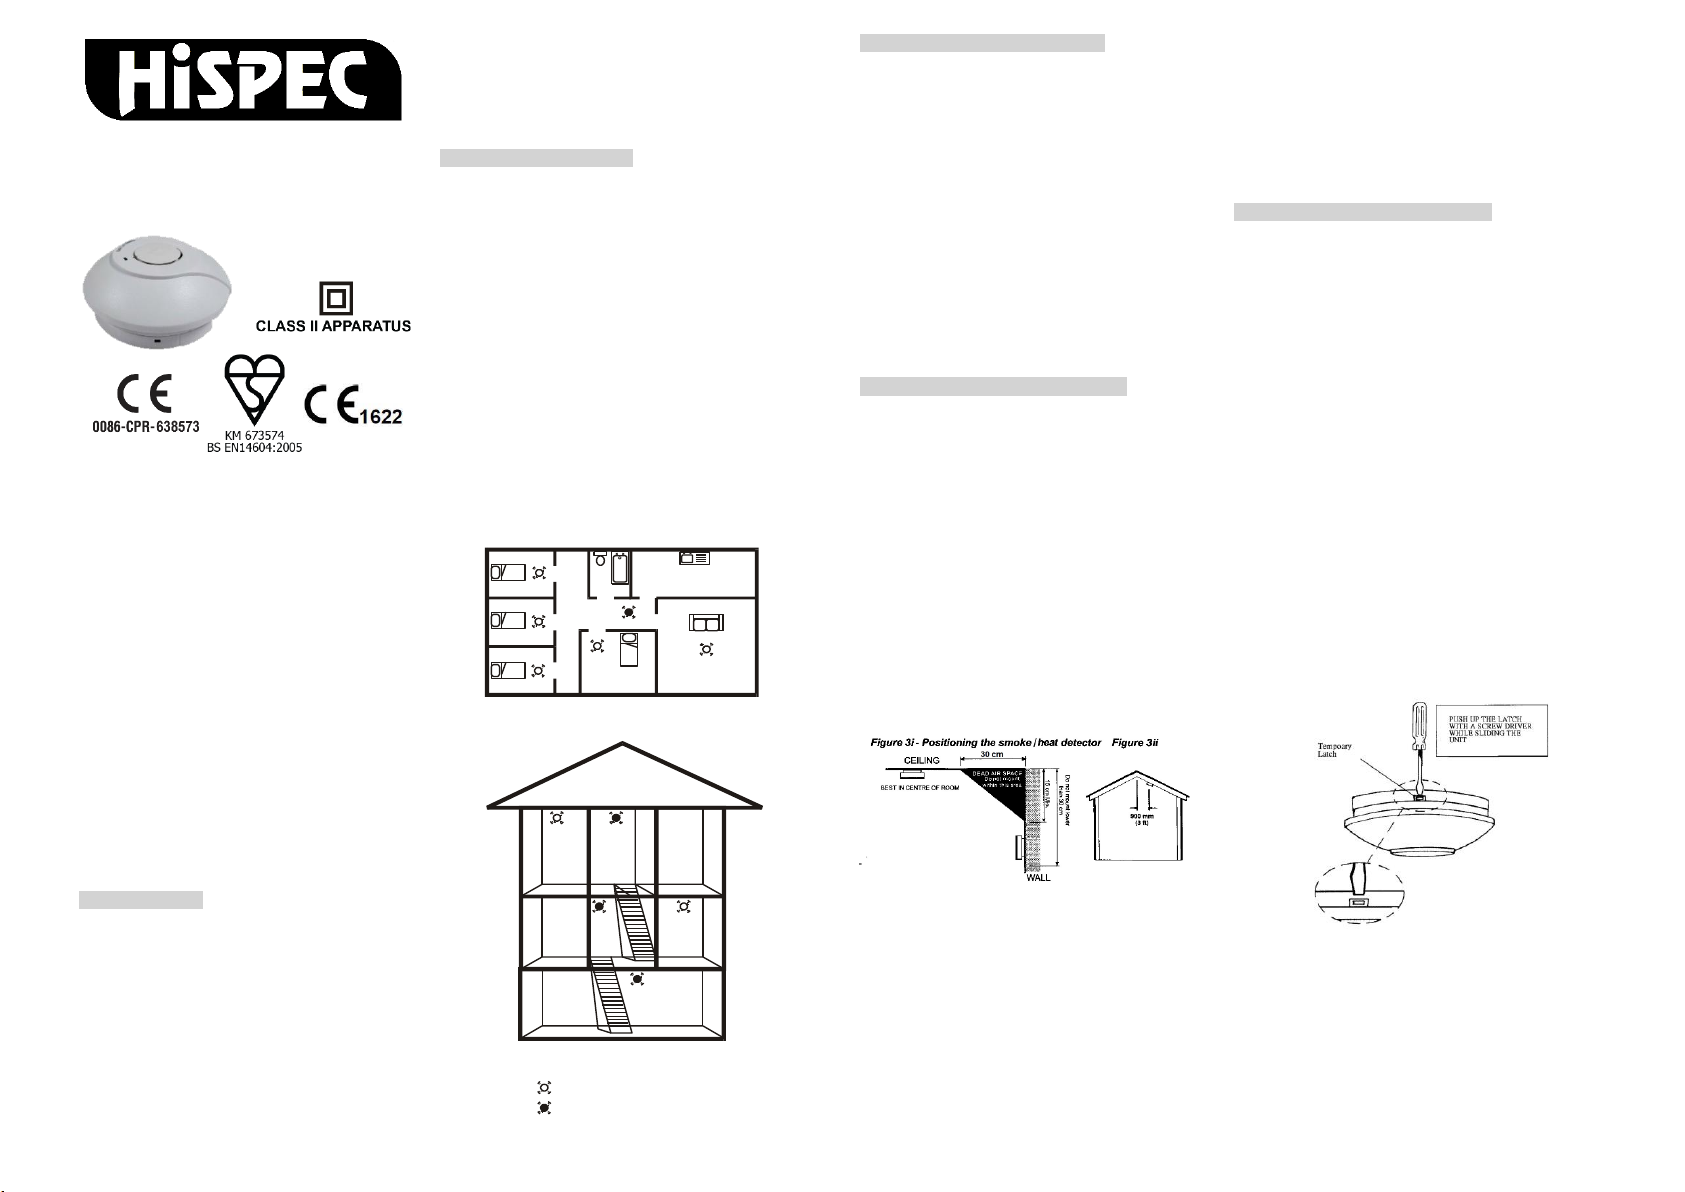
220~240V AC OPERATED
LANDING
HALL
BATHROOMBEDROOM
LIVING
ROOM
KITCHEN
BASEMENT
LIVING
ROOM
BATHROOM
KITCHEN
BEDROOM
BEDROOM
BEDROOM
BEDROOM
HALL
MAXIMUM PROTECTION
MINIMUM PROTECTION
KEY
FIGURE 1 - SINGLE STOREY DWELLING
FIGURE 2 - 2/3 STOREY DWELLING
Figure 4 – Release Temporary Lock
PHOTOELECTRIC
SMOKE ALARM
with RADIO LINK (868MHz)
MODEL: HSSA PE RF
(With 9V Battery Back-up)
Main Features :
Photoelectric Sensor For Slow
Smoldering Fires
Power / Alarm indicator
HUSH FEATURE
Battery Back Up
Low Battery Warning
Wireless interconnectable (Up To 20
Hispec smoke And/Or heat Alarms)
Dip switch for coding
Supplied with Fixing Kit
Loud 85dB Alarm Signal
This instruction leaflet contains important information on
the correct installation and operation of your heat alarm.
Read this leaflet fully before attempting installation and
retain for future reference.
SPECIFICATION
Power Source : 220-240Vac~ 50-60Hz with 9V battery
Battery Back-up : 9V Carbon Zinc (Golden Power 1604D,
Battery Back-up Life : In the event of a break in the mains
Operation Current : <40mA operation (In Alarm)
Transmit & Receive frequency: 868.4MHz
Digital modulation method: GFSK
Transmitting & Receiving distance: over 80M in open space
Transmit data rate : 50Kbps
Coding selection : 16 combinations
back-up (battery included)
1604S Golite, Gold Peak 1604P) Alkaline
Battery Gold Peak 1604A, Energizer 522,
Duracell MN1604)
supply the battery will give detector
operation for one month minimum
Max. wireless interconnection: 20 units
Max. wire interconnection : 40 units
Sensitivity to smoke : 0.65-1.52 % per foot obscuration
Operation Temperature : 4℃-50℃
Ambient Humidity : 10%-90%
Alarm Sound Level : 85 Decibels at 3 metres
PRODUCT DESCRIPTION
HSSA/PE/RF is a multiple station photoelectric smoke alarm with a radio
link mounting base which allows it to be interconnected to other Hispec
alarms. (Can be mixed and matched with the Hispec Photoelectric Smoke
Alarm HSSA/PE/RF and the Heat Alarm HSSA/HE/RF) The radio link
base has both signal transmitter and receiver built-in. It transmits a Radio
Frequency(RF) alarm signal when the unit detects smoke. When it
receives an RF alarm signal from other unit, it will sound. This
interconnect feature allow up to 20 units to be interconnected together
within 100 meters and thus all alarms will sound when any one is
activated. Using the wireless signal transmission technology awards
wiring location problem and allows the smoke and heat alarms to be
placed further apart when compared to a wired installation.
Note: This smoke alarm cannot be connected to any other device
such as a fire alarm panel.
All the Smoke Alarms should be interconnected to ensure the early
warning will be heard, particularly by somebody sleeping. A properly
designed early warning fire system ensures the alarm is given before the
escape routes become blocked with smoke.
LOCATING THE SMOKE ALARM
If your dwelling is on a single storage, for minimum protection you
should fit an alarm in a corridor or hallway between the sleeping
and living areas (incl. Kitchens). Place it as near to the living
areas as possible and ensure the audible alarm can be heard
when the bedrooms are occupied. See Figure 1 for examples.
If your dwelling is multi-storey, for minimum protection one alarm
should be fitted at the bottom of the staircase with further alarms
fitted on each upstairs landing. This includes basements but
excludes crawl spaces and unfinished attics. See Figure 2 for
examples.
NOTE: For maximum protection an alarm should be fitted in
every room (except kitchen, bathroom and garage).
DO NOT FIT AN ALARM IN THE KITCHEN OR BATHROOM, as
cooking fumes or steam may trigger the alarm.
DO NOT FIT ALARM IN GARAGE, as exhaust fumes are likely to
set it off.
POSITIONING THE SMOKE ALARM
Ceiling Mounting
As hot smoke rises and spread out, it is advisable to mount on a
ceiling in a central position. Avoid areas where there is no air
circulation. E.g. Corners of rooms and keep away from items
which may prevent the free flow of air. Place the unit at least 300
mm from and light fitting or decorative object which might obstruct
smoke entering the alarm. Keep at least 300 mm away from walls.
See Figure 3i.
Wall Mounting
Do not mount tight into the corners. Put the top edge of your
smoke alarm between 150 and 300mm below the ceiling. Keep at
least 300mm from room corners. See Figure 3i
On a Sloping Ceiling
In areas with sloping or peaked ceilings install your Smoke Alarm
900mm from the highest point measured horizontally because
“dead air” at the apex may prevent smoke from reaching the unit.
See Figure 3ii.
In very dusty or dirty environments such as workshops.
Locate unit at least 1.5m and route wiring at least 1m away
for fluorescent light fittings as electrical “noise” and/or
flickering may affect the unit. Do not wire into the same
circuit as fluorescent lights or dimmers.
Do not locate in insect infested areas. Insects and
contamination on the alarm sensor can increase its response
time.
INSTALLING THE SMOKE ALARM
WARNING – This smoke alarm is mains powered and requires
wiring by a qualified electrician in accordance with the current
IEE Regulations for Electrical Installations (BS7671).
The circuit used to power the smoke alarm must be a dedicated
permanent supply that cannot be switched off accidentally by the
normal user. Before installing ensure the electrical supply is isolated.
WARNING: To prevent injury, this smoke alarm must be
securely attached to the ceiling/wall in accordance with the
installation instructions.
All hardwired interconnect smoke alarms must be supplied from a
single power circuit and a common neutral must be used.
WARNING: Do not connect the interconnect wire to Live or
Neutral.
Disconnect the AC main power from the circuit that is going
to be used.
Having established the mounting location install a junction
box suitable for locating the termination point. Ensure that
there is no other electrical wiring or pipe work in the area
adjacent to the mounting surface.
Unlock the detector unit from the base by pushing up the
temporary latch with a screw driver. See Figure 4
Areas to be avoided include the following :
Situations where the temperature may fall below 04℃or
rise above 50℃
Humid areas such as bathrooms, kitchens, shower rooms
where the relative humidity may exceed 90%
Near a decorative object, door, light fitting, window molding
etc., that may prevent smoke from entering the alarm.
Fume filled environments such as garages. Exhaust gases
may cause false alarms.
Adjacent to or directly above hot components such as
radiators or wall vents that can effect the direction of air
currents.
Set the coding. Each unit comes a four positions dip switch
(see Figure 6) for coding the transmit and receive frequency
to prevent interference with any other RF equipment. There
are 16 combinations.
Page 2
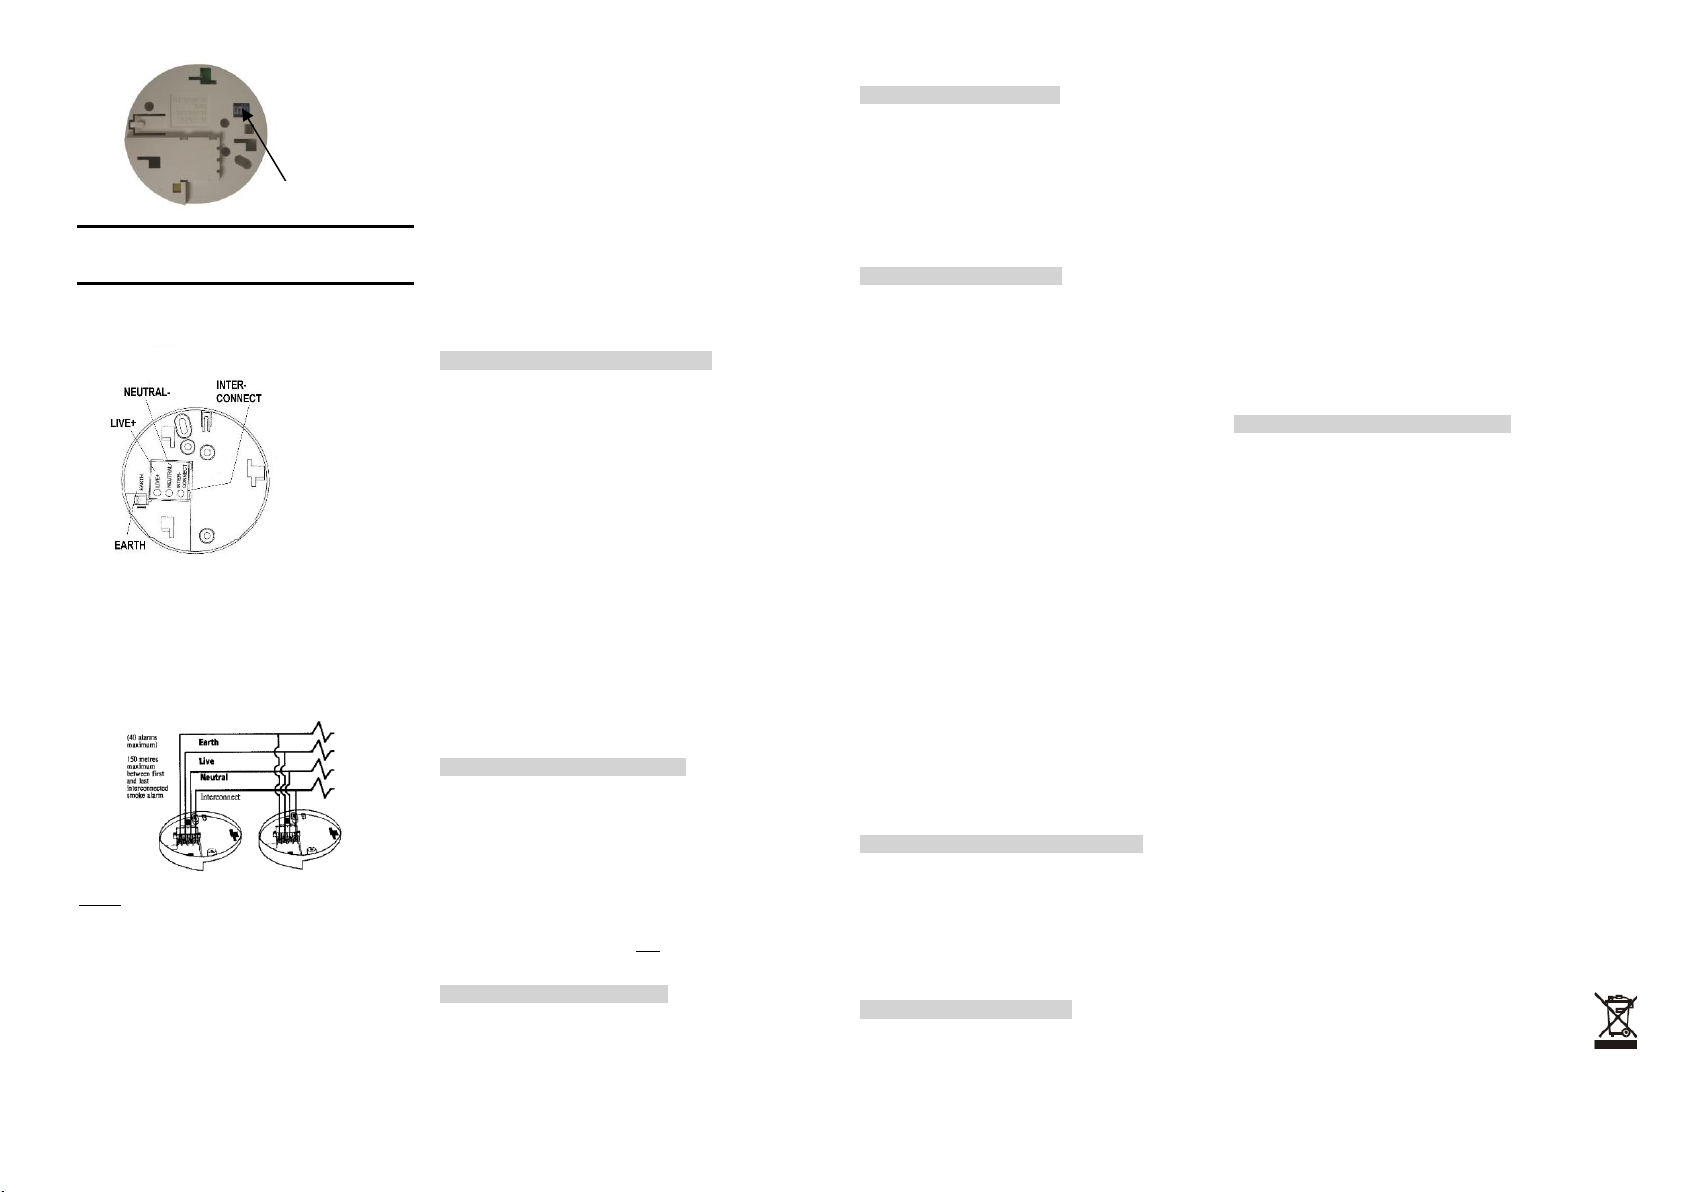
Figure 6 – DP Switch setting facility
4 Position DIP Switch
IMPORTANT!
The setting of the dip switch must be the same on all
interconnected units.
Connect the wires to the correct terminals on the mounting
base and fix the mounting base in position. Ensure the
screws are fully tightened. See Figure 5.
Figure 5 – Wiring & Interconnect facility
The alarm must be wired in accordance with National wiring codes.
LIVE : connect to house wires coloured Brown, Red or marked
with L.
NEUTRAL : connect to house wires coloured Blue, Black or
marked with N.
INTERCONNECT : normally not used except to hardwire
interconnect to the mains smoke (Hispec model HSSA/PE) or heat
alarm (Hispec model HSSA/HE). Never use EARTH wire for
interconnect wire.
Remark
HSSA/PE/RF smoke alarm & HSSA/HE/RF heat alarm are
detectors, which can be interconnected with each other by
wireless radio links.
In another case, the user will have the option to interconnect them
to the other hard wired type smoke alarms by the wiring be the
“interconnection terminal” on the base.
WARNING: Connection to the EARTH terminal is not needed
for correct functioning of the Smoke Alarm. It is just for
conveniently terminating any earth supply wire coloured
green or green/yellow. It does not provide protective
earthing for the Smoke Alarm.
Insert a 9V battery firmly into battery compartment on the rear of
the alarm. NOTE POLARITY OF CONNECTIONS. Ensure the
metal tab is fully depressed when the battery has been fitted.
NOTE – For the safety of the end user the smoke alarm cannot
be fitted without its battery.
Before assembly to base plate test the correct operation of the
smoke alarm (operating from the battery only) by depressing the
test button on the front of the alarm. The unit should emit a loud
pulsating alarm.
Assemble alarm onto the mounting plate by sliding it in according
to the direction of the arrows.
Restore the AC supply
Test the correct operation of the smoke alarm by depressing the
test button on the front of the detector. The unit should emit a loud
pulsating alarm.
Should use 2.1mm wire for connection.
OPERATING YOUR SMOKE ALARM
Once the smoke alarm has been installed a small GREEN indicator light
(LED) should be visible through the alarm grill indicating that AC supply
is healthy. A RED indicator light (LED) should also flash approximately
once a minute to indicate the battery is healthy and the unit is operating
properly.
If smoke is detected, the unit will emit a load pulsating alarm and a RED
indicator light (LED) will be flashing quickly at the same time until the air
is clear.
At normal time, the radio link module is working under sleep mode. It will
open the receiving window at a short time around every 20 seconds. In
order to awake it and set it at transmission mode, the simplest way is to
press the button on top of the smoke detector. It will continually transmit
as long as the button is pressed.
To test two units’ transmission and reception performances/parameters,
it is important to set them with the same code. The dip switch for setting
the code is available on the mounting base of the unit. When one is at its
receiving mode, it can receive a triggering signal from the transmitting
unit within 20 seconds. As soon as the receiving unit gets the signal, it
will activate the alarm to sound loudly unit the transmitting signal is
vanished.
TESTING YOUR SMOKE ALARM
It is recommended that you test your smoke alarm once a week to
ensure the detector is working correctly.
Push and hold the test button for approximately 3 seconds. A loud
pulsating alarm should sound and a RED indicator light (LED) will flash
at the same time.
NOTE – for multiple interconnected smoke alarms(either by radio link or
hardwire), only the RED indicator light (LED) of the originating unit will
flash rapidly. All other units in the interconnect system will sound an
alarm(for radio link interconnected units, it will sound within 20 seconds)
but their RED indicator light (LED) will NOT flash. Test each alarm
checking that the alarm is triggered on all other alarms installed.
HUSH OR SILENCE FEATURE
This Smoke Alarm has a built-in Hush or Silence feature incorporated into
the Test button. If cooking or other non-hazardous sources cause the
unwanted alarm, it can be temporarily silenced by depressing the test
button and holding for approximately 3 seconds. The alarm will enter a
dormant period for 10 minutes. The red LED will flash every 10 seconds
to indicate the sensitivity is reduced. At the end of the hush period the
alarm will reset to normal sensitivity.
NOTE – If the smoke density increase during this period (i.e. from
a fire) the unit will go into alarm mode.
LOW BATTERY WARNING
If the smoke alarm emits a short ‘beep’ once a minute the battery
is at the end of its life and should be replaced immediately. This
low voltage warning will be given for at least 30 days. In this case,
the other interconnected units in the system which are not in low
battery condition will chirps for a few seconds once a hour as long
as the detector with the “dead” battery beeps.
If the red indicator light (LED) does not flash every minute then
replace the battery.
BATTERY REPLACEMENT
Always TURN OFF the A.C. supply to the smoke alarm before
replacing the battery. Replace the battery at least once annually,
or immediately when the low battery signal sounds once a minute,
even though the smoke alarm is receiving A.C. power.
Test the alarm for correct operation using the test facility
whenever the battery is replaced.
WARNING: DANGER OF EXPLOSION IF BATTERY IS
INCORRECTLY REPLACED. THE USE OF BATTERIES
OTHER THAN THOSE RECOMMENDED ON THE BACK OF
THE SMOKE ALARM MAY BE DETRIMENTAL TO ITS
OPERATION
The battery should only be replaced by a qualified electrician or
similarly qualified person.
Turn off the A.C. power supply to the smoke alarm.
Gently slide the smoke alarm out from the mounting plate.
Remove the battery from the compartment.
Insert a new, healthy 9V battery. NOTE POLARITY OF
CONNECTIONS. Ensure the metal tab is fully depressed
when the battery has been fitted
Using the Push-to-Test button, test the smoke alarm to
verify 9V DC battery back-up. See “TESTING YOUR
SMOKE ALARM”
Reattached the smoke alarm to the mounting plate by
sliding until it snaps into place.
Turn on the AC power and test the smoke alarm using the
Push-to-Test button. See “TESTING YOUR SMOKE
ALARM”
MAINTAINING YOUR SMOKE ALARM
Clean your smoke alarm at least once every six months to prevent
dust build up. This can be done using a vacuum cleaner with the
brush attachment. Clean gently around the front grilled section
and sides.
The apparatus shall not be exposed to dripping or splashing
and no objects filled with liquids, such as vases, shall be
placed on the apparatus.
IMPORTANT SAFEGUARDS
Installation of your smoke alarm is only one step in your safety
plan. Other important steps should be taken to further improve
your safety:-
Install the smoke alarm properly, following this instruction
leaflet
Test your smoke alarm weekly
Replace the battery immediately once depleted
Do not smoke in bed
Keep matches & lighters away from children
Store flammable materials in a proper manner and never use
them near naked flames or sparks
Maintain emergency equipment such as Fire Extinguishers,
escape ladders etc and ensure all occupants know how to
use them correctly.
Plan an escape route/s from your building in advance and
ensure all occupants are aware of them. Re-enforce this
awareness periodically through-out the year.
Make sure escape routes remain free of any obstructions.
WARNING: IF THERE IS ANY QUESTION AS TO THE CAUSE OF
AN ALARM IT SHOULD BE ASSUMED THAT THE ALARM IS
DUE TO AN ACTUAL FIRE AND THE DWELLING SHOULD BE
EVACUATED IMMEDIATELY.
THIS PRODUCT IS A SEALED UNIT AND CANNOT BE
REPAIRED – IF THE UNIT IS TAMPERED WITH IT WILL
INVALIDATE THE GUARANTEE. IF THE UNIT IS FAULTY
PLEASE RETURN IT TO YOUR ORIGINAL SUPPLIER WITH
YOUR PROOF OF PURCHASE.
YOUR SMOKE ALARM GUARANTEE
These smoke alarms are guaranteed to be free from defects in
materials and workmanships under normal use and service for a
period of three years from date of purchase. The company will not
be obligated to repair or replace parts which are found to be in need
of repair because of misuse, damage or alterations occur after the
date of purchase. Send the Smoke Alarm with proof of purchase,
postage and return postage prepaid, to local distributor. The liability
of the company arising from the sale of this smoke alarm shall not
in any case exceed the cost of replacement of smoke alarm and in
no case shall the company be liable for consequential loss or
damages resulting from the failure of the smoke alarm.
HISPEC ELECTRICAL PRODUCTS LTD. SHALL HAVE NO
LIABILITY FOR ANY PERSONAL INJURY OR PROPERTY
DAMAGE, OR ANY SPECIAL INCIDENTAL, CONTINGENT OR
CONSEQUENTIAL DAMAGE OF ANY KIND RESULTING FROM
A FIRE. THE EXCLUSIVE REMEDY FOR BREACH OF THE
LIMITED WARRANTY CONTAINED HEREIN IS THE REPAIR OR
REPLACEMENT OF THE DETECTIVE PRODUCT AT HISPEC
ELECTRICAL PRODUCTS LTD. OPTION. IN NO CASE SHALL
HISPEC ELECTRICAL PRODUCTS LTD.’S LIABILITY UNDER
ANY OTHER REMEDY PRESCRIBED BY LAW EXCEED THE
PURCHASE PRICE. YOUR SMOKE ALARMS IS NOT A
SUBSTITUTE FOR PROPERTY, DISABILITY, LIFE OR OTHER
INSURANCE OF ANY KIND. APPROPRIATE COVERAGE IS
YOUR RESPONSIBILITY. CONSULT YOUR INSURANCE AGENT.
This does not affect your statutory rights.
This alarm is only suitable for single occupancy private dwellings
only and not intended for multi occupancy private dwellings or
commercial or industrial dwellings.
Waste electrical products should not be disposed of with normal
household waste. Please recycle where facilities exist. Check with
your Local Authority or retailer for recycling advice. New regulation
will encourage the recycling of Waste from Electrical and Electronic
Equipment (European "WEEE Directive" effective August 2005).
Hispec Electrical Products Ltd
www.hispec.co.uk
Ver: 06-JUL-2017
 Loading...