

Page 1

USER’S OPERATION MANUAL
Before operating this unit, please read this manual
thoroughly, and retain for future reference
HRBC137
English
EN
Page 2

Contents
Thank you for choosing Hisense. We are sure you will find your new beverage
cooler a pleasure to use. However, before you use the appliance, we recommend
that you carefully read the instructions, which provide details about installing
and using the product. Please keep this manual for future reference.
Brief introduction.....................................................................................................................................................
Safety and warning information..................................................................................................................
Installing your new appliance .......................................................................................................................
Description of the appliance...........................................................................................................................
Display controls........................................................................................................................................................
Connecting your beverage cooler to Wi-Fi..........................................................................................
Using your appliance...........................................................................................................................................
Cleaning and care.................................................................................................................................................
Troubleshooting.......................................................................................................................................................
Disposal of the appliance.................................................................................................................................
0 1
03
1 6
1 8
19
23
25
30
32
34
Page 3

Brief Introduction
Thank you for choosing Hisense. We hope you find your new appliance a
pleasure to use. Before you use the appliance, we recommend that you read
through these instructions carefully, which provide details about its usage
and functions.
Please ensure that all people using this appliance are familiar with its
operations and safety features. It is important that you install the appliance
correctly and pay attention to the safety instructions carefully.
We recommend that you keep this user's manual with the appliance for
future reference and for any future users.
This appliance is intended to be used in household and similar applications
such as:
•Kitchen- areas in shops, offices and other working environments;
•Suites in hotels, motels and other residential types of environment;
•Bed and breakfast environments.
•Catering and similar non-retail applications. If you feel that the appliance is
not operating correctly, please check the Troubleshooting page for
assistance. If still in doubt contact the Hisense customer service help line for
assistance or to arrange a call out by an authorized service technician.
01
Page 4
Safety and warning information
General safety and daily use
The appliance is intended to be used exclusively for
the storage of beverage as explained in this
instruction booklet.
WARNING
The WARNING alert means a potentially hazardous
situation. Serious injury or death may occur if not
avoided.
DANGER
The DANGER alert means an imminently hazardous
situation. Serious injury or death may occur if not
avoided.
CAUTION
The CAUTION alert means a potentially hazardous
situation. Moderate or minor injury may occur if not
avoided.
02
Page 5
Safety and warning information
General safety and daily use
WARNING
•This appliance is not intended for use by persons
(including children) with reduced physical,
sensory or mental capabilities, or lack of
experience and knowledge, unless they have been
given supervision or instruction concerning use of
the appliance by a person responsible for their
safety. Children should be supervised to ensure
that they do not play with the appliance.
•It is dangerous to alter the specifications or modify
this product in any way.
•Before any cleaning or maintenance work is
carried out, be sure to switch off and unplug the
appliance.
•This appliance is heavy. Care should be taken
when moving it.
•Take utmost care when handling your appliance
so as not to cause any damage to the cooling unit
with consequent possible fluid leakages.
03
Page 6

Safety and warning information
General safety and daily use
WARNING
•The appliance must not be located close to
radiators or gas cookers.
•Avoid prolonged exposure of the appliance to
direct sunlight.
•There must be adequate ventilation around the
appliance and any damage to the refrigerant
circuit must be avoided.
•Do not use other electrical appliances inside of
the appliance.
•Do not store explosive substances such as
aerosol cans with a flammable propellant in this
appliance.
•Keep burning candles, lamps and other items
with flames away from the appliance so that
they do not set the appliance on fire.
•Do not use extension cords or ungrounded (two
prong) adapters;
04
Page 7
Safety and warning information
General safety and daily use
WARNING
•If the cord is damaged, it must be replaced by the
manufacturer, its service agent or similar qualified
person in order to avoid hazard.
•Do not store explosive substances such as aerosol
cans with a flammable propellant in this
appliance.
WARNING
•Keep ventilation openings, in the appliance
enclosure or in the built-in structure, clear of
obstruction.
WARNING
•Do not use mechanical devices or other means to
accelerate the defrosting process, other than
those recommended by the manufacturer.
WARNING
•Do not damage the refrigerant circuit.
05
Page 8

Safety and warning information
General safety and daily use
WARNING
•Do not use electrical appliances inside the
appliance, unless they are of the type
recommended by the manufacturer.
WARNING
Risk of child entrapment. Before you throw away
your old beverage cooler or freezer:
•Take off the doors.
•Leave the shelves in place so that children may
not easily climb inside.
WARNING
•When positioning the appliance, ensure the supply
cord is not trapped or damaged.
WARNING
•Do not locate multiple portable socket-outlets or
portable power supplies at the rear of the
appliance.
06
Page 9

Safety and warning information
General safety and daily use
WARNING
•This appliance can be used by children aged from
8 years and above and persons with reduced
physical, sensory or mental capabilities or lack of
experience and knowledge if they have been
given supervision or instruction concerning use of
the appliance in a safe way and understand the
hazards involved. Children shall not play with the
appliance. Cleaning and user maintenance shall
not be made by children without supervision.
WARNING
•Children aged from 3 to 8 years are allowed to
load and unload refrigerating appliances.
07
Page 10

Safety and warning information
Service/Repair
•Any electrical work required to install this appliance
should be carried out by a qualified electrician or
competent person. This product should be serviced by
an authorized Service Center, and only genuine spare
parts should be used.
•Under no circumstances should you attempt to repair
the appliance yourself. Repairs carried out by
inexperienced persons may cause injury or more
serious malfunctioning. Refer to your local Service
Center, and always insist on genuine Hisense spare
parts.
•This appliance contains hydrocarbons in its cooling
unit; maintenance and recharging must therefore only
be carried out by authorized technicians.
Service Note
•This appliance employs Hydrocarbon Refrigerant type
R600a. It is hazardous for anyone other than an
Authorized Service Person to service this appliance.
Queensland Service Notes
•In Queensland, the Authorized Service Person Must
hold a Gas Work Authorization for hydrocarbon
08
Page 11

Safety and warning information
refrigerants to carry out servicing or repairs which
involve removal of covers.
Use
•The beverage cabinet is designed to be used
specifically for the storage of potable beverage only.
•Best performance is obtained with ambient
temperature as follows:
Ambient Temperature Range
+10°C (50°F ) to + 43°C (109°F )
The class of your appliance is shown on its rating plate.
Note: If the ambient temperature is higher or lower than
the above listed, the energy consumption will be
affected accordingly.
•Do not store flammable gas and liquid in the
appliance, because they may explode.
•Do not place beverage directly against the rear wall of
compartment.
•The appliance manufacturer’s storage
recommendations should be strictly adhered to.
•Refer to using your appliance.
09
Page 12

Safety and warning information
•The inner lining of the appliance has channels through
which the refrigerant passes. Should the channels be
punctured the unit could become damaged beyond
repair. Do not use sharp instruments to scrape off frost
or ice. Frost may be removed by using a scraper period.
Under no circumstances should solid ice be forced off
the liner. Solid ice should be allowed to thaw by
defrosting the appliance.
Installation important
•For electrical connection carefully follow the
instructions given in specific paragraphs.
•Unpack the appliance and check if there is any
damage to it. Do not connect the appliance if it is
damaged. Report possible damage immediately to the
place of purchase. In this case retain all packing
materials.
•During normal operation, the compressor and/or
condenser at the back of the appliance heat up
considerably. For safety reasons, minimum ventilation
must be as shown in the instructions.
10
Page 13

Safety and warning information
•Transmitting frequency band(s) and max allowed
transmitting power in the operating frequency
band(s): 2400-2483.5MHz, less than or equal to 20dbm.
•This equipment should be installed and operated with
minimum distance 20cm between the radiator & your
body.
Attention
•Keep ventilation openings clear of obstruction.
•Care must be taken to ensure that the appliance does
not stand on the electrical supply cable. Important: if
the power cord is damaged, it must be replaced by a
special cord or assembly available from the
manufacture or its service agent.
•Do not use extension cords or ungrounded (two prong)
adapters.
•If the appliance is transported horizontally, it is
possible that the oil contained in the compressor flows
in the refrigerant circuit. It is advisable to wait at least
two hours before connecting the appliance to allow
the oil to flow back in the compressor.
11
Page 14

Safety and warning information
•There are working parts in this product which heat up.
Always ensure that there is adequate ventilation as a
failure to do this will result in component failure and
possible loss. See installation instructions.
•Parts which heat up should not be exposed.
•Wherever possible the back of the product should be
near the wall.
To avoid contamination of food, please respect the
following instructions:
•Opening the door for long periods can cause a
significant increase of the temperature in the
compartments of the appliance.
•Clean regularly surfaces that can come in contact with
food and accessible drainage systems.
•If the refrigerating appliance is left empty for long
periods, switch off, defrost, clean, dry, and leave the
door open to prevent mould developing within the
appliance.
12
Page 15

Safety and warning information
Electrical Connection
1. The appliance requires a single phase
220V~240V/50Hz power supply. It has a power cord
that has a 3-prong grounding plug that minimizes the
possibility of electrical shock. This appliance must be
grounded. Do not remove the grounding prong or
modify the power plug.
2. Do not modify the power plug. The power plug must
be accessible when the appliance is installed.
3. The appliance should not be turned off with a switch
or other device.
4. Make sure that the plug is not squashed or damaged.
Otherwise, it may cause short circuit, electric shock or
overheat and even cause a fire.
5. Do no insert the power plug if the socket is loose, there
is a risk of electric shock or fire.
6. Switch off the appliance and disconnect it from the
main power before you clean or move it.
7. Never unplug the appliance by pulling on the
electrical cord. Always grip the plug firmly and pull
straight out from the socket to prevent damaging the
power cord.
13
Page 16

Safety and warning information
8. Do not operate the appliance without the cover over
the interior lighting.
9. Any electrical component must be replaced or
repaired by a qualified electrician or Hisense
authorized service technician. Only genuine replacement parts should be used.
10. To avoid eye injury, do not look direct into the LED
light located in the beverage cooler compartment. If
it is not functioning correctly, consult a qualified,
registered electrician or replace it in accordance with
the “cleaning and care” chapter.
Environment Protection
This appliance does not contain gasses which could
damage the ozone layer, in either its refrigerant circuit
or insulation materials. The appliance should not be
discarded together with your local city refuse and
rubbish. The insulation foam contains flammable
gasses. The appliance should be disposed of according
to the applicable regulations of your local government.
Avoid damaging the cooling unit, especially at the rear
near the heat exchanger. The materials used on this
appliance marked by the symbol are recyclable.
14
Page 17
Safety and warning information
Cleaning the interior
Before using the appliance for the first time, wash the
interior and all internal accessories with lukewarm water
and some neutral soap so as to remove the typical smell
of a brand-new product, and then dry naturally and
thoroughly.
NOTE: Do not use detergents or abrasive powders, as
these will damage the finish.
Refrigerant
The refrigerant isobutane(R600a) is contained within
the refrigerant circuit of the appliance. During
transportation and installation of the appliance, ensure
that none of the components of the refrigerant circuit
becomes damaged.
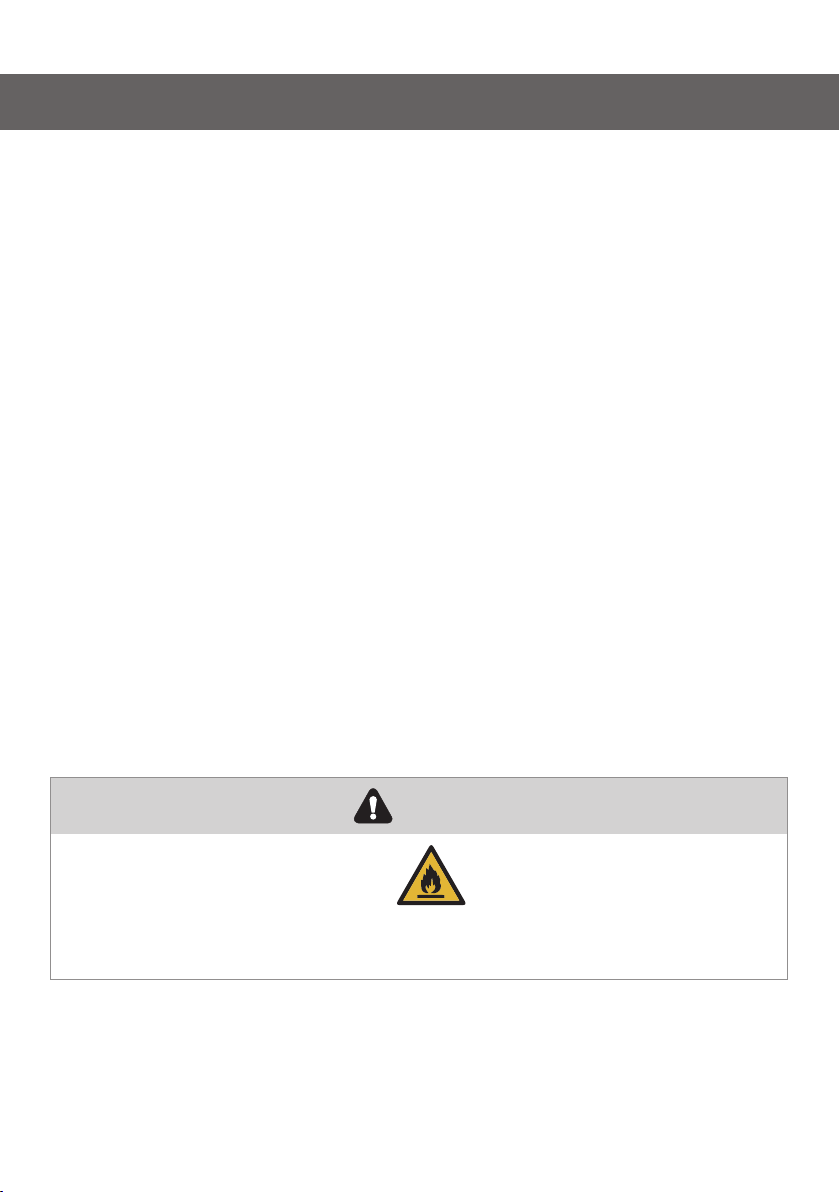
WARNING
Risk of fire/ flammable materials
The symbol is a warning and indicates the refrigerant
and insulation blowing gas are flammable.
15
Page 18
Installing your new appliance
Before using the appliance for the
first time, you should be informed of
the following tips.
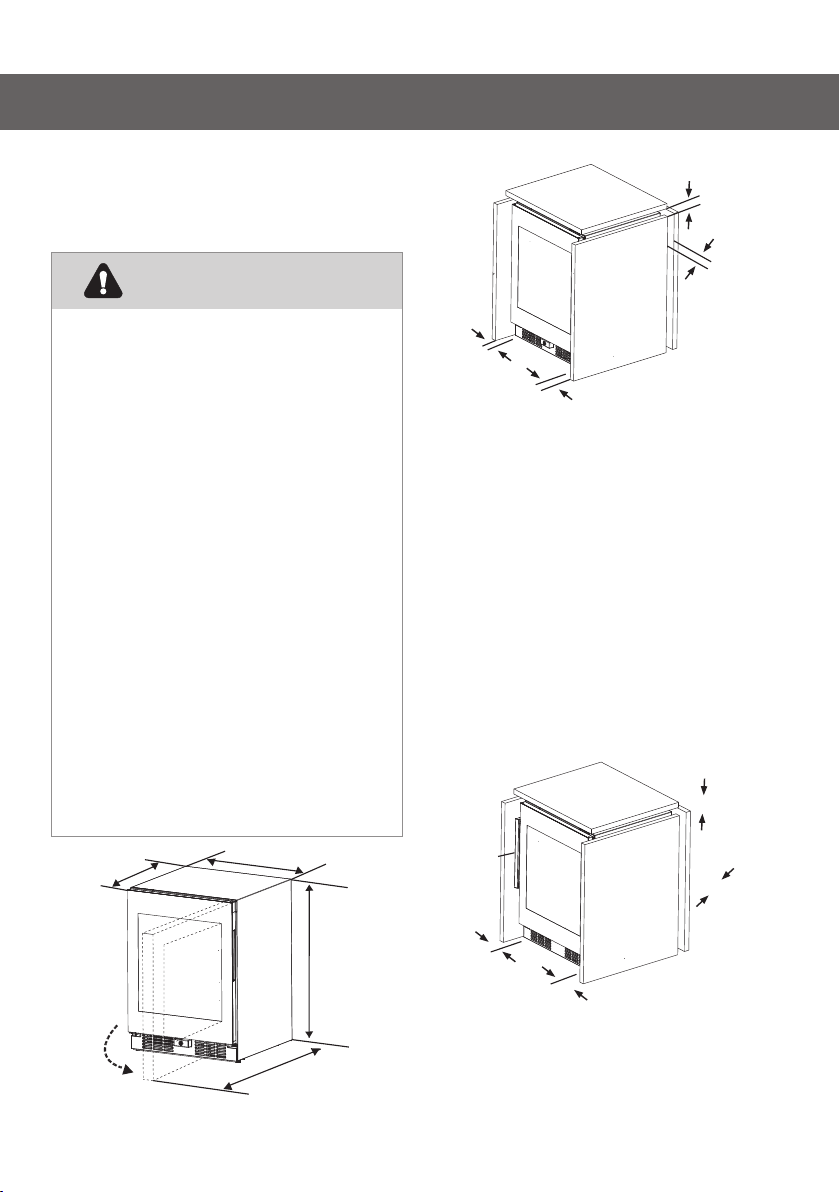
≥35mm
Ventilation of appliance
In order to improve efficiency of
the cooling system and save
energy, it is necessary to maintain
good ventilation around the
appliance for the dissipation of
heat. For this reason, sufficient
clear space should be available
around the product.
Suggest:
It is advisable for there to be at
least 35mm of space from the
back to the wall, at least 35mm
from its top, and at least 35 mm
from its side to the wall. As
shown in the following
diagrams.
595mm
625mm
≥
35mm
≥35mm
≥
35mm
Position your appliance in a dry
place to avoid high moisture.
If the product is installed with an
external handle, the product can be
mounted on cabinet or a similar
counter, and the product need to fix
for preventing falling. The effective
space requirements of the cabinet
are as follows:
≥10mm
external
handle
1143mm
820mm
≥5mm
≥10mm
≥5mm
16
Page 19
Installing your new appliance
Note
•Avoid locating the appliance in
damp areas. Too much moisture in
the air will cause frost to form
quickly on the evaporator.
•Keep the appliance out of direct
sunlight, rain or frost. Position the
product away from heat sources
such as stoves, fires or heaters.
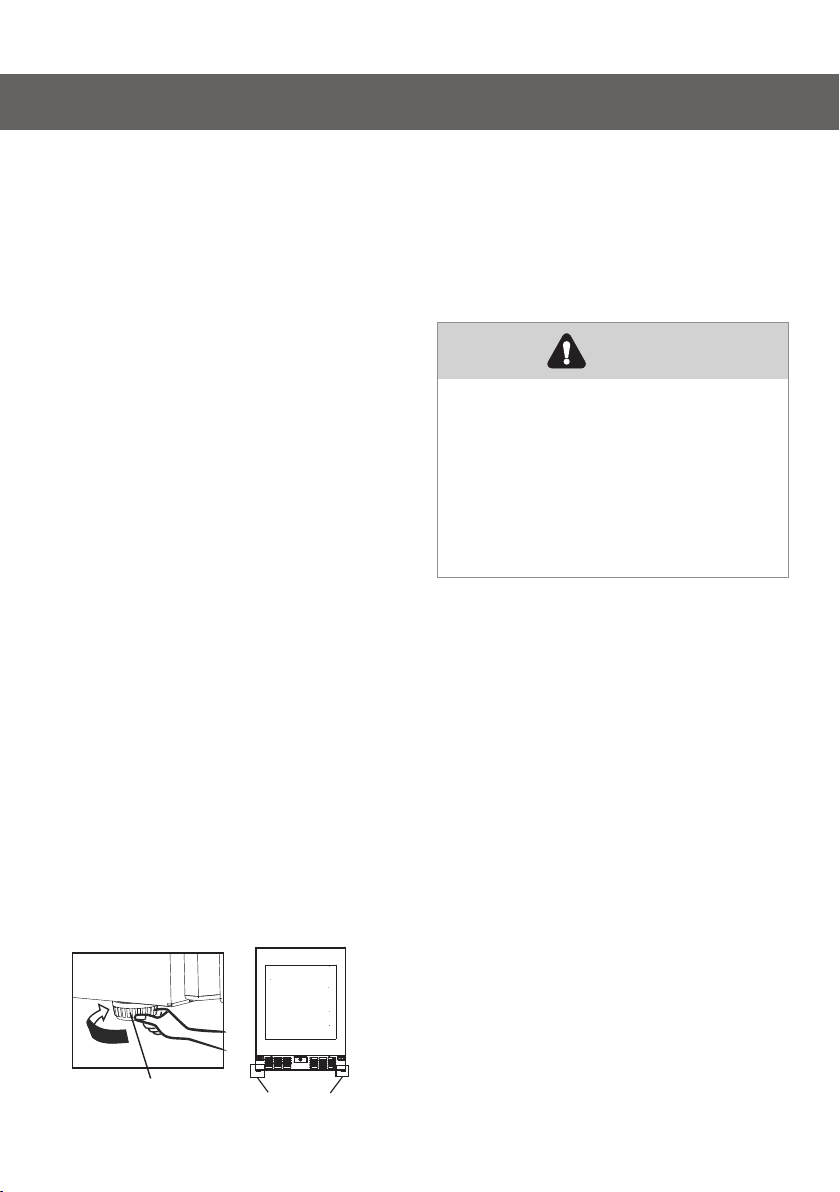
Leveling Of Appliance
The appliance should be level in
order to eliminate vibration. We
recommend that you level the
appliance by the following steps.
1. Put the beverage cooler into the
right place.
2. Turn the cabinet leg (with your
fingers or a suitable screw driver)
until they touch the floor.
3.Tilt back the top backwards for
about 10-15mm or 1° by turn the
adjustable feet. This will allow the
door to self-close providing a
consistent closed seal.
Electrical Connection
Caution! Any electrical work required
to install this appliance should be
carried out by a qualified person or
authorized service technician.
WARNING
This appliance must be
grounded. The manufacturer
declines any liability should
these safety measures not be
observed.
Cabinet leg
Cabinet leg
17
Page 20

Description of the appliance
Description of the appliance
equipped with glass shelves
① control panel ⑤ Adjustable foot
② LED light
③ shelf part
④ lock(Optional)
⑥ gasket part
⑦ door
⑧ handle part (Optional, configuration-based)
NOTE
•The appliance can keep 140 cans of beverage at the same time, please
place the beverage cans as shown above.
•Can capacities, mentioned in this manual are based on standard
12ounces cans and standard shelving.
•When the beverage cabinet is put in too many drinks once, and the
internal temperature alarm is normal. Don't worry.
•For the whole drink to cool more quickly and homogeneous , suggest not
to accumulate too much beverage in the fan outlet.
•Features may vary depending on model. Not all models will have
features listed.
18
Page 21

Display controls
1
2
3
4
1. Standby key
2. Light key
3. Temperature control key -Up
4.Temperature Indicator
Unlock
All the keys are locked if the icon “ ”is
illuminated, touch the “ ” key for
approximately 3 seconds to unlock
them. And it will be locked itself after
20 seconds if no touching any key.
Display
The control panel, shown above, is at
the top of the beverage storage
appliance.
8
7
6
5
5. Temperature control key - Down
6. Lock and unlock key
7. Cancel alarm key
8. Wi-Fi key
•Each time the power turns on, the
display panel will light everything
for 3 seconds, and then enter the
normal display status.
•The display will activate the screen
saver when the door is closed for 60
seconds with the display on.
•Open door action will exit the
screen saver.
19
Page 22

Display controls
•Each valid button press emits a
short sound.
•The corresponding temperature
setting is reflected in the display,
and the setting takes effect and is
stored after 10 seconds of operation
without touch the key.
Standby Mode
•When you do not plan to use this
appliance for a period of time, you
can save energy by entering the
standby state.
•To enter standby mode, Touch and
hold the standby key for more than
3 seconds in the unlock sate. The
buzzer will beep and the display
board will show "--".
•To exit standby mode, Touch and
hold the standby key for more than
3 seconds in the unlock sate. The
buzzer rings will beep.
NOTE: In standby mode, cooling will
stop. If you do not to use the
appliance for a long time, take out
the beverage cooler, and unplug
Light key
•When the door opened, the lighting
automatically lights up. The door
closed, and the lighting is delayed
for 30 seconds to turn off.
•After the door is opened, the lighting
can be turned on or off by touch the
light key.
•The brightness of the light can be
adjusted. Touch the light key for
approximately 3 seconds. to enter
the light brightness adjustment
mode, with 2 beeps. Touch the light
key to adjust the brightness of the
lighting according to the cycle of
high, medium, and low. Touch the
light key for approximately 3
seconds, or after 10 seconds of
keyless operation, or touch any key
except for the light key, will exit the
light brightness adjustment mode.
NOTE: When the door remains open,
the light will automatically turn off
after a maximum of 10 minutes of
illumination.
20
Page 23
Display controls
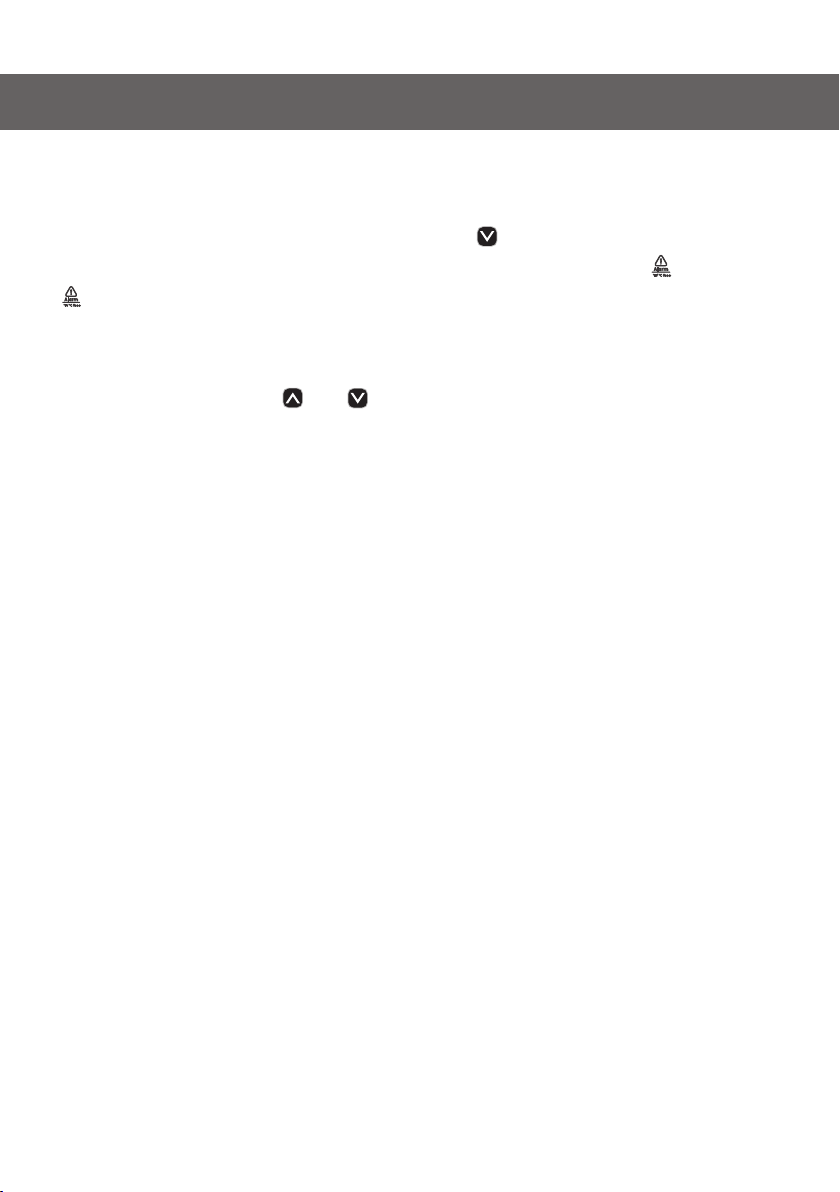
Temperature Measure Change
You can change the temperature
display setting from Celsius to
Fahrenheit degrees by touch the
“ ”key for 3 seconds,and vice versa.
Temperature regulation
You can set the temperature you
desire by touch the key " "o r" ".
The temperature will increase 1°C or
1°F each time you touch the UP key
and will decrease 1°C or 1°F each time
you touch the DOWN key.
NOTE:
•The appliance doesn’t work properly
if the set temperature is higher than
the ambient temperature.
•The temperature range is from 1°C(
34°F) to 10°C( 50°F).
•When you set a temperature, you set
an average temperature for the
whole cabinet. There may be a 2°C (
3.6°F) to 3°C ( 5.4°F) variance
between the top and bottom
shelves of the appliance.
Sabbath mode
In the unlocked state ,touch and hold
the“ ” key that is on the right side of
control panel and the“ ” key for
more than 3 seconds to enter the
Sabbath mode, the control panel is
off, the key does not respond, the
buzzer does not respond, until it
automatically quit for 80 hours or
long press the key combination
again.
21
Page 24
Display controls
Over Temperature Alarm
In order to avoid the temperature
problem that could affect the quality
of the beverage, the appliance has
an over temperature alarm function.
When an over temperature alarm
occurs, cancel the alarm by pressing
the Cancel Alarm Key and take out
the beverage, and contact customer
service.
NOTE:
In the over temperature alarm state,
press the Cancel Alarm Key to exit the
over temperature alarm, the alarm
tone stops, once the appliance cools
to the required temperature.
Door Alarm
The door alarm will sound once the
fridge door is open over 1 minutes. In
case of door alarm, the buzzer will
sound 3 times per minute and will
stop automatically 9 minutes later.
Closing the door will also clear the
door alarm. To save energy, don’t
keep the door open for a long time
when using beverage cooler.
WARNING
If the LED light is broken, please DO
NOT CHANGE IT YOURSELF!
Changing the light yourself may
cause injury or serious
malfunctioning. It must be
replaced by a qualified service
technician in order to avoid a
hazard. Contact your local
Service Center for help. Before
changing the LED light, switch off
the appliance and unplug it, or
pull the fuse or the circuit breaker.
22
Page 25
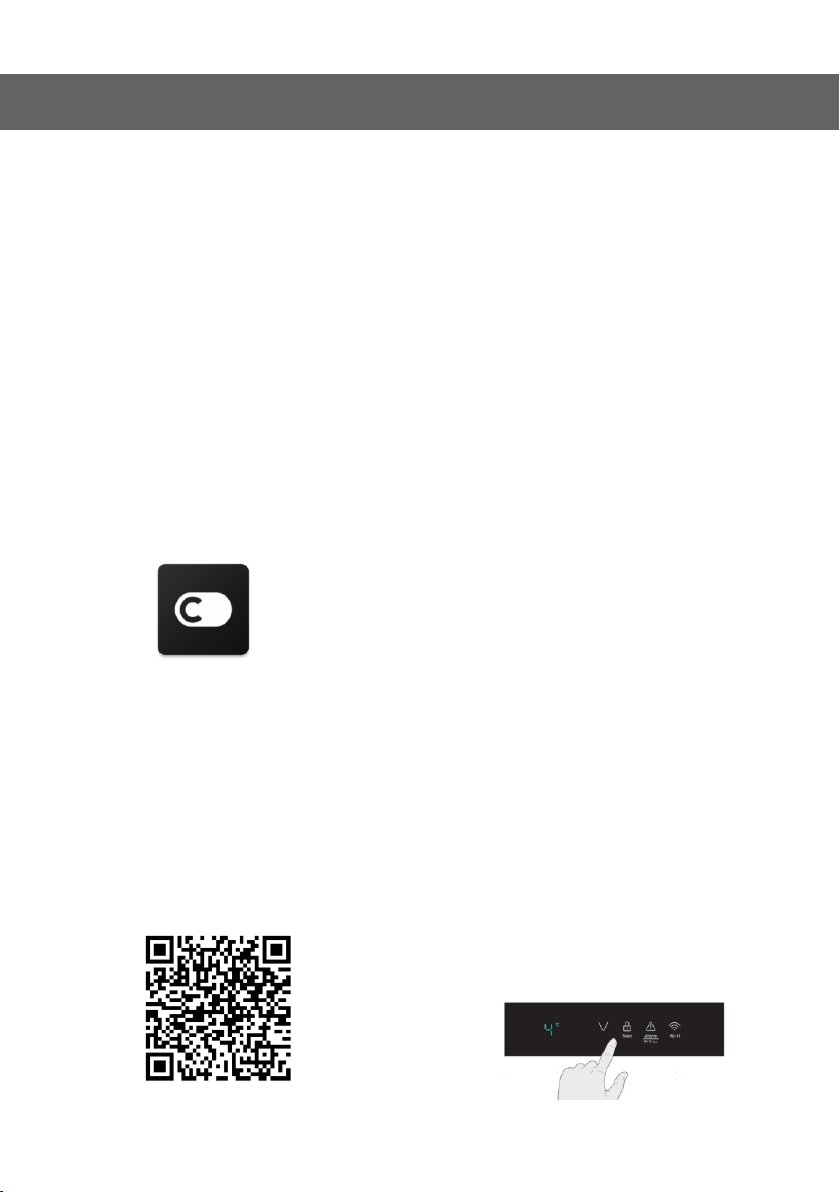
Connecting your beverage cooler to Wi-Fi
ConnectLife app
ConnectLife is a smart home app
that allows you to communicate
with your smart appliances using a
smartphone or tablet.
Installation
1. Open the Apple App Store (iOS) or
the Google Play Store (Android) on
your smart phone.
2. Search for the “ConnectLife ” app.
You will see an app with the
following icon:
3. Download and install the
ConnectLife app provided by
ConnectLife, LLC.
Alternatively, you can scan the
following QR code with your smart
phone or tablet to find the
ConnectLife app:
NOTE
•The distance between your
appliance and the Wi-Fi router can
impact the performance. If they are
too far apart, pairing your
appliance might fail or take longer.
•The appliance supports 2.4GHz WiFi networks only. The Wi-Fi network
SSID must be visible.
•The surrounding wireless
environment (other connected
devices) can affect the
performance of your network.
•Your appliance Wi-Fi connection
may experience interruptions due
to external factors such as your
home network environment or
Internet service provider.
Connecting your beverage Cooler
After installing the ConnectLife app,
sign in or create an account and
follow these steps:
1. Ensure the appliance is powered on
and the control panel is active. You
will know it is ready when the lights
that indicate temperature are on.
23
Page 26
Connecting your beverage cooler to Wi-Fi
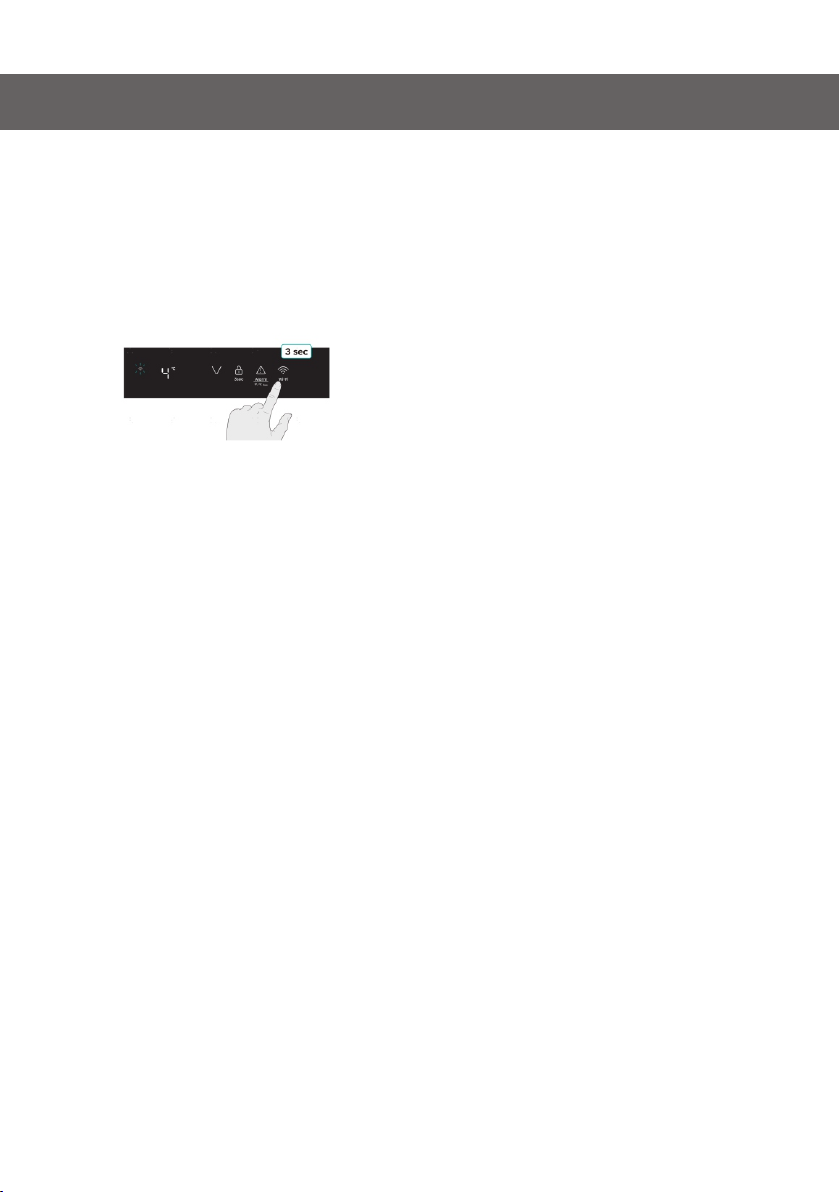
2. Put the beverage cooler in pairing
mode by holding the Wi-Fi key for 3
seconds. You will hear a beep and
see the Wi-Fi light flashing after it is
constantly on for a few seconds.
3. Ensure bluetooth is enabled on
your phone and open the
ConnectLife app. Look for the popup indicating that a new appliance
has been found. Tap the button on
the pop-up and follow the
instructions to proceed.
4. If a pop-up doesn’t appear, tap the
button called “Add appliance” or
“+” in the app.
5. Locate “Wine Climate Cabinet” in
the device list and select it.
6. Follow the instruction in the app to
connect your beverage cooler.
Once the setup is complete, your
beverage cooler will appear on
your home screen.
•To factory reset your network
settings, press and hold the Wi-Fi
key for 6 seconds. You will hear two
beeps once the appliance is reset.
•After resetting, the appliance will
automatically go into pairing
mode.
•A solid Wi-Fi light indicates the
appliance is successfully
connected to the home network.
NOTE
•The appliance will remain in pairing
mode for a maximum of 5 minutes.
24
Page 27
Using your appliance
This section tells you how to use most
of the useful features. We
recommend that you read through
them carefully before using the
appliance.
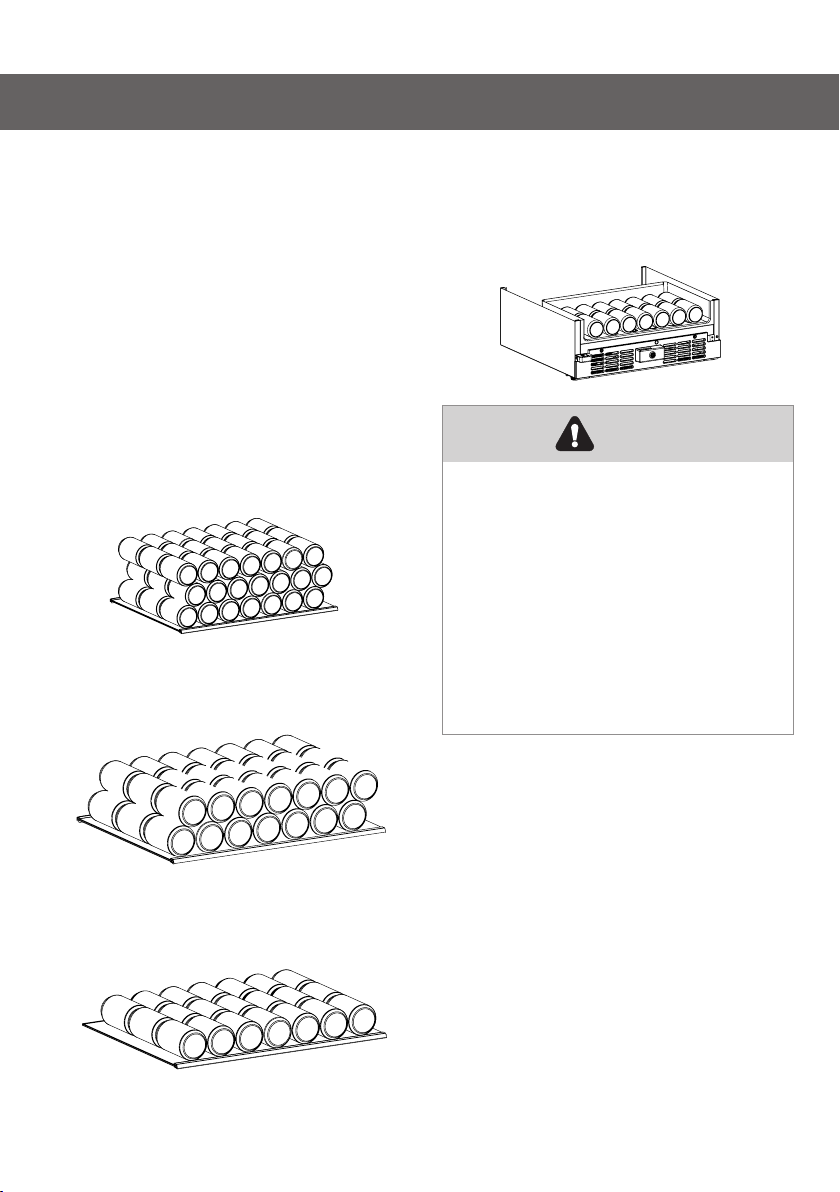
Placement Of Bottles
Appliance is equipped with 3 shelves
with 63 cans each.
The cans should be placed on the
shelves as shown below.
The second shelves can hold 42 cans
as shown below.
You can also place bottles in the 14
cans which are located at the
bottom of the beverage cooler.
WARNING
·To prevent the bottles from
rolling down and being
broken, there should not be
more than 14 bottles placed at
the bottom of the refrigerate
room as showed above.
·The maximum loading of each
type of shelf is 15kg.
The shelves on the guide rail can hold
21 cans as shown below.
25
Page 28
Using your appliance
WARNING
When reversing the door, the
appliance must not be
connected to power. Ensure
that the plug is removed from
the power socket
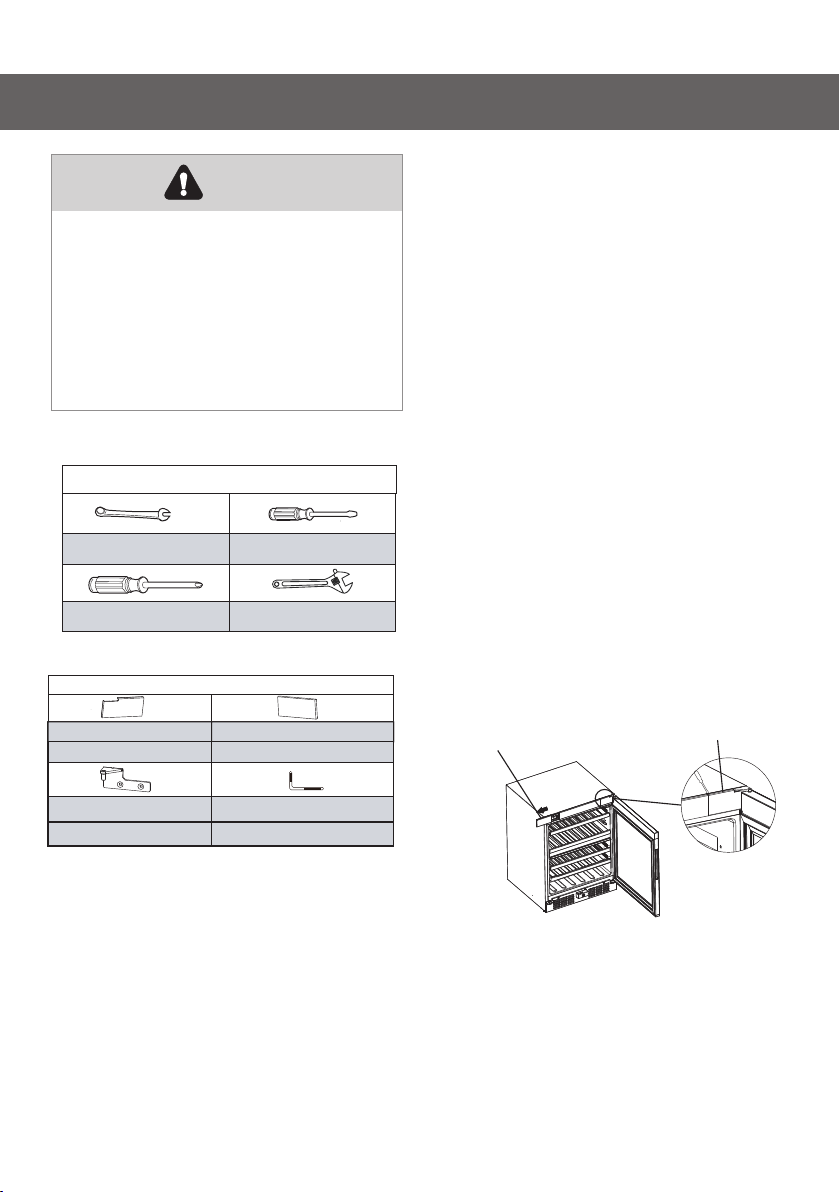
The tools you will need(Not provided):
Not provided
8mm wrench
Phillips head screwdriver
The parts you will need(provided):
Provided
Lef t upper c over
1
Thin-blade screwdriver
Adjustable wrench
Right upper cover
1
NOTE: If required you may lay the
beverage cooler on its back in order
to gain access to the base, you
should rest it on soft foam packaging
or similar material to avoid
damaging the backboard of the
beverage cooler. To reverse the
door, the following steps are
1. Stand the beverage cooler upright,
open the door, use a thin-blade
screwdriver to pry off the right
upper cover, then push the left
upper cover out to the left.
NOTE: you should need to pad the
pry area with cloth towel to avoid
scratching the top of the beverage
cooler.
left upper cover
right upper cover
Upp er left h inge
1
4mm Allen Wrench
1
26
Page 29
Using your appliance
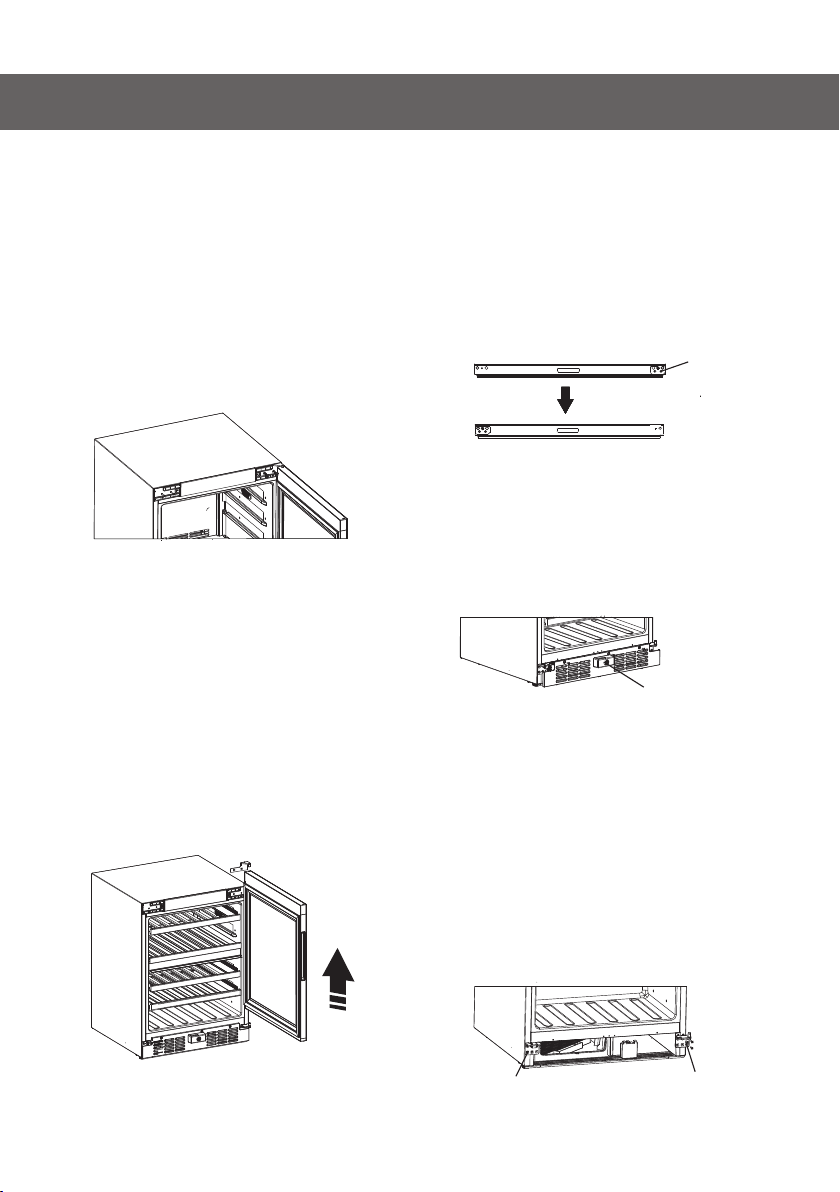
2. Using a Phillips head screwdriver,
remove the two screws on the left
side. Then use the 4mm Allen
Wrench to remove the two screws
on the right side that hold the upper
right hinge in place.(Please support
the door when you doing it.)
3. Move the door from the down
hinge by carefully lifting the door
straight up.
NOTE: When removing the door,
watch for washer(s) between the
hinge and the bottom of the upper
door that may stick to the door. Do
not lose these washers.
4. Lay the door flat and use a Phillips
head screwdriver to remove the
screw holding the limit block at the
bottom of the door and replace the
limit block to the left position, then
reattach the screw.
limit block
5. Use a Phillips head screwdriver to
remove the three screws from the
air deflector, then remove the air
deflector.
air deflector
6. Transform the bottom hinge from
right to left and remove the door
bracket as following:
6.1 Unscrew the bottom right hinge
screws and the bottom left door
bracket screws.
NOTE: Keep the hinge for the future
use.
door bracket
bottom right hinge
27
Page 30

Using your appliance
6.2 Transform the bottom right hinge
into bottom left hinge, relax the axis
of the hinge and install it on the left
hole, screw up the axis .
7. Secure the lower hinge to the left
and use the 4mm Allen Wrench to
tighten the three screws, then
secure the door bracket to the right,
again tightening the three screws.
9. Reattach the right two screws,
then attach the door to the lower
hinge and upper left hinge to the
top of the door, then use two screws
to secure the upper left
hinge.(Please hold the door when
you doing it.)
bottom left hinge
8. Reinstall the air deflector and
secure the three screws using a
Phillips screwdriver.
door bracket
10. Reattach the left upper cover and
upper right cover.
28
Page 31

Using your appliance
11. Handle
installation(configuration-based)
(1) First of all, find the handle and
screws in the spare parts bag;
(2) Align the screw holes on the
handle with the corresponding
holes on the door body;
(3) Use a screwdriver to fix the
screws in the screw holes on the
handle until they are tightened;
(4) Install another screw in the
same way;
(5) If the door body is operated to
change the door left and right, the
handle needs to be removed first,
WARNING
When disposing of your
appliance, use an approved
disposal site. Remove the plug
and ensure that any locks or
catches are removed, to prevent
young children being t rapped
inside.
29
Page 32

Cleaning and care
For hygienic reasons the appliance
(including exterior and interior
accessories) should be cleaned
regularly.
WARNING
Before cleaning, the appliance
must be powered off and
unplugged. Danger of electrical
shock!
Exterior Cleaning
To maintain good appearance of
your appliance, you should clean it
regularly.
•Spray water onto the cleaning cloth
instead of spraying directly on the
surface of the appliance. This helps
ensure an even distribution of
moisture to the surface.
•Clean the door with a mild
detergent and then wipe it dry with a
soft cloth.
CAUTION
·Don’ t use sharp objects as
they are likely to scratch the
surface.
·Don’ t use Thinner, Car
detergent, Clorox, oils,
abrasive cleansers or organic
solvents such as Benzene for
cleaning. They may damage
the surface of the appliance
and may cause fire.
30
Page 33
Cleaning and care
Cleaning The Beverage Cooler
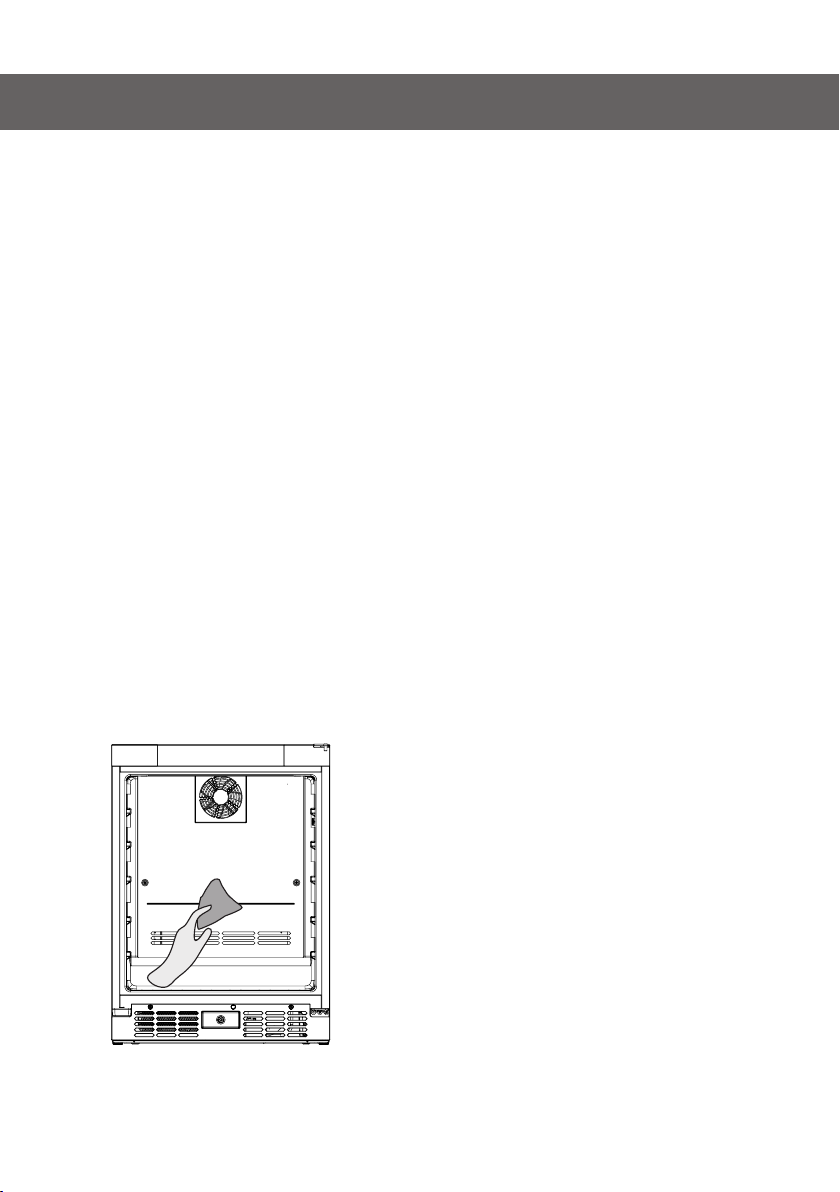
To clean the beverage cooler, you
should follow these steps:
Unplug the appliance and remove
everything.
-Wash the inside with a warm water
and baking soda solution. The
solution should be about 2
tablespoons of baking soda to 4 cups
of water.
-Wash the shelves with a mild
detergent solution.
-It may also be necessary to
periodically wipe the bottom part of
the storage , and condensation may
collect there.
31
Page 34

Troubleshooting
If you experience a problem with your appliance or are concerned that the
appliance is not functioning correctly, you can carry out some easy checks
before calling for service, please see below.
WARNING
Don’ t try to repair the appliance yourself. If the problem persists after
you have made the checks mentioned below, contact a qualified
electrician, authorized service technician or the store where
you purchased the product.
Problem
The appliance
is too warm.
Heavy build up
of frost, possibly
also on the door
seal.
Water on the
floor.
Possible cause & Solution
1. Temperature is not properly adjusted.
2. Door was open for an extended period.
3. The appliance is near a heat source.
1. Please look in the "Display controls" section.
2. Open the door only as long as necessary.
3. Please refer to the "Installing your new appliance" section.
Door seal is not air tight(possibly after changing over
the hinges).
Carefully warm the leaking sections of the door seal with a
hair dryer (not hotter than approx 50°C). At the same time
shape the warmed door seal by hand such that it sits
correctly.
Water drain hole is blocked.
Please refer to the " Cleaning and care " section.
32
Page 35
Troubleshooting
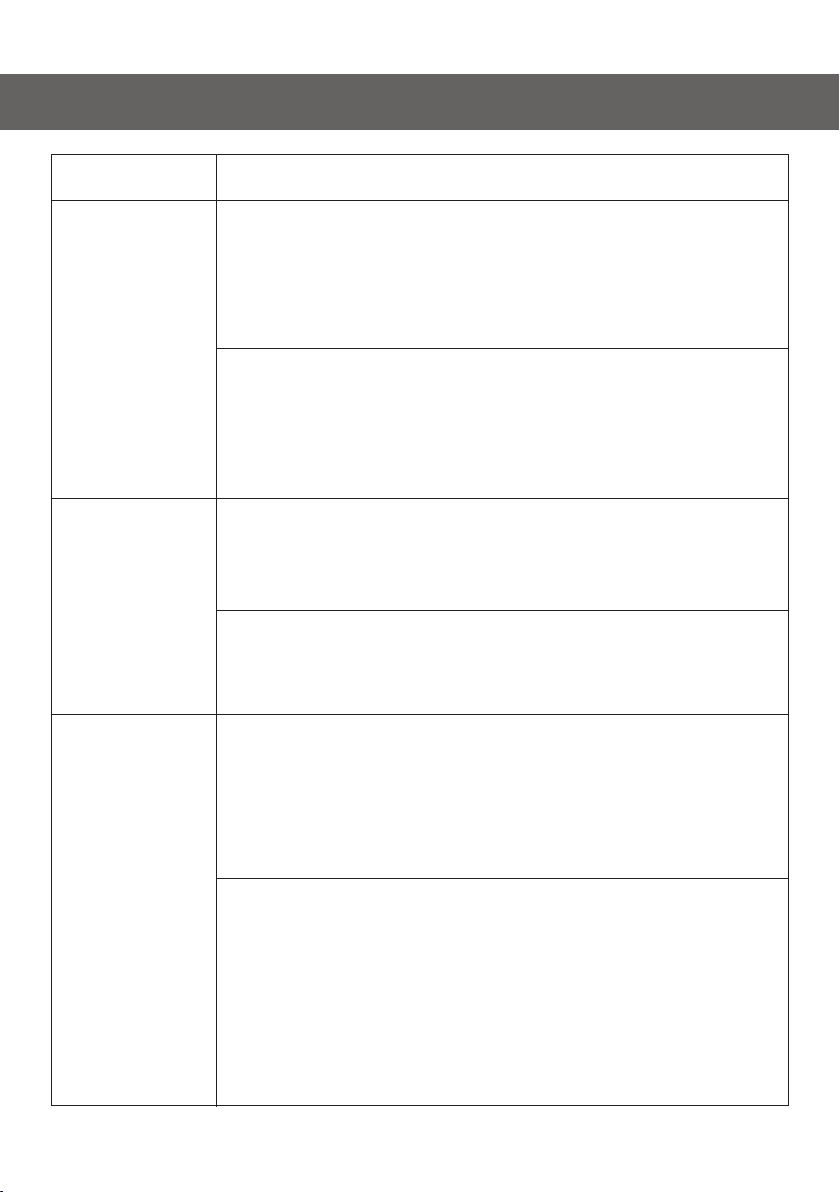
Problem
Unusual noises.
The compressor
does not start
immediately
after changing
the temperature
etting.
Unable to
connect
appliance to
Wi-Fi network
Possible cause & Solution
1. Appliance is not level.
2. The appliance is touching the wall or other objects.
3. A component, e.g. a pipe, on rear of the appliance is
touching another part of the appliance or the wall.
1. Readjust the feet.
2. Move the appliance slightly.
3. If necessary, bend the component out of the way
carefully.
1.This is normal, no error has occurred.
2.The setting temperature is higher than the ambient
temperature.
1.The compressor starts after a period of time.
2.Set the temperature lower than the ambient
temperature as you want.
1.The password for home Wi-Fi network was entered
incorrectly.
2.The home Wi-Fi router frequency is not 2.4GHz.
3.The router and appliance kept far apart causing the
poor network.
1. Make sure the password is correct and connect again.
2. The appliance only supports 2.4GHz radio frequency.
Set up a dedicated 2.4GHz Wi-Fi SSID and connect the
appliance to it.
3. Consider either moving the router closer to the
appliance or purchasing Wi-Fi range extender and
installing it.
33
Page 36

Disposal of the appliance
It is prohibited to dispose of this appliance as house hold waste. Please check
for with your local government for proper disposal procedures.
Packaging Materials
Packaging materials with the recycle symbol are recyclable. Dispose of the
packaging into a suitable waste collection container to recycle it.
Before Disposal Of The Appliance
1. Pull out the power cord from the power socket.
2. Cut off the power cord and discard.
WARNING
Refrigerators contain refrigerant and gases in the
insulation. Refrigerant and gases must be disposed
of professionally as they may cause eye injuries or
ignition. Ensure that tubing of the refrigerant circuit
is not damaged prior to proper disposal.
34
Page 37
Disposal of the appliance
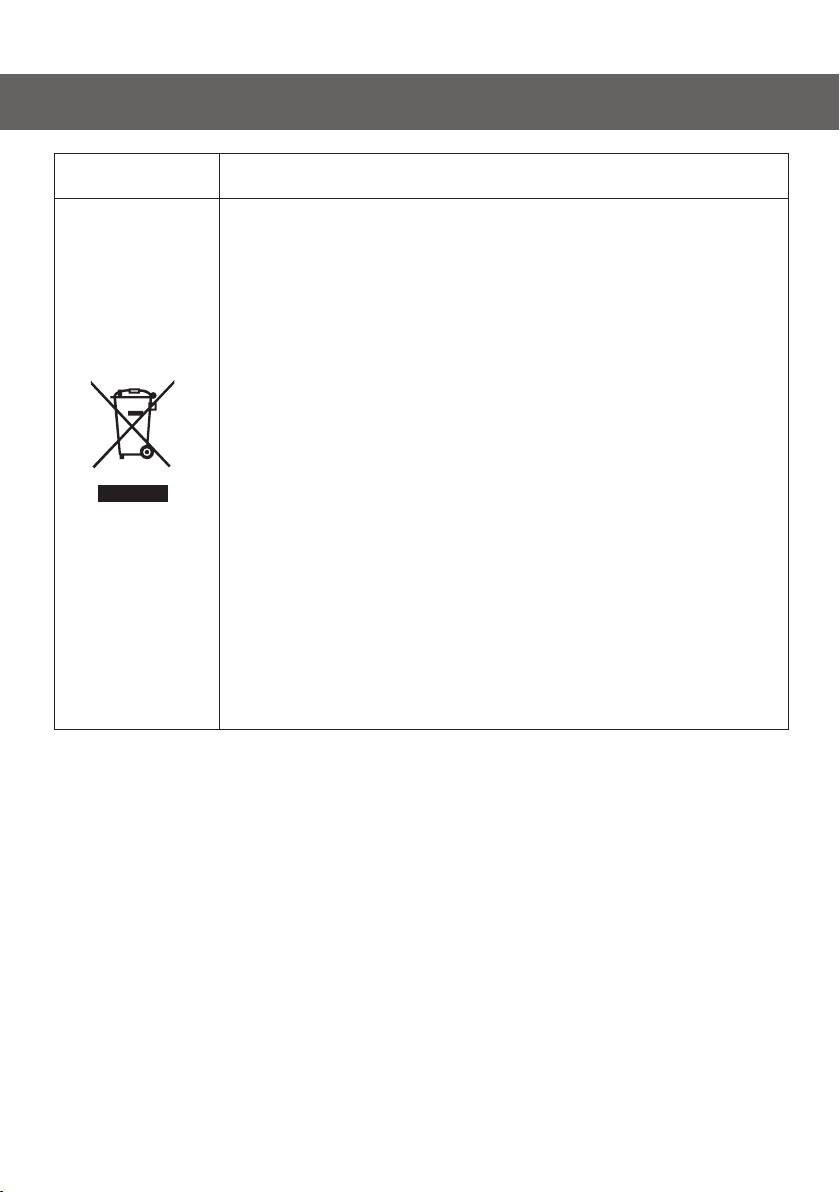
Correct Disposal of this product
This symbol on the product or in its packing
indicates that this product may not be treated as
household waste. Instead, it should be taken to
the appropriate waste collection point for the
recycling of electrical and electronic equipment.
By ensuring this product is disposed of correctly,
you will help prevent potential negative
consequences for the environment and human
health, which could otherwise be caused by the
inappropriate waste handling of this product. For
more detailed information about the recycling of
this product, please contact your local council
your household waste disposal service, or the
shop where you purchased the product.
35
Page 38
4332499
 Loading...