

Page 1
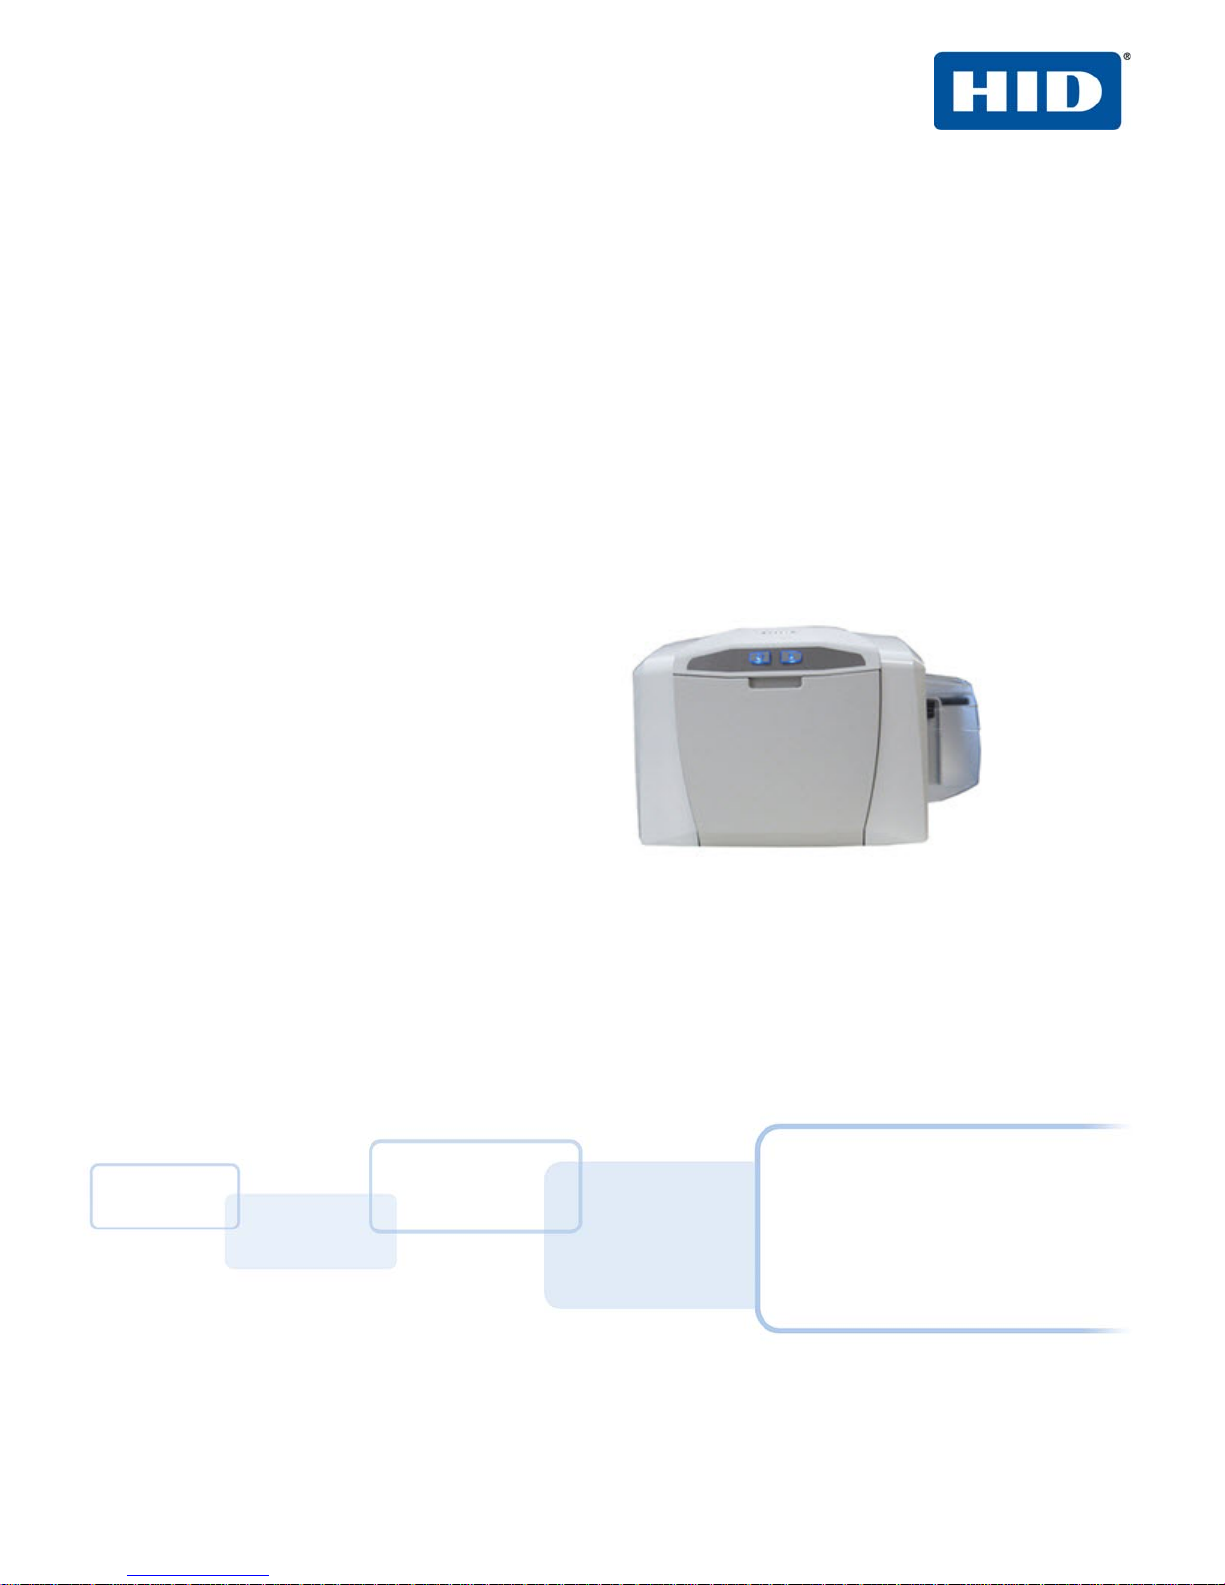
FARGO® C50 Card Printer
User Guide
PLT-01277
Version: 1.2
November 2014
hidglobal.com
Page 2

Copyright
© 2013-2014 HID Global Corporation/ASSA ABLOY AB. All rights reserved.
This document may not be reproduced, disseminated or republished in any form without the prior
written permission of HID Global Corporation.
Trademarks
HID GLOBAL, HID, the HID logo, and FARGO are the trademarks or registered trademarks of HID
Global Corporation, or its licensors, in the U.S. and other countries.
Contacts
For additional offices around the world, see www.hidglobal.com corporate offices.
Americas and Corporate Europe, Middle East and Africa (EMEA)
Page ii
611 Center Ridge Drive
Austin, TX 78753
USA
Phone: 866 607 7339
Fax: 949 732 2120
Haverhill Business Park Phoenix Road
Haverhill, Suffolk CB9 7AE
England
Phone: 44 (0) 1440 711 822
Fax: 44 (0) 1440 714 840
Asia Pacific Brazil
Condomínio Business Center
19/F 625 King’s Road
North Point, Island East
Hong Kong
Phone: 852 3160 9833
Fax: 852 3160 4809
Av. Ermano Marchetti, 1435
Galpão A2 CEP 05038-001
Lapa - São Paulo/SP
Brazil
Phone: 55 11 5514-7100
Fax: 55 11 5514-7109
HID Global Customer Support: hidglobal.com/customer-service
PLT-01277, Version: 1.2 November 2014
Page 3

Contents
Chapter 1: Introduction and Specifications . . . . . . . . . . . . . . . . . . . . . . . . . . . . . . . . . . . . . . . . . . . . . . 1-1
1.1 Using this Document . . . . . . . . . . . . . . . . . . . . . . . . . . . . . . . . . . . . . . . . . . . . . . . . . . . . . . . . . . . . . . . 1-1
1.2 Specifications . . . . . . . . . . . . . . . . . . . . . . . . . . . . . . . . . . . . . . . . . . . . . . . . . . . . . . . . . . . . . . . . . . . . 1-2
1.2.1 Regulatory Compliance . . . . . . . . . . . . . . . . . . . . . . . . . . . . . . . . . . . . . . . . . . . . . . . . . . . . .1-2
1.2.1.1 Agency Listings . . . . . . . . . . . . . . . . . . . . . . . . . . . . . . . . . . . . . . . . . . . . . . . . . . . . . . . . . .1-2
1.2.1.2 United States . . . . . . . . . . . . . . . . . . . . . . . . . . . . . . . . . . . . . . . . . . . . . . . . . . . . . . . . . . . .1-3
1.2.1.3 Canada . . . . . . . . . . . . . . . . . . . . . . . . . . . . . . . . . . . . . . . . . . . . . . . . . . . . . . . . . . . . . . . . .1-3
1.2.1.4 Taiwan . . . . . . . . . . . . . . . . . . . . . . . . . . . . . . . . . . . . . . . . . . . . . . . . . . . . . . . . . . . . . . . . . .1-3
1.2.1.5 Japan . . . . . . . . . . . . . . . . . . . . . . . . . . . . . . . . . . . . . . . . . . . . . . . . . . . . . . . . . . . . . . . . . . .1-3
1.2.1.6 Korea . . . . . . . . . . . . . . . . . . . . . . . . . . . . . . . . . . . . . . . . . . . . . . . . . . . . . . . . . . . . . . . . . . .1-3
1.3 Safety Messages . . . . . . . . . . . . . . . . . . . . . . . . . . . . . . . . . . . . . . . . . . . . . . . . . . . . . . . . . . . . . . . . . . 1-4
1.3.1 Safety Messages - United States . . . . . . . . . . . . . . . . . . . . . . . . . . . . . . . . . . . . . . . . . . . . 1-4
1.3.2 Safety Messages - French . . . . . . . . . . . . . . . . . . . . . . . . . . . . . . . . . . . . . . . . . . . . . . . . . . .1-5
1.3.3 Safety Messages - Taiwan . . . . . . . . . . . . . . . . . . . . . . . . . . . . . . . . . . . . . . . . . . . . . . . . . . .1-6
1.3.4 Safety Messages - China . . . . . . . . . . . . . . . . . . . . . . . . . . . . . . . . . . . . . . . . . . . . . . . . . . . .1-7
1.4 Technical Specifications . . . . . . . . . . . . . . . . . . . . . . . . . . . . . . . . . . . . . . . . . . . . . . . . . . . . . . . . . . . 1-8
1.5 Functional Specifications . . . . . . . . . . . . . . . . . . . . . . . . . . . . . . . . . . . . . . . . . . . . . . . . . . . . . . . . . 1-10
1.6 Printer Components - Print Ribbons . . . . . . . . . . . . . . . . . . . . . . . . . . . . . . . . . . . . . . . . . . . . . . . 1-10
1.6.1 Ribbon Types and Print Counts . . . . . . . . . . . . . . . . . . . . . . . . . . . . . . . . . . . . . . . . . . . . . 1-10
1.7 Printer Components - Blank Cards . . . . . . . . . . . . . . . . . . . . . . . . . . . . . . . . . . . . . . . . . . . . . . . . . . 1-11
1.8 Setup and Installation Procedures . . . . . . . . . . . . . . . . . . . . . . . . . . . . . . . . . . . . . . . . . . . . . . . . . . 1-11
Chapter 2: Hardware User Interface . . . . . . . . . . . . . . . . . . . . . . . . . . . . . . . . . . . . . . . . . . . . . . . . . . . . 2-1
2.1 Card Printer Buttons . . . . . . . . . . . . . . . . . . . . . . . . . . . . . . . . . . . . . . . . . . . . . . . . . . . . . . . . . . . . . . 2-1
2.1.1 Using the Power Button . . . . . . . . . . . . . . . . . . . . . . . . . . . . . . . . . . . . . . . . . . . . . . . . . . . .2-1
2.1.2 Using the Pause/Resume Button . . . . . . . . . . . . . . . . . . . . . . . . . . . . . . . . . . . . . . . . . . . . .2-1
2.1.3 Card Printer Beeps . . . . . . . . . . . . . . . . . . . . . . . . . . . . . . . . . . . . . . . . . . . . . . . . . . . . . . . . 2-2
Chapter 3: Printer Preferences . . . . . . . . . . . . . . . . . . . . . . . . . . . . . . . . . . . . . . . . . . . . . . . . . . . . . . . . 3-1
3.1 Card Tab. . . . . . . . . . . . . . . . . . . . . . . . . . . . . . . . . . . . . . . . . . . . . . . . . . . . . . . . . . . . . . . . . . . . . . . . . 3-2
3.2 Device Options Tab . . . . . . . . . . . . . . . . . . . . . . . . . . . . . . . . . . . . . . . . . . . . . . . . . . . . . . . . . . . . . . 3-4
3.2.1 Write Only . . . . . . . . . . . . . . . . . . . . . . . . . . . . . . . . . . . . . . . . . . . . . . . . . . . . . . . . . . . . . . . 3-6
3.3 Image Color Tab . . . . . . . . . . . . . . . . . . . . . . . . . . . . . . . . . . . . . . . . . . . . . . . . . . . . . . . . . . . . . . . . . . 3-7
3.4 Image Calibrate Tab. . . . . . . . . . . . . . . . . . . . . . . . . . . . . . . . . . . . . . . . . . . . . . . . . . . . . . . . . . . . . . 3-10
3.5 Magnetic Encoding Tab . . . . . . . . . . . . . . . . . . . . . . . . . . . . . . . . . . . . . . . . . . . . . . . . . . . . . . . . . . 3-11
November 2014 PLT-01277, Version: 1.2
Page 4

Page iv
3.6 Overlay / Print Area Tab. . . . . . . . . . . . . . . . . . . . . . . . . . . . . . . . . . . . . . . . . . . . . . . . . . . . . . . . . . 3-12
3.6.1 Defining an Overlay or Print Area . . . . . . . . . . . . . . . . . . . . . . . . . . . . . . . . . . . . . . . . . . 3-14
3.6.2 Defining additional areas . . . . . . . . . . . . . . . . . . . . . . . . . . . . . . . . . . . . . . . . . . . . . . . . . . 3-15
3.6.3 Deleting a Defined Area . . . . . . . . . . . . . . . . . . . . . . . . . . . . . . . . . . . . . . . . . . . . . . . . . . 3-15
3.6.4 Visual Security Solutions . . . . . . . . . . . . . . . . . . . . . . . . . . . . . . . . . . . . . . . . . . . . . . . . . . 3-16
3.7 K-Panel Resin Tab . . . . . . . . . . . . . . . . . . . . . . . . . . . . . . . . . . . . . . . . . . . . . . . . . . . . . . . . . . . . . . . 3-17
3.8 Printer Info Tab . . . . . . . . . . . . . . . . . . . . . . . . . . . . . . . . . . . . . . . . . . . . . . . . . . . . . . . . . . . . . . . . . . 3-19
Chapter 4: ToolBox . . . . . . . . . . . . . . . . . . . . . . . . . . . . . . . . . . . . . . . . . . . . . . . . . . . . . . . . . . . . . . . . .4-1
4.1 Configuration Tab . . . . . . . . . . . . . . . . . . . . . . . . . . . . . . . . . . . . . . . . . . . . . . . . . . . . . . . . . . . . . . . 4-2
4.2 Calibrate Ribbon Tab. . . . . . . . . . . . . . . . . . . . . . . . . . . . . . . . . . . . . . . . . . . . . . . . . . . . . . . . . . . . . 4-4
4.3 Clean Printer Tab . . . . . . . . . . . . . . . . . . . . . . . . . . . . . . . . . . . . . . . . . . . . . . . . . . . . . . . . . . . . . . . . 4-5
4.4 Advanced Settings Tab . . . . . . . . . . . . . . . . . . . . . . . . . . . . . . . . . . . . . . . . . . . . . . . . . . . . . . . . . . 4-6
4.4.1 Settings and Troubleshooting . . . . . . . . . . . . . . . . . . . . . . . . . . . . . . . . . . . . . . . . . . . . . . 4-7
Chapter 5: Troubleshooting . . . . . . . . . . . . . . . . . . . . . . . . . . . . . . . . . . . . . . . . . . . . . . . . . . . . . . . . . .5-1
5.1 Communications Errors. . . . . . . . . . . . . . . . . . . . . . . . . . . . . . . . . . . . . . . . . . . . . . . . . . . . . . . . . . . . 5-1
5.1.1 Error and Status Messages . . . . . . . . . . . . . . . . . . . . . . . . . . . . . . . . . . . . . . . . . . . . . . . . . 5-2
Chapter 6: Cleaning . . . . . . . . . . . . . . . . . . . . . . . . . . . . . . . . . . . . . . . . . . . . . . . . . . . . . . . . . . . . . . . . .6-1
6.1 Using the Required Supplies . . . . . . . . . . . . . . . . . . . . . . . . . . . . . . . . . . . . . . . . . . . . . . . . . . . . . . . 6-1
6.2 Cleaning the Printer . . . . . . . . . . . . . . . . . . . . . . . . . . . . . . . . . . . . . . . . . . . . . . . . . . . . . . . . . . . . . . . 6-2
6.2.1 Cleaning Inside the Printer . . . . . . . . . . . . . . . . . . . . . . . . . . . . . . . . . . . . . . . . . . . . . . . . . 6-2
6.2.2 Cleaning Outside the Printer . . . . . . . . . . . . . . . . . . . . . . . . . . . . . . . . . . . . . . . . . . . . . . . 6-2
6.2.3 Cleaning the Printhead . . . . . . . . . . . . . . . . . . . . . . . . . . . . . . . . . . . . . . . . . . . . . . . . . . . . 6-2
Chapter 7: Firmware Updates . . . . . . . . . . . . . . . . . . . . . . . . . . . . . . . . . . . . . . . . . . . . . . . . . . . . . . . . .7-1
7.1 Upgrade Information . . . . . . . . . . . . . . . . . . . . . . . . . . . . . . . . . . . . . . . . . . . . . . . . . . . . . . . . . . . . . . 7-1
PLT-01277, Version: 1.2 November 2014
Page 5

Introduction and Specifications
FARGO C50 Card Printer User Guide At a Glance
This User Guide covers the information required to setup, install, and configure the printer driver
options.
The following topics are covered in this User Guide:
Chapter 1: Introduction and Specifications
Chapter 2: Hardware User Interface
Chapter 3: Printer Preferences
Chapter 4: ToolBox
Chapter 1
Chapter 5: Troubleshooting
Chapter 6: Cleaning
Chapter 7: Firmware Updates
1.1 Using this Document
Links are displayed in italic text. If the user clicks on a link, they will “jump” to that section in the
document.
Hyperlinks to link to outside information are in underlined blue. Clicking one of these will open a
webpage or another document the link “points” to.
November 2014 PLT-01277, Version: 1.2
Page 6
Introduction and Specifications Page 1-2
1.2 Specifications
This section provides specific information on the Regulatory Compliances, Agency Listings, Technical
Specifications and Functional Specifications for the C50 Card Printer.
1.2.1 Regulatory Compliance
The Card Printer is listed under UL 60950-1 (2nd edition) Information Technology
Equipment
UL
File Number: E145118
Note: This product is intended to be supplied by a Listed Power Unit marked Class 2
and rated for 24Vdc, 3.3A minimum.
CSA
FCC
CE
Environmental
1.2.1.1 Agency Listings
Emissions and
Immunity
Standards
Safety Standards
Additional Agency
Listings
The Printer manufacturer has been authorized by UL to represent the Card Printer as
CSA Certified under CSA Standard C22.2 No. 60950-1-07 2
File Number: E145118
The Card Printer complies with the requirements in Part 15 of the FCC rules for a Class
A digital device.
The Card Printer has been tested and complies with EN300-330-1, EN300-330-2,
EN301-489-1, EN301-489-3, EN55022 class A, EN55024, EN6100-3-2, EN6100-3-3,
EN60950-1.
Note: Based on the above testing, the Printer manufacturer certifies that the Card
Printer complies with the following European Council Directives and has placed the CE
mark on the Card Printer.
LVD 2006/95/EC, EMC 2004/108/EC, R&TTE 1999/5/EC, ROHS2 2011/65/EC
ENERGY STAR, RoHS2, China RoHS, Power supply Efficiency level V minimum
FCC Part 15 Class A, RSS-GEN, RSS 210, CNS 13438, EN55022 Class A, EN55024,
EN6100-3-2, EN6100-3-3, EN300-330-1, EN300-330-2, EN301-489-1, EN301-489-3,
GB9254, GB 17625
UL IEC 60950-1 (2nd edition), CSA C22.2 No. 60950-1-07(2nd edition), EN60950-1,
GB4943, CNS14336
CCC, BSMI, KC
nd
edition
PLT-01277, Version: 1.2 November 2014
Page 7

Page 1-3 Introduction and Specifications
1.2.1.2 United States
This device complies with Part 15 of the FCC rules. Operation is subject to the following two
conditions:
1. This device may not cause harmful interference.
2. This device must accept any interference received, including interference that may cause
undesired operation.
Note: This equipment has been tested and found to comply with the limits for a Class A digital
device, pursuant to part 15 of the FCC Rules. These limits are designed to provide reasonable
protection against harmful interference when the equipment is operated in a commercial
environment. This equipment generates, uses, and can radiate radio frequency energy and, if not
installed and used in accordance with the instruction manual, may cause harmful interference to
radio communications. Operation of this equipment in a residential area is likely to cause harmful
interference; in which case, this interference is required to be corrected at the users expense.
IMPORTANT: Changes or modifications to an intentional or unintentional radiator not expressly
approved by the party responsible for compliance could void the user’s authority to operate the
equipment.
1.2.1.3 Canada
This device complies with Industry Canada license-exempt RSS standard(s). Operation is subject to
the following two conditions: (1) this device may not cause interference, and (2) this device must
accept any interference, including interference that may cause undesired operation of the device.
Le présent appareil est conforme aux CNR d'Industrie Canada applicables aux appareils radio
exempts de licence. L'exploitation est autorisée aux deux conditions suivantes: (1) l'appareil ne doit
pas produire de brouillage, et (2) l'utilisateur de l'appareil doit accepter tout brouillage
radioélectrique subi, même si le brouillage est susceptible d'en compromettre le fonctionnement.
1.2.1.4 Taiwan
䴻✳⺷娵嫱⎰㟤Ỷ≇澯⮬柣暣㨇炻朆䴻姙⎗炻℔⎠ˣ⓮嘇ㆾἧ䓐侭⛯澵⼿㑭冒嬲
潏柣澯ˣ≈⣏≇澯ㆾ嬲潏⍇姕妰䈡⿏⍲≇傥ˤỶ≇澯⮬柣暣㨇ἧ䓐澵⼿⼙枧梃
凒⬱ℐ⍲⸚㒦⎰㱽忂ᾉ烊䴻䘤䎦㚱⸚㒦䎦尉㗪炻ㅱ灅⌛ 䓐炻㓡┬军䃉⸚㒦㗪㕡
⼿两临ἧ䓐ˤ⇵枭⎰㱽忂ᾉ炻㊯ὅ暣ᾉ㱽夷⭂ἄ㤕䃉䶂暣忂ᾉˤỶ≇澯⮬柣暣㨇
枰⽵⍿⎰㱽忂ᾉㆾⶍ㤕ˣ䥹⬠⍲慓瀏䓐暣㲊灕⮬⿏暣㨇姕⁁⸚㒦ˤ
1.2.1.5 Japan
ɱʌ㻻㖤ʍ㐅ⴷʌශᕅᇐʰɯʄɢʜɷȾ
㐅ⴷᇐ⮠ʍㅢ $& ʅɷ
ᵢ㼳ʍ䴱⌘ʰֵ⭞ɵɽ 5),'ₕಞʌ䃣ʝʨᴮɫ䗲ʝ㻻㖤ʅɷȾ
ɻʌɽʟֵ⭞ɷʩ⭞䙊ᡶʉʦʁʄʍȽⱸₕಞʉᖧ丵ʰфɦʩᚆʪɪɠʨʜɷ
1.2.1.6 Korea
㢨 ὤὤ⏈ 㛹ⱨ㟝 Oh Ἵ P 㤸㣄䑀 㤵䚝ὤὤ⦐㉐ 䑄⬘㣄 ❄⏈ ㇠㟝㣄⏈ 㢨 㥄㡸 㨰㢌䚌㐐Ὤ ⵈ⢰⮤ S ᴴ㥉 㞬㢌 㫴
㜡㜄㉐G㇠㟝䚌⏈Gᶷ㡸G⯝㤵㡰⦐G䚝⏼␘ U
November 2014 PLT-01277, Version: 1.2
Page 8
Introduction and Specifications Page 1-4
1.3 Safety Messages
1.3.1 Safety Messages - United States
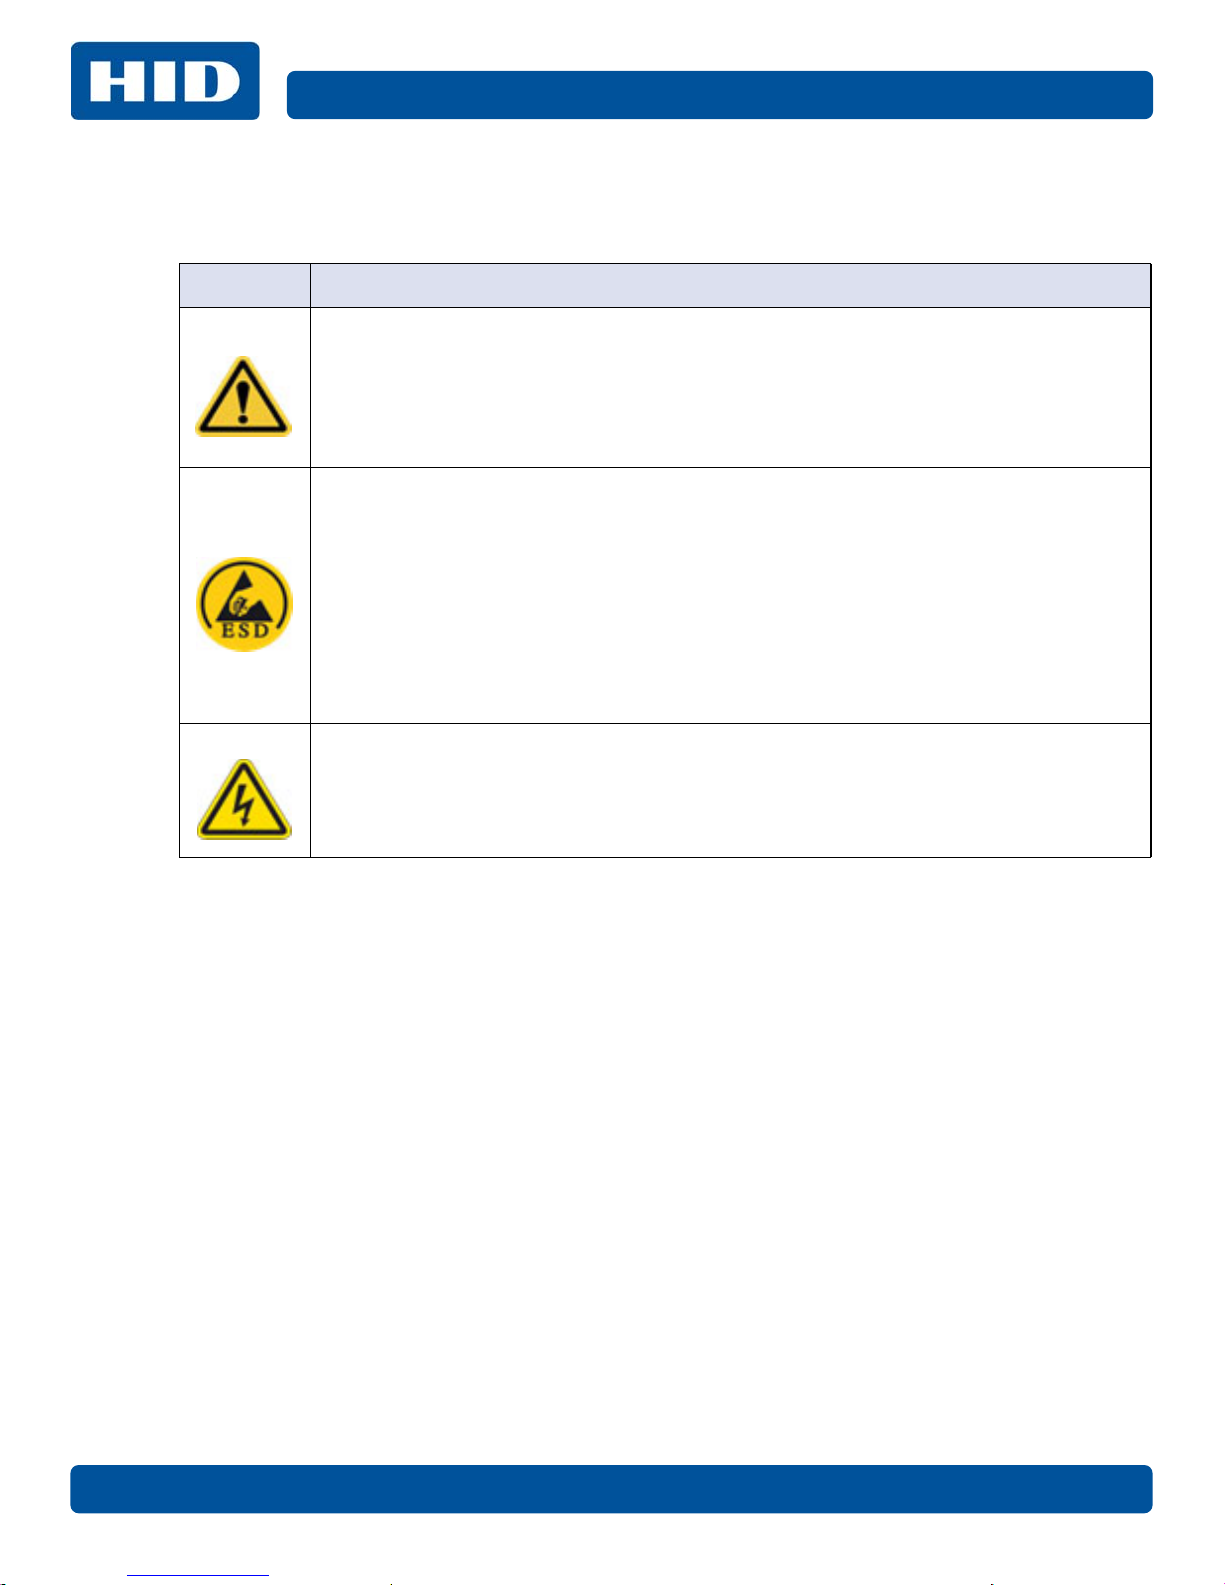
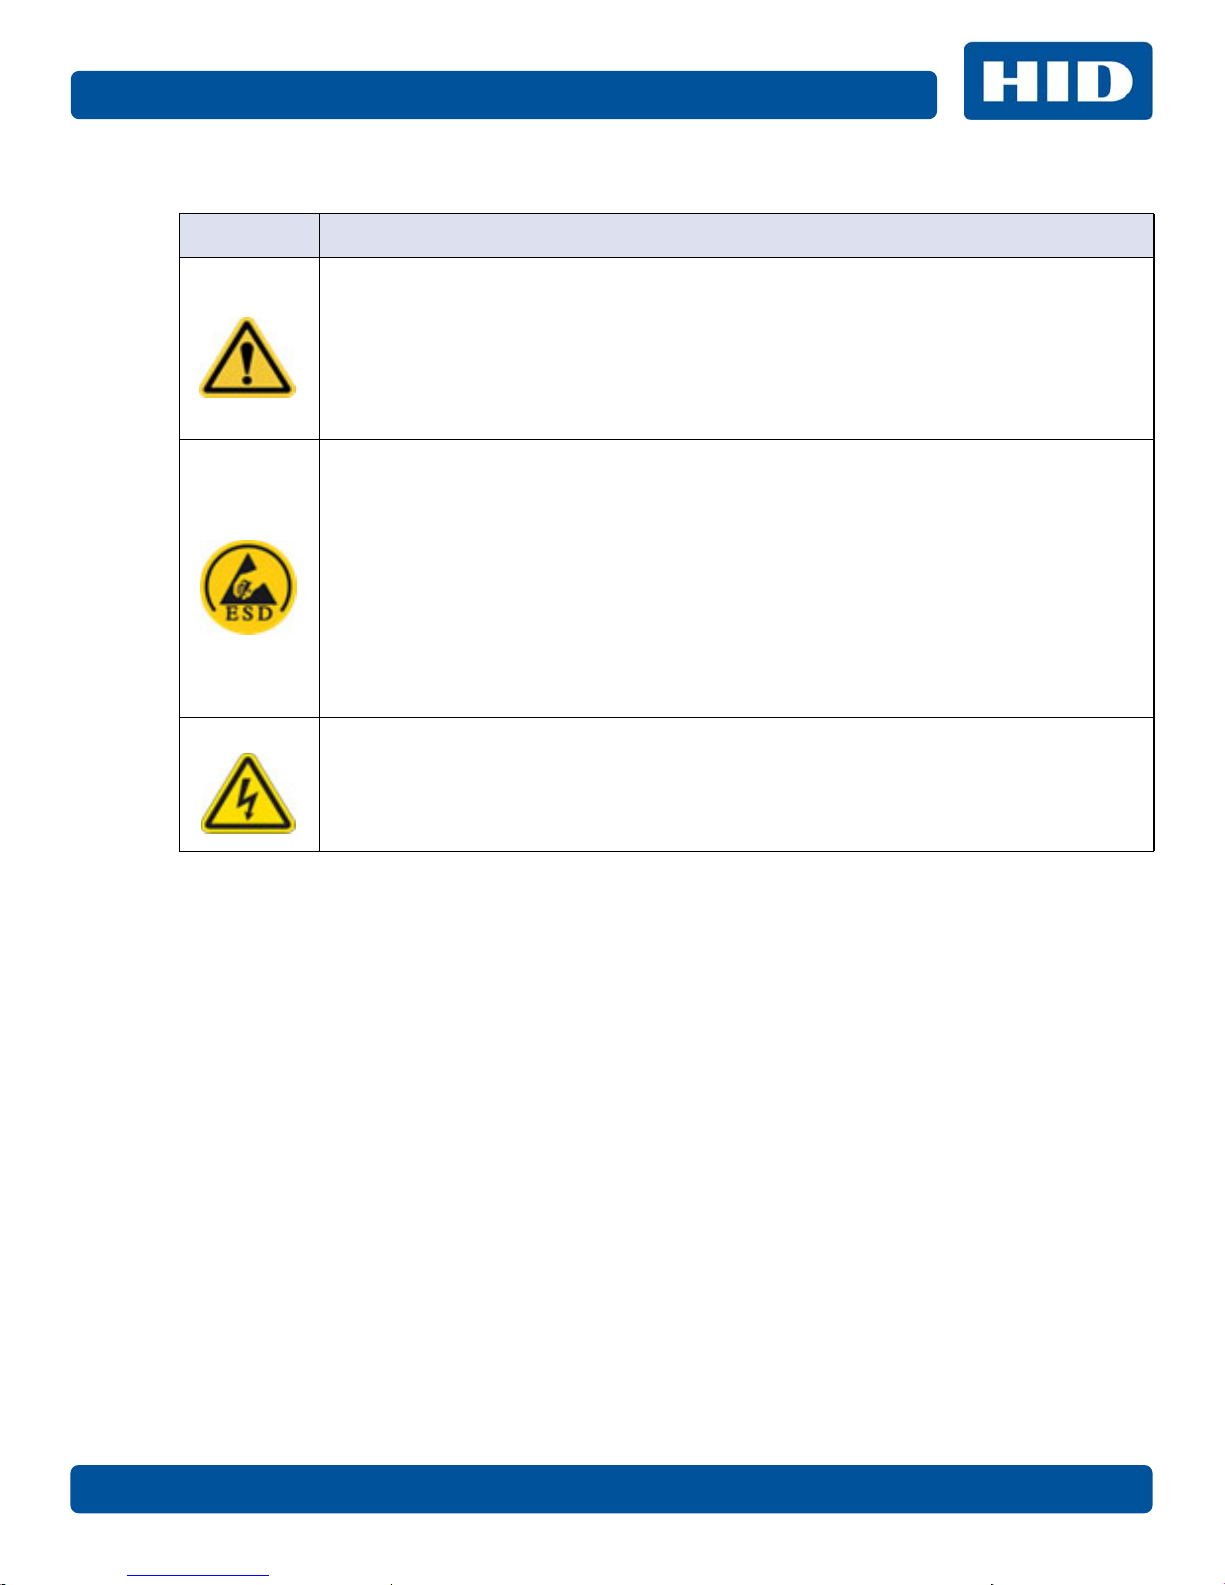
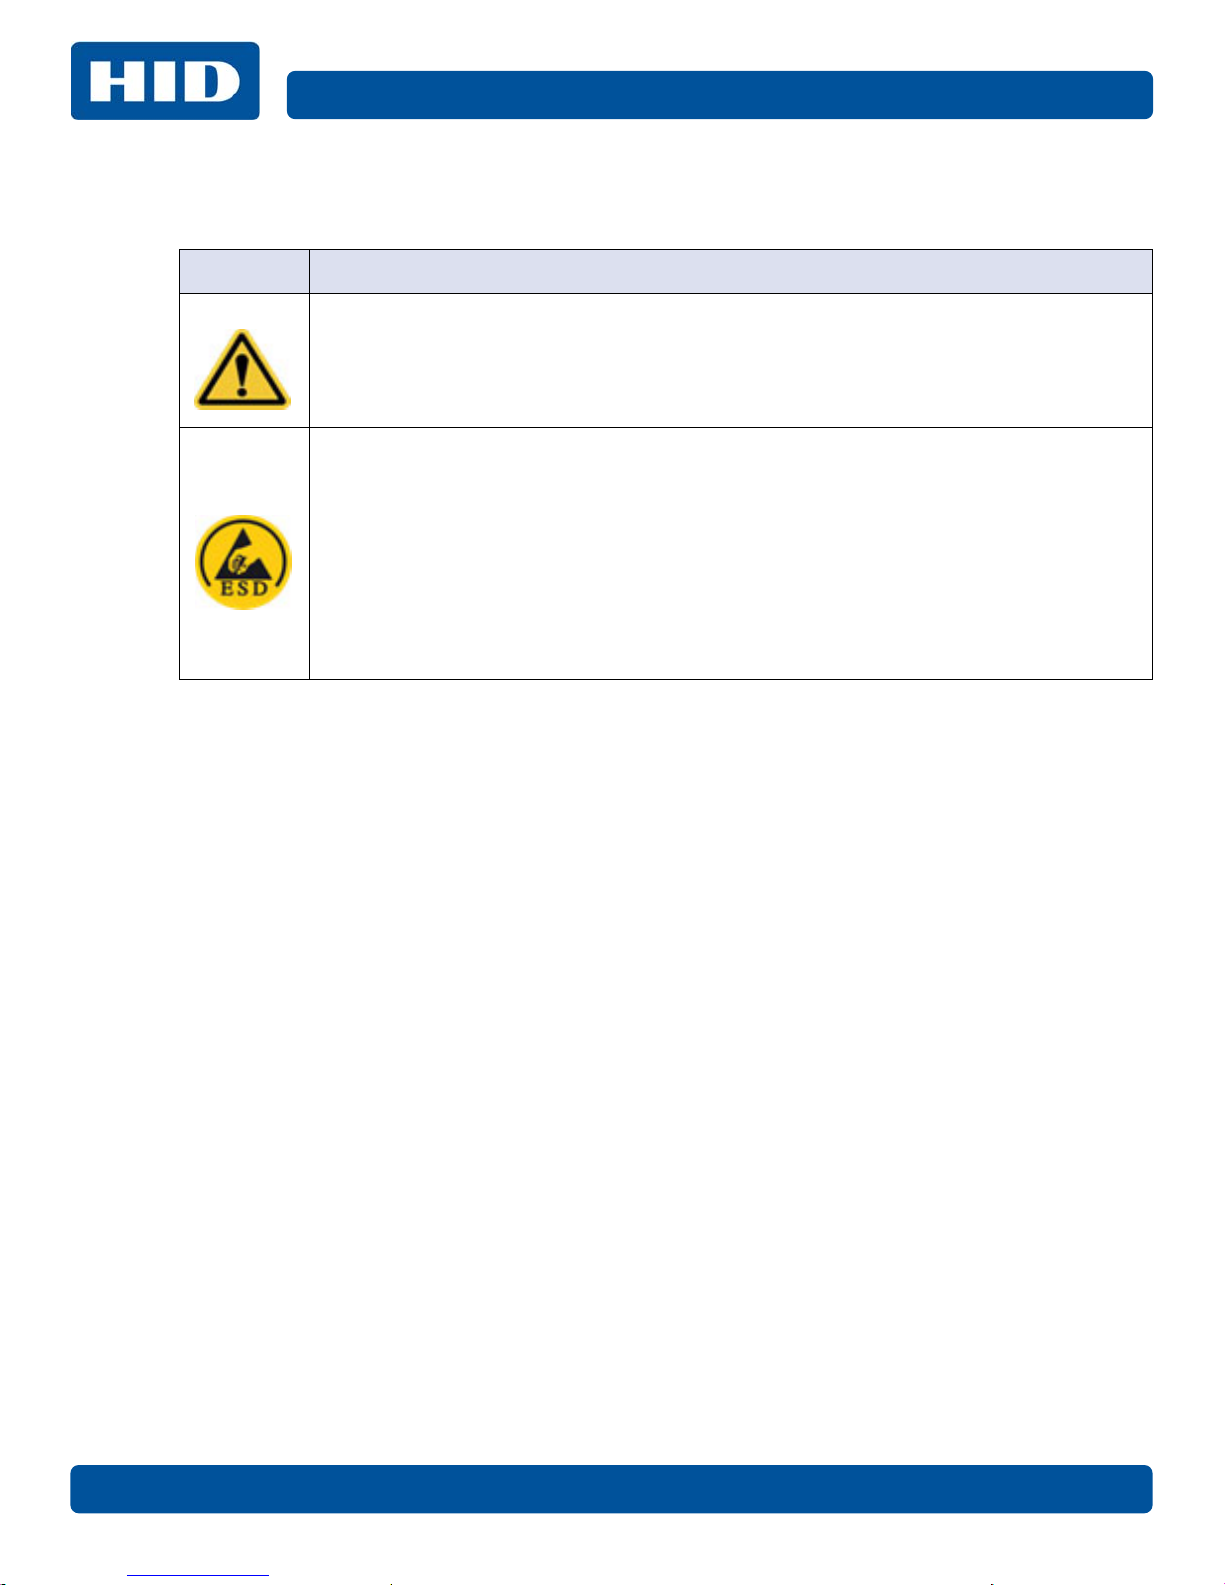
Symbol Critical Instructions for Safety Purposes
Danger:
ESD:
Caution:
Failure to follow these guidelines results in personal injury or death.
To prevent personal injury or death:
• Reference the following safety messages before performing an operation.
• Always remove the power cord prior to performing repair procedures, unless otherwise
specified.
• Ensure only qualified personnel perform these procedures.
This device is electro statically sensitive. The device may be damaged if exposed to static
electricity discharges.
To prevent damage:
• Reference the following safety messages before performing an operation.
• Observe all established Electrostatic Discharge (ESD) procedures while handling cables
in or near the Circuit Board and Printhead Assemblies.
• Always wear an appropriate personal grounding device.
• Always remove the Ribbon and Cards from the Printer before making any repairs,
unless otherwise specified.
• Remove jewelry and thoroughly clean hands before working on the Printer.
This symbol warns of an electrical hazard that could result in personal injury or death.
PLT-01277, Version: 1.2 November 2014
Page 9
Page 1-5 Introduction and Specifications
1.3.2 Safety Messages - French
Symbole Instructions critiques visant la Sécurité
Si ces directives ne sont pas suivies les résultats peuvent être des lésions corporelles ou la
Danger:
ESD:
mort.
Pour éviter des lésions corporelles ou la mort:
• Rapportez-vous aux avis suivants de sécurité avant de procéder à une opération.
• Retirez toujours le câble d’alimentation avant d’effectuer des procédures de réparation,
sauf spécification contraire.
• Assurez-vous qu’uniquement des personnes qualifiées réalisent des procédures.
Ce dispositif est sensible à l’électricité statique. Il peut souffrir des dommages s’il est exposé
à des décharges électrostatiques.
Pour éviter des dommages:
• Rapportez-vous aux messages suivants avant de procéder à une opération.
• Suivez toutes les procédures de Décharges Electrostatiques (ESD) en vigueur durant le
maniement des câbles dans ou à proximité des Ensembles de Cartes de Circuit
Imprimé et Tête d’Impression.
• Portez toujours un dispositif de mise à la terre personnelle appropriée.
• Retirez toujours le ruban et les Cartes de l’Imprimante avant d’effectuer toute
réparation, sauf spécification contraire.
• Retirez tous bijoux et lavez soigneusement vos mains avant de travailler à l’Imprimante.
Attention:
Ce symbole est un avis de péril électrique passible de résulter en lésion corporelle ou mort.
November 2014 PLT-01277, Version: 1.2
Page 10
Introduction and Specifications Page 1-6
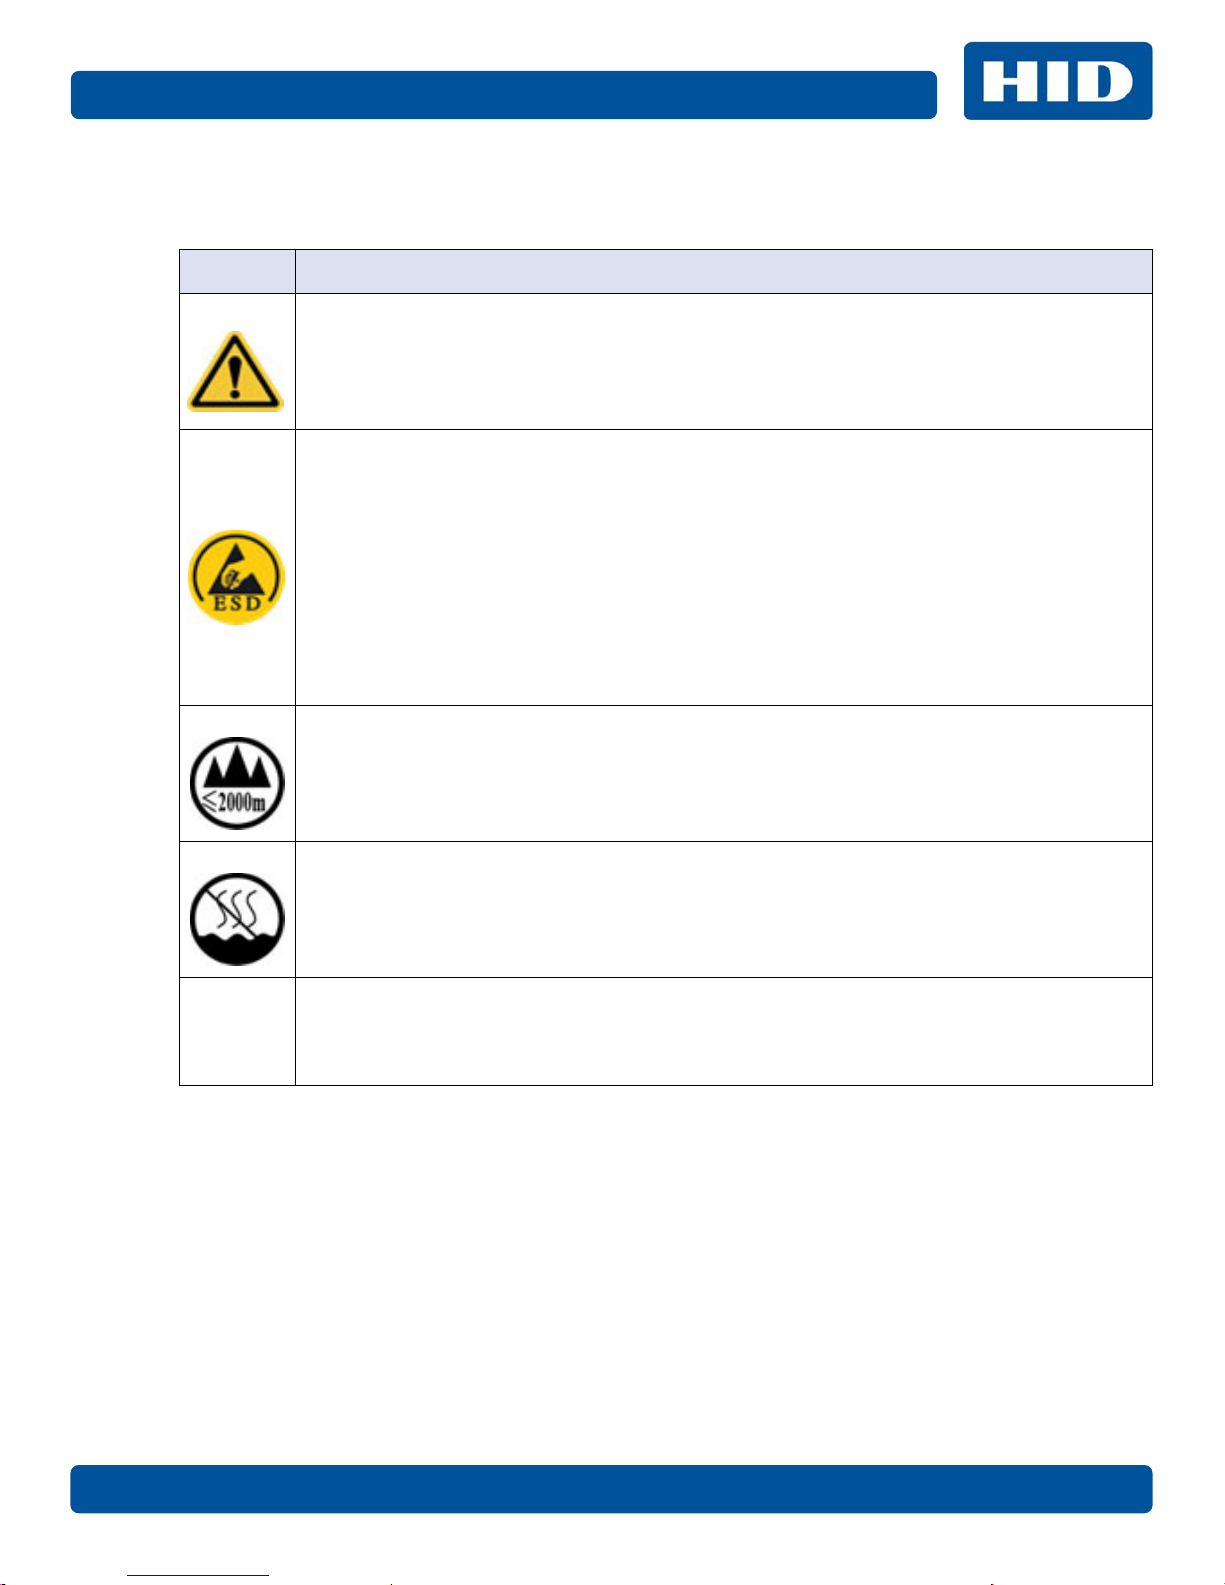
1.3.3 Safety Messages - Taiwan
䷩橼㔯ġ⮬柣䘤⮬⍲⬱ℐ㊯Ẍġ⬱ℐ妲〗 炷⮷⽫㩊㞍炸
㧁姀 慵天䘬⬱ℐḳ枭婒㖶
⌙晒 :
⮷⽫ :
㛒㊱䄏婒㖶⬱墅⎗傥忈ㆸṢ⒉ ṉˤ
⛐⎗傥䓊䓇㼃⛐⬱ℐ⓷柴䘬⛘㕡㚱嬎䣢㧁姀ˤ
炷⤪ⶎ⚾䣢炸ˤ
䁢Ḯ性Ṣ⒉ ⭛炻⛐忚埴㚱㬌嬎䣢㧁姀䘬㑵ἄ⇵炻婳⍫侫⬱ℐ屯妲㍸䣢ˤ
䁢Ḯ性Ṣ⒉ ⭛炻⛐㰺㚱䈡⇍婒㖶䘬ね㱩ᶳ炻ᾖ䎮⇵婳斄㌱暣㸸攳斄ˤ
㬌姕⁁⮵朄暣⼰㓷デˤ⤪㝄⍿⇘朄暣㓦暣炻姕⁁㚫㎵⢆ˤ
⛐⎗傥䓊䓇㼃⛐朄暣⬱ℐ⓷柴䘬⛘㕡㚱嬎䣢㧁姀ˤ
炷⤪ⶎ⚾䣢炸ˤ
䁢Ḯ性㎵⢆姕⁁炻⛐忚埴㚱㬌嬎䣢㧁姀䘬㑵ἄ⇵炻婳⍫侫⬱ℐ屯妲㍸䣢ˤ
䁢Ḯ性㎵⢆姕⁁炻⛐㌺㓦暣嶗㜧⌘⇟柕倗⎰墅伖墉朊ㆾ旬役䘬暣䶂㗪炻婳㲐シ奨⮇㚱䘬
朄暣㓦暣姕⁁ˤ
䁢Ḯ性㎵⢆姕⁁炻婳晐㗪ἑ㇜⎰怑䘬㍍⛘墅伖 炷㭼⤪烉ㇳ僽ᶲ㇜ᶨᾳ檀⑩岒䘬㍍⛘ㇳ僽ⷞ
ẍ⍿⇘⎗傥䘬 ⭛炸ˤ
䁢Ḯ性㎵⢆姕⁁炻⤪㝄㰺㚱䈡㬲婒㖶炻⛐ ảỽᾖ䎮⇵炻婳⍾ᶳ⌘堐㨇ᶲ䘬刚ⷞ⌉ˤ
䁢Ḯ性㎵⢆姕⁁炻⛐ἧ䓐⌘堐㨇⇵炻婳㐀ᶳㆺ㊯ㇳᶲ梦⑩炻Ṽ䳘㶭㲿ㇳᶲ䘬㱡傪ˤ
PLT-01277, Version: 1.2 November 2014
Page 11
Page 1-7 Introduction and Specifications
1.3.4 Safety Messages - China
ᆹޘ⎸ ˄䈧Ԅ㓶䰵䈫˅
ㅖ ⎹৺ᆹޘⲴ䟽㾱䗷〻
ড䲙
ሿᗳ
ྲн䚥ᗚ䘉Ӌᆹ㻵ᤷই䘋㹼ˈ㜭Պሬ㠤䟽Քˈ⭊㠣↫ӑDŽ
㜭ᕅᆹޘ䰞仈Ⲵؑ⭡䆖ㅖ ˄ྲᐖമᡰ⽪˅ᶕ㺘⽪DŽ
ѪҶ⺞؍Ӫ䓛ᆹޘˈ൘ᢗ㹼ࡽ䶒ᑖᴹ↔ㅖⲴѻࡽˈ䈧ݸ䰵䈫л䶒Ⲵᆹޘ⎸DŽ
ѪҶ⺞؍Ӫ䓛ᆹޘˈ䲔䶎ᴹ㿴ᇊˈࡉ൘ᢗ㹼㔤؞䗷〻ࡽˈ㓸ᓄᯝᔰ⭥ⓀDŽ
↔䇮༷Ѫ䶉⭥ᝏ䇮༷DŽྲ᳤䵢൘䶉⭥⭥⍱лˈ㜭Պᦏൿ䇮༷DŽ
㜭ᕅ䶉⭥ᆹޘ䰞仈Ⲵؑ⭡䆖ㅖ ˄ྲᐖമᡰ⽪˅ᶕ㺘⽪DŽ
ѪҶ䱢→䇮༷ᡆӻ䍘ᦏˈ൘ᢗ㹼ࡽ䶒ᑖᴹ↔ㅖⲴѻࡽˈ䈧ݸ䰵䈫л䶒Ⲵᆹޘ⎸DŽ
ѪҶ䱢→䇮༷ᡆӻ䍘ᦏˈ䈧൘༴⨶⭥䐟ᶯ઼ᢃঠཤ䜘Ԧѝᡆ䱴䘁Ⲵ⭥㔶ᰦˈ䚥ᆸᡰᴹ㿴ᇊⲴ
䶉⭥᭮⭥(6'䗷〻DŽ
ѪҶ䱢→䇮༷ᡆӻ䍘ᦏˈ䈧㓸֙ᑖ䘲ᖃⲴњӪ᧕ൠ䇮༷ ˄ֻྲˈᐢ᧕ൠ䚯ݽࠪ⧠▌൘ᦏൿ
Ⲵ儈䍘䟿㞅ᑖ˅DŽ
ѪҶ䱢→䇮༷ᡆӻ䍘ᦏˈ䲔䶎ᴹ㿴ᇊˈࡉ൘ᢗ㹼ԫօ㔤؞䗷〻ࡽˈ㓸ᓄሶ㢢ᑖ઼䇱
оᢃঠᵪ࠶DŽ
ѪҶ䱢→䇮༷ᡆӻ䍘ᦏˈ൘ᢃঠᵪࡽˈ䈧лᤷ઼кⲴ⨐ᇍ侠⢙ˈᒦሶкⲴ⋩
઼⊑ᖫᓅ⍇ᒢ߰DŽ
ӵ䘲⭘Ҿ⎧ᤄ Pԕлൠᆹޘ֯⭘
Use only at altitudes not more than 2000m above sea level.
ӵ䘲⭘Ҿ䶎✝ᑖ≄ىᶑԦлᆹޘ֯⭘
⧟ຳ؍ᣔ ѝഭ 5R+6
⧟؍֯⭘ᵏᱟสҾᵜӗ૱⭘Ҿ࣎ޜ⧟ຳDŽ
Environmental Protection Use Period is based on the product being used in an office
environment.
November 2014 PLT-01277, Version: 1.2
Page 12

Introduction and Specifications Page 1-8
1.4 Technical Specifications
Term Function
Print Method Dye Sublimation / Resin Thermal Transfer
Print resolution 300 dpi (11.8 dots/mm); continuous tone
Colors Up to 16.7 million colors / 256 shades per pixel
Print Ribbon Options
Print Speed
• Full-color with resin black and overlay panel, YMCKO*, 250 prints
• Resin black (standard and premium), 1000 prints
• Resin green, blue, red, white, silver and gold, 1000 prints
• Rewrite technology – No ribbon is required
* Indicates the Ribbon type and the number of Ribbon panels printed where
Y=Yellow, M=Magenta, C=Cyan, K=Resin Black, O=Overlay, F=Fluorescing Resin
• 7 seconds per card (K*)
• 24 seconds per card (YMCKO*)
• Print speed indicates an approximate batch print speed and is measured
from the time a card feeds into the printer to the time it ejects from the
printer.
• Print speeds do not include encoding time or the time needed for the PC
to process the image.
• Process time is dependent on the size of the file, the CPU, amount of RAM
and the amount of available resources at the time of the print.
* Indicates the ribbon type and the number of ribbon panels printed where
Y=Yellow, M=Magenta, C=Cyan, K=Resin Black, O=Overlay, F=Fluorescing Resin
Card Size and Types
Supported
Accepted Standard Card
Sizes
Accepted Card Thickness
Accepted Card Types
Input Hopper Card
Capacity
Output Hopper Card
Capacity
Card Cleaning Each ribbon cartridge includes a new card-cleaning roller.
Printer Memory 32MB RAM
Operating Systems
Interface USB 2.0
• CR-80 (3.375 in. L x 2.125 in. W / 85.6mm L x 54mm W)
• CR-79 (3.313 in. L x 2.063 in. W / 84.1mm L x 52.4mm W
• CR-80 edge-to-edge (3.36 in. L x 2.11 in. W / 85.3mm L x 53.7mm W)
• CR-79 (3.3 in. L x 2.04 in. W / 8 3.8mm L x 51.8mm W)
• 10 mil
• 20 mil
• 30 mil
• 40 mil
• PVC or polyester cards with polished PVC finish
• Monochrome resin required for 100% polyester cards
• Optical memory cards with PVC finish
• Rewrite
50 Cards (.030 in. / .762 mm) + Manual Feed
30 cards (.030 in. / .762 mm)
Windows® XP/Vista™ (32 bit & 64 bit)/Server 2003 & 2008/Windows® 7 (32 &
64 bit)/Windows® 7(32 & 64 bit)/Linux®/MAC® OS X 10.5, 10.6, 10.7, 10.8
PLT-01277, Version: 1.2 November 2014
Page 13

Page 1-9 Introduction and Specifications
Term Function
Operating Temperature 65° F to 80° F (18° C to 27°C)
Humidity 20-80% non-condensing
Dimensions 8.8 in. H x 13.7 in. W x 7.9 in. D (224mm H x 348mm W x 201mm D)
Weight 7.5 lbs. (3.4 Kg)
Agency Listings
Supply Voltage 100-240 VAC, 1.6 A
Supply Frequency 50 Hz / 60 Hz
Warranty
Options Printer Cleaning Kit
Software FARGO Workbench™ Diagnosis Utility
Display Status indicated by button color (red or blue), flashing, always on or always off.
Safety: UL 60950-1, CSA C22.2 (60950-1), and CE; EMC; FCC Class A, CRC
c1374, CE (EN 55022 Class A, EN 55024), CCC, BSMI, KCC
Printer – Two years
Printhead – Two years, unlimited pass with UltraCard®
November 2014 PLT-01277, Version: 1.2
Page 14
Introduction and Specifications Page 1-10
1.5 Functional Specifications
This card printer utilizes two different, yet closely related printing technologies to achieve its
remarkable direct-to-card print quality for dye-sublimation and resin thermal transfer.
1.6 Printer Components - Print Ribbons
Print ribbons are available in several versions to meet a variety of requirements:
• Resin-only
• Dye-sublimation-only
• Combination dye-sublimation / resin versions.
To make it easier to remember which print ribbons are which, a letter code has been developed to
indicate the type of ribbon panels found on each ribbon. This letter code is as follows:
= Dye-Sublimation Yellow Panel
Y
= Dye-Sublimation Magenta Panel
M
= Dye-Sublimation Cyan Panel
C
= Resin Black Panel (Premium unless otherwise stated)
K
= Clear Protective Overlay Panel
O
= Fluorescing Panel
F
1.6.1 Ribbon Types and Print Counts
The following table lists print capability of each ribbon type.
Ribbon Count
YMCKO – Full Color/Resin Black / Overlay 100
K – Standard Resin 1000
K – Premium Resin 1000
Colored Resin 1000
PLT-01277, Version: 1.2 November 2014
Page 15
Page 1-11 Introduction and Specifications
1.7 Printer Components - Blank Cards
Type Description
Card Size
Card Surface
UltraCard Brand Cards
• CR-80 edge-to-edge (3.36 in. L x 2.11 in. W / 85.3mm L x 53.7mm W)
• CR-79 (3.3 in. L x 2.04 in. W / 83.8mm L x 51.8mm W)
Suitable cards must have a polished PVC surface free of fingerprints, dust or
any other types of embedded contaminants. In addition, cards must have a
completely smooth, level surface for the printer to achieve consistent color
coverage. Some types of proximity cards have an uneven surface that inhibits
consistent color transfer.
Some types of smart card chips are raised slightly above the card’s surface,
which also results in poor color transfer.
The UltraCard product line, available exclusively as part of HID Global's Fargo
brand secure card issuance solutions, has a long standing reputation among
dealers and end-users for consistent quality in construction.
In addition to blank stock, the UltraCard line is available in a variety of
configurations for magnetic stripe and other anti-counterfeiting features.
UltraCard PVC cards are medium-durability cards for a glossy, photo quality
finish. These cards are clean scratch-free cards for high-quality prints and
extended printhead life.
1.8 Setup and Installation Procedures
The setup and installation procedure follows:
1. Unpack the printer and inspect the carton to ensure that no damage has occurred during
transportation. Make sure that all supplied accessories are included with the unit.
2. See the Installation Guide for information on how to load the ribbon cartridge and card stock.
3. See the Installation Guide for how to connect the power to the printer.
November 2014 PLT-01277, Version: 1.2
Page 16

Introduction and Specifications Page 1-12
This page intentionally left blank.
PLT-01277, Version: 1.2 November 2014
Page 17
Hardware User Interface
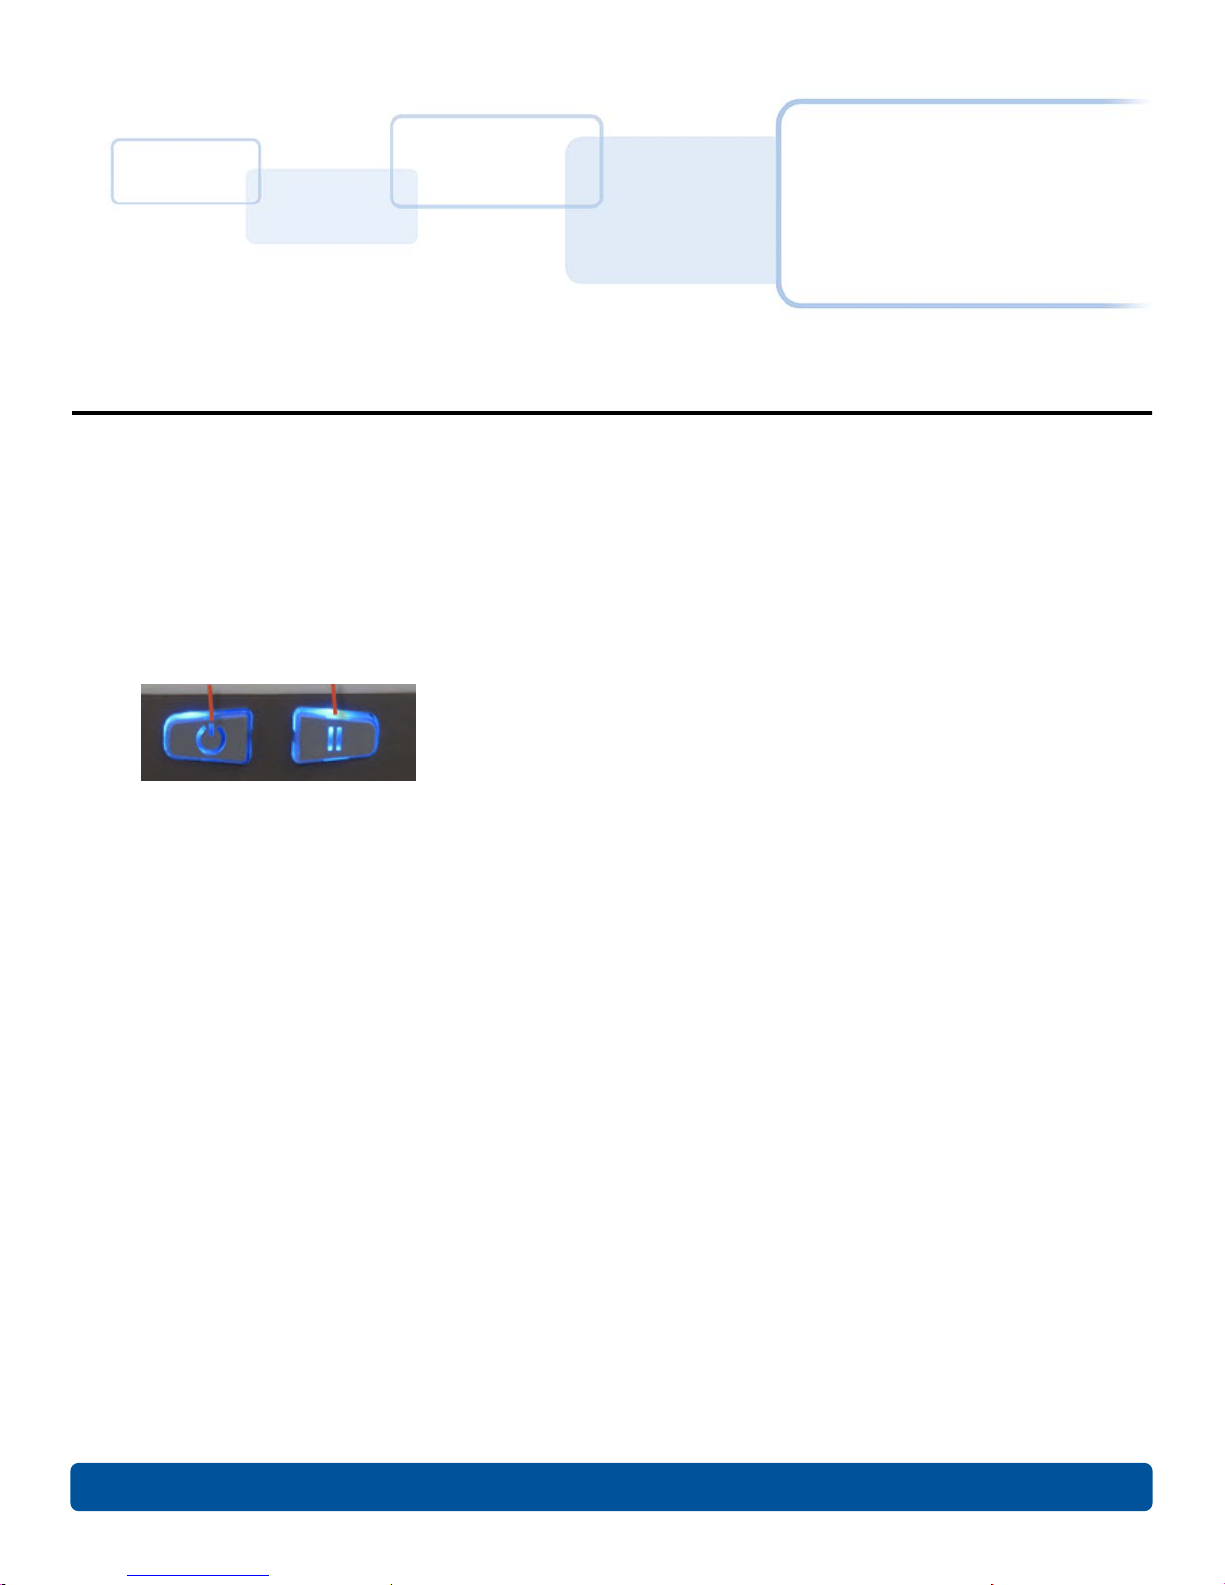
The Card Printer has two hardware user-interface features: buttons and beeps.
2.1 Card Printer Buttons
Card Printer Buttons
The card printer has two buttons that perform multiple functions. The light color of the buttons is blue,
except when there is an error condition, which will be indicated in red.
Chapter 2
Power
Pause/Resume
2.1.1 Using the Power Button
The Power button initiates or interrupts electrical power to the printer.
To start up the printer, press the Power button once. The buttons illuminate with a steady blue
light.
To deactivate the printer, press the Power button twice. The lighted buttons extinguish and
become dark.
The button also moves cards to the left along the card track toward the output hopper.
Press the Power button to clear jammed cards.
2.1.2 Using the Pause/Resume Button
The Pause/Resume button enables the user to temporarily stop and continue the print process.
To suspend printing, press the Pause/Resume button once. When printing stops, the button
changes from steady to blinking.
To continue printing, press the Pause/Resume button once again. The button returns to a
steady glow.
November 2014 PLT-01277, Version: 1.2
Page 18

Hardware User Interface Page 2-2
2.1.3 Card Printer Beeps
The card printer beeps to indicate the successful completion of a setting or activity.
A single beep generally indicates a successful change.
One or more beeps signals the restoration of default values for settings on the Advanced
Settings tab in ToolBox.
PLT-01277, Version: 1.2 November 2014
Page 19

Printer Preferences
This section provides an overview of the Printing Preferences tabs.
There are some common buttons displayed on all screens:
Button Description
Chapter 3
OK
Cancel
Help
Default
Closes the dialog box and saves the driver configuration changes since the dialog box
opened.
Closes the dialog box and discards configuration changes made since the dialog box
opened.
Displays Help topics specific to the active tab.
Returns all settings to the default selection.
November 2014 PLT-01277, Version: 1.2
Page 20

3.1 Card Tab
The Card tab has the options for the card type and positions, as well as access to diagnostics and
calibrations.
Note: Never run cards with a contaminated, dull or uneven surface through the printer. Printing onto
such cards will ultimately lead to poor print quality. Always store the card stock in its original
packaging or in a clean, dust-free container. Do not print onto cards that have been damaged or
soiled.
Printer Preferences Page 3-2
PLT-01277, Version: 1.2 November 2014
Page 21

Page 3-3 Printer Preferences
Group or Field Description
Select the Card Size option:
CR-80: This is the default card size selection for the Card Printer with a print area
53.6mm x 85.5mm x 30mil (3.375 in. x 2.125 in. x 30 mil).
CR-79: Use this selection to print to cards with a print area 53.6mm X 85.5mm X 30 mil
(2.110 in. x 3.366in. x 30 mil).
Card Size
Note: These print area dimensions are 1mm (.04 in.) larger than the actual card size.
This extension enables the Printer to overprint images so they appear edge-to-edge
when transferred to the card.
When designing a card format, set the card or page size within the card design
program to the exact Print Length and Print Width dimensions listed in the Card Size
panel.
Print Width
These two items display the actual card size.
Print Length
Select the Card Thickness (mil) value from the drop-down list.
Options are:
Card
Thickness
Orientation
• 10 mil
• 20 mil
• 30 mil
• 40 mil
Select either the Portrait or Landscape option.
Portrait: The card will print in a vertical orientation.
Landscape: The card will print in a horizontal orientation.
Copies
Set the number of copies to be printed. Range is 1 to 10000.
Informational Buttons
Diagnostics
ToolBox
Click Diagnostics to launch the Workbench Printer Utility.
Click ToolBox to access the ToolBox window and options.
After installation of a compatible ribbon cartridge in the printer.
Open the printer driver settings:
Test Print
About
Select About to display the copyright information, the driver’s version number and
date code.
1. From the computer’s Start menu, select Devices and Printers.
2. Right-click the Card Printer entry under Printers and Faxes.
3. Select Printing Preferences.
4. Select the Card tab, and click Test Print. An image is sent to the printer.
November 2014 PLT-01277, Version: 1.2
Page 22

Printer Preferences Page 3-4
3.2 Device Options Tab
The Device Options tab has the ribbon options as well as image printing position on the card.
Group or Field Description
Supplies
Automatically detect the installed ribbon for every print job
The printer driver automatically detects the installed ribbon.
To manually select the ribbon type, clear the checkbox option and select the ribbon from the Ribbon Type
drop-down menu.
PLT-01277, Version: 1.2 November 2014
Page 23

Page 3-5 Printer Preferences
Group or Field
Ribbon Type
Dual Sided
Options
Rotate Front 180 Degrees
Disable Printing
Write Only
Description
Select the ribbon type that is loaded in the printer.
• YMCKO: Yellow, Magenta, Cyan, Resin Black, Overlay
• YMCKOK: Yellow, Magenta, Cyan, Resin Black (2 Panels), Overlay
• K: Black Standard Resin
• K: Black Premium Resin
• Colored Resin: Resin Yellow, Resin Magenta, Resin Cyan
Not available in the C50 Card Printer.
Select this option to rotate the image on the front of the card by 180
degrees when printed
Select this option to prohibit the printer from printing.
This option is only available when the selected Ribbon Type is NONE.
See Section 3.2.1: Write Only.
November 2014 PLT-01277, Version: 1.2
Page 24

3.2.1 Write Only
Select this option to use rewritable cards. The default setup is for the printer to first erase the entire
card then write new information on the card. There is no option to select specific areas to erase. To
print or erase a section, use the Overlay/Print Area tab. Select the specific area in the same manner
as a print job with a color ribbon.
Printer Preferences Page 3-6
To erase many cards, use the FARGO Workbench Re-Writable Card Eraser option. It does not print,
It only erases.
Note: No ribbon is used with rewritable cards. Do not load a ribbon into the printer when using this
process. Printing on a rewritable card with a ribbon will ruin the card.
PLT-01277, Version: 1.2 November 2014
Page 25

Page 3-7 Printer Preferences
3.3 Image Color Tab
The Image Color tab has the options for adjusting the color printed onto the card.
November 2014 PLT-01277, Version: 1.2
Page 26

Printer Preferences Page 3-8
Group or Field Description
Image Quality
Select one of the following options from the drop-down menu.
None:
• If interested in print speed rather than print color
• If color correcting an image that has been previously printed
Color Matching
Resin Dither
Heat
Dye-Sub Intensity:
(YMC)
Resin Head, Front
Overlay Heat (O)
Advanced Setting
button
• If using third-party color matching software.
System Color Management: Allows the printer driver to make color corrections
through a complex color-matching algorithm.
Note: This option shifts colors so the image more closely matches how they
appear on screen.
Algebraic: to use the Algebraic color-matching algorithm.
Resin Dither is available when the resin ribbon is installed. This process produces
different shades of gray by varying the patterns of black and white dots. There are
no gray dots at all.
There are two selections available:
• Optimized for Graphics
• Optimized for Photos
Adjusting this slide controls the overall darkness and lightness of the dye-sub
printed image.
Move the slide to the left to use less heat in the printing process, resulting in a
lighter print.
Move the slide to the right to use more heat, resulting in a darker print.
Note: This slide only affects those images printed with dye-sublimation ribbon
panels (YMC).
Adjusting this slide controls the amount of heat the printer uses when printing
with the resin black panel.
Move the slide to the left to use less heat in the printing process, resulting in a
lighter or less saturated print.
Move the slide to the right to use more heat, resulting in a darker or more
saturated print.
Note: This control can be helpful for fine-tuning the sharpness of resin text and
bar codes.
Move the slider to the left to use less heat on the overlay during the printing
process. Move the slider to the right to use more heat.
Clicking this opens the Advanced Image Color window.
PLT-01277, Version: 1.2 November 2014
Page 27

Page 3-9 Printer Preferences
Group or Field Description
Adjust the sliders as needed to improve image quality.
• Move the slide to the left (-) for less sharpness / contrast / gamma / color.
• Move the slide to the right (+) for more sharpness / contrast / gamma / color.
Click OK to accept any variance from the default values and return to the
Image Color tab window.
Click Cancel to negate all changes and return to the Image Color tab window.
Click Default to clear changes back to the default settings for this window.
Advanced Image
Color
November 2014 PLT-01277, Version: 1.2
Page 28

Printer Preferences Page 3-10
3.4 Image Calibrate Tab
The Image Calibrate tab has the adjustments to the image position on the card.
Group or Field Description
Image Position
Adjust the image position values by clicking the arrow buttons next to the Vertical and Horizontal fields.
These values ensure that the cards always remain in the same position as they travel through the printer
(regardless of image orientation).
PLT-01277, Version: 1.2 November 2014
Page 29

Page 3-11 Printer Preferences
Use the Vertical adjustment to move the image toward the top or bottom of the card.
• A positive number moves the image toward the top.
Vertical
Horizontal
The card Illustration rotates according to the selection of Portrait, Landscape (Card tab) or Rotate Front 180
Degrees (Device Options tab).
The outline around the illustration remains constant in the landscape orientation.
• A negative number moves the image toward the bottom.
The maximum value for the Vertical adjustments is ±100 Pixels
(10 Pixels = 0.03inches (.8mm).
Use the Horizontal adjustment to move the image toward the left or right side of the
card.
• A positive number moves the image toward the left.
• A negative number moves the image toward the right.
The maximum value for the Horizontal adjustments is ±100 Pixels
(10 Pixels = 0.03inches (.8mm).
3.5 Magnetic Encoding Tab
Reserved (although currently displays as a tab).
November 2014 PLT-01277, Version: 1.2
Page 30

Printer Preferences Page 3-12
3.6 Overlay / Print Area Tab
The Overlay / Print Area tab contains the options to control and customize where the overlay (O)
panel and/or the print area appear on the card. By default, this option is set to print and overlay the
entire card.
The orientation of the card display area is determined by the orientation specified on the Card tab.
PLT-01277, Version: 1.2 November 2014
Page 31

Page 3-13 Printer Preferences
Group or Field Description
To define an overlay or print area, select that option in the overlay / print field.
• Full Card: Select this option to overlay and/or print the entire card.
• Defined Area(s): Select this option to overlay and/or print only in the
selected and defined area(s).
• Undefined Area(s): Select this option to overlay and/or print in the space
outside the selected and defined area.
Overlay / Print Areas
For Print and Overlay
• Omit Smart Chip Area: Select this option to overlay and/or print only in
the space outside the standard location of a smart chip.
• Omit Mag Strip Area: Select this option to overlay and/or print only in the
space outside the standard location of an ISO-standard magnetic stripe.
• Omit Signature Area: Select this option to overlay and/or print only in the
space outside the standard location of a signature panel.
See Section 3.6.1: Defining an Overlay or Print Area
This option applies the defined area to both the print and overlay processes.
For Overlay Only
For Print Only
(No Overlay)
Security Options
Visual Security
Solutions™
Verimark
HoloMark
The defined area applies only to the overlay process. The entire card prints and
only the overlay is affected.
The defined are applies only to the print process. Overlay is disabled.
Use this field to enable and select a visual security option. The default value for
all cards is No Visual Security.
When one of the options is selected, the overlay/print area feature is disabled
and the security options become selectable. See Section 3.6.4: Visual Security
Solutions.
This option is reserved for future use.
Use this option for hologram security.
November 2014 PLT-01277, Version: 1.2
Page 32

Printer Preferences Page 3-14
3.6.1 Defining an Overlay or Print Area
To define an overlay or print area:
1. Click the drop-down list in the Overlay / Print Area field and select the option.
2. When an option is selected, a default black area displays on the card design area grid.
3. Click and drag to enlarge the area and move it to the preferred location on the card.
The size and coordinates of the area update in the number fields using the units specified,
inches or mm.
4. Up to five areas can be defined.
PLT-01277, Version: 1.2 November 2014
Page 33

Page 3-15 Printer Preferences
3.6.2 Defining additional areas
1. After the first area is defined, select 2 in the Defined Areas spin box.
2. The second area begins again at the 0,0 location.
3. Click and drag to enlarge the area and move it to the preferred location on the card.
4. This procedure can be done up to the five area limit.
3.6.3 Deleting a Defined Area
To delete one or more defined areas:
1. Select the area to be deleted.
2. Click Delete.
November 2014 PLT-01277, Version: 1.2
Page 34

Printer Preferences Page 3-16
3.6.4 Visual Security Solutions
This field presents options based on the orientation of the card in the template.
Landscape designs offer
A – Upper Left
B – Upper Right
C – Lower Left
D – Lower Right
Portrait designs offer
E – Upper Left
F – Upper Right
G – Lower Left
H – Lower Right
PLT-01277, Version: 1.2 November 2014
Page 35

Page 3-17 Printer Preferences
3.7 K-Panel Resin Tab
The K-Panel Resin tab contains the controls for indicating the position where the resin black (K) panel
of a full-color ribbon is printed. If a ribbon without a resin black panel is installed in the printer, these
options are grayed out and unavailable.
The orientation of the card display area is determined by the orientation specified on the Card tab.
Group or Field Description
This area includes three options:
Print All Black With
K-Panel
Full Card
November 2014 PLT-01277, Version: 1.2
Select this option to print the resin black (K) panel for all black found within all
areas of the image.
• Full Card
• Defined Area(s)
• Undefined Area(s)
Page 36

Printer Preferences Page 3-18
Group or Field Description
Defined Area(s)
Undefined
Area(s)
Print YMC Under K
Print K Only
Select this option to overlay and/or print only in the selected and defined area(s).
Select this option to overlay and/or print in the space outside the selected and
defined area.
Select “Print YMC under K” to print all black in the designated areas with the
yellow (Y), magenta (M) and cyan (C) ribbon panels directly beneath the resin
black (K) panel. This combination provides a gradual transition between the resin
black text or bar code.
Select “Print K Only” to print using the resin black (K) panel onto a white
background to maximize the sharpness of printed text and bar codes.
PLT-01277, Version: 1.2 November 2014
Page 37

Page 3-19 Printer Preferences
3.8 Printer Info Tab
The Printer Info tab contains the supply information about the medias installed on the printer:
Ribbon Type
Reorder Number
Card Count
Printer Serial #
Firmware Version
Note: Graphic for information ONLY. DO NOT use to order supplies.
November 2014 PLT-01277, Version: 1.2
Page 38

Printer Preferences Page 3-20
PLT-01277, Version: 1.2 November 2014
Page 39

ToolBox
This section provides an overview of the ToolBox tabs.
There are some common buttons displayed on screens:
Button Description
Chapter 4
OK
Cancel
Help
Default
Closes the dialog box and saves the driver configuration changes since the dialog box
opened.
Closes the dialog box and discards configuration changes made since the dialog box
opened.
Displays Help topics specific to the active tab.
Returns all settings to the default selection.
November 2014 PLT-01277, Version: 1.2
Page 40

ToolBox Page 4-2
4.1 Configuration Tab
The Configuration tab has two sections: Event Monitoring and Set Language.
Group or Field Description
Event Monitoring
This section selects events that result in notification or displays prompt for the user. The default setting is to
monitor four conditions:
Low Ribbon
PLT-01277, Version: 1.2 November 2014
Notifies the user that the amount of ribbon remaining for use in the cartridge
is diminishing. When error displays, a Do not show this message again
message allows the user to suppress the message during the current printing
session.
Page 41

Page 4-3 ToolBox
Group or Field Description
Notifies the user the printer requires cleaning and provides a Clean button to
start the cleaning process.
Clean Printer
Error Status Notifies the user that an error status exists
Note: The printer cleaning notification dialog displays when 3000 cards have
been printed. The number of cards can be changed on the Advanced Settings
tab.
See Section 4.4: Advanced Settings Tab
Password Prompt
Set Language
Requires the user to enter a security password before the printer driver
accepts a print job.
This section enables the selection of the language used for printer driver
messages. The default printer language is English.
November 2014 PLT-01277, Version: 1.2
Page 42

ToolBox Page 4-4
4.2 Calibrate Ribbon Tab
The Calibrate Ribbon tab enables the user to start the ribbon calibration. Follow the directions on the
screen to perform this procedure.
PLT-01277, Version: 1.2 November 2014
Page 43

Page 4-5 ToolBox
4.3 Clean Printer Tab
The Clean Printer tab has the instructions to clean the printer.
Additional cleaning can be done as needed. See Chapter 6: Cleaning.
November 2014 PLT-01277, Version: 1.2
Page 44

ToolBox Page 4-6
4.4 Advanced Settings Tab
The Advanced Settings tab contain the adjustments for the internal printer settings.
Adjustment is typically required in connection with troubleshooting.
Customize the settings for each printer and save the settings within the printer memory.
CAUTION: In general, do not adjust these settings. However, under rare circumstances, adjustment
is necessary. Ensure there is advanced knowledge prior to making these adjustments.
Group or Field Description
Setting
Default
Current
PLT-01277, Version: 1.2 November 2014
This column displays the type of setting.
This column displays the default setting value.
This column displays the current setting value.
Page 45

Page 4-7 ToolBox
Group or Field Description
This option applies the changed values. Change the current value by clicking the field
Apply
to activate the control, enter the new value, and click Apply or OK to apply the
change. The change to the firmware value is confirmed by one beep from the printer.
Restore Defaults
This option restores all factory default values. To restore the factory default values,
click Restore Defaults and click Yes on the Settings confirmation window.
4.4.1 Settings and Troubleshooting
Setting Description Troubleshooting
Head Resistance
Print Left of Form
Image Darkness
Print Top of Form
Ribbon Print
Tension
Printhead resistance is set to
an incorrect value.
Adjusts the vertical position
of the printed image on the
card; so it appears centered.
Adjusts the overall darkness
of the printed image by
increasing or decreasing the
amount of heat used by the
printhead when printing.
Adjusts the length-wise or
horizontal position of the
printed image on the card (so
it appears to be centered)
Adjusts the tension (drag) on
the ribbon during printing.
Locate the actual resistance value on the printhead,
for example, R=XXX.
Reserved
Lighten the printed image by clicking or enter the
exact negative value decreasing the printhead heat.
Darken the image by clicking or entering a positive
value increasing the amount of printhead heat.
IMPORTANT: If this setting is set too high, the ribbon
may jam or break.
Reserved
Increase the value to increase tension. To decrease
tension, decrease the value.
Note: Small adjustments are recommended. Too high
or too low tension can cause the ribbon to break.
Ribbon Calibrate
Green
Resin Heat Adjust
Sleep Time
OLED Contrast
Ribbon Calibrate
Blue
November 2014 PLT-01277, Version: 1.2
Reserved Reserved
Adjusts the darkness of black
resin text and bar codes if
they appear faded or too
light or dark.
Adjusts the time until the
printer stops energizing the
transfer roller, which
conserves energy.
Reserved Reserved
Reserved Reserved
Increase the value to darken the print. Decrease the
value to lighten the print.
Increase the setting to delay the sleep mode. Disable
sleep mode with a 0 value.
The counter for this setting starts after standby time
has elapsed.
Page 46

ToolBox Page 4-8
Setting Description Troubleshooting
Cleaning Rate
Ribbon Green
LED Level
Ribbon Blue LED
Level
Head Home
Offset
Head Print Offset
Head Contact
Offset
Head Queue
Offset
Head Card
Thickness Offset
10 Mil Card
Queue Offset
Adjusts the number of cards
printed before the printer
displays a message to
indicate cleaning is needed.
Reserved Reserved
Reserved Reserved
Reserved Reserved
Reserved Reserved
Reserved Reserved
Reserved Reserved
Reserved Reserved
Reserved Reserved
The default value is 3000. To increase the frequency of
cleaning, lower the value.
Note: The card count on the Printer Info tab does not
reset when cleaning completes.
PLT-01277, Version: 1.2 November 2014
Page 47

Troubleshooting
The purpose of this section is to provide the user with specific procedures for recovering the printer
from an error condition.
If problems are encountered beyond the situations described below, contact support.hidglobal.com.
5.1 Communications Errors
Symptom(s): Incorrect output, communications error on PC, stalling, no response from Printer or no
job printed.
1. Confirm that the system meets the minimum requirements:
• IBM-PC or compatible.
• Windows 7 (32 bit & 64 bit), Windows XP (32 bit), Windows 2003 (R1 and R2 32 bit),
Windows 2008, R2 (32 bit and 64 bit), Vista (32 bit and 64 bit),
• Pentium
• 500 MB free hard disk space or more
• USB Port
2. Confirm the correct installation of the printer driver.
Note: This pertains especially if an obsolete driver was recently removed.
a. Close the software program.
b. Reboot the computer.
c. Select Control Panel > Devices and Printers > Card Printer.
d. Right-click Card Printer
e. Select Printing Preferences > Card > About.
f. Check the date and version number of the printer driver.
3. Print a test print:
a. Select Start > Devices and Printers > Card Printer (USB).
b. Right-click Card Printer (USB).
c. Select Printing preferences > Card > Test Print.
4. Determine whether adequate disk space is available.
Note: A large volume of temporary files on the computer can cause communications errors.
™
class 500 MHz computer with 256 MB of RAM or higher
Chapter 5
November 2014 PLT-01277, Version: 1.2
Page 48

Troubleshooting Page 5-2
5.1.1 Error and Status Messages
Error Message Description Troubleshooting
Card Eject Error
Card Hopper
Empty
Card Jam
Card Not Found
Cover Open
General Error
Headlift Error
Invalid Ribbon
A card is not successfully
ejected from the printer.
No cards are loaded in the
input hopper.
Multiple cards are located
in the printer.
The printer is unable to
feed a card from the input
hopper.
The printer cannot print
when the cover is open.
The printer does not print
for an unspecified reason.
The printhead does not
move up / down
successfully.
The printer is compatible
with selected types of
ribbons. An incompatible
ribbon is installed.
OR
The Ribbon Type on the
Device Options tab is set
incorrectly.
Press the Power button repeatedly to move the card toward
the output hopper.
Place cards in the input hopper.
Press the Power button repeatedly to move all cards toward
the output hopper.
Ensure that cards are available and loaded correctly.
Press the Pause/Resume button.
To cancel the print, click Cancel Print.
Close the cover.
1. Power the printer off by pressing the Power button
twice.
2. Open the cover and remove the ribbon cartridge. Check
for a jammed or broken ribbon.
• If the ribbon is not jammed or broken, reinstall the
cartridge.
• If the ribbon is jammed or broken, replace it with a
compatible cartridge.
3. Close the cover and press the Power button once to
restore power.
4. Close the software program.
5. Reboot the computer.
1. Open the cover, remove the ribbon cartridge and press
the Power button two times to power down the printer.
2. Check for any obstructions in the printhead are or
mechanism. Remove any obstructions.
3. Reinstall the ribbon cartridge and close the cover.
4. Press the Power button to return power to the printer.
5. The power off and back on procedure can reset the
printhead or transfer headlift motor.
Verify the Ribbon Type on the Device Options tab is set
correctly.
If incorrect, select the matching ribbon type.
Open the cover and remove the ribbon cartridge.
Install a compatible cartridge and close the cover.
PLT-01277, Version: 1.2 November 2014
Page 49

Page 5-3 Troubleshooting
Error Message Description Troubleshooting
No Ribbon
Installed
Printer Needs
Cleaning
Ribbon
Break/Jam
Ribbon Miscue
Ribbon Out
Ribbon RFID
Error
No ribbon is installed.
OR
The ribbon is jammed in
the cartridge.
OR
The cartridge RFID tag is
corrupt.
The number of cards set in
the Cleaning Rate setting
is reached.
The ribbon is jammed or
broken in the cartridge.
The ribbon is not able to
find the next panel
correctly.
The print ribbon is used to
its maximum capacity.
The printer is incompatible
with the ribbon installed.
1. Open the cover and check for a ribbon cartridge. If no
cartridge is present, install a ribbon and close the cover.
2. If a ribbon cartridge is present, remove the cartridge and
verify the ribbon can move freely and is not upside-down
in the cartridge.
3. Verify the Ribbon Type on the Device Options tab is set
correctly.
4. Test with a new ribbon to verify the RFID tag.
The default value is 3000.
Two options are available: Clean Now or Remind Me.
To run the cleaning routine immediately, click OK.
To delay the cleaning routine, select the Remind Me option
and select one of four options:
•Never
• In 10 Prints
• In 50 Prints
• In 100 Prints
1. Open the cover and remove the cartridge.
2. Verify the ribbon can move freely.
3. If the ribbon is broken, tape the ends of the ribbon
together and wind any excess onto the take-up spool.
4. Reinstall the cartridge, close the cover and press the
Pause/Resume button.
To cancel the print, click the Cancel Print button.
1. Open the cover and remove the ribbon cartridge.
2. Verify the ribbon is not broken or upside down in the
cartridge.
• If the ribbon is not broken, reinstall the cartridge, close
the cover and press the Pause/Resume button.
• If the ribbon is broken, tape the ends of the ribbon
together and wind any excess onto the take-up spool.
Reinstall the cartridge, close the cover and press the
Pause/Resume button.
To cancel the print, click the Cancel Print button.
1. Install a qualified ribbon into the ribbon cartridge and
press the Pause/Resume button.
2. Verify the ribbon is not broken or upside down in the
cartridge and press the Pause/Resume button.
3. Verify the Ribbon Type on the Device Options tab is set
correctly.
Install a ribbon cartridge that is compatible with the printer.
Press the Pause/Resume button.
Ribbon Sensor
Error
November 2014 PLT-01277, Version: 1.2
The ribbon temperature
sensor is out of range.
Calibrate the ribbon sensor:
1. Click on Cancel Print.
2. Open the cover and remove the ribbon cartridge.
3. Close the cover.
4. Select Card > ToolBox > Calibrate Ribbon > Calibrate.
Page 50

Troubleshooting Page 5-4
Error Message Description Troubleshooting
1. Click OK.
The Supply
information is
unavailable at
this time.
Wrong Ribbon
Installed
Unable to Feed
Card
Unable to Read
Settings from
the Printer
The printer driver does not
automatically detect the
ribbon type.
The printer is compatible
with selected types of
ribbons. An incompatible
ribbon is installed.
OR
The Ribbon Type on the
Device Options tab is set
incorrectly.
The printer is unable to
feed a card from the input
hopper.
The printer driver does not
detect the printer.
2. Click Device Options.
3. Clear the Automatically detect the installed Ribbon for
every print job check box.
4. Select the Ribbon Type drop-down button and select
the installed ribbon type.
1. Verify the Ribbon Type on the Device Options tab is set
correctly. If incorrect, select the matching ribbon type.
2. Open the cover and remove the ribbon cartridge.
3. Install a compatible cartridge and close the cover.
1. Ensure that cards are available and loaded correctly.
2. Press the Pause/Resume button.
To cancel the print, click Cancel Print.
1. Click OK.
2. Verify that the printer is powered on.
3. Check for communications errors.
See
Section 5.1: Communications Errors.
PLT-01277, Version: 1.2 November 2014
Page 51

Cleaning
Important: Clean the printer on a regular basis to ensure that the printer consistently produces high
quality output.
The cleaning described in this section is additional to the information on the Clean Printer tab of the
ToolBox.
For detailed information, reference the Cleaning Kit instructions in the kit.
Chapter 6
WARNING:
Disconnect the printer's power cord whenever performing any type of
maintenance procedure unless otherwise directed.
AVERTISSEMENT:
Débranchez le cordon d'alimentation de l'imprimante à chaque fois d'effectuer
tout type de procédure de maintenance, sauf indication contraire.
6.1 Using the Required Supplies
For the maintenance procedures outlined for the printer, a Printer Cleaning Kit is required, available
from the reseller. This optional kit includes the following:
• Printhead cleaning swabs pre-moistened with 99.99% isopropyl alcohol for cleaning the printer's
printhead.
• Cleaning cards with an adhesive backing for cleaning the printer's rollers.
• Gauze pads pre-moistened with 99.99% isopropyl alcohol for cleaning the printer's interior and
exterior.
• Alcohol cards pre-moistened with 99.99% isopropyl alcohol for cleaning the printer's platen
rollers, card feed rollers.
NOTE: As with any electronic device, internal components of the printer, such as the printhead may
be damaged if exposed to static electrical discharges. To avoid potential damage, always wear an
appropriate personal grounding device, such as a wrist strap (with integral resistor) connected to an
ESD ground. At a minimum, make positive contact with the bare metal chassis of the printer with the
hand prior to touching any internal electrical components.
November 2014 PLT-01277, Version: 1.2
Page 52

Cleaning Page 6-2
6.2 Cleaning the Printer
6.2.1 Cleaning Inside the Printer
1. Open the cover.
2. Remove the ribbon cartridge from the printer.
3. With compressed air, blow out all visible areas of the printer interior to remove debris.
Note: If there is not a can of compressed air, use a cleaning pad from the printer cleaning kit to
wipe out all visible areas inside the printer. Remove any debris that may be inside.
WARNING:
Disconnect the Printer's power cord whenever performing any type of
maintenance procedure unless otherwise directed.
AVERTISSEMENT:
Débranchez le cordon d'alimentation de l'imprimante à chaque fois d'effectuer
tout type de procédure de maintenance, sauf indication contraire.
4. Re-install the printing supplies.
5. Close the cover.
6.2.2 Cleaning Outside the Printer
The printer has a durable casing that should retain its luster and appearance for many years.
Clean it only with a cleaning pad from the printer cleaning kit.
CAUTION:
Do not use cleaning solvents of any kind or spray the printer with a cleaner!
ATTENTION:
Ne pas utiliser de solvants de nettoyage de toute nature ou vaporiser de
l'imprimante avec un nettoyant!
6.2.3 Cleaning the Printhead
To maintain consistent print quality:
• Clean the printhead every time the print ribbon is changed
• Perform this procedure approximately every 3000 prints.
CAUTION:
Never use a sharp tool or abrasive object to clean the printhead. Watches,
rings, bracelets and other jewelry can damage the printhead.
ATTENTION:
Ne jamais utiliser un outil pointu ou un objet abrasif pour nettoyer la tête
d'impression. Montres, bagues, bracelets et autres bijoux peuvent
endommager la tête d'impression.
PLT-01277, Version: 1.2 November 2014
Page 53

Page 6-3 Cleaning
1. Remove watches, rings, bracelets and other jewelry.
2. Unplug the power cord from the electrical outlet.
3. Open the cover and remove the ribbon cartridge.
4. Use an alcohol swab (squeeze to saturate the tip) from the printer cleaning kit to firmly wipe
back and forth across the surface of the printhead.
5. Reinstall the ribbon cartridge and close the cover when the printhead is completely dry.
November 2014 PLT-01277, Version: 1.2
Page 54

Cleaning Page 6-4
This page intentionally left blank.
PLT-01277, Version: 1.2 November 2014
Page 55

Firmware Updates
New firmware releases provide enhancements, such as improved reliability, added features or better
print quality. Updates are available for download from the Internet at support.hidglobal.com.
Refer to the Workbench Printer Utility User Guide to download and install firmware updates.
7.1 Upgrade Information
To upgrade the printer’s firmware, perform the following steps:
1. Run the FARGO Workbench Printer Utility.
2. If running FARGO Workbench Version 3 or greater:
a. Select the Update Manager Workbench Utility.
b. Select the printer(s) to update.
c. Click the Select Firmware file… option to locate or enter this latest firmware file
(FRW-00373_DTC100_v2.3.3.20.frm).
d. Search for the firmware file, or enter the name and click Open.
e. Click Begin Updating Firmware to send the file to the printer(s).
3. If running a FARGO Workbench release prior to Version 3:
a. Choose the Application Menu at the upper left and select Upgrade Firmware.
b. Enter the firmware file name or click Browse to find and select this latest firmware file
(FRW-00373_DTC100_v2.3.3.20.frm).
c. Click OK to send the file to the printer(s).
4. Restart the printer if it does not automatically restart.
Chapter 7
November 2014 PLT-01277, Version: 1.2
Page 56

Firmware Updates Page 7-2
This page intentionally left blank.
PLT-01277, Version: 1.2 November 2014
Page 57

Revision History
Date Description Version
November 2014
July 2013 Ribbon print count change. 1.1
April 2013 First Release 1.0
Updated liability and trademark acknowledgments and copyright
statements. Updated Japan cert. Updated to current format.
Updated global customer support information.
1.2
PLT-01277, Version: 1.2 November 2014
Page 58

hidglobal.com
 Loading...