

Page 1

AW2
Wiegand Door Module
Quick Install Guide
AW2-901-EN, Rev. A.1
PLT-03463 A.1
Copyright
© 2018 HID Global Corporation/ASSA ABLOY AB. All rights reserved.
This document may not be reproduced, disseminated or republished in any form without the prior written permission of
HID Global Corporation.
Contents
AW2
Quick Install
Guide
Mounting
Screws
Cable Ties
Spare Label
Metal-Oxide
Varistors
Mounting
1. Slide the AW2 firmly into a
vacant position.
2. Secure the AW2 using all
four mounting screws
Note:
Please see the Installation Guide for details and advanced features.
Page 2
Relay 1
Inputs 1
Relay 2
Inputs 2
Reader 1
Reader 2
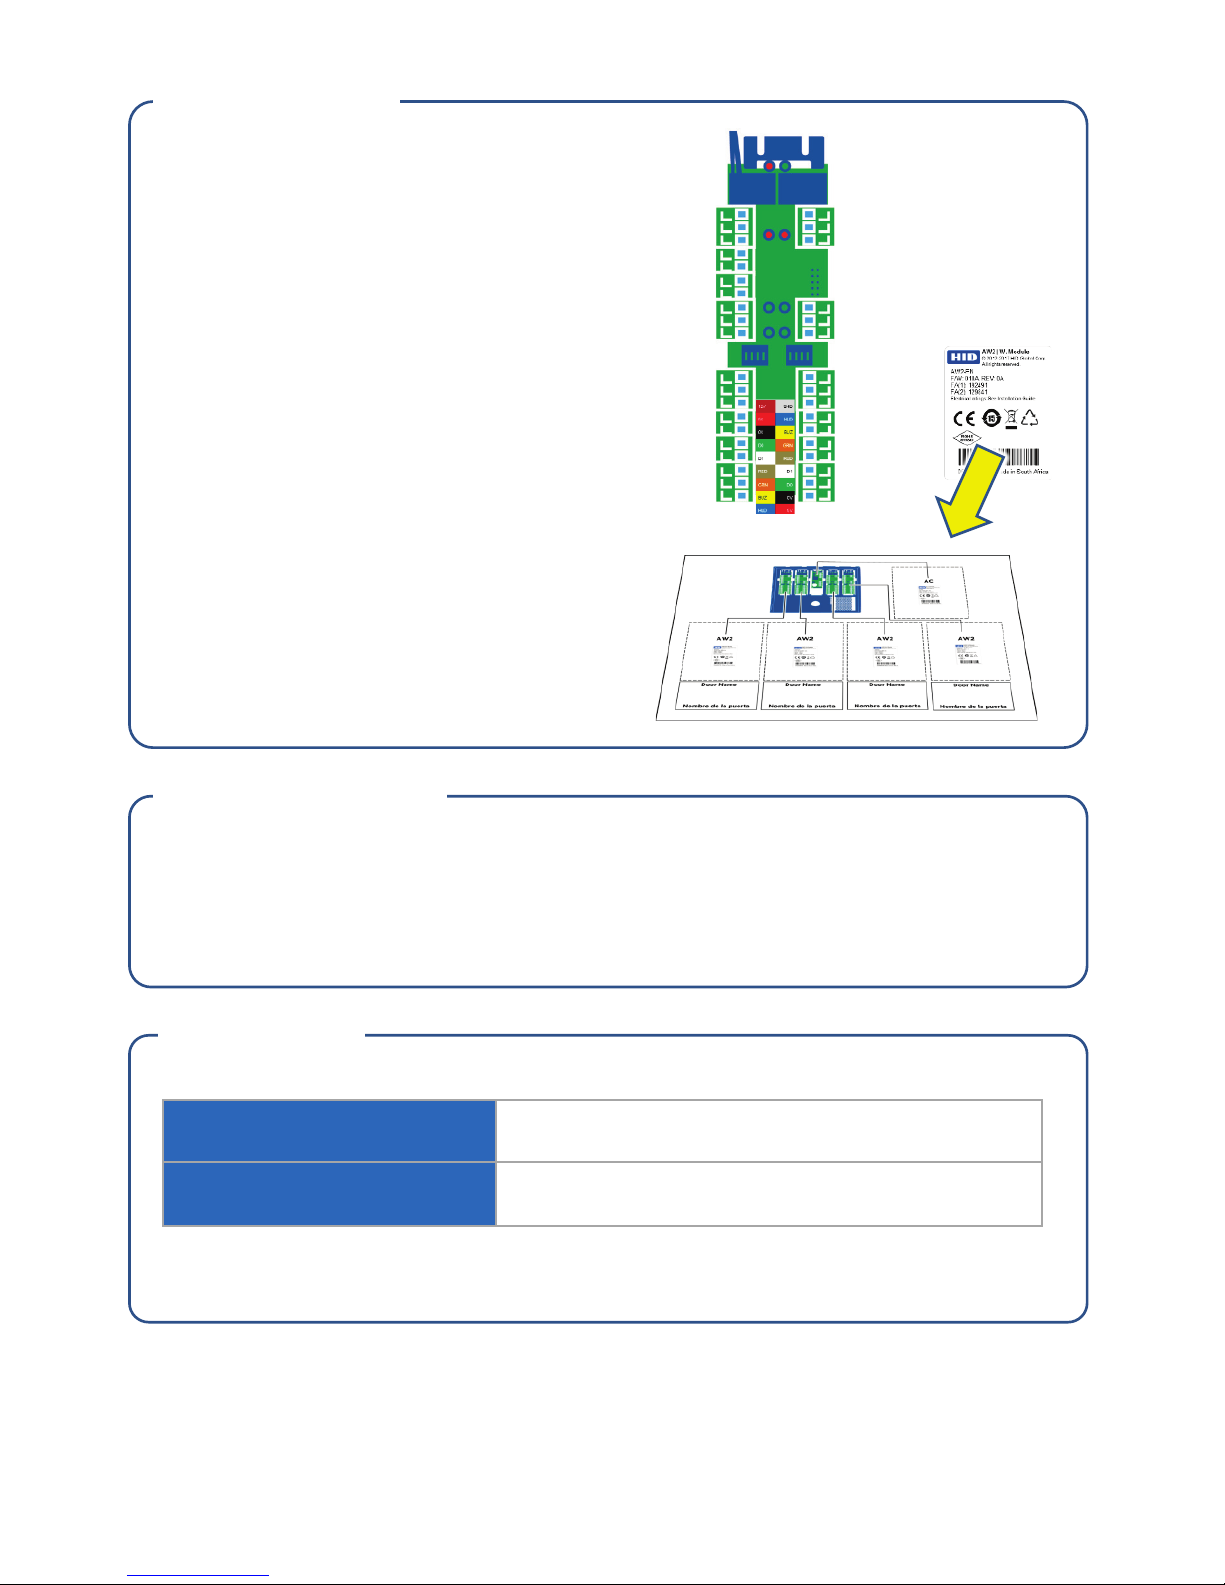
AW2
1. Wire the readers to the AW2.
2.
Wire the desired inputs to the
AW2.
3.
Wire the locks to the AW2 relay
terminals.
4.
Place the AW2 label in the correct
location on the back page of the
ACW2-
XN quick guide. This will be
used during door setup.
HID Access Manager
Specifications
Required Settings
1. Go to the ‘Doors’ menu and click ‘Device Discovery’ to detect the new
AW2 module
2.
Add/Configure the new doors and readers
Note:
It is best practice to use an additional fused power supply for the locks
Basic Installation
Wiegand Module (AW2)
Relay Rating [10A, 28VDC] [5A, 220VAC] [12A, 120VAC]
Recommended
Cable Specifications
Input & Wiegand: >=22AWG, Max 150m
Relay: >=18AWG, Max 150M
Trademarks
HID GLOBAL, HID, the HID Brick logo, the Chain Design, ICLASS, ICLASS SE, SEOS, and OMNIKEY are trademarks
or registered trademarks of HID Global, ASSA ABLOY AB, or its affiliate(s) in the US and other countries and may
not be used without permission. All other trademarks, service marks, and product or service names are trademarks
or registered trademarks of their respective owners.
 Loading...