

Page 1

hidglobal.com
4TRESS™ AAA Out-of-Band
Authentication (SMS) and
®
Fortinet
Secure Access
Integration Handbook
Document Version 1.2 | Released | May 2013
Page 2

4TRESS AAA Out-of-Band Authentication (SMS) and SSL VPN Fortinet | Integration Handbook
External Release | © 2012
2
Table of Co ntents
1.0 Introduction ....................................................................................................................................................3
1.1 Scope of Document ......................................................................................................................................3
1.2 Prerequisites ................................................................................................................................................3
2.0 Secure Access Configuration.......................................................................................................................4
2.1 Procedure 1: Configure the RADIUS Authentication Server ........................................................................4
2.2 Procedure 2: Create New User Group .........................................................................................................5
3.0 4TRESS AAA Configuration .........................................................................................................................7
3.1 Procedure 1: Configure Basic SSL VPN Settings ........................................................................................7
3.2 Procedure 2: Configure the Portal ...............................................................................................................9
3.3 Procedure 3: Configure the Security Policy .............................................................................................. 10
3.4 Procedure 4: Create Tunnel Mode Security Policy ................................................................................... 12
3.5 Procedure 5: Configure Routing for Tunnel Mode .................................................................................... 14
4.0 Configure 4TRESS AAA ............................................................................................................................. 15
4.1 Procedure 1: Configure FortiGate Gate .................................................................................................... 15
4.2 Procedure 2: Assign Group(s) to the FortiGate Gate................................................................................ 17
4.3 Procedure 3: Create An Out-of-Band Delivery Gateway .......................................................................... 19
4.4 Procedure 4: Assign An SMS Token ........................................................................................................ 21
5.0 Authentication Using Out-of-Band Authentication ................................................................................. 22
Copyright ................................................................................................................................................................ 23
Trademarks ............................................................................................................................................................ 23
Revision History .................................................................................................................................................... 23
-2013 HID Global Corporation/ASSA ABLOY AB. All rights reserved. Page |
Page 3

4TRESS AAA Out-of-Band Authentication (SMS) and SSL VPN Fortinet | Integration Handbook
External Release | © 2012
3
1.0 Introduction
FortiGate® appliances provide enterprise-class protection against network, content, and application-level threats
for any deployment, from small offices to large enterprises, service providers, and carriers. Providing secure
access via a VPN over existing Internet connections requires strong, two-factor authentication to protect
resources. The HID Global Identity Assurance™ solutions that work with FortiGate appliances incorporate SSL
VPN solutions with versatile, strong authentication that is flexible, scalable, and simple to manage. There are two
solutions:
• 4TRESS AAA Server for Remote Access—Addresses the security risks associated with a mobile workforce
remotely accessing systems and data.
• 4TRESS Authentication Server (AS)—Offers support for multiple authentication methods that are useful for
diverse audiences across a variety of service channels (SAML, RADIUS, etc.), including user name and
password, mobile and PC soft tokens, one-time passwords, and transparent Web soft tokens.
1.1 Scope of Document
This document explains how to set up 4TRESS AAA Web token authentication with FortiGate solutions. Use this
handbook to enable out-of-band authentication when using an SSL-protected FortiGate VPN.
1.2 Prerequisites
• The 4TRESS AAA Server is up-to-date (v6.7) with LDAP users and groups already configured.
• FortiGate version greater than 4.0,build 0513,120130 (MR 3 Patch 5) installed and configured.
• The Web soft token is configured to work with a PIN.
• User phone numbers are declared in a functioning LDAP server.
-2013 HID Global Corporation/ASSA ABLOY AB. All rights reserved. Page |
Page 4
4TRESS AAA Out-of-Band Authentication (SMS) and SSL VPN Fortinet | Integration Handbook
External Release | © 2012
4
Getting Started
2.0 Secure Acc ess Configurat ion
This chapter describes how to manage FortiGate Secure Access.
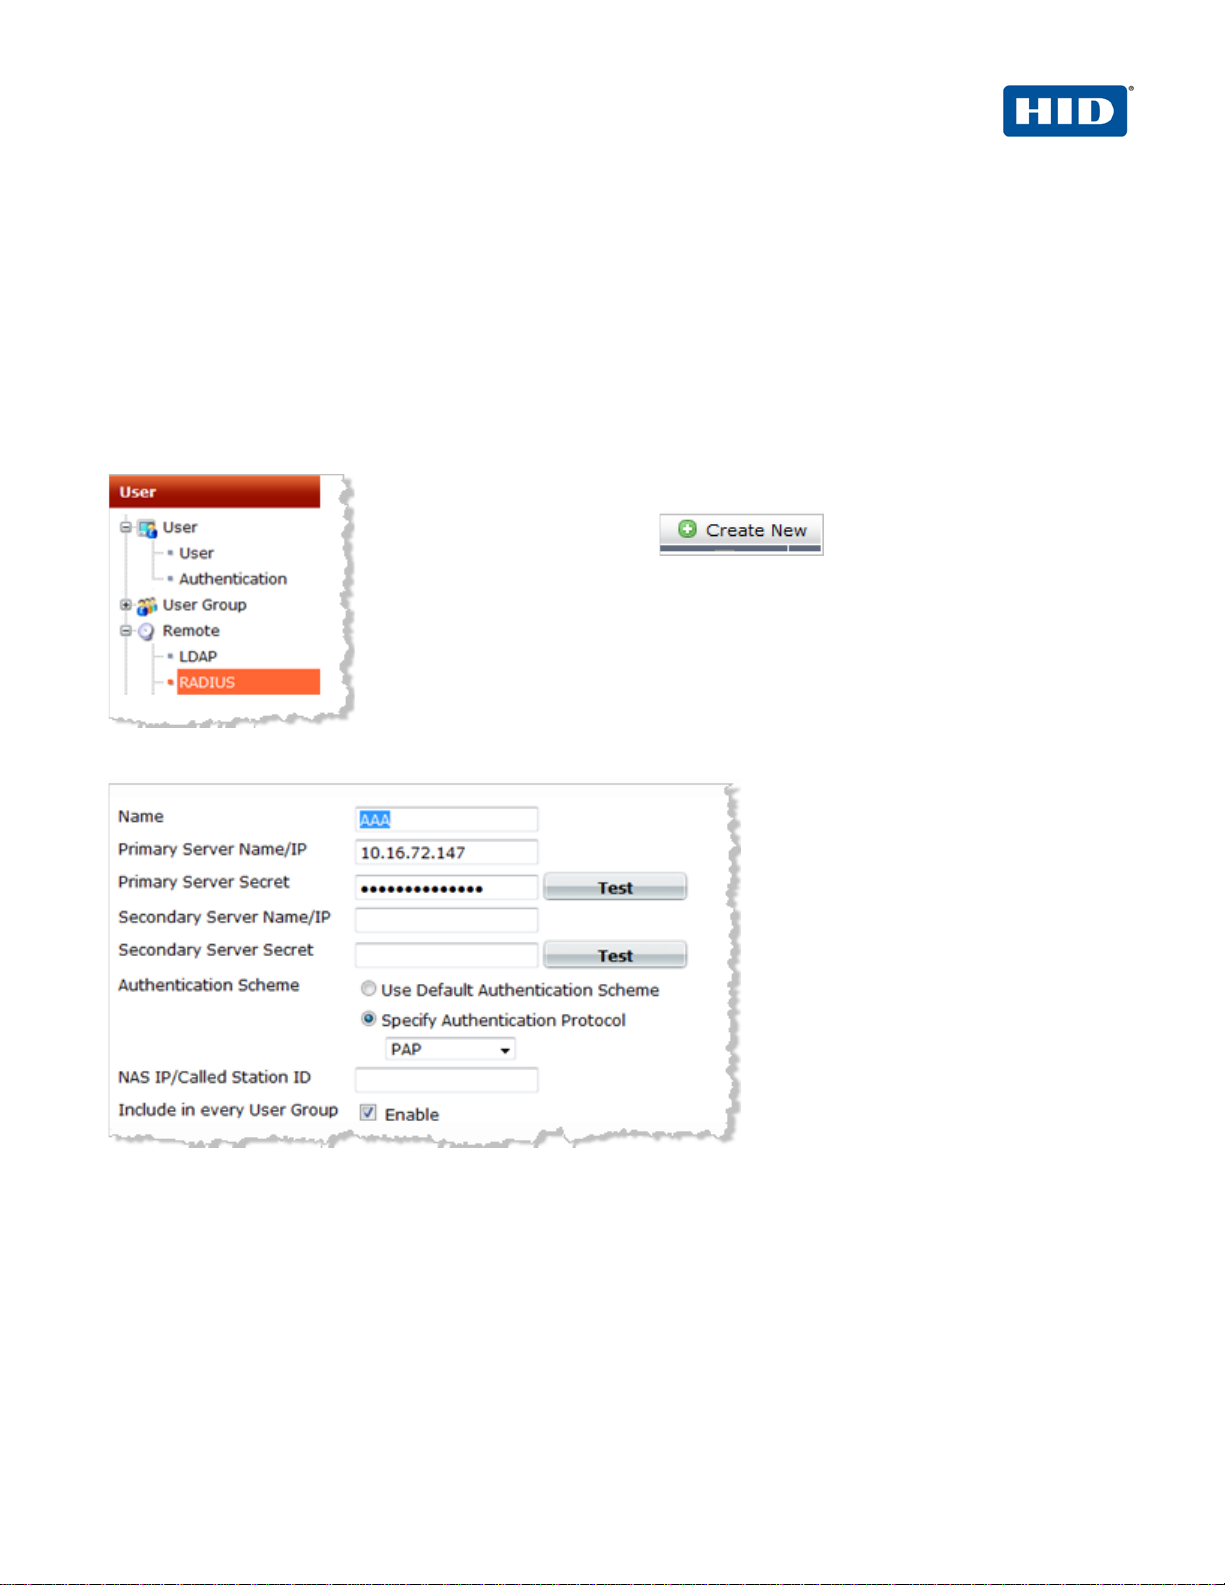
2.1 Procedure 1: Configure the RADIUS Authentication Server
1. Logged into the FortiGate
Web console, navigate to
User > Remote > RADIUS.
2. Click Create New.
The following dialog is displayed.
3. Enter the following attributes.
• Name—Enter the name that is used to identify the AAA server on the FortiGate unit.
• Primary Server Name/IP—Enter the domain name or IP address of the primary AAA server.
• Primary Server Secret—Enter the RADIUS server secret key for the primary AAA server. The primary
• Secondary Server Name/IP—Enter the domain name or IP address of the secondary AAA server , if you
server secret key should be a maximum of 16 characters in length.
have one.
-2013 HID Global Corporation/ASSA ABLOY AB. All rights reserved. Page |
Page 5
4TRESS AAA Out-of-Band Authentication (SMS) and SSL VPN Fortinet | Integration Handbook
External Release | © 2012
5
• Secondary Serv er Sec ret —Enter the RADIUS server secret key for the secondary AAA server. The
secondary server secret key MUST be a maximum of 16 characters in length.
• Authentication Scheme—Select the Use Default Authentication Scheme option to authenticate wit h
the default method. The default authentication scheme uses PAP, MSCHAP- V2, and CHAP, in that
order. Select the Specify Authentication Protocol option to override the default authentication method,
and then choose the protocol from the list: MSCHAP- V2, MS-CHAP, CHAP, or PAP, depending on what
your RADIUS server requires.
• NAS IP/Called Station ID—Enter the NAS IP address and Called Station ID. If you do not enter an IP
address, then the IP address that the FortiGate interface uses to communicate with the AAA server will
be applied.
• Include in every User Group—Select this option to have the AAA server automatically included in all
user groups.
4. Click OK at the bottom of the page.
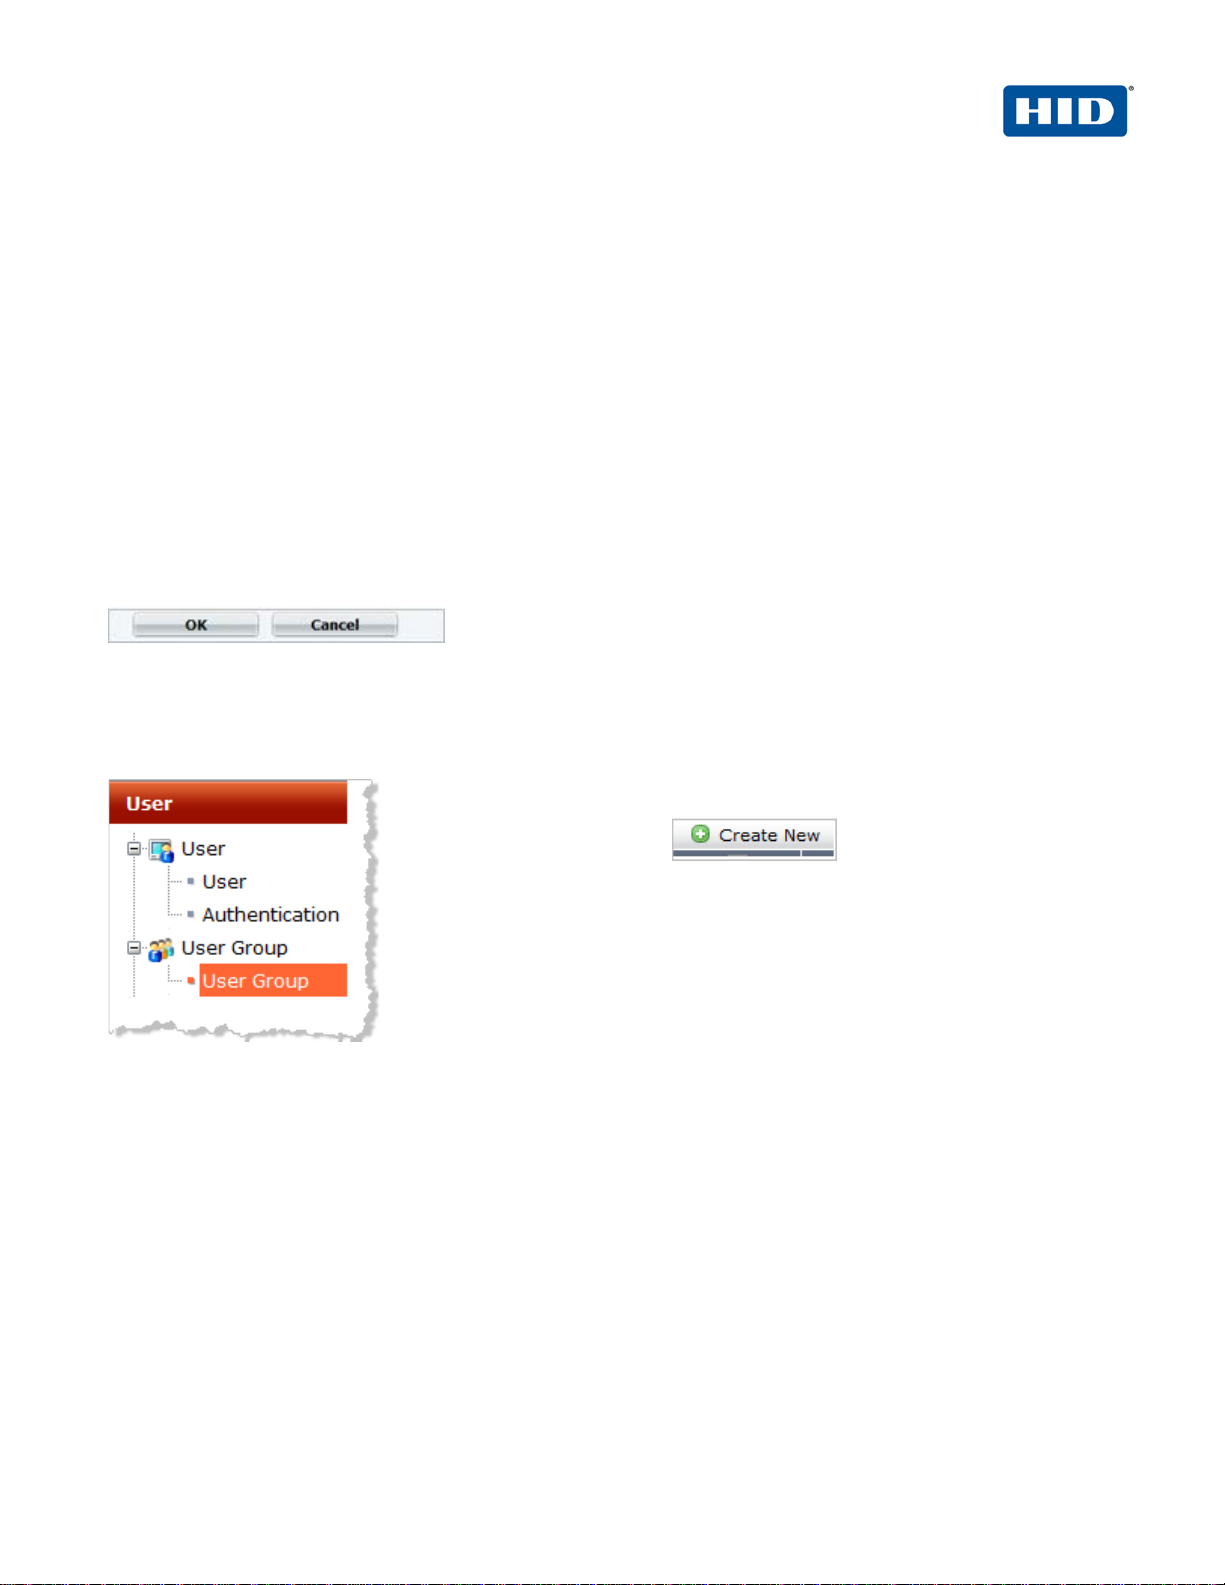
2.2 Procedure 2: Create New User Group
A user group is a list of user identities. In this case, the identity is a RADIUS server.
1. Logged into the
FortiGate Web console,
navigate to User >
User Group > User
Group.
2. Click Create New.
The following dialog is displayed.
-2013 HID Global Corporation/ASSA ABLOY AB. All rights reserved. Page |
Page 6
4TRESS AAA Out-of-Band Authentication (SMS) and SSL VPN Fortinet | Integration Handbook
External Release | © 2012
6
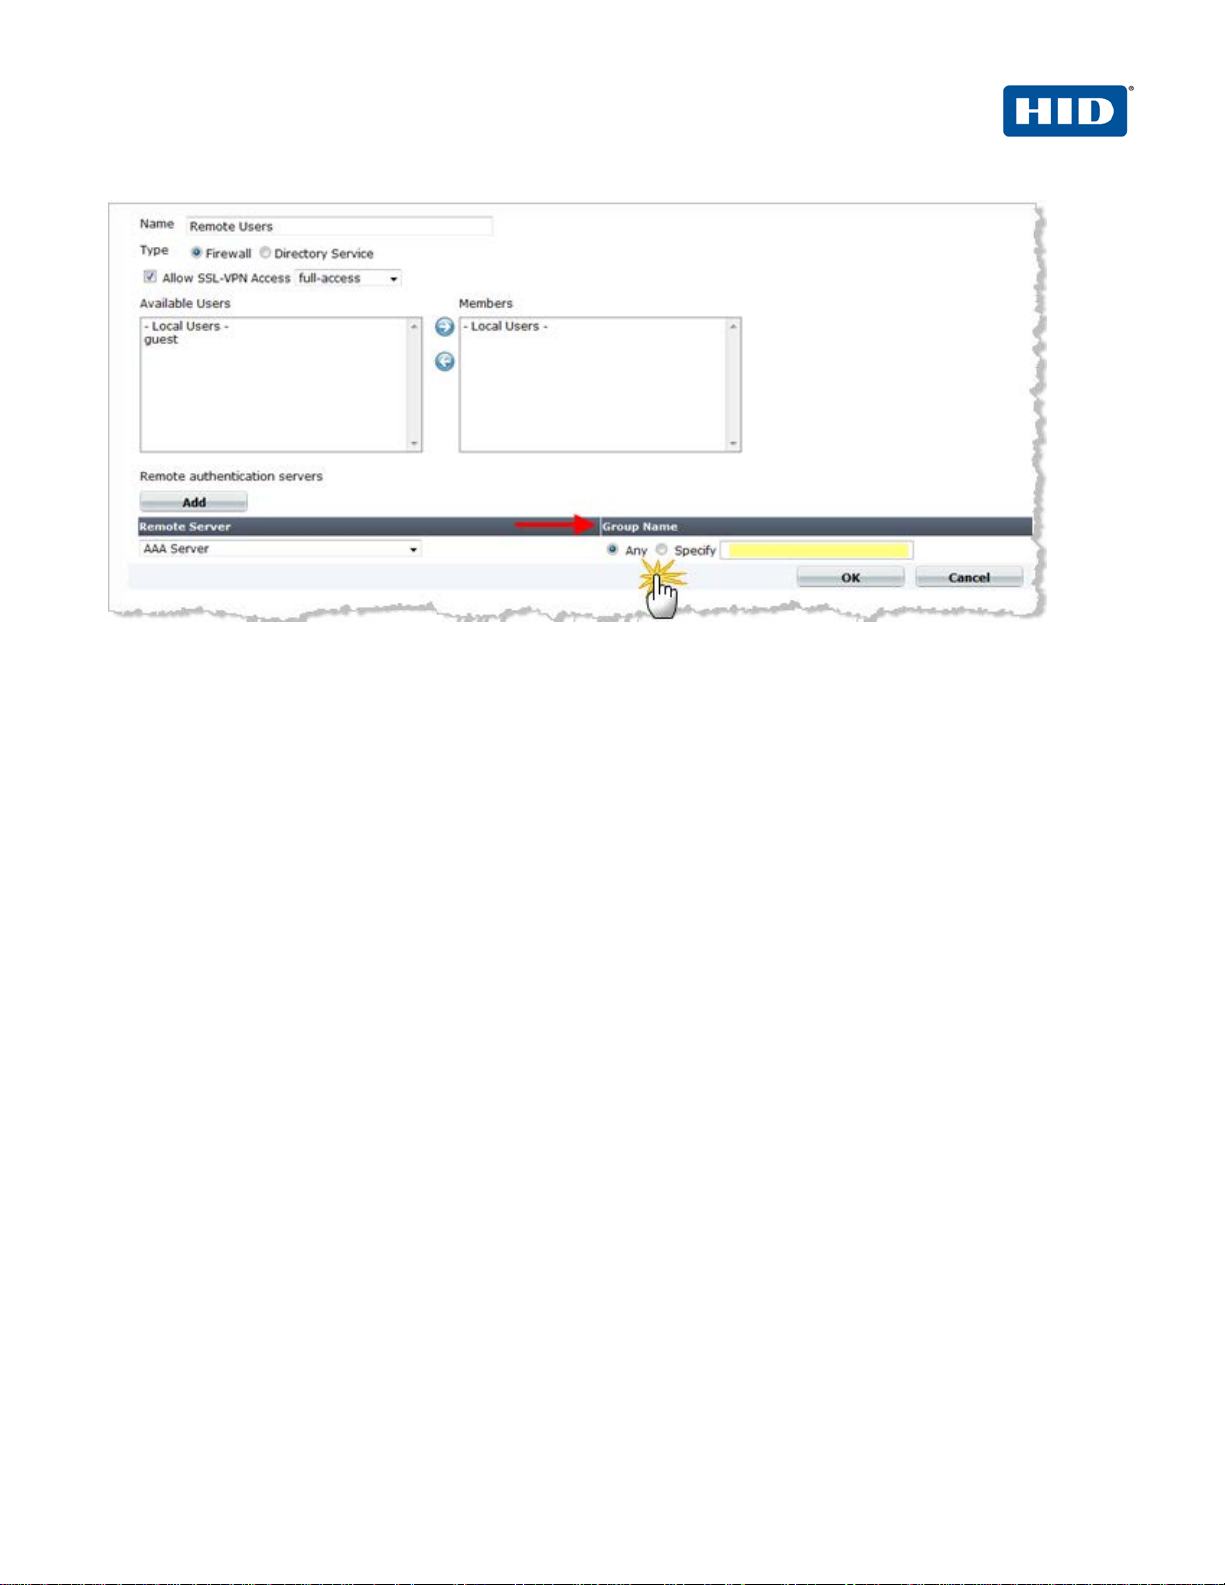
Note: In any firewall user group, you can enable SSL VPN access and select the Web portal that the users
can access. When the user connects to the FortiGate unit via HTTPS on the SSL VPN port (default 10443),
the FortiGate unit requests a username and password.
3. To add a new remote authentication server, click Add. The Remote Server drop-down list appears, along
with information about the Group Name.
4. Use the Group Name field to configure group name(s) to be added as identities who can be authenticated.
GROUP NAME OPTIONS:
• In the Group Name field, select Any to match all possible groups.
• In the Group Name field, select Specify, and then enter the group name in the appropriate format for
the type of server (RADIUS).
• You must specify at least one group name. The group name is the name of the group on the
RADIUS server.
• If you want to specify more than one group name, then use a comma to separate the names.
• Important: When you specify a group name or names, you must use a specific RADIUS
dictionary on the AAA Server and also create an authorization profile. For more information on
this topic, refer to the guide named 4TRESS_AAA_AdminGuide.pdf, specifically the section
called Create a New RADIUS Authorization Profile.
• Also refer to the following vendor-specific requirements.
The FortiGate unit RADIUS VSA dictionary is supplied by Fortinet and is available through the Fortinet Knowledge
Base (http://kb.forticare.com) or through Technical Support.
-2013 HID Global Corporation/ASSA ABLOY AB. All rights reserved. Page |
Page 7
4TRESS AAA Out-of-Band Authentication (SMS) and SSL VPN Fortinet | Integration Handbook
External Release | © 2012
7
# Fortinet Vendor-Specific attributes vid=12356
ATTRIBUTE Fortinet-Group-Name 26 [vid=12356 vty=1 vat=string]
ATTRIBUTE Fortinet-Client-IP-Address 26 [vid=12356 vty=2 vat=ipaddr]
ATTRIBUTE Fortinet-Vdom-Name 26 [vid=12356 vty=3 vat=string]
ATTRIBUTE Fortinet-Client-IPv6-Address 26 [vid=12356 vty=4 vat=octets]
ATTRIBUTE Fortinet-Interface-Name 26 [vid=12356 vty=5 vat=string]
ATTRIBUTE Fortinet-Access-Profile 26 [vid=12356 vty=6 vat=string]
3.0 4TRESS AAA Configurati on
This chapter describes how to configure the 4TRESS AAA Authentication Server.
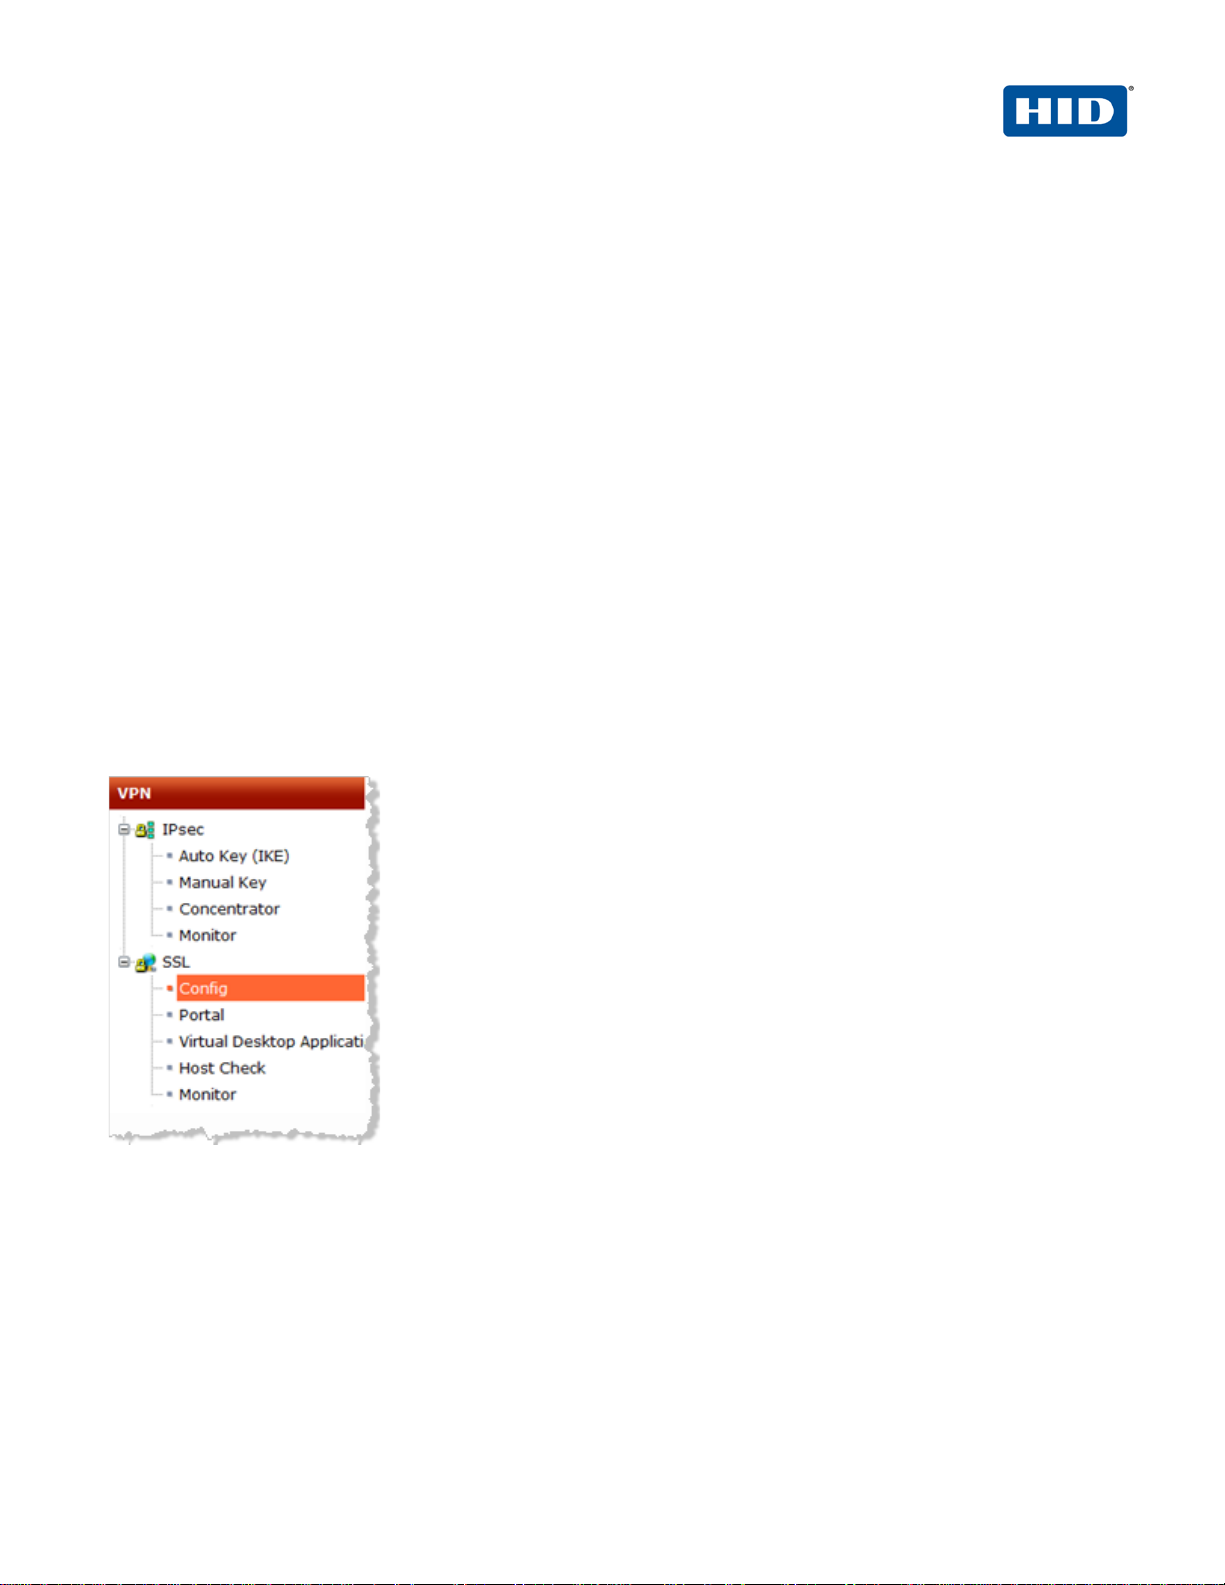
3.1 Procedure 1: Configure Basic SSL VPN Settings
1. To configure the basic SSL VPN settings for encryption and login options, navigate to VPN > SSL > Config in
the FortiGate Web console.
-2013 HID Global Corporation/ASSA ABLOY AB. All rights reserved. Page |
Page 8
4TRESS AAA Out-of-Band Authentication (SMS) and SSL VPN Fortinet | Integration Handbook
External Release | © 2012
8
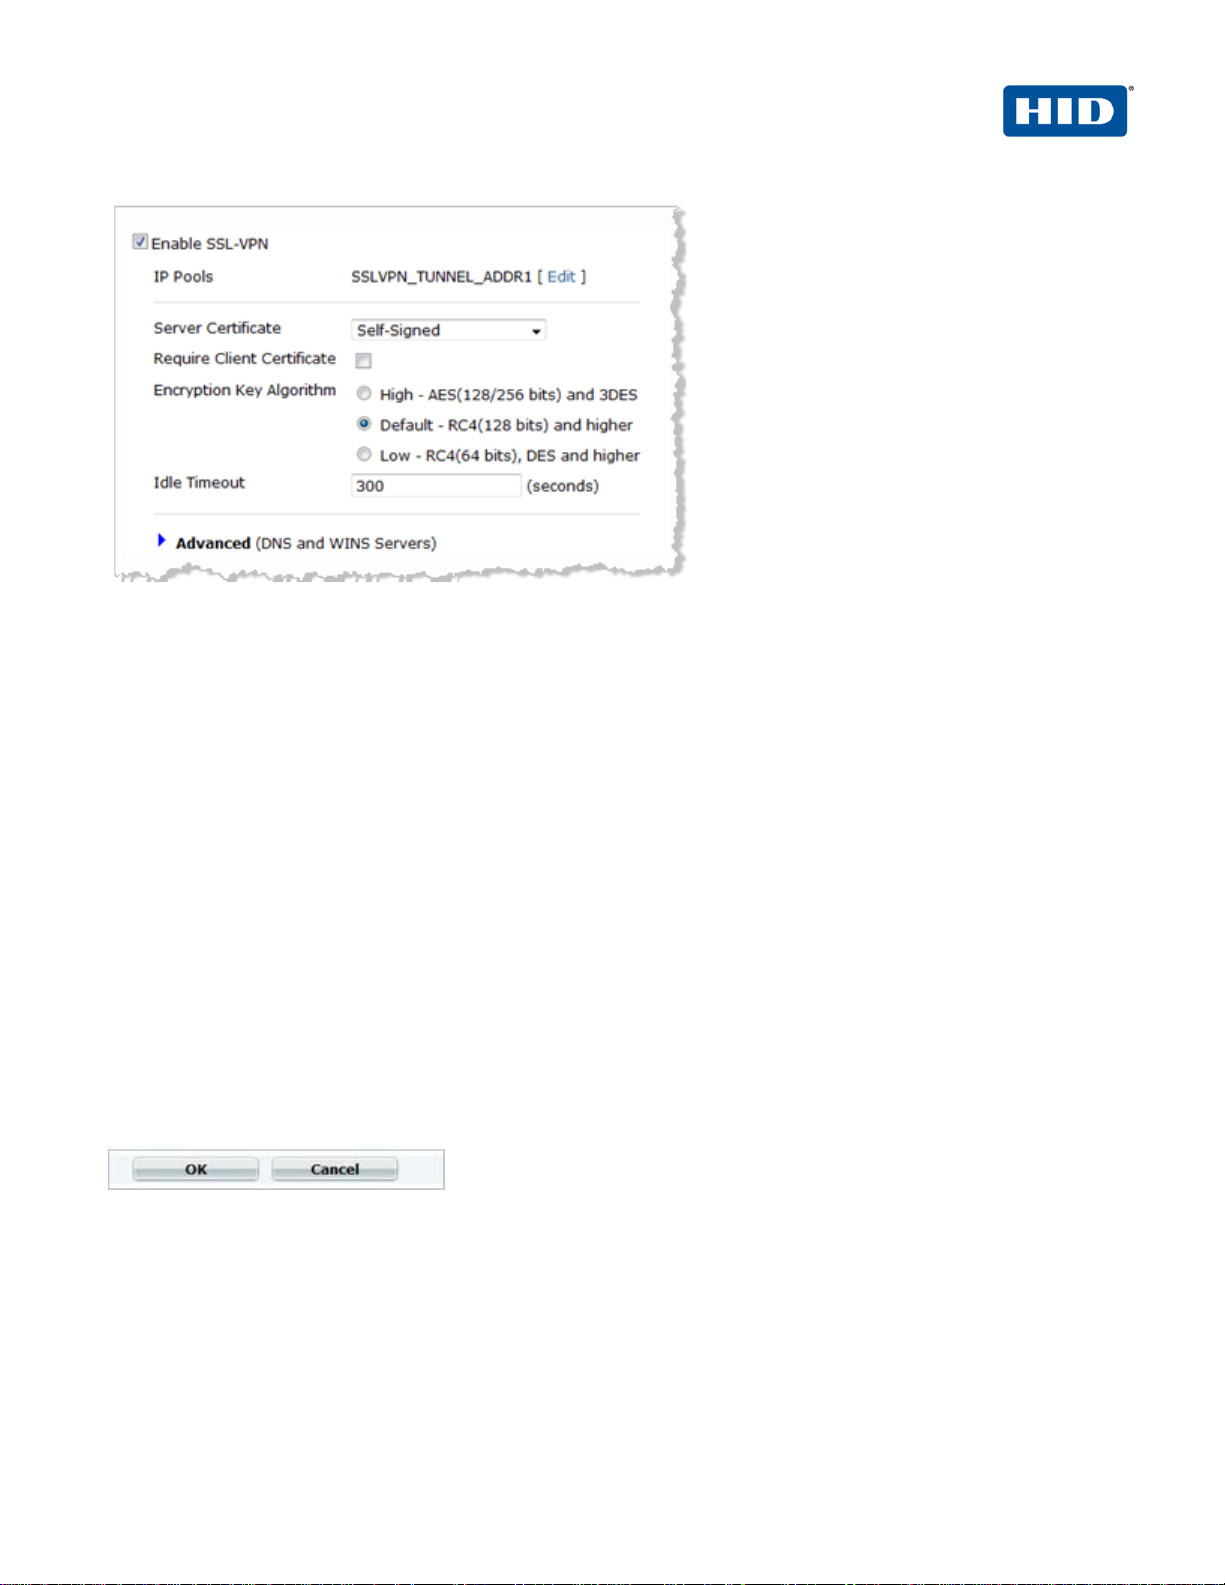
2. Select the option En ab le S SL -VPN.
3. Next to IP Pools—SSLVPN_TUNNEL_ADDR1,click Edit. IP Pools.
This allows you to select the range or subnet firewall addresses that represent IP address ranges reserved for
tunnel-mode SSL VPN clients. The IP Pool that you select will be the one created.
4. From the Server Certificate drop-down list, select the signed server certificate to use for authentication. If
you accept the default setting (Self-Signed), then the FortiGate unit offers its Fortinet factory installed
certificate to remote clients when they connect.
5. Deselect the Require Client Certificate option.
6. For Encryption Key Algorithm, select the algorithm for creating a secure SSL connection between the
remote client Web browser and the FortiGate unit.
7. For Idle Timeout, enter the period of time (in seconds) that the connection can remain idle before the user
must log in again. The range is from 10 to 28800 seconds. Setting the value to 0 will disable the idle
connection timeout. This setting applies to the SSL VPN session.
8. For Advanced (DNS and WINS Servers), enter up to two DNS servers and/or two WINS servers to be
provided for the use of clients.
9. Click OK at the bottom of the page.
-2013 HID Global Corporation/ASSA ABLOY AB. All rights reserved. Page |
Page 9

4TRESS AAA Out-of-Band Authentication (SMS) and SSL VPN Fortinet | Integration Handbook
External Release | © 2012
9
3.2 Procedure 2: Configure the Portal
Portal configuration determines what remote users see when they log in to the portal. Both the system
administrator and the user have the ability to customize the SSL VPN portal.
There are three pre-defined default Web portal configurations available:
• Full access
• Tunnel access
• Web access
1. To view the portal settings page, navigate to VPN > SSL > Portal in the FortiGate Web console. (This
document uses the full-access portal default.)
2. Configure the following settings.
• Session Information—The Session Information widget displays the login name of the user, the amount
of time the user has been logged in, and the inbound and outbound traffic statistics.
-2013 HID Global Corporation/ASSA ABLOY AB. All rights reserved. Page |
Page 10

4TRESS AAA Out-of-Band Authentication (SMS) and SSL VPN Fortinet | Integration Handbook
External Release | © 2012
10
• Bookmarks—Bookmarks are used as links to internal network resources. When a bookmark is selected
from a bookmark list, a pop-up window appears with th e web page. Teln et, VNC, and RDP require a
browser plug-in. FTP and Samba replace the bookmarks page with an HTML file-browser.
• Connection Tool—Use the Connection Tool widget to connect to an internal network resource without
adding a bookmark to the bookmark list. You select the type of resource and specify the URL or IP
address of the host computer.
• Tunnel Mode—If your Web portal provides tunnel mode access, then you have to configure the Tunnel
Mode widget. These settings determine how tunnel mode clients are assigned IP addresses.
3. Click Apply.
For more information on how to customize this portal, refer to the document, Fortigate-sslvpn-40-mr3.pdf (full
name: Fortinet SSL VPN ForiOS™ Handbook v3 for FortiOS 4.0 MR3). Locate the document at the following
URL:
http://docs.fortinet.com/fgt/handbook/40mr3/fortigate-sslvpn-40-mr3.pdf
3.3 Procedure 3: Configur e the Security Policy
To create an SSL-VPN security policy – Web-based manager, perform the following steps.
1. Logged into the FortiGate Web console, navigate to Policy > Policy > Policy.
2. Click Create New (located in the pane to the right).
-2013 HID Global Corporation/ASSA ABLOY AB. All rights reserved. Page |
Page 11

4TRESS AAA Out-of-Band Authentication (SMS) and SSL VPN Fortinet | Integration Handbook
External Release | © 2012
11
3. From the Source Interface/Zone drop-down list, select the name of the FortiGate network interface that
connects to the Internet.
4. From the Source Address drop-down list, select all.
5. From the Destination Interface/Zone drop-down list, select the FortiGate network interface that connects to
the protected network.
6. From the Destination Address drop-down list, select the firewall address you created that represents the
networks and servers to which the SSL VPN clients will connect.
If you want to associate multiple firewall addresses or address groups with the Destination Interface/Zone,
then from Destination Address, click the plus symbol. In the dialog box that is displayed, move the firewall
addresses or address groups from the Available Addresses section to the Members section, then click OK.
7. From the Action drop-down list, select SSL-VPN.
8. Deselect the SSL Client Certificate Restrictive option.
9. From the Cipher Strength drop-down list, select the bit level of SSL encryption. The Web browser on the
remote client must be capable of matching the level that you select.
10. Select the Configure SSLVPN Users option. (A security policy for an SSL VPN is automatically an identitybased policy.)
11. Click Add to add a user group to the policy. The Edit Authentication Rule window opens on top of the
security policy. Enter the following information and then click OK. You can click Add again to add more
groups.
-2013 HID Global Corporation/ASSA ABLOY AB. All rights reserved. Page |
Page 12

4TRESS AAA Out-of-Band Authentication (SMS) and SSL VPN Fortinet | Integration Handbook
External Release | © 2012
12
• Select User Groups in the left list (dialog not illustrated) and use the right arrow button to move them to
the right list.
• Select Service in the left list (dialog not illustrated) and use the right arrow button to move them to the
right list.
• Select the ANY service to allow the user group access to all services.
12. Click OK.
3.4 Procedure 4: Create Tunnel Mode Sec urity Policy
If your SSL VPN will provide tunnel mode operation, then create a security policy to enable traffic to pass between
the SSL VPN virtual interface and the protected networks. This is in addition to the SSL VPN security policy that
you created in the preceding section.
To configure the tunnel mode security policy - web-based manager, perform the following steps.
1. Logged into the FortiGate Web console, navigate to Policy > Policy > Policy.
2. Click Create New (located in the pane to the right).
3. From the Source Interface/Zone drop-down list, select the virtual SSL VPN interface (for example, ssl.root).
4. From the Source Address drop-down list, select the firewall address you created that represents the IP
address range assigned to SSL VPN clients (for example, SSL_VPN_tunnel_users).
-2013 HID Global Corporation/ASSA ABLOY AB. All rights reserved. Page |
Page 13

4TRESS AAA Out-of-Band Authentication (SMS) and SSL VPN Fortinet | Integration Handbook
External Release | © 2012
13
5. From the Destination Interface/Zone drop-down list, select the interface that connects to the protected
network.
6. From the Destination Address drop-down list, select the firewall address that represents the networks and
servers the SSL VPN clients will connect to.
7. Accept the Schedule default (always)
8. Accept the Service default (ANY).
9. From the Action drop-down list, select ACCEPT.
10. Select the Enable NAT option, and then click OK.
This policy enables the SSL VPN client to initiate communication with hosts on the protected network. If you want
to enable hosts on the protected network to initiate communication with the SSL VPN client, then you should
create another Accept policy like the preceding one, but with the source and destination settings reversed.
Note: You must also add a static route for tunnel mode operation.
-2013 HID Global Corporation/ASSA ABLOY AB. All rights reserved. Page |
Page 14

4TRESS AAA Out-of-Band Authentication (SMS) and SSL VPN Fortinet | Integration Handbook
External Release | © 2012
14
3.5 Procedure 5: Configure Routing f or Tunnel Mode
If your SSL VPN operates in tunnel mode, then you must add a static route so that replies from the protected
network can reach the remote SSL VPN client.
To add the tunnel mode route - web-based manager, perform the following steps.
1. Logged into the FortiGate Web console, navigate to Router > Static > Static Route.
2. Click Create New.
3. Enter the Destination IP/Mask of the tunnel IP address that you assigned to the users of the web portal.
4. Select the SSL VPN virtual interface for the Device.
5. Click OK.
-2013 HID Global Corporation/ASSA ABLOY AB. All rights reserved. Page |
Page 15

4TRESS AAA Out-of-Band Authentication (SMS) and SSL VPN Fortinet | Integration Handbook
External Release | © 2012
15
4.0 Configure 4TRESS AAA
This chapter describes how to configure the 4TRESS AAA Authenticati on Ser ver .
4.1 Procedure 1: Configure FortiGate Gate
A gate for the 4TRESS AAA Server is a group of Network Access Servers (NAS) that is used to simplify
administration. For configuration details, refer to 4TRESS AAA Server technical documentation.
1. In the tree in the left pane of the Administration Console, expand the Servers line.
2. Right-click on the server to which you want to add a gate, and then click New Gate.
3. Enter a Gate name (can be any string).
4. Select the option, RADIUS.
5. Use the Authorized IP addresses and host names section to specify filter(s) for the gate.
6. Click Add, and then click OK.
-2013 HID Global Corporation/ASSA ABLOY AB. All rights reserved. Page |
Page 16

4TRESS AAA Out-of-Band Authentication (SMS) and SSL VPN Fortinet | Integration Handbook
External Release | © 2012
16
7. The 4TRESS AAA Server uses the RADIUS shared secret to encrypt data between FortiGate and the
4TRESS AAA authenticatio n server. Cl ick Shared Secret, and then modify the appropriate shared secret for
your system (see section 2.1 Procedure 1: Configure the RADIUS Authentication Server on pa ge 44).
8. Click OK.
-2013 HID Global Corporation/ASSA ABLOY AB. All rights reserved. Page |
Page 17

4TRESS AAA Out-of-Band Authentication (SMS) and SSL VPN Fortinet | Integration Handbook
External Release | © 2012
17
4.2 Procedure 2: Assign Group(s) to the FortiGate Gate
Remember that you must have user groups created and the corresponding LDAP configured. For details, refer to
the ActivIdentity 4TRESS AAA Administration Guide.
1. To assign groups to the gate, in the tree in the left pane, select the group.
2. Use the Group / Gate Assignments section of the page to specify gate(s) for the group’s users to utilize in
order to access a protected resource.
3. Click Add.
-2013 HID Global Corporation/ASSA ABLOY AB. All rights reserved. Page |
Page 18

4TRESS AAA Out-of-Band Authentication (SMS) and SSL VPN Fortinet | Integration Handbook
External Release | © 2012
18
4. Select the Gate, the AZ profile. and the AC profile.
5. Click OK.
WARNING: If you specified a specific RADIUS user group name in Fortinet, then you must use an AZ profile with
vendor specific attributes (see section 2.2 Procedure 2: Create New User Group on page 5).
To create an AZ profile, refer to 4TRESS_AAA_AdminGuide.pdf.
-2013 HID Global Corporation/ASSA ABLOY AB. All rights reserved. Page |
Page 19

4TRESS AAA Out-of-Band Authentication (SMS) and SSL VPN Fortinet | Integration Handbook
External Release | © 2012
19
4.3 Procedure 3: Create An Out-of-Band Delivery Gateway
4TRESS AAA supports OOB authentication (SMS) via telephones. The actual SMS one-time password is a
random number generated by the Appliance and sent to the end user through a delivery gateway. To create a
gateway, perform the following steps using the AAA Server Administration Console.
1. Select Tools, and then click Options.
2. Select the SMS Gateway tab.
3. Select the Protocol to use for sending the SMS to the cell phone.
4. For SMS Center Address, enter the IP address or domain name of the SMS Center’s server.
5. Enter the SMS Center Port number for the above server.
6. Enter the login and password credentials that the AAA Server uses to authenticate to the SMS Center server.
7. For Cell Phone Number LDAP Attribute, enter the attribute used by your organization’s LDAP directory for
user phone numbers.
-2013 HID Global Corporation/ASSA ABLOY AB. All rights reserved. Page |
Page 20

4TRESS AAA Out-of-Band Authentication (SMS) and SSL VPN Fortinet | Integration Handbook
External Release | © 2012
20
8. Customize the text of the message you want sent to users (for example, “Here’s your one time password:”)
and then click OK.
9. Add two registry entries: one to activate the challenge-response mode for the SMS activation code and the
other to customize the Activation message (that appears on the FortiGate page).
HKEY_LOCAL_MACHINE\SOFTWARE\ActivCard\ActivPack\ActivPackServerV6
-2013 HID Global Corporation/ASSA ABLOY AB. All rights reserved. Page |
Page 21

4TRESS AAA Out-of-Band Authentication (SMS) and SSL VPN Fortinet | Integration Handbook
External Release | © 2012
21
4.4 Procedure 4: Assi gn An SMS Token
You can assign an SMS Token for use as a primary authentication method to a single user or multiple users (bulk
assignment).
1. From the AA Server Administration console, from the Devices menu, click SMS Token.
2. Use the search function to search for user(s) to whom you want to assign the token(s). To select multiple
users, press either Shift + click or Ctrl + click.
3. Select the user or users from the list, and then click Set.
-2013 HID Global Corporation/ASSA ABLOY AB. All rights reserved. Page |
Page 22

4TRESS AAA Out-of-Band Authentication (SMS) and SSL VPN Fortinet | Integration Handbook
External Release | © 2012
22
5.0 Authentic ation Using O ut-of-Band Authentication
1. The user authenticates on the FortiGate login page b y entering a Name and Password and then clicking
Login.
2. When the credentials are validated, the system generates a one-time-password and sends it via telephone.
3. The user enters the password as prompted by a new FortiGate page (illustrated nex t) , and then clicks OK.
-2013 HID Global Corporation/ASSA ABLOY AB. All rights reserved. Page |
Page 23

4TRESS AAA Out-of-Band Authentication (SMS) and SSL VPN Fortinet | Integration Handbook
External Release | © 2012
23
Document
July 2012
Eco-System Workgroup
Initial release
1.1
Updated copyright statement, rebranding to HID Global TP
1.2
Copyright
© 2012-2013 HID Globa l Cor poration/ASSA ABLOY AB. All rights reserved.
Trademarks
HID, the HID logo, ActivID, 4TRESS and/or other HID Global products or marks referenced herein are registered
trademarks or trademarks of HID Global Corporation in the United States and/or other countries.
The absence of a mark, product, service name or logo from this list does not constitute a waiver of the HID Global
trademark or other intellectual property rights concerning that name or logo. The names of actual companies,
trademarks, trade names, service marks, images and/or products mentioned herein are the trademarks of their
respective owners. An y rights not express l y granted h er ein are reserved.
Revision His tory
Date Author Description
May 2013 Eco-System Workgroup
template
Version
-2013 HID Global Corporation/ASSA ABLOY AB. All rights reserved. Page |
Page 24

4TRESS AAA Out-of-Band Authentication (SMS) and SSL VPN Fortinet | Integration Handbook
External Release | © 2012
24
Americas
US Federal
Europe
Asia Pacific
Web
+1 510.574.0100
+1 571.522.1000
+33 (0) 1.42.04.84.00
+61 (0) 3.9809.2892
http://www.hidglobal.com/identity-assurance
Corporate Headquarters
15370 Barranca Parkway
Irvine, CA 92618
www.hidglobal.com
+1 949.732.2000
-2013 HID Global Corporation/ASSA ABLOY AB. All rights reserved. Page |
 Loading...