

Page 1

Heska Element COAG
Veterinary Analyzer
Operator’s Guide
™
November 8, 2017
Page 2

Page 3

Contents
About this Guide vii
Technical Support . . . . . . . . . . . . . . . . . . . . . . . . . . . . . . . . . vii
I. The Heska Element COAG™Veterinary Analyzer 1
1. Introduction 3
1.1. General Information . . . . . . . . . . . . . . . . . . . . . . . . . . . . . 3
1.2. Intended Use of the Heska Element COAG™Analyzer . . . . . . . . . . 3
1.3. Basic Operating Principles . . . . . . . . . . . . . . . . . . . . . . . . . 4
1.4. Features of the Heska Element COAG™Analyzer . . . . . . . . . . . . 4
1.4.1. Symbols Used in Labeling . . . . . . . . . . . . . . . . . . . . . 5
1.4.2. Intended Use of the Heska Element COAG™Cartridges . . . . . 5
2. System Description and Setup 7
2.1. User Information and Precautions . . . . . . . . . . . . . . . . . . . . . 7
2.2. Unpacking . . . . . . . . . . . . . . . . . . . . . . . . . . . . . . . . . . 8
2.3. Main Components . . . . . . . . . . . . . . . . . . . . . . . . . . . . . 9
2.3.1. The Heska Element COAG™Analyzer . . . . . . . . . . . . . . 9
2.3.2. The Heska Element COAG™Cartridge . . . . . . . . . . . . . . 11
2.4. Setup . . . . . . . . . . . . . . . . . . . . . . . . . . . . . . . . . . . . 11
3. Configuring the Heska Element COAG™Analyzer 13
3.1. The Home Screen . . . . . . . . . . . . . . . . . . . . . . . . . . . . . 13
3.2. Configuration of the Heska Element COAG™Analyzer . . . . . . . . . . 14
3.2.1. Clinic Info . . . . . . . . . . . . . . . . . . . . . . . . . . . . . . 15
3.2.2. Software Version/Upgrade . . . . . . . . . . . . . . . . . . . . . 16
3.2.3. Copy Data from the Analyzer . . . . . . . . . . . . . . . . . . . 17
3.2.4. Customize . . . . . . . . . . . . . . . . . . . . . . . . . . . . . 18
3.2.5. Regional Setup . . . . . . . . . . . . . . . . . . . . . . . . . . . 19
3.2.5.1. Set Date . . . . . . . . . . . . . . . . . . . . . . . . . 20
3.2.5.2. Set Time . . . . . . . . . . . . . . . . . . . . . . . . . 22
3.2.5.3. Set the Date Format . . . . . . . . . . . . . . . . . . . 23
3.2.5.4. Set the Language . . . . . . . . . . . . . . . . . . . . 24
3.2.5.5. Set the Keyboard Layout . . . . . . . . . . . . . . . . 25
iii
Page 4

Contents
3.2.6. Connections . . . . . . . . . . . . . . . . . . . . . . . . . . . . 26
3.2.6.1. Printer . . . . . . . . . . . . . . . . . . . . . . . . . . 28
3.2.6.2. Network . . . . . . . . . . . . . . . . . . . . . . . . . 29
3.2.7. Quality Assurance . . . . . . . . . . . . . . . . . . . . . . . . . 32
3.2.7.1. Calibration . . . . . . . . . . . . . . . . . . . . . . . . 32
3.2.7.2. Analyzer Self Test . . . . . . . . . . . . . . . . . . . . 34
3.2.8. Screen Saver . . . . . . . . . . . . . . . . . . . . . . . . . . . . 34
3.2.8.1. Load Pictures . . . . . . . . . . . . . . . . . . . . . . 35
4. Memory Database 37
4.1. Viewing Test Results . . . . . . . . . . . . . . . . . . . . . . . . . . . . 37
4.2. Performing a Database Search . . . . . . . . . . . . . . . . . . . . . . . 38
4.2.1. Search by Patient ID . . . . . . . . . . . . . . . . . . . . . . . . 39
4.2.2. Search by Sample ID . . . . . . . . . . . . . . . . . . . . . . . . 39
4.2.3. Search by Date . . . . . . . . . . . . . . . . . . . . . . . . . . . 40
4.2.4. Search by Test Type . . . . . . . . . . . . . . . . . . . . . . . . 40
5. Maintenance and Support 41
5.1. Routine Maintenance . . . . . . . . . . . . . . . . . . . . . . . . . . . . 41
5.2. Cleaning the Outer Shell . . . . . . . . . . . . . . . . . . . . . . . . . . 41
5.3. Cleaning the Cartridge Slot and Air Filter . . . . . . . . . . . . . . . . . 41
5.4. Service . . . . . . . . . . . . . . . . . . . . . . . . . . . . . . . . . . . 42
5.5. Disposal of the Heska Element COAG™Analyzer . . . . . . . . . . . . . 42
6. Troubleshooting 43
6.1. Technical Support . . . . . . . . . . . . . . . . . . . . . . . . . . . . . . 43
6.2. Problems That Give No Advisory Messages . . . . . . . . . . . . . . . . 43
6.3. List of Advisories . . . . . . . . . . . . . . . . . . . . . . . . . . . . . . 43
6.4. Screen Calibration . . . . . . . . . . . . . . . . . . . . . . . . . . . . . 45
II. The Heska Element COAG™Test Portfolio 47
7. PT/aPTT Combination Test 49
7.1. Blood Coagulation . . . . . . . . . . . . . . . . . . . . . . . . . . . . . 49
7.2. Test Specifications . . . . . . . . . . . . . . . . . . . . . . . . . . . . . 50
7.3. Test Requirements . . . . . . . . . . . . . . . . . . . . . . . . . . . . . 53
7.3.1. Materials and Equipment . . . . . . . . . . . . . . . . . . . . . . 53
7.3.2. Blood Sample Preparation . . . . . . . . . . . . . . . . . . . . . 53
7.4. Limitations . . . . . . . . . . . . . . . . . . . . . . . . . . . . . . . . . . 54
7.5. Test Procedure . . . . . . . . . . . . . . . . . . . . . . . . . . . . . . . 54
8. Equine Fibrinogen Test 57
8.1. Fibrinogen Testing . . . . . . . . . . . . . . . . . . . . . . . . . . . . . 57
iv
Page 5

Contents
8.2. Test Specifications . . . . . . . . . . . . . . . . . . . . . . . . . . . . . 58
8.3. Test Requirements . . . . . . . . . . . . . . . . . . . . . . . . . . . . . 60
8.3.1. Materials and Equipment . . . . . . . . . . . . . . . . . . . . . . 60
8.3.2. Centrifuge . . . . . . . . . . . . . . . . . . . . . . . . . . . . . . 60
8.3.3. Sample Preparation . . . . . . . . . . . . . . . . . . . . . . . . 61
8.4. Limitations . . . . . . . . . . . . . . . . . . . . . . . . . . . . . . . . . . 62
8.5. Test Procedure . . . . . . . . . . . . . . . . . . . . . . . . . . . . . . . 63
9. Canine Fibrinogen Test 67
9.1. Fibrinogen Testing . . . . . . . . . . . . . . . . . . . . . . . . . . . . . 67
9.2. Test Specifications . . . . . . . . . . . . . . . . . . . . . . . . . . . . . 68
9.3. Test Requirements . . . . . . . . . . . . . . . . . . . . . . . . . . . . . 70
9.3.1. Materials and Equipment . . . . . . . . . . . . . . . . . . . . . . 70
9.3.2. Centrifuge . . . . . . . . . . . . . . . . . . . . . . . . . . . . . . 70
9.3.3. Sample Preparation . . . . . . . . . . . . . . . . . . . . . . . . 70
9.4. Limitations . . . . . . . . . . . . . . . . . . . . . . . . . . . . . . . . . . 72
9.5. Test Procedure . . . . . . . . . . . . . . . . . . . . . . . . . . . . . . . 73
10.Canine DEA 1 Blood Typing 77
10.1. Canine Blood Typing . . . . . . . . . . . . . . . . . . . . . . . . . . . . 77
10.1.1. Blood Groups . . . . . . . . . . . . . . . . . . . . . . . . . . . . 78
10.1.2. Blood Transfusion . . . . . . . . . . . . . . . . . . . . . . . . . 78
10.2. Test Specifications . . . . . . . . . . . . . . . . . . . . . . . . . . . . . 78
10.3. Test Requirements . . . . . . . . . . . . . . . . . . . . . . . . . . . . . 80
10.3.1. Materials and Equipment . . . . . . . . . . . . . . . . . . . . . . 80
10.3.2. Blood Sample Preparation . . . . . . . . . . . . . . . . . . . . . 81
10.4. Limitations . . . . . . . . . . . . . . . . . . . . . . . . . . . . . . . . . . 81
10.5. Test Procedure . . . . . . . . . . . . . . . . . . . . . . . . . . . . . . . 82
11.Feline A, B and AB Blood Typing 87
11.1. Feline Blood Typing . . . . . . . . . . . . . . . . . . . . . . . . . . . . . 87
11.1.1. Feline Blood Groups . . . . . . . . . . . . . . . . . . . . . . . . 87
11.1.2. Blood Transfusion Risks . . . . . . . . . . . . . . . . . . . . . . 88
11.1.3. Mating risks . . . . . . . . . . . . . . . . . . . . . . . . . . . . . 88
11.2. Test Specifications . . . . . . . . . . . . . . . . . . . . . . . . . . . . . 88
11.3. Test Requirements . . . . . . . . . . . . . . . . . . . . . . . . . . . . . 90
11.3.1. Materials and Equipment . . . . . . . . . . . . . . . . . . . . . . 90
11.3.2. Blood Sample Preparation . . . . . . . . . . . . . . . . . . . . . 91
11.4. Limitations . . . . . . . . . . . . . . . . . . . . . . . . . . . . . . . . . . 91
11.5. Test Procedure . . . . . . . . . . . . . . . . . . . . . . . . . . . . . . . 92
Bibliography 95
v
Page 6

Page 7
About this Guide
This Operator’s Guide is written for Heska Element COAG™Analyzers with software
newer than version
ing finding the version of the software currently installed on the analyzer and instructions
to upgrade to the newest version.
The following symbols and convention are used in this guide:
Bold Used for menu, command and keyboard selections and screens you will see.
Italics
Used for emphasis.
Helpful information about a particular topic.
i
Important information to prevent problems and ensure that you are successful
!
in using the instrument.
Technical Support
For any inquiries about the instrument or use of the test cartridges, contact your Distributor
or Heska Corporation Customer Support.
See contact information below:
03102017_0848
. Please refer to
Section 3.2.2
for information regard-
Heska Corporation
3760 Rocky Mountain Avenue
Loveland, Colorado 80538
USA
T 800-464-3752
Í www.heska.com
vii
Page 8

Page 9

Part I.
The Heska Element COAG
Veterinary Analyzer
™
Page 10

Page 11

1. Introduction
1.1. General Information
The Heska Element COAG™Analyzer is an innovative specialty Analyzer developed
and used exclusively for veterinary diagnostics.
The Heska Element COAG™Analyzer enables veterinarians to perform automated
in-clinic specialty testing using disposable cartridges. The Heska Element COAG
Analyzer’s operation is based on light absorption.
The Heska Element COAG™Analyzer contains microprocessors and LED optical elements to control all testing and analytical functionalities. The operator controls the
Analyzer’s functions through a 7-inch color touch screen. An open slot in the front of the
Analyzer allows the insertion of a cartridge, and guides the test cartridge into place for
analysis.
The Heska Element COAG™Analyzer test cartridge has two optical detection windows
and is preloaded with dry reagents specific to the tests. All blood clot formations or
reactions occur within the test cartridge.
Test results are displayed on screen, and are automatically stored in the instrument’s
memory database for later retrieval. The results can be printed to an optional USB printer
or exported to a central Laboratory Information System (LIS). An external keyboard can
also be connected to USB ports at the back of the instrument, if so desired.
Chapter 1
™
1.2. Intended Use of the Heska Element COAG™Analyzer
The Heska Element COAG™Analyzer provides quantitative in-vitro determination of:
• Fibrinogen
• PT (Prothrombin Time)
• aPTT (activated Partial Thromboplastin Time)
• DEA 1 Canine Blood Typing
• Feline A & B Blood Typing
3
Page 12

1. Introduction
If the Heska Element COAG™Analyzer is used in any way other than that
!
described in this manual, the Analyzer may not operate as intended, may
produce inaccurate or no results, and may pose a safety hazard. Only use
approved Heska Element COAG™cartridges with the Analyzer.
1.3. Basic Operating Principles
The Heska Element COAG™Analyzer’s operation is based on one-time-use test cartridges containing micro channels and test-specific reagents. Samples added to the
Heska Element COAG™cartridges flow through micro channels in the cartridge where it
reacts with test-specific reagents. Light passing through the optical detection window on
the cartridge is absorbed by the sample in the channels. The Analyzer measures how
much light is absorbed and automatically calculates the test results, which are displayed
on screen and stored in the Analyzer’s database. No interaction is needed or required
by the user during the analysis.
1.4. Features of the Heska Element COAG™Analyzer
• Large, 7-inch color touchscreen
• Easy-to-use touchscreen controls
• Small sample size (100 µL or less)
• Fast and accurate point-of-care results
• Simple and user-friendly operation
• Continuous internal self-test monitoring during operation
• Small footprint
•
Up to 1000 test results can be stored and retrieved from the instrument’s results
database
• Allows Patient and Sample ID input (optional)
• LIS-interface
4
Page 13
1.4. Features of the Heska Element COAG™Analyzer
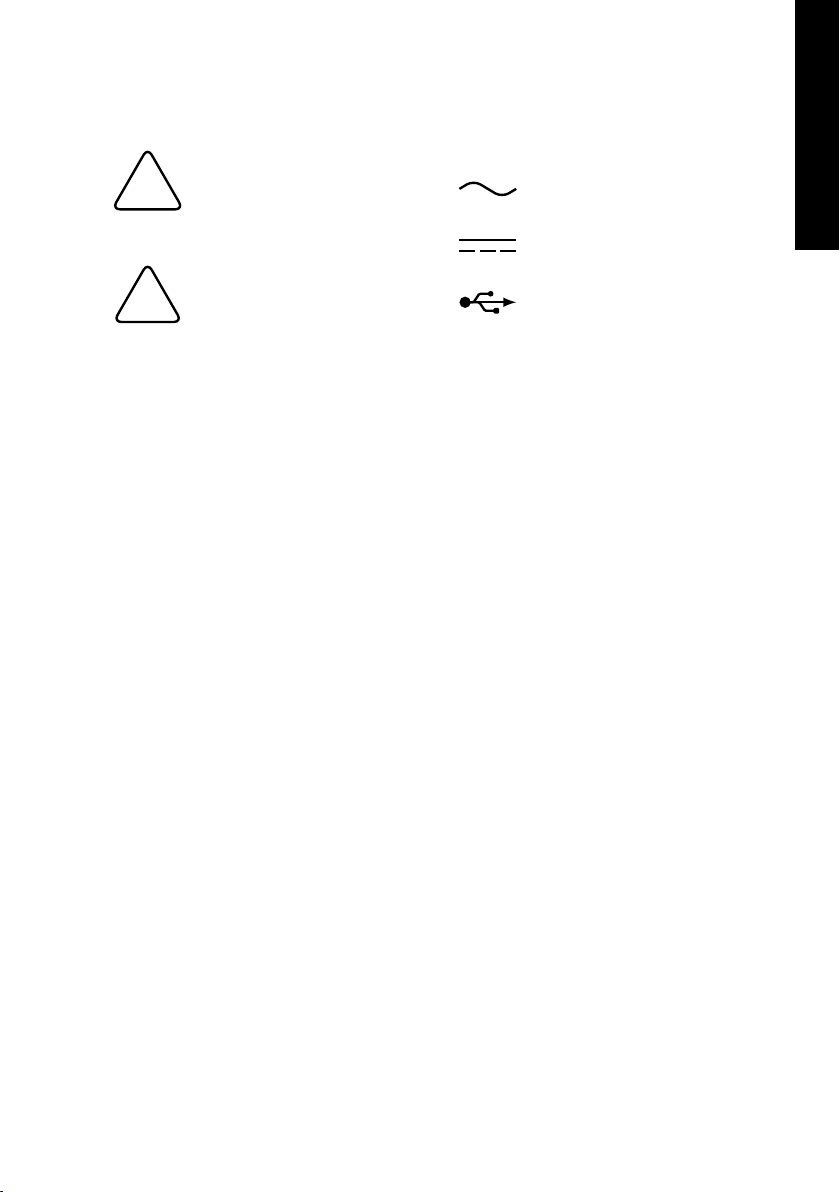
1.4.1. Symbols Used in Labeling
Caution, risk of danger
E
!
(see accompanying warning text)
Caution, risk of electric shock
Alternating Current
Direct Current
USB Connection
1.4.2. Intended Use of the Heska Element COAG™Cartridges
The Heska Element COAG™cartridges are exclusively intended for use with the Heska
Element COAG™Analyzer. Utilizing it with other instruments is not advisable.
•
Each Heska Element COAG™cartridge is clearly labeled with test type and individually packed in a sealed pouch with a desiccant bag to protect it from moisture.
•
Once the pouch has been opened, the Heska Element COAG™cartridge must be
used within the time limit stated on the package insert.
•
Do not use the cartridge after its expiration date since it is only stable until the date
stamped on the pouch. Using it after the duration date can result in inaccurate test
results.
•
Do not store the Heska Element COAG™cartridge outside the temperature range
stated on the package insert:
– Fibrinogen Test (36 °F to 46 °F) / (2◦C to 8◦C)
Chapter 1
– PT/aPTT Combination Test (36 °F to 46 °F) / (2◦C to 8◦C)
– DEA 1 Canine Blood Typing Test (36 °F to 77 °F) / (2◦C to 25◦C)
– Feline A & B Blood Typing Test (36 °F to 77 °F) / (2◦C to 25◦C)
•
The Heska Element COAG™cartridges should be at room temperature before use,
i.e., between
temperatures impairs its accuracy.
•
Used cartridges, pipettes and collection tubes are considered potentially infectious.
Dispose them off properly in accordance with the policies and regulations practiced
at the place of operation.
59 °Fto86 °F(15◦Cto30◦C
). Exposing the cartridge to extreme
5
Page 14

1. Introduction
•
When using the Heska Element COAG™cartridges, all biohazard safety guidelines pertaining to handling and disposal of animal blood samples must be strictly
followed.
Do not reuse cartridges. All Heska Element COAG™cartridges are for single
!
use only. Once used, the cartridge should be disposed of in accordance with
the safety guidelines at the place of operation.
6
Page 15

2. System Description and Setup
2.1. User Information and Precautions
Please read the instructions in this Operator’s Guide carefully before using the Heska
Element COAG™Analyzer, and follow all instructions and warnings and keep it handy
for future references.
The Heska Element COAG™Analyzer and its cartridges are exclusively intended for
veterinary use. If the Heska Element COAG™Analyzer is used in a manner not specified
by the manufacturer, the protection provided by the instrument may be impaired.
Observe the following:
•
Attempting to open or dismantle the instrument can cause electric shock and will
void the warranty.
•
Protect the instrument from being wet, whether it is exposure to wet locations or to
rain or snow.
•
Use only the power supply that is provided together with the instrument. Use of
any other power supply will damage the instrument, thus, voiding the warranty.
•
It is highly recommended that the power supply be disconnected or the instrument
turned off when not in use.
•
The power supply must be connected to a main power outlet that is grounded and
of a quality normally found in hospitals, domestic and commercial environments.
•
Do not expose the Heska Element COAG™Analyzer to extreme temperatures:
below
59 °F(15◦C
COAG™Analyzer near a heat source nor expose it to direct sunlight.
) and above
86 °F(30◦C
). Never expose the Heska Element
Chapter 2
•
It is strongly recommended to inspect the Heska Element COAG™Analyzer regularly for damages. If damaged, disconnect instantly and contact Technical Support
for assistance.
•
If the Heska Element COAG™Analyzer is accidentally dropped, immediately contact
Technical Support. In this case, no test should be performed until it has been
serviced by authorized personnel.
7
Page 16

2. System Description and Setup
•
Do not use non-Heska Element COAG™cartridges with the Heska Element COAG
Analyzer. A non-Heska Element COAG™cartridge will not operate in the instrument
and will only generate an error message when used.
•
Before inserting the cartridge, make sure that there are no foreign objects in the
cartridge slot. Test cartridges should slide in easily into the cartridge slot. No force
is needed in the insertion.
•
Do not use excessive force or sharp objects on the Analyzer’s sensitive touch
screen. A light tap is sufficient.
•
The detachable power supply cord set and appliance inlet of the external power
supply are considered as the disconnecting device.
•
The USB interface connector of the Heska Element COAG™Analyzer must only
be connected to SELV circuits.
•
The LAN connector must only be connected to 10Base-T/100Base-TX circuits.
External computing devices connected to the USB and LAN interface connectors
have to comply with the standard UL60950 for US and Canada, and IEC60950 for
other countries.
•
Network/USB cables connected to Heska Element COAG™Analyzer should not
be more than 3 meters long.
2.2. Unpacking
When unpacking the instrument, be sure that the following guidelines are followed:
• Remove the Heska Element COAG™Analyzer from the shipping carton.
•
Place the Analyzer on a leveled surface relatively free of animal hair, dust and
other contaminants.
• Do not place near a window or a heat source.
™
Make sure that you received the following components:
• Heska Element COAG™Analyzer
• Sealing Cartridge
• Power supply with cord
• Power cord
• Heska Element COAG™Diagnostic System Operator’s Guide.
•
Quick Guide for each of the tests in the Heska Element COAG™test portfolio,
see Part II.
8
Page 17
2.3. Main Components
2.3.1. The Heska Element COAG™Analyzer
2.3. Main Components
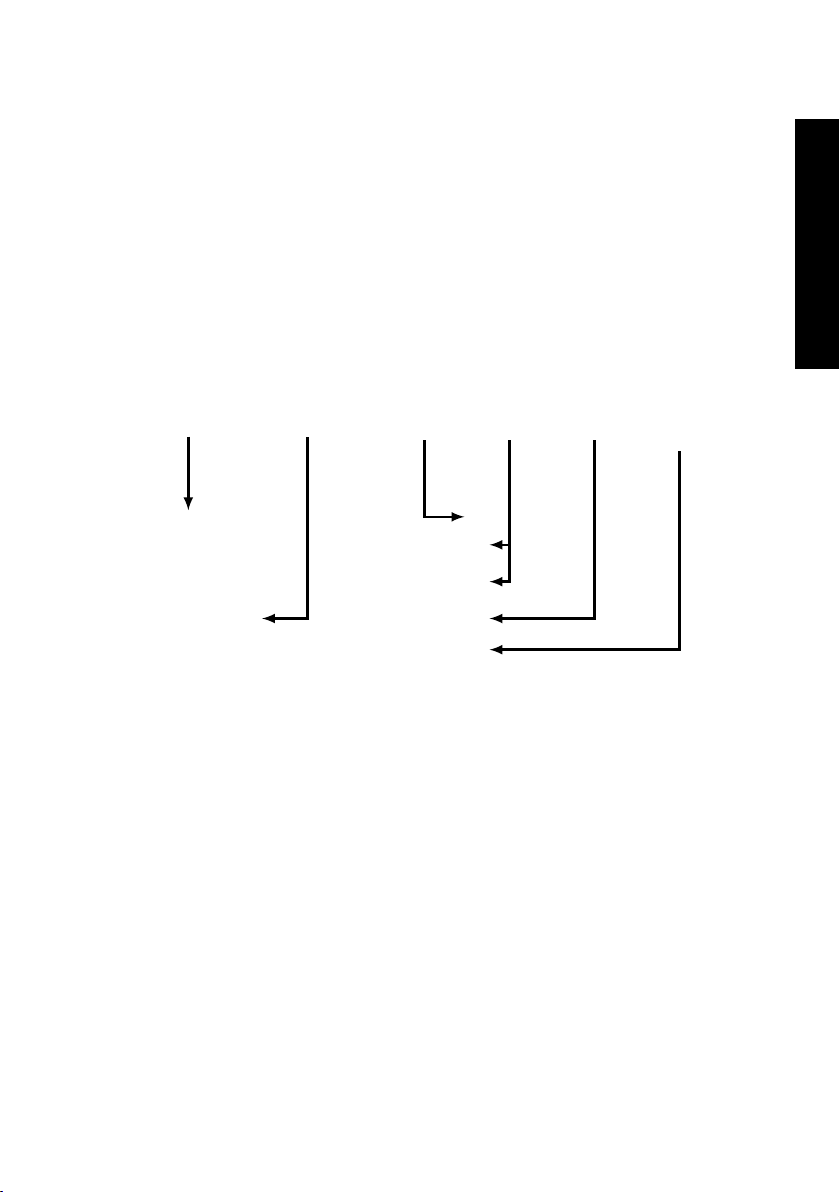
The main components of the Heska Element COAG™Analyzer are shown in
and an overview of the Analyzer’s technical specifications is given in Table 2.1.
The Heska Element COAG™Analyzer has a 7-inch touch screen which serves as the
main interaction point between the operator and the instrument itself. The instrument has
a cartridge slot located on the front where the Heska Element COAG™test cartridges are
inserted. The power supply connector is located at the back of the instrument together
with the LAN port and two USB 2.0 ports. An on/off button is located at the rear of the
instrument as well.
Touch
Screen
Figure 2.1: Front (left) and back (right) view of the Heska Element COAG™Analyzer.
Cartridge
Slot
On/Off
Button
USB 2.0
Ports
LAN
Port
Figure 2.1
Power
Supply
Connector
Chapter 2
9
Page 18

2. System Description and Setup
Table 2.1: Technical Specifications for the Heska Element COAG™Analyzer.
Operating Environment Indoor use only
Temperature 59 °F to 86 °F (15◦C to 30◦C)
Max. Relative Humidity 80 %
Max. Altitude 9843 ft (3000 m)
Pollution Degree 2
Others
Mode of Operation Continuous
Instrument’s placement minimum distance from the nearest object
Power Supply
Input 100 V AC to 240 V AC
Output 12 V DC
Instrument
Input 12 V DC
Power Consumption 32.4 W
Transient Overvoltage Category II of IEC 60364-4-443
Instrument Input Connections 12 V DC Power Supply
Instrument Input and Output Connections
15 cm/6 in
(fluctuations < 10 % of nominal voltage)
1.5 A
50 Hz to 60 Hz
6.67 A
2.7 A
LAN and USB 2.0
10
Page 19
2.3.2. The Heska Element COAG™Cartridge
2.4. Setup
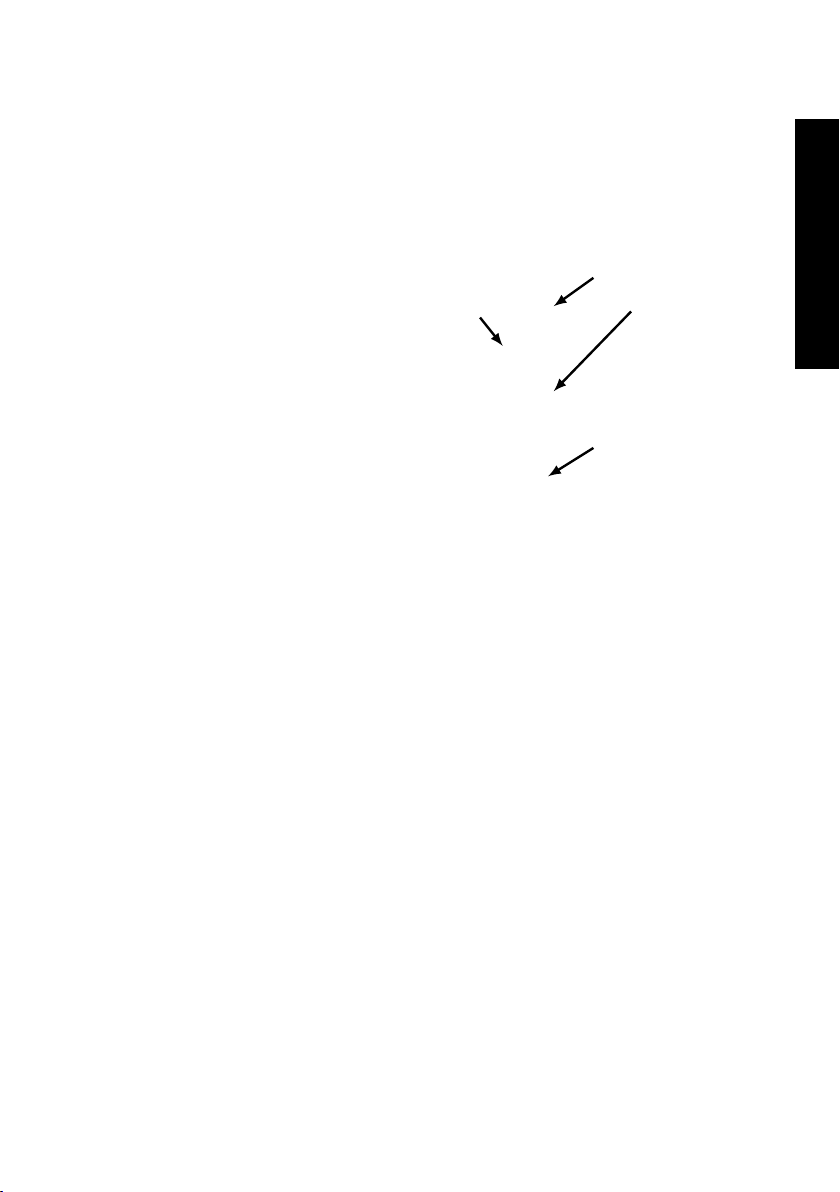
Figure 2.2
COAG™cartridge has a label that indicates the kind of test the cartridge performs. It
has a sample well where the sample is being added or placed.
Sample added to the Heska Element
COAG™cartridge is drawn by capillary force into the cartridge where it
is mixed with reagents. The microfluidic based design makes it possible
to have two independent detection
windows on the cartridge with a sample volume below
ing through the two optical detection
windows is absorbed by the sample.
Test results are determined by using
the measurement technology of light
absorbance.
The cartridge contains the reagents
necessary to perform the tests. The
user only needs to insert the cartridge
in the instrument’s cartridge slot and
follow the on-screen instructions. A
small sample volume is enough to carry out the tests. Just add an adequate amount of
sample and see the results after a few minutes.
shows a typical Heska Element COAG™test cartridge. The Heska Element
Optical
detection
windows
Sample
well
100 µL
Cartridge
label
. Light pass-
Figure 2.2: Heska Element COAG™cartridge.
2.4. Setup
Chapter 2
Before setting up the Heska Element COAG™Analyzer:
• Make sure that the room temperature is between 59 °F to 86 °F (15◦C to 30◦C).
•
If the instrument has been stored outside the aforementioned temperature range,
let the instrument reach room temperature prior to use.
•
When the abovementioned factors have been met, place the Heska Element
COAG™Analyzer on a clean, flat, and stable vibration free surface at least
(6 in) from the nearest object.
• Plug the Heska Element COAG™Analyzer into the power supply.
•
Turn on the instrument by touching the power button at the back of the instrument.
15 cm
11
Page 20

2. System Description and Setup
The Heska Element COAG™Analyzer is now ready for configuration. See
a detailed description of the Analyzer software and configuration options.
Chapter 3
for
12
Page 21

3. Configuring the Heska Element COAG
Analyzer
3.1. The Home Screen
™
The Home Screen is the instrument’s main menu screen, see
the first screen visible after the instrument has been turned on and serves as the main
access point for operating the Analyzer and modifying the settings of the instrument.
Make sure that the date and time shown on the screen are correct; otherwise, refer to
Change the Date/Time under
ready for use at this point. The following features are available at the Home Screen:
Turn Off
Start Test
History
an on-screen touch button situated at the upper left corner of the screen, used
to turn the instrument off. It is also possible to turn off the instrument using the
power button located at the back of the instrument.
on-screen touch buttons used to initiate the tests. Currently, canine and feline
PT/aPTT coagulation tests, canine and feline blood typing, and canine and equine
fibrinogen testing are available. See
the specific tests.
on-screen touch button for search and retrieval of measurement data gathered
from previous testing. The results database is described in Chapter 4.
Section 3.2.5
for resetting directions. The instrument is
Chapter 7toChapter 10
Figure 3.1
. This screen is
Figure 3.1:
Screen. The main
screen holds buttons
for starting a new analysis, review the results
history, and modify the
instruments settings as
well as turning off the
instrument.
for instructions about
Home
Chapter 3
13
Page 22

3. Configuring the Heska Element COAG™Analyzer
Setup
on-screen touch button for instrument configuration. This opens the Settings
Menu for configuration. The instrument configuration is described in Section 3.2.
3.2. Configuration of the Heska Element COAG™Analyzer
Configuration of the Heska Element COAG™Analyzer is performed from the Settings
Menu which is accessed by touching the
Menu can be seen in Figure 3.2.
Setup
button at the Home Screen. The Settings
Figure 3.2:
Menu. From the Settings Menu it is possible
to change and review
the Analyzer configuration. The configuration
options are organized
in categories which
can be accessed by
touching the purple
arrow button to the right
of the category title.
The configuration options are divided into categories. The settings for a category can
be accessed by touching the purple arrow button to the right of the category title. The
categories are:
Clinic Info
Software V.
Copy data
Setttings
Edit yourclinic information (name, contact information, etc.), see
The information is not required, but if present it will appear on the result printouts
and blood typing certificates.
View and update software version. The currently installed software version
is printed in the text field next to the category title. Touch the to install a different
software version, see Section 3.2.2 for detailed instructions.
Copy test data and results to a USB stick or an external hard drive, see
Section 3.2.3
case of unexpected results or problems with the Analyzer.
. The exported data can be sent to Customer Support for analysis in
Section 3.2.1
.
Customize Modify the Analyzer’s default settings, see Section 3.2.4.
Regional Setup
time and date are always displayed on the Analyzer’s Home Screen and will be
printed on the results printouts and logged in the results database.
14
Change time, date and time format, see
Section 3.2.5
. The current
Page 23

3.2. Configuration of the Heska Element COAG™Analyzer
Connections
Laboratory Information System (LIS), see
of the connectivity options.
Quality assurance
Fibrinogen Test, see
Section 3.2.7.2.
Screen saver
when the screen saver is running, see Section 3.2.8.
i
When the instrument is configured, touch
Screen.
Use this menu to install an external printer or connect the instrument to a
Section 3.2.6
From this menu, it is possible to calibrate the instrument for the
Section 3.2.7.1
Turn the screen saver on/off and change the images shown on the screen
The
Service
internal system functions and requires a password.
button is only used by Authorized Service Personnel to access
, or to perform a self test of the Analyzer, see
Done
to return to the Analyzer’s Home
for a detailed discussion
3.2.1. Clinic Info
The Clinic Info screen is shown in
clinic’s contact information. To enter the Clinic Info screen touch the
the Analyzer’s Home Screen and touch the to the right of the Clinic Info category in
the Settings Menu.
All information in the Clinic Info screen is optional but will, if present, appear on the result
printouts. Further, when connecting to a data exchange or computer network, the clinic
information will also be transferred to any connected Laboratory Information System
(LIS). Refer to
LIS.
Section 3.2.6.2
Figure 3.3
for details regarding how to setup the Analyzer with a
. The menu has data fields for entering the
Setup
button on
Chapter 3
To enter your clinic information:
Figure 3.3:
In the Clinic Info menu
the user can optionally
supply name and contact information for the
clinic. If entered, the information will be printed
on result printouts and
be exported if the Analyzer is connected to a
LIS.
Clinic Info.
15
Page 24

3. Configuring the Heska Element COAG™Analyzer
1.
Touch the purple arrow button across the Clinic Info field on the Settings Menu.
This opens the Clinic Info screen shown in Figure 3.3.
2. Edit each field by touching across each field.
3. Use the on-screen keyboard to type in relevant information.
4.
When finished, touch
touch Cancel.
5. Repeat item 2 to 4 for each field that needs changing.
6. When all changes are applied, touch Done to return to the Settings Menu.
i
Touching
the change(s).
Cancel
Done
. To clear any undesired changes and to start anew,
clears any undesired change(s) and touching
Done
3.2.2. Software Version/Upgrade
confirms
The Software screen is shown in
Setup
button on the Analyzer’s Home Screen and touch the to the right of the Software
v. category in the Settings Menu. The current version of the software installed on the
instrument is indicated on the Settings Menu screen and is also printed in the Current
software version text field on the Software screen.
Figure 3.4:
Version Screen. The
currently installed software version is printed
in the Current software
version text field. A
software upgrade can
be applied by touching
the Upgrade button.
To upgrade the Analyzer software:
1.
2.
3.
Software
Unplug any device that may be plugged into the USB port at the back of the
Analyzer.
Insert the installer USB memory stick into the USB port at the back of the instrument
and wait 10 seconds for the Analyzer to register the memory stick.
Touch
Upgrade
on the lower right hand side of the screen of the Software screen.
Figure 3.4
. To enter the Software screen touch the
16
Page 25

3.2. Configuration of the Heska Element COAG™Analyzer
4.
Touch
Yes
in the dialog box when asked to confirm that you want to upgrade,
otherwise, touch No.
5.
Wait for the Analyzer to apply the upgrade and reboot. When the instrument starts
up anew, the upgrade has been applied and the new software version will be
printed in the Current Software version text field.
Software upgrade requires that you obtain a USB memory stick containing an
i
installer for the new software from Heska Corporation or from your Distributor.
3.2.3. Copy Data from the Analyzer
All test data and results stored in the Analyzer can be copied to a USB memory stick
by touching the to the right of the Copy data category in the Settings Menu, see
Figure 3.5.
Chapter 3
Figure 3.5:
data can be copied
from the instrument
by touching to the
right of the Copy data
category in the Settings
Menu. When the data
transfer is complete,
Data copied will be
printed in the text field
next to the Copy data
category.
To copy data from the Analyzer to a USB stick:
1.
Unplug any device that may be plugged into the USB port at the back of the
Analyzer.
2.
Insert a USB memory stick into the USB port and wait 10 seconds for the Analyzer
to register the memory stick.
3.
From the Settings Menu touch the purple to the right of the Copy data category.
The data transfer will begin and Copying data. . . will appear in the status text field.
4.
When the data transfer is complete Data copied will appear in the status text field.
5. Remove the USB stick and reconnect any device that was unplugged.
If a USB error message appears, check if the USB memory stick is properly
i
inserted into the USB port and assure that the USB stick is not defective.
Measurement
17
Page 26

3. Configuring the Heska Element COAG™Analyzer
3.2.4. Customize
The Customize screen is shown in
the
Setup
button on the Analyzer’s Home Screen and touch the to the right of the
Customize category in the Settings Menu.
Figure 3.6:
From the Customize
screen it is possible
to customize whether
or not Patient and
Sample ID must be
supplied during the
test sequence, the unit
for test results and
frequency between
notifications.
In the Customize menu, you can change the defaults for the following settings in the
Heska Element COAG™Analyzer:
Patient ID Required
Sample ID Required
Calibration Reminder
Fibrinogen Unit
Customize.
By default, this feature is deactivated but should be activated when
used together with LIS as this field is used by many LIS systems to identify the
test result for a particular patient. When Patient ID required is set to Yes, it is
not possible to continue a test sequence without supplying information about the
Patient ID.
Requiring Patient ID is highly recommended when using Heska Element
i
COAG™with a LIS, since editing the Patient ID is no longer possible after
testing. For LIS users, please note that the Patient ID field is used as a
unique identifier denoted as Practice Assigned ID (See
By default, this feature is deactivated but can be activated if the
clinic wishes to have information in the Sample ID field in the results history (can
be used to search for a particular result). When Sample ID required is set to Yes it
is not possible to continue a test sequence without supplying information about
the Sample ID.
By default is set to no, and does not remind you when the next
Fibrinogen calibration is due. Should an analyzer require fibrinogen calibration,
please contact Heska Technical Services.
Includes a selection of available units that is used for the Fibrinogen
Test results. Possible choices are: grams per liter (g/L), milligrams per deciliter
Figure 3.6
. To enter the Customize screen touch
Section 3.2.6.2
).
18
Page 27

3.2. Configuration of the Heska Element COAG™Analyzer
(mg/dL) and grams per deciliter (g/dL). By default, the fibrinogen results are reported in grams per liter.
Add-sample notification
sample. Possible choices are: once, every 10 seconds, every 30 seconds and
every minute. By default, the user is notified only once when the test is ready for
the sample.
To customize the above settings:
1.
Toggle between the available options by touching the purple arrow button to the
right of the relevant menu point.
2.
When finished, touch
tions, touch Cancel.
Touching
i
the change(s).
Change the frequency of beeps when a test is ready for the
Done
to confirm the new settings. To cancel any modifica-
Cancel
clears any undesired change(s) and touching
Done
3.2.5. Regional Setup
confirms
Chapter 3
The Regional Setup screen is shown in
touch the
the Regional Setup category in the Settings Menu.
From the Regional Setup screen it is possible to adjust the settings listed below:
Date Use this menu to set the current date, see Section 3.2.5.1.
Time Use this menu to set the current time, see Section 3.2.5.2.
US/Europe
Setup
button on the Analyzer’s Home Screen and touch the to the right of
Use this menu to set the desired date and time format, see
Figure 3.7
. To enter the Regional Setup screen
Figure 3.7:
Setup. In the Regional
Setup menu, it is possible to adjust the date
and time, modify the
date/time format and
change the language
and keyboard layout
used by the Analyzer.
Regional
Section 3.2.5.3
.
19
Page 28

3. Configuring the Heska Element COAG™Analyzer
Language
Use this menu to select the language used by the instrument, see
Section 3.2.5.4
Keyboard layout Use this menu to change the keyboard layout, see Section 3.2.5.5.
To change any of the above settings, touch the to the right of the relevant settings
field. When done modifying the regional settings, touch the
Done
button to return to the
Settings Menu.
3.2.5.1. Set Date
The screen for setting or displaying the current date is shown in Figure 3.8.
Figure 3.8: Date menu.
The current date is displayed in the text field
at the top of the page.
To change the current
date use the on-screen
keyboard. The date
must be specified using
mm/dd/yyyy format.
When the complete
entry complies with this
format, Correct Format
is displayed above the
text field. Otherwise,
Incorrect Format is
displayed.
.
To set the current date:
1. From the Home Screen, touch Setup (this opens the Settings Menu).
2.
From the Settings Menu, touch to the right of the Regional Setup category (this
opens the Regional Setup Menu).
3.
From the Regional Setup page, touch to the right of the Date entry field.
shows the Set Date screen.
4. Use the on-screen keyboard to enter the date.
5. Confirm by touching Done.
20
Figure 3.8
Page 29

3.2. Configuration of the Heska Element COAG™Analyzer
The Date Format is shown below the Entry Box. Incorrect Format message is
i
displayed above the entry box until the complete entry has been made. When
the entry has been completed with the correct format, Correct Format message
is displayed.
i
Touching
the change(s).
Cancel
clears any undesired change(s) and touching
Done
confirms
Chapter 3
21
Page 30

3. Configuring the Heska Element COAG™Analyzer
3.2.5.2. Set Time
The screen for setting or displaying the current time is shown in Figure 3.9.
Figure 3.9: Time menu.
The current time is displayed in the text field
at the top of the page.
To change the current
time use the on-screen
keyboard. The time
must be specified
using the format shown
below the entry field.
When the complete
entry complies with this
format, Correct Format
is displayed above the
text field. Otherwise,
Incorrect Format is
displayed.
To set the current time:
1. From the Home Screen, touch Setup (this opens the Settings Menu).
2.
From the Settings Menu, touch to the right of the Regional Setup category (this
opens the Regional Setup Menu).
3.
From the Regional Setup page, touch to the right of the Time entry field.
Figure 3.9 shows the Set Time screen.
4. Use the on-screen keyboard to enter the time.
5. Confirm by touching Done.
The Time Format is shown below the Entry Box. Incorrect Format message is
i
displayed above the entry box until the complete entry has been made. When
the entry has been completed with the correct format, Correct Format message
is displayed. The time and date format can be changed in the US/Europe Menu,
see Section 3.2.5.3.
i
Touching
the change(s).
Cancel
clears any undesired change(s) and touching
Done
confirms
22
Page 31

3.2. Configuration of the Heska Element COAG™Analyzer
3.2.5.3. Set the Date Format
The screen for setting or displaying the current date and time format is shown in
Figure 3.10. Two formats are available:
USA
When this date/time format is active, the date is shown as mm/dd/yy and the time
is displayed using the 12-hour system followed by AM or PM.
Europe
When this date/time format is active, the date is shown as dd/mm/yy and the
time is displayed using the 24-hour system.
Figure 3.10:
mat. The currently active date and time format is indicated with a
dark purple arrow button to the right. To select a different format,
touch the to the right
of the desired format.
To set the current time and date format:
1. From the Home Screen, touch Setup (this opens the Settings Menu).
2.
From the Settings Menu, touch to the right of the Regional Setup category (this
opens the Regional Setup Menu).
3.
From the Regional Setup page, touch to the right of the US/Europe entry field.
Figure 3.10 shows the Date Format screen.
4.
Activate the desired date and time format by touching to the right of the preferred
menu item. The active format is indicated by a dark purple button.
5. Touch Done to confirm the change.
i
Touching
the change(s).
Cancel
clears any undesired change(s) and touching
Done
Date for-
Chapter 3
confirms
23
Page 32

3. Configuring the Heska Element COAG™Analyzer
3.2.5.4. Set the Language
The screen for selecting or displaying the language used by the graphical user interface
is shown in
arrow button to the right of the language name. Currently, English (the default language)
and Spanish, are supported.
Figure 3.11
. The currently active language is indicated by a dark purple
Figure 3.11:
Menu. The currently
active language is indicated by a dark purple
arrow button to the right
of the language name.
Touch the purple to
the right of another
language option to
change the language of
the user interface.
To select a different language for the graphical user interface:
1. From the Home Screen, touch Setup (this opens the Settings Menu).
2.
3.
4.
5. Touch Done to accept the change and return to the Regional Setup screen.
Language
From the Settings Menu, touch to the right of the Regional Setup category (this
opens the Regional Setup Menu).
From the Regional Setup page, touch to the right of the Language entry field.
Figure 3.11 shows the Language screen.
To change the language, touch the to the right of the desired language so that it
changes from purple to dark purple.
24
The purple arrow button to the right of the language options turns dark purple
i
when the designated language is selected.
i
Touching
the change(s).
Cancel
clears any undesired change(s) and touching
Done
confirms
Page 33

3.2. Configuration of the Heska Element COAG™Analyzer
3.2.5.5. Set the Keyboard Layout
The screen for selecting or displaying the keyboard layout used by the graphical user
interface is shown in
dark purple arrow button to the right of the keyboard layout name.
The keyboard layout refers to the visual and functional arrangement of the keys and legends associated with the arrangement of buttons on the on-screen keyboards. Currently,
five commonly used keyboard layouts are available:
QWERTY
AZERTY
QWERTZ
Dvorak
Blickensderfer
This keyboard layout is the most widespread layout in use and is the default
layout used by the Heska Element COAG™Analyzer. In this layout Q-W-E-R-T-Y
are the first six letters in the upper row of letters on the keyboard.
This keyboard layout is commonly used in French speaking countries. In
this layout A-Z-E-R-T-Y are the first six letters in the upper row of letters on the
keyboard.
This keyboard layout is commonly used in Germany. In this layout Q-W-E-R-
T-Z are the first six letters in the upper row of letters on the keyboard.
This keyboard layout is frequently used as an alternative for the QWERTY
keyboard layout. In this keyboard layout most of the English characters are concentrated in the middle row of letters.
The bottom row of characters in this layout is D-H-I-A-T-E-N-S-O-R.
Figure 3.12
This keyboard layout, for some people, provides better typing efficiency.
. The currently active keyboard layout is indicated by a
Chapter 3
Figure 3.12:
Layout. The currently
selected keyboard
layout is indicated by
a dark purple arrow
button to the right of
the keyboard layout
name. Touch the
purple to the right of
another layout option
to change the layout
of the graphical user
interface.
By default, the Heska Element COAG™Analyzer displays the QWERTY Keyboard Layout.
To change to a different layout:
Keyboard
25
Page 34

3. Configuring the Heska Element COAG™Analyzer
1. From the Home Screen, touch Setup (this opens the Settings Menu).
2.
From the Settings Menu, touch to the right of the Regional Setup category (this
opens the Regional Setup Menu).
3. From the Regional Setup, touch to the right of the Keyboard Layout entry field.
4.
To change to a different keyboard layout, touch the button to the right of the
desired layout. A dark purple button indicates the layout chosen.
shows the Keyboard Layout screen.
5. To apply the new setting, touch Done.
i
Touching
the change(s).
Cancel
clears any undesired change(s) and touching
Figure 3.12
Done
confirms
3.2.6. Connections
The Connections screen is shown in
Setup
on the Analyzer’s Home Screen and the across the Connections category in
the Settings Menu.
Figure 3.13:
Menu. The currently
selected printer and
the status for the LIS
system is shown in
the text fields in the
connection menu.
Two external connections are available from the Connections screen:
Printer
Network
Connections
The name of the currently selected printer is shown in the text field to the right of
the Printer category. Refer to
to a different printer.
The network text field shows the status of the build in Laboratory Information
System (LIS). By default, data export to a LIS is disabled. Refer to
for details regarding how to configure the Heska Element COAG™Analyzer for
use with a LIS.
Figure 3.13
Section 3.2.6.1
. To enter the Connections menu, touch
for details regarding how to change
Section 3.2.6.2
26
Page 35

3.2. Configuration of the Heska Element COAG™Analyzer
To configure the Heska Element COAG™Analyzer’s connections to an external printer
or an external network, touch the to the right of the preferred category.
Touching Done returns to the Settings Menu.
i
Chapter 3
27
Page 36

3. Configuring the Heska Element COAG™Analyzer
3.2.6.1. Printer
The Heska Element COAG™Analyzer is programmed to run with specific printer models
that are currently available in the market. This section covers the necessary information
regarding printer compatibility and suggestions regarding other options, if these printers
are not available at your convenience.
The Heska Element COAG™Analyzer only functions properly if connected to a printer
approved by the manufacturer and compatible with the Heska Element COAG™Analyzer.
Figure 3.14:
Selection Menu. The
Printer Menu shows
a list of printers that
are compatible with
the Heska Element
COAG
The currently selected
printer is indicated by
a dark purple arrow
button to the right of
the printer name.
To change the printer or to view a list of printer models compatible with the Heska Element
COAG™Analyzer, follow these steps:
1. From the Home Screen, touch Setup (this opens the Settings Menu).
2.
3.
4.
5.
Printer
™
Analyzer.
From the Settings Menu, touch to the right of the Connections category (this
opens the Connections Menu).
From the Connections screen, touch to the right of the Printer entry field. This
will display a list of printers compatible with the Heska Element COAG™Analyzer.
Connected printers are indicated with black text, offline printers with red.
i
The currently selected printer is indicated by a dark purple arrow button
to the right of the name of the printer.
To select a different printer for use with the Heska Element COAG™Analyzer, set
the printer up according to the manufacturer’s instructions and connect it to the
Heska Element COAG™Analyzer using a USB cable. The USB port is located on
the back of the instrument, see Figure 2.1.
Select your connected printer by touching the corresponding arrow key on the
right-hand side of the screen.
28
Page 37

3.2. Configuration of the Heska Element COAG™Analyzer
6. Touch Done to confirm and return to the Settings Menu.
Touching
i
the change(s).
As the instrument uses an embedded operating system, it has no physical
i
means of adding new custom printers. If the available printers do not match
your preference, it is recommended to use Heska Element COAG™Auto-printer
instead. Heska Element COAG™Auto-printer is a free, standalone network
based utility program, supplied by Heska Corporation that enables the Analyzer
to print to any printer, connected directly or indirectly to a local network. Contact
your Distributor regarding Auto-printer.
3.2.6.2. Network
This section discusses prerequisites and guidelines relevant to LIS technicians and the
options that are available regarding data transmission from the Heska Element COAG
Analyzer to a media within your data exchange network.
If your laboratory does not have a Laboratory Information System setup, leave
!
the Data Export setting at off (the default) and disregard the remainder of this
section.
Cancel
clears any undesired change(s) and touching
Done
confirms
Figure 3.15:
Screen. From the
Network Screen it is
possible to configure
the Heska Element
COAG™Analyzer for
use with a LIS.
Network
Chapter 3
™
Prerequisites
an IP address and port number of your LIS are required in order to set up the data
export.
The Heska Element COAG™Analyzer should be connected to the network where a
connection to your LIS can be achieved through an Ethernet port located at the back of
your Heska Element COAG™Analyzer.
The Heska Element COAG™Analyzer transmits data via TCP/IP, hence
29
Page 38

3. Configuring the Heska Element COAG™Analyzer
Note that the information is transmitted in the language chosen on the Heska Element
COAG™Analyzer.
Contact Heska Corporation for an updated list of applied LIS tags, enabling your LIS
operator to set a viable connection up to your Heska Element COAG™Analyzer. With
regard to any LIS system, Heska Corporation does not deliver any specification files,
drivers or middleware applications.
Industrial standard NCCLS LIS protocols, NCCLS LIS01-A2, Vol. 28, No. 13
i
and NCCLS LIS02-A2, Vol. 24, No. 33, have been implemented.
Guidelines
must be provided by the user.
Edit each field in the Network Screen (see
button to the right of the corresponding entry box.
Server The following fields apply to the identification of your LIS server:
Data Export
To configure your Heska Element COAG™Analyzer with a LIS, information
Figure 3.15
Enables/disables data export to a LIS on the Analyzer. With data export
activated the following fields become editable.
Note that when enabling data export from the Heska Element COAG™Analyzer it
will still function as a stand-alone instrument saving all measurements on disk, but
will additionally transfer measurement results to your LIS.
Results measured when the connection to the LIS is offline are queued and
transmitted when a connection has been established. This queue does not survive
a power cycle (switching the instrument off/on).
With data export enabled a
test results of the Heska Element COAG™Analyzer. This enables the operator to
retransmit all or individually selected measurements stored on the Heska Element
COAG™Analyzer. Touching
will queue the measurement results for retransmission upon a reconnection. This
queue does not survive a power cycle (switching the instrument off/on).
With data export enabled, the LIS can query the Heska Element COAG™Analyzer
to resend individual or all results. If communication is lost in the process, the
Heska Element COAG™Analyzer will queue the intended measurements for
retransmission upon reconnection. This queue does not survive a power cycle
(switching the instrument off/on).
On the Home Screen of the Heska Element COAG™Analyzer, LIS connection
problems are indicated, notifying the user to check connectivity.
Resend
Resend
button appears on the history pages for the
when the connection to the server is offline
) by touching the purple arrow
30
Page 39

3.2. Configuration of the Heska Element COAG™Analyzer
•
A small ‘N’ flashes on the lower right-hand corner, when no LIS connection
can be established.
•
A small ‘T’ flashes on the lower right-hand corner, when the LIS is not
responding.
If the connection is lost or offline, reconnection is attempted at pre-defined time
intervals.
IP Address
IP Port Type your LIS server application’s IP port number. This field is forced editable,
Instrument
address automatically from the network or to specify one manually.
IP Origin
Type your LIS server application’s IP Address here. This field is forced
editable, if data export has been enabled.
if data export has been enabled.
The instrument section in the screen specifies whether to obtain an IP
By default the IP origin is set to Obtain automatically. It is strongly recom-
mended to leave this setting at the default value. As the Heska Element COAG
Analyzer is equipped with Automatic Private IP Addressing (APIPA), it is not neces-
sary to alter the remaining settings in the Instrument section (the Heska Element
COAG™Analyzer will work on networks without a DNS server).
Note that setting a fixed IP address as IP Origin will produce error mes-
!
sages if the instrument cannot connect to the network. If you set the IP
Origin to a fixed value, you must contact you local IT administrator to
obtain the values for the IP Address, Subnet mask and Default gateway.
If you have a strict IT setup at your facility, and need to white-list your Heska
Element COAG™Analyzer, the DNS or APIPA automatically obtained IP address
for the Heska Element COAG™Analyzer will be listed in the field Instrument IP
Address. The MAC address of your Heska Element COAG™Analyzer can be
found on the Service page.
Chapter 3
™
An important note on Practice Assigned ID: The LIS field, Practice Assigned
i
ID, is a unique identifier (key) for any LIS to handle exported data. For this
field, the Heska Element COAG™Analyzer uses the Patient ID the operator
entered. Therefore, when using the Analyzer in a data export setup, it is highly
recommended to apply the user option to require Patient ID (See
Section 3.2.4
).
31
Page 40

3. Configuring the Heska Element COAG™Analyzer
A Note on the Communications Log: In the service page of the Heska Element
i
COAG™Analyzer, a log of the data export communication can be found (the
last 1000 messages are shown).
The log page is intended for LIS service technicians to find transmission problems when integrating the Heska Element COAG™Analyzer into their LIS
system.
The transmitted data is shown at protocol layer with a primary column indicating
direction to and from the instrument.
In addition to the transmitted data, the Heska Element COAG™Analyzer will
log messages when the communication with the server is established or lost.
Also, miscellaneous error messages will appear here.
3.2.7. Quality Assurance
Figure 3.16:
assurance menu.
3.2.7.1. Calibration
The Calibration menu is shown in
over date(s) and time(s) for when calibration for the Fibrinogen Test has been performed.
The currently active calibration is indicated with a dark purple button to the right of the
row with the calibration information.
32
Quality
Figure 3.18
. The Calibration menu gives an overview
Page 41

3.2. Configuration of the Heska Element COAG™Analyzer
Figure 3.17:
Overview. The Calibration overview
shows details regarding
date(s) and time(s) for
when calibration for the
Fibrinogen Test has
been performed.
To access the Calibration overview, touch the
then touch the to the right of the Calibration category in the Settings Menu.
The Calibration page has three buttons:
Done
Touching the
to the Fibrinogen Calibration settings.
Save
If more than one calibration has been carried out, you can choose which calibration
the Analyzer should use when performing a Fibrinogen Test. If the calibration is
changed, you must touch
Menu.
Done
button returns to the Settings Menu without making changes
Save
to store the new selection and return the Settings
Setup
button on the Home Screen and
Calibration
Chapter 3
Calibrate
To perform a new calibration of the Heska Element COAG™Analyzer for use
with the Fibrinogen Test, touch the
sequence.
Note that performing a calibration of the Heska Element COAG™Analyzer
i
requires an Fibrinogen Calibration Kit. Please contact Technical Support
Services for details regarding this procedure.
Calibrate
button. This will start a calibration
33
Page 42

3. Configuring the Heska Element COAG™Analyzer
3.2.7.2. Analyzer Self Test
Figure 3.18:
self test results. This
menu provides an
overview of the details
regarding date(s) and
time(s) for when an
Analyzer self test has
been performed.
Analyzer
3.2.8. Screen Saver
The Screen Saver Settings screen is shown in
Settings screen, touch
right of the Screen Saver category in the Settings Menu. The Heska Element COAG
Analyzer’s screen saver consists of user-selected pictures shuffled randomly.
Figure 3.19:
saver settings. From
the screen saver
settings menu, it is possible to enable/disable
the screen saver. If the
screen saver is enabled,
the delay for starting
the screen saver and
the interval between
the exchanging the
displayed images can
be configured.
Screen
Setup
on the Analyzer’s Home Screen and touch the to the
Figure 3.19
. To enter the Screen Saver
™
Five options are available to configure the Heska Element COAG™Analyzer’s screen
saver:
Enable
Touch the to the right to turn the screen saver on/off. If the screen saver is
turned off, the remaining settings have no effect.
34
Page 43
3.2. Configuration of the Heska Element COAG™Analyzer
Delay
Touch the to the right to change the delay before the screen saver is started.
Possible choices are 1 minute, 5 minutes, 10 minutes, and 30 minutes.
Interval
Load pictures
Start now
3.2.8.1. Load Pictures
Pictures for display when the Heska Element COAG™Analyzer’s screen saver is running
can be loaded from the Screen Saver Pictures menu, see
pictures can be loaded and displayed at random when the screen saver is running.
Touch the to the right to change the interval between exchanging the displayed
images when the screen saver is running. Possible choices are every 10 seconds,
every minute, and every 5 minutes.
To select pictures to be displayed when the screen saver is running,
touch the to the right. See
formats and how to load the pictures.
Touch the to the right to test the screen saver. Touch anywhere on the
screen to return to the Screen Saver Settings menu after testing.
Touching
i
Done
in the Screen Saver Settings menu returns to the Settings Menu.
Section 3.2.8.1
for details regarding supported image
Figure 3.20
Figure 3.20: Load Pictures.
Up to eight screen
saver pictures can be
loaded at a time for use
by the Heska Element
COAG
screen saver. To load
a picture, touch the
desired picture number
and select the image
file. To delete a picture
touch the purple cross
next to the image.
. Up to eight
™
to the right of the
Analyzer’s
Chapter 3
To add a new picture for use by the screen saver:
1. From the Home Screen, touch Setup (this opens the Settings Menu).
2.
From the Settings Menu, touch to the right of the Screen Saver category (this
opens the Screen Saver Settings page).
35
Page 44

3. Configuring the Heska Element COAG™Analyzer
3.
From the Screen Saver Settings page, touch to the right of the Load pictures
entry (this opens the Screen Saver Pictures page, see Figure 3.20).
4.
Insert a USB stick with the desired pictures in the USB port on the back of the
Analyzer, see Figure 2.1 for the location of the USB port.
The pictures must be in JPEG format with extension “.jpg” and be smaller
i
than 1 MB.
5.
Touch the to the right of the desired picture number. This will open a list of
JPEG images located at the root of the USB stick. If no images are found an error
message will be displayed.
6. Select the image to load and touch Done.
7.
Repeat
item 5
and
item 6
for all pictures you want to appear when the screen saver
is running.
8.
When all images are loaded, touch
menu, see Section 3.2.8 for options in this menu.
i
Touching
Settings menu.
Done
in the Screen Saver Pictures menu returns to the Screen Saver
Done
to return to the Screen Saver Settings
36
Page 45

4. Memory Database
Up to a 1000 test results are automatically stored in the Heska Element COAG™Analyzer’s memory database. The files in the database are sorted by date, with the most
recent first. Each file is stored with Patient ID, Sample ID, Test Date and Time, and test
results. There is a built-in search function to retrieve test results by Test Type, Patient
or Sample ID or by Date. Test results can be printed if a printer is connected to the
Analyzer.
4.1. Viewing Test Results
To view the results database, touch the
This will open the results database view shown in
1000 results obtained on the Analyzer sorted by date (newest first).
For each result the following are listed: Date and time of test, Test Type, Patient ID and
Sample ID. Patient and Sample ID are supplied by the operator when running the test.
The test date/time and test type are automatically logged by the Analyzer when running
a test.
Results can be retrieved from the database by performing a search based on the above
meta-data. To access the Search Menu, touch the
screen and follow the directions given in Section 4.2.
History
button on the Analyzer’s Home Screen.
Figure 4.1
Search
. This view shows the last
button at the buttom of the
Figure 4.1:
history. Up to 1000
test results are stored
in the internal results
database on the Heska
Element COAG
Analyzer.
Results
37
Chapter 4
™
Page 46

4. Memory Database
The
Resend
button to syncronize the results in the LIS if you have changed the Analyzer configuration
(language, time format, etc.) or if the connection to the LIS has been corrupted. All test
results will remain in the Analyzer’s database and only a copy will be transmitted to the
LIS.
Touch the Done button to return to the Analyzer’s Home Screen.
To view details for a particular test, follow the steps below:
1. From the Home Screen, touch History (this opens the Memory database).
2. Touch the H and N buttons to scroll through the files in the database.
3.
button is only visible if the Analyzer is connected to a LIS. Use the
Touch the on the right hand side of the screen corresponding to each file or the
result line to review the detailed test results. The test result is retrieved in the same
format as it was originally obtained.
If a printer is connected to the Analyzer, the test result can be printed by
i
touching the on-screen Print button.
Resend
4.2. Performing a Database Search
It is possible to search the results database for a particular result based on a number of
search criteria. To access the Search menu, touch the
screen, see Figure 4.1. Figure 4.2 shows the results history search interface.
Search
button on the Memory
Figure 4.2:
Search. A search for
a particular result can
be carried out using the
Patient ID, Sample ID
or test date and type as
search criteria.
The available filters for a database search are listed below. It is possible to combine one
or more search criteria when performing a database search.
Patient ID
38
Results
Supply a text string for filtering the results based on the user-supplied Patient
IDs. See Section 4.2.1 for details.
Page 47

4.2. Performing a Database Search
Sample ID
From date & To date
Test type
Supply a text string for filtering the results based on the user-supplied Sample
IDs. See Section 4.2.2 for details.
Supply dates for filtering the results based on the test dates when
the analyses were performed. See Section 4.2.3 for details.
Use the to the right of the text field to toggle which test types to show in a
results search. See Section 4.2.4 for details.
4.2.1. Search by Patient ID
1.
Touch
History
hand side of the Memory screen to access the Search Menu.
2. On the Search Menu, touch the purple arrow button across the Patient ID field to
access the on-screen keyboard to type in the designated information required to
retrieve the corresponding measurement data for a specific patient.
3. Touch Done when finished registering the search entry.
4.
To begin the search, touch
restart the search process touch Clear All.
5. If the Search-button was previously touched, the results gathered will be shown.
6. To start anew, touch Back.
Writing the whole Patient ID info is not necessary. You can write the word or
i
just part of the word as the search phrase.
on the Home screen, and then touch
Search
on the lower right hand side of the screen. To
Search
on the lower right
Chapter 4
4.2.2. Search by Sample ID
1.
Touch
History
hand side of the Memory screen to access the Search Menu.
2.
On the Search Menu, touch the purple arrow button across the Sample ID field to
access the on-screen keyboard to type in the designated information required to
retrieve the corresponding measurement data for a specific patient.
3. Touch Done when finished registering the search entry.
4.
To begin the search, touch
restart the search process touch Clear All.
5. If the Search-button was previously touched, the results gathered will be shown.
6. To start anew, touch Back.
on the Home Screen, and then touch
Search
on the lower right hand side of the screen. To
Search
on the lower right
39
Page 48

4. Memory Database
Writing the whole Sample ID info is not necessary. You can write the word or
i
just part of the word as the search phrase.
4.2.3. Search by Date
1.
Touch
History
on the Home Screen, and then touch
hand side of the Memory screen to access the Search Menu.
2.
On the Search Menu, touch the across the From Date field to access the onscreen keyboard to type in the start date wherein the test took place or touch the
across To Date field, if the end date is desired.
3.
Touch Done when finished registering the search entry, or touch
the entry and return to the Search menu.
4.
To begin the search, touch
restart the search process touch Clear All.
5. If the Search-button was previously touched, the results gathered will be shown.
6. To start anew, touch Back.
Search
on the lower right hand side of the screen. To
Search
on the lower right
Cancel
4.2.4. Search by Test Type
1.
Touch
History
on the Home Screen, and then touch
hand side of the Memory screen to access the Search menu.
2. On the Search Menu, touch the across the Test Type field until the desired test
type is accessed. These test types are as follows:
• DEA 1 Canine Blood Typing
• PT/aPTT Combo
• Equine Fibrinogen
• Feline A & B Blood Typing
• Canine Fibrinogen
3.
Touch
Done
when finished registering the search entry, or touch
the entry and return to the Search Menu.
4.
To begin the search, touch
restart the search process touch Clear All.
5. If the Search-button was previously touched, the results gathered will be shown.
6. To start anew, touch Back.
Search
on the lower right hand side of the screen. To
Search
on the lower right
Cancel
to clear
to clear
40
Page 49

5. Maintenance and Support
5.1. Routine Maintenance
The Heska Element COAG™Analyzer only requires cleaning on a regular basis as
maintenance. A visual inspection of the instrument for damage and a regular cleaning of
the surface are strongly recommended.
Do not use the Heska Element COAG™Analyzer if it appears to be damaged.
i
Disconnect the power, and contact your Distributor for technical support.
5.2. Cleaning the Outer Shell
Visually inspect the instrument and clean if necessary. Pay special attention to the
cartridge slot opening. Removal of dried blood, dirt or other foreign matters is done by
using a water-moistened cotton swab or a damp cloth. Make sure to remove residual
water with a dry cotton swab or a dry cloth. If a disinfectant is needed, use Virkon (
solution). After disinfection of the instrument, wipe it with a damp water-moistened cloth
or cotton swab to remove any residual disinfectant.
•
Use of solvents or strong cleaning agents is inadvisable, as they may damage the
instrument’s surface and the LCD touch screen.
•
Use of aerosols or pouring detergents, solutions or any other liquid directly onto
the instrument is likewise not recommended.
1 %
Chapter 5
We strongly suggest that you follow the instructions to avoid damaging the
!
instrument. Damages incurred due to improper maintenance are not covered
by the warranty.
5.3. Cleaning the Cartridge Slot and Air Filter
Cleaning of the cartridge slot and air filter should be done by lightly vacuuming their
openings. The air filter is located on the right side (as seen from the front) of the instrument
and the cartridge slot in front.
41
Page 50

5. Maintenance and Support
Do not vacuum the fan opening as this may cause damage to the fan. The
!
fan opening is located on the left-hand side (as seen from the front) of the
instrument. Damage caused by non-recommended cleaning methods is not
covered by the product warranty.
5.4. Service
The instrument monitors its internal hardware and software and reports problems to the
display screen (see Troubleshooting Section). If the instrument, for some reason, does
not work properly and needs to be serviced, please contact your Distributor or Heska
Corporation Customer Support for technical assistance at 1-800-464-3752.
• The Heska Element COAG™Analyzer has no user-serviceable parts.
•
There is a battery on the computer board inside the instrument. Replacement of
this battery must be carried out by an authorized service provider.
•
The Heska Element COAG™Analyzer has an anti-tampering device. The warranty
is voided if the instrument is opened by a non-authorized service provider.
5.5. Disposal of the Heska Element COAG™Analyzer
The Heska Element COAG™Analyzer contains electronic circuits and battery, therefore,
local regulations for electric equipment disposal should be followed in disposing of the
instrument.
42
Page 51

6. Troubleshooting
6.1. Technical Support
Contact Heska’s Technical Support Services for assistance at 1-800-464-3752.
6.2. Problems That Give No Advisory Messages
Problems that may occur but will not give an error message on the screen are tabulated
in Table 6.1.
Problem Corrective Action
Nothing happens when the instrument is
turned on
The Heska Element COAG™cartridge cannot be inserted in the cartridge slot of the
Heska Element COAG™Analyzer
The message
tridge
after the cartridge has been inserted.
Nothing happens when a button is touched
or there is a misalignment between the
point of touch and the action carried out by
the Analyzer.
Table 6.1: List of problems that give no error messages.
Make sure that the instrument is connected
to the power supply and that the power supply is connected to a power outlet. Check
that the LED on the power supply is lit.
Make sure that there are no foreign objects
in the cartridge slot.
Please insert new car-
is still shown on the screen even
Make sure that the cartridge is fully inserted in the cartridge slot.
Make sure that the Analyzer’s touch screen
is properly calibrated. See Section 6.4 for
information regarding how to perform a
screen calibration.
Chapter 6
6.3. List of Advisories
In case a problem occurs during a test, the Heska Element COAG™Analyzer will in most
instances report an Advisory Number. For a list of possible advisories and corresponding
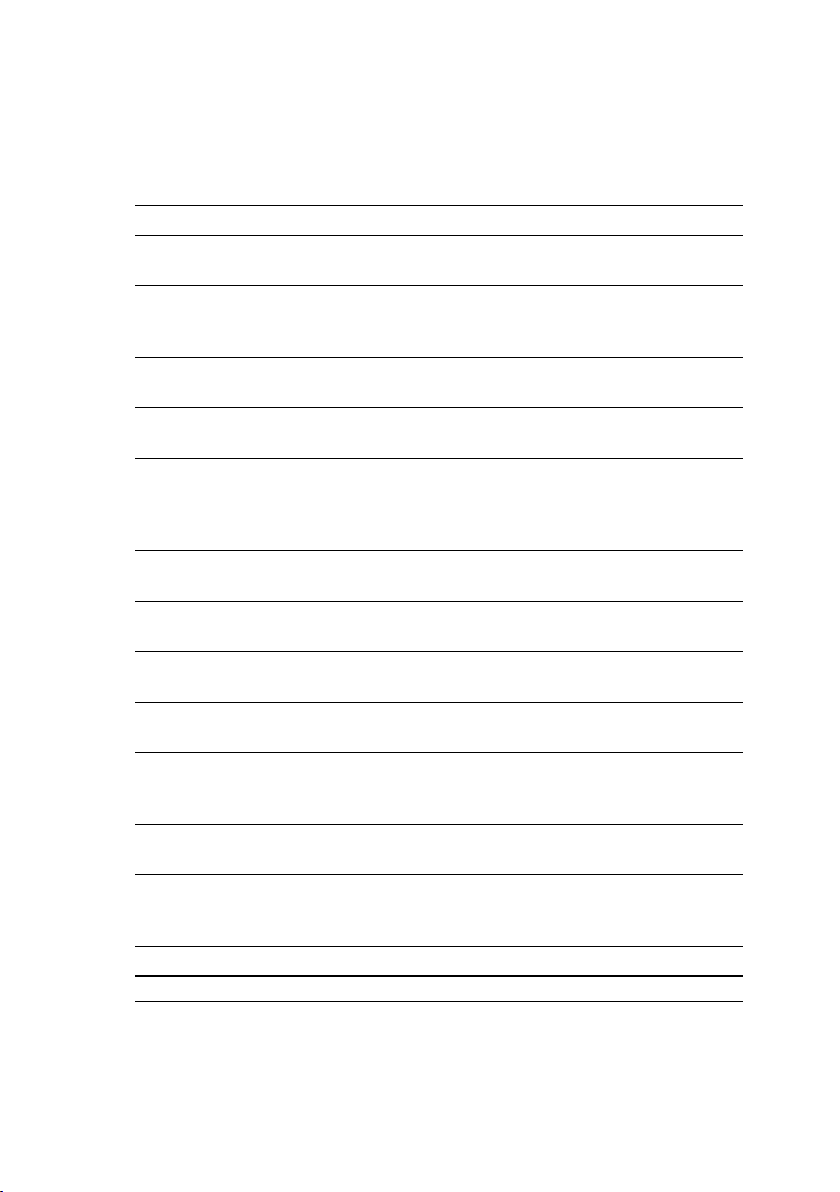
corrective actions, please refer to Table 6.2.
43
Page 52
6. Troubleshooting
If the problem persists after trying the corrective action listed for the relevant advisory
number in Table 6.2, please contact technical support.
Table 6.2: List of Advisories.
No. Cause Corrective Action
2
6
7 Flow too fast in the cartridge Repeat the test with a new cartridge. Be
8 Flow too slow in the cartridge Repeat the test with a new cartridge. Be
9 Sample added too early
10
11
12 Ambient temperature too low
13 Ambient temperature too high
14–19 Light detection issue
20 No cartridge detected
22–23 Light detection issue
24 LIS is not responding Check LIS and Ethernet cable
Blood sample not detected due to
inadequate amount of blood used
No clot detected. Can be due to
a very sick animal or the tube not
filled correctly
Malfunction of instrument components
On-going test terminated by the
user
Continued on next page
Repeat the test with a new cartridge. Be
sure to follow the on-screen instructions
Repeat the test with a new cartridge. Be
sure to follow the on-screen instructions
sure to follow the on-screen instructions
sure to follow the on-screen instructions
Wait for the message Add sample and
wait before adding sample to the cartridge.
Be sure to follow the on-screen instructions
Turn off and restart the instrument
Repeat the test with a new cartridge
Restore recommended ambient conditions for the instrument
Restore recommended ambient conditions for the instrument
Repeat the test with a new cartridge and
ensure that no foreign objects are in the
cartridge slot
Make sure that the cartridge is fully inserted in the cartridge slot
Repeat the test with a new cartridge and
ensure that no foreign objects are in the
cartridge slot
44
Page 53

6.4. Screen Calibration
No. Cause Corrective Action
25 Test error Repeat the test with a new cartridge. Be
sure to follow the on-screen instructions
26 Autoaggulatination detected
27 Flow too slow in cartridge
29 Wrong calibration code
30–33 Incorrect cartridge code Retype code from pouch
34 Incorrect cartridge code
35 Incorrect cartridge code Check expiry date from pouch
36 Internal error Contact technical service
37–38 Signal distortion Repeat the test with a new cartridge. Be
39
Poor sample quality due to hemolysis, RBCs or lipemia
Please check the sample quality and repeat the test with a new cartridge
Please ensure proper dilution of the sample and repeat test
Ensure that the 11-digit code is correct
and that the calbration kit has not expired
Check date setting on instrument and retype code from pouch
sure to follow the on-screen instructions
Check sample quality and if needed take
new sample
6.4. Screen Calibration
A screen calibration can be initiated by touching the touch screen (anywhere) during startup of the Heska Element COAG™Analyzer.
initiation.
Figure 6.1
shows the Screen Calibration
Figure 6.1:
Calibration. A screen
calibration can be
initiated by touching
the Heska Element
COAG
touch screen during
start-up.
™
Screen
Analyzer’s
45
Chapter 6
Page 54

6. Troubleshooting
Once the screen calibration has been initiated, a progress-bar will appear. Upon progress
bar time-out, the screen calibration program will start automatically. Otherwise, touch
Start Now
screen calibration, touch the
the calibration. You will need a small and pointy – but not sharp – piece of plastic to
perform the screen calibration.
on the touch screen to initialize the program immediately. To cancel the
Cancel
button. Follow the on-screen instructions to perform
46
Page 55

Part II.
The Heska Element COAG™Test
Portfolio
Page 56

Page 57

7. PT/aPTT Combination Test
The PT/aPTT Coag Combo cartridge
used with the Heska Element COAG
Analyzer is designed to detect and diagnose abnormalities in Prothrombin Time
(PT) and Activated Partial Thromboplastin
Time (aPTT).
Each PT/aPTT Coag Combo cartridge
contains dual optical detection windows
filled with micro-channels: one for detecting PT clotting time, another for aPTT clot
detection.
The PT/aPTT Coag Combo test cartridge
can simultaneously measure PT and
aPTT from a single drop of citrated whole
blood with nominal test duration of 10 minutes including warm-up time.
™
Figure 7.1:
The Heska Element COAG
PT/aPTT COAG Combo test kit.
7.1. Blood Coagulation
Blood coagulation is the process by which blood forms clots [1–4]. Disorders in the
coagulation process can lead to an increased risk of bleeding and/or clotting. Events
that lead to the formation of a blood clot are simplified in coagulation theory into two
coagulation cascades that are referred to as the intrinsic pathway and the extrinsic
pathway, both leading to the common pathway and the formation of a stable fibrin clot.
The analysis of blood coagulation can be a guide in determining a large number of
existing or potential disorders that can seriously affect the health of the patient, see
Figure 7.2 and [4].
™
Chapter 7
The extrinsic pathway is initiated through the interaction of tissue factor with factor VII.
Tissue factor is released from or exposed on the damaged tissue, disrupted cells, or cells
such as macrophages, monocytes, or activated endothelial cells. In-vivo platelets, the
essential cofactors in this reaction, provide the platelet phospholipid surface on which the
49
Page 58
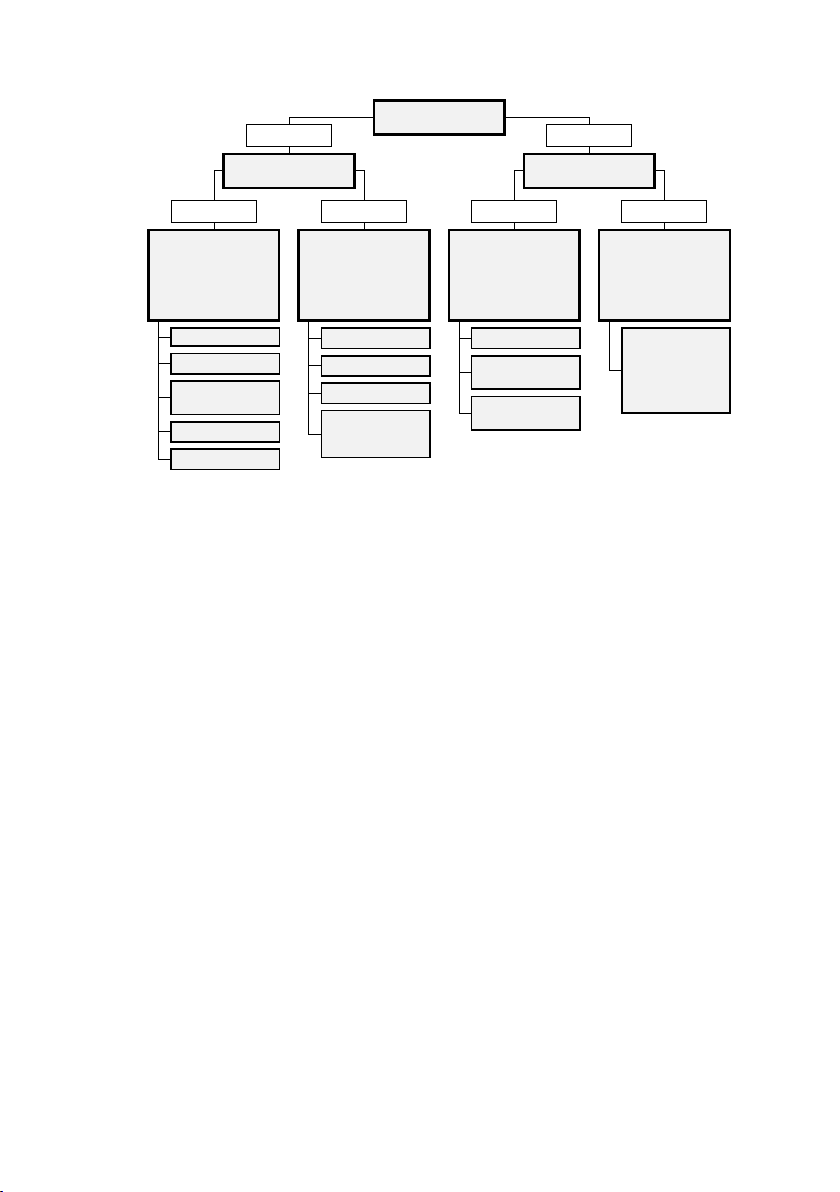
7. PT/aPTT Combination Test
Prolonged Normal
PT PT
aPTT
Prolonged Normal Prolonged Normal
Common path-
way disorder
± combined intrinsic and
extrinsic pathway disorder
DIC
Over-heparinization
Common pathway
factor deficiency
Vitamin K deficiency
Rodenticide toxicity
Intrinsic path-
way disorder
Hemophilia A (VIII)
Hemophilia B (IX)
Hemophilia C (XI)
Factor XII deficiency
with no associated
bleeding disorder
Extrinsic path-
way disorder
Factor VII deficiency
Early rodenticide deficiency
Vitamin K deficiency/antagonist
No coagula-
tion disorder
Consider primary
bleeding disorder
- platelets
- von Willebrand factor
- vascular disorder
Figure 7.2: Guide to possible diagnosis based on PT and aPTT clot time.
coagulation occurs. The test reagents include phospholipid, therefore thrombocytopenia
does not affect this test.
The intrinsic pathway is started through contact activation of factor XII. The pathway goes
through several reactions that result in the formation of activated factor X. The common
pathway uses factor X, factor V, and free calcium to create enzymatic conversion of
prothrombin to thrombin, which is then used in creating fibrin from fibrinogen. Activated
Partial Thromboplastin Time (aPTT) and Prothrombin Time (PT) tests are general coagulation tests used for screening and measuring the functionality of the blood coagulation
cascade. PT is used to assess the extrinsic and common pathway and aPTT to assess
the intrinsic and common pathway.
7.2. Test Specifications
An overview of the PT/aPTT COAG Combo test specifications is given in
test has been validated for use with feline (cat) and canine (dog) citrate-stabilized whole
blood. Under normal operating conditions, test results have a Coefficient of Variation
(CV) of 7 % or better.
A PT/aPTT COAG Combo test takes less than 15 minutes to perform. The actual time
depends on the blood sample and test environment. At room temperature, it takes about
50
Table 7.1
. The
Page 59

7.2. Test Specifications
90 seconds for the instrument to warm up the test cartridge to the operating temperature
of
99 °F/37◦C
procedure of the assay begins, the result is reported as soon as a clot is identified in either
of the measuring channels. Typically, this occurs within approximately 10 minutes.
Each test cartridge is individually packed in a sealed pouch with a desiccant bag and a
disposable pipette. The pouch should be stored at refrigerated temperatures (
46 °F/2◦Cto8◦C
reach room temperature prior to running the test. The pouch should not be exposed to
direct sunlight. Once the pouch has been opened, the cartridge should be used within
10 minutes. A cartridge must be used within that day. Do not return a warmed cartridge
to the refrigerator. If stored in accordance with these guidelines, the test cartridges are
stable until the expiration date printed on the pouch label.
The test cartridge can be used only once and only in combination with the Heska Element
COAG™Analyzer. Once used, the cartridge, pipette and sample collection tube should
be considered as potentially infectious. Dispose of them properly in accordance with the
policies and regulations at the place of operation.
!
. Lower and higher temperatures may change the warm up time. Once the
36 °F
). Remove the pouch from the refrigerator and allow the cartridge to
Always strictly adhere to all biohazard safety guidelines pertaining to handling
and disposing of animal blood samples.
to
51
Chapter 7
Page 60
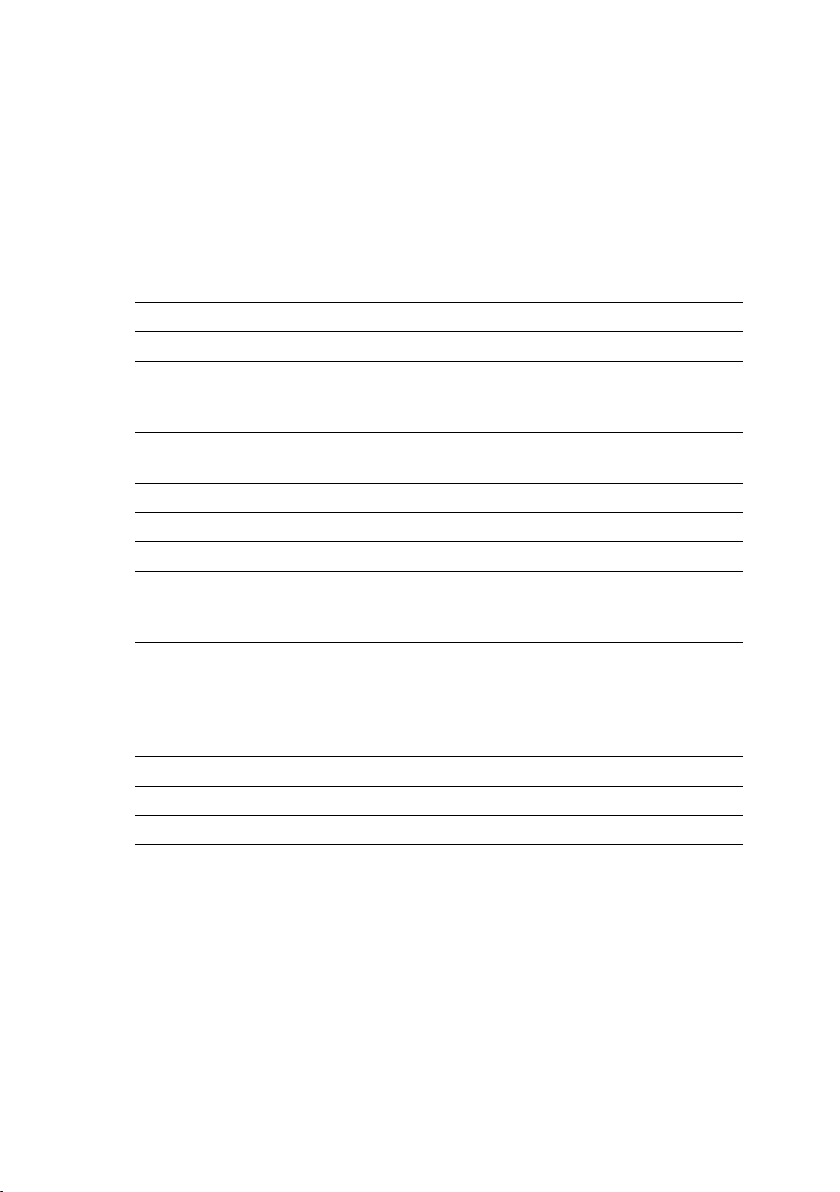
7. PT/aPTT Combination Test
Table 7.1: Specifications for the PT/aPTT COAG Combo Test.
Measurement Technology Clot time, light absorbance
Result Units Second
Reference Ranges Species PT aPTT
Feline (Cat) 15 s to 21 s 90 s to 130 s
Canine (Dog) 14 s to 19 s 75 s to 105 s
Dynamic Range PT aPTT
11 s to 35 s 30 s to 200 s
Sample Type Whole blood
Sample Volume 60 µL
Sample Collection 3.2 % concentration sodium citrate tube
Sample Stability
Cartridge Stability
Storage Refrigerate at 36 °F to 46 °F/2◦C to 8◦C
Shelf Life The expiration date is printed on the pouch label
Time to results Approximately 10 minutes
2 hours of room temperature (
30◦C
). Invert the tube back and forth 10 times every 10
minutes
Do not expose cartridges in the foil pouch to direct sunlight. Once warmed to room temperature, cartridge must
be used within that day. Do not return warmed cartridges
to the refrigerator. Use cartridges taken from the foil
pouch within 10 minutes
59 °Fto86 °F/15◦C
to
52
Page 61

7.3. Test Requirements
7.3. Test Requirements
7.3.1. Materials and Equipment
The following materials and equipment are required in order to perform a Heska Element
COAG™PT/aPTT COAG Combo Test on the Heska Element COAG™Analyzer:
• Heska Element COAG™Analyzer
• PT/aPTT COAG Combo Test Cartridge
• Pipette (included in the sealed pouch with the test cartridge)
• Syringes with a 22-gauge needle or larger
• Sample tubes containing 3.2 % sodium citrate as an anticoagulant
• Package insert for the PT/aPTT COAG Combo Test
7.3.2. Blood Sample Preparation
Use a syringe with a 22-gauge needle or larger when drawing the blood to avoid hemolysis.
Collect the blood directly into the tube containing citrate as the anticoagulant. The result
of a coagulation analysis is very much dependent on the quality of the blood sample and
the correct concentration of anticoagulant in the sample. Follow standard blood-drawing
procedures at all times and pay special attention to the following:
•
Blood samples, if possible, should be collected about 5 minutes before testing to
stabilize the mixture of the blood and the citrate.
•
The sample collection tube must not be over- or under-filled. Even though the assay
requires only
tube has been filled to the correct filling line.
•
Slowly invert the tube containing the blood sample 10 times every 10 minutes as
an alternative if a blood rocker is not available.
•
The blood sample should be kept at room temperature, in case the testing is
delayed. Blood may be tested up to two hours after it has been collected without
affecting the test result.
•
Contamination from thromboplastin, alcohol and intravenous solutions will interfere
with the coagulation assay.
•
Hemolysis and foaming of the blood sample are potential sources of inaccurate
and imprecise test results.
60 µL
of whole blood, it is very important that the sample collection
Chapter 7
53
Page 62

7. PT/aPTT Combination Test
•
When collecting the blood sample, it is important that exhilaration of the patient be
minimized. Exhilaration or excitement increases the amount of blood cells in the
blood. This can increase platelet count and/or aggregation, levels of Von Willebrand
factors, fibrinogen and factors V and VIII, which have significant influence on the
coagulation cascade.
• Sedatives and analgesics can also influence blood coagulation.
The accuracy of the PT/aPTT COAG Combo Test is mainly dependent on the
!
quality of the blood sample. The way the blood is collected and has been
handled can greatly affect the blood quality.
7.4. Limitations
The veterinarian is always the final arbiter of test result interpretation and impact on
diagnosis. Therefore it is highly recommended that Heska Element COAG™test results
should be scrutinized in the light of a specific patient’s condition and medical history, as
well as current or potential therapy.
Any test result exhibiting inconsistency with a patient’s status should be repeated and/or
supplemented with additional diagnostic tests.
The accuracy of Heska Element COAG™Analyzer test results is largely dependent on
the quality of the blood specimen which in turn is dependent on:
• The blood sample collection
• The proper volume of blood/citrate
• The proper mixing of the citrated blood
• The proper introduction of the blood sample into the cartridge well.
Blood samples with a hematocrit of less than
mended for use with the Heska Element COAG™Analyzer. Blood samples outside this
range may result in an instrument error or inaccurate test result.
Please observe all precautions cited in this guide and use good blood sampling
i
technique at all times.
15 %
or greater than
65 %
are not recom-
7.5. Test Procedure
Verify that you have the necessary materials and equipment for performing a PT/aPTT
COAG Combo test, see Section 7.3.
Afterward, follow these simple test procedures:
54
Page 63

7.5. Test Procedure
Step 1:
Step 2:
Step 3:
Step 4:
Step 5:
Remove a pouch with a test cartridge from the refrigerator and let the pouch
and cartridge reach room temperature
starting the test.
Draw blood from the patient into a sample tube containing
as an anticoagulant.
From the Home Screen, touch either the
nine PT/aPTT
to start the test.
When the message Please insert new cartridge
is shown on the screen, insert the test cartridge
completely into the cartridge slot on the front
of the Analyzer.
The cartridge must have the label facing upward and the sample well sticking out of the
Analyzer.
On the on-screen keyboard, enter the cartridge
code (printed on the cartridge pouch label) in
the entry field and touch Done.
or the
Feline PT/aPTT
59 °Fto86 °F/15◦Cto30◦C
3.2 %
sodium citrate
Ca-
button
before
Step 6:
Step 7:
Touch
Confirm
has been obtained in a citrate test tube and
that the tube was appropriately filled.
Touch
Patient ID
formation using the on-screen keyboard.
Touch Done to confirm.
Entering Sample ID is optional but recommended to aid in finding the result in the Analyzer’s database.
to acknowledge that the blood
and enter the necessary in-
Chapter 7
55
Page 64

7. PT/aPTT Combination Test
Step 8:
Step 9:
Step 10:
Touch
Next
to continue. The
ing Up screen opens.
It takes approximately 90 seconds for the Analyzer to warm up the test cartridge to
37◦C
depending on the environment’s temperature. Lower and higher room temperatures
may change the warm up time.
Do not add blood samples while the cartridge is warming up. Wait
!
until a prompt appears on the screen instructing you to add the
sample.
By default, a message
and a single beeping sound can be heard which signals that the
blood sample can now be added to the cartridge.
Gently invert the test tube back and forth 10 times to obtain a uniform mixture
of blood cells and plasma.
When the message
disposable one-time-use pipette supplied with the cartridge to add a droplet
of blood sample to the cartridge’s sample well.
Be sure to fill the sample well with at least 60 µL blood.
i
The measurement starts automatically as soon as the sample is
detected. The test progress is shown on the screen. Measurement
takes approximately 10 minutes.
If the Analyzer alerts you that an insufficient amount of sample was
placed into the sample well, repeat the measurement with a new
cartridge. Touch Cancel to terminate the ongoing test.
The test result is displayed on the screen when
the test is finished.
Cartridge Warm-
99 °F
Add blood and wait
Add blood and wait
or
flashes on the screen
appears on the screen, use the
56
If a printer is connected to the instrument, touch
Print to print the test result.
Touch
Done
to return to the Home screen. Remove the used test cartridge and dispose of it
properly.
Page 65

8. Equine Fibrinogen Test
The Heska Element COAG™Fibrinogen
cartridge used with the Heska Element
COAG™Analyzer is designed to measure
the concentration of clottable fibrinogen in
an equine (horse) plasma sample using
the Ellis–Stransky method.
Each Fibrinogen cartridge contains dual
optical detection windows filled with microchannels.
The Heska Element COAG™test cartridge measures the fibrinogen concentration from
nominal test duration of approximately 10
minutes including warm-up time.
100 µL
diluted plasma with
8.1. Fibrinogen Testing
Fibrinogen is an acute phase protein
(APP), used as a clinical indicator of acute or chronic systemic inflammation. APPs
are quickly released into the bloodstream as a reaction to injury or infection. APPs are
proteins in which plasma concentration either increase or decrease by at least
an inflammatory stimulus [5, 6].
Early detection of systemic inflammation is particularly significant in formulating and
initiating an effective treatment plan [7]. Inflammation that is undiagnosed or unrecognized
can impair growth and performance. Fibrinogen plasma concentration normally increases
within 24 to 48 hours in response to inflammation. Elevated levels of fibrinogen indicate a
degree of systemic inflammatory response. Increase in fibrinogen concentration is related
to the magnitude of inflammation and often occurs before clinical evidence of disease [8–
13
]. Low levels of fibrinogen may indicate a potential bleeding and/or liver problem. Quick
and accurate diagnosis is essential for successful outcome of treatment.
When measured in citrated plasma, a level above the normal range of
indicates a systemic inflammatory response. Age and breed have to be taken into
Figure 8.1:
The Heska Element COAG
Fibrinogen test kit.
25 %
after
2.0 g/Lto4.0 g/L
57
™
Chapter 8
Page 66

8. Equine Fibrinogen Test
consideration when evaluating the fibrinogen level [14]. Newborn foals normally have
40 %
less plasma fibrinogen reaching normal level 4 to 7 days after birth meaning that
normal fibrinogen range in newborn foals is expected to be lower compared to older foals
and adult horses [15–17].
Detection of low levels of fibrinogen can indicate a systemic activation of the clotting
system, with consumption of clotting factors faster than synthesis. Excessive clotting
factor consumption is known as Disseminated Intravascular Coagulation (DIC). In the
context of acute critical illness such as sepsis or trauma, DIC can be difficult to diagnose,
but a strong clue is detection of low fibrinogen and concomitant observation of prolonged
clotting time (PT and aPTT). Liver problems can also result in decreased levels of
fibrinogen.
8.2. Test Specifications
An overview of the Heska Element COAG™Fibrinogen test specifications is given in
Table 8.1
extracted from citrate-stabilized whole blood. Under normal operating conditions, test
results have a precision of 0.3 g/L or better.
A Fibrinogen test takes approximately 10 minutes to perform. The actual time depends
on the blood sample and test environment. At room temperature, it takes about 5 minutes
for the Analyzer to warm up the test cartridge to
temperatures may change the warm up time. Once the procedure of the assay begins,
the result is reported within approximately 10 minutes.
Each test cartridge is individually packed in a sealed pouch with a desiccant bag and a
disposable pipette tip. The pouch should be kept at refrigerated temperatures (
46 °F/2◦Cto8◦C
reach room temperature prior to running the test. Once the pouch has been warmed to
room temperature, the cartridge should be used within the same day. After opening the
foil package, the cartridge must be used within 10 minutes. Do not return the cartridge
to the refrigerator once warmed to room temperature. If stored in accordance with these
guidelines, the test cartridges are stable until the expiration date printed on the pouch
label. One pre-filled tube with diluent should be used with each test. Dispose of the
diluent tube after running a test.
The test cartridge can be used only once and only in combination with the Heska
Element COAG™Analyzer. Once used, the cartridge, pipette tip, diluent tube, and
sample collection tube should be considered as potentially infectious. Dispose of them
properly in accordance with the policies and regulations at the place of operation.
. The test has been validated for use with diluted equine (horse) plasma
99 °F(37◦C
). Remove the pouch from the refrigerator and allow the cartridge to
Always strictly adhere to all biohazard safety guidelines pertaining to handling
!
and disposing of animal blood samples.
). Lower and higher ambient
36 °F
to
58
Page 67

8.2. Test Specifications
Table 8.1: Specifications for the Heska Element COAG™Fibrinogen Test.
Measurement Technology Light absorbance, turbidity-based plasma assay
Result Units mg/dL, g/L or g/dL
Reference Range Species mg/dL g/L
Horse (equine) 150 to 400 1.5 to 4.0
Dynamic Range mg/dL g/L
0 to 2000 0.0 to 20.0
Sample Type Platelet poor plasma
Sample Volume 100 µL
Sample Collection 3.2 % or 3.8 % concentration sodium citrate tube
Sample Stability
Cartridge Stability
Storage Refrigerate at 36 °F to 46 °F or 2◦C to 8◦C
Shelf Life The expiration date is printed on the pouch label.
Time to results Approximately 10 minutes
12 hours at room temperature (
30◦C) for whole blood sodium citrate samples.
3 hours at room temperature (
30◦C) for plasma extracted.
30 days at freezing temperature (
plasma samples extracted from a citrate tube and placed
in a red-top tube.
Do not expose cartridges in the foil pouch to direct sunlight or leave at room temperature for more than one
day. Use cartridges taken from the foil pouch within 10
minutes
59 °Fto86 °For15◦C
59 °Fto86 °For15◦C
14 °For−10◦C
to
to
) for
59
Chapter 8
Page 68

8. Equine Fibrinogen Test
8.3. Test Requirements
The Heska Element COAG™Analyzer must be calibrated to run the Fibrinogen Test
cartridge. the Analyzer will be pre-calibrated from the factory.
8.3.1. Materials and Equipment
The following materials and equipment are required in order to perform an Equine
Fibrinogen Test on the Heska Element COAG™Analyzer:
• Heska Element COAG™Analyzer
• Fibrinogen Test Cartridge
• Pipette tip (included in the sealed pouch with the test cartridge)
• 100 µL fixed-volume pipette
• Pre-filled diluent tube (included in each box of cartridges)
• Syringes with a 22-gauge needle or larger
• Sample tubes containing 3.2 % or 3.8 % sodium citrate as an anticoagulant
• Package insert for Heska Element COAG™Fibrinogen Test cartridge
• Centrifuge minimum 7000 g × minutes.
8.3.2. Centrifuge
Table 8.2
revolutions per minute to obtain platelet-poor plasma as needed by the Heska Element
COAG™Fibrinogen Test.
Some centrifuges do not display theg-loading of the sample, but instead show the
revolutions per minute (RPM) of the centrifuge. In that case, use the table to find the
required centrifugation time for a given RPM and centrifuge radius1.
1
60
lists the required centrifugation time as a function of centrifuge radius and
The centrifuge radius is the distance between the axis of rotation and the center of the test-tube when placed in the
centrifuge.
Page 69
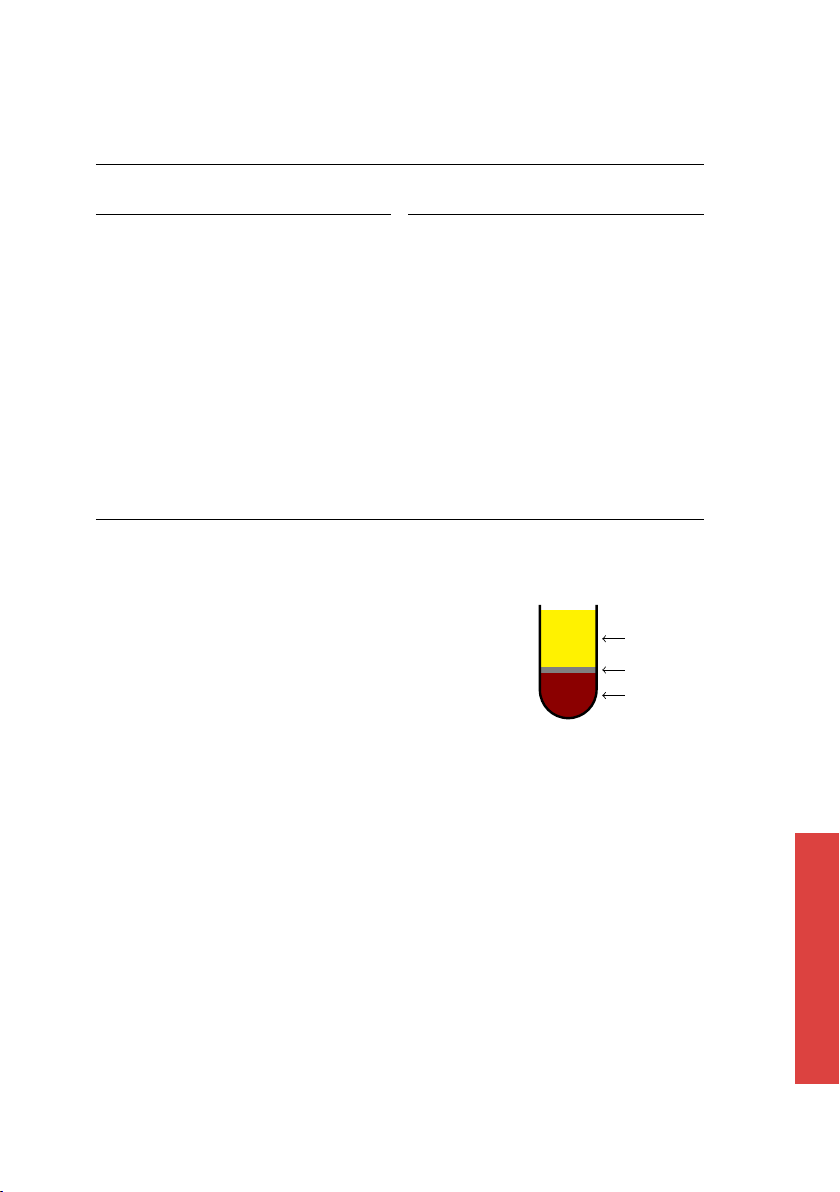
8.3. Test Requirements
Table 8.2:
Centrifugation time for various combinations of centrifugation speeds and
centrifuge radius.
Radius RPM Acc. Time Radius RPM Acc. Time
[cm] [1/min] [g] [min] [cm] [1/min] [g] [min]
2.5 5000 698 11 7.5 7000 4104 2
2.5 6000 1005 7 7.5 8000 5360 2
2.5 7000 1368 6 7.5 9000 6784 2
2.5 8000 1787 4 7.5 10 000 8375 1
2.5 9000 2261 4 10.0 2000 447 16
2.5 10 000 2792 3 10.0 3000 1005 7
5.0 5000 1396 6 10.0 4000 1787 4
5.0 6000 2010 4 10.0 5000 2792 3
5.0 7000 2736 3 10.0 6000 4020 2
5.0 8000 3574 2 10.0 7000 5472 2
5.0 9000 4523 2 10.0 8000 7147 1
5.0 10 000 5584 2 10.0 9000 9045 1
7.5 5000 2094 4 10.0 10 000 11 167 1
7.5 6000 3015 3
8.3.3. Sample Preparation
Use a syringe with a 22-gauge needle or larger when drawing the blood to avoid hemolysis. Collect the blood directly
into the blue top tube containing citrate as the anticoagulant. The result of a Fibrinogen analysis is dependent on
the quality of the blood sample and the extracted plasma.
To extract platelet-poor plasma from the whole blood sample, centrifuge the blood for a minimum
The rotation speed and necessary spin time is dependent
on the centrifuge size. Please refer to
7000 g × minutes
Table 8.2
for mini-
.
Figure 8.2:
blood sample after
centrifugation.
mum centrifuge requirements.
Make sure to collect plasma for the Fibrinogen Test from the
upper part of the plasma in the tube to avoid contaminating
the plasma with RBCs.
As part of the test procedure, the extracted platelet-poor plasma must be diluted in
accordance with the on-screen instruction on the Heska Element COAG™Analyzer.
Follow standard blood-drawing procedures at all times and pay special attention to the
following:
Plasma
Buffy coat
Red blood cells
Whole
Chapter 8
61
Page 70

8. Equine Fibrinogen Test
•
Contamination from thromboplastin, alcohol and intravenous solutions will interfere
with the fibrinogen assay. Hemolysis and foaming of the blood sample are potential
sources of erroneous test results.
•
Do not use blood that has been stabilized in any other way than using
3.8 % citrate collection tubes.
• Do not use blood from over-filled or under-filled citrate tubes.
•
Do not use plasma from samples that have been centrifuged at less than
• Do not use blood samples with visible clotting or debris accumulation.
•
Do not use plasma exhibiting signs of hemolysis, lipemia or other conditions that
may affect turbidity. A general guideline is that the sample should be clear and
more yellow than red in color.
•
To avoid mechanical hemolysis, the needle used should have a 22-gauge or larger.
•
The vein puncture site should be cleaned with alcohol and allowed to air-dry
completely.
•
When diluting the platelet poor plasma, ensure that no diluent is caught in the cap
of the pre-filled micro tube by tapping the cap prior to opening the tube.
•
Use only the supplied Heska Element COAG™Fibrinogen pre-filled micro tube
with diluent. The Fibrinogen test will not work correctly if other diluents are used.
•
To avoid contaminating the plasma with red and white blood cells, please extract
the required volume from the upper half of the plasma.
•
Do not touch the part of the pipette tip that will come in contact with the plasma
when removing the pipette tip from the pouch.
•
Test results may be impaired if sample is older than 12 hours or the extracted
plasma is older than 3 hours.
3.2 %
or
7000 g × minutes
.
The accuracy of the Heska Element COAG™Fibrinogen Test is mainly depen-
!
dent on the quality of the blood sample and the extracted plasma. The way
the blood is collected and has been handled can greatly affect the blood and
plasma quality.
8.4. Limitations
The veterinarian is always the final arbiter of test result interpretation and impact on
diagnosis. Therefore, it is highly recommended that Heska Element COAG™test results
should be scrutinized in the light of a specific patient’s condition and medical history, as
well as current or potential therapy.
62
Page 71

8.5. Test Procedure
Any test result exhibiting inconsistency with a patient’s status should be repeated and/or
supplemented with additional diagnostic tests.
The accuracy of Heska Element COAG™Analyzer test results is largely dependent on
the quality of the sample specimen which in turn is dependent on:
• The blood sample collection
• The proper volume of blood/citrate
• The proper mixing of the citrated blood
• The proper extraction of platelet-poor plasma
• The proper introduction of the sample into the cartridge well.
Please observe all precautions cited in this guide and use good blood sampling
i
technique at all times.
8.5. Test Procedure
Verify that you have the necessary materials and equipment for performing a Fibrinogen
test, see Section 8.3.
Afterward, follow these simple test procedures:
Step 1:
Step 2:
Step 3:
Remove a pouch with a test cartridge from the refrigerator and let the pouch
and cartridge reach room temperature
starting the test.
Draw blood from the patient into a sample tube containing
sodium citrate as an anticoagulant. The Fibrinogen assay requires only
platelet poor plasma but the tube should be full to ensure the correct concentration of sodium citrate.
Separate the whole blood by centrifuging the blood sample in the collection
tube into platelet poor plasma. To achieve sufficiently platelet poor plasma,
the blood sample must be centrifuged at minimum
Table 8.2 for a list of required centrifugation time.
The plasma should be extracted as soon as possible after collecting the blood
sample. The whole blood sample can be kept for maximum 12 hours provided
that the temperature does not exceed
the sample at room temperature until testing. Do not expose to direct sunlight.
59 °Fto86 °For15◦Cto30◦C
3.2 %or3.8 %
7000 g × minutes
86 °F/30◦C
. It is recommended to store
before
100 µL
, see the
63
Chapter 8
Page 72

8. Equine Fibrinogen Test
Step 4:
Step 5:
Step 6:
Step 7:
From the Home Screen, touch the
rinogen button to start the test.
When the message Please insert new cartridge
flashes on the screen, insert the Heska Element COAG™test cartridge completely into
the cartridge slot on the front of the Analyzer.
The cartridge must have the label facing upward and the sample well sticking out of the
Analyzer.
On the on-screen keyboard, enter the cartridge
code (printed on the cartridge pouch label) in
the entry field and touch Done.
Touch
Confirm
has been obtained in a citrate test tube, that the
tube was appropriately filled, and that whole
blood sample was spun to platelet poor plasma
at minimum 7000 g × minutes.
to acknowledge that the blood
Equine Fib-
Step 8:
Step 9:
64
Touch
Patient ID
mation using the on-screen keyboard. Touch
Done to confirm.
Entering Sample ID is optional but recommended to aid in finding the result in the Analyzer’s database.
Touch
Next
ing Up screen opens.
It takes approximately 5 minutes for the Analyzer to warm up the test cartridge to
37◦C
depending on the environment’s temperature. Lower and higher room temperatures
may change the warm up time.
and enter the necessary infor-
to continue. The
Cartridge Warm-
99 °F
or
Page 73

Step 10:
Step 11:
Step 12:
8.5. Test Procedure
Do not add sample while the cartridge is warming up. Wait until a
!
prompt appears on the screen instructing you to add the sample.
By default, a message
and a single beeping sound can be heard which signals that the
diluted plasma sample can now be added to the cartridge.
Ensure that no diluent is caught at the top of the diluent tube by tapping the
tube on a hard surface. Using the supplied pipette tip, puncture the foil on the
diluent tube. Extract
the
100 µL
fixed volume pipette and supplied pipette tip. Dilute the platelet
poor plasma by aspirating into the supplied diluent tube and ensure proper
mixing by aspirating a minimum of 5 times.
Make sure that no diluent is caught in the lid of the diluent tube.
!
When the message
use a
100 µL
diluted plasma to the cartridge’s sample well.
Be sure to fill the sample well with
i
The measurement starts automatically as soon as the sample is
detected. The test progress is shown on the screen. Measurement
takes approximately 10 minutes.
If the Analyzer alerts you that an insufficient amount of sample was
placed into the sample well, repeat the measurement with a new
cartridge. Touch Cancel to terminate the ongoing test.
The test result is displayed on the screen when
the test is finished.
100 µL
Add 100 µL sample and wait
fixed-volume pipette and the supplied pipette tip to add
Add sample and wait
platelet poor plasma from the collection tube using
100 µL
flashes on the screen
appears on the screen,
100 µL
diluted platelet poor plasma.
If a printer is connected to the instrument, touch
Print to print the test result.
Touch Done to return to the Home screen.
Step 13: Remove the used test cartridge and dispose of it properly.
Chapter 8
65
Page 74

Page 75

9. Canine Fibrinogen Test
The Heska Element COAG™Canine Fibrinogen cartridge used with the Heska Element COAG™Analyzer is designed to
measure the concentration of clottable fibrinogen in a canine (dog) plasma sample
using the Ellis–Stransky method.
Each Canine Fibrinogen cartridge contains dual optical detection windows filled
with micro-channels.
The Canine Fibrinogen test cartridge measures the fibrinogen concentration from
100 µL
diluted plasma with nominal test
duration of approximately 10 minutes including warm-up time.
9.1. Fibrinogen Testing
Fibrinogen (clotting factor I) is a coagulation protein produced by the liver and present in
plasma of all vertebrates [18,19]. It plays an important role in blood coagulation, cellular
interactions, inflammation and wound healing. Fibrinogen is also known as an acute
phase protein (APP) and has been widely used as a clinical indicator of acute or chronic
inflammation or tissue damage in mammals [18, 20–22].
The canine normal range of plasma circulated fibrinogen is
evaluating canine fibrinogen level, age has to be taken into consideration: younger dogs
show slight but statistically significant higher fibrinogen level [23].
In response to ongoing inflammation, fibrinogen plasma concentration changes within
24 to 48 hours [24]. The function and quantity of plasma fibrinogen can be altered by
both inherited and acquired disorders [25]. Fibrinogen is an essential component of
the hemostatic process and its level may be increased in response to inflammation, or
reduced due to consumption [26]. Low plasma fibrinogen concentration can indicate a
systemic activation of the clotting system, where consumption of clotting factors is faster
than synthesis, with increased risk of bleeding as a consequence.
Figure 9.1:
Heska Element COAG™Canine Fibrinogen Test kit.
1.2 g/Lto3.0 g/L
. When
67
Chapter 9
Page 76

9. Canine Fibrinogen Test
In dogs, during active acute or chronic hepatitis, hyperfibrinolysis is observed frequently
in association with liver cell necrosis or apoptosis [27–29]. Therefore, the main purpose
of measuring fibrinogen level in canine medicine is to indicate blood coagulation disorders
in which the concentration of fibrinogen falls [30]. Moreover, measurement of fibrinogen
level, together with determination of other APPs, provides accurate information of the
course of the disease and allows better monitoring of treatment.
9.2. Test Specifications
An overview of the Canine Fibrinogen test specifications are given in
test has been validated for use with diluted canine (dog) plasma extracted from citratestabilized whole blood. Under normal operating conditions, test results have a precision
of 0.3 g/L or better.
A Fibrinogen test takes up to 10 minutes to perform. The actual time depends on the
blood sample and test environment. At room temperature, it takes about 5 minutes for
the Analyzer to warm up the test cartridge to
temperatures may change the warm up time. Once the procedure of the assay begins,
the result is reported within approximately 10 minutes.
Each test cartridge is individually packed in a sealed pouch with a desiccant bag and a
disposable pipette tip. The pouch should be kept at refrigerated temperatures (
46 °F/2◦Cto8◦C
reach room temperature prior to running the test. The pouch should not be exposed to
direct sunlight and should be used within the same day it is warmed to room temperature.
Once the pouch has been opened, the cartridge should be used within the 10 minutes.
If stored in accordance with these guidelines, the test cartridges are stable until the
expiration date printed on the pouch label. One pre-filled tube with diluent should be
used with each test. Dispose of the diluent tube after running a test.
The test cartridge can be used only once and only in combination with the Heska
Element COAG™Analyzer. Once used, the cartridge, pipette tip, diluent tube, and
sample collection tube should be considered as potentially infectious. Dispose of them
properly in accordance with the policies and regulations at the place of operation.
Always strictly adhere to all biohazard safety guidelines pertaining to handling
!
and disposing of animal blood samples.
). Remove the pouch from the refrigerator and allow the cartridge to
99 °F(37◦C
). Lower and higher ambient
Table 9.1
. The
36 °F
to
68
Page 77
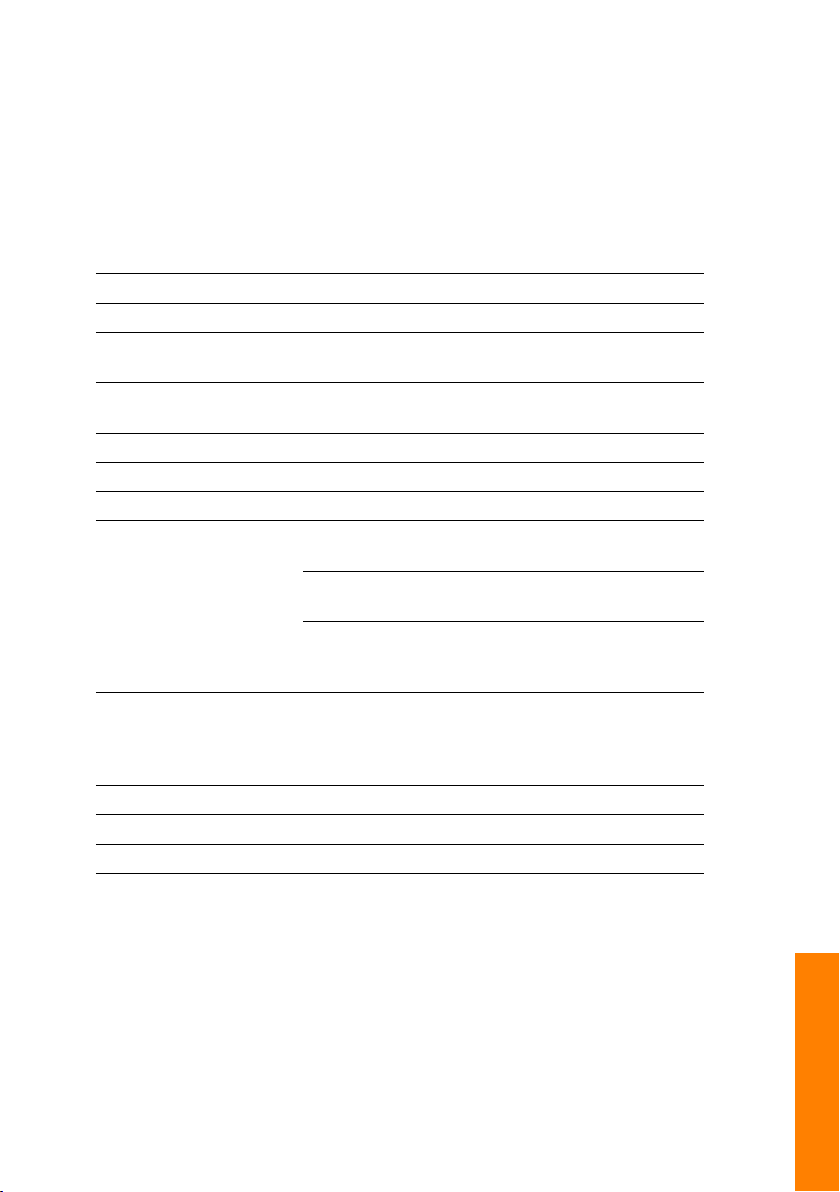
9.2. Test Specifications
Table 9.1: Specifications for the Heska Element COAG™Canine Fibrinogen Test.
Measurement Technology Light absorbance, turbidity-based plasma assay
Result Units mg/dL, g/L or g/dL
Reference Range Species mg/dL g/L
Dog (canine) 120 to 300 1.2 to 3.0
Dynamic Range mg/dL g/L
0 to 2000 0.0 to 20.0
Sample Type Platelet poor plasma
Sample Volume 100 µL
Sample Collection 3.2 % or 3.8 % concentration sodium citrate tube
Sample Stability
Cartridge Stability
Storage Refrigerate at 36 °F to 46 °F or 2◦C to 8◦C
Shelf Life The expiration date is printed on the pouch label.
Time to results Approximately 10 minutes
12 hours at room temperature (
30◦C) for whole blood sodium citrate samples.
3 hours at room temperature (
30◦C) for plasma extracted.
30 days at freezing temperature (
plasma samples extracted from a citrate tube and placed
in a red-top tube.
Do not expose cartridges in the foil pouch to direct sunlight or leave at room temperature for more than one
day. Use cartridges taken from the foil pouch within 10
minutes
59 °Fto86 °For15◦C
59 °Fto86 °For15◦C
14 °For−10◦C
to
to
) for
69
Chapter 9
Page 78

9. Canine Fibrinogen Test
9.3. Test Requirements
9.3.1. Materials and Equipment
The following materials and equipment are required in order to perform a Canine Fibrinogen Test on the Heska Element COAG™Analyzer:
• Heska Element COAG™Analyzer
• Canine Fibrinogen Test Cartridge
• Pipette tip (included in the sealed pouch with the test cartridge)
• 100 µL fixed-volume pipette
• Pre-filled diluent tube (included in each box of cartridges)
• Syringes with a 22-gauge needle or larger
• Sample tubes containing 3.2 % or 3.8 % sodium citrate as an anticoagulant
• Package insert for Canine Fibrinogen Test cartridge
• Quick Guide for Canine Fibrinogen Test
• Centrifuge minimum 7000 g × minutes.
9.3.2. Centrifuge
Table 9.2
revolutions per minute to obtain platelet-poor plasma as needed by the Canine Fibrinogen
Test.
Some centrifuges do not display theg-loading of the sample, but instead show the
revolutions per minute (RPM) of the centrifuge. In that case, use the table to find the
required centrifugation time for a given RPM and centrifuge radius1.
lists the required centrifugation time as a function of centrifuge radius and
9.3.3. Sample Preparation
Use a syringe with a 22-gauge needle or larger when drawing the blood to avoid hemolysis.
Collect the blood directly into the test tube containing citrate as the anticoagulant. The
result of a Fibrinogen analysis is dependent on the quality of the blood sample and the
extracted plasma.
1
The centrifuge radius is the distance between the axis of rotation and the center of the test-tube when placed in the
centrifuge.
70
Page 79
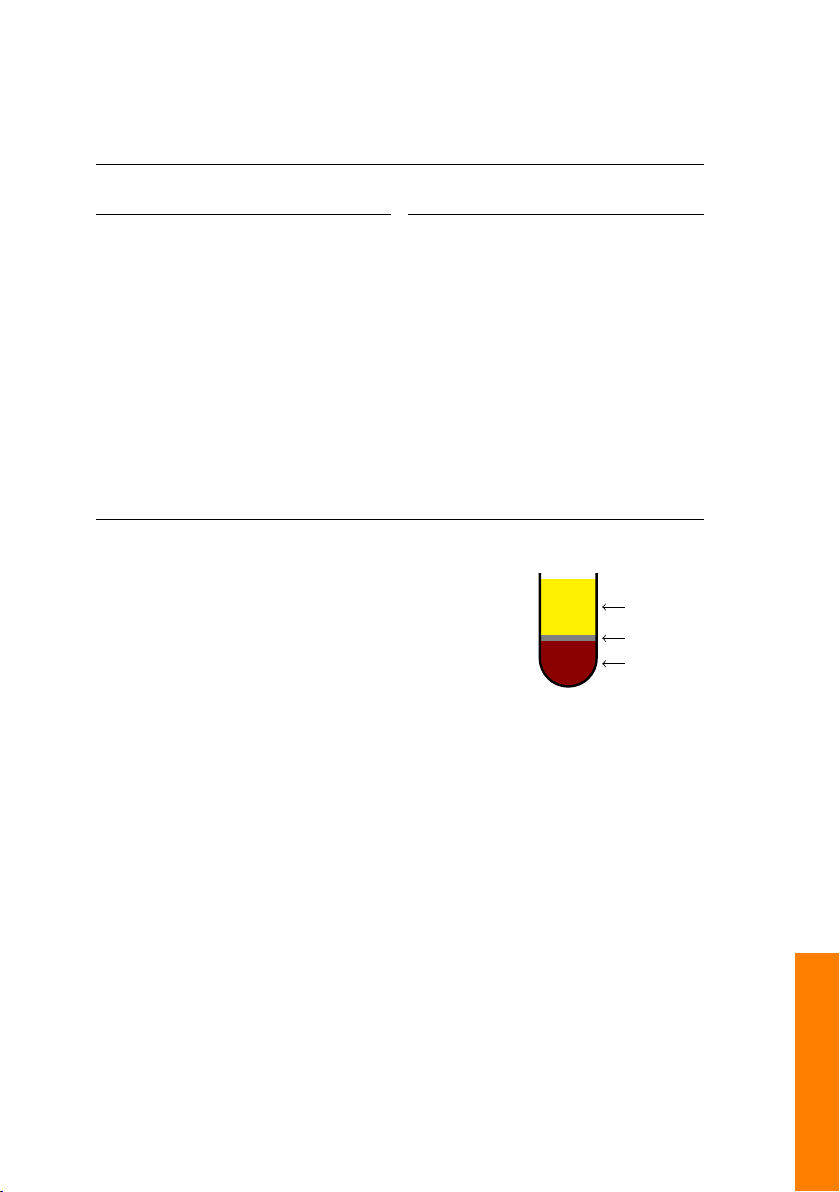
9.3. Test Requirements
Table 9.2:
Centrifugation time for combinations of centrifugation speed and centrifuge
radius.
Radius RPM Acc. Time Radius RPM Acc. Time
[cm] [1/min] [g ] [min] [cm] [1/min] [g] [min]
2.5 5000 698 11 7.5 7000 4104 2
2.5 6000 1005 7 7.5 8000 5360 2
2.5 7000 1368 6 7.5 9000 6784 2
2.5 8000 1787 4 7.5 10 000 8375 1
2.5 9000 2261 4 10.0 2000 447 16
2.5 10 000 2792 3 10.0 3000 1005 7
5.0 5000 1396 6 10.0 4000 1787 4
5.0 6000 2010 4 10.0 5000 2792 3
5.0 7000 2736 3 10.0 6000 4020 2
5.0 8000 3574 2 10.0 7000 5472 2
5.0 9000 4523 2 10.0 8000 7147 1
5.0 10 000 5584 2 10.0 9000 9045 1
7.5 5000 2094 4 10.0 10 000 11 167 1
7.5 6000 3015 3
To extract platelet-poor plasma from the whole blood sample, centrifuge the whole blood in a centrifuge for minimum
7000 g × minutes
time is dependent on the centrifuge size. Please refer to
Table 9.2 for minimum centrifuge requirements.
. The rotation speed and necessary spin
Plasma
Buffy coat
Red blood cells
Centrifugation will separate the Red Blood Cells (RBC)
from the plasma, see
tation of a sample tube after centrifugation. Make sure
to collect plasma for the Canine Fibrinogen Test from the
Figure 9.2
for a schematic represen-
Figure 9.2:
Whole blood
sample after centrifugation.
upper part of the plasma in the tube to avoid contaminating
the plasma with RBCs.
Other than centrifugation, no special sample preparation is needed before initiating the
Canine Fibrinogen Test. As part of the test procedure, the extracted platelet-poor plasma
must be diluted in accordance with the on-screen instruction on the Heska Element
COAG™Analyzer.
Follow standard blood-drawing procedures at all times and pay special attention to the
following:
•
Contamination from thromboplastin, alcohol and intravenous solutions will interfere
with the fibrinogen assay. Hemolysis and foaming of the blood sample are potential
71
Chapter 9
Page 80

9. Canine Fibrinogen Test
sources of erroneous test results.
•
Do not use blood that has been stabilized in any other way than using
3.8 % citrate collection tubes.
• Do not use blood from over-filled or under-filled citrate tubes.
•
Do not use plasma from samples that have been centrifuged at less than
• Do not use blood samples with visible clotting or debris accumulation.
•
Do not use plasma exhibiting signs of hemolysis, lipemia or other conditions that
may affect turbidity. A general guideline is that the sample should be clear and
more yellow than red in color.
•
To avoid mechanical hemolysis, the needle used should have a 22-gauge or larger.
•
The vein puncture site should be cleaned with alcohol and allowed to air-dry
completely.
•
When diluting the platelet poor plasma, ensure that no diluent is caught in the cap
of the pre-filled micro tube by tapping the cap prior to opening the tube.
•
Use only the supplied Heska Element COAG™Fibrinogen pre-filled micro tube
with diluent. The Fibrinogen test will not work correctly if other diluents are used.
•
To avoid contaminating the plasma with red and white blood cells, please extract
the required volume from the upper half of the plasma.
•
Do not touch the part of the pipette tip that will come in contact with the plasma
when removing the pipette tip from the pouch.
•
Test results may be impaired if the sample is older than 12 hours or the extracted
plasma is older than 3 hours.
3.2 %
or
7000 g × minutes
.
The accuracy of the Canine Fibrinogen Test is mainly dependent on the quality
!
of the blood sample and the extracted plasma. The way the blood is collected
and has been handled can greatly affect the blood and plasma quality.
9.4. Limitations
The veterinarian is always the final arbiter of test result interpretation and impact on
diagnosis. Therefore, it is highly recommended that Heska Element COAG™test results
should be scrutinized in the light of a specific patient’s condition and medical history, as
well as current or potential therapy.
Any test result exhibiting inconsistency with a patient’s status should be repeated and/or
supplemented with additional diagnostic tests.
72
Page 81

9.5. Test Procedure
The accuracy of Heska Element COAG™Analyzer test results is largely dependent on
the quality of the sample specimen which in turn is dependent on:
• The blood sample collection
• The proper volume of blood/citrate
• The proper mixing of the citrated blood
• The proper extraction of platelet-poor plasma
• The proper introduction of the sample into the cartridge well.
Please observe all precautions cited in this guide and use good blood sampling
i
technique at all times.
9.5. Test Procedure
Before performing any tests, be sure that the Heska Element COAG™Analyzer has been
installed properly in accordance with the instructions in this guide. See
details regarding how to set the Analyzer up correctly.
Verify that you have the necessary materials and equipment for performing a Heska
Element COAG™Canine Fibrinogen test, see Section 9.3.
Afterward, follow these simple test procedures:
Step 1:
Step 2:
Step 3:
Step 4:
Remove a pouch with a test cartridge from the refrigerator and let the pouch
and cartridge reach room temperature
starting the test.
Draw blood from the patient into a sample tube containing
sodium citrate as an anticoagulant. The Fibrinogen assay requires only
platelet poor plasma but the tube should be full to ensure the correct concentration of sodium citrate.
Fractionate the whole blood by centrifuging the blood sample in the collection
tube into platelet poor plasma. To achieve sufficiently platelet poor plasma,
the blood sample must be centrifuged at minimum
Table 9.2 for a list of required centrifugation time.
The plasma should be extracted as soon as possible after collecting the blood
sample. The whole blood sample can be kept for maximum 12 hours provided
that the temperature does not exceed
the sample at room temperature until testing. Do not expose to direct sunlight.
Remove the cartridge and pipette tip from the pouch and the pre-filled tube
with diluent from the kit box.
59 °Fto86 °For15◦Cto30◦C
7000 g × minutes
86 °F/30◦C
. It is recommended to store
Chapter 3
3.2 %or3.8 %
for
before
100 µL
, see the
73
Chapter 9
Page 82

9. Canine Fibrinogen Test
Step 5:
Step 6:
Step 7:
Step 8:
From the Home Screen, touch the
rinogen button to start the test.
When the message Please insert new cartridge
flashes on the screen, insert the Heska Element COAG™test cartridge completely into
the cartridge slot on the front of the Analyzer.
The cartridge must have the label facing upward and the sample well sticking out of the
Analyzer.
On the on-screen keyboard, enter the cartridge
code (printed on the cartridge pouch label) in
the entry field and touch done.
Touch
Confirm
has been obtained in a citrate test tube, that the
tube was appropriately filled, and that whole
blood sample was spun to platelet poor plasma
at minimum 7000 g × minutes.
to acknowledge that the blood
Canine Fib-
Step 9:
Step 10:
74
Touch
Patient ID/Sample ID
essary information using the on-screen keyboard. Touch Done to confirm.
Entering Sample ID is optional but recommended to aid in finding the result in the Analyzer’s database.
Touch
Next
to continue. The
ing Up screen opens.
It takes approximately 5 minutes for the Analyzer to warm up the test cartridge to
37◦C
depending on the environment’s temperature. Lower and higher room temperatures
may change the warm up time.
and enter the nec-
Cartridge Warm-
99 °F
or
Page 83

Step 11:
Step 12:
Step 13:
9.5. Test Procedure
Do not add sample while the cartridge is warming up. Wait until a
!
prompt appears on the screen instructing you to add the sample.
By default, a message
and a single beeping sound can be heard which signals that the
diluted plasma sample can now be added to the cartridge.
Ensure that no diluent is caught at the top of the diluent tube by tapping the
tube on a hard surface. Using the supplied pipette tip, puncture the foil on the
diluent tube. Extract
the
100 µL
fixed volume pipette and supplied pipette tip. Dilute the platelet
poor plasma by aspirating into the supplied diluent tube and ensure proper
mixing by aspirating a minimum of 5 times.
Make sure that no diluent is caught in the lid of the diluent tube.
!
When the message
use a
100 µL
diluted plasma to the cartridge’s sample well.
Be sure to fill the sample well with at least
i
poor plasma.
The measurement starts automatically as soon as the sample is
detected. The test progress is shown on the screen. Measurement
takes approximately 10 minutes.
If the Analyzer alerts you that an insufficient amount of sample was
placed into the sample well, repeat the measurement with a new
cartridge. Touch Cancel to terminate the ongoing test.
The test result is displayed on the screen when
the test is finished. If a printer is connected
to the instrument, touch
result.
100 µL
Add 100 µL sample and wait
fixed-volume pipette and the supplied pipette tip to add
Add sample and wait
platelet poor plasma from the collection tube using
Print
to print the test
flashes on the screen
appears on the screen,
100 µL
diluted platelet
100 µL
Touch Done to return to the Home screen.
Step 14: Remove the used test cartridge and dispose of it properly.
75
Chapter 9
Page 84

Page 85

10. Canine DEA 1 Blood Typing
Chapter 10
The Canine DEA 1 Test Cartridge is used in conjunction with the Heska Element COAG
Analyzer for in vitro blood group determination testing. The Canine DEA 1 cartridge is
intended for use in performing a rapid blood group determination for Canine DEA 1 from
a drop of diluted EDTA-stabilized canine whole blood.
10.1. Canine Blood Typing
While it is broadly true that dogs do
not possess alloantibodies to incompatible blood groups and, thus, will generally tolerate well an initial incompatible
transfusion, sound practice of veterinary
medicine dictates that such transfusions
be avoided. The half life of the transfused
incompatible cells will be quite short and,
thus, the intended therapeutic result may
not even be attained. Also, the potential
future needs of the canine patient must
be considered. Antibodies resulting from
a transfusion of incompatible blood may
form in only 5 to 7 days and will have longterm viability [31–35]. This eliminates the
option of using incompatible blood in a
future emergency situation.
Figure 10.1: The Canine DEA 1 test kit.
™
In addition, antibodies developed in
bitches by sensitization resulting from
transfusion of incompatible blood groups must be of special concern to breeders. Since
antibodies are present in the colostrum, bitches with alloantibodies to a given blood type
should not be bred to a sire possessing that blood group if they are expected to nurse
the resulting puppies [32]. The nursing puppies will develop isoerythrolysis and may be
susceptible to disease or even die due to hemolytic anemia [32, 36–38].
77
Page 86

10. Canine DEA 1 Blood Typing
10.1.1. Blood Groups
Eight specific antigens have been identified on the surface of the canine erythrocytes [31,
39
]. The internationally accepted canine blood group system, the Dog Erythrocyte
Antigen (DEA), is based on these antigens. It currently characterizes eight common
blood groups, the antigens DEA 1, 1.2, 3, 4, 5, 6, 7, and 8.
As occurred in human medicine, new antigens are now being discovered on the red cells
of dogs. One, DAL, has been reported and is the subject of journal articles. These are
often breed specific and, thus, can be considered rare.
The DEA 1 blood group is the most significant blood factor in the dog. The DEA 1
blood group is highly antigenic and is the primary lytic factor in canine transfusion
medicine [32,39–47]. Although all of the blood group antigens are capable of stimulating
formation of alloantibodies, DEA 1 has the greatest stimulation potential. Thus, most
reactions resulting from the transfusion of incompatible cells occur when DEA 1 positive
blood is given to a DEA 1 negative recipient [32]. Clinically significant reactions to DEA 1.2
may occur but are less severe. DEA 7 may be a factor in transfusion reactions, but since
it is a cold agglutinin and a naturally occurring isoantibody, it is considered to have
very low clinical significance. The remaining antigens are considered to cause clinically
insignificant transfusion problems [32].
10.1.2. Blood Transfusion
Ideally, all transfused blood would be DEA 1 negative. However, until the concept of using
blood rapidly available from commercial sources is more widely accepted, transfusion
from dogs that are present in the area at the time of need will remain the norm.
It is estimated that
auto-agglutinate and because a very anemic dog may give equivocal results, typing prior
to an urgent need for the information is indicated. Identifying a particular dog as DEA 1
positive or negative at birth greatly simplifies future decision making. A DEA 1 positive
dog can receive both DEA 1 positive and negative blood. A dog that is DEA 1 negative
should not receive DEA 1 positive blood.
The Canine DEA 1 test cartridge used with the Heska Element COAG™Analyzer is
intended for use to classify dogs as DEA 1 positive, negative or inconclusive.
40 %
of all dogs are DEA 1 positive [31]. Because a number of dogs
10.2. Test Specifications
Test results obtained under normal operating conditions have an accuracy of
better. A small percentage of blood samples is not possible to type definitely using the
Heska Element COAG™Analyzer. The results for these samples will be reported as
78
95 %
or
Page 87
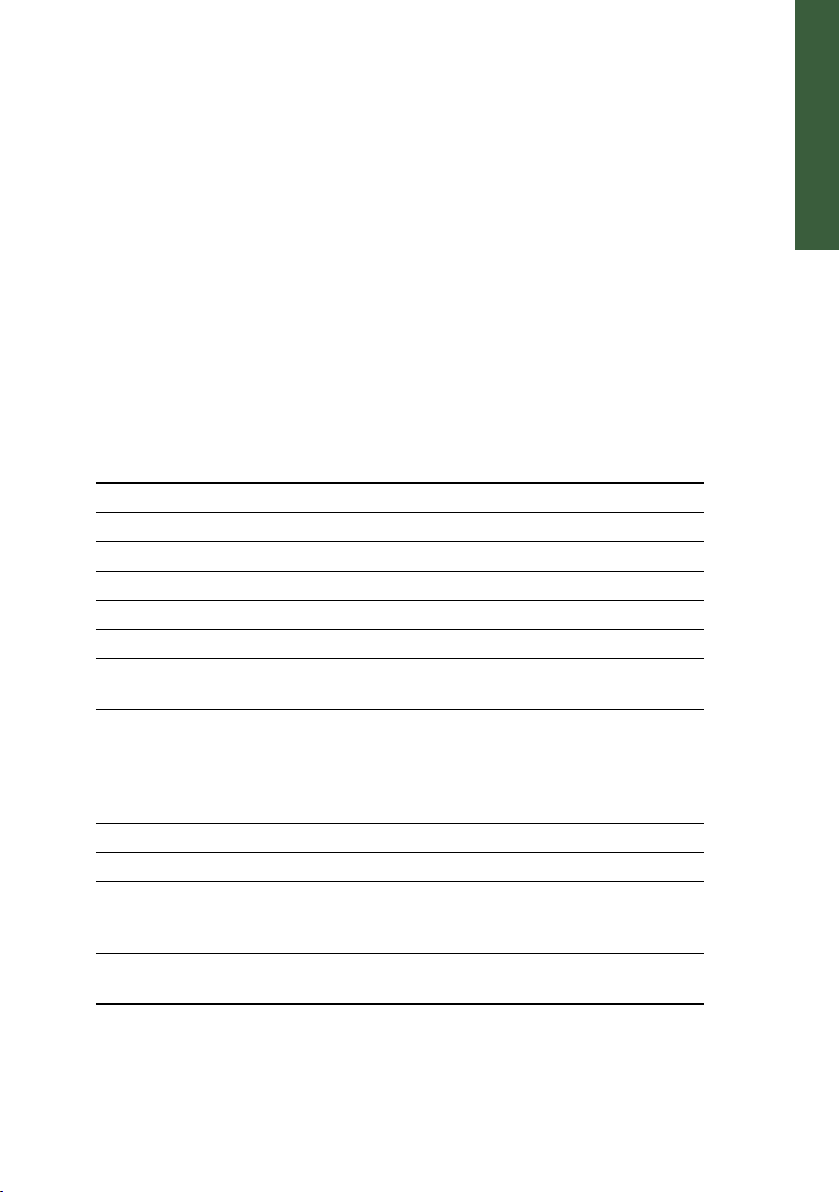
10.2. Test Specifications
Inconclusive. A minimum of
the Canine DEA 1 Blood Typing Test.
All components of the test kit are stable at refrigerated temperatures (
46 degree For2◦Cto8◦C
warmed do not return cartridge to the refrigerator and use within the same day. After
opening the pouch and cartridge must be used within 10 minutes. Kits and components
should not be exposed to direct sunlight. Once warmed do not return cartridge to the
refrigerator and use within the same day. After opening the pouch and cartridge must
be used within 10 minutes. The time it takes to perform a blood type determination
with the Heska Element COAG™Analyzer depends on factors such as type of test and
test environment. At room temperature, it takes about 90 seconds for the instrument to
warm up the test cartridge to
change the warm up time. Once the procedure of the assay begins, an answer should
be available within 5 minutes.
Table 10.1: Specifications for the Canine DEA 1 Blood Typing Test.
Measurement Technology Agglutination detection using light absorbance
Species Canine (Dog)
Possible results Positive, Negative and Inconclusive
Sample Type Diluted whole blood
Sample Volume 100 µL of whole blood
Sample Collection EDTA collection tube
Sample Stability Use the blood within the day of collection. Do not dilute
Cartridge Stability Do not expose the cartridges in the foil pouch to direct
Storage Store at 36 °F to 77 °F/2◦C to 25◦C
Shelf Life The expiration date is printed on the pouch label.
Warm-up time
Time to results Approximately 5 minutes from adding the sample to the
95 %
of correctly collected blood samples are typable using
36 degree F
) until the expiration date printed on the pouch label.Once
99 °For37◦C
the sample until prompted to do so on-screen.
sunlight or leave them at room temperature for more
than one day.
Use cartridges taken from the foil pouch within 10
minutes
Approximately 90 seconds. The actual time depends on
the blood sample and test environment. Very low or high
ambient temperatures may change the warm-up time.
cartridge
. Lower and higher room temperatures may
to
Chapter 10
79
Page 88

10. Canine DEA 1 Blood Typing
Each Canine DEA 1 Blood Typing Test cartridge contains a monoclonal antibody specific
to the DEA 1 antigen on a red blood cell. Each cartridge is individually packed with a
disposable plastic pipette tip in a sealed pouch containing a desiccant bag to keep it
moisture free. A torn or otherwise damaged pouch may allow moisture to reach the test
cartridge and adversely affect performance. Do not use a test cartridge from a damaged
pouch. Open the pouch just prior to use.
The test cartridge can be used only once and only in combination with the Heska
Element COAG™Analyzer. Once used, the cartridge, pipette tip, diluent tube, and
sample collection tube should be considered as potentially infectious. Dispose of them
properly in accordance with the policies and regulations at the place of operation.
Always strictly adhere to all biohazard safety guidelines pertaining to handling
!
and disposing of animal blood samples.
10.3. Test Requirements
10.3.1. Materials and Equipment
In order to perform a Canine DEA 1 Blood Typing Test with the Heska Element COAG
Analyzer, the following materials and equipment are required.
The following materials are required but not provided with the Canine DEA 1 Blood Typing
Test:
• Heska Element COAG™Analyzer
• Syringes with a 22-gauge needle or larger
• Sample collection tube with EDTA as the anticoagulant
• 100 µL fixed volume pipette
The following materials are required and supplied with the Canine DEA 1 Blood Typing
Test:
• Canine DEA 1 Blood Typing cartridge
•
Dropper bottle pre-filled with diluent. The plastic bottle contains phosphate buffered
saline (PBS) at pH 7.4. The dropper tip dispenses approximately
The bottle contains enough fluid to perform all the tests in the kit
• Tube for sample preparation (one for each cartridge)
• Plastic pipette tip (one for each cartridge)
The following materials are optional:
80
40 µL
of fluid.
™
Page 89

10.4. Limitations
•
Package insert for the Canine DEA 1 Blood Typing Test (shipped with each box of
cartridges)
•
Quick Guide for the Canine DEA 1 Blood Typing Test (shipped with the software
update for the Canine DEA 1 Blood Typing Test)
10.3.2. Blood Sample Preparation
Use a syringe with a 22-gauge needle or larger to avoid hemolysis. Collect blood directly
into the EDTA test tube. The result of any blood analysis is dependent on the quality
of the blood sample. Follow standard blood-drawing procedures at all times and pay
special attention to the following:
•
Blood samples, if possible, should be collected within the day of testing. Ensure
proper mixing of the anticoagulant into the blood sample.
•
If a blood rocker is not available, slowly invert the tube containing the blood sample
10 times every 10 minutes.
•
The blood sample should be kept at room temperature, in case the testing is
delayed.
•
Inspect the blood sample for hemolysis when measuring the hematocrit. As a
general rule, the plasma must be clear and more yellow than red in order for the
sample to be suitable for testing with the Canine DEA 1 Blood Typing Test.
Chapter 10
The accuracy of the Canine DEA 1 Blood Typing Test is mainly dependent on
!
the quality of the blood sample. The way the blood is collected and has been
handled can greatly affect the blood quality.
10.4. Limitations
The veterinarian is always the final arbiter of test result interpretation and impact on
diagnosis. Therefore it is highly recommended that Heska Element COAG™test results
should be scrutinized in the light of a specific patient’s condition and medical history, as
well as current or potential therapy.
Any test result exhibiting inconsistency with a patient’s status should be repeated and/or
supplemented with additional diagnostic tests.
The accuracy of Heska Element COAG™Analyzer test results is largely dependent on
the quality of the blood specimen.
81
Page 90

10. Canine DEA 1 Blood Typing
•
The accuracy of the test results is dependent on the quality of the blood sample.
The quality of the blood sample is dependent upon the blood sample collection, the
proper blood to EDTA ratio, and the proper introduction of the sample and diluent
into the sample well. Please observe all precautions cited in this manual and use
good blood sample collection techniques at all times.
•
A very limited number of canine patients exhibit auto-agglutination of varying
degrees due to serum factors that cause agglutination of the patient’s own red
cells. The Canine DEA 1 cartridge has two channels – a reference channel and
a test channel. If auto-agglutination occurs in the reference channel, this will be
indicated on the results screen. If auto-agglutination occurs the blood should not
be used for transfusion and the dog should only be transfused with blood from a
DEA 1 negative donor. This occurs in only a very small percentage of patients.
•
Being an absorption assay, the test accuracy is dependent on proper dilution of
the whole blood before adding the sample to the cartridge. Always measure the
hematocrit of the sample prior to testing and follow the on-screen dilution procedure.
•
Hemolyzed blood samples may cause false DEA 1 negative results because the
Analyzer is unable to distinguish RBC agglutinates from the plasma containing
hemoglobin. Always verify that the sample is not hemolyzed when measuring the
hematocrit. As a general guideline, the plasma must be clear and more yellow than
red. If the sample is severely hemolyzed, a new blood sample should be drawn.
•
Blood samples with a hematocrit of less than
recommended for use with the Heska Element COAG™Analyzer. Blood samples
outside this range may result in an instrument error or inaccurate test result.
10 %
or greater than
70 %
are not
10.5. Test Procedure
Verify that you have the necessary materials and equipment for performing a Canine
DEA 1 Blood Typing test, see Section 10.3.
Step 1:
Step 2:
Step 3: Determine the hematocrit of the sample.
82
Remove a pouch with a test cartridge from the refrigerator and let the pouch
and cartridge reach room temperature
30◦C before starting the test.
Draw blood from the patient into a tube coated with or containing EDTA as an
anticoagulant. The assay requires only 100uL of whole blood but the syringe
or tube should be full to ensure the correct concentration of EDTA. If the blood
type is not to be determined immediately, nutrients such as CPDA should not
be added.
59 /degree Fto86 /degree F/15◦C
to
Page 91

10.5. Test Procedure
Step 4:
Step 5:
Step 6:
Step 7:
Step 8:
Remove the cartridge and pipette tip from the pouch and the pre-filled tube
with diluent from the kit box.
From the Home Screen, touch the
Blood Typing button to start the test.
When the message Please insert new cartridge
flashes on the screen, insert the test cartridge
completely into the cartridge slot on the front
of the Analyzer.
The cartridge must have the label facing upward and the sample well sticking out of the
Analyzer.
On the on-screen keyboard, enter the cartridge
code (printed on the cartridge pouch label) in
the entry field and touch Done
Touch
Confirm
has been obtained in a EDTA test tube and that
the tube was appropriately filled.
to acknowledge that the blood
Canine
Chapter 10
Step 9:
Step 10:
Touch
Patient ID
mation using the on-screen keyboard. Touch
Done
to confirm. Entering Sample ID is optional but recommended to aid in finding the
result in the Analyzer’s database.
Enter the previously measured hematocrit
value in percent using the on-screen keyboard.
Based on the specified hematocrit the Heska
Element COAG™Analyzer will calculate the
number of diluent drops needed for correct dilution of the sample.
Touch Next to continue.
and enter the necessary infor-
83
Page 92

10. Canine DEA 1 Blood Typing
Step 11:
Step 12:
Step 13:
Step 14:
Dilute the sample following the on-screen instructions. First, dispense the number of drops
of diluent stated on the screen into one of the
supplied sample tubes. Then mix
blood into the diluent using the fixed volume
pipette and supplied pipette tip. Ensure proper
mixing by aspirating a couple of times using
the pipette.
Touch
Next
to continue. The
ing Up screen opens.
It takes approximately 90 seconds for the Analyzer to warm up the test cartridge to
or
37◦C
depending on the environment’s temperature. Lower and higher temperatures may
change the warm up time.
Do not add the sample while the cartridge is warming up. Wait until
!
a prompt appears on the screen instructing you to add the sample.
By default, a message
screen and a single beeping sound can be heard which signals that
the blood sample can now be added to the cartridge.
Gently invert the test tube back and forth 10 times to obtain a uniform mixture
of blood cells and diluent.
When the message
use the fixed volume pipette and the pipette tip supplied with the cartridge to
add 100 µL of diluted blood to the cartridge’s sample well.
Be sure to fill the sample well with at least 100 µL blood.
i
The measurement starts automatically as soon as the sample is
detected. The test progress is shown on the screen. Measurement
takes approximately 5 minutes. If the Analyzer alerts you that an
insufficient amount of sample was placed into the sample well, repeat
the measurement with a new cartridge. Touch
the ongoing test.
The test result is displayed on the screen when
the test is finished.
Add 100 µL sample and wait
100 µL
of
Cartridge Warm-
99 °F
Add 100 µL sample and wait
appears on the screen,
Cancel
flashes on the
to terminate
84
If a printer is connected to the instrument, touch
Print to print the test result.
Touch Done to return to the Home screen.
Page 93
10.5. Test Procedure
DEA 1 Blood Typing Certicate
Patient Information Clinic Information
Blood Typing in Dogs
Dog blood groups are classied using the Dog Erythrocyte Antigen (DEA) system. The DEA system denes
six blood types based on the presence of specic inherited antigens on the surface of the red blood cells.
In the context of transfusion DEA 1 is the most important blood type because transfusion with DEA 1
positive blood to a negative recipient can cause sensitization or severe heamolytic reactions.
The Element COAG™ DEA 1 Blood Typing Test uses
antibodies specic to the DEA 1 antigens to determine the amount of DEA 1 antigens on the blood cells
in a sample.
Blood Typing Result
The result of the Element COAG™ DEA 1 blood typing test is shown below
DEA 1 Negative
Safe Blood Donation
Dogs that have been tested positive for DEA 1
can be transfused with blood from any donor
without risk of sensitization or hemolytic reactions. Blood from DEA 1 positive donors can only
be donated to DEA 1 positive recipient dogs.
Dogs that are dicult to type due to antigen
properties should only be transfused with blood
from DEA 1 negative donors. Blood from dogs
in this group should only be donated to DEA 1
positive recipient dogs.
To avoid sensitization or hemolytic transfusion
reactions DEA 1 negative dogs should only be
transfused with blood from DEA 1 negative
donors. Dogs that have been tested negative for
DEA 1 are suitable donors for any other dog.
The Element COAG™ DEA 1 Blood Typing Test is a joint development of dmslaboratories,
inc. and Heska and is manufactured by Zoetis Denmark ApS. Element COAG™ is a trademark of Heska.
DEA 1 Positive
dmslaboratories
If the printer supports printing on A4-paper, it is
possible to print the result on a pre-formatted
Heska Element COAG™Blood Typing Certificate.
The user-supplied clinic information and Patient and Sample ID will appear on the printed
certificate.
Step 15: Remove the used test cartridge and dispose of it properly.
Chapter 10
85
Page 94

Page 95

11. Feline A, B and AB Blood Typing
The Feline A & B Blood Typing Test Cartridge is used with the Heska Element COAG
Analyzer for in vitro blood group determination. The Feline A & B Blood Typing cartridge
is intended for use in performing a rapid blood group determination for cats from a drop
of diluted EDTA-stabilized whole blood.
11.1. Feline Blood Typing
11.1.1. Feline Blood Groups
The AB system is the major blood group
system in domestic cats. The common
blood types are A and B. Cats with blood
type A have naturally occurring anti-B antibodies at a low titer and cats with blood
type B have naturally occurring anti-A antibodies at a high titer. A third rare type AB
is also known. Cats with the rare AB type
do not have anti-A or anti-B antibodies.
There are however no null phenotype and
as a consequence, there is no universal
donor [48].
The A and B blood groups are genetically determined and blood type A is the
most common among cats but the frequency varies significantly by breed and
geographic location. Breeds that do not
have the B type are Siamese, Burmese,
American Shorthair, Oriental Shorthair
and Tonkinese. Breeds with high incidence of the B blood type are Abyssinian, Japanese
Bobtail, Birman, Persian, Scottish Fold, British Shorthair, Cornish Rex, Exotic Shorthail,
Somali, Sphynx, Turkish Van, Turkish Angora and Devon Rex [49].
The inheritance of the rare AB group is not well understood and the incidence of the
AB type is reported to be less than 1 %. Breeds that have the very rare type AB blood
Figure 11.1:
The Feline A & B Blood Typing
test kit.
™
Chapter 11
87
Page 96

11. Feline A, B and AB Blood Typing
include Birman, British Shorthair, Scottish Fold, Somali, and Sphynx. Somalis are more
likely than average to have the rare type AB blood [49].
11.1.2. Blood Transfusion Risks
Cats that are transfused, even once, with an incompatible blood type, are at risk for
a transfusion reaction. Cats with Type B blood exhibit an immediate and catastrophic
systemic anaphylactic reaction and a Hemolytic Transfusion Reaction (HTR) when
transfused with Type A blood, because of their natural high-titered anti-A antibody. As
an outcome death of the patient is extremely likely.
Cats with type A blood exhibit a natural low-titered anti-B antibody response when
transfused with type B blood. In this case, the reaction is mild but the transfused cells
will have a shortened life span. The recipient will develop moderate titers of anti-B
antibody that will result in a serious reaction if a subsequent incompatible transfusion is
administered [48].
11.1.3. Mating risks
Serious problems can also result from accidental or mismatched mating. A mating
of a type B queen with a type A tom will result in their type A kittens being at risk
for neonatal isoerythrolysis (“NI”), commonly known as “fading kitten syndrome”. The
maternal naturally occurring highly titered anti-A antibody occurs in the colostrum where
from it can be absorbed by the newborn kittens. The absorbed antibody attacks the
kittens’ type A erythrocytes. Although the kittens can seem normal at birth, they develop
signs after nursing, fade and die within the first days of life. Determining the blood type
of the queen and the tom prior to mating, coupled with appropriate genetic counseling,
can minimize the risk of NI. Furthermore, immediate blood type determination of the
newborn kittens will alert the client to remove the kittens and to begin surrogate nursing
where necessary [48].
11.2. Test Specifications
The Feline Blood Typing test cartridge used with the Heska Element COAG™Analyzer
is intended for use to classify cats as A positive, B positive, or A and B positive. Test
results obtained under normal operating conditions have an accuracy of 99.31 %.
All components of the test kit are stable at refrigerated temperatures (
2◦Cto25◦C
warmed to room temperature, the cartridge must be used within that day and should not
be returned to the refrigerator.
88
). Kits and components should not be exposed to direct sunlight. Once
36 °Fto77 °F
or
Page 97
11.2. Test Specifications
The time it takes to perform a blood type determination with the Heska Element COAG
Analyzer depends on factors such as type of test and test environment. At room temperature, it takes about 90 seconds for the instrument to warm up the test cartridge to
or
37◦C
. Lower and higher room temperatures may change the warm up time. Once
the procedure of the assay begins, an answer should be available within 5 minutes.
Each Heska Element COAG™/RapidVet®Test cartridge contains a monoclonal antibody
or a lectin specific to the A antigen on a red blood cell or to the B antigen. Each cartridge
is individually packed with a sealed pouch containing a desiccant bag to keep it moisture
free. A torn or otherwise damaged pouch may allow moisture to reach the test cartridge
and adversely affect performance. Do not use a test cartridge from a damaged pouch.
Open the pouch just prior to use. Once the pouch has been opened, the test cartridge
should be used within 10 minutes.
Table 11.1:
Measurement Technology Agglutination detection using light absorbance
Species Feline (Cat)
Possible results A, B or AB
Sample Type Diluted whole blood
Sample Volume 100 µL of whole blood (in cases with low hematocrit of
Sample Collection EDTA collection tube
Sample Stability Use the blood within the day of collection. Do not dilute
Cartridge Stability Do not expose the cartridges in the foil pouch to direct
Storage Store at 36 °F to 77 °F/2◦C to 25◦C
Shelf Life The expiration date is printed on the pouch label.
Warm-up time
Time to results Approximately 5 minutes from adding the sample to the
Specifications for the Heska Element COAG™/RapidVet®Feline Blood Typing Test.
the blood (below 29 %), more volume will be needed.)
the sample until prompted to do so on-screen.
sunlight, or leave at room temperature for more than
one day.
Use cartridges taken from the foil pouch within 10
minutes
Approximately 90 seconds. The actual time depends on
the blood sample and test environment. Very low or high
ambient temperatures may change the warm-up time.
cartridge
™
99 °F
Chapter 11
89
Page 98

11. Feline A, B and AB Blood Typing
The expiration date of each cartridge is printed on the pouch label. Do not use the
cartridge after the expiration date.
The test cartridge can be used only once and only in combination with the Heska
Element COAG™Analyzer. Once used, the cartridge, pipette tip and diluent tube should
be considered as potentially infectious. Dispose of them properly in accordance with the
policies and regulations at the place of operation.
Always strictly adhere to all bio-hazard safety guidelines pertaining to handling
!
and disposing of animal blood samples.
11.3. Test Requirements
11.3.1. Materials and Equipment
In order to perform a Feline Blood Typing Test with the Heska Element COAG™Analyzer,
the following materials and equipment are required.
The following materials are required but not provided with the Feline Blood Typing Test:
• Heska Element COAG™Analyzer
• Syringes with a 22 gauge or larger needle
• Sample collection tube with EDTA as the anticoagulant
• 100 µL fixed volume pipette.
The following materials are required and supplied with the Feline Blood Typing Test:
• Feline A & B Blood Typing cartridge
•
Tube pre-filled with diluent (one for each cartridge). Each tube contains phosphate
buffered saline (PBS) at pH 7.4 and contains enough fluid to perform one test on a
cartridge.
• Pipette tips.
•
Package insert for the Feline Blood Typing Test (shipped with each box of cartridges)
90
Page 99

11.4. Limitations
11.3.2. Blood Sample Preparation
Use a syringe with a 22 gauge or larger needle to avoid hemolysis. Collect blood directly
into the EDTA test tube. The result of any blood analysis is dependent on the quality
of the blood sample. Follow standard blood-drawing procedures at all times and pay
special attention to the following:
•
Blood samples, if possible, should be collected within the day of testing. Ensure
proper mixing of the anticoagulant into the blood sample.
•
If a blood rocker is not available, slowly invert the tube containing the blood sample
10 times every 10 minutes.
•
The blood sample should be kept at room temperature, in case the testing is
delayed.
The accuracy of the Feline A & B Blood Typing Test is mainly dependent on
!
the quality of the blood sample. The way the blood is collected and has been
handled can greatly affect the blood quality.
11.4. Limitations
The veterinarian is always the final arbiter of test result interpretation and impact on
diagnosis. Therefore it is highly recommended that Heska Element COAG™test results
should be scrutinized in the light of a specific patient’s condition and medical history, as
well as current or potential therapy.
Any test result exhibiting inconsistency with a patient’s status should be repeated and/or
supplemented with additional diagnostic tests.
The accuracy of Heska Element COAG™Analyzer test results is largely dependent on
the quality of the blood specimen.
•
The quality of the blood sample is dependent upon the blood sample collection, the
proper blood to EDTA ratio, and the proper introduction of the sample and diluent
into the sample well. Please observe all precautions cited in this manual and use
good blood sample collection techniques at all times.
•
Being an absorption assay, the test accuracy is dependent on proper dilution of
the whole blood before adding the sample to the cartridge. Always measure the
hematocrit of the sample prior to testing and follow the on-screen dilution procedure.
•
Auto-agglutinated or hemolyzed blood samples may cause false results. The Analyzer is unable to distinguish RBC agglutinates from plasma containing hemoglobin.
Always verify that the sample is not hemolyzed when measuring the hematocrit.
As a general guideline, the plasma must be clear and more yellow than red. If the
sample is severely hemolyzed a new blood sample should be drawn.
Chapter 11
91
Page 100

11. Feline A, B and AB Blood Typing
•
Blood samples with a hematocrit of less than
recommended for use with the Heska Element COAG™Analyzer. Blood samples
outside this range may result in an instrument error or inaccurate test result.
4 %
or greater than
60 %
are not
11.5. Test Procedure
Before performing any tests, be sure that the Heska Element COAG™Analyzer has been
installed properly in accordance with the instructions in this guide. See
details regarding how to set the Analyzer up correctly.
Verify that you have the necessary materials and equipment for performing a Feline A &
B Blood Typing test, see Section 11.3.
Chapter 3
for
Step 1:
Step 2:
Step 3: Determine the hematocrit of the sample.
Step 4:
Step 5:
Step 6:
Remove a pouch with a test cartridge from the refrigerator and let the pouch
and cartridge reach room temperature
starting the test.
Draw blood from the patient into a tube coated with or containing EDTA as an
anticoagulant. The assay requires only 100uL of whole blood but the syring or
tube should be full to ensure the correct concentration of EDTA. If the blood
type is not to be determined immediately, nutrients such as CPDA should not
be added.
Remove the cartridge and pipette tip from the pouch and the pre-filled tube
with diluent from the kit box.
From the Home Screen, touch the
Blood Typing button to start the test.
When the message Please insert new cartridge
flashes on the screen, insert the Feline A & B
Blood Typing test cartridge completely into the
cartridge slot on the front of the Analyzer. The
cartridge must have the label facing upward
and the sample well sticking out of the Analyzer.
59 °Fto86 °F/15◦Cto30◦C
Feline
before
92
 Loading...