

HeathCo 67WDB00TX User Manual

Wireless Push
Button Insert
(Style may vary from illustration)
The Heath®/Zenith Wireless Push Button Insert
works with any Heath
• Patented Technology
• Battery powered push button - No wires to
run.
• 128 selectable codes allow more than one
chime system in the same house.
• Factory installed batteries.
•
LED halo lighted push button (see Halo Lighted
Push Button Feature for more information).
• Fits any mounting plate with a 5/8" diameter
®
/Zenith wireless chime.
opening.
• Works with stucco or aluminum siding.
© 2008 HeathCo LLC 598-1312-00
WARNING: To prevent possible SERIOUS INJURY
or DEATH:
• NEVER allow small children near batteries.
• If battery is swallowed, immediately notify doctor.
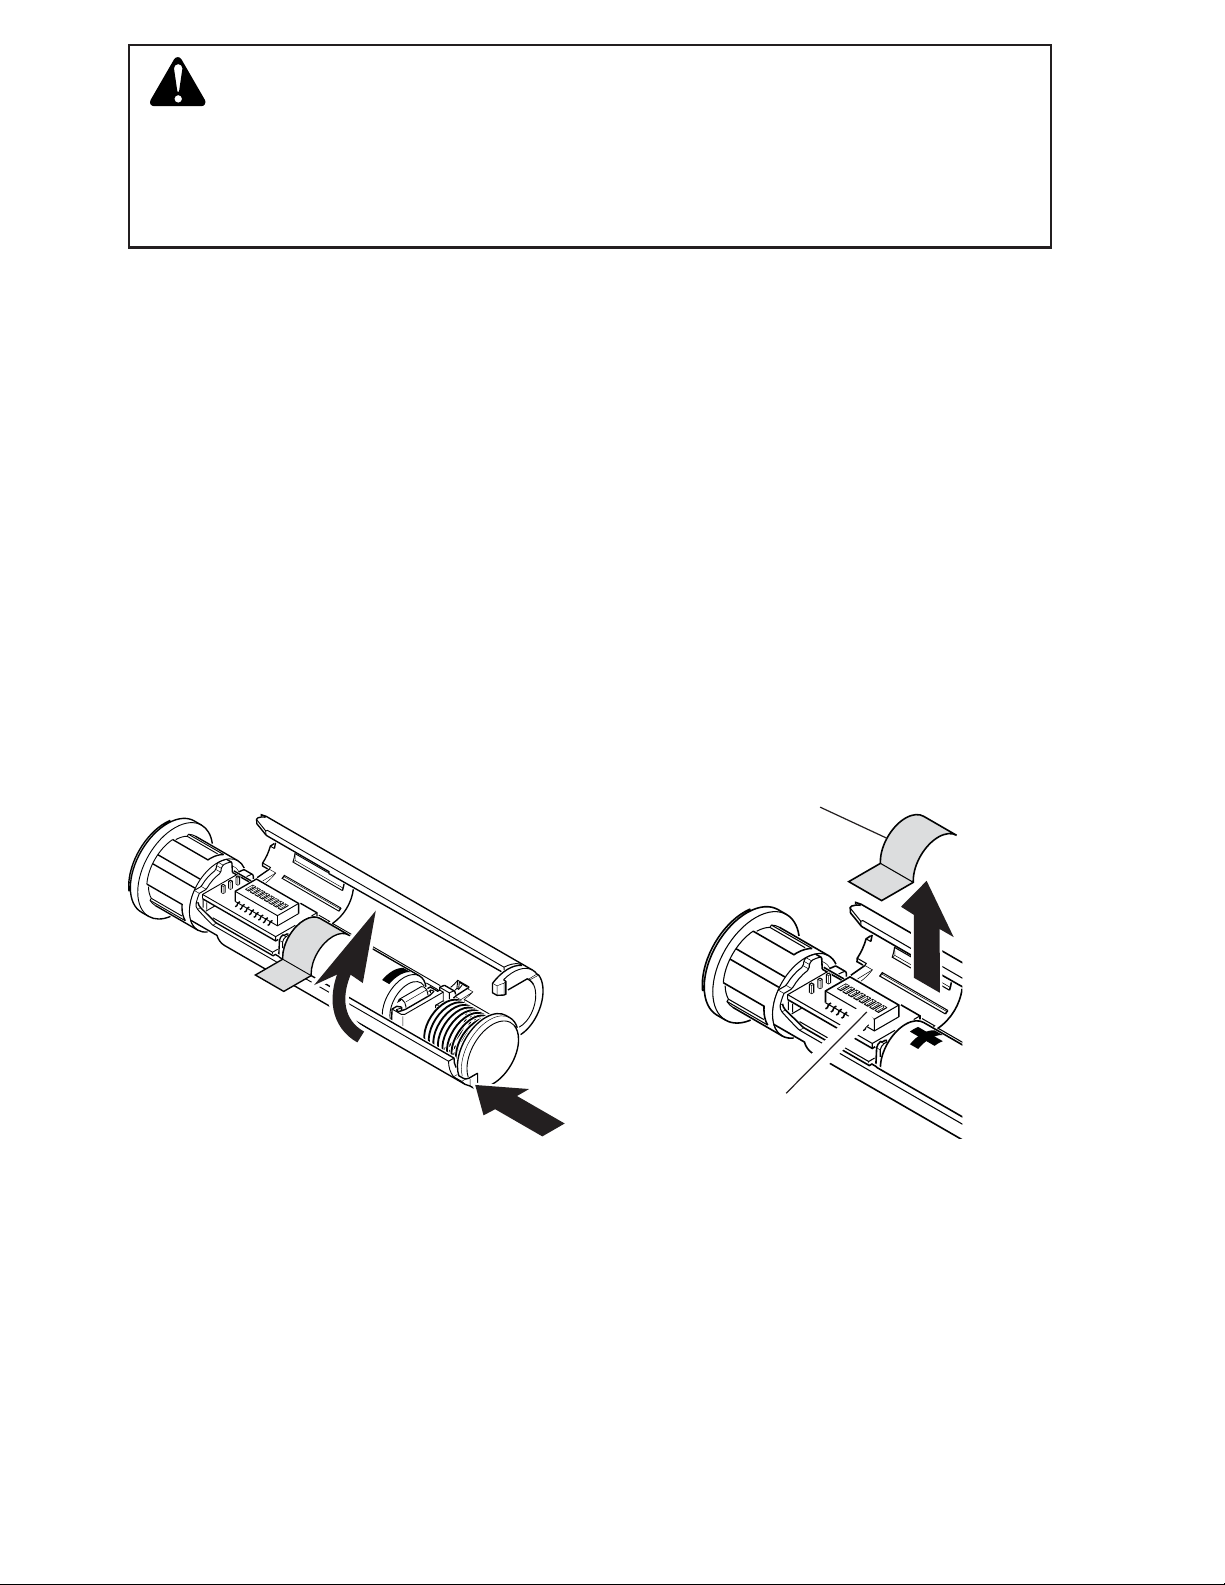
1. Open battery cover. To open battery, press in tab on back
of push button and lift cover
to activate factory installed battery
Troubleshooting for replacement battery information.
2. Test range. Temporarily position push button where you
want it mounted. Press push button to verify chime and
push button work properly. If chime does not sound, see
Troubleshooting.
(see Figure 1). Pull battery tab
(see Figure 2). Note: See
Pull tab to
activate battery
Dip Switches
Figure 1 Figure 2
DRAFT COPY
-2-
598-1312-00
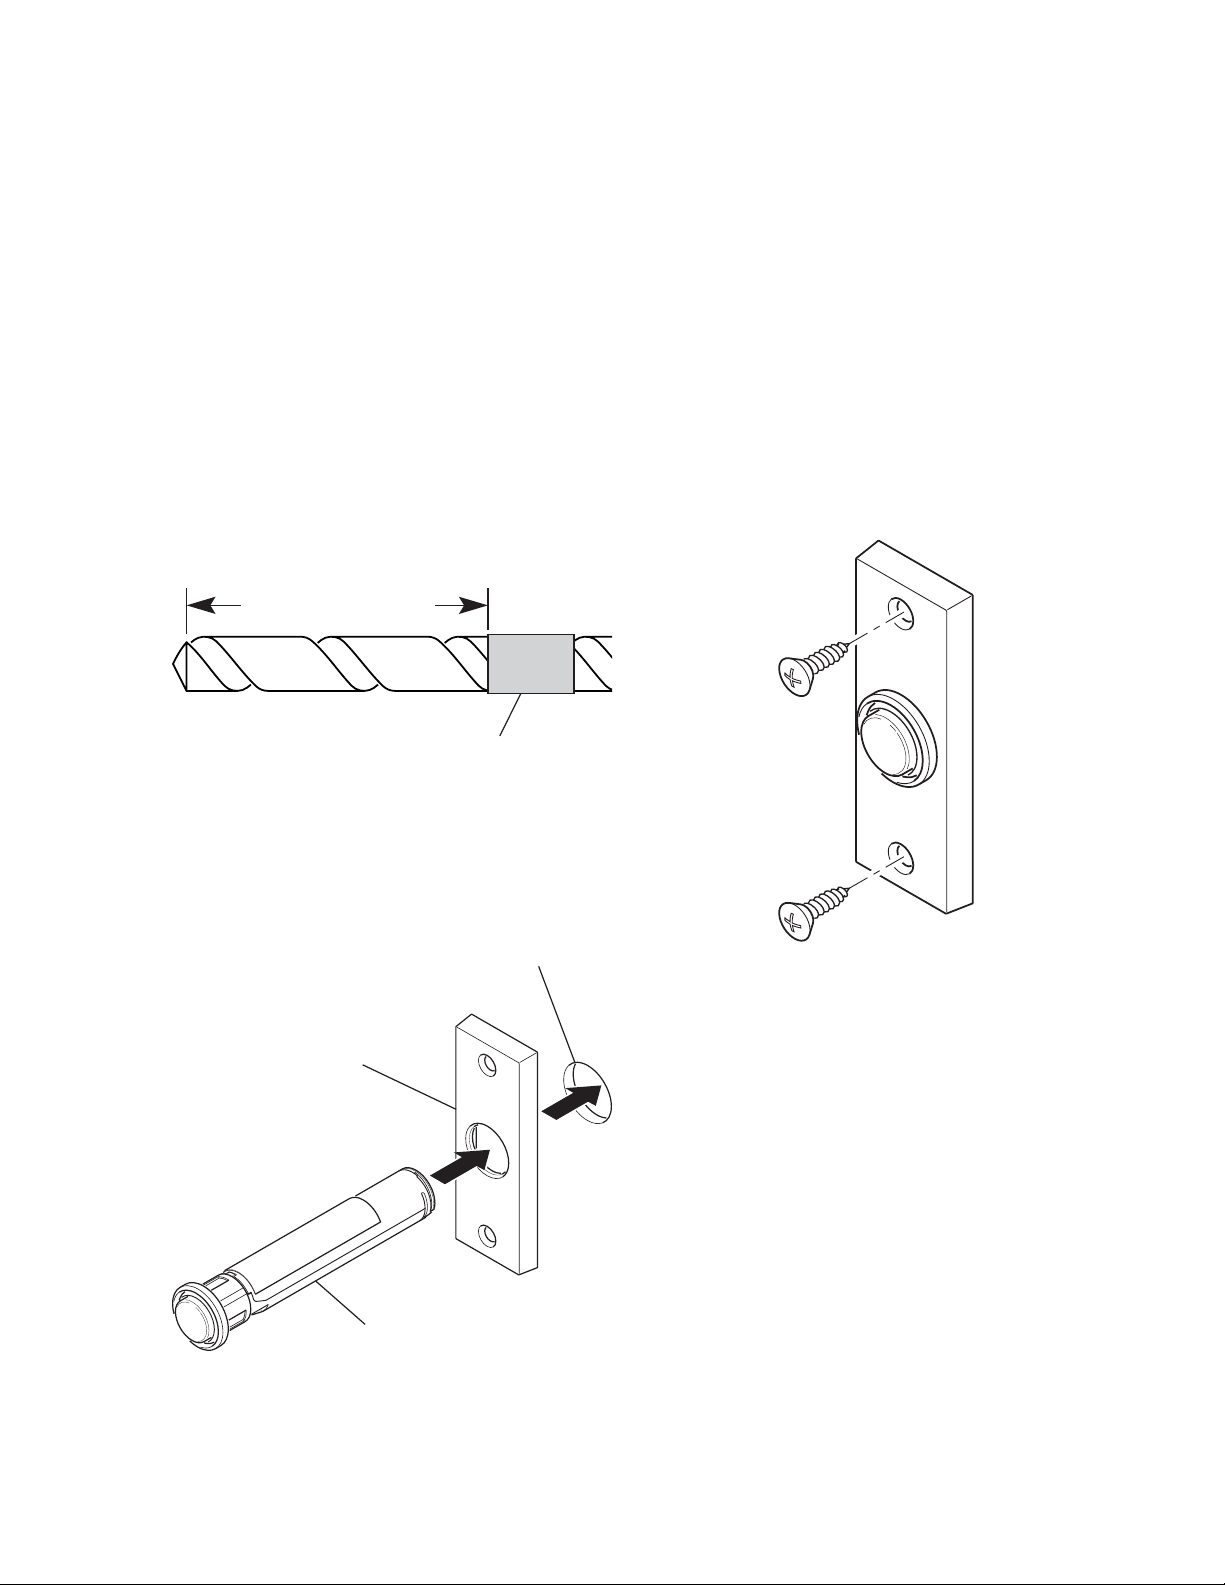
3. Mount push button. Note: Use a standard 5/8" drill bit. Do
not use a spade-type bit.
1
• Use masking tape to mark 3
Figure 3).
• Drill 5/8" diameter hole 3 1/2" deep in desired mounting
location.
• Fully insert push button into mounting hole. Insert push
/2" depth on drill bit (see
button into mounting hole
• Attach mounting plate to wall with screws included with
plate
31/2" (89 mm)
5/8" Hole Drilled 3
(see Figure 5).
Masking Tape
Figure 3
1
/2" Deep
(see Figure 4).
Push Button
Mounting Plate
DRAFT COPY
Figure 4
598-1312-00
Figure 5
Push Button Insert
-3-
 Loading...