

HeathCo 60WRC05TX User Manual
Wireless 6-Button
ON
1 2 3 4
Model SL-6005
Remote Control
Features
• Eight selectable channels available, so multiple remotes can be used in the
same home.
• Car visor clip included for convenience.
Car Visor Clip
Channel 1, DIM
Channel 1, ON
Channel 1, OFF
Remote Control
Eight selectable channels allow the user to operate several
systems at different locations in your home. If purchasing
more than one wireless control system, select different
operating channels for each system or they will interact with
each other.
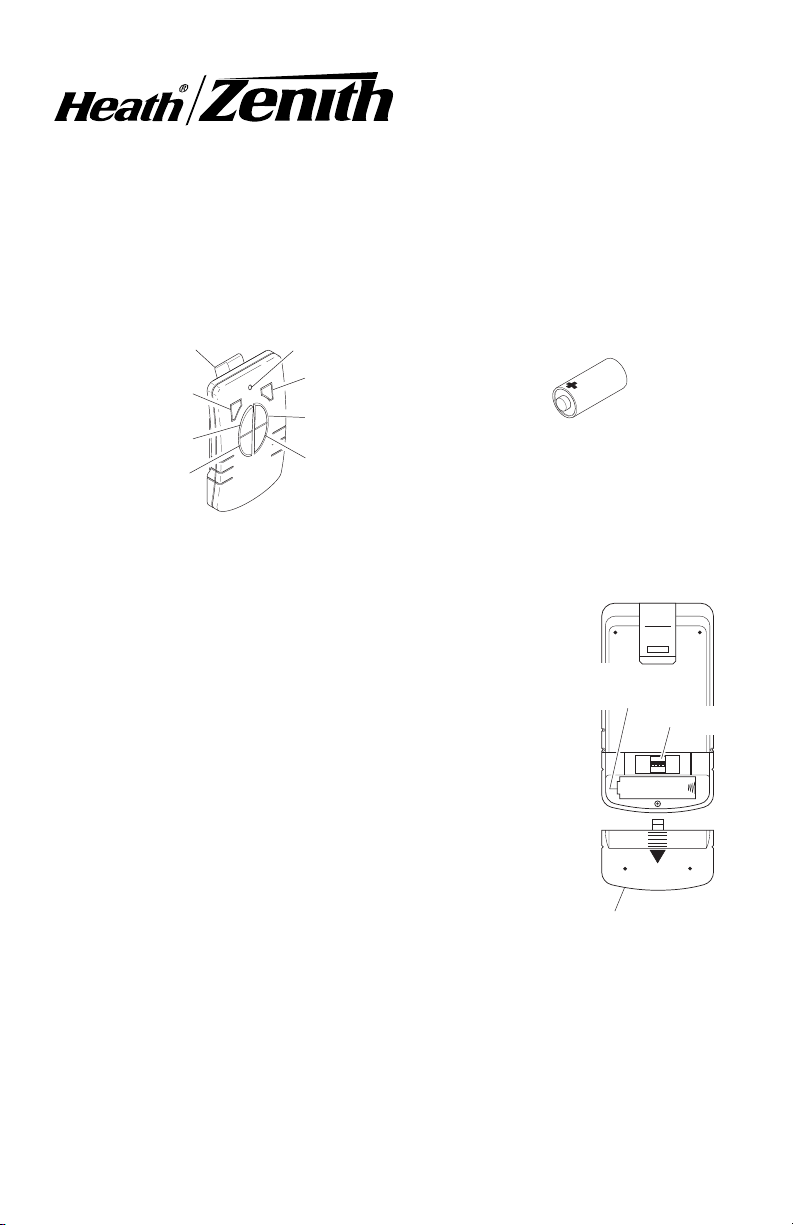
1. Install alkaline 12-volt remote battery (A23 type).
Remove cover from back of transmitter by pressing on
it with your thumb and sliding it off as shown in Figure
1. Using outline of battery chamber as a guide, align
battery with chamber and insert battery into remote.
Slide cover back onto transmitter.
2. Remote Control Functions.
Channel 1/2 ON: Turns ON any devices set to the same
channel as this remote control.
Channel 1/2 OFF: Turns OFF any devices set to the
same channel as this remote control.
Channel 1/2 DIM: Activates the DIM feature for any devices used with this
remote control that have the DIM feature built-in.
DRAFT COPY
LED Indicator Light
Channel 2, DIM
Channel 2,ON
Channel 2, OFF
Operation
12-Volt (A23 Type)
Battery (Included)
Positive
Terminal
Jumpers
Battery
Battery Cover
Figure 1
© 2001 DESA International 598-1116-00
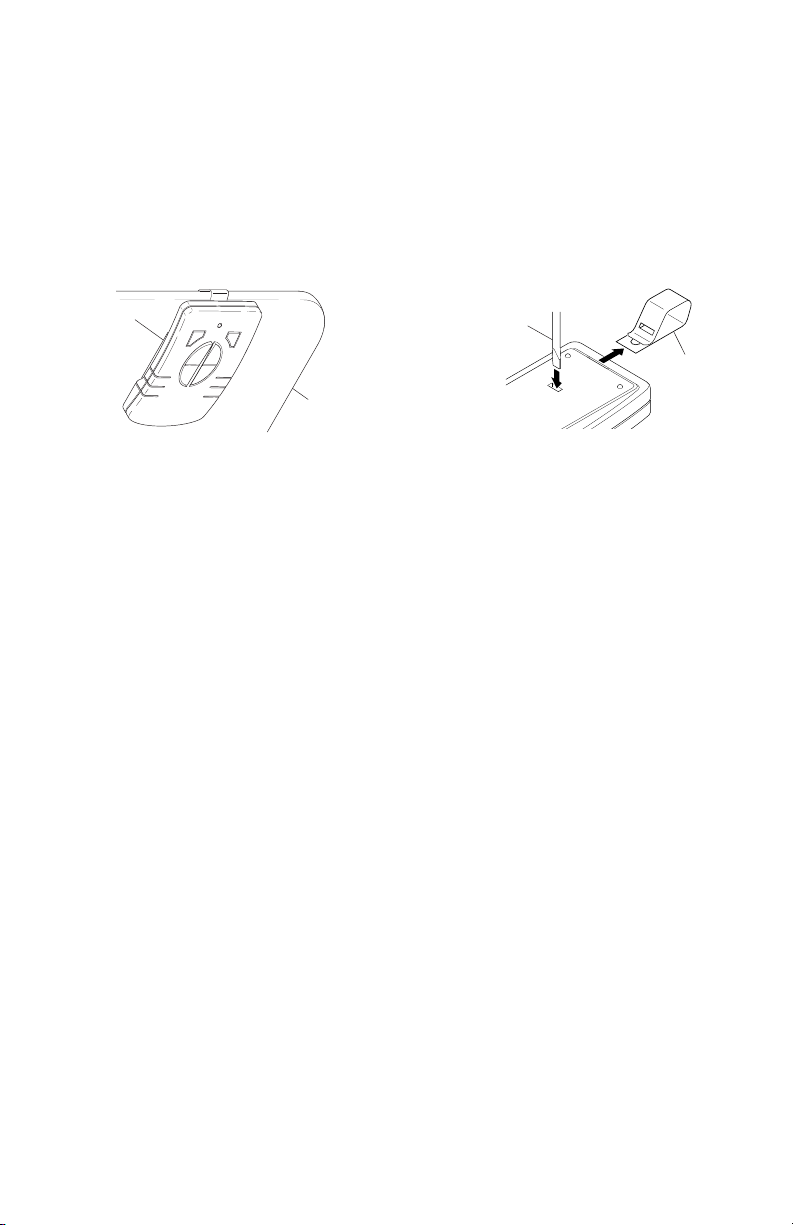
Car Visor Clip
The remote control is equipped with a removable car visor clip for added
convenience. The car visor clip may be removed to allow the remote to lie flat on
table tops or other horizontal surfaces.
1. Attach car visor clip to car visor as shown in Figure 3.
2. To remove car visor clip. Insert a small flat-head screw driver into slot on
back of remote. Gently push portion of clip inside of remote with screwdriver
while pulling clip out of remote from top (see Figure 4).
Remote
Control
Screwdriver
Visor Clip
Car Visor
Figure 3 Figure 4
DRAFT COPY
2
598-1116-00
 Loading...