

HeathCo 60WCP07TX Users Manual
Plug-In Control
9V Battery
Model SL-6007
Panel
Features
• Operational range of up to 100 feet.
• Controls all Heath®/Zenith Remote Home™ line
of products.
• Adds programmable ON/OFF function for up to
16 channels of remote controlled products.
• UL/cUL listed power supply.
• FCC/IC tested and approved.
• 12/24 Hour Digital Clock Display.
• 9V battery backup to prevent program loss.
• Flash control on compatible receivers when using the Panic feature.
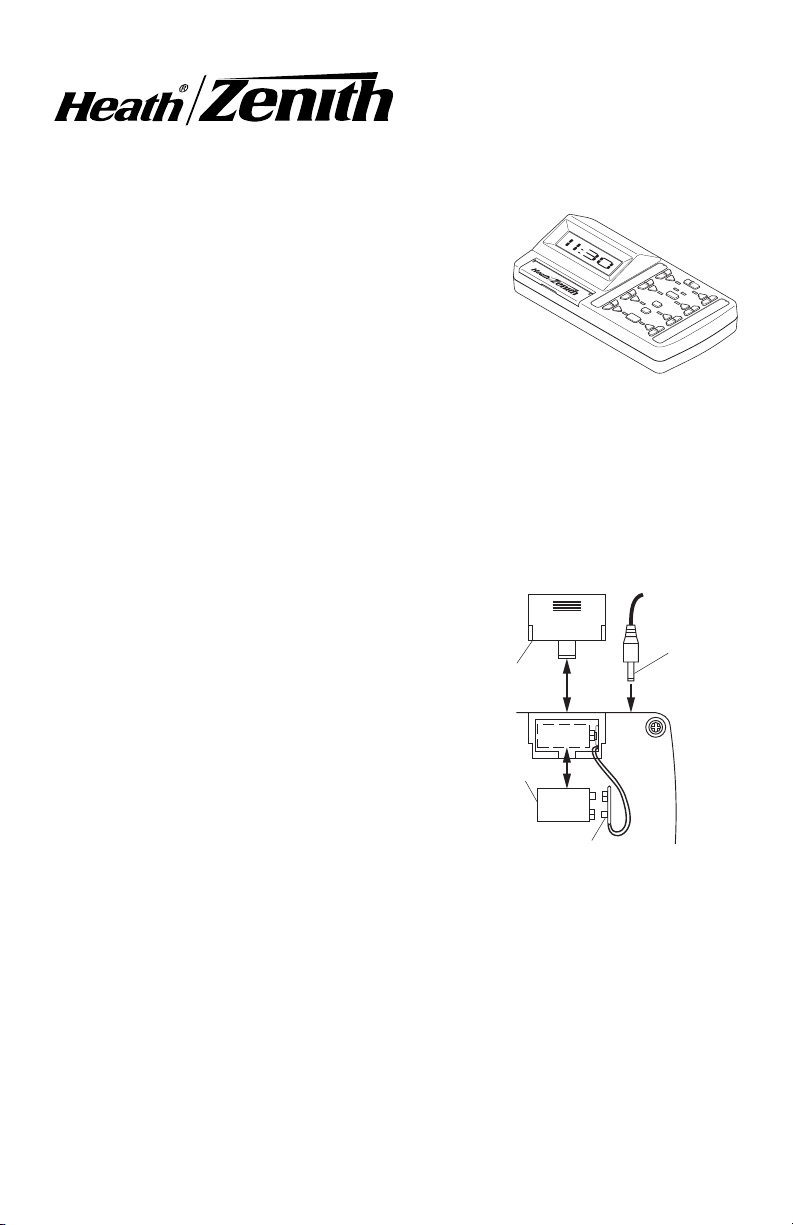
Battery Installation and Battery Backup
The SL-6007 is designed for 120VAC operation using the included DC power
converter, but has the added feature of an onboard battery backup to prevent
program memory loss. To install rechargeable battery:
1. Remove battery cover on rear of hous-
ing by sliding cover down.
2. Install rechargeable 9V battery accord-
ing to polarity markings.
3. Close battery compartment by revers-
ing the previous instructions.
Upon power failure, the battery backup will
automatically shut down all non-essential
functions. The display and keypad will not
work. The battery backup will last in excess of
5 hours. When power is restored, the unit will
restart the display and set all channels to the
OFF position. All programming will be maintained unless the back up reserve is depleted. If the battery is depleted, reprogramming of the time and automated functions will
again be required.
Battery
Cover
9 Volt
Battery
9 Volt Battery Connector
Installing 9 Volt Rechargable
Battery and DC Power
•
AM
•
PM
•
A
ON
OFF
DIM
Connector
ON
O
FF
ON
O
FF
DIM
ON
O
FF
DIM
ALL
ON
ALL
O
FF
DIM
PANI
C
DIM
ON
OFF
DC Power
Connector
DIM
GRO
A
UP
B
1
MO
D
DIM
2
E
ON
O
FF
DIM
O
N
O
FF
ON
OFF
DRAFT COPY
© 2002 DESA International 598-1136-00
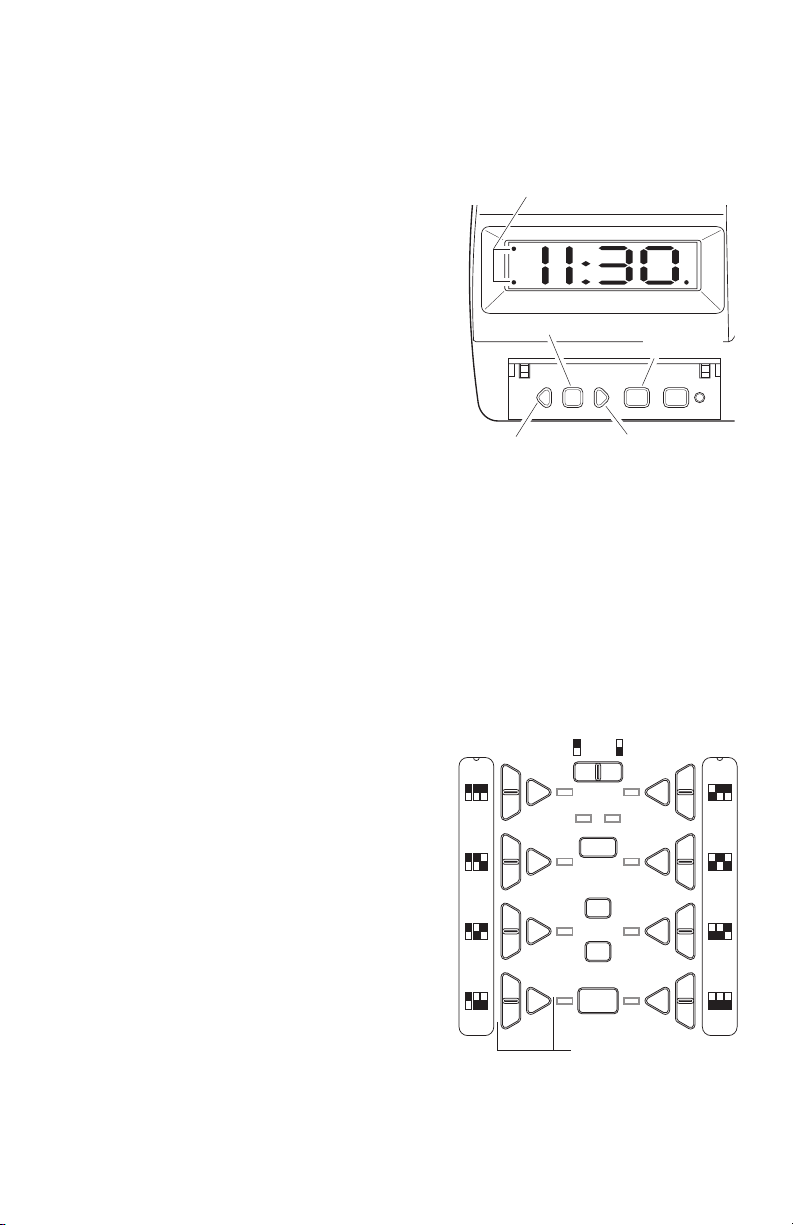
Setting The Time
The following buttons (located under the front cover) are used to set the time:
TIME SET, SELECT, and the – (LEFT) and + (RIGHT) arrow buttons.
1. Press the TIME SET button. The hour
will highlight.
2. Press the LEFT or RIGHT arrow buttons
to adjust the hour (Hint: Holding the arrow
button down will scroll through the numbers. Release the arrow button when the
desired hour is displayed).
Note: When in 12-hour mode the AM and
PM indicators will light indicating which
part of the day is currently selected.
3. Press the SELECT button. The minute
will highlight.
4. Press the LEFT or RIGHT arrow buttons to adjust the minute(Hint: Holding
the arrow button down will scroll through
the numbers. Release the arrow button when the desired hour is displayed).
5. Press the SELECT button. The 12/24-hour mode becomes adjustable.
6. Press the LEFT or RIGHT arrow buttons to toggle between 12-hour and 24-hour
display mode. Note: The AM or PM indicator will light when the 12-hour mode is
selected. If neither AM nor PM indicator is lit, the 24-hour mode is selected.
Note: If a mistake is made, return to the hour, minute, or 12/24-hour indicator at
any time by using the SELECT key to scroll to the desired position.
When the desired selections are completed, press the TIME SET button.
AM/PM/24-Hour Indicators
AM
PM A
Select Button
– Select Time Set Program+
– (Left) Arrow
+ (Right) Arrow
Setting the Time
Time Set
Button
Setting Receiver(s) Dip Switches
The Control Panel transmitter has
preprogrammed dip switch settings for each
channel. In order for the Control Panel to
communicate with a receiver, the dip switches
on the receiver must correspond with the
preprogrammed dip switch settings of the
channel you wish to use. Note: There are no
dip switches on the Control Panel that require setting.
1. Determine which receiver(s) will be op-
2. Set receiver(s) dip switches 1, 2, and 3
DRAFT COPY
erated by which channel.
to match the dip switch settings for the
channel you wish to operate the
receiver(s).
2
(Dip Switch 4 in DOWN position)
ON
DIM
OFF
1 2 3
ON
DIM DIM
OFF
1 2 3
ON
DIM DIM
OFF
1 2 3
ON
DIM DIM
OFF
1 2 3
GROUP
AB
1 2
MODE
ALL
ON
ALL
OFF
PANIC
(Dip Switch 4 in UP position)
DIM
Channel (Includes
ON, OFF, DIM)
Preprogrammed Dip Switch
Settings
598-1136-00
ON
OFF
1 2 3
ON
OFF
1 2 3
ON
OFF
1 2 3
ON
OFF
1 2 3
3. Determine whether the receiver(s) will be in Group A or B.
4. Set dip switch 4 on the receiver to the same setting as Group A or B.
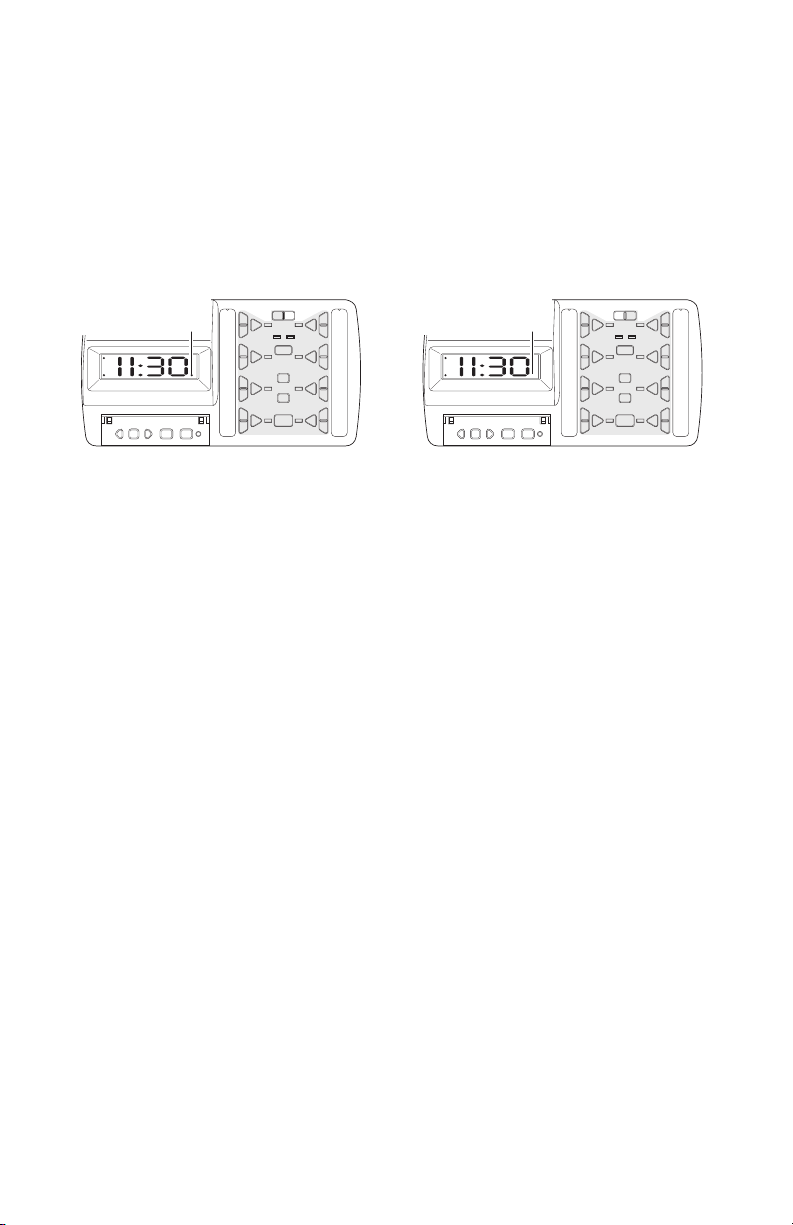
Control Descriptions
GROUP: Allows each channel to be used for 2 different groups of receivers (for
a total of 16 channels). It also allows for the programming of 2 separate groups of
8 channels, for a total of 16 programmable (ON/OFF) combinations. To choose
Group A, press the left side of the switch (the Group Indicator will be on). To choose
Group B, press the right side of the switch (the Group Indicator will be off).
Group Selection
Indicator ON
AM
PM A
–Select Time Set Program+
Group A Selected
AB
ON
DIM
OFF
12
ON
DIM DIM
OFF
ON
DIM DIM
OFF
ON
DIM
OFF
GROUP
ON
DIM
OFF
MODE
ON
OFF
ALL
ON
ON
OFF
ALL
OFF
ON
PANIC
DIM
OFF
Group Selection
Indicator OFF
AM
PM A
– Select Time Set Program+
Group B Selected
ON
DIM
OFF
ON
DIM DIM
OFF
ON
DIM DIM
OFF
ON
DIM
OFF
GROUP
AB
12
MODE
ALL
ON
ALL
OFF
PANIC
ON
DIM
OFF
ON
OFF
ON
OFF
ON
DIM
OFF
Group Selection
ALL ON: Turns ON all light fixtures programmed for either Group A or Group B.
Each channel LED indicator will light in sequential order as units are turned on.
To perform this function, select either Group A or Group B then press ALL ON.
If lights are off or dimmed (where applicable) they will be turned on full power.
ALL OFF: Turns OFF all light fixtures programmed for either Group A or Group
B. Each channel LED indicator will light in sequential order as units are turned
on. To perform this function, select either Group A or Group B then press ALL
OFF. If lights are on or dimmed (where applicable) they will be turned off.
PANIC: Turns ON all light fixtures programmed for either Group A or Group B.
Light fixtures within the selected group that have Flash capability will FLASH
when this command is received. Each channel LED indicator will alternately light
in sequential order. ALL OFF will turn off all channels within the selected group
and reset all light fixtures to normal operating mode.
Channel ON: Turns ON all light fixtures that are configured to work with a
particular channel. To perform this function, press the ON button located by the
channel number desired (between 1 and 8). When ON is pressed, the channel
DRAFT COPY
LED will momentarily light.
Channel OFF: Turns OFF all light fixtures that are configured to work with a
particular channel. To perform this function, press the OFF button located by the
channel number desired (between 1 and 8). When OFF is pressed, the channel
LED will momentarily light.
598-1136-00
3
 Loading...