

Hayward AquaConnect User manual
AquaConnect™
Troubleshooting Guide Residential
TSG-ACHN110d
Copyright 2017 Hayward Industries Inc.
Safety Precautions
Warning
High Voltage Electrocution Hazard
Hazardous voltage can shock, burn, cause serious injury
and or death. To reduce the risk of electrocution and or
!
2
electric shock hazards:
• Only qualified technicians should remove the
panel
• Replace damaged wiring immediately
• Insure panel is properly grounded and bonded

Table of Contents
How it Works
Pg.
4-
Status LEDs
6
How To:
Pg.
7-
Train the Device & Perform a Range Test
8-9 Create an Account & Add a Pool
10-12
Find IP Address (mobile)
13-14
Find
15-17
Setup and Suspect a Sub Account
18-24
Troubleshooting:
Pg.
25-44
1. LAN Function
26-30
2. Unit Not Communicating
31-35
3. Web/App Account: Login Failure
36-37
4. Endless Refresh
38-41
5. NO LEDs Illuminated/Blank
42-44
Additional Information:
Pg.
45-47
A Note of Frequent
46
Reading Serial Numbers
47
& Compatibility Status LEDs
IP Address (pc)
Not Working
OR Failure to Refresh
5
24
3
Power Outages
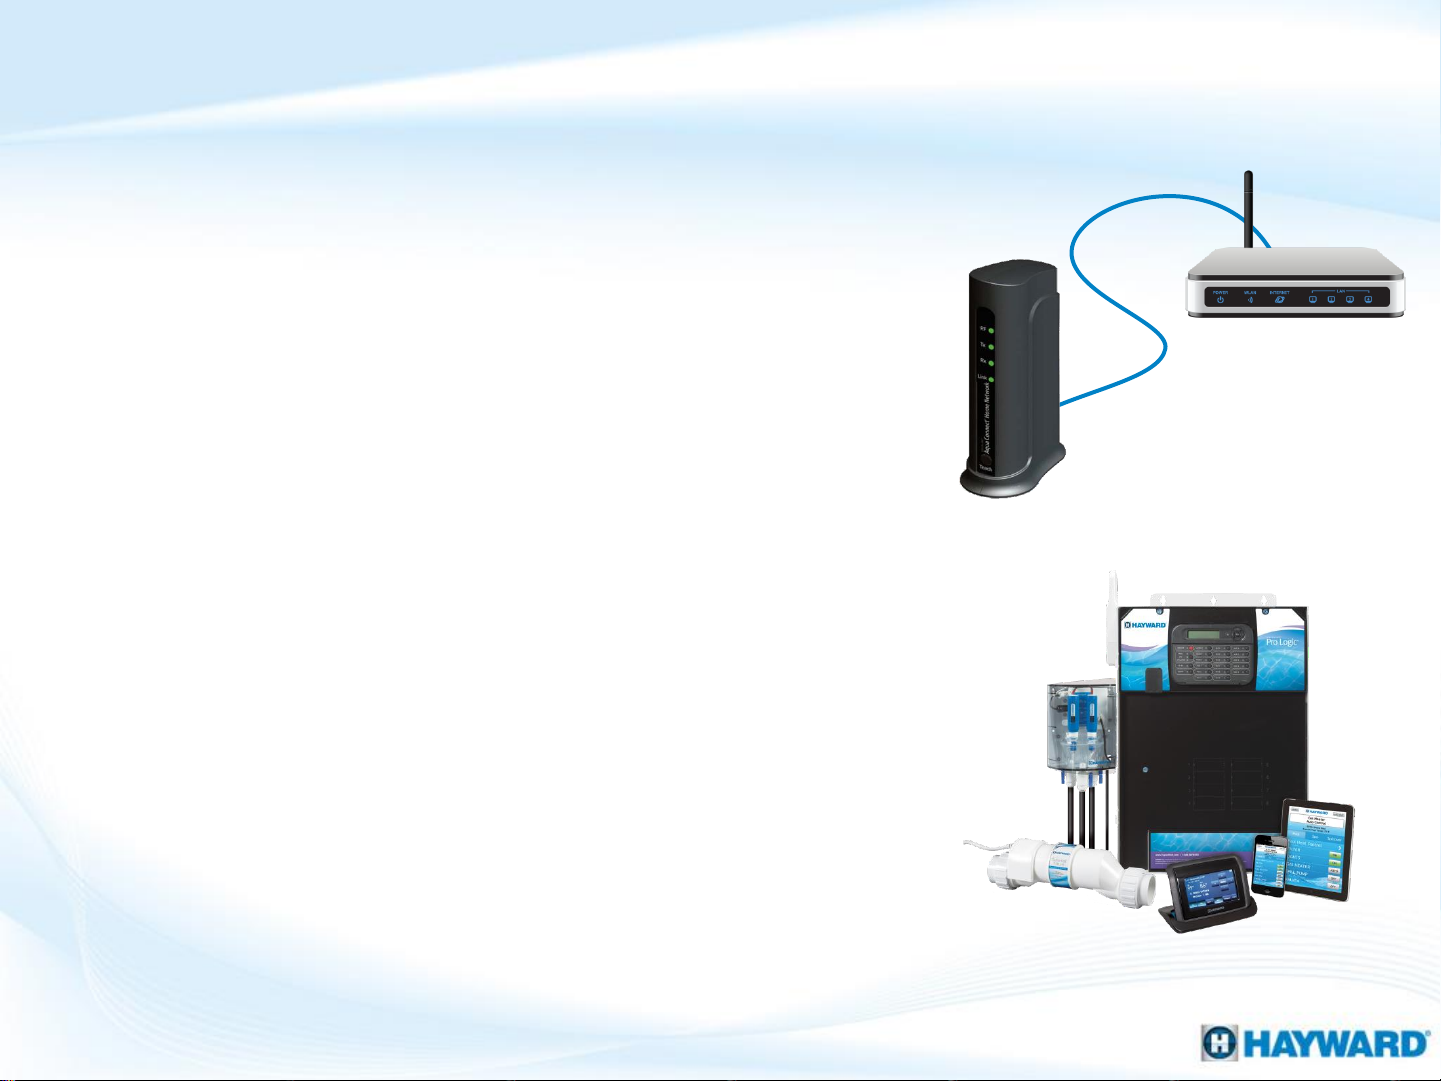
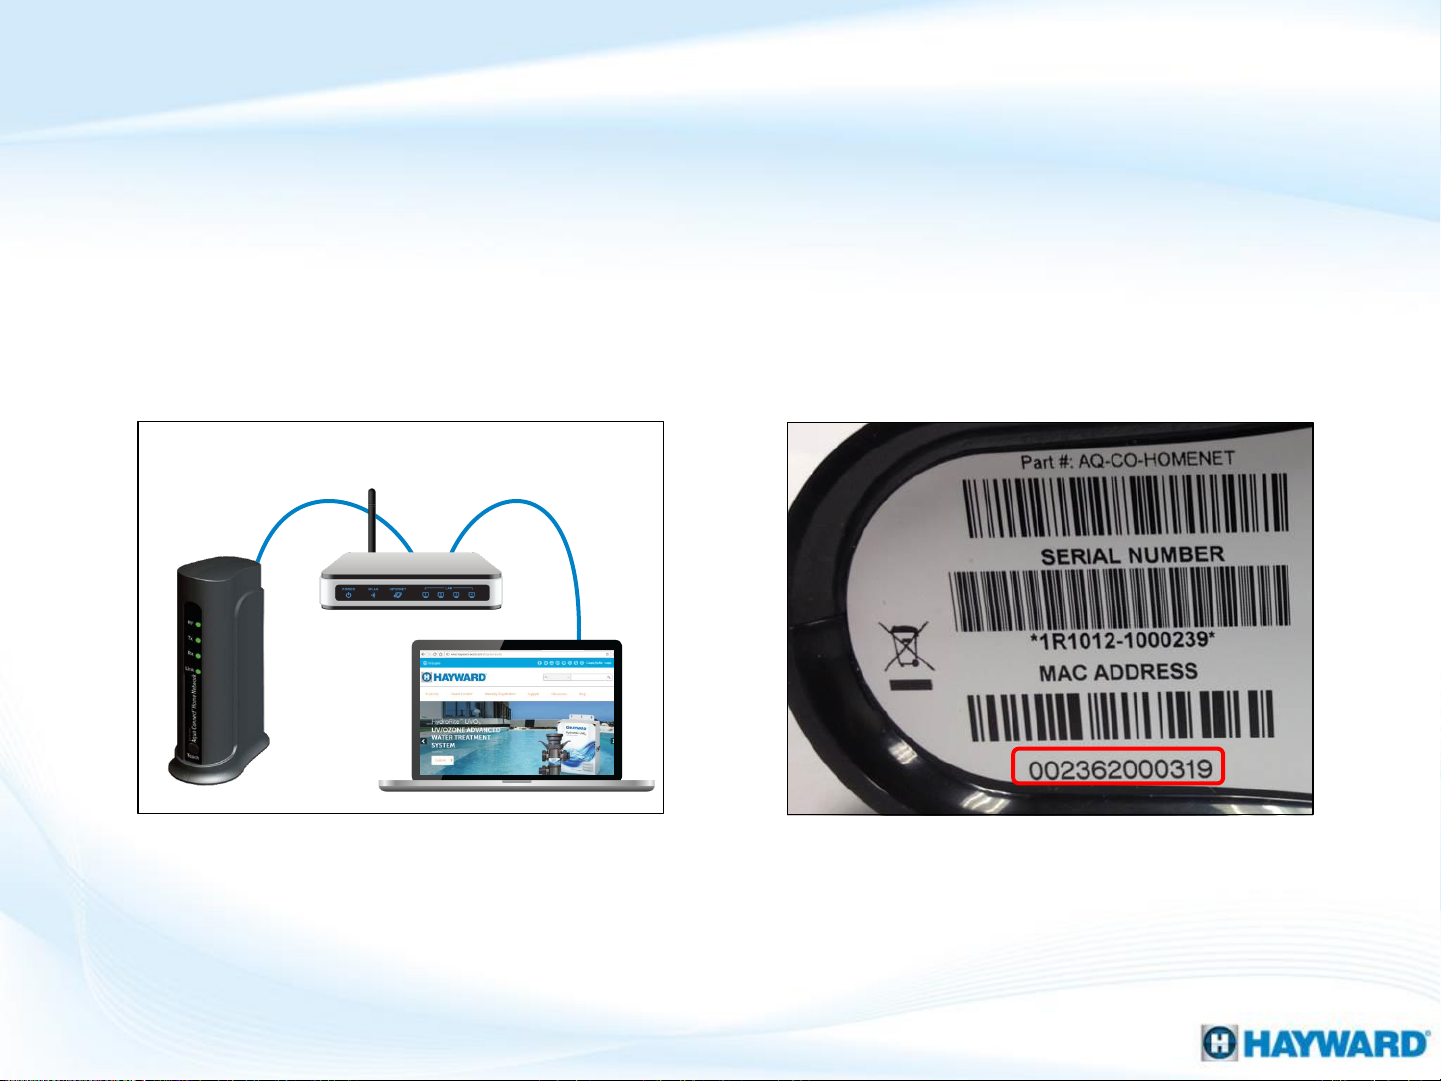
AquaConnect Home Network: How It Works
• The AquaConnect Home Network Device
(ACHN) acts as a gateway between a
network router and compatible Hayward
controllers.
• The AquaConnect HN device requires a
direct Ethernet connection to the home
router (preferably located within 3 feet of
the home router).
4
• Once the AquaConnect is synced to the
controller (using an RF pairing method),
the device is then connected to the
network via an Ethernet connection. This
allows the AquaConnect to send/receive
commands to and from the controller and
translate them in a manner that can be
used through a web interface.
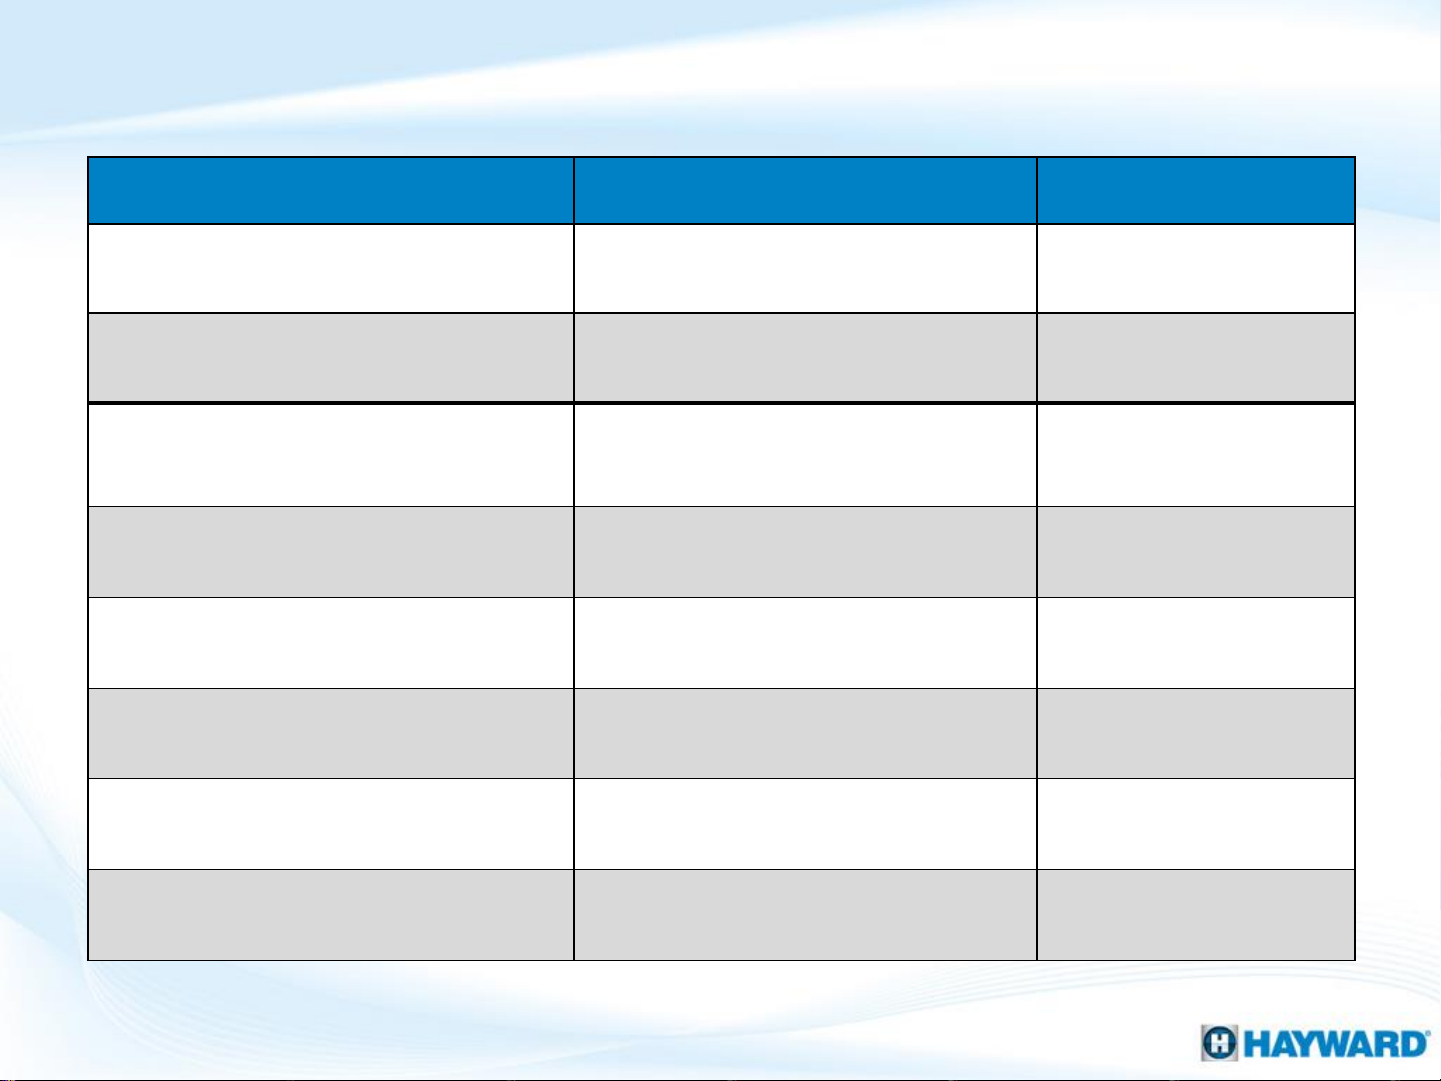
AquaConnect (AQHN): Compatibility
Equipment
AquaConnect
2
ProLogic
AquaPlus
AquaLogic
E
OnCommand
AquaRite
Model Min. Firmware
AQ-CO-HOMENET 1.10
nd
Generation Antenna AQL2-BASE-RF 3.00
All models (including PL-P-4) 4.20
PL-PLUS & PL-PLUS-16V 4.20
All models NOT COMPATABLE
-Command 4 All models 2.90
5
All models 1.10
Pro All models 1.20 or higher
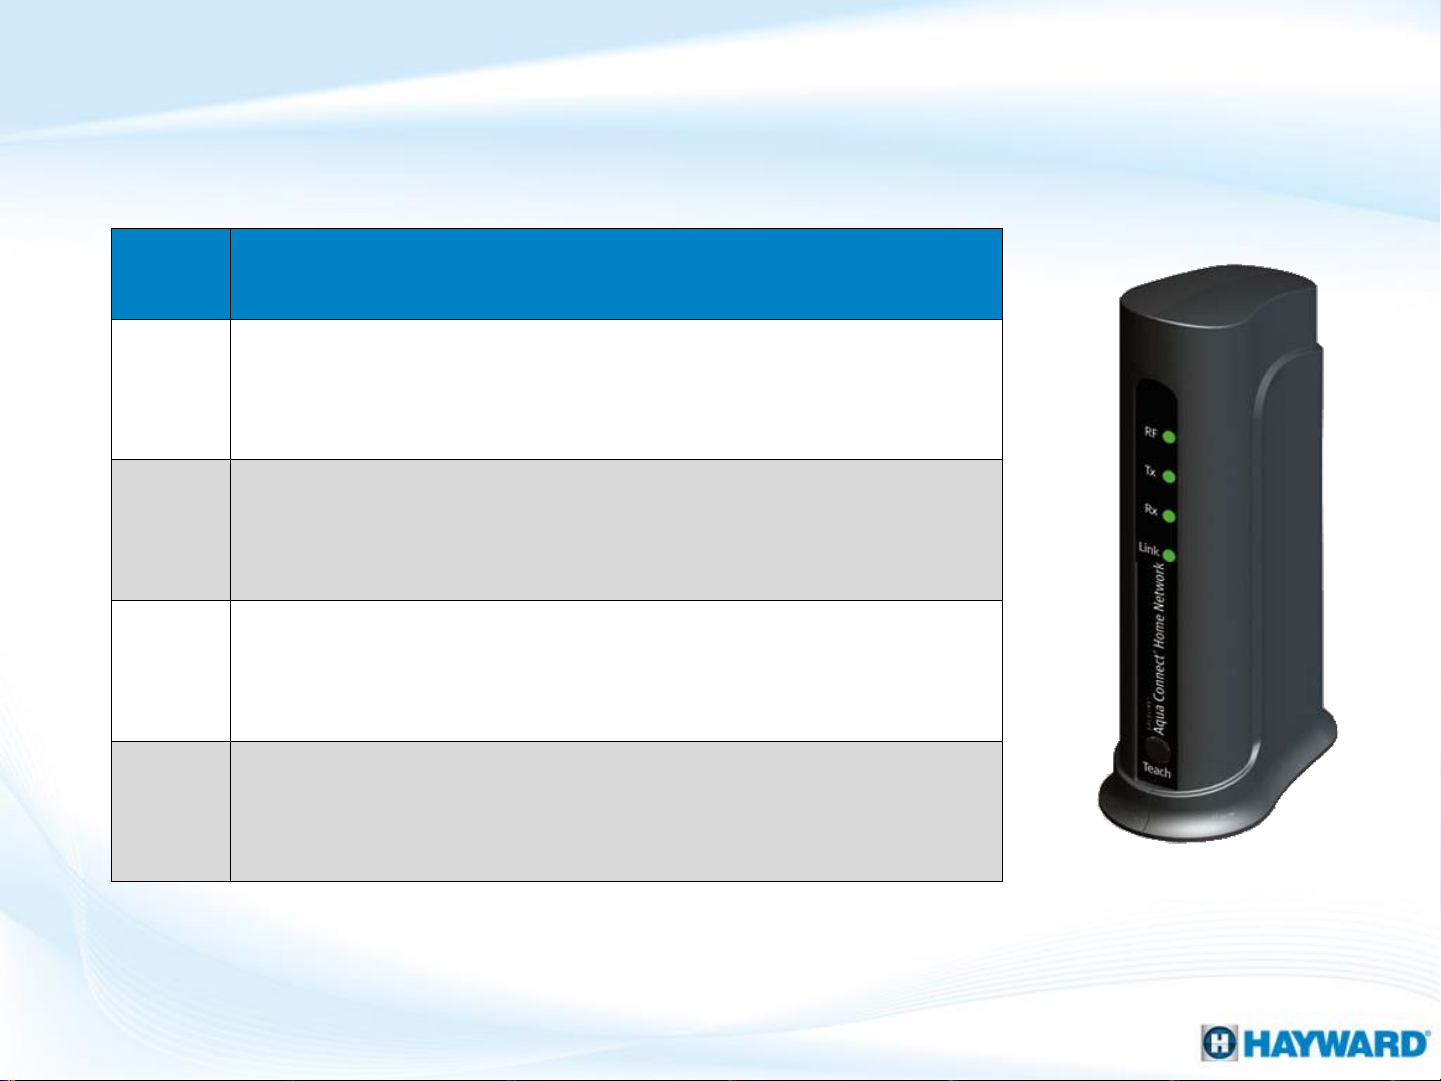
AquaConnect (ACHN): Status LEDs
LED
RF
TX
RX
LINK
Description
Normal Operation: ON Solid
Indicates whether or not the ACHN is communicating
with the pool controller.
Normal Operation: Flashing
Indicates when the ACHN is sending information
through the Ethernet cable.
Normal Operation: Flashing
Indicates when the ACHN is receiving information from
the Ethernet cable.
Normal Operation: Flashing 4 times per minute
Indicates when communication occurs between the
6
ACHN and the Aqua Connect Website.
AquaConnect™
How To:
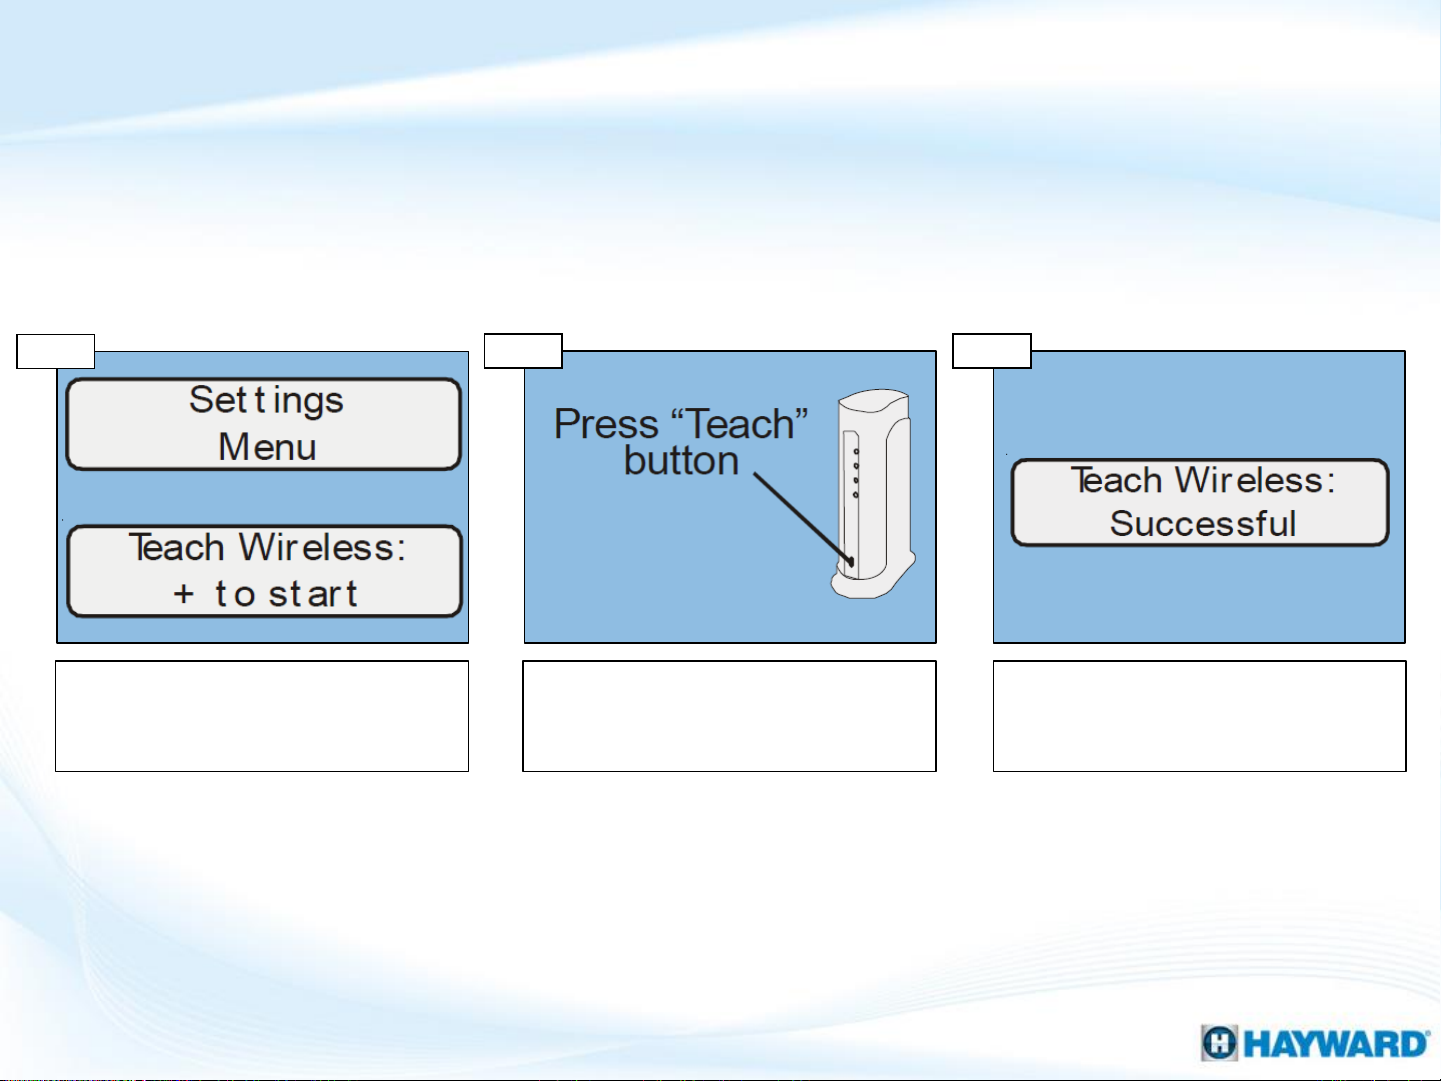
How To: Train the AquaConnect Device
Use the following steps to train the ACHN to the control system. Make sure both
units are powered up when conducting this step.
Step 1
Press the Menu button on the ProLogic
system until the Settings Menu appears,
then press the left arrow button until
“Teach Wireless: + to start” appears.
NOTE: If training the wireless device fails verify that the antenna is generation 2 (AQL2-BASE-RF). A
GLX-RF-EXTEND is available if the antenna needs to be moved closer to the Aqua Connect.
Step 2 Step 3
Press the “+” button to initiate the
sequence on the controller and hold
down the teach button on the Aqua
Connect Home Network device.
Training will be complete when the
controller reports “Teach Wireless
Successful” If unsuccessful, reposition
and repeat the training process.
8
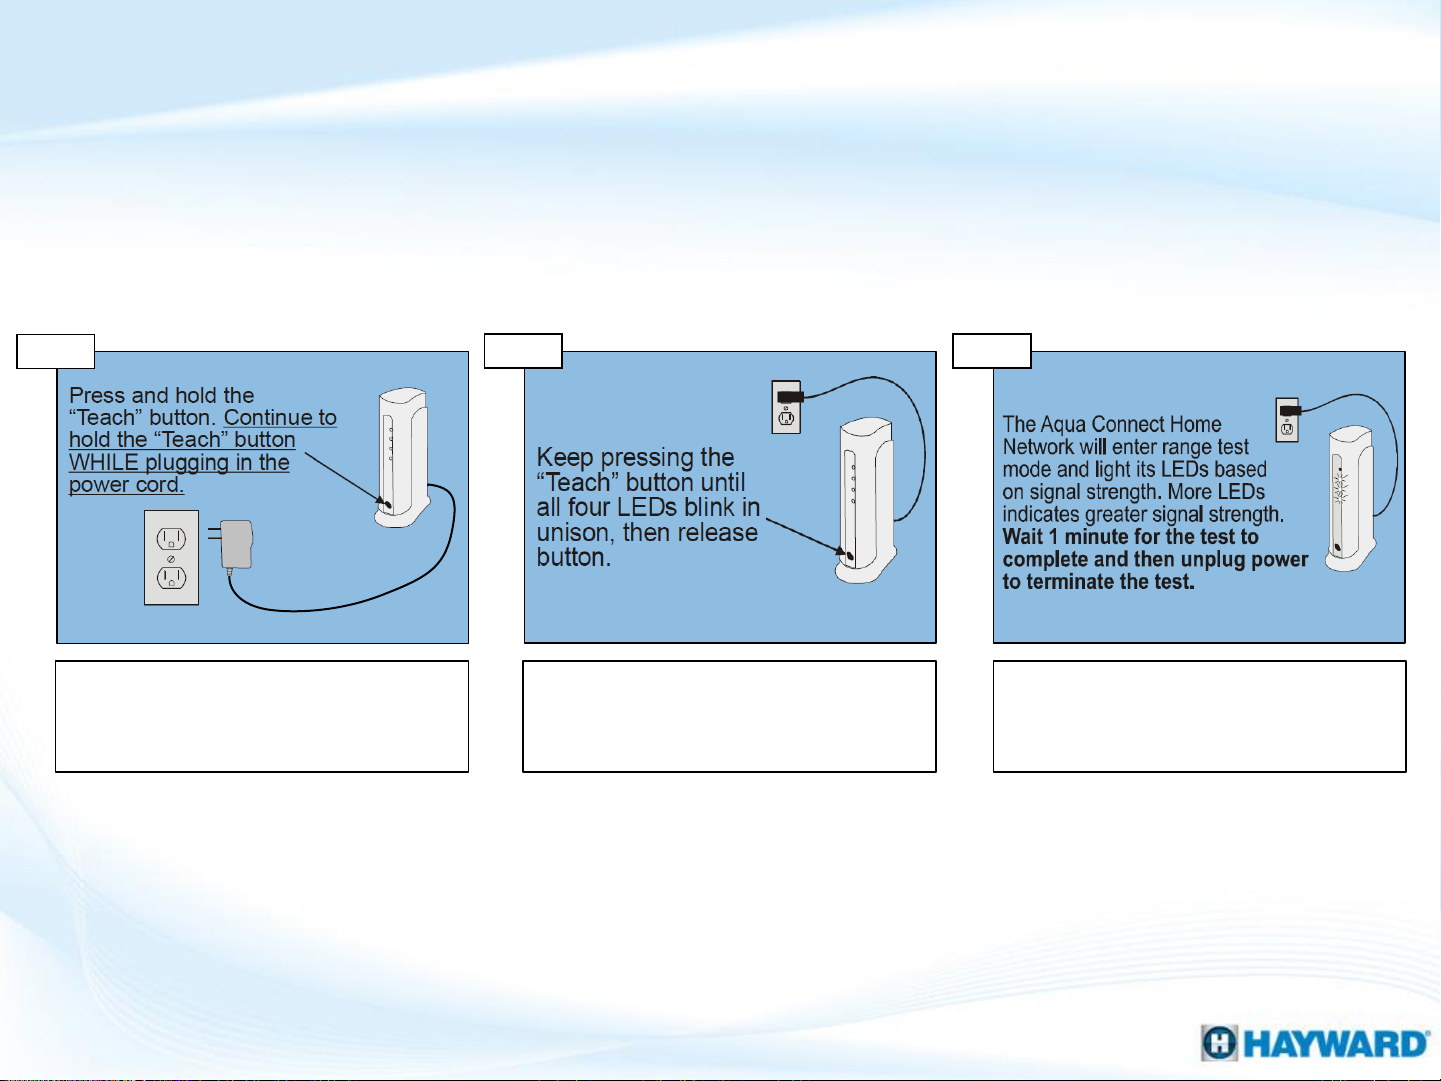
How To: Perform a Range Test
Use the following steps to perform a range test, verifying the RF signal strength
between the ACHN device and the control system. Once complete, clear the test by
power cycling the ACHN device.
Step 1
To perform a range test unplug the
ACHN and hold down the “Teach”
button. While holding down the button
plug in the power cable.
NOTE: If two LEDs or less appear after conducting a range test, relocate the base antenna or the
Step 2 Step 3
Keep holding down the teach button
until the LEDs flash in unison; once
flashing let go of the teach button and
watch the LEDs.
After two minutes the number of LEDs
illuminated will indicate signal strength.
3-4 LEDs are desired, if less, reposition
ACHN device to achieve a stronger RF signal strength.
the ACHN or antenna and retest.
9
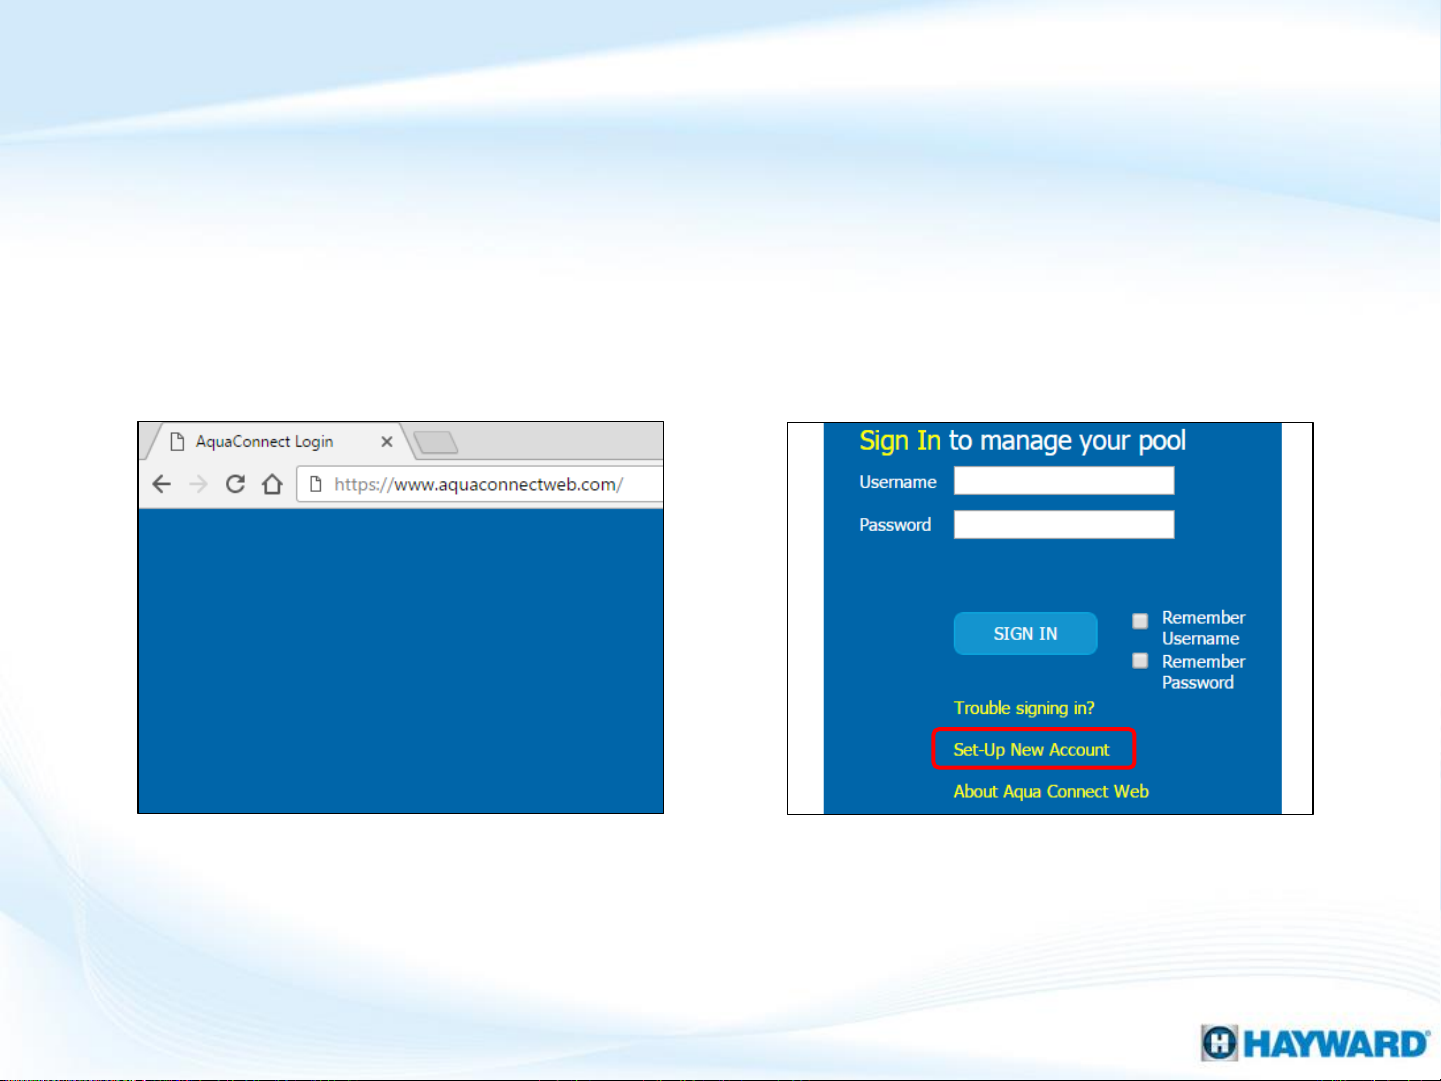
How To: Create Account & Add a Pool
In order to control the AquaConnect to be controlled remotely an account will need to
be created and the device MUST be registered.
1. Proceed to:
www.aquaconnectweb.com
2. Click on “Set-Up New Account”
this will open a form
10
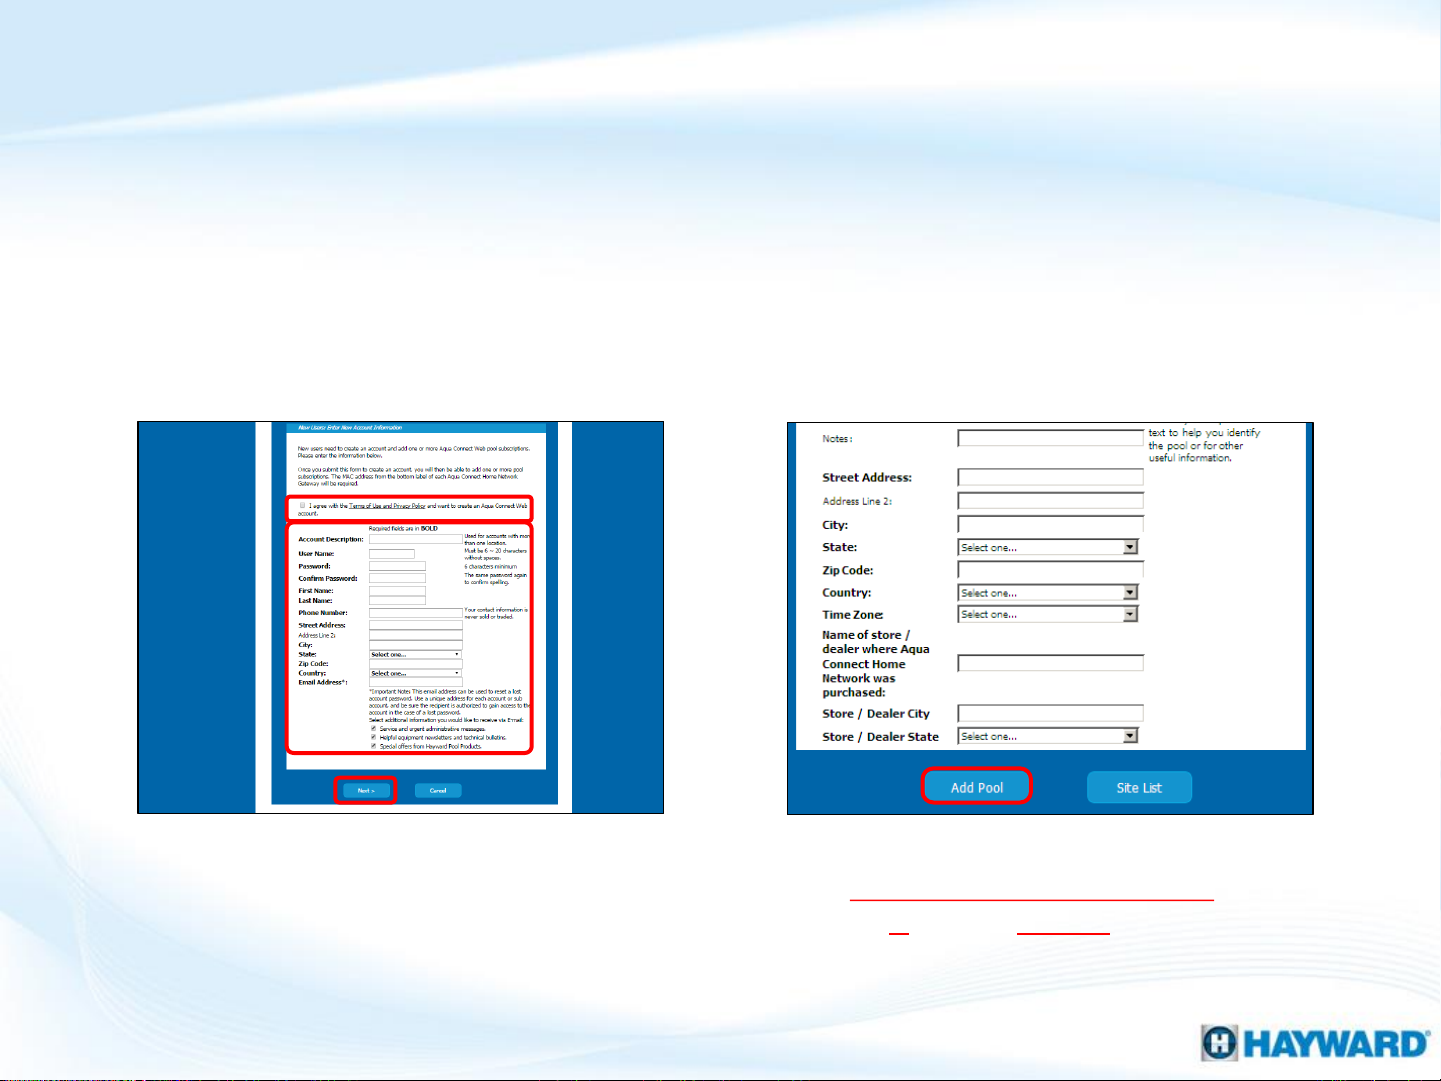
How To: Create Account & Add a Pool (cont.)
Once the account has been created, use the credentials to log into this account, the next
step is to “add a pool” which is used to register an AquaConnect.
3. Fill out all the required
information, then click “Next”*
*NOTE: Be sure to check the box next to “I agree with the Terms of Use and Privacy Policy” and
though the User Name is not case sensitive, the Password IS. Finally, DO NOT use special
characters either the username or password.
4. Once the account is set up,
scroll down & select “add a pool”
11
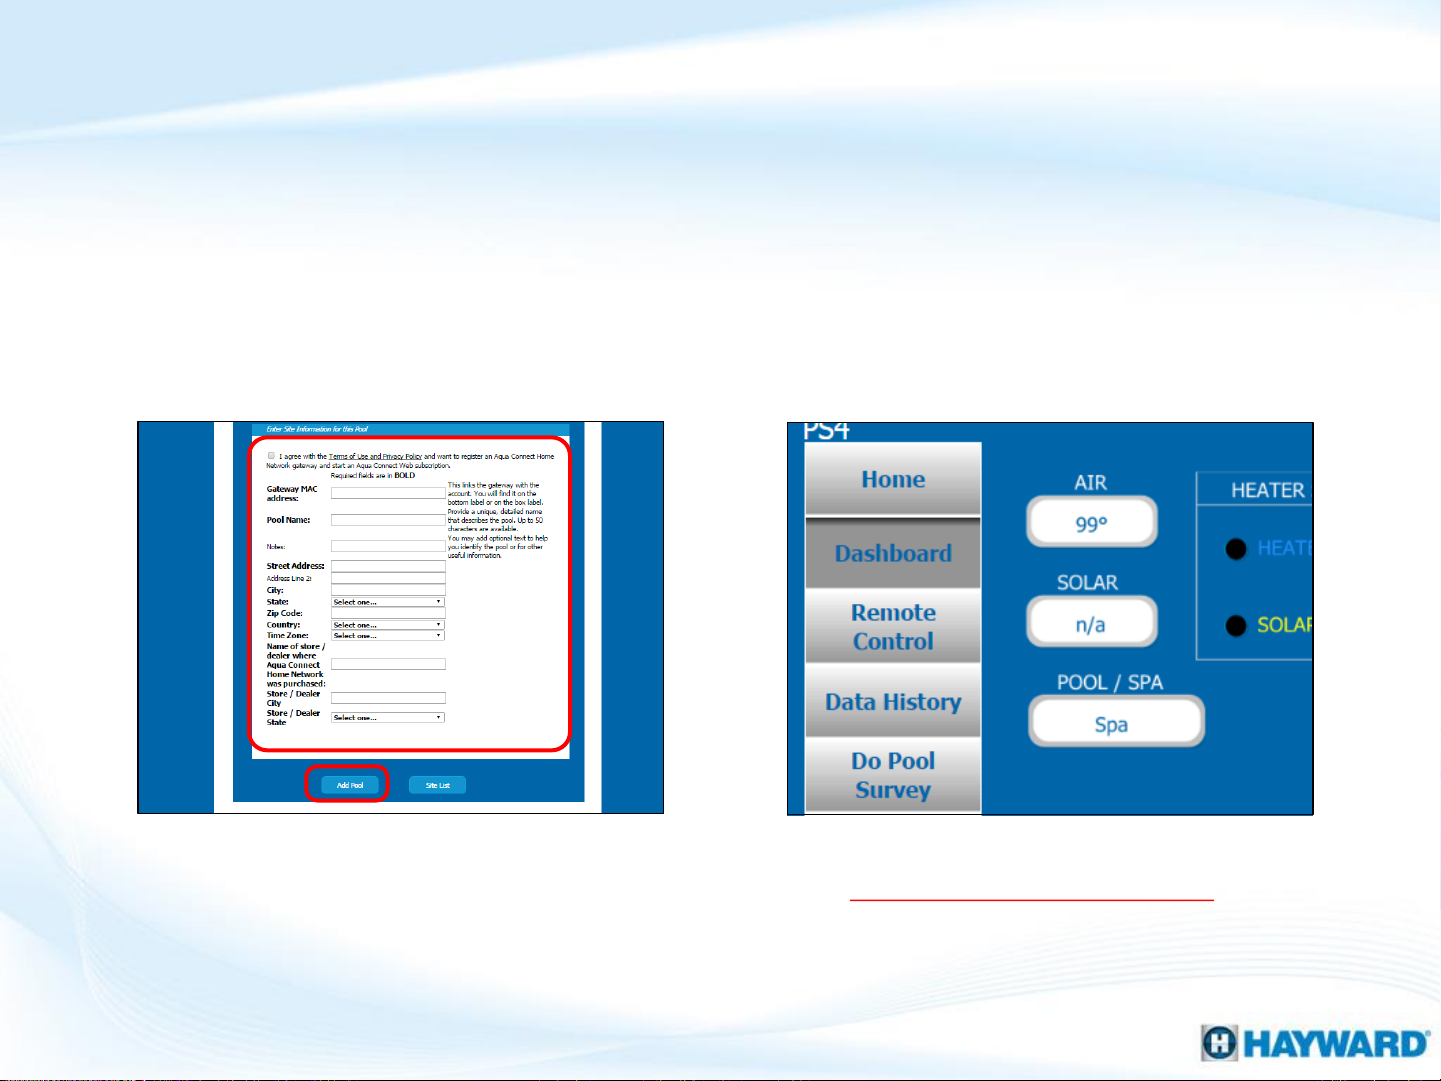
How To: Create Account & Add a Pool (cont.)
In order to control the AquaConnect to be controlled remotely an account will need to
be created and the device MUST be registered.
5. Fill out all the required
information, then click “Add Pool”*
*NOTE: Be sure to check the box next to “I agree with the Terms of Use and Privacy Policy” and
make sure the MAC Address entered is the full number that can be found on the bottom of the
AquaConnect device.
6. Once complete the dashboard
or site list will appear.
12
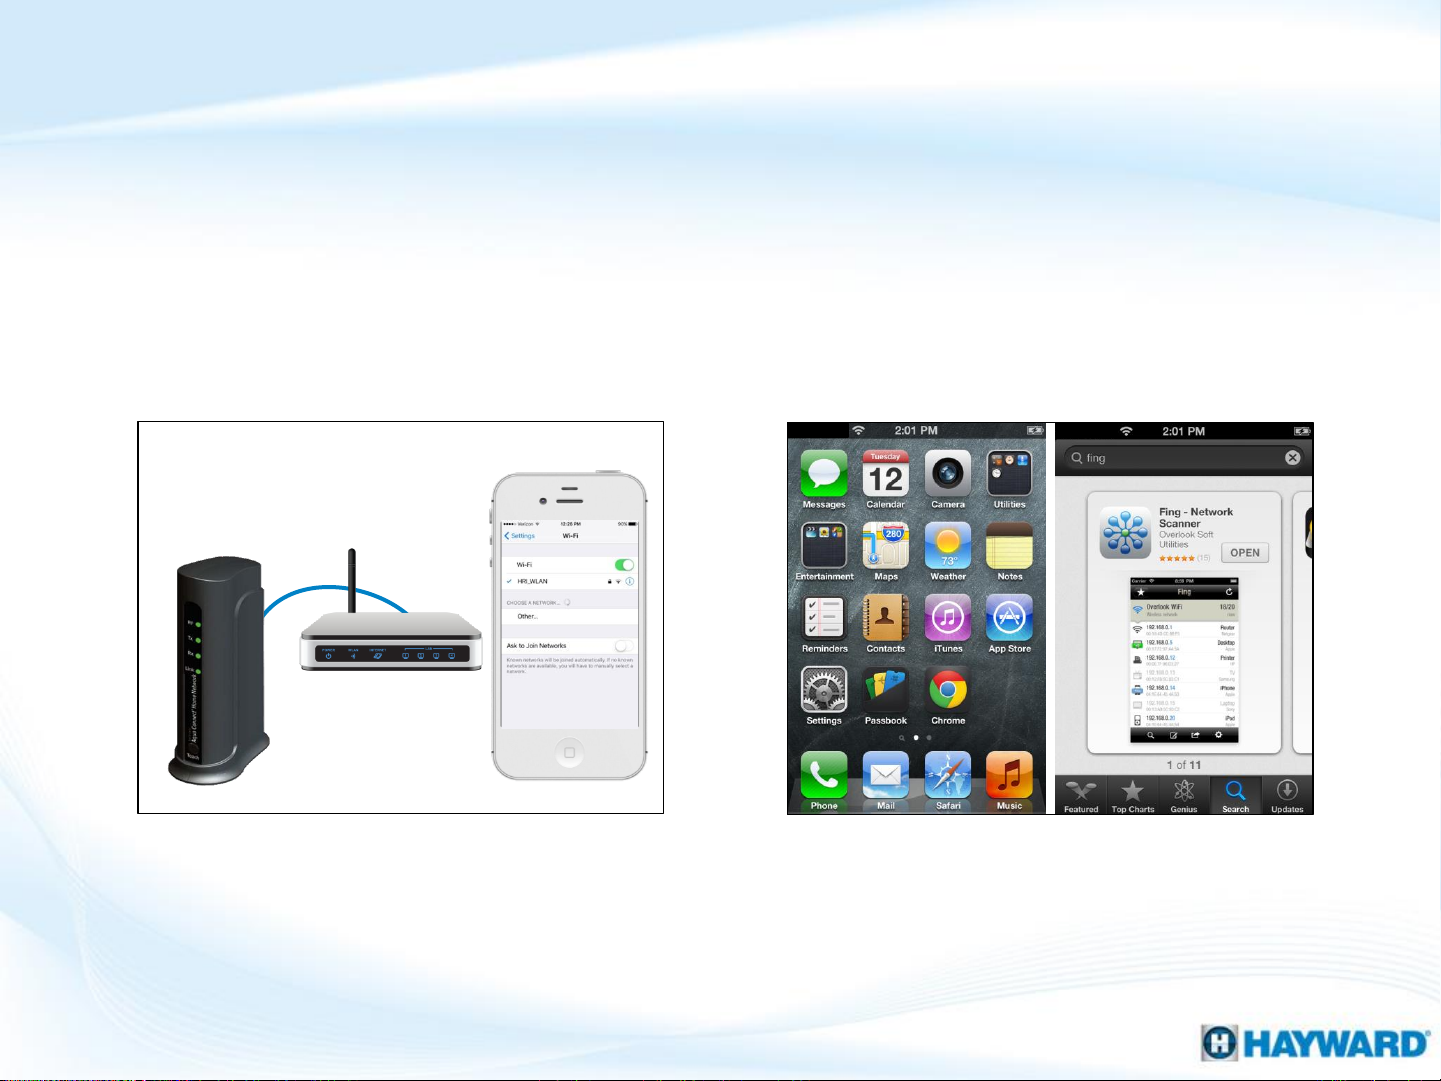
How To: Find IP Address (Mobile Device)
In order to control the AquaConnect using the LAN or intranet function, the IP address,
issued by the network router, must be obtained.
1. Verify mobile device & ACHN are
connected to the same network
The “Fing – Network Scanner” can be used to locate and generate a report on all devices connected
to the same network as the mobile device.
2. Locate and download the “Fing
– Network Scanner”, then launch
13
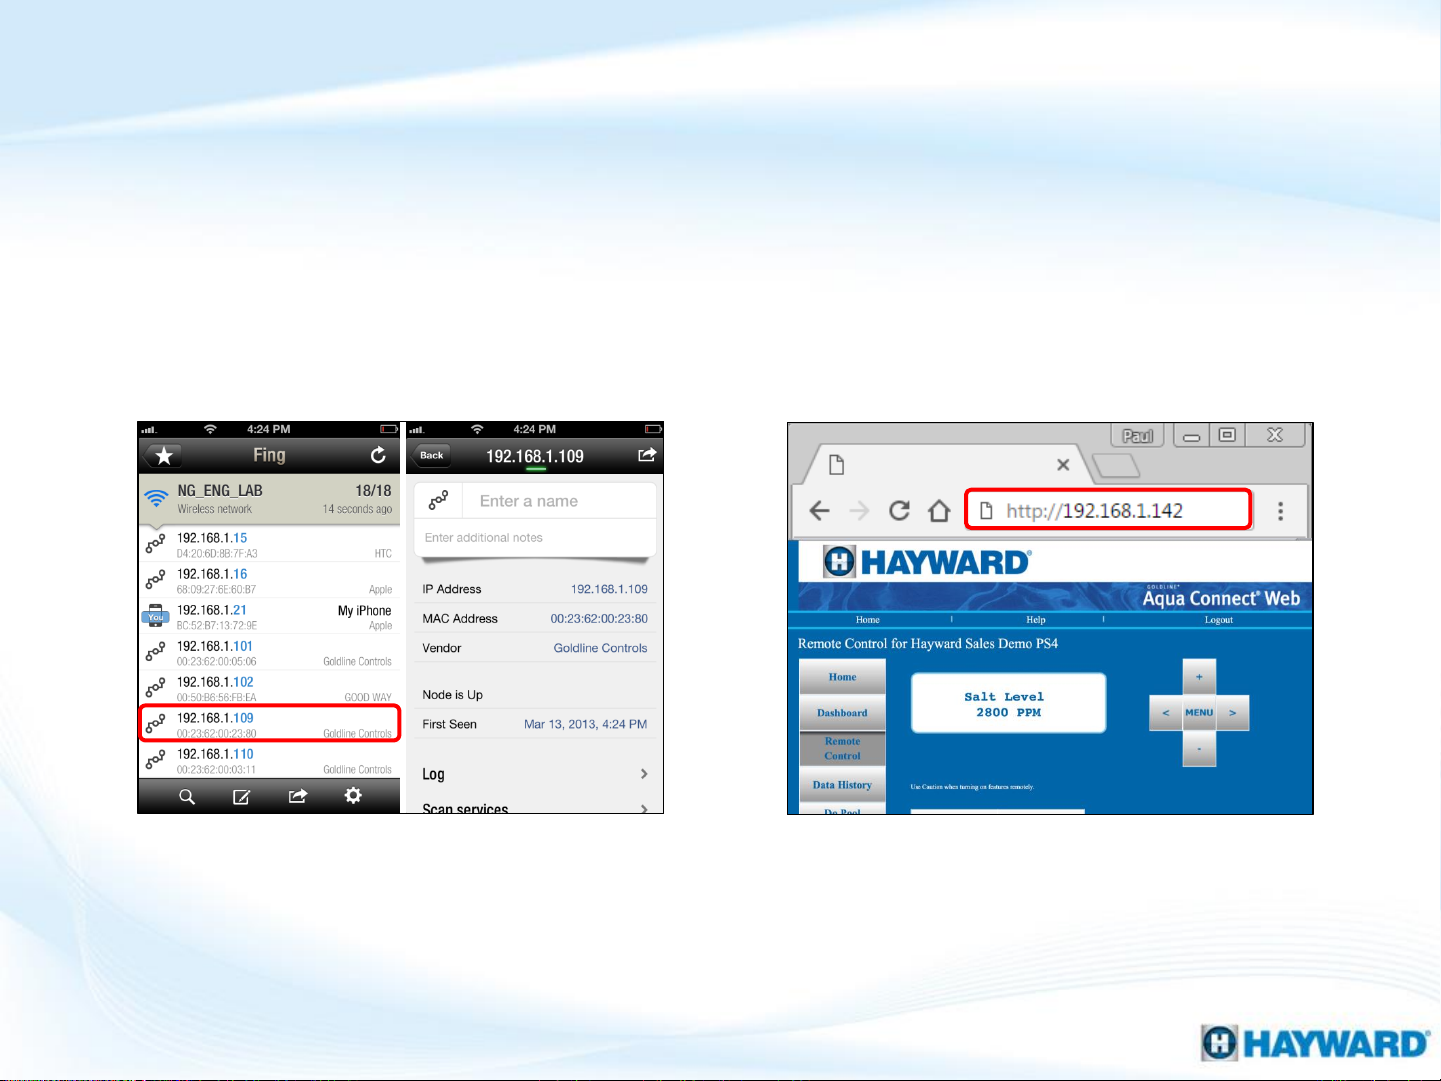
How To: Find IP Address (Mobile Device) (cont.)
TIP: Once the remote control “LAN” page loads, it may be a good idea to bookmark the
webpage. NOTE: The IP address is subject to change.
3. Scan the network. Record IP
address for “Goldline controls”
NOTE: The IP address is subject to change over time as the router may issue a new address. This
process should be repeated if the LAN feature stops working in the future.
4. Type the IP address in the
address bar, preceded by http://
14
How To: Find IP Address (PC)
In order to control the AquaConnect using the LAN or intranet function, the IP address
that has been issued by the network router must be obtained.
1. Verify the PC & ACHN are
connected to the same network
2. On the bottom of the ACHN,
copy the last 3 digits of the MAC
15
 Loading...