

Hayward AQL2-SS-RF Owner's Manual

Hayward Pool Products
620 Division Street, Elizabeth NJ 07207
Phone: (908) 355-7995
www.hayward.com
Contents
Installation.............................1
Operation..............................2
Troubleshooting.................... 4
Warranty................................6
Spaside Remote Control
for Aqua Logic and Pro Logic
Owner's Manual
AQL2-SS-RF
USE ONLY HAYWARD GENUINE REPLACEMENT PARTS
092152D RevB
Compatibility
This product is compatible with all Pro Logic controls and Aqua Logic controls operating with software revision r1.10 or higher and using an AQL2-BASE-RF Base Station operating with software
revision r3.00 or higher. Note that this product will NOT communicate with an AQL-BASE-RF Base
Station. To verify the software level of your Aqua Logic control, press the Menu button (possibly
multiple times) until "Diagnostic Menu" is displayed. Press the ">" or "<" keys (possibly multiple
times) until the main software revision level is displayed (the revision should be 1.10 or higher).
Next, press the ">" key (possibly multiple times) until the "RF Base" revision level is shown (the
revision should be 3.00 or higher).
If the software revision level is less than those specified above, contact the Technical Service Dept.
from Monday through Friday, 8AM to 8PM Eastern at 908-355-7995 for information on upgrades.
Installation
1. Batteries are installed at the factory: There is no need to open the spaside unit.
2. Base Station required: The Pro Logic or Aqua Logic control unit must have an AQL2-BASE
RF base station installed. The base station allows the Pro Logic/Aqua Logic control unit to
communicate with the spaside remote.
3. Teach the unique ID code: The base station attached to the Pro Logic/Aqua Logic control
unit has a unique ID code that ensures that your unit will not affect other systems in the
neighborhood, and likewise, their remote will not affect your system. To teach the ID code to
the spaside remote unit:
a. On any Pro Logic/Aqua Logic display/keypad unit press the
“Menu” button (possibly multiple times) until “Settings Menu” is
displayed.
b. Press “<“ or “>” (again, possibly multiple times) until “Teach Wire-
less” is displayed.
c. Press the “+” button to start the teaching process.
d. Press and hold any button on the spaside remote. The LED indica-
tor should blink once when the button is first pushed. Continue
holding the button until the LED flashes 3 times (within about 7
seconds). This is a confirmation that the operation was successful.
The Pro Logic/Aqua Logic display will indicate “Teach Wireless:
Successful” at this time. If the LED indicator does not flash 3 times,
refer to the Troubleshooting section of this manual for additional
information.
Settings
Menu
Teach Wireless:
+ to start
Teach Wireless:
Successful
Press and hold
wireless button
1
USE ONLY HAYWARD GENUINE REPLACEMENT PARTS
4. Apply labels: The Pro Logic and Aqua Logic controls allow each output (e.g. AUX1) to be
renamed to what is actually being controlled. The spaside remote comes with a sheet of name
labels—simply peel the appropriate label off the sheet and apply to the appropriate set of
buttons on the spaside remote.
5. Installation is complete: You can now use the spaside wireless remote.
Operation
The spaside remote communicates with the base station on the Pro Logic/Aqua Logic control unit
using RF (radio frequency) technology. When you push a button on the spaside remote, it sends
a command and flashes the LED indicator once. After a brief delay, the spaside remote receives
a confirmation from the Pro Logic/Aqua Logic base station and the LED indicator on the spaside
remote will flash 2 times. This double LED flash is your confirmation that the command has been
successfully transmitted to the control unit. If the LED doesn’t flash at all or else just flashes once
after you’ve pushed a button, refer to the Troubleshooting section for assistance in resolving these
problems.
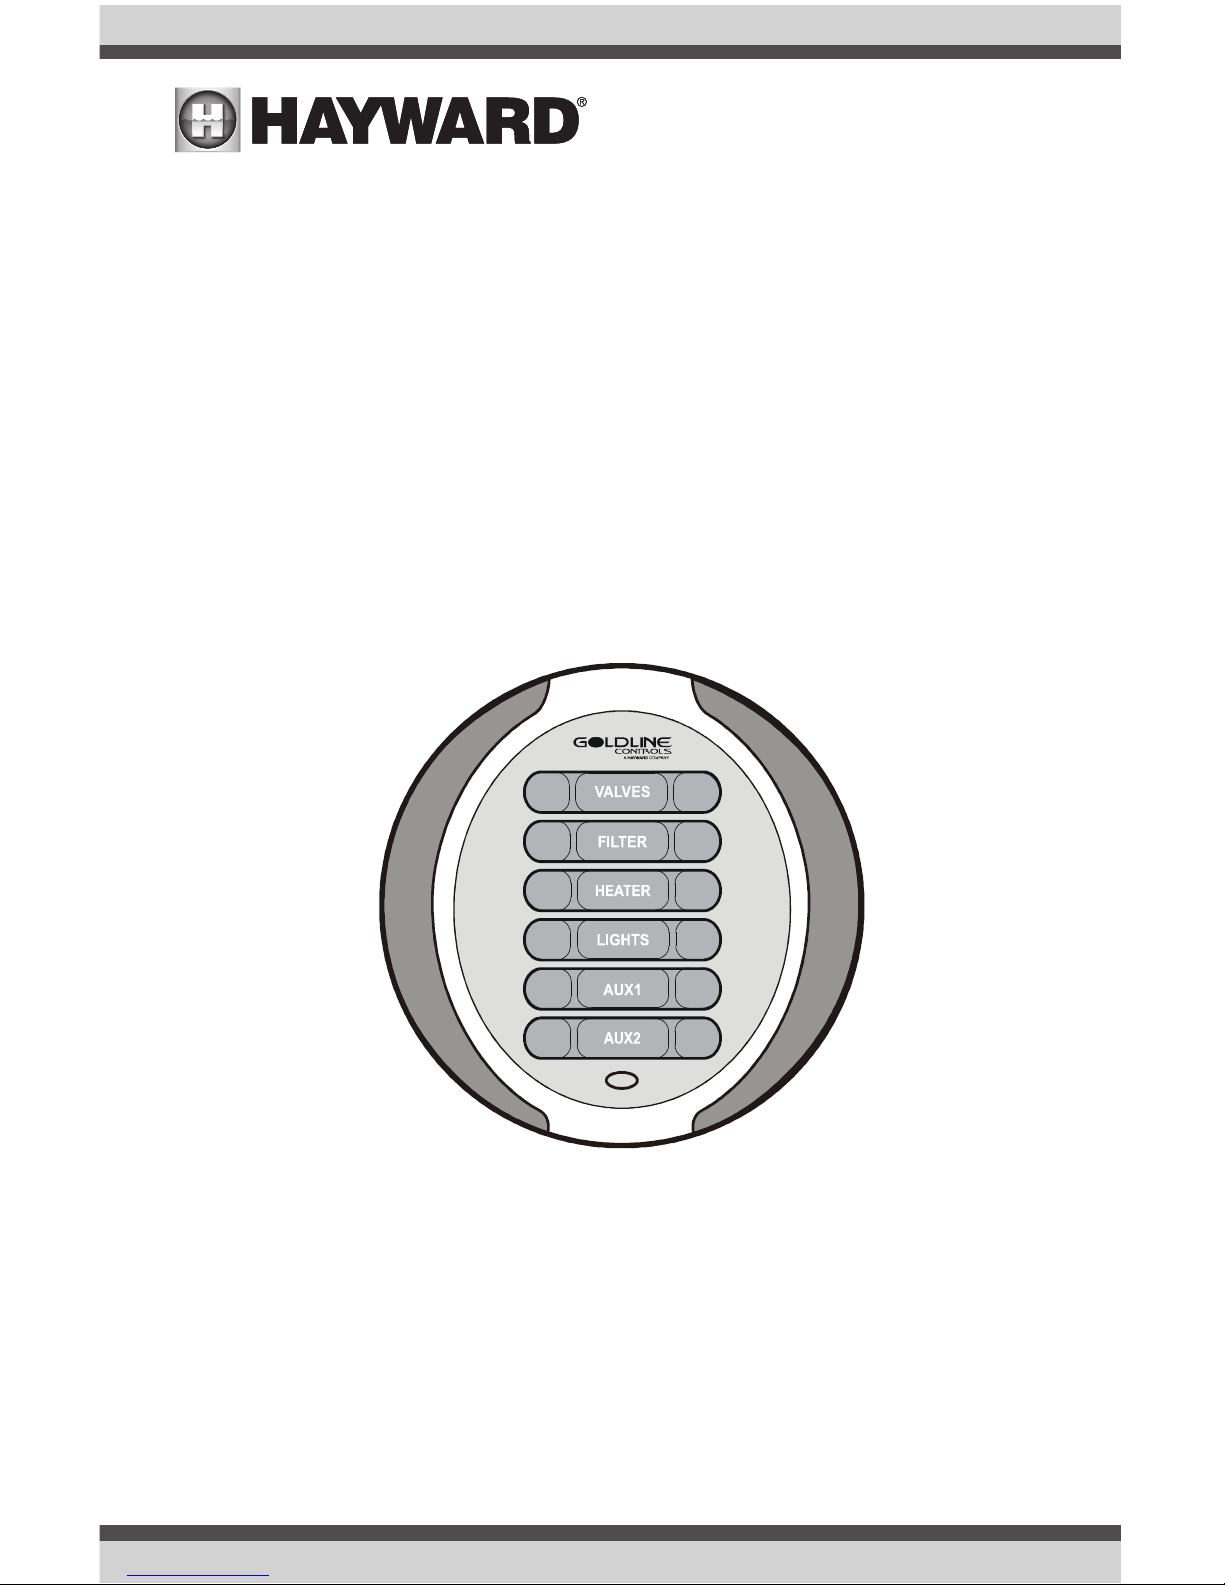
Valves POOL/SPA These buttons will allow you to select either pool or spa operation. You can
not select spa spillover operation from the spaside remote.
Filter ON/OFF The ON/OFF buttons allow manual operation that will override any automatic
control settings (e.g. timeclock). The manual setting will remain active until
the next scheduled automatic turn on/off event. There are some exceptions:
If the Heater1 is operating and the heater cooldown function is enabled, then
pressing the OFF button will turn off the heater and the pump will run for
another 5 minutes to allow the heater to cooldown before automatically turning off.
OFF
OFF
OFF
OFF
OFF
SPA
ON
ON
ON
ON
ON
POOL
G
1-0
803
15A
-1
USE ONLY HAYWARD GENUINE REPLACEMENT PARTS
2
USE ONLY HAYWARD GENUINE REPLACEMENT PARTS
2
 Loading...