


Neuron.book Seite i Montag, 23. Dezember 2002 2:28 14

Neuron.book Seite ii Montag, 23. Dezember 2002 2:28 14

Neuron.book Seite i Montag, 23. Dezember 2002 2:28 14
Table of contents
Welcome to the family! 1
The Neuron Team 2
Copyright 2
The manual ... 3
Style conventions 3
Icons 4
Specified use 5
Safety first - notes on safety 5
Get yourself connected 8
Unpacking / standard accessories 8
Setting up 8
Neuron’s connectors and ports 9
Before cabling up ... 9
A word on audio quality ... 9
Mains cord 9
Stereo setup, surround setup, headphones 10
External controllers: Footswitches & pedals 11
MIDI setup 12
Digital inputs/outputs, USB connection 13
Let the games begin... 14
Powering up (finally!) 14
Switching off 15
Quick Start Guide 16
Neuron basics 22
The philosophy behind Neuron 22
A look at control features in general 25
Stick controller 26
Data input wheels (wheels) 29
Knob 29
Menu navigation in the main display 29
Operating modes 32
Operating mode: Sound mode 32
Operating mode: Setup mode 32
Hierarchies: The Neuron memory model 33
Master volume 35
Fundamentals: Basic settings 36
Neuron’s modules 43
Signal Flow 43
Module: Programmer 45
Programmer: Control features 46
Programmer: Programming sounds 49
Sound menu 49
Sound parameters 49
Snapshots & the play/compare function 52
Neuron’s copy/paste function 54
Back to the roots: The reset function 57
Programmer: Programming setups 58
Setup menu 59
Setup parameters 61
Table of contents
i

Neuron.book Seite ii Montag, 23. Dezember 2002 2:28 14
Table of contents
ii
Module: Resynator 69
The philosophy behind resynators 69
The idea behind Neuron models 70
Resynator: Control features 73
Resynator: Menu 75
Resynator: Parameters 77
Resynator: Handling 86
Module: Blender 93
Blender: Control features 94
Blender: Menu 94
Blender: Parameters 94
Blender: Types 96
Module: Shaper 1/2 99
Normal or repeat? 103
Shaper 1/2: Control features 105
Shaper 1/2: Menu 106
Shaper 1/2: Parameters 108
Shaper 1/2: Handling 110
Module: Mod 114
Mod: Routing 115
Mod: Menu 116
Mod: Control features 116
Mod: Parameters 116
Mod: Handling 117
Mod: Waves - Available LFO waveforms 118
Module: Slicer 119
Slicer: Control features 121
Slicer: Menu 122
Slicer: Parameters 122
Module: Silver 123
Filter basics 124
Silver: Control features 133
Silver: Menus 136
Silver: Parameters 138
Silver: Handling 146
Module: Shaper 3 149
Shaper 3: Control features 151
Shaper 3: Menu 151
Shaper 3: Parameters in silver status 152
Shaper 3: Handling 153
Module: Master effects 154
Master effects: Control features 157
Master effects: Menu 158
Master effects: Parameters 159
Master effects: Handling 160
Free controllers 162
Controllers: Menu 163
Controllers: Route planning 165
Surround mode 169
Surround basics 169
Surround menu in Neuron 174
Surround handling in Neuron 174

Neuron.book Seite iii Montag, 23. Dezember 2002 2:28 14
MIDI control 178
MIDI-relevant basic settings 178
MIDI-relevant setup settings 179
SysEx commands (System exclusive data) 179
Controller list 181
Updates and Backups 185
A word on the USB interface 185
The load/dump function 187
Load/dump: Menu 187
Load/dump: Options 188
Just feed it 192
Converting samples into Neuron models 192
Technical data 193
CE Declaration of conformity 194
Index 195
iii
Table of contents

Neuron.book Seite iv Montag, 23. Dezember 2002 2:28 14

Neuron.book Seite 1 Montag, 23. Dezember 2002 2:28 14
Welcome to the family!
Thank you for purchasing this groundbreaking
electronic musical instrument. To this day, I recall
the thrill that reading words much like these gave me
when I brought my brand-new synthesizer home. I
devoured the pages that followed in that first
manual - it would become my bedside bible for many
days after acquiring that cherished machine. Years
have passed since; as a musician, I owned many
instruments and as a designer, I contributed to the
making of many more. With Neuron, I was able to
make my personal dream come true - an aspiration
that would not have been attainable without the
close cooperation of one of the brightest minds in
the music business. Neuron’s synthesis engine
embraces the imagination and comprehensive
knowledge of Stephan Sprenger, who in March 2000
set out with me on an adventure of designing what
is certainly the most powerful new development in
synthesizers in recent years. Before you stands the
hard-won result of this shared vision. I would like to
take this opportunity to thank everyone who worked
so hard – sometimes to the limits of human
endurance – to blast through barriers and turn this
vision into a product that satisfies your and our
standards for quality.
As you get to know Neuron, you will come across a
range of innovative functions. Many of these are the
fruits of a Herculean development effort, and a
goodly share has been implemented for the first time
in an electronic musical instrument. I am certain
that you will soon come to appreciate the depth and
breadth of neural synthesis; its sonic potential is, in
fact, tremendous. And its unique control features
make it so easy to shape this instrument’s jawdropping sounds.
Here’s hoping that you will become acquainted with
your new instrument in no time at all. This manual
will help you understand this machine. You will find
familiar features in some areas and be confronted
with completely novel features in others. However,
in order to make the most of your synthesizer’s
potential, I recommend that you make this manual
your bedtime storybook in the days ahead just as I
did years ago and still do today.
Thank you for the confidence in our product and in
our new company.
Welcome to the family!
Axel Hartmann
1

Neuron.book Seite 2 Montag, 23. Dezember 2002 2:28 14
The Neuron Team
2
The Neuron Team
• Software:
Engine: Stephan Sprenger, Prosoniq Products Software
UI Soft, Bios: Josef Pogadl (Management), Jürgen
Fornoff
UI Hard, Bios: Puschmann Engineering, Marcus Werner
• Hardware implementation: Schlafhorst Electronics
GmbH,
Dr. Hans-Georg Nowak (Management)
• Project Management: Josef Pogadl, Axel Hartmann, Arnd
Kaiser.
• Design: Axel Hartmann, Design Box
• Sound design: Arnd Kaiser, Bernhard Bouché, Ray
Legnini, Christian Ledwig, Peter Gorges,
Yellow Tools, Uwe Zahn, Peter Kuhlmann
• Housing/Component Construction: Frank Schneider
(Management), Klaus Weber, Werner Bernd
• User Manual: Volker Fischer, bfj document partner
Illustrations: Design Box, Shaun Ellwood
Translation: Tom Green
Thanks to:
(In alphabetical order): Werner Bernd, Melisande Bernsee,
Bernhard and Heidi Bouché, Thad Brown, Charlotte Clare,
the Design Box Team, Wolfgang Düren, Joachim Flor, Gerd
Gehrke, Detlef Glißmeyer, Uli Gobbers, Andreas Hafen,
Christian Hellinger, Martin Herbst, Russ Jones, Joachim
Keil, Tony Kostanjsek, Lothar Krell, Stephan Leitl, Heiko
Meerz, Drew Neumann, Jörg Pauly, Susanne Pennewiss,
the Prosoniq Team, Stefan Rapp, Rapp Architekten, Peter
Ries, all the comp.dsp regulars, Frederic "Bo" Schelling,
the Schlafhorst Electronics Team, Boris Schneider, Dieter
Strobel, Terratec, Manfred Tillmann, the TSI Team, Drazen
"Wanzinn kuhl(tm)" Vlahovic, Hans Zimmer
Copyright
No part of this operating manual may be reproduced,
published, or transmitted in any form or by any means,
electronic, mechanical, photocopying, recording or
otherwise without the express written permission of
Hartmann GmbH. Contents are subject to change for
technical reasons and due to amendments.
The greatest care and diligence has been taken in
compiling this manual. However, there is always the
chance of an oversight. We apologize for any
inconvenience should you come across an error. We are
not liable for changes made to Neuron after this manual
went to print.
© 2002 Hartmann GmbH, 88214 Ravensburg, Germany.
All rights reserved.
Neuron.book Seite 3 Montag, 23. Dezember 2002 2:28 14
The manual ...
If all you had needed was more reading material, you
would have bought Bukowski’s collected works or
Keith Emerson’s biography but not a neural
synthesizer.
We are well aware that reading operating manuals is
a pain. So the question begs, "Who should read what
in this manual?"
... for pros
If Neuron is the latest in a long
line of synthesizers owned by
you, if you’re a seasoned sound
programmer, and if you’re
familiar with the theory behind
envelopes and filters, you will
need this book merely as a
reference for individual parameters, for guidance in
navigating the menus, or because you want to look
up something about this or that control feature. Not
so: Even if you are a bona fide synthesizer expert, its
controls are sure to be new to you!
This manual also offers a parameter table for every
Neuron module, a list of control features and menu
diagrams for quick reference – plenty of stuff to
ponder even for the synthesizer expert.
Our Quick Start Guide starts on page 16 . Its
purpose is to give the eager synthesist who wants to
dive right into the Neuron pool a friendly shove.
... and for not quite so professional pros
In the event that you are an (absolute) beginner or
are not quite sure what an envelope is good for and
what a chorus does, this manual offers an
explanatory and hopefully enlightening introduction
for every module.
... with an index to boot!
We invested considerable effort into referencing
terminology in the index starting on page 195 so
that you can access any desired information in a
hurry.
Style conventions
Most of us are creatures of habit. That is why in this
manual we have opted to use distinctive typeset to
denote control features, parameters, and displays.
Control features such as buttons, knobs, wheels, and
stick controllers appear in bold. Parameters that can
be selected or edited in a module as well as LEDs
appear in italics.
Display read-outs are shown in
typescript
.
The manual ...
3

Neuron.book Seite 4 Montag, 23. Dezember 2002 2:28 14
Icons
4
In order to describe how to use the navigation stick
located next to the main display in as few words as
possible, we use the following shortcuts:
Stick.down means that you should move the stick
down once in order to perform the given operation.
Stick.up/left/right means move the stick in the
given direction.
Icons
Our couch potatoes will accompany you through this
manual:
You will find couch potatoes
lounging about all over the book.
They pop up wherever a need for
further enlightenment arises,
marking passages containing a
key fact, cross-referencing a
related topic ...
...or offering valuable tips on
good-to-know stuff like
tweaking sounds or
programming Neuron.
The confused couch potato
turns up because something
discussed on that page seems
unclear!
Heads up if you see the couch
potato and his friends
listening intently. If you take
the hint and "listen up" too,
you will discover an
interesting or unusual fact.
The stick controllers are Neuron’s
hallmark features. They enable
effective, intuitive, and easy
handling. The stick icon appears
wherever a stick is mentioned in
the text.

Neuron.book Seite 5 Montag, 23. Dezember 2002 2:28 14
Specified use
Neuron® is a neural synthesizer to be used
exclusively for generating low-frequency audio
signals for creating sounds. Any other use is
improper and prohibited. Hartmann GmbH is not
liable for inappropriate or improper use of the device
and such use voids the manufacturer’s warranty.
Safety first - notes on safety
The following guidelines are crucial to your safety
and the longevity of the device. Read and heed!
Consider also the notes on safety printed on the
device’s connection panel.
Failure to heed the guidelines below can lead to fatal
injuries through electrical shock or to the
destruction of the device!
• Keep the device out of the rain and away from
any other splashing water. Under no
circumstances, allow water to seep into the
housing. Do not place any receptacle
containing liquid on the device - even if this
means you must do without your traditional
chill-out drink during your combo’s last
number!
• Always set up a safe distance from water; that
means bathtubs and swimming pools too.
Bathers and swimmers are in danger of
electrical shock!
• Do not operate the device in a moist
environment. Humidity may not exceed 75%.
• If you place the device on a stand or other
platform, make sure it and the floor you are
standing on are dry!
CAUTION
Lethal
electrical
shock hazard!
Safety first - notes on safety
5
Neuron.book Seite 6 Montag, 23. Dezember 2002 2:28 14
Safety first - notes on safety
6
CAUTION
Lethal
electrical
shock hazard!
• Never use faulty mains, audio, or other
connecting cords. If the included mains cord is
damaged or lost, use a suitable replacement
cord only.
• In countries in which the included mains cord
cannot be used, turn to a qualified specialist for
help.
• Never connect the device to a socket that is
unsuitable, damaged or improperly installed.
• Always unplug the mains cord from the socket
by pulling the plug and never the actual cord!
• Do not touch the mains cord with wet hands!
• Never sever the mains cord’s green/yellow earth
or ground wire. It serves the essential function
of protecting you and the device.
Failure to heed the guidelines below can lead to the
damage or destruction of the device.
• Connect Neuron to alternating current power
supplies rated from 100 to 240 V and with a
frequency of 50 to 60 Hz.
• Do not operate Neuron in extremely dusty or
dirty environments and only up to an altitude of
2,000 meters above mean sea level.
• Do not operate Neuron near heat sources. Do not
expose the device to direct and intense sunlight.
Do not operate it outside an ambient
temperature range of 15 ° and 35 ° C.
• Always ensure air can circulate freely around
the device for purposes of heat dissipation.
Never cover or obstruct the ventilation ducts on
the side and particularly on the bottom panel
of the enclosure!
• Do not expose the device to powerful vibrations
or mechanical shocks.
• Unplug audio cords and connectors by pulling
the plug rather than the cord.
CAUTION
Danger of
damage
or
destruction!
Neuron.book Seite 7 Montag, 23. Dezember 2002 2:28 14
Safety during operation
• Ensure the device is set up in a stable, level
position.
• Make sure that no objects make their way into
the device’s interior. If this does occur, switch
the device off immediately and pull the mains
plug. Do not open the device. Take it to an
authorized service center and have a qualified
technician remove the foreign object.
• In combination with a connected amp, mixer,
speakers, or headphones, Neuron can produce
volume levels that may lead to irreparable
hearing loss. Always keep a close watch on
volume settings and make sure you operate
your setup at a reasonable level.
Notes on care, maintenance and repair
• Do not open the device. There are no userserviceable parts in the device’s interior.
• Users are prohibited from replacing the lithium
batteries in the device. Have an authorized
service center do this. Note that batteries may
explode if not handled properly!
• Users are prohibited from replacing fuses. Have
an authorized service center do this. The mains
cord must be disconnected before replacing
fuses.
• As a rule, only qualified and authorized
specialists may open the device strictly for
repair purposes.
• Use only a dry, soft cloth or brush to clean the
housing. Do not clean the device with alcohol,
solvents, or other chemicals.
Safety first - notes on safety
7
Neuron.book Seite 8 Montag, 23. Dezember 2002 2:28 14
Unpacking / standard accessories
8
Get yourself connected
Unpacking / standard accessories
After unpacking, inventory the standard accessories.
The package should contain
• Neuron,
• a mains cord (suitable for your country's
outlets),
• this operating manual (sad stab at a joke),
• and the registration card with warranty.
Please turn to your authorized dealer if any of the
standard accessories are missing!
We recommend that you keep the original packaging
for future transportation purposes!
It is our solemn duty to keep all registered owners
abreast of the latest developments and system
updates! You too will enjoy this wonderful service
after you fill in the warranty card and send it to your
local distributor or to the address printed on the card.
Once we receive your registration, we will send you
ModelMaker, a software application that lets you
create your own models from samples!
Setting up
Place your Neuron on a clean, smooth surface,
making sure the device resides on a firm, stable base.
When choosing a location suitable for setting up,
read and heed the notes on safety on page 5.

Neuron.book Seite 9 Montag, 23. Dezember 2002 2:28 14
Neuron’s connectors and ports
The connector panel is located on the
left side of the device! That is a nice
touch because your audience can
admire the handsome Hartmann
trademark – a very distinctive on
button – rather than a rat’s nest of
cords.
The ports are shown in detail in the
illustrations on the following pages.
Before cabling up ...
• switch off all devices in the signal chain!
• read the guidelines on the following pages first
and heed the notes on safety on page 5.
• turn the volume on the connected amp / mixer
all the way down.
A word on audio quality ...
To allow your Neuron to unleash all the awesome
might of its sonic powers and our innovative
resynthesis technology to work its magic, be sure to
use premium audio devices (amps, mixers, speaker).
In other words, plug into the best gear you can
reasonably afford. Also, be sure to run Neuron in
stereo; better yet, in surround mode! Read the
comments on master volume on page 35.
Mains cord
Ensure both the mains cord and the given outlet are
the right type and in a state of good repair before
plugging the mains cord into the socket. Read also
the notes on safety starting on page 5.
Neuron may be operated at mains voltages ranging
from 100 V AC to 240 V AC only.
The device is not equipped with an 115/230V
selector, it automatically adapts to the mains
voltage if available within the aforementioned
range.
Neuron’s connectors and ports
9
Neuron.book Seite 10 Montag, 23. Dezember 2002 2:28 14
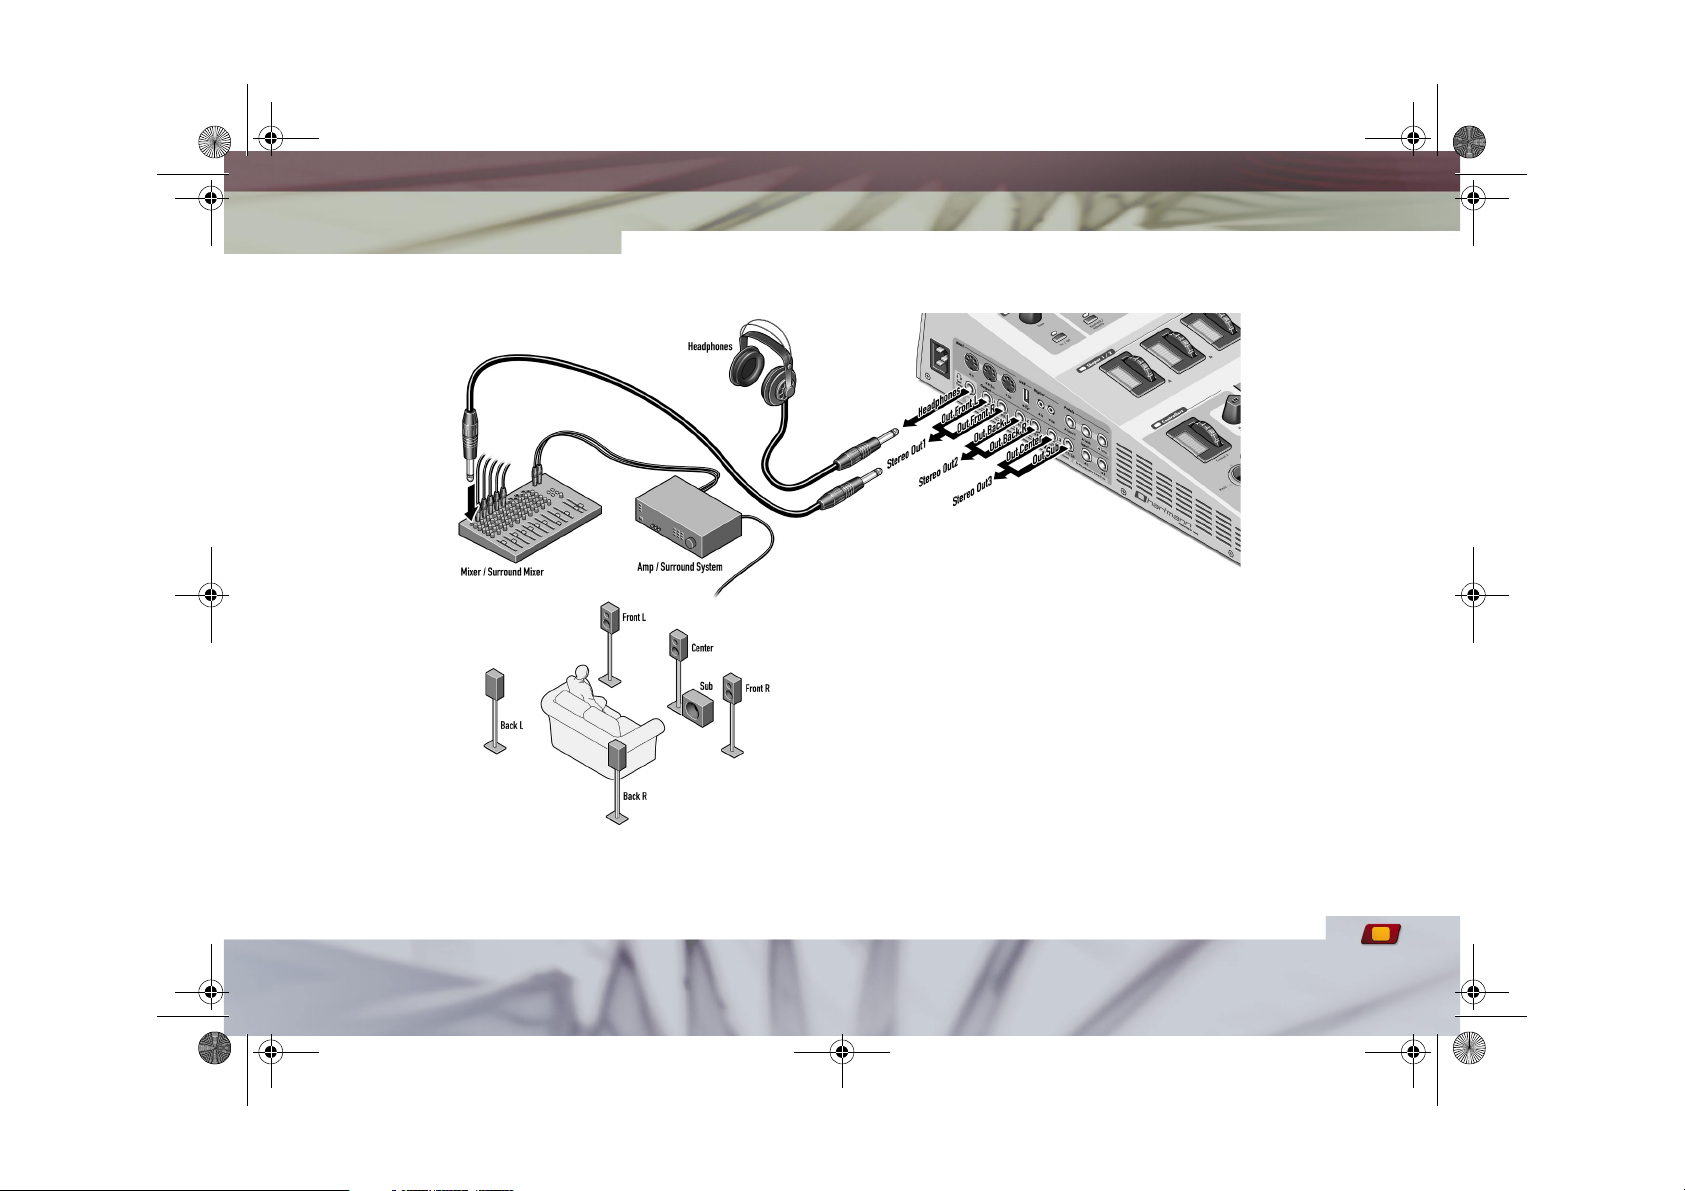
Stereo setup, surround setup, headphones
Stereo setup, surround setup, headphones
The volume of all analog audio outputs and the headphones output is controlled via the master volume knob.
Whenever you work with headphones, be sure to check the volume before you strike any keys!
10
Outputs: 3x Stereo L, R or Surround Front, Back, Center/Sub:
• Mono: Use the right channel of stereo output 1.
• Stereo: Effects are routed through stereo output 1 only; outputs
2 and 3 remain dry. You can patch every sound of any setup to one
of the three stereo outputs (out setup parameter), including the
volume and pan settings for that sound. See table 5 on page 61.
• Surround: Stereo output 1 carries the signals for the front
channels (L, R) and stereo output 2 carries the signals for the two
back channels. In surround mode, the center channel signal is
routed via output 3 left; output 3 right sends a signal destined for
the subwoofer.
The setup menu also contains sound-related parameters for the
surround channels (table 5 on page 61).
Headphones: Class A stereo headphones output. In surround mode,
you will hear the two front channels in your headphones.

Neuron.book Seite 11 Montag, 23. Dezember 2002 2:28 14
External controllers: Footswitches and pedals
Control 4:You can connect a continuous controller of any type and
polarity here. In the controller menu, you can define up to four functions
for the pedal (see page 165).
In the default setting, control 4 adjusts the volume of both resynators.
MIDI controller number: 11 ("expression").
Neuron automatically identifies the type of connected footswitch and sustain pedal when it is powered up. If this is
not the case, you can provide that information to Neuron via the basic settings parameters footswitch and sustain ped
Switch: Port designed to take a footswitch of any type (opener or
closer) and polarity. You can define functions for the switch in the
controller menu (see page 167).
MIDI controller number: 66.
Sustain: Connect a standard sustain pedal here.
MIDI controller number: 64.
11
External controllers: Footswitches and pedals

Neuron.book Seite 12 Montag, 23. Dezember 2002 2:28 14
MIDI setup
MIDI setup
12
In: MIDI input. Neuron receives MIDI data from
the MIDI output of a computer, MIDI keyboards,
sequencer, or other MIDI controller via this
input.
Thru: This port receives the same signal as the
in port. You can patch MIDI data "thru" to
another MIDI device via this output.
Out: All MIDI data generated in Neuron is sent
to other MIDI-enabled devices via this MIDI
output. Connect a MIDI device that you want to
control via Neuron here.
You will find a detailed description of Neuron’s
MIDI control mechanisms starting on page 178.

Neuron.book Seite 13 Montag, 23. Dezember 2002 2:28 14
Digital inputs/outputs, USB connection
Digital In/Out: Digital audio input and output. Designed for loss-free audio
data transfer, these are S/PDIF channels in coaxial format with a fixed
sampling rate of 44.1 KHz (24 bits). The serial transfer format consists of
the actual audio data as well as various other info and status bits, some of
which enable copy protection.
For example, you could use a suitable coaxial cable (75 ohms, RCA connectors) to connect Neuron to a hard disk
recording system, DAT recorder, or digital mixer. Note that the content of the digital signal sent via this port is identical
to the analog signal routed out via stereo output 1.
USB: Standard USB interface for connecting a PC/MAC (via USB network adapter!). For details, see page 185.
Digital inputs/outputs, USB connection
13

Neuron.book Seite 14 Montag, 23. Dezember 2002 2:28 14
Powering up (finally!)
Let the games begin...
Set up your gear as follows: Connect stereo output 1
(L/R) to the inputs of your mixer or audio interface.
For purposes of MIDI control, connect the MIDI In/
Out ports in the standard manner used for other
synthesizers.
To learn more about Neuron’s connections and
interfaces, see page 8.
14
While the Neuron is booting (that is, loading all data
required for operation), the main display reads
Then Neuron’s software is initialized.
This launching process can take some time.
Powering up (finally!)
The on/off switch is the Hartmann logo located at
the rear of the housing.
When Neuron comes on line, it is in sound mode with
sound 0 loaded.
The switch lights up continuously when Neuron is up
and running.

Neuron.book Seite 15 Montag, 23. Dezember 2002 2:28 14
Switching off
To switch off Neuron (though we’re keen to know
what reason you might have to ever shut Neuron
down...), briefly press the handsome mains power
switch.
If you have defined the option ask for the switch off
parameter (which is the default setting) in the basic
settings, the following question appears in the
display
Press enter (that’s the knob next to the main
display) in order to shut Neuron down. This process
takes several seconds and is indicated by the display
reading,
If you reconsider at the last moment (very sensible of
you), press the exit button so that Neuron remains
powered up.
If the basic settings parameter switch off is set to
quick, Neuron will switch off without further inquiry.
Switching off ...
We recommend that you have Neuron prompt you
before it powers down; that is, set switch off to ask.
We endowed Neuron with this option to prevent it
from being switched off inadvertently (say because
in his on-stage frenzy your easily excited vocalist
tends to mow down everything in his path).
Emergency off
In the unlikely event that Neuron refuses to power
down in the normal "orderly" fashion, you can always
use the emergency off function. Do this by pressing
and holding the mains power switch for five seconds.
This option is your last-resort. It is comparable to
.
pulling the mains plug. So, use it in emergencies
only. Oh, and that telltale popping noise that
indicates a connected device has been switched off
while the sound reinforcement system remains? You
will hear it in all its sonic glory through the audio
outputs!
Beyond that, there is the possibility of data
integrity problems on the hard disk, though
chances of this occurrence are remote.
15
Switching off

Neuron.book Seite 16 Montag, 23. Dezember 2002 2:28 14
Quick Start Guide
Quick Start Guide
Have you set up your gear at least in a rudimentary configuration, connected Neuron, and switched it on? Good;
now, let us take you on a whirlwind tour. First let’s take a peek at Neuron’s modules:
16
(1) Resynators (see the description on page 69). This is
where the sonic revolution starts! Resynators are the
interface between Neuron’s models and your creative
powers. (2) The blender is the arbitrator between the two
resynators (see the description on page 93). (3) Shaper
1 and 2 are flexible envelope generators (page 99). (4) The
programmer is Neuron’s command and control center and
administrative headquarters (page 45). (5) Lurking
beneath the mod’s unassuming exterior is a powerful LFO
generator serving as a freely assignable modulation source
(page 114). (6) The slicer is an unusual variation on an LFO
(page 119). (7) The silver module is a multi-effect
sporting a top-flight multimode filter (page 123). It is also
the home of the surround controls. (8) Shaper 3 lets you
define a filter envelope (page 149). (9) Master effects
put pro quality delay and reverb at your fingertips
(page 154). (10) And finally we give you free controllers
for free-thinking citizens (page 162)!

Neuron.book Seite 17 Montag, 23. Dezember 2002 2:28 14
If you cannot wait to find out the order and hierarchy
of modules in the signal flow, check out page 43/44
where you will find a detailed diagram that should
answer all your questions.
And now back to our guided tour.
The following Quick Start Guide caters for seasoned
keyboardists and producers who have plenty of
experience with synthesizers. Follow along with
these steps and you will gain an initial impression
of Neuron’s powers without delving into detail. So
let us get down to some hands-on fun and leave the
theory for later...
Local on/off
You w ill find the Local on/off MIDI parameter in
Neuron’s basic settings. To adjust it,
• Press the basic settings button located below
the main display. The display reads
• Use the navigation stick at the left of the
display to scroll down (we call this little
exercise stick.down) until the Local parameter
appears in the display:
• Readjust the parameter value by twisting the
knob at the right of the display.
You will find the purpose, use and handling of all
basic settings parameters described in the section
starting on page 36.
You will learn more about MIDI control on page 178.
Loading and playing sounds
You have three options for loading sounds:
• Type in the three-digit sound number on the
numeric keypad (the sound loads immediately
after entering the third digit),
• or press the up/down buttons to load the next/
previous sound,
• or dial in the sound number by twisting and
then pressing the knob located next to the
display (pressing = enter).
For more insight on sound mode, check out
"Programmer: Programming sounds" starting on
page 49.
17
Quick Start Guide

Neuron.book Seite 18 Montag, 23. Dezember 2002 2:28 14
Quick Start Guide
18
Exit/panic
If you get lost in a menu, simply press the exit
button located at the bottom right of the main
display. Sound loader will reappear. Pressing and
holding it activates the panic function, which
restarts Neuron. The device reports back with the
most recently selected sound or setup activated.
Something old and something new
You will find that though Neuron features many new
and different things, its structure is largely familiar
and certainly very clear. Filters (though in the
Neuron the silver module does the filtering) and
envelopes (that would be the Shaper) are old
acquaintances, as is the LFO (called "mod" in
Neuronese). However, instead of conventional
oscillators, Neuron features two resynators. One or
two models provide the source material for every
sound. They can be processed in a variety of ways in
the resynators. Sound processing options are so
extensive that you will seldom use the filters and
effects. In fact, many factory sounds do without
filters altogether.
Effects on/off (silver effects + master effects)
• There are two effect units in Neuron. Located in
the silver module, freq FX and time FX are
available for every sound. They remain assigned
to each sound even in setup mode. You can
switch them on and off separately via the freq
FX and time FX buttons. You can also opt to
switch the entire silver module on and off via
the on/off button.
• Master effects (delay and reverb) are global,
which means they are available once only for
each sound/setup. You can switch them on and
off via the effects on/off button.
For a detailed description of the silver module, see
page 123. For more on master effects, see page 154.
A controller for every season
Neuron’s free controllers are assigned to many of the
preset sounds. These are
• the modulation wheel (control 2),
• the stick controller (pitch bend and control 1)
• and the rotary encoder (control 3).

Neuron.book Seite 19 Montag, 23. Dezember 2002 2:28 14
When you are checking out sounds, be sure to try on
the controllers for size. This will give you a first
impression of their amazing sound-shaping
possibilities. Read "Free controllers" starting on
page 162 to learn how to integrate controllers into
the modulation matrix.
Resynators, scape/sphere, editing via stick
The resynators are the heart of Neuron’s synthesis
engine. A single model in a resynator offers
astonishingly versatile sound-sculpting
possibilities. Neuron's fundamental sound source,
the model is divided into a scape (that’s the soundgenerating section) and a sphere (the soundshaping section). For a piano sound, for instance,
the strings are represented in the scape and the
body in the sphere. There are six sound parameters
distributed over three levels for each scape/sphere.
Parameters differ from model to model and are
provided with descriptive names and functions.
To experiment with resynator parameters, first
determine whether you want to edit the scape or the
sphere using the scape/sphere button. Then select
the desired parameter level by pressing the
parameter level button. Your best bet is to start
with parameter level 1.
You will find an in-depth explanation of resynators
and all their parameters and control features as well
as a bunch of tips on all key "how-to’s..." starting on
page 69.
Storing snapshots and sounds
Neuron's stick controllers are highly responsive
tools, making it easy for you to manipulate
parameters very subtly. Often very different sounds
are just a figurative "hair" or nudge apart, so you
may find that a touch too much relegates the desired
sound to some digital hell. But help is near in the
form of the snapshot function. Best try it out now
and use it frequently:
• After you have discovered a hip variation on a
sound, simply press the snapshot button
located in the programmer module. Presto, the
current panel settings are assigned a number
and stored. You can store up to 50 snapshots.
• To retrieve a stored snapshot, press the play/
compare button and twist the knob next to the
display to select the desired snapshot number.
Use enter (press the knob) to load the
snapshot.
Snapshots and the play/compare function are
described in detail on page 52.
19
Quick Start Guide

Neuron.book Seite 20 Montag, 23. Dezember 2002 2:28 14
Quick Start Guide
20
Please bear in mind that snapshots are not stored
with the sound and that they are deleted when you
change sounds.
For this reason, make a habit of storing hip sounds
immediately!
Press the store button to save a sound. Then twist
the knob to select the desired memory slot (or sound
number). Scroll to the second line of the display
using navigation stick.right. Fiddle with the knobs
and navigation stick to assign a name (stick.up/
down changes between uppercase and lowercase).
Conclude the storage process by pressing enter (the
knob, that is). You have 1,000 memory slots
available for storing sounds.
To learn more about this, read the section
"Programmer: Programming sounds" starting on
page 49.
Loading and playing setups
Setup mode is Neuron’s multimode. Four sounds can
be played on four MIDI channels, or assigned to the
keyboard in the form of a split/layer. 512 memory
slots are available for setups.
Activate setup mode by pressing the setup button,
then load stored setups using the same three
methods used to load sounds stored in the sound
mode - via the numeric keypad, up/down or rotary
knob (see section above).
Setting and assigning MIDI channels
Assign MIDI channels to the individual sounds of a
setup in the setup menu:
• Neuron is in setup mode.
• Press the exit button twice briefly to activate
the setup loader:
• Stick.down repeatedly to scroll to the MIDI
menu option:
The MIDI channels of the four sounds in the
current setup are listed side by side.
Stick.right/left moves the cursor "<" from one
sound to the next. The name and number of the
sound you just edited appear in the first line of
the display.
• Twist the knob to set the channel number for
each of the four sounds.
A value of 0 denotes "omni."

Neuron.book Seite 21 Montag, 23. Dezember 2002 2:28 14
In Neuron, the MIDI global channel (as defined in
the basic settings) applies exclusively to sound
mode. The aforementioned settings apply in setup
mode.
You will find a detailed description of Neuron’s MIDI
control mechanisms starting on page 178.
Storing setups
Setups are stored in the same way as sounds. Note
that actual sound data is not stored in the setup.
Instead, the system stores references (or links) to
the sounds contained therein. If a sound is edited,
moved, or deleted, all setups in which this sound is
used change accordingly.
For a closer look at all parameters and the handling
of setups, please refer to the section "Programmer:
Programming setups" starting on page 58.
Creating your own models
You can load additional models or make your own
models from samples to add to Neuron’s 200 factory
models. This is done on an external computer (Mac or
personal computer) rather than on Neuron.
You will require a software application called
ModelMaker to do this. It analyzes samples or
multisamples and converts them into Neuronspecific resynthesis models. These are transferred via
USB to Neuron’s internal hard disk.
To learn how this works and which software and
hardware are required, read "The load/dump
function" starting on page 187. You will find further
information on ModelMaker on page 192.
21
Quick Start Guide

Neuron.book Seite 22 Montag, 23. Dezember 2002 2:28 14
The philosophy behind Neuron
22
Neuron basics
The philosophy behind Neuron
Contemporary music productions have benefited
from computer assistance for years now. Though
computers have assumed the role of the actual
recording equipment, they come in many other
musical guises. Case in point: Where in the past
synthesizers and samplers were made up of discrete
electronic components, today they run as programs
on a DSP (digital signal processor).
The past five years have seen the advent of a
technology so powerful that it allows emulations of
musical instruments to be integrated into computerassisted music systems in the form of software plugins. This lets you enjoy the convenience of accessing
virtual instruments right there on your computer.
The instruments appear on a graphical interface on
your screen, alongside the actual recording software.
This view depicts the various control features –
faders, knobs, buttons, switches, and so forth – that
serve to "play" a virtual instrument such as a sampler
or synthesizer.
It is safe to say that today this technology is the
industry standard. However, despite the unassailable
convenience, ever more users are voicing their
dissatisfaction with the ergonomic shortcomings of
playing an instrument via screen, computer
keyboard, and mouse. Musicians and producers alike
feel that this uninspiring working method is an
encumbrance, hampering creativity and the allimportant impelling force of musical intuition. The
growing success of specialized remote controllers –
outboard gear sporting real control features - attests
to the fact that many musicians miss the touchy-feely
vibe of a real instrument.
The irony of this retro yearning is that most virtual
instruments are computer-generated emulations of
what were once real instruments. But the allure of
the corporeal is compelling, and savvy users have
come to appreciate that tactile sensations play a
part in making music, and that hands-on handling of
an electronic instrument’s man-machine interface
gets the creative juices flowing.
Though this bias towards the palpable assisted in the
birth of Neuron, tactility is just one of many aspects.
Taken in its entirety, it is nothing short of the next
logical step in the ongoing development of synthesis
engines. And thus its man-machine interface is an
organic extension of the synthesizer’s heart and
soul, the synthesis engine, and a remote control
designed specifically to afford direct access to its
formidable powers.

Neuron.book Seite 23 Montag, 23. Dezember 2002 2:28 14
A short trip down memory lane
An explanation of the true breadth and depth of the
concept behind Neuron requires a trip down memory
lane to recap the history of electronic musical
instruments and synthesizers.
Almost a century ago, the pioneers of electronic
music began experimenting with colossal synthesis
engines powered by electricity. On a quest for new
sounds that classic instruments were incapable of
producing, these musical modernists spawned
devices that would inspire many great tunesmiths
and composers of film scores. The driving force
behind this crusade was the desire to explore the
great sonic frontier. That would change over the
course of the coming decades. Commercialization
and corporatization changed the way music was
perceived and made. Technological advances,
particularly strides made in the past 30 years, made
it possible to produce entire compositions using
electronic instruments called synthesizers and
samplers.
The new market paradigm for instrument builders
was to fashion "authentic" sounds – timbres and
tones as close as possible to those produced by
traditional instruments.
Imitation gave way to innovation in the last decade
or so when musicians began to see the tremendous
creative potential that the all but forgotten classic
synthesizers harbored.
Concurrently, a new musical style emerged that
celebrated the sound of electronica as such.
Today contemporary productions are for all practical
purposes musical hybrids in which synthesizer
sounds typically share sonic space with the timehonored instruments of pop music. That explains the
modern-day renaissance of archetypal synthesizers,
albeit in the guise of the aforementioned digital
emulations rather than as a box full of complex
discrete circuits.
In every era of sound synthesis, half-mad audio
scientists toiled away in their labs, concocting all
manner of approaches to synthesis. Key technologies
emerged and held sway over the synthesizer market
for many years. Hordes of companies embraced them
and incorporated them in proprietary products. A
handful of technologies prevailed – to this day, they
provide the coordinates by which every manufacturer
charts his synthesizers’ course.
23
The philosophy behind Neuron
Neuron.book Seite 24 Montag, 23. Dezember 2002 2:28 14
The philosophy behind Neuron
24
A case can be made for the point that a trailblazing
technology arrives every 15 to 20 years and, equally
important, spawns generations of commercially
successful products:
• Subtractive synthesis
Pioneers: Moog™, EMS™, Buchla™, Sequential
Circuits™, Oberheim™, ARP™
• Additive synthesis
Pioneers: Fairlight™, Synclavier™, PPG™,
Technos ™
• Hybrid synthesis / digital synthesis
Pioneers: PPG™
• FM (frequency modulation)/PD (phase
distortion) synthesis
Pioneers: Yamaha™, Casio™
• Virtual sound synthesis / physical modeling
Pioneers: Yamaha™
• Sampling
Pioneers: Fairlight™, EMU Systems™,
Synclavier™
... and today: Neuron!
We are convinced that with Neuron, we have created
a technological force sure to drive a sonic revolution
of the same order. Neuron employs a technology that
in the near future will reshape the perceptions of the
entire computer industry. Adaptable computer
algorithms power it. Its sound generation system is
rooted in the overwhelming potential of resynthesis.
The term is easily defined: resynthesis is a process by
which an original exemplar is artificially replicated in this case, creating a digital mirror image of a sonic
event – with all its characteristic features remaining
intact.
We applied the principles of an adaptive program
that has evolved and been refined over many years.
Now for the first time in the history of synthesizers,
it is possible to access resynthesized sounds with
astonishing accuracy and radically reshape them to
dramatic, even spectacular effect.
Like a sentient being, Neuron recognizes a sound.
But more than that, its intelligence is such that it
puts at your disposal parameters whose structures
are adapted dynamically to suit this sound. And that
makes Neuron the first synthesizer with a brain full
of responsive synapses, that is, variable rather than
fixed parameter assignments.

Neuron.book Seite 25 Montag, 23. Dezember 2002 2:28 14
A new sonic dimension in the age of the remix
Neuron is an instrument of the remix era.
Contemporary pop music no longer clings to the
notion th at music al s o unds or t he mes must be new ly
developed or composed. Instead, music-makers mine
the rich seam of our musical heritage for material;
good ideas are recycled and developed further. A
drum loop is sampled to create another - the fact
that the first drum loop was already sampled from an
old record notwithstanding. And so it goes ad
infinitum.
Neuron captures the musical spirit of the time.
Rather than dipping into a single well – a particular
form of synthesis or sound source - Neuron draws
buckets full of musical material from every well. It
has the power to develop every sound further. It does
not matter if the source is a lone flute sound or an
entire song. What for the conventional synthesizer is
the end of the sound generation chain is only the
beginning for Neuron. There are no more rules or
boundaries.
Like the remix changed the face of pop music,
Neuron’s unique powers of resynthesis open up a new
dimension in creative musical endeavor, offering
unprecedented opportunities for individual
expression to both musicians and non-musicians.
A look at control features in general
Neuron’s extraordinary user interface is another
crucial feature alongside its innovative synthesis
engine. Our philosophy dictates that every Hartmann
instrument is easy to understand and use, that it
handles intuitively, and that it makes discovering
new technology fun. To live up to that promise, we
were compelled to invent several new control
features. The tactile experience of generating sound
via Neuron is something entirely apart from what you
have encountered with conventional synthesizers.
The layout of the external operating panel mirrors
Neuron’s internal signal flow and provides a vivid
visual reference to how individual modules interact.
Its control features are arrayed logically. Striking
visuals draw your attention to key functions and
fundamental settings. The graphics of secondary
functions incorporating several control features are
homogenous, denoting their common ground and
shared purpose.
25
A look at control features in general

Neuron.book Seite 26 Montag, 23. Dezember 2002 2:28 14
A look at control features in general
26
Stick controller
The resynators’ and silver module’s principal control
features are stick controllers.
Every stick is surrounded by four cross-x displays
showing individual parameters and current settings.
Parameter value changes are indicated directly.
Opposite parameters (for example, big and small) are
arrayed diametrically. Logic dictates that the sum of
their values is always equal to the peak value.
Parameters that are not opposite each another can
be edited independently.
The jaw-dropping power and finesse of this
unprecedented set of control features is definitely
unmatched. They enable everything from the
subtlest to the most drastic modulations.
The stick’s mushroom-like contours facilitate
handling. A stick may be gripped with the thumb and
(index) finger or guided by inserting a finger into a
trough-like groove on its surface.
When you move a stick, the first of the parameters
that you have just edited (generally at the top left)
appears in the main display. Use the rotary knob and
navigation stick located next to the main display to
edit the values directly and in numeric increments.
Experience has shown that this method of using the
stick intuitively to make a rough adjustment and
then fine-tuning the setting numerically works well.
Calibrating stick controllers
Owing to their physical makeup, the resynators’ and
silver module’s three stick controllers and control 1 /
pitch stick have certain mechanical manufacturing
tolerances. The sticks must be calibrated to
compensate for these small deviations. The process
of calibration adjusts the stick’s mechanical travel to
match the value range it is designed to cover.

Neuron.book Seite 27 Montag, 23. Dezember 2002 2:28 14
When is calibration necessary?
All sticks and aftertouch are factory calibrated so
you do not have to do this under normal
circumstances. However, we recommend that you
re-calibrate (as described below) if:
• you are unable to access all parameter values
via stick;
• parameter values jump when you move sticks;
• the center position of the pitch bend (control
1) is no longer true to pitch;
• the keyboard aftertouch value peaks out
despite the fact that the basic settings
parameter aftertouch scale (see page 40) is
adjusted properly.
How to calibrate stick controllers (and
aftertouch)
• Press the basic settings button. The main
display shows the menu offering Neuron’s basic
settings.
• Stick.down the navigation stick located next to
the main display to scroll to the basic settings
menu option
At this point you can cancel the calibration
process by pressing exit or by operating any
other module.
• The following prompt appears:
• Rotate the first stick that you want to calibrate
several times, stirring like you would sugar into
coffee. Be sure to move it to the full range of
travel. Do this until the values shown in the
main display no longer change. This stirring
action serves to measure the stick’s maximum
range of travel. These physical values are then
mapped to the value range that is to be
covered, meaning that they are converted.
The display for resynator 1 could look
something like this:
27
A look at control features in general

Neuron.book Seite 28 Montag, 23. Dezember 2002 2:28 14
A look at control features in general
28
• Move the two resynator sticks, the silver
module’s stick, and the stick labeled control 1
one after the other as described above.
• Because the control 1 stick also serves as a
pitch controller, you can also calibrate its
center position (pitch = 0). The idea is to
prevent unintentional detuning when it is set
to the zero position.
In order to determine the center position of
control 1, move the stick very lightly around
the center. While Neuron is doing the
calibration, its display shows the values
measured by the device.
Example:
• Here is how to calibrate aftertouch: Strike any
key on the keyboard and then bear down with
increasing pressure until the measured
maximum value appearing in the display does
not change anymore.
Example:
• Once you have calibrated everything to your
satisfaction, confirm the values by pressing the
rotary knob next to the main display (enter).
The Neuron software’s current version number
appears in the main display.
Basic parameter stick mode
While on the subject of sticks, let us look at the stick
mode parameter in the basic settings:
When you switch to another parameter level or load
another sound/model, the four cross-x displays
indicate the stored values, but the stick will rarely be
in a position that corresponds to these values. Using
the stick mode parameters, you can determine how
the sticks respond when this is the case. You will find
a detailed description of the parameter on page 37.
Stick animation
You can record the stick controllers’ movements and
play this stick animation back to manipulate
parameter values on the fly.
For a detailed description of stick animation, check
out page 89.

Neuron.book Seite 29 Montag, 23. Dezember 2002 2:28 14
Data input wheels (wheels)
Envelopes are controlled
using rotary encoder
wheels and adjacent bar
displays. This enables
effective hands-on
tweaking and swift
access to all parameter values of entire groups of
control features. What’s more, this approach to
handling is ideal for ascertaining envelope settings.
Note that several wheels can be operated
simultaneously.
The wheels’ value ranges are scaled on the fly. This
means that the faster you turn a wheel, the greater
the range of values it steps through.
Knob
The pentagon at the top
morphs into a circle
below. This five-sided
design affords a sure
grip. Though the visuals
of this simple control feature are asymmetrical, the
knob’s axis evinces symmetry. The tug of war
between the two signifies dynamism. The knob lacks
a pointer because it is a rotary encoder, meaning
that its range is infinite. You will find that this
control also responds on the fly so that you can
adjust values in individual incremental steps as well
as sweep across greater value ranges.
The knob next to the main display also serves the
function of an enter button as found on the
computer keyboard (see page 31).
Menu navigation in the main display
The central control unit contains the main display
(two lines with 16 characters each); the parameters
of all Neuron modules appear in it. If you activate a
control feature on the device’s panel, the display
also indicates the corresponding parameter changes.
This gives you the choice of editing parameters using
the given module’s dedicated control features or
controlling the module via control unit.
The navigation stick lets you access all menu options
swiftly and efficiently.
A rotary encoder with a built-in button serves to
input data and confirm entries (enter).
29
A look at control features in general

Neuron.book Seite 30 Montag, 23. Dezember 2002 2:28 14
A look at control features in general
30
Note that Neuron is not endowed with a master menu
that starts at a common root and extends throughout
the modules. Instead, each module has its own menu
that is accessed like this:
• Press the menu button of the given module to
call the most recently edited menu option into
the main display. Press the menu button while
the menu is active to access the top level of the
menu (for example, model loader in the
resynators).
Or:
• Manipulate any of the module’s knobs or
buttons. The main display will immediately
display the appropriate menu option. You can
then scroll through that module’s menu using
the navigation stick (on the central control
unit) in order to edit other parameters.
Total recall: Neuron "remembers" menu options!
When you begin designing sounds, you are sure to
work with several Neuron modules simultaneously.
For this reason, Neuron remembers the most
recently edited option of every menu. So, if you exit
a menu and return to this menu later by pressing the
menu button, you will arrive at exactly the same
point. In order to jump to the top level of the menu
from there, press the menu button once.
Navigating menus
After you retrieve the menu of a given module, you
can edit using the navigation stick and knob
(located to the left and right of the main display,
respectively):
• Stick.down and stick.up to scroll through the
main menu options. Stick.right and stick.left
to jump to and scroll through submenus if on
hand.
• The rotary knob edits the current parameter.
Depending on the parameter, you can either
select among predefined settings or adjust a
numeric value.

Neuron.book Seite 31 Montag, 23. Dezember 2002 2:28 14
Neuron’s enter button
For some menu options, pressing the knob has the
same effect as pressing an enter key: When loading
models, sounds and setups, first select the number
(it appears in the display) by twisting the knob and
then pressing the knob to confirm the selection. The
desired data is then loaded.
The enter button is also required for operations such
as storing calibration and loading/dumping data.
The settings of typical value-based parameters take
effect without having to press enter.
While editing a parameter value, you can reset the
value to the given default value by simply pressing
enter. For parameters that can have both negative
and positive values, this is generally a value of 0.
Exit. But do not panic.
Press the exit button briefly to quit the current menu
option.
In sound mode, this returns the display to the top
level of the sound menu, which is sound loader. In
setup mode, pressing exit either jumps to the most
recently edited menu option of the setup menu or, if
you are already working in the setup menu, to setup
loader.
In some cases, exit also serves to cancel the
operation that is currently underway, for example,
when storing a sound/setup or when Neuron asks
you if you really want to switch it off.
If you press and hold the button until the LED
extinguishes (three seconds should do), you will
activate the panic function. This generates an all
notes off command, and that spells immediate
silence, say, in the event of a hung note. It tells both
Neuron’s internal workings as well as the MIDI setup
to shut up. After rebooting, Neuron comes back on
line in the same mode that it was in before the panic
attack occurred. All settings remain intact.
31
A look at control features in general

Neuron.book Seite 32 Montag, 23. Dezember 2002 2:28 14
Operating mode: Sound mode
32
Operating modes
Neuron distinguishes between two operating modes:
sound mode and setup mode. The latter you are
probably familiar with – it has the same underlying
concept as multimode.
Neuron comes on line in sound mode.
Operating mode: Sound mode
As its name would indicate, in sound mode you can
play individual sounds, edit, and store them. You are
also free to create new sounds by loading models
into the resynators, editing their parameters, and
doing other fun stuff like defining envelopes or
piling on silver effects. Since this operating mode
pertains to a single sound, it is also called single
mode.
How to enter/exit sound mode
Sound mode and setup mode are mutually exclusive.
To access sound mode, quit setup mode by pressing
the setup button. The LED above the button does
not light up when Neuron is set to sound mode.
You will find out how to store, load and edit sounds
in the section starting on page 50.
Operating mode: Setup mode
In setup mode or multimode, sounds created in
sound mode are combined into setups. A setup may
contain up to four sounds that can be played
simultaneously.
Sound mode and setup mode are mutually exclusive.
To access setup mode, quit sound mode by pressing
the setup button. The LED above the button lights
up when Neuron is in setup mode.
Selecting sounds:
Located above the main display you will find four
buttons labeled sound 1 to sound 4. Every button
represents a sound stored in the current setup. You
can assign sounds to buttons in setup mode. For
more on this, see page 65.
When you press a button repeatedly, the assigned
sound is activated (LED lights up), deactivated (LED
extinguishes), or primed (LED flashes).
At the risk of belaboring the obvious, an activated
sound is played with the setup while a deactivated
sound is muted. But what does a primed sound do?
A sound has to primed before you can edit it. It can
be manipulated by means of the module’s control
features while the current setup is performed. For
example, you can edit a primed sound’s model
parameters in real-time using the sticks.

Neuron.book Seite 33 Montag, 23. Dezember 2002 2:28 14
Further setup parameters
A setup consists of more than merely four sounds. It
contains many other parameters, for example, the
balance of levels between individual sounds,
surround settings, and so forth. Though these
parameters have a bearing on the sounds contained
in a setup, they are only meaningful in the context
of a setup.
All parameters that are stored along with a setup are
listed in table 5 on page 61.
Handling setups
The section "Programmer: Programming setups"
starting on page 58 provides detailed insight into
how to program setups.
Hierarchies: The Neuron memory model
Like the food chain in the real world, Neuron is
ordered in hierarchies. We distinguish between four
levels that are stored separately.
The basic settings (see page 36) define the device’s
basic properties. All global parameters that you will
use to tweak Neuron to suit your taste and needs are
stored here.
All models that you will load into the resynators and
use as the source material for sounds are stored at
the model level.
Trust us: The factory model database contains plenty
of models. Courtesy of Neuron’s system architecture,
every model harbors the potential for thousands of
tone-shaping options, which is why the actual
number of models does not say much about Neuron’s
phenomenal range of tonal possibilities.
A model of understatement, a notable British
automaker likes to call the performance capacity of
his lavishly appointed limousines’ muscular engines
"sufficient." Sounds good to us: Neuron ships with a
"sufficient" range of interesting models. In fact, you
will find it impossible to plumb the full depths of its
powers of expression. In the unlikely event that you
find yourself hitting any boundaries, you will be
delighted to learn that the model level on its internal
33
Hierarchies: The Neuron memory model

Neuron.book Seite 34 Montag, 23. Dezember 2002 2:28 14
Hierarchies: The Neuron memory model
34
hard disk offers plenty of room to house many more
models.
The model files containing all sphere and scape
parameters come in different sizes depending on
complexity. But there is no reason to fret about hard
disk real estate – there is plenty of acreage reserved
for files.
In the section "The idea behind Neuron models"
starting on page 70 you will find out everything
worth knowing about models.
Note that when editing sounds via resynator, the
actual model data stored in the model database is
not edited. A model is loaded into the resynator as
a reference – in other words, another instance of
the original model is generated - and the settings
that you dial for its parameters are stored at the
sound level rather than the model level.
This explains why the sound level is the third stage
of our hierarchy. Every sound is the sum of wildly
diverse information, including everything from the
employed models to silver effect settings. When you
load a sound, all settings pertaining to this sound
are loaded from the sound database into the
appropriate modules. Every new sound that you store
wanders into the sound database accompanied by all
this data.
Unlike many other synthesizers, Neuron has no
sound banks because the 1,000 potential sounds are
stored sequentially. For purposes of MIDI addressing,
consider sounds 0 to 99 to be a "virtual" first bank,
sounds 100 to 199 a second bank, and so forth.
So, what kind of information is stored at the sound
level?
• The name and number of the sound.
• References (or links) to the employed model
numbers of both resynators.
• The settings of all scape and sphere parameters
of both resynators (see page 77).
• Blender settings (see page 94).
• Envelope settings (see page 108).
• Mod settings (see page 116).
• Slicer settings (see page 122).
• Silver settings (see page 138), with the
exception of the surround settings - these
belong to the setup!
• Controller settings (see page 165).
• Sound-related pan values (page 49).
• Master effect settings are stored at the sound
level and at the setup level.
Back in the section "Operating modes" starting on
page 32 you learned that up to four sounds can be
combined into a setup.

Neuron.book Seite 35 Montag, 23. Dezember 2002 2:28 14
This brings us to the very top of our hierarchy:
Multimode-specific data is stored at the setup level.
Each of the up to 512 setups that the setup database
can hold contains the following information:
• Name and number of the setup.
• Numbers of the four sounds.
• Volume level for every sound.
• Transpose setting for every sound.
• Detune setting for every sound.
• MIDI channel for every sound.
• Local on/off setting for every sound.
• The selected audio output for every sound.
• Pan setting for every sound.
• Key low and key high for every sound.
• Low and high velocity for every sound.
• Silver mix value for every sound.
• Delay send for every sound.
• Reverb send for every sound.
• Surround settings for every sound.
The four sounds contained in the setup are not
copied into the setup; they are referenced by their
numbers. The actual sound remains in the sound
database. Its data is copied from there when a setup
is loaded. Consequently, every change made to a
sound is automatically audible in the setup without
having to be stored anew.
You will find in-depth information on these settings
in the parameter table on page 61.
Master volume
Adjust the overall volume of your Neuron using the
red master volume knob located below shaper 1.
The master volume knob controls the levels of all
analog audio outputs (stereo/surround and headphones) as well as the digital output (S/PDIF).
The current setting is not stored with a sound or
setup! Instead, when Neuron comes on line, it
automatically dials in the volume level set when you
last played the synth.
When you twist the master volume knob, the current
volume appears in the main display (the value range
is 0 to 127).
At peak volume, Neuron delivers maximum dynamic
range with minimum converter noise. Back off the
volume on connected equipment and crank up
Neuron’s level. That said, though, you don’t want to
max out Neuron’s master volume; leave a little
reserve and, depending on sound, keep an eye (or
ear) on levels. You do not want any spikes to hurt
your ears or gear.
35
Master volume

Neuron.book Seite 36 Montag, 23. Dezember 2002 2:28 14
Fundamentals: Basic settings
36
Fundamentals: Basic settings
Neuron offers global parameters called basic settings
that let you set the device up to suit your wishes and
preferences. Basic settings have a bearing on the
device as a whole rather than a single sound or
setup.
Defining basic settings:
• Press the basic settings button located below
the main display. The display should read as
follows:
• Stick.down and stick.up to scroll through the
available global parameters (see table 1 on
page 37).
• Use the knob to edit the currently selected
parameter.
The device automatically quits the basic settings
menu when you edit a parameter in any module.
When you quit the basic settings menu by pressing
the basic settings button again, Neuron jumps to
the most recently edited menu. In both cases, the
device recalls the most recently edited basic
settings parameter and displays it when you call the
menu back up again.
Table 1 explains all basic settings parameters.

Neuron.book Seite 37 Montag, 23. Dezember 2002 2:28 14
A look at basic settings
Master tune Determines Neuron’s overall tuning by adjusting the reference frequency A3 (440 Hz). The value
Stick mode Determines the operating mode of stick controllers in the resynators and silver module.
indicated for this parameter is an absolute value (that is, it is not offset). Value ranges from 400 to 480
Hz.
A bit of background on this menu option: Neuron is not equipped with motorized sticks that retrieve the
current parameter values when you switch to another parameter level or load another sound/model and
move to positions corresponding to these values. After you switch over, the four cross-x displays indicate
the currently stored values, but it is an unlikely coincidence if the stick position actually tallies with
these parameter values.
Three modes determine how the indicated parameter values respond to stick movements:
• Jump: When a stick is toggled, every parameter immediately takes over the value of the current stick
position, that is, the value jumps.
• Snap: The parameter values remain unchanged when a stick is toggled until the stick moves to about
10 value increments within the range of the stored value. Then the value zeros in on the value determined
by the stick’s position and can be edited again. In essence, this mode simulates a motorized stick, with
the difference that the stick must be set manually to the correct position.
• Reltv (relative): The stick movement is relative to the stored value: The physical distance from the current
position to the furthest point of travel is superimposed on the range of values yet to be covered and
the scale is adjusted accordingly. Once the stick arrives at the maximum / minimum value, the stick
position and the range of values are identical again.
We recommend that you select a preferred mode and stick (ha, ha) with it.
Table 1: Basic settings
37
Fundamentals: Basic settings

Neuron.book Seite 38 Montag, 23. Dezember 2002 2:28 14
Fundamentals: Basic settings
38
ResyParReset Determines if default values are loaded into a resynator or the current values are retained when a model
is loaded.
Options:
• Yes: Models are always loaded into the resynator with the default parameter values stored in the model
database.
• No: No models are loaded into the resynator with the default values. The currently defined values are
retained in the newly loaded model.
• Ask: When loading a model, the device asks if you want to take over the parameter values or load the
default values. The display reads:
Use the knob to select yes or no before you load the model via enter.
The option of loading existing parameter values into another model can come in handy. Case in point:
You can load a similar model into the resynator and use the existing values as a starting point for your
sound-sculpting efforts.
Use Defaults?
Table 1: Basic settings (cont.)

Neuron.book Seite 39 Montag, 23. Dezember 2002 2:28 14
VeloCu rve Determines the dynamic response of the keyboard. Attack dynamics vary according to the selected
velocity curve. Your options are:
• Log2, Log1: Various types of logarithmic
curves.
• Linear (default setting): Linear curve, that is,
the pressure you apply to the key dictates
dynamic response.
• Exp1, Exp2: Various types of exponential
curves.
• Fix32, Fix64, Fix96 and Fix127: No attack
dynamics; instead response is fixed. The
higher the fixed value, the higher the output
volume.
The velocity value is computed for every voice.
In other words, every note you play is rendered
at its original velocity!
Neuron treats velocity like an internal
controller. The modulation destinations for
velocity are determined at the destination via
the depth parameter.
Example: Resynator volume is modulated via velocity when the menu option volume velo depth in the
resynator menu is set to a value other than 0.
For more on this, read the section "Velocity as an additional controller" starting on page 168.
Table 1: Basic settings (cont.)
39
Fundamentals: Basic settings

Neuron.book Seite 40 Montag, 23. Dezember 2002 2:28 14
Fundamentals: Basic settings
40
Aftertouch
scale
MIDI Glb Ch Determines the global send and receive channel for MIDI data (MIDI global channel) for sound mode. In
Defines a factor (threshold value) for the aftertouch scale.
As the name would imply, "aftertouch" is the pressure applied to a key once it has been pressed. The
keyboard determines how much force is applied, converts this value into an aftertouch command, and
sends it to predefined destinations. This data may be employed to shape tone, for example, to generate
vibrato or modulate the filter frequency (see below). The harder you bear down on a key after striking it,
the higher the aftertouch value and the more intense its influence on the given sound. In Neuron (and
via MIDI), aftertouch is monaural, meaning that the aftertouch modulation affects the entire sound
rather than individual voices.
Value range: 0 to 127. 0 deactivates the function. At low values, aftertouch is less responsive; a value of
127 gives you the full dynamic range.
Neuron treats aftertouch like an internal controller for which you can define up to four simultaneous
destinations. Go to the controller menu to do this. While you are there, you can also define the depth for
every destination. In addition to the "global" scale value, you can adjust aftertouch depth individually
for each destination.
For more on this, pore over page 165.
Note also in this context the menu option for calibrating aftertouch (see page 28).
sound mode, Neuron responds to incoming MIDI data only when the defined MIDI global channel and
send channel numbers are identical.
Value range: 0 to 16. 0 denotes omni, meaning that Neuron processes incoming messages on all MIDI
channels. For more on this, pore over page 178.
In setup mode, the individual sound-related MIDI channel settings in the setup menu apply - see
page 61.
Table 1: Basic settings (cont.)

Neuron.book Seite 41 Montag, 23. Dezember 2002 2:28 14
Local Deactivates/activates Neuron’s synthesis engine via the keyboard as well as via controls 1 to 4, the
SysXDeviceID Defines the device identification for system exclusive MIDI messages.
Dspl Contrast Controls the brightness of the displays. Values range from 1 (dark) to 4 (bright).
StkRec start Determines the trigger that starts stick recording.
Srnd Sub Hz Defines the cutoff frequency for the subwoofer channel in surround mode.
footswitch, the sustain pedal and aftertouch.
Local = Off: Neuron’s keyboard is disabled. It cannot address the internal synthesis engine; all controls
are deactivated. Neuron can play incoming MIDI data or serve as a MIDI master keyboard.
Local = On: The internal synthesis engine can be controlled using Neuron’s keyboard and as well as via
incoming MIDI data. All controls (see above) are enabled.
Note in this context the function of the local setup parameter, which serves the same purpose for every
sound within a setup (see page 61). If the global local parameter is set to off, the setup parameters of
the same name are overruled, meaning that all four sounds are off regardless of the respective local
parameter setting.
Hexadecimal values range from 00 to 7F.
To learn more about this, read the section "SysEx commands (System exclusive data)" starting on page
179.
After you press a module’s record stick button, the recording function is set to standby and the button’s
LED flashes. To actually start recording, you must activate the defined trigger, that is, either move the
appropriate stick or press any key on the keyboard. You will find further details on this starting on
page 89.
Options: Key or Stick.
Frequencies below the defined sub cutoff frequency are sent to the subwoofer.
Options: 13 Hz to 20.2 KHz (in semitone steps).
Surround mode is described on page 169.
Table 1: Basic settings (cont.)
41
Fundamentals: Basic settings

Neuron.book Seite 42 Montag, 23. Dezember 2002 2:28 14
Fundamentals: Basic settings
42
Footswitch Defines the type of footswitch connected to the pedal/switch port (see page 11).
SustainPed Defines the type of footswitch connected to the pedal/sustain port (see page 11).
Switch Off Determines how Neuron powers down.
Software:
Version
Calibration? Serves to calibrate all stick controllers and keyboard aftertouch. After you have pressed enter, another
Normally, Neuron identifies the connected switch on its own. If it fails to do this, you can enter the type
using this parameter.
Your options are open and close. MIDI controller number: 66.
Normally, Neuron identifies the connected switch on its own. If it fails to do this, you can enter the type
using this parameter.
Your options are open and close. MIDI controller number: 64.
Options: Ask (Neuron's query must be confirmed with enter; exit cancels the operation) or quick (no
query). We recommend that you stick with the default setting, ask!
To learn more about this, read the section "Switching off" starting on page 15.
Indicates the software version that Neuron is currently running.
Compare version numbers to find out if an update for your Neuron is ready and waiting on the Hartmann
home page (www.hartmann-music.com)!
prompt appears - Calib: Move sticks or press aftertouch – that lets you start calibrating.
Good-to-know background stuff: The sticks can be calibrated to compensate for mechanical
manufacturing tolerances. The process of calibration adjusts the stick’s range of travel to match the value
range it is designed to cover.
To learn how to calibrate sticks and aftertouch, refer to page 26.
Table 1: Basic settings (cont.)

Neuron.book Seite 43 Montag, 23. Dezember 2002 2:28 14
Neuron’s modules
Signal Flow
The following two charts depict the Neuron’s signal. The gray arrows signify audio data; control data is white.
43
Signal flow (part I)
Signal Flow

Neuron.book Seite 44 Montag, 23. Dezember 2002 2:28 14
Signal Flow
44
Signal flow (part II)

Neuron.book Seite 45 Montag, 23. Dezember 2002 2:28 14
Module: Programmer
Programmer is Neuron’s command and
control center. It is your tool for managing
sounds and setups. Use the numeric
keypad with the up and down button to
select setup and sound numbers and the
store button to save sounds and setups.
Programmer also offers extremely versatile
snapshot and play/compare functions,
which are described in detail on page 52.
Located below programmer is the main
display with its navigation stick and rotary
knob, which you are sure to be familiar
with by now!
Let us take a closer look at its control
features.
45
Module: Programmer
Neuron.book Seite 46 Montag, 23. Dezember 2002 2:28 14
Module: Programmer
Programmer: Control features
Programmer
Numeric keypad Keypad for loading the desired sound (in sound mode) or setup (in setup mode). When you type
Down and Up buttons Use the down button to scroll through stored sounds (in sound mode) or setups (in setup mode)
10’s hold button Activate this button (LED lights up) to freeze the tens numeral of the currently selected number.
Store button Stores the current sound (see page 51) and setup (see page 67).
Snapshot
and
Play/compare
buttons
46
in the three-digit number (where appropriate, preceded by zeros), all modules are set to the
stored values.
When loading a model into a resynator (see page 86), you can also type in the model number on
the numeric keypad.
in descending order. Press the up button to load the next higher sound or setup. All stored data
is loaded into Neuron’s modules just as if you type in a sound/setup number on the numeric
keypad.
The idea is to make it easier to enter a sound/setup number directly.
Example: Say sound 082 is loaded. Press 10's hold. The 08- is held in place (until you deactivate
the function by pressing the button again). Then you can press, say, 9 to switch to 089.
The snapshot function stores a snapshot of all modules’ current settings. In combination with
the play/compare button, you can audition your snapshots and A/B or compare the edited sound
to the original.
You will find detailed information and a description of how to proceed on page 52.
Table 2: Programmer control features

Neuron.book Seite 47 Montag, 23. Dezember 2002 2:28 14
Sound 1 to Sound 4
buttons
Buttons for switching a sound on and priming it within a setup. The LED for the given sound
button indicates its status. You can change the status by pressing the buttons repeatedly.
LED lights up steadily: The sound is played with the current setup.
LED off: The sound is muted in the current setup.
LED flashes: The sound is primed, meaning that it can be edited in real-time using the control
features on Neuron’s modules (for example, the shaper wheels or sticks).
You will find out how to load a sound into a setup on page 65.
If you want to mute an activated sound without priming it first, press and hold the appropriate
sound button for several seconds until the LED extinguishes (one second should do).
Table 2: Programmer control features (cont.)
Control unit
Setup button Switches back and forth between sound and setup modes. The LED above the button lights up
when Neuron is in setup mode. You will find basic info on the two operating modes starting on
page 32. For a detailed explanation of the programming process, read the section starting on
page 67.
Controllers button Calls up the controller menu in which you can assign specific modules and functions to the free
controllers. To learn more about this, read the section "Free controllers" starting on page 162.
Copy/paste button Serves to copy parameter sets from one sound to another. To learn more about this, read the
Load/dump button Starts the function that writes (or dumps) and loads models, sounds, setups, and Neuron software
section "Neuron’s copy/paste function" starting on page 54.
via the USB interface to and from a connected PC/MAC. It also serves to transfer system exclusive
data. To learn more about this, read the section "Updates and Backups" starting on page 185.
Table 3: Control unit control features
47
Module: Programmer

Neuron.book Seite 48 Montag, 23. Dezember 2002 2:28 14
Module: Programmer
48
Basic settings button Calls up the menu offering basic settings that let you set up the device according to your wishes
Exit/panic button This button has two functions:
Navigation stick and
rotary knob
and preferences. Basic settings have a bearing on the device as a whole rather than a single
sound or setup.
You will find a list of basic settings as well as instructions on how to define them on page 36.
• The exit function facilitates navigation in the menus. In sound mode, pressing exit briefly returns
you to the top level of the sound menu, sound loader. In setup mode, pressing exit either jumps
to the most recently edited menu option of the setup menu or, if you are already working in the
setup menu, to setup loader. In some cases, exit also serves to cancel the operation that is
currently underway, for example, when storing a sound/setup or when Neuron asks you if you
really want to switch it off.
• If you press and hold the button until the LED extinguishes (three seconds should do), you will
activate the panic function. This generates an all notes off command, and that spells immediate
silence, say, in the event of a hung note. It tells both Neuron’s internal workings as well as the
MIDI setup to shut up. After rebooting, Neuron comes back on line in the same mode that it was
in before the panic attack occurred. All settings remain intact.
After you retrieve the menu of a given module, you can edit using the navigation stick and knob
(located to the left and right of the main display, respectively): Stick.down and stick.up to
scroll through the main menu options. Stick.right and stick.left to jump to and scroll through
submenus if on hand.
The rotary knob edits the current parameter. Depending on the parameter, you can either select
among predefined settings or adjust a numeric value.
For certain menu options, pressing the knob is tantamount to pressing the enter button (see
page 31).
Table 3: Control unit control features (cont.)

Neuron.book Seite 49 Montag, 23. Dezember 2002 2:28 14
Programmer: Programming sounds
This section discusses all procedures required to
program sounds in sound mode. Be sure also to read
about the topic "Operating mode: Sound mode"
starting on page 32. We will get into setup mode on
page 58.
First, though, let us look at a short description of the
sound menu.
Sound menu
We call the top level of the sound menu sound loader.
• If setup mode is active, you can access it by
starting sound mode (by pressing the setup
button).
• If sound mode is already active, press exit.
Setup
Exit
Sound No.
Soundname
Sound No.
Pan
Sound No.
Pan Keytrack
R1 Modelno./Name
R2 Modelno./Name
Sound parameters
Sound Number and name of the current sound.
(sound loader)
Used
models
This menu option shows the currently
employed models of both resynators. (For
info purposes only, you cannot select models
here!)
Pan Positions the sound in the stereo panorama.
Note that the sounds within a setup are
assigned individual or dedicated pan
settings (see page 62).
Value range: -64 to +63 (from the far left to
the far right).
Pan
Keytrack
Assigns pan settings to the keyboard. This
parameter lets you place the sound at
different positions within the stereo
panorama in accordance with the pitch of
the note you play.
Value ranges from -64 to +63.
0 = no pan key tracking.
Positive values: Lower notes are panned to
the left, higher notes to the right.
Negative values: Lower notes are panned to
the right, higher notes to the left.
And on that note, be sure to check out the
picture on page 85.
Table 4: Sound parameters
49
Module: Programmer
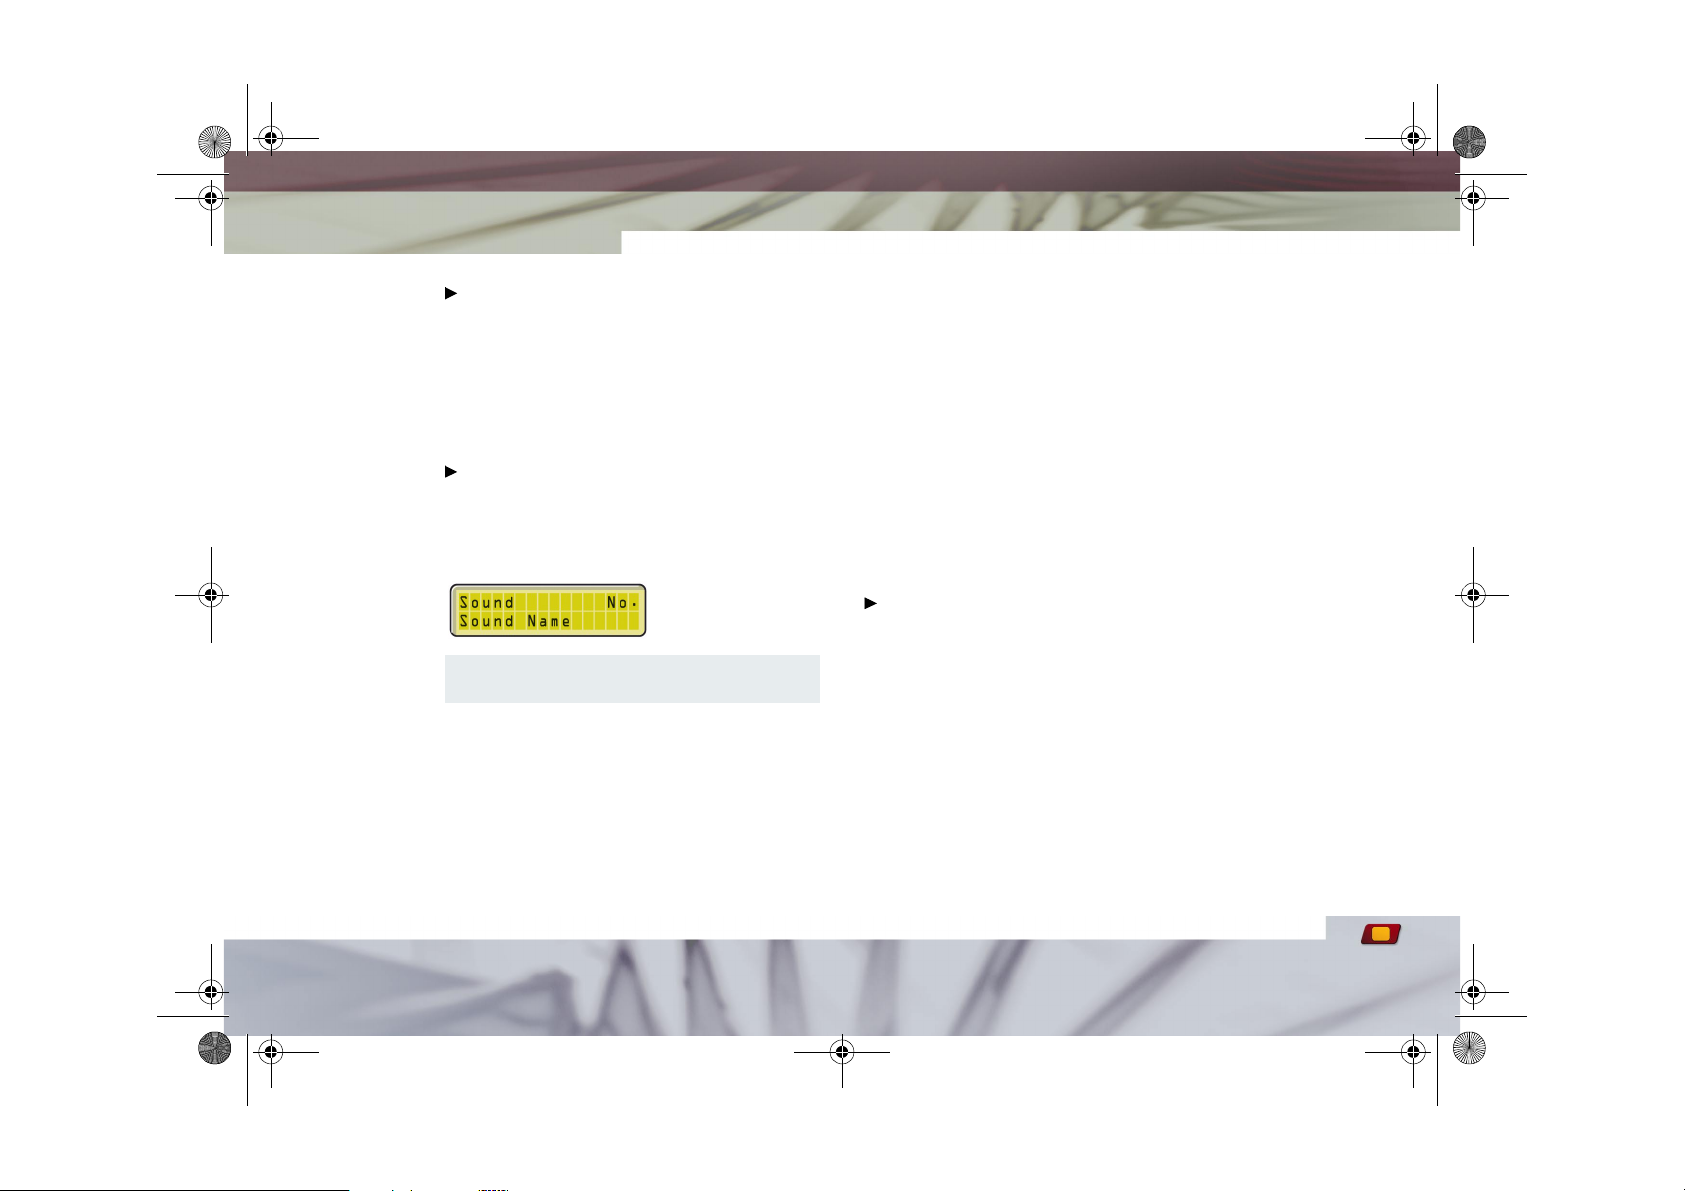
Neuron.book Seite 50 Montag, 23. Dezember 2002 2:28 14
Module: Programmer
50
How to start sound mode
All the procedures described in the following section
mandate that Neuron runs in sound mode. To this
end, you may have to quit setup mode by pressing
the setup button below the main display. The LED
above the button does not light up when Neuron is
set to sound mode.
How to load a stored sound
Start sound mode (see above).
Sound loader appears in the main display along with
the name and the number of the currently loaded
sound:
If you are already working in sound mode, call
sound loader by briefly pressing the exit button.
You have three options for loading sounds:
• In order to step through all sounds
successively, press the up or down button in
programmer. In each step, the next sound is
loaded and indicated in the main display. (You
can only do this when sound loader is
displayed.)
• Type in the three-digit sound number using the
numeric keypad (whenever necessary, preceded
by zeros, e.g. 003). The sound loads immediately after typing the third digit. (You can only
do this when sound loader is displayed.)
• Dial in the sound number by twisting the knob
next to the display and confirm with enter (by
pressing the knob). The number continues to
flash until the selected sound is loaded.
When you load a sound, all modules are set to the stored
values. A tremendous amount of model- and soundrelated information has to be loaded with every sound,
so the process may take a while.
How to edit a sound
The technology that powers Neuron offers an
unprecedented spectrum of tonal variety. Consider
just the possibilities afforded by dynamic parameter
assignment and you can appreciate that there simply
is not enough room in this manual to explore all the
sound-shaping variants. The following list can give
you no more than a general idea. Follow the crossreferences to learn more about each sound
processing operation! The signal flow in Neuron is
depicted on page 43.
• If you want to use an existing sound as the
starting point for creating a new sound, then
load it as described above.

Neuron.book Seite 51 Montag, 23. Dezember 2002 2:28 14
• Then load other models into the resynators (see
page 86) and change their parameters
(page 87).
• Use the blender (page 93)!
• Use envelopes (page 110).
• Shape the sound using the mod module
(page 117), the slicer (page 119), or the
effects in the silver unit (page 123).
• Vary the sound’s pan settings or define the pan
keytrack parameter in the sound menu (see
page 49).
How to store a sound
If you like your new creation, store it. (There is
plenty of room: Neuron sleeps 1,000 sounds
comfortably!) All parameters pertaining to a sound
are stored with the sound as properties. To find out
which parameters and settings are stored at the
sound level, read the section "Hierarchies: The
Neuron memory model" starting on page 33.
The store function in sound mode works like the save
as... command commonly used on computers. You
can either store the sound under the current number
or put it to some other place within the sound
database.
• Press the red programmer store button. The
button’s LED lights up; the sound number
flashes and the current sound name appears in
the main display.
• Twist the knob to select the number under
which you want to store the sound. The name of
the sound currently stored under this number
appears. Note that this sound will be
overwritten!
• Name the new sound: Stick.right to access the
first character in the display’s second line. As
soon as the name of the currently stored sound
appears in the display, you can overwrite it.
Twist the knob to select the desired character.
Tip: Stick.up/stick.down to select uppercase
and lowercase.
51
Module: Programmer

Neuron.book Seite 52 Montag, 23. Dezember 2002 2:28 14
Module: Programmer
52
Use the navigation stick and the knob as
described above to change each character in
the name line.
• After you have named your baby, confirm the
storage process by pressing the rotary knob.
The display reads
Saving...
for a moment
and returns to the most recently active menu at
the end of the storage process.
You can cancel the store operation at any time
with the exit button before you send the
sound off to its new address! This returns the
display to the most recently edited menu
option.
Snapshots and the play/compare function
As you may have already discovered, you can search
for the ultimate sound in Neuron with the delicate
touch of a neurosurgeon or the harsh hand of a
butcher.
The reason for this is that the resynators – in
combination with the fantastic control features – are
so versati le. And the y inv ite y ou to disc over the joys
of experimentation. Occasionally you may go too far,
perhaps attempting to give an almost perfect sound
a final polish only to rub off its sonic sheen.
Use the snapshot function –it can fix that problem.
It lets you take pictures of every stop along your
auditory journey so that you can safely revisit the
current sound setting.
In combination with the play/compare button, you
can audition your snapshots and A/B or compare the
edited sound to the original. If desired, you can use
a snapshot as the template for renewed experimentation.
This lets you backtrack and find your way home if you
lose your way in the sonic jungle.

Neuron.book Seite 53 Montag, 23. Dezember 2002 2:28 14
Up to 50 snapshots can be saved in a temporary buffer. Snapshots vanish into the digital ether when you
switch sounds, store the sound, or switch Neuron
off! If you take more than 50 snapshots, stored
snapshots are overwritten automatically starting
with number 1.
The snapshot function is available in sound mode
only!
How to shoot snapshots
When you have arrived at a sound that you deem
worthy of a snapshot, press the snapshot button.
The current sound settings are stored as a snapshot.
A message appears briefly in the display (in our
example, this is the first shot):
You can capture and temporarily save up to 50
settings using this method. Every subsequent shot is
automatically assigned the number following the
most recently saved number.
Use the play/compare function to audition a saved
snapshot.
How to use the play/compare function
Press the play/compare button to switch back and
forth between two modes.
• Play mode applies to the current sound
settings,
• compare mode, in turn, renders the original
sound, as it is stored in the sound database.
An LED indicating the current mode is located above
the button. If this LED lights up, you are working in
compare mode, otherwise play mode (which offers
the current sound and settings) is active. The main
display also indicates compare mode:
Compare mode Play mode
Press the button repeatedly to conveniently A/B two
sound settings – that is, switch back and forth
between them.
You cannot edit any sound parameters when in
compare mode. To do this, you must play the current
settings.
Beyond that, you can select any snapshot in compare
mode and compare the initial sound with any of the
edited sounds that you have saved temporarily.
To do this, first activate compare mode (LED lights
up), then twist the knob to step through the
53
Module: Programmer

Neuron.book Seite 54 Montag, 23. Dezember 2002 2:28 14
Module: Programmer
54
snapshots and load the desired shot by pressing the
knob. Neuron exits compare mode automatically
(LED extinguishes) and the current sound setting
data is overwritten by the stored snapshot data.
Make a habit of shooting an up-to-date snapshot
before loading an earlier snapshot to avoid losing
the fruits of your labors!
If while comparing sounds you decide to cancel all
changes and continue working with the initial
sound, simply load this sound again from the sound
database (see page 50). All snapshots are erased
when you do this.
Neuron’s copy/paste function
Copy and paste lets you copy data to other sounds or
other modules within the current sound.
Press the programmer copy/paste button to enable
the copy function. Here is its menu structure:
CopyFromSound No.
Soundname
CopyWithin What
Data selection
Reset to default
Data selection
1) Selection list: data to be copied (from one sound to another)
2) Selection list: "What" = data to be copied (within a sound).
3) Selection list: "Where" = destination (within a sound).
4) Selection list: data to be reset to default values.
Select options by twisting the knob.
2)
4)
What To Copy
Data selection
CopyWithin Where
Target selection
Enter starts the copy/reset operation.
1)
3)
Copy/paste mode is ended automatically when you
change a parameter in any module. If you exit the
copy/paste menu by pressing the copy/paste
button again, Neuron jumps to the most recently
edited menu. In both cases, the device recalls the
most recently edited copy/paste menu option and
displays it immediately when you access the copy/
paste menu again.

Neuron.book Seite 55 Montag, 23. Dezember 2002 2:28 14
Copying from one sound to another
When copying from one sound to another, data is
always copied from the selected source sound to the
currently loaded sound.
If the source and destination numbers are identical,
Neuron loads data stored in the sound database,
overwriting the current settings. This lets you
cancel changes that have not been stored.
The selection list offers data/parameter sets from all
modules whose settings are stored at the sound
level. This includes:
• Resynators’ model parameter values or the
complete resynator configuration,
• envelope parameters of all shapers,
• mod, blender, and slicer settings,
• the silver module’s effect parameters,
• master effects settings,
• aftertouch settings,
• free controller assignments,
• the resynators’ and the silver module’s stick
recordings.
Example: How to copy parameter values
from one sound to another
In the following example, we will copy the resynator
1 settings of sound 010 to sound 032.
• Prerequisite: Sound 010 is programmed and
stored. The current sound is sound 032.
• Press copy/paste in programmer. The copy/
paste menu’s most recently edited option
appears in the display.
• Twist the knob to dial in number 10 because
that sound is where we want to copy data from.
• Stick.right to access the list of data that can
be copied:
55
Module: Programmer

Neuron.book Seite 56 Montag, 23. Dezember 2002 2:28 14
Module: Programmer
56
• Twist the knob to select the desired source
data:
• Press enter. All resynator 1 source data is
copied from sound 010 into resynator 1 of the
current sound.
Then you can immediately copy another data
record using the knob or stick.left to select
another source sound.
Copying within a sound
You have two selection lists offering options for
copying within a sound. The "What" list (see menu
diagram) offers resynator data, shaper and controller
settings, etc. It is followed by the "Where" list,
which lets you select the destination. "Where" offers
only those destinations that are meaningful in
connection with the previously selected data.
Current settings are always copied when copying
data within a sound irrespective of whether or not
the settings have been stored.
Example: How to copy data in the current
sound from resynator 1 to resynator 2
In the following example, we will copy resynator 1’s
current settings to resynator 2 within sound 010.
• Press copy/paste in programmer. The copy/
paste menu’s most recently edited option
appears in the display. If necessary, scroll to
the copy within menu option.
Twist the knob to select data to be copied from
the „What“ list.

Neuron.book Seite 57 Montag, 23. Dezember 2002 2:28 14
• Stick.right to access the "Where" selection list.
Select the destination within the current sound
via knob; in our example this is resynator 2.
• Press enter. All data is copied from resynator 1
to resynator 2 within the current sound.
Then you can copy the same source data to another
destination (if possible) using the knob or
stick.left to return to the "What" selection list.
Back to the roots: The reset function
The copy/paste menu boasts a special feature called
reset (see page 54). It lets you set selected data
records back to their default settings.
The reset selection list offers the same data records
as the copy selection list.
• Press copy/paste in programmer. The copy/
paste menu’s most recently edited option
appears in the display.
• Stick.down to access the reset function. The
selection list appears in line 2. Select the
desired data record using the knob.
• Press enter. The values of the selected data
record are reset. In the case of stick recordings,
all corresponding tracks are erased.
Then you can reset another data record
immediately using the knob or stick.up to go to
the copy function.
You can also use the enter button to reset just the
current parameter rather than entire parameter sets
to the default setting.
57
Module: Programmer

Neuron.book Seite 58 Montag, 23. Dezember 2002 2:28 14
Module: Programmer
Programmer: Programming setups
Before we dive right into programming, look at the following chart. It recaps basic information on the topic of
"Operating mode: Setup mode" starting on page 32.
58
You can combine up to four sounds in setup mode. In stereo mode, sounds can
be routed freely to the three stereo outputs (along with the „wet“ or effects
signal).
In surround mode, L/R stereo master effects are routed to the front L/R and
back L/R outs, while the center channel and sub remain "dry." Sounds can be
positioned freely in the surround field via stick controller or on the fly in the
soundscape via stick animation.

Neuron.book Seite 59 Montag, 23. Dezember 2002 2:28 14
Setup menu
Stick.down and stick.up in the usual fashion to
scroll through the various menu options.
The four sounds in the setup are displayed side by
side for every menu option (with the exception of the
surround parameters). The cursor < indicates which
sound you are currently editing with the knob. The
name of this sound also appears in the first line of
the display.
Example: Volume settings for the four sounds in the
setup. The same level (30) is set for each sound. The
cursor points to sound 2.
Stick.left and stick.right to scroll among the
sounds within a menu option.
The setup menu is a matrix: If, for example, the
cursor points to sound 2 and you stick.up/down to
scroll to the next/previous menu option, the cursor
remains in place; that is, it continues to point to
sound 2.
The menu diagrams on the following pages show the
default settings of the individual setup parameters.
All parameters are described in table 5 on page 61.
Button
SetUp No.
Setup
SetUp_name
Snd 1 Soundname
Button Sound 4Sound 2 Sound 3Sound 1
Vol 1 Soundname
127< 127 127 127
Transp 1 Soundname
Detune 1 Soundname
MIDI 1 Soundname
Local 1 Soundname
Out 1 Soundname
ST1< ST1 ST1 ST1
Pan 1 Soundname
Continued on next page ...
5< 0 0 0
0< 0 0 0
0< 0 0 0
1< 2 3 4
On<OnOnOn
0< 0 0 0
Snd 2 Soundname
52<00
Snd 2 SetUp_na
5210<0
Snd 2 SetUp_n
5 2 10 19<
Vol 2
Vol 3
Vol 4
Transp 2
Transp 3
Transp 4
Detune 2
Detune 3
Detune 4
MIDI 2
MIDI 3
MIDI 4
Local 2
Local 3
Local 4
Out 2
Out 3
Out 4
Out 2
Out 3
Out 4
59
Module: Programmer

Neuron.book Seite 60 Montag, 23. Dezember 2002 2:28 14
Module: Programmer
60
... Continued from prev ious page
KeyLow 1 Soundname
C-2< C-2 C-2 C-2
KeyHigh 1 Soundname
G8< G8 G8 G8
VeloLow 1 Soundname
1<111
VeloHigh 1 Soundname
127< 127 127 127
Silver 1 Soundname
127< 127 127 127
Delay 1 Soundname
0<000
Reverb 1 Soundname
0<000
Continued on next page ...
KeyLow 2
KeyLow 3
KeyLow 4
KeyHigh 2
KeyHigh 3
KeyHigh 4
VeloLow 2
VeloLow 3
VeloLow 4
VeloHigh 2
VeloHigh 3
VeloHigh 4
Silver 2
Silver 3
Silver 4
Delay 2
Delay 3
Delay 4
Reverb 2
Reverb 3
Reverb 4
... Continued from previous page
Silver Stick
Surround Mode = on
when
and
Sound 1 primed
Same
applies to
Sounds 2 to 4
Surround
Mode On/Off
Surround Stk Ani
Sound 1 On/Off
Surround FrLeft
Sound 1 63
Surround FrRight
Sound 1 63
Surround BkRight
Sound 1 63
Surround BkLeft
Sound 1 63
SrndCenterWeight
Sound 1 63
Surround sub mix
Sound 1 63
Surround Stk Ani
Sound 2 On/Off
Snd 2 SetUp_na
Sound 3 On/Off
Snd 2 SetUp_n
Sound 4 On/Off
Surround FrLeft
Sound 2 63
Snd 2 SetUp_na
Sound 3 63
Snd 2 SetUp_n
Sound 4 63
Surround FrRight
Sound 2 63
Snd 2 SetUp_na
Sound 3 63
Snd 2 SetUp_n
Sound 4 63
Surround BkRight
Sound 2 63
Snd 2 SetUp_na
Sound 3 63
Snd 2 SetUp_n
Sound 4 63
Surround BkLeft
Sound 2 63
Snd 2 SetUp_na
Sound 3 63
Snd 2 SetUp_n
Sound 4 63
SrndCenterWeight
Sound 2 63
Snd 2 SetUp_na
Sound 3 63
Snd 2 SetUp_n
Sound 4 63
Surround sub mix
Sound 2 63
Snd 2 SetUp_na
Sound 3 63
Snd 2 SetUp_n
Sound 4 63

Neuron.book Seite 61 Montag, 23. Dezember 2002 2:28 14
Setup parameters
Snd Numbers of the sounds contained in the
current setup.
Vol Sets the volume levels for the individual
sounds within the setup. Value range: 0 to
127.
Transp Transposes the individual sounds within the
setup in semitone steps.
Value range: -48 to +48.
Detune Detunes individual sounds within the setup
in cent increments.
Value range: -99 to +99.
MIDI Determines MIDI data send and receive
channel for sounds in setup mode.
A sound responds to incoming MIDI data
only when the defined MIDI channel and
send channel numbers are identical.
Value range: 0 to 16. 0 denotes omni,
meaning that the sound responds to
incoming messages on all MIDI channels (see
page 178).
In sound mode, the global MIDI channel
settings defined in the basic settings apply
(see page 40).
Table 5: Setup parameters
Local Deactivates/activates Neuron’s synthesis
engine via the keyboard as well as via
controls 1 to 4, the footswitch, the sustain
pedal and aftertouch.
Local = Off: Neuron’s keyboard is disabled for
this sound so that it cannot control the
internal synthesis engine; the controls are
deactivated. However, the sound can be
played via incoming MIDI data and send
MIDI data.
Local = On: The internal synthesis engine can
be controlled for this sound via Neuron’s
keyboard as well as via incoming MIDI data.
All controls are enabled.
Note in this context the function of the local
basic settings parameter (see page 41): If
this global parameter local is set to off, the
settings of the four setup parameters of the
same name are overruled.
Out Defines the audio output for every sound in
stereo mode.
Your options are ST1 (stereo output 1), ST2
and ST3. The headphones output receives the
same signal as ST1.
See also the illustration on page 10.
Table 5: Setup parameters (cont.)
61
Module: Programmer

Neuron.book Seite 62 Montag, 23. Dezember 2002 2:28 14
Module: Programmer
62
Pan Positions the sound in the stereo panorama.
Value range: -64 to +63.
The setup menu lists special surround
parameters for defining the surround
panorama (see page 63).
For more on the pan parameter, see the
explanation given for sound mode panorama
settings starting on page 49.
Key Low
Key High
Velo Lo w
Velo High
Limits the keyboard range for every sound.
Key low defines the lower limit, key high the
upper limit.
The parameters represent note numbers. A
sound is triggered only when notes higher
than or equal to the key low value (default:
C-2) and lower than or equal to the key high
value (default: G8) are played.
Value range: C-2 to G8 (0 bis 127).
Default MIDI assignment: C3 = 60.
Defines a velocity window for each sound. A
sound is audible only if the velocity (key
pressure) lies within the boundaries defined
here. The default for each sound is 1 for velo
low and 127 for velo high.
Value ranges: 1 to 127.
Table 5: Setup parameters (cont.)
Silver Defines the silver mix amount for the
individual sounds.
This is best explained by an example: Say
individual silver settings are stored for each
of the four sounds within a setup. Say also
that you are satisfied with each sound when
you hear it in isolation, but in the context of
the entire setup, you find a given effect too
puny or too mighty. The setup menu offers
these mix parameters so you can determine
the level of silver effects separately for each
sound and adjust the desired balance
between them.
Value range: 0 to 127.
0 = silver effects are switched off.
127 = silver effects are rendered at the level
determined in the sound (meaning they are
not amplified!)
Delay Determines the delay send amount for the
individual sounds.
The master effects module processes the
composite signal of all four sounds, meaning
that the delay settings apply to all sounds
within a setup. This parameter lets you
determine the send amount for each sound
individually.
Table 5: Setup parameters (cont.)

Neuron.book Seite 63 Montag, 23. Dezember 2002 2:28 14
Reverb Determines the reverb send amount for the
Surround
Stk Ani
individual sounds. The master effects module
processes the composite signal of all four
sounds, meaning that the reverb settings
apply to all sounds within a setup. This
parameter lets you determine the send
amount for each sound individually.
Defines the playback mode for stick
recordings in surround mode (stick playback)
for each sound.
• Off: Stick animation is disabled for the
given sound.
• 1Shot: The first note you play triggers the
recorded stick movement for the given
sound (single trigger) and the animation
continues to shape the sound regardless of
how many notes you play thereafter. Once
the animation has run its c ourse it is not retriggered.
• Repeat: The first note you play triggers the
animation and then – unlike when the 1shot
setting is enabled – it is repeated in cycles
for as long as you continue playing notes.
To learn how to record stick controller
movements, read the topic "Stick recording
and animation" starting on page 89.
Table 5: Setup parameters (cont.)
Surround
FrLeft
Surround
FrRight
Determines the amount or level of each
sound in the left front surround channel.
Value range: 0 to 127.
0 means that the given sound is not audible
in the left front speaker.
127 means the sound is routed in the
maximum amount (or level) to the left front
surround channel.
Note that this parameter is the inverse of the
parameter for the right rear channel:
For more on this, see the comments following
the table!
Determines the amount or level of each
sound in the right front surround channel.
Value range: see above
Note that this parameter is the inverse of the
parameter for the left rear channel:
Surround FrRight + Surround BkLeft = 127.
For more on this, see the comments following
the table!
Table 5: Setup parameters (cont.)
63
Module: Programmer

Neuron.book Seite 64 Montag, 23. Dezember 2002 2:28 14
Module: Programmer
64
Surround
BkRight
Surround
BkLeft
Srnd
Center
Weight
Determines the amount or level of each
sound in the right rear surround channel.
Value range: see above
Note that this parameter is the inverse of the
parameter for the left front channel:
Surround BkRight + Surround FrLeft = 127.
For more on this, see the comments following
the table!
Determines the amount or level of each
sound in the left rear surround channel.
Value range: see above
Note that this parameter is the inverse of the
parameter for the right front channel:
Surround BkLeft + Surround FrRight = 127.
For more on this, see the comments following
the table!
Boosts or cuts the center channel for each
sound. Note that the effect of this value is
relative to the value determined by stick.
Value range: 0 to 127. Default 63.
Values < 63: Cuts the center channel’s level.
Values > 63: Boost.
Table 5: Setup parameters (cont.)
Surround
sub mix
Boosts or cuts the subwoofer channel for
each sound.
Value range: 0 to 127. Default 63.
Values < 63: Cuts the subwoofer channel’s
level.
Values > 63: Boost.
Table 5: Setup parameters (cont.)
The values of the surround pan parameters FrLeft to
BkLeft (and implicit Center) can be adjusted via
silver stick controller when surround mo de i s ac tive
and the given sound is primed within the setup.
Please note that SrndCenterWeight is a separate
parameter in addition to the implicit center value.
Surround mode is described in detail starting on
page 169.

Neuron.book Seite 65 Montag, 23. Dezember 2002 2:28 14
How to start setup mode
All the procedures described in the following section
require that Neuron is running in setup mode.
To start this mode, press the setup button located
below the main display. The LED above the button
lights up when Neuron is in setup mode.
How to load a setup
Start setup mode as described above. Setup loader
appears in the main display along with the number
and name of the currently loaded setup.
If you are already working in setup mode, call setup
loader by briefly pressing exit once or twice
(depending on the currently active menu).
You have three options for loading a setup:
• In order to step through all stored setups
successively, press the up or down button in
programmer. In each step, the next setup is
loaded and indicated in the main display. (You
can only do this when setup loader is
displayed.)
• Enter the three-digit setup number using
programmer’s numeric keypad (whenever
necessary, preceded by zeros, e.g. 003). The
setup is loaded immediately after the third
digit is entered. (You can only do this when
setup loader is displayed.)
• Dial in the setup number by twisting the knob
next to the display and confirm with enter (by
pressing the knob). The setup number
continues to flash until the selected setup is
loaded.
When you load a setup, all modules are set to the
stored values.
How to load a sound into a setup
Located above the main display you will find four
buttons labeled sound 1 to sound 4. Every button
represents a sound stored in the current setup.
If you press one of these buttons when the device is
in setup mode, the display jumps right to the menu
option that lets you load sounds and the cursor
points to the desired position.
65
Module: Programmer

Neuron.book Seite 66 Montag, 23. Dezember 2002 2:28 14
Module: Programmer
66
Example: Press sound 2.
Dial in the desired sound number using the knob and
confirm with enter (press the knob).
Stick.left and stick.right to move the cursor so that
you can load sounds to the other positions in the
setup.
How to prime a sound for editing within a
setup
The aforementioned sound 1 to 4 buttons also serve
to do this.
When you press a button repeatedly, the assigned
sound is activated (LED lights up), primed (LED
flashes), or deactivated (LED extinguishes).
If you want to mute an activated sound without
priming it first, press and hold the appropriate
sound button until the LED extinguishes (one
second should do).
An activated sound is played with the setup while a
deactivated sound is muted. A primed sound can be
edited by means of the module’s control features
while the current setup is being performed.
All changes - for example, parameters edited via
stick in the resynators, or in slicer or silver - always
apply to the primed sound and are audible in the
setup without having to first store the edited
sound or load the edited sound into the setup.
How to store edited sounds in a setup
Sounds are reference by (or linked into) a setup. If
you edit a sound’s parameters within a setup because
you want it to sound a bit different in the setup than
it does in sound mode, you must store these changes
specifically. Simply storing the setup will not save
these changes.
Setup mode offers an enhanced store function for
this very purpose.
• Press the red store button.
You can now select in the display what you want
to store:
Use the knob to select the setup-specific
parameters or one of the four sounds to be
stored.
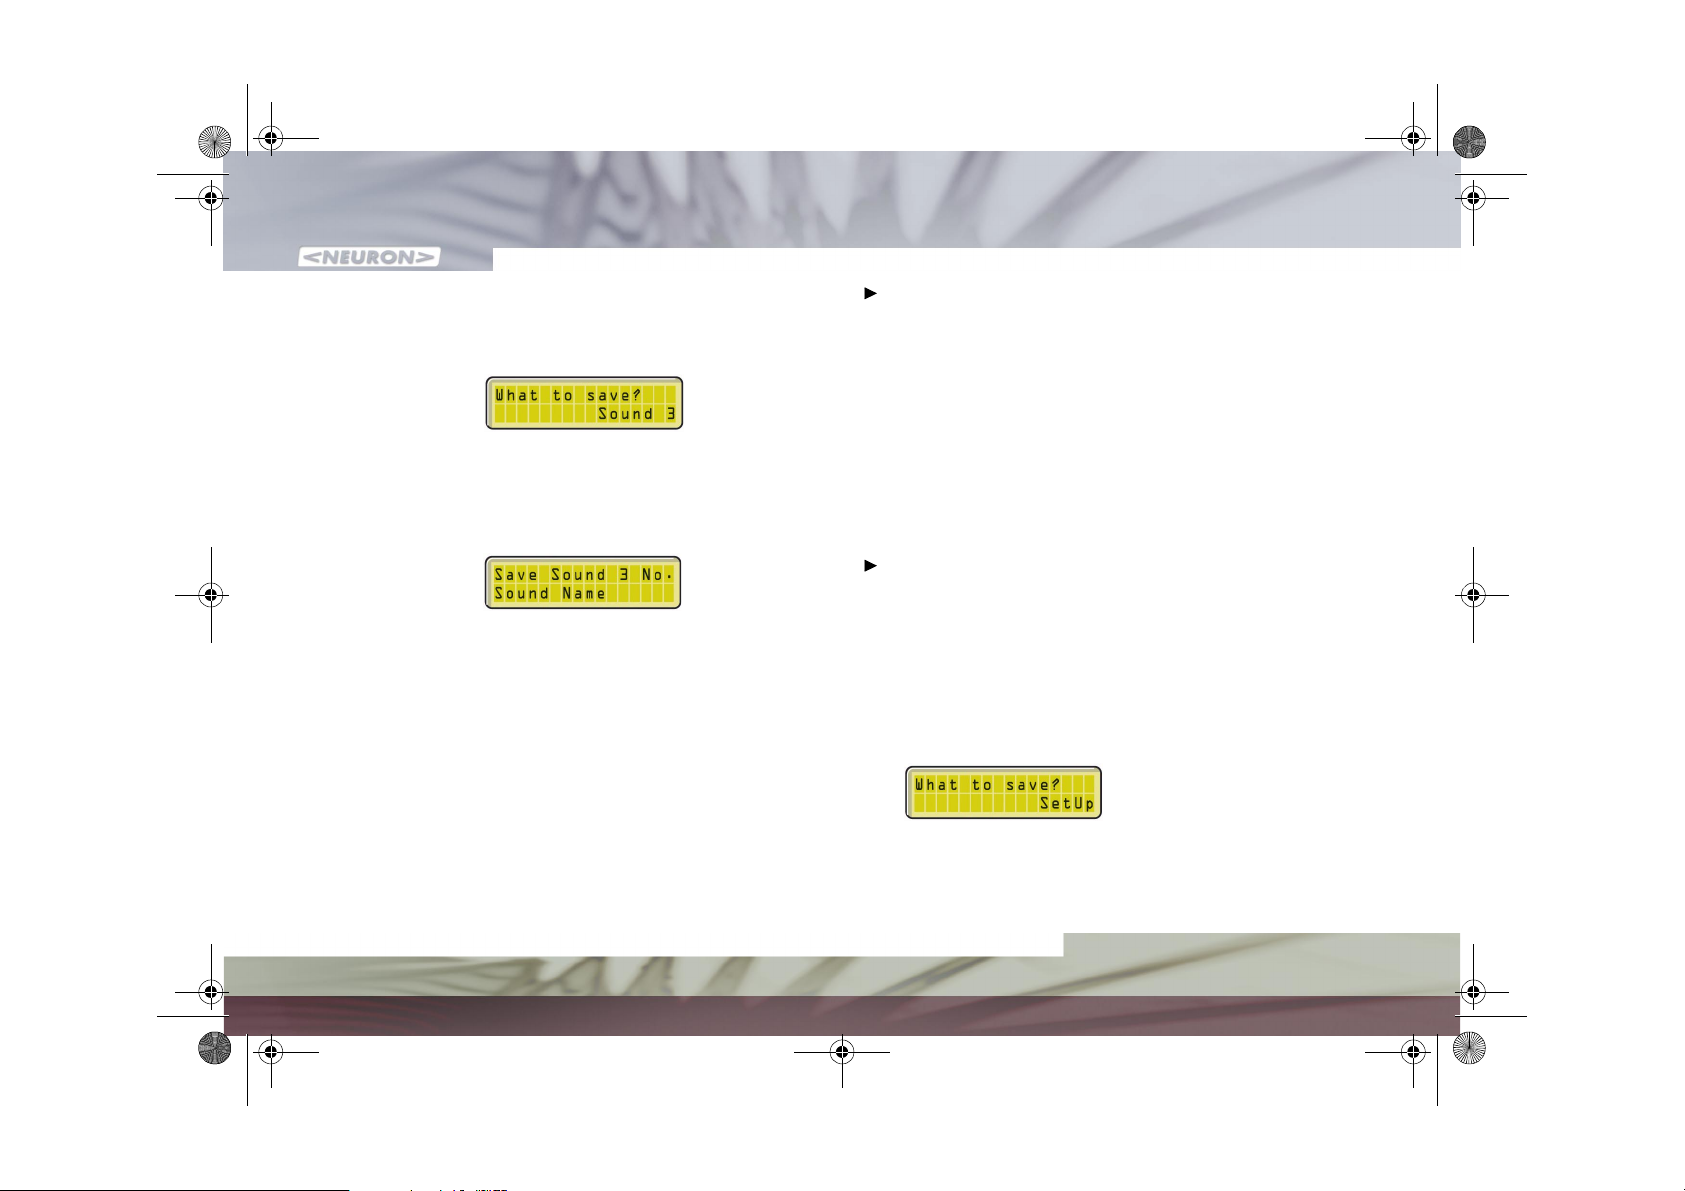
Neuron.book Seite 67 Montag, 23. Dezember 2002 2:28 14
For example, say you have edited sound 3 and
want to store sound 3 under another name and
number.
• Select sound 3 using the knob.
• Confirm your selection via enter.
The rest of the procedure is the same as the
procedure for storing a sound in sound mode.
• If necessary, dial in a new number with the
knob and assign a new name to the sound.
For details on how this is done, please read the
description on page 51.
• Confirm the storage process by pressing enter
(the rotary knob). The display reads
Saving...
to the most recently edited menu option.
After you have stored the sound under another
number and with a new name, the new sound
automatically takes the place of the old sound in the
setup.
for a moment and then returns
How to program a setup
You have two options for programming a setup:
either load a previously programmed setup and
change the settings as desired or generate a new
setup by loading a "fresh" number and begin
assigning the sounds.
After you have loaded the desired sounds, toggle the
navigation stick to scroll through the setup menu
(see page 59) and define the various parameters for
each sound. All parameters are described in the table
starting on page 61.
How to store a setup
The store function in setup mode works like the save
as... command commonly used on computers. You
can either store the setup under the current number
or put the setup some other place within the setup
database.
• Press the red programmer store button while in
setup mode. Now you can select what you want
to store:
setup
Press enter to select the
.
67
Module: Programmer

Neuron.book Seite 68 Montag, 23. Dezember 2002 2:28 14
Module: Programmer
68
• The current setup number or name appears in
the main display.
• Twist the knob to select the number under
which you want to store the setup. The name of
the setup currently stored under this number
appears. Note that this setup will be
overwritten!
• Name the new setup: Stick.right the navigation
stick to access the first character in the
display’s second line. The name of the currently
stored setup appears in the display and you can
now overwrite it (see the example display).
Twist the knob to select the desired character.
Tip: Stick.up/stick.down to select uppercase
and lowercase.
Use the navigation stick and the knob as
described above to change each character in
the name line.
• After you have named the setup, confirm the
storage process by pressing the rotary knob.
The display reads
Saving...
for a moment
and returns to the most recently active menu at
the end of the storage process.
You can cancel the store operation at any time with
the exit button before you send the setup off to its
new address! This returns the display to the most
recently edited menu option.

Neuron.book Seite 69 Montag, 23. Dezember 2002 2:28 14
Module: Resynator
The philosophy behind resynators
You are sure to be familiar with the term
"resynthesis". It has certainly been on
musicians’ and sound designers’ minds
for many years. For good reason: This
brand of synthesis harbors tremendous
sound design potential. The problem to
date has been that no one had found a
feasible solution to the interface problem: How can all this sonic potential be
handled intuitively?
The solution to this problem is intelligence, a quality
that conventional sound generating machines lack.
But Neuron is a breed apart: its synthesis engine’s
nerve system is endowed with artificial intelligence.
Happily for users, it hand les very much like a classic
synth, though the approach to shaping sound is
completely different.
Whereas it takes all kinds of complicated connections between the various modules to generate interesting sounds on a classic synth, Neuron holds a
treasure-trove of great-sounding source material
right there in the heart of its synthesis engine. You
can tailor this material to suit your taste with ease
- some might even say in style.
The dynamo that drives classic subtractive synthesizers, the oscillator, inspired the resynator. Its name
expresses that kinship: The term "resynator" is an
amalgam of "resynthesis" and "oscillator." A resynator also performs similar functions. Like an oscillator, it provides the basic material for sound
generation.
Module: Resynator
69

Neuron.book Seite 70 Montag, 23. Dezember 2002 2:28 14
Module: Resynator
70
The idea behind Neuron models
While the classic analog synthesizer offers just a few
basic waveforms for purposes of sound generation,
the resynator features a sophisticated sound model
at this bottom-line level of sound shaping. The
underlying principle is comparable to that of many
modern-day PCM synthesizers that use samples
rather than basic waveforms. However, Neuron’s
models are far more advanced and versatile than the
fixed sound bite that is a sample, which does not
allow invasive sound sculpting.
Neuron sound models are created via adaptive sound
analysis and linked to individual parameter sets. And
as parameter names like small, warm, cold, and
torsion would attest, every parameter addresses
some kind of tonal property.
Model parameters
A model’s parameters are a combination of musically
meaningful values. As discussed above, accessing
the key musical attributes of a sound poses
tremendous obstacles. Courtesy of adaptable
algorithms, resynthesis has the power to blast
through this performance barrier:
Following a basic classification, the neural synthesis
engine detects the formative parameters of a sound,
categorizes them in groups, and assigns them to one
of two parameter levels that we call scape and sphere
(more on this later). How "freely" or "abstractly" the
neural synthesis engine defines the parameters of a
sound is determined during the process of model
generation.
This analysis yields parameter sets that are loaded
into the resynator along with the sound (which in
the process of model generation is transformed into
a model) and placed at your fingertips. The stick
controller lets you modify these parameters in realtime. That is tantamount to performing open-heart
surgery on the very essence of what makes a sound
sound like it does.
And that makes Neuron the first synthesizer to
parameterize audio source material on the fly.
Because this base material can be any conceivable
audio event, you have an inexhaustible supply of
sonic goods at your disposal at this early stage of
sound generation.

Neuron.book Seite 71 Montag, 23. Dezember 2002 2:28 14
Scape and sphere
Every model is subdivided into two parameter
regions called scape and sphere.
A scape puts all parameters associated with the
formative qualities of a sound at your disposal, for
example, the vibrations of vocal cords, or a string. A
scape serves to determine inherent attributes, for
example, whether the sound is the product of a
chaotic, disharmonic or harmonic oscillating system.
By sphere, we mean extrinsic sound-shaping factors,
that is, the environmental conditions – a piano case,
a guitar body - in which the sonic event occurs.
Spectral processes, formants, resonance, absorption
factors, and the like are determined here.
Each of the two regions contains three parameter
levels. At every level, the parameters are positioned
crosswise as polar opposites as depicted in the
picture on page 69.
The Neuron library contains models of classical
instruments; after all, bending the commonplace
sounds of instruments such as the piano, strings,
oboe, or even a Minimoog bass promises truckloads
of fun. However, if you restrict yourself to merely
manipulating these oft-encountered sounds, you will
not tap into the true potential of the awesome
powers of neural synthesis.
The first time you fire up the synthesis engine, it will
dawn on you what astonishing sound-shaping
possibilities the stick controllers in the resynators
offer!
Manipulating scape and sphere
The actual editing of a model – that is, invasive
sound sculpting – is performed in real-time using the
stick controller. The stick morphs between two
opposite sonic attributes, and it does this
selectively by scape or sphere and parameter level.
(In this context, the verb "morph" means to change
over seamlessly from parameter to another.)
This process is best explained using an example: Say
resynator 1 contains a model called "flute". The
neural process assigned the following sphere
parameter sets (among others) to this sound: "metal
/ wood" and "large / small". The woodiness and size
of the flute can be varied on the fly by moving the
stick. For its scape parameters, our flute is assigned
at one of the three levels "wide / narrow" and "clear
/ rough". This means that you can edit the breadth
and roughness of the flute’s sound on the fly.
71
Module: Resynator

Neuron.book Seite 72 Montag, 23. Dezember 2002 2:28 14
Module: Resynator
72
The two resynators in Neuron...
Neuron features two resynators of identical design.
Models may be selected freely for each resynator.
Envelopes and stick recording/animation
Editing within the scape and sphere parameter levels
can be performed at each level via a "hard-wired"
ADSR envelope. The envelope defined in shaper 1
modulates resynator 1, likewise shaper 2 serves as
the envelope generator and resynator 2.
In addition, the two shapers offer freely routable
envelopes (either two ADSR envelopes or one 4
levels 4 times curve) for controlling resynator pitch.
The curve parameters are defined in the respective
shaper, the depth or intensity of the curve (and
therefore its routing) is determined in the menu of
the given resynator (FreeEnv Pitch, see page 83).
To learn how to handle the shaper, read the section
"Module: Shaper 1/2" starting on page 99.
As an alternative, stick movements can be recorded
in real-time and applied selectively to control the
parameters of each scape/sphere level.
We call this process stick animation and have de-
dicated a separate section to it starting on page 89.
Pitch, volume and parameter modulation
The volume of every resynator output as well as pitch
and every scape and sphere level’s opposite
parameter pairs can be modulated via the mod
module’s LFO.
The form and frequency of the modulating LFO
oscillation are determined in the mod menu, which
also lets you define the basic depth as well as delay
time. You will find more on this on page 116.
After you have defined the LFO oscillation in the
mod module, go to the resynator menu to assign
the modulation to the resynator (if desired) and
determine modulation intensity.
To this end, the LFO depth menu offers the options
pitch, volume, and L1 scape 1/3 to L3 sphere 2/4.
These parameters are in described in table 7 starting
on page 82.

Neuron.book Seite 73 Montag, 23. Dezember 2002 2:28 14
Resynator: Control features
On/Off
buttons
Stickcontroller
On/off switch for the resynator. Pressing
this button can mute each resynator.
Neuron is a synthesis instrument designed
specifically to let you get fast results.
That is why it affords swift, efficient and
intuitive access to parameters. This is
particularly evident in the resynator. The
stick controller lets you tweak up to four
parameters simultaneously. Though
gamers will love its joystick-like vibe, it is
nevertheless a very subtle sound-sculpting
tool. And it is phenomenally powerful.
Though you may start with the sound of a
conventional instrument, in no time at all
you will be exploring totally uncharted
(synthetic) sonic territory.
Tip: After you manipulate the stick to get
a coarse parameter setting, the main
display shows the current parameters. To
fine-tune that setting, toggle the
navigation stick to scroll (stick.right/
left) through the four parameters of the
current level and use the knob to set the
desired value.
Note also the basic settings parameter
stick mode (see page 37).
Table 6: Resynator control features
Displays The nature of these parameters varies
considerably depending on the type of
model and its attributes. For better
orientation, they are shown along with
the respective values in the displays
surrounding the stick controller.
Model
select
menu
button
Select
(scape/
sphere)
button
When you are not working in the resynator
/
menu, you can press this button to access
the most recently edited resynator
parameter. To use model loader to load a
model into the resynator (see page 86),
press the button in the resynator menu.
You will find a description of the menu on
page 75.
The parameters of every model are
subdivided into scape and sphere
parameters (see page 71). This button lets
you select a parameter region for editing
via the level button and stick. The current
parameter values of a region are
automatically retained when you switch to
the other region.
Table 6: Resynator control features (cont.)
73
Module: Resynator

Neuron.book Seite 74 Montag, 23. Dezember 2002 2:28 14
Module: Resynator
74
Parameter
Level
(1 / 2 / 3)
button
Record
stick button
Scape and sphere parameters are ordered
in three levels each. After you have
chosen a region using the select button,
this menu is where you determine the
level to be processed via stick. Again,
Neuron "memorizes" the current settings
when you switch to another level.
The movements of the stick controller can
be recorded and stored for every scape and
sphere parameter level.
By activating stick animation, you can
play the recorded movement back (see the
next line in the table).
This lets you program extremely vigorous
modulations as an integral component of
a sound. To learn how to record stick
controller movements, read page 89.
Table 6: Resynator control features (cont.)
Contour
control
button
An ADSR envelope or previously recorded
movement of the stick controller can
influence every scape and sphere
parameter level. The contour settings can
be determined separately for every
parameter level, so you have six contour
controls available for each resynator.
By pressing this button several times, you
can select between:
• Off (no LED lights up): An envelope or
stick recording does not manipulate the
selected parameter level.
• Shaper: The par. level ADSR envelope in
the given shaper is assigned to the
current scape or sphere parameter level.
Note that the par. levels LED in the
shaper must light up before you can
define the envelope.
Continued on next page...
Table 6: Resynator control features (cont.)

Neuron.book Seite 75 Montag, 23. Dezember 2002 2:28 14
... Continued from previous page
The amplifier envelope defined in the
shaper is always active for the entire
resynator, regardless of the contour
control setting in the resynator.
To find out how to define an envelope,
please read the section starting on
page 110.
• Stick Animation: The stick movement
previously recorded via record stick is
played back as a 1shot or in repeat mode,
depending on the stick animation
setting in the resynator menu (see
page 80). Manual stick movements have
no effect on the current parameter level
while stick animation is activated!
Octave
button
The pitch for the given model can be
edited in octaves.
Note also in this context the pitch menu
options semi and cent in the resynator
menu (see page 82).
Table 6: Resynator control features (cont.)
Resynator: Menu
Press the model select/menu button to access the
resynator menu. The most recently edited resynator
menu option appears in the main display. Press this
button again to access model loader.
The resynator menu is a matrix. Stick.up/down to
scroll through the main menu options as well as
through related options in a submenu.
Example: Stick.down takes you from <L3 scape 4>
directly to <L3 sphere 4> and Stick.up leads to <L2
sphere 4>.
The rotary knob adjusts numeric values or scrolls
through predefined settings.
The model select/menu button takes you to this
menu, as do diverse other resynator control features.
For example, when you move the stick controller the
values of the currently edited model parameter
appear directly in the display and can be edited via
knob.
Though the following diagrams show resynator 1’s
R1
menu (the display indicates
in li ne 1) only, th e se
illustrations serve as an example for both resynators.
Note also that the device shows the actual parameter
names in line 2 rather than the dummies
<
scape>/<sphere>
shown here.
75
Module: Resynator

Neuron.book Seite 76 Montag, 23. Dezember 2002 2:28 14
Module: Resynator
On/Off
Resynator 1
Switch
76
Activating model loaders:
within the Resynator menu: press 1 x
without the Resynator menu: press 2 x
Paramete r
Level
Resynator 1
Param Level
Select
Stick
Access
the corresponding
menu option, depending on
selected lev el or
Region (see LED)
Model/Edit
Resynator 1
Volume
R1 Load Model
No. Name
R1 Param Value
L1 <Scape 1>
R1 Param Value
L1 <Sphere 1>
R1 Param Value
L2 <Scape 1>
R1 Param Value
L2 <Sphere 1>
R1 Param Value
L3 <Scape 1>
R1 Param Value
L3 <Sphere 1>
Continued on next page ...
R1 Volume
LFO Depth
R1 Param Value
L1 <Scape 2>
corresponding to
Level 1 Scape
like
Level 1 Scape
like
Level1 Sphere
like
Level 1 Scape
like
Level1 Sphere
Key track
Sc
VeloDepth
L1 <Scape 3>
Sc
L1 <Scape 4>
R1 LFO Depth
L1 Scape 1/3
Cont.
Control
if Level 1 and Scape
L1 Scape 2/4
R1 Key Track
L1 Scape 1/3
Resynator 1
Cont Control
L1 Scape 2/4
R1 Velo Depth
L1 Scape 1/3
L1 Scape 2/4
R1 Stick Anim
Scape
= Stick.up / stick.down
= Stick.left / stick.rig ht
matrix-like
structure
of the menu!

Neuron.book Seite 77 Montag, 23. Dezember 2002 2:28 14
... Continued from prev ious page
R1 Model Size
Key track
Octave
R1 Pitch
Octave
R1 Model Hi/Lo
Velo Switch
R1 Model Size
Offset
R1 Pitch
Semi
Cent
R1 Pitch
LFO Depth
Key track
R1 Pitch Free Env
ADSR 1 Depth
R1 Pitch
ADSR 2 Depth
R1 Pitch
4L/4T Depth
Resynator: Parameters
Volume Determines the volume of the
Volume
LFO Depth
resynators. This lets you adjust and
balance the relative levels of the two
resynators.
Value range: 0 to 127.
Determines the modulation depth of the
mod-generated LFO oscillation and thus
the intensity of its effect on resynator
volume.
Value range: -64 to +63.
Depth = 0: No mod-generated volume
modulation.
Depth > 0: Starting at the current level,
the volume increases in accordance with
the LFO oscillation (up to a max value of
127).
Depth < 0: Volume decreases in
accordance with the LFO oscillation.
Note in this context the global LFO
depth, which is defined directly in the
mod module (page 116). Global LFO
depth is offset against this modulation
destination’s depth value.
Table 7: Resynator parameters
77
Module: Resynator

Neuron.book Seite 78 Montag, 23. Dezember 2002 2:28 14
Module: Resynator
78
Volume
Key track
Also called key follow, key track is a form
of keyboard control data. When key
tracking is activated, the keyboard
serves as a modulation source,
generating key track values in
accordance with the position or pitch of
the notes played on the keyboard. This
parameter determines the relative or
weighted volume of the various keyboard
zones. The notes of certain predefined
keyboard zones sound louder or softer
depending on the key track value.
Value range: -64 to +63.
0 = No weighting.
Positive values: Notes above the center
key’s pitch (C3) are played louder than
notes below C3. The higher the value,
the further this weighting is shifted to
the right of the keyboard.
Negative values: Notes below the center
key (C3) are played louder than notes
above C3. The lower the value, the
further this weighting is shifted to the
left.
See also the illustration on page 85.
Table 7: Resynator parameters (cont.)
Volume
VeloDepth
Param Value
L1 <Scape> to
L3 <Sphere>
Determines velocity modulation depth
and thus the intensity of the effect on
the resynator’s volume.
Value range: -64 to +63.
VeloDepth = 0: Velocity does not
modulate the volume level.
VeloDepth >0: The harder you bear down
on a key, the louder the output level.
VeloDepth <0: The harder you bear down
on a key, the softer the output level.
Model parameter values.
Value ranges: 0 to 127.
Model parameters can be set using the
resynator’s stick or the rotary knob
located next to the main display. The
latter lets you dial in settings more
precisely. We recommend that you set
coarse values using the sticks and finetune them in the menu.
Table 7: Resynator parameters (cont.)

Neuron.book Seite 79 Montag, 23. Dezember 2002 2:28 14
LFO Depth
L1 Scape 1/3
to
L3 Sphere 2/4
Determines the modulation depth of the
mod-generated LFO oscillation and thus
the intensity of its effect on the
opposite cross-x scape and sphere
parameter pairs (1/3 and 2/4).
Value range: -64 to +63
LFO depth = 0: Parameters are not
modulated.
LFO depth > 0: Starting at the current
value, the parameter value increases in
accordance with the LFO oscillation (up
to a max value of 127).
LFO depth < 0: The value decreases in
accordance with the LFO oscillation.
Note in this context the global LFO
depth, which is defined directly in the
mod module (page 116). Global LFO
depth is offset against this modulation
destination’s depth value.
Table 7: Resynator parameters (cont.)
KeyTrack
L1 Scape 1/3
to
L3 Sphere 2/4
Weights model parameters for different
keyboard zones. The higher the
parameter’s weight, the greater is its
influence and the more intense the
effect of parameter value changes.
Key tracking is defined separately for
each scape and sphere parameter level.
Note that you can differentiate between
the two cross-x parameter pairs within a
level.
Example:
weights the third sphere level’s second
and fourth parameter.
Value range: -64 to +63.
0 = No weighting
Positive values: Notes above the center
key (C3) are weighted higher than notes
below C3. The higher the value, the
further this weighting is shifted to the
right of the keyboard.
Negative values: Notes below the center
key (C3) are weighted higher than notes
above C3. The lower the value, the
further this weighting is shifted to the
left.
See also the illustration on page 85.
Keytrack L3 sphere 2/4
Table 7: Resynator parameters (cont.)
79
Module: Resynator

Neuron.book Seite 80 Montag, 23. Dezember 2002 2:28 14
Module: Resynator
80
VeloDepth
L1 Scape 1/3
to
L3 Sphere 2/4
Stick
animation
L1 scape to
L3 sphere
Determines velocity modulation depth
and thus the intensity of its influence on
individual cross-x scape and sphere
parameter pairs.
Value range: -64 to +63
VeloDepth = 0: Parameters are not
modulated.
VeloDepth >0: Starting at the current
value, the parameter value increases in
accordance with velocity (up to a max
value of 127): current parameter value +
velo depth x velocity value
VeloDepth <0: The value decreases in
accordance with velocity.
Defines the playback mode for stick
recordings (stick playback). Your options
are:
• 1Shot: The first note you play triggers
the recorded stick movement for the
given sound (single trigger) and the
animation continues to shape the
sound regardless of how many notes
you play thereafter.
Continued on next page...
Table 7: Resynator parameters (cont.)
Once the animation has run its course
it is not re-triggered until you release
all keys and then press a new key.
Tip: You can opt to use envelopes for
this purpose. The shaper offers multitrigger functionality, meaning that unlike stick animation - the envelope
is triggered every time you press a key.
This starts the envelope separately for
every note you play.
• Repeat: The first note you play triggers
the animation and then – unlike when
the 1shot setting is enabled – it is
repeated in cycles for as long as you
continue playing notes.
To learn how to record stick controller
movements, read the explanation
starting on page 89.
Table 7: Resynator parameters (cont.)

Neuron.book Seite 81 Montag, 23. Dezember 2002 2:28 14
Model Size
Key track
Model Size Key track determines how
keyboard transposition affects the size
of the model.
Value range: -64 to +63.
0 = the size of the model remains the
same across the entire keyboard.
Positive values: Notes above the root key
reduce the size of the model, notes
below the root key enlarge it.
Negative values: Notes below the root
key reduce the size of the model, notes
above the root key enlarge it.
Good-to-know background stuff:
Neuron’s approach to transposing models
differs from that of a sampler or ROMpler
(a synthesizer featuring sample playback
or sample ROM). While in a sampler not
only the pitch but also the apparent
sample size changes in accordance with
the played note, the size of a Neuron
model remains largely unchanged when
it is transposed. This yields a more
natural, organic sound.
Continued on next page...
Table 7: Resynator parameters (cont.)
When working with multi-models
(models derived from a multisample and
consisting of several scape/sphere
pairs), an audible jump or gap in the
soundscape may occur because virtually
every zone brings its own model size to
the sonic equation.
You can counter this effect by taking
advantage of the model size key tracking
parameter and, if necessary, the model
size offset parameter (see the next line
of the table).
When you enter a suitable setting,
Neuron transposes much like a sampler.
The model size can even be inverted in
relation to pitch if you enter negative
values, which makes for interesting
effects.
Model size key track and offset cannot be
modulated! In order to change the size
of the model on the fly, you must
modulate the given model parameter
directly (usually this will be sphere level
1). All modulation sources and
controllers may be used for this purpose.
Table 7: Resynator parameters (cont.)
81
Module: Resynator

Neuron.book Seite 82 Montag, 23. Dezember 2002 2:28 14
Module: Resynator
82
Model Size
Offset
Pitch Tunes the resynators. The submenu
Determines the extent of the offset
between the size of a model and the root
key.
Value range: -64 to +63.
0 = the model size remains constant,
meaning that it corresponds to the size
of the original sample on the root key.
Values other than zero increase or
decrease the size. This means that you
can play a model so that it behaves like
a sample (key track = +63, see above)
and retains the pitch of the original
sample even though it is smaller than
the original sample.
contains the following menu options:
• Octave. Value ranges from -2 to +1.
Adjustable only via the octave button.
• Semi. Value ranges from -24 to +24.
The knob detunes in semitones.
• Cent. Value ranges from -99 to +99.
The knob detunes in cent steps.
Table 7: Resynator parameters (cont.)
Pitch
LFO Depth
Determines the modulation depth of the
mod-generated LFO oscillation and thus
the intensity of its effect on resynator
pitch.
Value range: -64 to +63.
LFO depth = 0: Mod does not modulate
pitch.
LFO depth > 0: Starting at the current
value, pitch is modulated upwards in
accordance with the LFO oscillation.
LFO depth < 0: Pitch is modulated
downwards in accordance with the LFO
oscillation.
Note in this context the global LFO
depth, which is defined directly in the
mod module (page 116). Global LFO
depth is offset against this modulation
destination’s depth value.
Table 7: Resynator parameters (cont.)

Neuron.book Seite 83 Montag, 23. Dezember 2002 2:28 14
Pitch
Key track
Pitch FreeEnv
ADSR 1 Depth
and
ADSR 2 Depth
Determines the key tracking for the
resynator’s pitch.
Value range: -64 to +63.
Default: 63
0 = Pitch remains constant over the
entire keyboard (C3).
Positive values: The pitch of notes above
the center key (C3) rises. +63 pitch =
standard keyboard assignment.
Negative values: The pitch of notes
above the center key (C3) drops.
-64 = inversion of the standard keyboard
assignment.
See also the illustration on page 85.
Determines the modulation depth of the
free ADSR envelope generated by shaper
1 (or shaper 2) and thus the intensity of
its effect on resynator pitch.
Value range: -64 to +63.
Depth = 0: The free envelope does not
modulate pitch.
Depth > 0: Starting at the current value,
pitch rises in accordance with the ADSR
envelope.
Depth < 0: Pitch drops in accordance
with the envelope.
Continued on next page...
Pitch FreeEnv
4L/4T Depth
Note in this context the global depth of
the envelope, which is defined directly
in the shaper (page 108). This global
depth is offset against the Free Env
Depth value determined at this
modulation destination.
Determines the modulation depth of the
free 4 levels 4 times envelope generated
by shaper 1/2 and thus the intensity of
its effect on resynator pitch.
Value range: 0 to 127.
Depth = 0: The free envelope does not
modulate pitch.
Depth > 0: : Starting at the current
value, the pitch rises in accordance with
the 4L/4T curve.
Unlike ADSR depth, 4 L/4 T depth does
not allow negative values because the
envelope itself can accept negative
levels.
Note in this context the global depth of
the envelope, which is defined directly
in the shaper (page 108). This global
depth is offset against the Free Env
Depth value determined at this
modulation destination.
Table 7: Resynator parameters (cont.)
Table 7: Resynator parameters (cont.)
Module: Resynator
83

Neuron.book Seite 84 Montag, 23. Dezember 2002 2:28 14
Module: Resynator
84
Model
Hi/Lo
Velo Switch
Heads up: This parameter is enabled
only when the model loaded in the
resynator distinguishes between low and
high velocity zones. This property is
determined when the model is created in
ModelMaker.
The parameter defines a velocity
threshold value. If the pressure applied
to the key exceeds the threshold value,
the high velocity zone plays. If the force
of your key attack falls short of the
defined threshold value, the model’s low
velocity zone sounds.
That way you can address two sound
components within a model by simply
varying key pressure.
Value range: 1 to 127.
Table 7: Resynator parameters (cont.)

Neuron.book Seite 85 Montag, 23. Dezember 2002 2:28 14
Key tracking
You can define key tracking performance for every resynator (volume key track parameter (page 78), key track
parameter (page 79) and pitch key track parameter (page 83) as well as for the silver unit’s filters (page 138).
Starting from the center key, this parameter weights a module or a parameter with reference to pitch. An analogy may explain
this better: Picture a set of scales. The center key is the lever holding the two pans. Key tracking is the weight placed in a
pan. Negative values = weighted to the left side of the keyboard; positive values = weighted to the right of the keyboard.
Resynator and silver unit key tracking
85
Module: Resynator

Neuron.book Seite 86 Montag, 23. Dezember 2002 2:28 14
Module: Resynator
86
Resynator: Handling
If you are working in setup mode, you must first
prime the sound that you want to edit (see page 66)
or switch to sound mode!
How to load a model into a resynator:
• Activate the given resynator (on/off button).
• Press model select. Model loader appears in
the main display. Here’s an example using
resynator 1:
• Twist the knob to scroll through the model
database until you find the desired model. The
model number flashes until the selected model
is loaded. Load the model via enter (press the
knob).
Alternative:
Type in the three-digit model number on the
numeric keypad. The model loads immediately
after entering the third digit. You do not have
to press enter.
• The display reads:
Note in this context the basic settings parameter
ResyParReset. Use it to determine whether the model
is loaded into the resynator with the default values
stored in the database or if the current settings are
retained. A prompt may appear depending on
parameter setting. The basic settings parameter is
described on page 38.
Picture the following: The ResyParReset parameter
is set to yes/ask. You have run into a sonic dead-end
while editing the model, but you do not want to or
cannot use the snapshot function (see page 52) to
recall the initial parameter values. In this case,
simply load the default model values back into the
resynator and start over!

Neuron.book Seite 87 Montag, 23. Dezember 2002 2:28 14
How to edit models in the resynator:
You have a function called snapshot at your
disposal when editing. It lets you save the current
sound settings at any time. In combination with the
play/compare button, you can audition your
snapshots and A/B or compare the edited sound to
the original.
Snapshots are described on page 52.
• To edi t a model’s parameter values, first select
the parameter region (select button), then the
desired level (parameter level button).
• Edit the current level’s parameters using the
stick controller. The four displays surrounding
the stick indicate the current values:
• Once you have "touched" a parameter level
with the stick, the first parameter also appears
in the main display and can be fine-tuned there
using the knob:
• Stick.right and stick.left to access and edit
the other parameters at the same level.
Stick.up/stick.down takes you to the model’s
other parameter levels.
• Tune the resynator up or down using the octave
button. Go to the menu option pitch and scroll
to the right to detune the model in semitone or
cent steps (see the menu diagrams starting on
page 75).
• Vel ocity: If you want to modulate resynator
volume or individual cross-x parameter values
via key pressure, define the given velo depth
parameter in the resynator menu (see page 78).
• Key tracking: If desired, define volume key
tracking for the entire resynator (see page 78)
or key tracking for individual model parameters
(page 79).
87
Module: Resynator

Neuron.book Seite 88 Montag, 23. Dezember 2002 2:28 14
Module: Resynator
88
• LFO: If you want to modulate the model via an
LFO oscillation, first define the oscillation in
the mod module (page 117), then define the
modulation depth for pitch, volume or
individual parameter values in the resynator
(see parameter descriptions starting on
page 77).
• Contour control: Use the contour contr.
button to activate stick animation for the
resynator or to modulate model parameters via
envelope (shaper 1 LED lights up).
You must activate stick animation or the shaper
envelope specifically for every scape and sphere
parameter level. This means that in order to
modulate all levels, you must the select the
parameter levels via select and parameter
level and define the modulation source using
contour contr.
Stick animation is only available if a recording
of the stick movement (or track) has been
made for the given level. For more on this, read
the section starting on page 89.
If you want to use an envelope to modulate the
model parameters at a given level, you must
define the ADSR envelope in the appropriate
shaper and determine the desired depth (see
page 110).
The setting contour control = shaper 1 applies
to the parameter envelope only! The amp
envelope, which modulates resynator volume,
remains unaffected by this setting!
Neuron.book Seite 89 Montag, 23. Dezember 2002 2:28 14
Copying parameter sets or reloading stored
parameter values
You have the option of copying parameter value
settings or an entire resynator configuration from a
stored sound into the current sound or from one
resynator to another within the current sound. It is
also possible to reload the values stored in the sound
database into the respective resynator and cancel all
the previous changes made during editing.
You will find the copy function in the copy/paste
menu. As well as copying resynator settings and
parameter values, it serves to copy many other data
records, for example, effect settings or controller
assignments
The copy function is described in the section "Copy/
paste" on page 54. There you will find an example
demonstrating how to copy the complete set of
resynator settings from one sound to another.
Resetting model parameter/resynator settings
In the copy/paste menu, you will also find a reset
option. It resets resynator and other data to default
values. This function is described on page 57.
Stick recording and animation
When you move the stick controller to edit parameter
values, you can record these movements and play
them back to manipulate parameter values on the
fly. We call this process "stick animation."
In addition to envelopes, stick animation is your
other option for manipulating parameter values as a
function of time.
Let us look at the rules for stick recording and
animation:
• You can record one track for every parameter
level. This m+63eans that you can record six
tracks per resynator – one each for the three
scape and three sphere parameter levels.
You can record three tracks in the silver module:
one track each for the selected filter, time FX
and freq FX.
• You can play back a stored track at the
parameter level at which it was recorded. You
must press the contour contr. button to
specifically select an animation and play it
back for each level (see page 74).
• The resynator menu’s stick animation option
lets you determine if a track is played once or
(1shot) or it is cycled (repeat).
Playing a note triggers the animation. In 1shot
mode, the animation runs through once while
89
Module: Resynator

Neuron.book Seite 90 Montag, 23. Dezember 2002 2:28 14
Module: Resynator
90
in repeat mode it is re-triggered from the top for
as long as you hold the note.
• The first note that you play triggers every stick
animation. While the animation is running, any
notes played thereafter have no effect on the
animation. Unlike multi-triggering in
envelopes, stick animation is limited to a single
trigger.
• If stick animation is activated for a parameter
level (contour contr.), then this level responds
exclusively to the animation. No other type of
manipulation – say, moving the stick controller
manually, or starting a previously defined
parameter envelope - has an effect on this
level.
If a stick animation is activated for a specific
level, the parameters of all levels for which no
animation has been activated can be
manipulated in real-time by moving the stick
even if the respective shaper is activated for
purposes of contour control.
• The stick record start parameter in the basic
settings menu (see page 41) defines the trigger
conditions for starting a recording (the options
being move the stick or press a key).
• The maximum duration of a recording is
contingent upon the number of recorded tracks
and the intensity of stick movements. No
worries, though: under normal conditions, you
are unlikely to hit any boundaries!
• Stick recordings are stored at the sound level.
Surround tracks are an exception. Surround data
is generally stored in connection with a setup!
If you exit a sound without storing it, any newly
recorded tracks evaporate into the digital
ether!

Neuron.book Seite 91 Montag, 23. Dezember 2002 2:28 14
How to record a stick movement:
A new recording on the same track (at the same
parameter level) overwrites a previously recording
without warning!
• In the given module, use select (in the
resynator only) and parameter level to
determine the parameter level at which you
want to create an animation.
• Press the record stick button to set the
recording function to standby. The LED above
the button flashes.
• Start the actual recording by satisfying the
trigger condition defined for the basic settings
parameter stick record start; in other words,
move the stick or press any key on the
keyboard.
The LED lights up continuously during the
recording process.
Every movement of the stick controller is
recorded.
• Stop recording by pressing the record stick
button again.
The track is stored along with the other soundspecific data in the sound database when the
sound is stored.
If you do not store the sound, the recording is
lost when you change the sound/setup or
switch Neuron off!
How to start a stick animation:
• In the given module, use select (in the
resynator only) and parameter level to
determine the parameter level at which you
want to play back an animation.
Press the contour contr. button for this level
repeatedly so that the stick animation LED
lights up.
Repeat this step for every desired parameter
level.
91
Module: Resynator

Neuron.book Seite 92 Montag, 23. Dezember 2002 2:28 14
Module: Resynator
92
• Go to the resynator menu and define stick
animation mode for every scape and sphere
parameter level - 1shot or repeat (see the
parameter table on page 80).
The exception in surround mode:
The silver module's contour contr. is reserved
for the filter and effects. The surround menu
offers an added option called off for the menu
option stick animation that serves this
purpose. Activate a surround stick animation
by selecting 1shot or repeat in the surround
menu.
For more on this, be sure to check out the
chapter "Surround mode" starting on
page 177.
How to delete a track
A new recording made at the same parameter level
overwrites a track without warning! In order to
delete a track without overwriting it with a new
recording, proceed as follows:
• Select the parameter level at which you want to
delete a track in the given module using select
(in the resynator only) and parameter level.
• Press and hold the record stick button until the
LED above the button extinguishes (three
seconds should do).

Neuron.book Seite 93 Montag, 23. Dezember 2002 2:28 14
Module: Blender
Neuron features
another breed of
newfangled control
unit that sweeps
between resynators
called blender. We
had originally
intended to equip
Neuron with just
one resynator.
However, as we were developing Neuron it came to us
that the capability of blending or mixing two models
could offer tremendous creative potential. And that
notion prompted us to build the blender module.
It enables dynamic cross fading between two
resynators and lets you manipulate one resynator
using another.
Say resynator 1 contains the model of a flute.
Resynator 2 provides a piano-like model. Neural
synthesis allows specific parameters of one model to
influence the other model. In this configuration it
would be entirely feasible to impose the sound
generating properties of the piano model (that is,
the elements of the sound that we classify as scape
parameters - the vibration of strings, the dimensions
or the material the strings are made of) on the
sound-shaping environment of the flute model - for
example the material or size of the flute body. These,
in turn, are represented by the flute model’s sphere
parameters.
What does a strings pad sound like when chopped up
rhythmically by a drum loop? This could generate
freakish, alien-sounding rhythm clusters. How about
a choir made to "sing" through the body of a grand
piano or a snare striking the strings of a guitar –
what would that sound like?
Practically the only boundary is your zeal for
experimentation, especially when you consider the
complex intra-resynator routing options that various
blender types (see page 96) put at your disposal. The
more abstract models in particular offer wholly
unprecedented approaches to synthesizing sound.
But there is more good news: The blender is such a
versatile feature that it offers options for shaping
the blender amount (or level) on the fly. You can
modulate the amount via the mod module’s freely
definable LFO oscillations and/or via the shaper’s
free envelopes. The latter option gives you a choice
of two ADSR envelopes or one 4 levels 4 times
envelope.
Both modulation methods are defined via the given
depth parameters in the blender menu (see page 95).
93
Module: Blender

Neuron.book Seite 94 Montag, 23. Dezember 2002 2:28 14
Module: Blender
Blender: Control features Blender: Menu
Type
button
Blender
wheel
Selector button for the blender type. Press
it to access the blender menu in the main
display (see below).
The blender wheel controls the relative
amounts of the two resynator outputs or
determines the times for dynamic crossfades. How this amount or duration is
defined depends on the selected blender
type (see the section "Blender: Types"
starting on page 96).
The amount can be modulated via mod’s
LFO oscillation or the free envelopes of
shaper 1 and 2. The menu offers depth
parameters used for this purpose (see
page 95).
Table 8: Control features of the blender
94
The blender menu
appears in the main
display when you press
the type button.
Turn the blender wheel to
dial in the
menu option.
Scroll with the navigation stick and choose the
desired parameter setting using the knob.
All parameters are
described in detail in the
following table.
Blender: Parameters
amount
Type
Blender type
Wheel
Blender
Amount
Blender
LFO Depth
Blender free env
ADSR 1 Depth
Blender free env
ADSR 2 Depth
Blender free env
4L/4T Depth
Blender
Type
Defines the blender type and thus how the
two resynators influence each other. The
available blender types are described and
illustrated on page 96.
Amount Determines the weighting of the resynator
output levels. The value can be defined via
the blender wheel. The significance of the
amount varies according to the blender type.
Table 9: Blender parameters
 Loading...