

Page 1
CDR30 CDRecorder
STOP
CDR 30
PLAY PAUSE PROGRAM PREV. NEXT DUAL DISPLAY DISPLAY IRecord
Power Phones Phones Level
Sync Rec. 1 Trk. Dub Dubbing Speed Erase Finalize
OWNER’S MANUAL
Power for the digital revolution
®
™
Page 2
Table of Contents
3 Introduction
3 Special Features
3 Important Information on CD Recording
4 Safety Information
5 Front Panel Controls
7 Front Panel Information Display
9 Rear Panel Connections
10 Remote Control Functions
12 Installation and Connections
14 CD Recording Basics
14 Disc Types
14 Recording Options
14 CDR Terminology and Display Messages
15 Playback Basics
15 Loading and Unloading Discs
15 Using the Remote
16 Normal Play
16 MP3 Playback
17 HDCD
17 CD Text Playback
17 Search
17 Track Skip
18 Dual-Play Mode
18 Two-Disc Changer Operation
18 Time Display
18 Headphone Listening
19 Program Play
19 Programming Play Lists
19 Checking, Editing and Clearing
19 Repeat Play
20 Random Play
20 Intro Scan
21 CD Recording
21 Disc Dubbing
22 Recording from an External Source
23 Sync Recording
23 Record Levels
24 Finalizing CD-R and CD-RW Discs
24 Unfinalizing and Erasing CD-RW Discs
25 Troubleshooting Guide and Error Messages
26 Technical Specifications
®
Playback
Programmed Play Lists
Declaration of Conformity
We,Harman Consumer International
2, Route de Tours
72500 Château-du-Loir,
FRANCE
declare in own responsibility, that the product described in
this owner’s manual is in compliance with technical
standards:
EN 60065:1993
EN 55013/A12/8.1994
EN 55022/5.1995
EN 55020/12.1994
EN 61000-3-2/4.1995
EN 61000-3-3/1.1995
Carsten Olesen
Harman Consumer International
01/01
2 TABLE OF CONTENS
Typographical Conventions
In order to help you use this manual with the remote control, front panel controls and rear panel
connections, certain conventions have been used.
EXAMPLE – (bold type) indicates a specific remote control or front panel button, or rear panel
connection jack or a lit indicator in the front panel information display.
EXAMPLE – (OCR type) indicates a message that is visible on the front-panel information display
1
– (number in a square) indicates a specific front panel control
0
– (number in an oval) indicates a button or indicator on the remote
¡
– (number in a circle) indicates a rear-panel connection
A
– (letter in a square) indicates an indicator in the front-panel display
®
, High Definition Compatible Digital®and Pacific Microsonics™ are either regis-
HDCD
tered trademarks or trademarks of Pacific Microsonics, Inc., in the United States and/or other countries.
HDCD system manufactured under license from Pacific Microsonics,Inc.
Page 3
Introduction
Thank you for choosing Harman Kardon.
The CDR 30 CD Player/Recorder is a unique
product, designed not only to playback your
existing library of compact discs, but also to
record compact discs from either analog or digital programs.You may feed signals (for recording) to the CDR 30 from external sources such
as an A/V receiver, a tuner, tape deck or a CD
player, or you may simply place a CD in one
deck, and make a copy using a recordable CD in
the other deck.
Designed and engineered by Harman Kardon,
the CDR 30 is among the first audio CD
recorders with x4 speed capability.This means
that it will take only 15 minutes to copy a
60-minute disc. The CDR 30 is also the first
CD-R/RW audio recorder to offer MP3 playback,
dubbing of MP3 discs to conventional CD discs,
and HDCD
The CDR 30 not only records with the highest
speed and quality available but it is also an
audiophile CD player. Through the use of audiophile-grade digital-to-analog converters (DAC’s),
the CDR 30’s performance rivals the most
sophisticated high-end players. Should you wish
to bypass the internal DAC’s and use an external
digital processor, coax and optical digital outputs
are available.Thanks to the CDR 30’s dual-tray
design, you may even play two separate discs at
the same time, for parties or multi-room applications.To make CD playback more enjoyable, the
CDR 30 also features a wide range of program
and repeat functions.
Since CD recorders and MP3 are a relatively new
technology, this may be your first CD-R product.
Although CD recorders resemble play-only CD
machines in many ways, there are some important differences between a standard CD and a
CD-R. In addition, making a CD-R recording is
also a different process than what you may be
familiar with for making audio tape or cassette
recordings. For that reason, we encourage you to
read through this manual so that you are fully
acquainted with the way CD recording works.
This small investment in your time will pay major
dividends in the enjoyment that will result from
proper use of the CDR 30.
If you have additional questions about this
product – its installation or operation – that are
not answered in this manual, please contact
your dealer, who is your best source of local
information.
®
playback.
Special Features
■ Dual-Deck CD Player and CD-R/CD-RW
Recorder
■ 4x Dub Speed for Both CD-R and
Erasable CD-RW Discs (not for MP3
discs)
■ Plays MP3 and HDCD-Encoded Discs
■ Can read CD-Text and ID tracks on MP3
discs
■ Digital and analog record level adjust
■ Intro scan, selectable separately for
both drives
■ Two independent Audiophile-Grade
Digital-to-Analog Converters for
Highest Audio Quality
■ Dual-Play Capability, even for simultanous recording and playback
■ Extensive Playback Programming
Capabilities
■ Coaxial and Optical Digital Inputs and
Outputs
■ Front Panel Coaxial and Optical Digital
Inputs for Use With Portable Devices
■ Sample-Rate Convertor Allows Use of
DAT Players as Digital Source
■ Ergonomic Remote Control
■ High grade drives for both decks with
fast track access and excellent trackability.
Important Information About CD
Recording
In order to get the most enjoyment from your
new CD-R recorder, please pay special attention
to the following sections of the manual that provide information about the special features and
capabilities of CD Recorders.
■ The CDR 30 plays all standard CD audio discs
but for recording, the CDR 30 uses special
CD-R and CD-RW discs designed only for
audio use. CD-R discs designed for computer
use will not work in the CDR 30. See page 14
for more information on which types of discs
are used with the CDR 30.
■ The last step in making a CD-R and CD-RW
recording is the finalization process. Unless
this step is properly done, the disc will not
work in other players. See page 24 for information on finalizing discs.
■ Once finalized, CD-R discs will play in any CD
player, but CD-RW discs will only play in the
CDR 30 and certain other machines. Check
the specifications of your CD player if you
have questions about compatibility with
CD-RW discs.
■ As with all CD players, except those designed
specifically for portable use, you should never
move a CD player while there is a disc inside
one of the decks. NEVER move the CDR 30
until discs have been removed from both
decks.
INTRODUCTION 3
Page 4

Safety Information
Verify Line Voltage Before Use
Your CDR 30 has been designed for use with
220- to 240 Volt AC current. Connection to a
line voltage other than that for which it is
intended can create a safety and fire hazard and
may damage the unit.
If you have any questions about the voltage
requirements for your specific model, or about
the line voltage in your area, contact your selling
dealer before plugging the unit into a wall outlet.
Handle the AC Power Cord Gently
When disconnecting the power cord from an AC
outlet, always pull the plug, never pull the cord.
If you do not intend to use the unit for any considerable length of time, disconnect the plug
from the AC outlet.
Do Not Open the Cabinet
There are no user-serviceable components inside
this product. Opening the cabinet may present a
shock hazard, and any modification to the product will void your guarantee. If water or any
metal object such as a paper clip, wire or a
staple accidentally falls inside the unit, disconnect it from the AC power source immediately,
and consult an authorized service station.
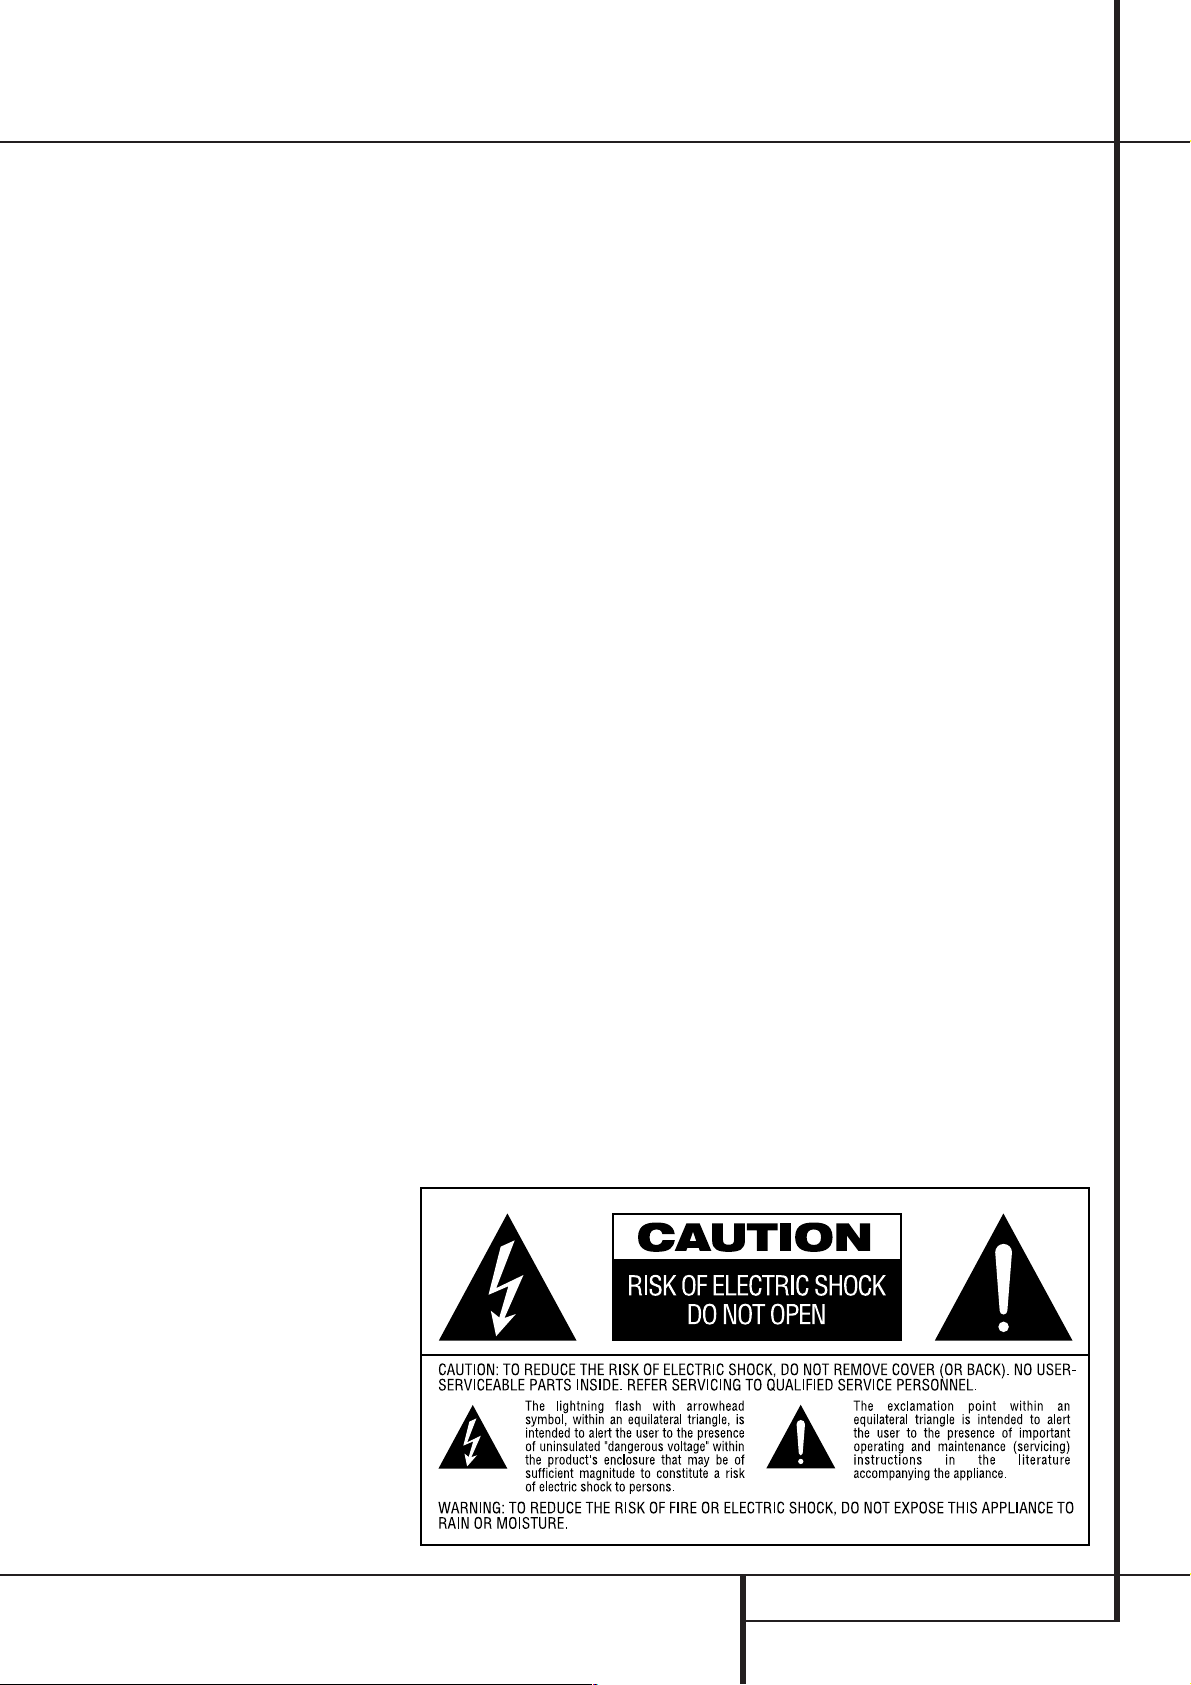
CAUTION: The CDR 30 uses a laser system. To
prevent direct exposure to the laser beam, do
not open the cabinet enclosure or defeat any of
the safety mechanisms provided for your protection. DO NOT STARE INTO THE LASER BEAM. To
ensure proper use of this product, please read
this owner’s manual carefully and retain it for
future use. Should the unit require maintenance
or repair, please contact your local Harman
Kardon service station. Refer servicing to qualified personnel only.
Installation Location
■ Place the unit on a firm and and level surface
that can support the weight of the product.
■ Make certain that proper space is provided
both above and below the unit for ventilation.
If this product will be installed in a cabinet or
other enclosed area, make certain that there
is sufficient air movement within the cabinet.
■ Do not place the unit directly on a carpeted
surface.
■ Avoid installation in extremely hot or cold
locations, or an area that is exposed to direct
sunlight or heating equipment.
■ Avoid moist or humid locations.
■ Do not obstruct the ventilation slots on the
top of the unit, or place objects directly over
them.
Cleaning
When the unit gets dirty, wipe it with a clean,
soft dry cloth. If necessary, wipe it with a soft
cloth dampened with mild soapy water, then a
fresh cloth with clean water. Wipe dry immediately with a dry cloth. NEVER use benzene,
aerosol cleaners, thinner, alcohol or any other
volatile cleaning agent. Do not use abrasive
cleaners, as they may damage the finish of metal
parts.
Moving the Unit
IMPORTANT NOTE: To avoid damage to the
CDR 30 which may not be covered by the warranty,be certain that all discs are removed from
the unit before it is moved. Once the CDR 30 is
installed, discs may be left in the unit when it is
turned off,but the unit should NEVER be moved
with discs left in either deck.
Important Information for the User
This equipment generates, uses and can radiate
radio frequency energy and, if not installed and
used in accordance with the instructions, may
cause harmful interference to radio communication. However, there is no guarantee that harmful interference will not occur in a particular
installation. If this equipment does cause harmful interference to radio or television reception,
which can be determined by turning the equipment off and on, the user is encouraged to try to
correct the interference by one or more of the
following measures:
■ Reorient or relocate the receiving antenna.
■ Increase the separation between the equip-
ment and receiver.
■ Connect the equipment into an outlet on a
circuit different from that to which the receiver is connected.
■ Consult the dealer or an experienced radio/TV
technician for help.
Unpacking
The carton and shipping materials used to protect your new CD recorder during shipment were
specially designed to cushion it from shock and
vibration.We suggest that you save the carton
and packing materials for use in shipping if you
move, or should the unit ever need repair.
If you do not wish to save the packaging materials, please note that the carton and other sections of the shipping protection are recyclable.
Please respect the environment and discard
those materials at a local recycling center.
4 SAFETY INFORMATION
Page 5

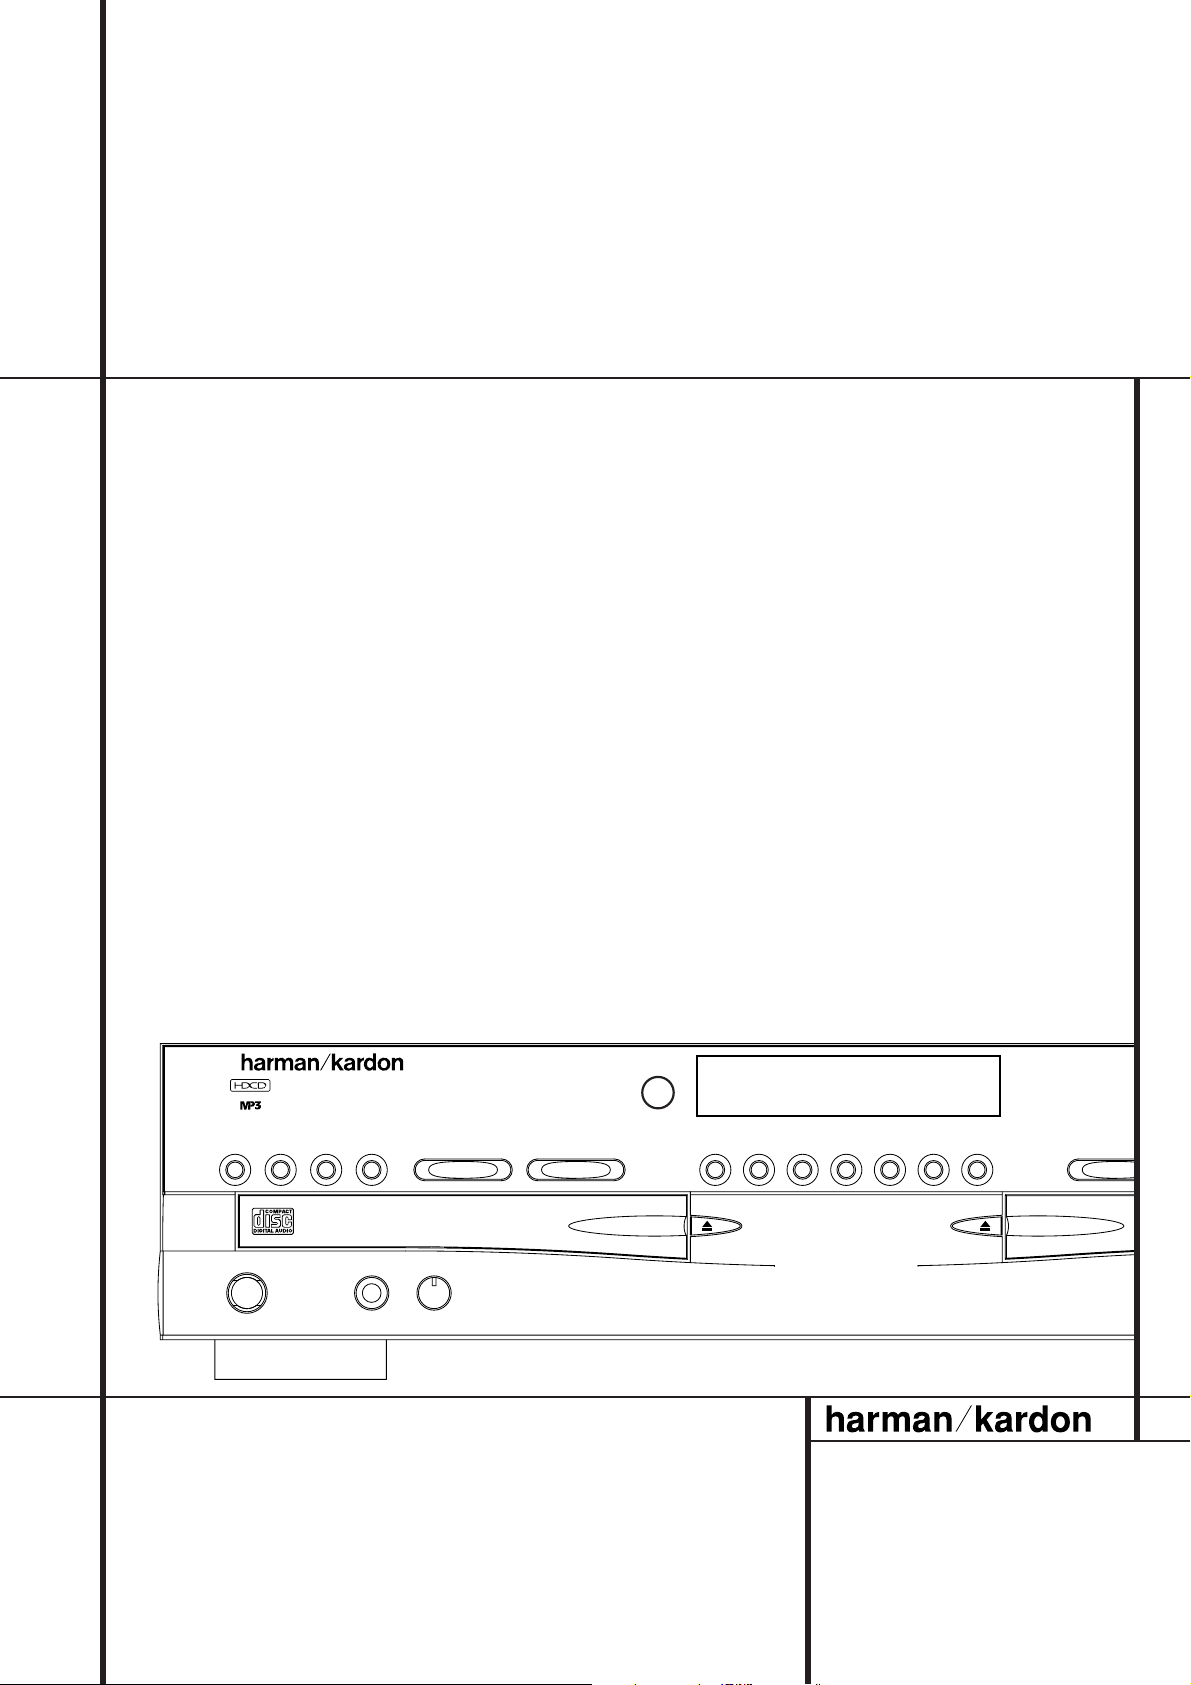
Front-Panel Controls
STOP
CDR 30
PLAY PAUSE PROGRAM PREV. NEXT DUAL DISPLAY DISPLAY INPUT PREV. NEXT PROGRAM PAUSE
MP3 DIG. REC
PLAY/SELECT STOPRecord
Power Phones Phones Level Optical In Digital In Analog Rec. Level
Sync Rec. 1 Trk. Dub Dubbing Speed Erase Finalize
2
1
3
5
6
7
8
9
)
!
#
@
$
%
*
&^
4
Ó
Ú
Û
Ù
ı
ˆ
˜
¯
¸
˝
˘
Ô
Ò
(
Power Switch
1
Standby Mode Indicator
2
Play (CDP) Deck
3
Headphone Jack
4
Headphone Level Control
5
Play (CDP) Open/Close
6
Record Button
7
Sync Record Button
8
1 Track Dub Button
9
Dubbing Button
)
Speed Select Button
!
Erase Button
@
Finalize Button
#
1
Power Switch: Press this switch to apply
power to the CDR 30. The unit will be turned on
and the Standby Mode Indicator
rounding the switch will turn green. Once the
unit has been turned on with this switch, it may
be operated from either the front panel or
remote control. Press the switch again to turn
the unit completely off.
2
Standby Mode Indicator: When the CDR
30 is in the ON mode, this indicator will glow
green. When the unit has been placed in the
Standby mode by pressing the Power-Off but-
ton
on the remote, the indicator will glow
orange, indicating that the unit is still connected
to the AC main supply and is ready to be turned
on from the remote control.
3
Play (CDP) Deck: This disc deck is used to
play conventional CD discs, MP3 discs and CD-R
or CD-RW discs that have been finalized.
4
Headphone Jack: Connect standard head-
phones to this jack for private listening.
2
sur-
Record (CDR) Deck Open/Close
$
Record (CDR) Deck
%
Optical Digital Input
^
Coaxial Digital Input
&
Analog Record Level Control
*
CDR Play/Select Button
(
CDR Deck Stop
Ó
CDR Deck Pause
Ô
Digital Level Controls
MP3 Select Button
Ò
CDR Deck Program Button
Ú
CDR Deck Next Track Button
Û
CDR Deck Previous Track Button
Ù
5
Headphone Level Control: Turn this
control to adjust the volume level to the headphones. Note that the use of this control will not
change the analog output levels at the rearpanel audio outputs
6
Play Deck (CDP) Open/Close: Press this
button to open or close the Play Deck
7
Record Button: Press this button to begin
the recording process. See pages 21-25 for more
information on CD recording.
8
Sync Record Button: Press this button
once to begin an automated recording of a single track from an external CD or MD player
when a digital connection is used. Press it twice
to begin automated recording of an entire disc.
See page 23 for more information on Sync
recording.
9
begin the process of copying a single track from
the CDP deck to a CD-R or CD-RW disc in the
CDR deck.
)
begin the process of making a complete copy of
the disc in the Play Deck
grammed tracks on that disc to a CD-R or
1 Track Dub Button: Press this button to
Dubbing Button: Press this button to
¡™
.
3
or of all pro-
3
.
Input Select
ı
CDR Deck Display Select
ˆ
Information Display
˜
Remote Sensor
¯
CDP Deck Display Select
˘
Dual/Single Play Select
¸
CDP Next Track
CDP Deck Previous Track
CDP Deck Program
CDP Deck Pause Button
CDP Deck Play Button
CDP Deck Stop Button
CD-RW disc in the Record Deck
for more information on dubbing.
!
Speed Select Button: Press this button to
select the recording speed for internal dubs. See
page 21 for more information.
@
Erase Button: Press this button to erase
one or more tracks or the entire contents of an
unfinalized CD-RW disc. When a CD-RW disc has
already been finalized you may erase the entire
disc or you may “unfinalize” the disc by erasing
the TOCdata. See page 24 for more information on erasing CD-RW discs.
#
Finalize Button: Press this button when a
recording is complete to initiate the finalization
process.The Play/Select Button
be pressed within three seconds to activate
finalization. Until this button is pressed and the
finalization process is complete, CD-R and CDRW discs may not be played on conventional CD
machines (even when finalized a CD-RW will
play only on CD players that are compatible with
CD-RWs, see also page 14).See page 24 for
more information on finalization.
%
. See page 21
(9must
FRONT PANEL CONTROLS 5
Page 6

Front Panel Controls
$
Record (CDR) Deck Open/Close:
Press this button to open or close the Record
Drawer
%
.
%
Record (CDR) Deck: This Disc Deck is used
to record or play CD, MP3,CD-R and CD-RW
discs.
^
Optical Digital Input: This jack accepts
the digital audio input signal from a compatible
digital audio product and should be connected
directly to the optical digital audio output on a
CD, MD or DVD player or any other compatible
digital source.To select this input, press the
Input Select Button
FRONT appears in the Time/Message
Display
F
. Note that the cover with the “eye”
icon must be removed before the input is used.
Save the cover and replace it when the jack is
not in use to prevent dust from entering the jack
and degrading the input’s performance.
&
Coaxial Digital Input: This input may be
used to connect the coaxial digital output on a
CD, MD or DVD player or any other compatible
digital source to the CDR 30 for digital recording. To select this input, press the Input
Select Button
appears in the Time/Message Display
*
Analog-Record Level Control: The con-
trol is used to adjust the input level when making recordings from analog sources such as cassettes, or when CDs are recorded in an analog
mode. See page 23 for more information on
record levels.
(
CDR Deck Play/Select: This button has
two functions. It may be pressed when a standard CD is in the Record Deck to put the
machine in play, or it may be used to enter a
selection or start certain record functions.
Ó
CDR Deck Stop: Press this button to stop
the CD in the Record Deck.
Ô
CDR Deck Pause:When the Record Deck is
in the Play mode, pressing this button will pause
the disc. If the disc has previously been paused,
pressing this button will restart the playback.
Digital Level Controls: These buttons
increase or decrease the record level when a
digital recording is being made. Press both buttons briefly and then release them to change
from manual to automatic digital recording level
control. See page 23 for more information on
digital recording levels.
ı
until OPTICAL
ı
until COAXIAL FRONT
F
.
Ò
MP3 Select Button: When a “Multisession”
disc containing both standard CD audio and
MP3 tracks is playing, the unit will default to
play of the standard CD audio tracks. Press this
button to play the MP3 tracks.
Ú
CDR Deck Program Button: Press this
button to begin the programming sequence for a
disc in the CDR deck. See page 19 for more
information on programmed playback.
Û
CDR Deck Next Track: This button has
two functions.When a disc is playing in the
Record Deck
play the disc in a fast-forward mode to quickly
locate a desired passage.At any time, tapping
the button and quickly releasing it will move to
the next track on a disc in play.
When a disc is stopped, each press will move
forward one track for programming or play (see
page 17 and 19 for locating tracks).
Ù
CDR Deck Previous Track:This button has
two functions.When a disc is playing in the
Record Deck
play the disc in a fast reverse mode to quickly
locate a desired passage.At any time, tapping
the button and quickly releasing it will move to
the beginning of the current track, and the next
press will move to the previous track.When a
disc is stopped, each press will move back one
for programming or play (see page 17 and 19
for locating tracks).
ı
Input Select: Press this button to select the
input source (coaxial rear, optical rear, coaxial
front, optical front and analog) for recording.
See page 22 for more information on input
selection.
ˆ
CDR Deck Display Select: Press this but-
ton to cycle through the time display options for
the Record Deck. See page 18 for more information on the time display.
˜
Information Display: The indicators in the
Information Display provide status reports on the
operation of the CDR 30. See page 7 for complete explanations of each indicator.
¯
Remote Sensor: The IR sensor that
receives the commands from the remote control
is behind this area. Do not cover or obscure this
part of the front panel to avoid any malfunction
with the remote.
˘
CDP Deck Display Select: Press this but-
ton to cycle through the time display options for
the Play Deck. See page 18 for more information
on the time display.
%
, press and hold this button to
%
, press and hold this button to
¸
Dual/Single Play Select: Press this button
to enable both CD decks to play at the same
time and function as separate, independent CD
units (Dual mode), or to have the unit play
through all the tracks on the disc in one deck
and then switch to the other (Single mode). In
the Dual mode it is also possible to record from
an external source in the CDR while the CDP
Deck is functioning as a standard CD player. See
page 18 for more information on dual-play
capability.
CDP Deck Next Track: This button has two
functions.When a disc is playing in the Play
Deck
3
, press and hold this button to play the
disc in a fast-forward mode to quickly locate a
desired passage.At any time, tapping the button
and quickly releasing it will move to the next
track on a disc in play.
When a disc is stopped, each press will move
forward one track for programming or play (see
page 17 and 19 for locating tracks).
CDP Play-Deck Previous: This button has
two functions.When a disc is playing in the Play
Deck
3
, press and hold this button to play the
disc in a fast-reverse mode to quickly locate a
desired passage.At any time, tapping the button
and quickly releasing it will move to the beginning of the current track, and the next press will
move to the previous track.When a disc is
stopped, each press will move back one for programming or play (see page 17 and 19 for locating tracks).
CDP Deck Program Button: Press this
button to begin the programming sequence for a
disc in the CDR deck. See page 19 for more
information on programmed playback.
CDP Deck Pause:When the CDP Deck is
running, pressing this button will pause the disc.
If the disc has previously been paused, pressing
this button will restart the playback.
CDP Deck Play Button: Press this button
to begin playback of a CD in the CDP Deck.
CDP Deck Stop Button: Press this button
to stop the CD in the CDP Deck.
6 FRONT PANEL CONTROLS
Page 7
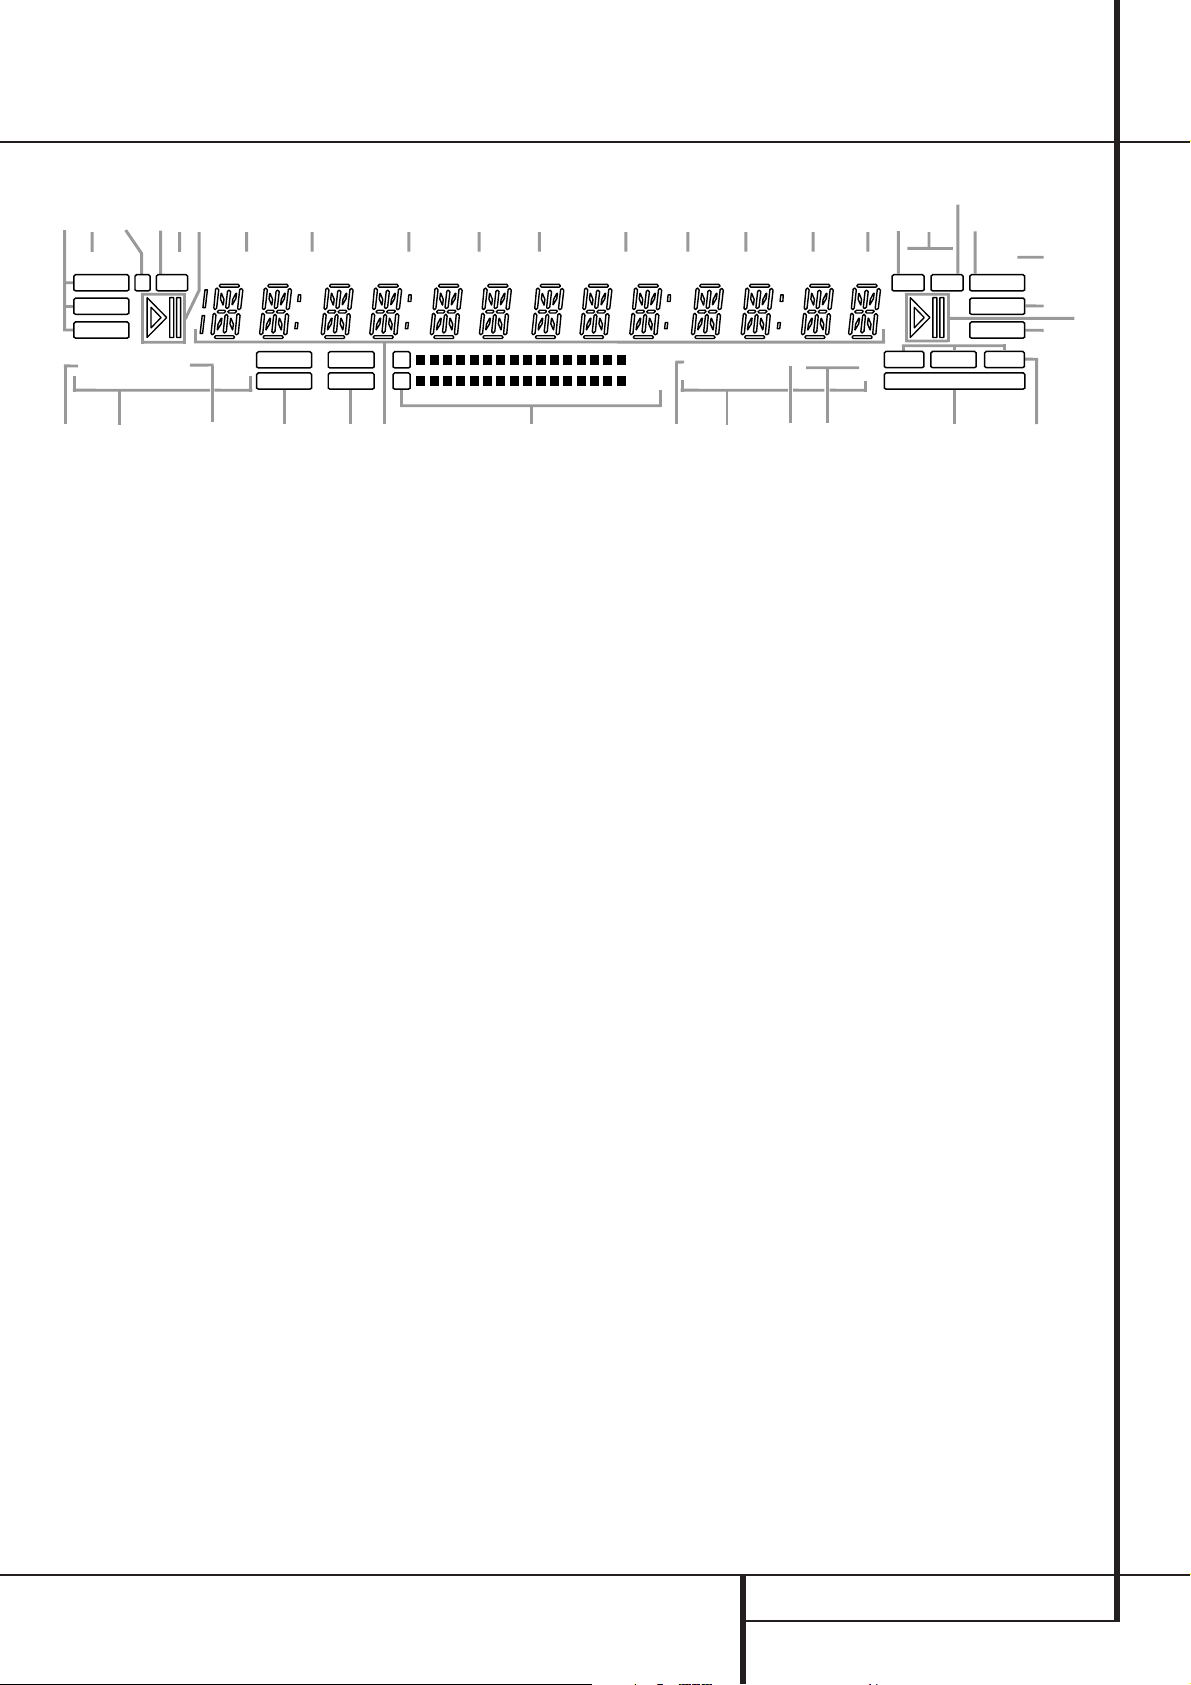
Front Panel Information Display
MP3
CDHDCD
RANDOM PROG
REPEAT 1 A–B
RANDOM PROG
REPEAT1 A–B
OVER X2 X4
OVER
ALL CD’S
ALL CD’S
HDCDTRACK TRACKTOTAL TOTAL TIME CD–RWREMAINRECREMAIN TIME A DRLC
MP3SRC
F
OPTICAL
COAXIAL
ANALOG
RECORD
SYNC
MANUAL
DUAL COPY PROHIBITCDR
CDP I T R DUBDISC
R
L
SINGLE
A A
B B
C
C
D
EF
G
I
H
J
L
M
N
O
P
QRST
U
VVWWX
YP
S
T
QNZ
K
L
Random Indicator
A
Repeat Mode Indicators
B
Program Indicator
C
Single/Dual Play Indicators
D
CDP/CDR Deck Indicator
E
Time/Message Display
F
Level Indicators
G
Dub Speed Indicators
H
Copy Prohibit Indicator
I
Dub Mode Indicators
J
Manual Track Increment Indicator
K
Play/Pause Indicators
L
Sync Indicator
M
HDCD Indicators
N
Record Indicator
O
MP3 Playback Indicator
P
CDR/RW Indicator
Q
Sample-Rate Converter Indicator
R
Time Indicators
S
Remaining Time Indicators
T
Record Time Indicator
U
Total Time Indicators
V
Track Time Indicators
W
Digital Record Level Status Indicator
X
Front Input Indicator
Y
Input Indicators
Z
Important Note: Since the CDR 30 is a dual-deck player/recorder, there are two separate sets of indicators for HDCD, Random,Program, Repeat Status,
Remain Time,Total Time,Track Time as well as separate Play/Pause Indicators and CD Indicators for each deck. As the function of these indicators is identical
for both decks, they are described in this manual with a common letter. When the CDR 30 is playing or recording a disc,any indicators that light on the left
side of the display describe the status of the Play Deck, while those that light on the right side of the display describe the status of the Record Deck.
Depending on the activity of the unit and the settings you select, different indicators may light on the two sides at the same time.
A
Random Indicators: These indicators light
when random playback has been programmed
for one of the CD decks. See page 20 for more
information on random play.
B
Repeat Mode Indicator: These indicators
display the type of repeat function being used.
See page 19 for more information on repeat status.
C
Program Indicators: These indicators light
when one of the CD decks is being programmed
for playback options. See page 19 for more
information on programmed play.
D
Single/Dual Play Indicators: One of these
indicators will light to indicate the unit’s playback mode, as selected with the Dual/Single
Play Select Buttons
¸
6N
. When the
Dual indicator lights, both decks will play
simultaneously through their respective
analog or digital outputs.When the SINGLE
indicator is lit, only one deck may play at a time,
but the unit will automatically switch from one
side to the other when a deck is finished playing.
E
CDP/CDR Deck Indicator: Indicate show if
the Level Indicators
G
are showing the out-
put of the record (CDR) or play (CDP) deck.
F
Time/Message Display: This display
shows the play or record time for either deck, as
noted by the various time and mode indicators
STUVW
. It also displays the CD Text or
MP3 information from a disc and displays various information, status and error messages.
G
Level Indicators: These LEDs display the
input level during a recording, and the output
level during playback. See page 23 for more
information on record levels.
H
Dub Speed Indicators: These indicators
show which record speed has been selected for
dub recordings. See page 21 for more information on record-speed selection.
I
Copy-Prohibit Indicator: This indicator
lights when a recording is not possible due to
the intervention of the Serial Copy Management
System (SCMS). See page 21 for more information on SCMS.
J
light when a dub is in progress between the
CDP and CDR decks to confirm that either one
track (1 TR) or the entire disc or programmed
tracks of the disc (DISC) are being dubbed.
K
indicator lights when the automatic track increment system has been turned off.When the indicator is lit, tracks may be incremented during a
recording by pressing the Track Increment
Button
L
show the status of the individual CD Decks.The
›› lights when the CD is playing, and the ››››±±±±
››
lights when the unit is in a Pause mode.
M
the unit has been programmed for a CD Sync
recording. See page 23 for more information on
Sync recordings.
N
light when either of the decks is playing a disc
that contains HDCD encoding.
Dub Mode Indicators: These indicators
Manual Track Increment Indicator: This
D
.
Play/Pause Indicator:These indicators
Sync Indicator: This indicator lights when
HDCD Indicators: These indicators will
FRONT PANEL INFORMATION DISPLAY 7
Page 8

Front Panel Information Display
O
Record Indicator: This indicator lights
when the unit is making a recording and flashes
during the preparations for recording.
P
MP3 Playback Indicator: These indicators
will light when either of the decks is playing a
disc that contains MP3 data.
Q
R/RW Indicator: This indicator shows which
type of recordable disc is present in the Record
Deck
%
. When a CD-R disc is present, only the
R is lit. The RW lights when an erasable CD-RW
disc is in use.
R
Sample-Rate Converter: This indicator
lights when the Sample-Rate Converter is in use
to change the digital sample rate when the
incoming signal is not the standard 44.1kHz
used by standard CDs.This is an automatic function and does not require any user intervention.
S
Time Indicator: This indicator lights in con-
junction with one of the time indicators
TVW
modes is active.
to show which of the time status
T
lights when the Time/Message Display F
shows the time remaining on a disc or on a
track.
U
lights in conjunction with the REMAIN
TOTAL
tor during a recording to show that the time
figure shown in the Time/Message Display
F
the time elapsed for the current track.
V
light when the Time/Message Display F
shows the total time of all tracks on a disc (in
stop mode) or the total remaining time (during
play).
W
light when the Time/Message Display
shows the running or remaining time of the individual track being played. Moreover the number
of the track actually selected is shown under
these indicators.
Remaining-Time Indicator: This indicator
Record Time Indicator: This indicator
T
and
V
indicators or the TRACKWindica-
is either the time remaining on the disc or
Total Time Indicators: These indicators
Track Time Indicators: These indicators
F
X
Digital Record Level Status Indicator:
During a digital recording, this indicator shows
ADRLC when the record level is controlled automatically, and DRLC when you may control it
manually. See page 23 for more information on
record levels.
Y
Front Input Indicator: This indicator lights
when the front panel Optical Digital
Coaxial Digital
a recording.
Z
Input Indicators: These indicators light to
display which input source is in use.
&
inputs are the source for
^
or
8 FRONT PANEL INFORMATION DISPLAY
Page 9

Rear Panel Connections
¡
™
£
¢
∞
§
¶
•
ª
‚
⁄
¤
100-240V~, 50/60Hz 28W
Play (CDP) Deck Analog Output
¡
Record (CDR) Deck Analog Output
™
Record (CDR) Deck Analog Input
£
Play (CDP) Deck Coaxial-Digital Output
¢
¡
Play (CDP)-Deck Analog Output:These
jacks carry the analog audio output signal from
the Play Deck
mode also from the Record Deck
ing CD Dubbing. Connect them to the CD input
jacks on a receiver, preamp or processor.
™
Record (CDR)-Deck Analog Output:
These jacks carry the output signal from the
Record Deck
mode also from the Play Deck
analog or digital recording. Connect them to the
Tape Play/In input jacks on a receiver, preamp or
processor.
£
Record (CDR)-Deck Analog Input:These
jacks accept the analog signals that are used
for CD recordings. Connect them to the Tape
Rec/Out outputs on a receiver, preamp or processor or directly to any analog source to be
recorded.
¢
Play (CDP)-Deck Coaxial-Digital
Output: This jack carries the digital-audio out-
put signal from the Play Deck
mal play, in Single mode also from the Record
Deck
%
a coaxial-digital input on a receiver, processor or
digital decoder.
∞
Record (CDR)-Deck Coaxial-Digital
Output: This jack carries the digital audio out-
put signal from the Record Deck
normal play, in Single mode also from the Play
Deck
3
Connect it to a coaxial digital input on a receiver, processor or digital decoder.
3
during normal play, in Single
%
, and dur-
%
during normal play, in Single
3
, and during
3
during nor-
, and during CD Dubbing. Connect it to
%
during
and during analog or digital recording.
Record (CDR) Deck Coaxial-Digital Output
∞
Record (CDR) Deck Coaxial-Digital Input
§
Record (CDR) Deck Optical-Digital Input
¶
Record (CDR) Deck Optical-Digital Output
•
§
Record (CDR)-Deck Coaxial-Digital
Input: This jack accepts the digital-audio input
signal from a compatible digital audio product
and should be connected to the coaxial-digital
output on a CD, MD or DVD player or an A/V
receiver or processor.
IMPORTANT NOTE: The coaxial digital outputs
and inputs should only be connected to digital
input or output jacks. Even though they use the
same RCA type connector as standard analog
audio connections, DO NOT connect them to
conventional analog input or output jacks.
¶
Record (CDR)-Deck Optical-Digital
Input: This jack accepts the digital-audio input
signal from a compatible digital audio product,
and should be connected directly to the opticaldigital output on a CD, MD or DVD player or an
A/V receiver or processor.
•
Record (CDR)-Deck Optical-Digital
Output: This jack carries the digital audio out-
put signal from the Record Deck
normal play, in Single mode also from the Play
Deck
3
, and during analog or digital recording. Connect it to an optical-digital input on a
receiver, processor or digital decoder.
ª
Play (CDP)-Deck Optical-Digital
Output: This jack carries the digital audio out-
put signal from the Play Deck
mal play, in Single mode also from the Record
Deck
%
, and during CD Dubbing. Connect it to
an optical-digital input on a receiver, processor
or digital decoder.
%
3
during nor-
during
Play (CDP) Deck Optical-Digital Output
ª
Remote IR Input
‚
Remote IR Output
⁄
AC Power Cord
¤
‚
Remote IR Input: Connect the output of a
remote infrared sensor or the remote control
output of another compatible Harman Kardon
product to this jack. This will enable the remote
control to operate even when the front-panel
Remote Sensor
also be used with compatible IR remote control
based automation systems.
⁄
Remote IR Output: Connect this jack to
the IR input jack of another compatible Harman
Kardon remote controlled product to have the
built-in Remote Sensor
provide IR signals to other compatible products.
¤
AC Power Cord: Connect this plug to an
AC outlet. If the outlet is switch controlled, make
certain that it is in the ON position, if you want
to turn the unit on.
¯
is blocked.This jack may
¯
on the CDR 30
REAR PANEL CONNECTIONS 9
Page 10

Remote Control Functions
0
Power-On Button
1
Play Deck (CDP) Display
2
CDP Deck Open/Close
3
CDP Deck Select
4
Program
5
Reverse Search
6
Single Play Select
7
Program Check
8
Previous-Track
9
Play/Select
A
Random Play
B
Text Readout Select
C
Auto/Manual Track Increment Selector
D
Track Increment
E
Numeric Keys
F
A-B Repeat Select
G
Repeat
H
MP3 Select
I
Intro Scan
J
Level Indicator Select
K
Stop
L
Pause
M
Next Track
N
Dual Play Select
O
Forward Search
P
CDR Deck Select
Q
CDR Deck Open/Close
CDR Display Speed
Power Off
Clear
a
c
e
g
i
k
l
n
b
d
f
h
j
m
P
D
C
SINGLE
ON
PREV
RANDOM
CDP
A
UTO/M
A
L
P
S
I
D
SEARCH
TEXT
AN
1
POWER
Y
CLEAR
PROG.
PROG
CHECK
PLAY/SELECT
STOP
CDR
T
R
I
N
C.
2
SEARCH
EV
L
CDP
INT.
CDP
3
D
EL I
S
I
P
NEXT
PAUSE
C
S
L
A
ND
CDR
A
CDR
MP3
OFF
Y
N
DUAL
30
29
28
`
C
D
R
z
y
x
w
v
u
t
s
r
IMPORTANT NOTE: Some of the remote’s functions including Play, Pause, Stop, Search, Next
and Previous Track, Repeat, A-B, Program,
Program Check, Clear, Random and the Numeric
Keys are shared between the two decks.Always
remember to press the CDP Select button
3
to use the remote to control the Play Deck,
or press the CDR Select button
the Record Deck.
When you press one of these buttons, an indication of CDPor CDR will appear in the appropriate Time/Message Display
information about functions shared see
page 15).
P
F
to control
(for more
o
4
7
CDR/RW
6
5
REPEAT
8
9
A B
0
p
q
10 REMOTE CONTROL FUNCTIONS
Page 11

Remote Control Functions
0
Power-On Button: Press this button to
turn the CDR 30 on. Note that in order for this
control to function, the Front-Panel Power
Switch
1
must first be pressed so that the unit
is in the Standby mode.
1
Play Deck (CDP) Display Control: Press
this button to cycle through the various time display options for the disc in the Play Deck
See page 18 for more information on time-display options.
2
Play Deck (CDP) Open/Close: Press this
button to open or close the Play Deck
3
Play Deck (CDP) Select: Press this button
to control or program the functions of the disc in
the Play Deck
4
Program: Press this button to begin the
programming sequence for one of the CD decks.
See page 19 for more information on programming the CDR 30.
5
Reverse Search: Press this button to play
the selected disc in reverse to locate a desired
passage.
6
Single Play Select: When this button is
pressed, the CDR 30 will function as a two-disc
CD player/ changer. In the Single mode, the
audio output will be routed to all output jacks
¡™¢∞•
actually playing. See page 18 for more information on the Single-Play mode.
7
Program Check: Press this button to
check or edit a programmed playback sequence.
See page 19 for more information on programmed
playback.
8
Previous-Track Skip: Press this button to
skip backwards to the beginning of the track
currently being played. Press it a second time to
move back to the beginning of each previous
track.
9
Play/Select: This button has two functions.
It will most often be used as a standard play
button, but when setting up certain record functions, it is also used as an Enter or Select button.
3
.
regardless of which CD deck is
3
3
.
.
A
Random Play: Press this button to begin
random play of all tracks on a disc.
B
Text Readout Select: Press one of these
buttons to view the CD Text from the disc playing in either the CDP or CDR decks. If one of the
buttons is pressed and the disc playing does not
contain text a NO TEXT message will be displayed in the Time/Message Display
page 17 for more information on CD Text readout.
C
Auto/Manual Track Increment
Selector: Press this button to select between
automatic and manual track increments during a
recording session. See pages 22-23 for more
information on track increments.
D
Track Increment: When the Manual mode
for track increments is selected during recording,
press this button to increase the track number.
NOTE: This function does not operate during
Sync or dub recording.
E
Numeric Keys: Press these buttons to
access a specific track for playback or during the
programming process. See page 19 for more
information on programmed playback.
F
A-B Repeat: Press this button to specify a
segment of a disc for repeat play. See page 19
for more information on repeat play.
G
Repeat: Press this button once to repeat
the current track.To repeat an entire disc, press
the button twice. Press it a third time to repeat
both discs in sequence (with Single mode only).
H
MP3 Select: When a Multi-session disc
with both CD Audio and MP3 data is playing,
press this button to select playback of either
type of information. See page 16 for more information on MP3 playback select.
I
Intro Scan: Press one of these buttons to
start the Intro Scan feature for either deck. When
Intro Scan is in use, the unit will play the first ten
seconds of each track on the disc.To play any
track in its entirety during the Intro Scan process,
press the Play Button
J
Level Indicator Select: Press these
buttons to select the playback or record level
display for either the play (CDP) or record (CDR)
decks. See page 18 for more information on
indicator select.
9
.
F
. See
K
Stop: Press this button to stop playback or
recording.
L
Pause: Press this button to momentarily
pause playback or recording. Press it again to
resume playback.
M
Next-Track Skip: Press this button to skip
forward to the next track on a disc.
N
Dual Play Select: Press this button to
enable both CD Decks to play back at the same
time and function as separate, independent CD
units. In this mode it is also possible to record
from an external source while the Play Deck is
functioning as a standard CD player. See page
18 for more information on dual-play capability.
O
Forward Search: Press this button to play
a disc in a fast-forward mode.
P
Record Deck (CDR) Select: Press this
button to control or program the functions of
the disc in the Record Deck
Q
Record Deck (CDR) Open/Close: Press
this button to open or close the Record Deck
%
.
Record Deck (CDR) Display Control:
Press this button to cycle through the various
time-display options for the disc in the Record
Deck
%
. See page 18 for more information on
time-display options.
Power-Off: Press this button to place the
unit in a Standby mode.
Clear: Press this button to clear an item in
a program sequence. See page 19 for more information.
%
.
REMOTE CONTROL FUNCTIONS 11
Page 12

Installation and Connections
Important Note: To prevent possible damage
to your speakers or other components in your
audio system, we strongly recommend that ALL
system components, including the CDR 30,be
turned off completely when any connections are
made or a new component is installed.
Locating the CDR 30
Since the CD transports in the CDR 30 are precision instruments, they are subject to interference
from vibration.To minimize the possibility of
skipping during playback or recording, it is recommended that the unit be placed on a level,
solid, vibration-free surface.
When installing the CDR 30 in a cabinet or tight
space, always make certain that there is enough
room in front of the unit for the disc drawers to
open fully, and that there is enough space above
the unit so that discs may easily be inserted in
the disc drawers.
In addition to the safety considerations outlined
on page 4, it is also recommended that the CDR
30 not be placed in a location that is subject to
direct sunlight or extreme heat or cold, as these
conditions may damage the discs used in the
player, or the player itself. Note that audio amplifiers or high-power receivers, as well as certain
other electronic products, may generate significant heat. For that reason,do not place the CDR
30 directly on top of an amplifier, receiver, or
other heat source.Always allow at least 2 cm of
free space on all sides of the CDR 30, as well as
other electronic products, to allow for proper
ventilation.
The unit should also be kept away from sources
of water or damp conditions.
Connections to Your Audio System
When connecting the CDR 30, think of the
process as if your were connecting a standard
CD player and a tape or cassette recorder, with
the addition of the digital connections.
Play-Deck Connections
The rear panel connections
“CDP” refer to the outputs of the Play Deck
3
, which functions as a standard CD player.
Connect the analog left/right CDP outputs
to the CD inputs on your receiver, preamp or surround processor.
For best playback results,a digital connection is
recommended, using the coaxial
ª
outputs. Connect them to the matching digi-
tal inputs of your receiver, preamp, processor or
external digital decoder.
Note that you may have to change a setting on
the receiver or processor to link the digital input
to the “CD” button or input selector. Consult the
owner’s manual on that device for details, as this
configuration may vary from unit to unit.
Record-Deck Connections
The rear panel connections
labeled “CDR” refer to the inputs and outputs
for the Record Deck
capabilities of your receiver, preamp or processor, you may find it convenient to connect the
analog inputs and outputs to the jacks marked
for a tape recorder. As the CDR 30’s functions
resemble those of a standard tape recorder, this
might make it easier to select it as an input on
your receiver or preamp. Connect the analog
CDR-Out jacks
input on your receiver or preamp. Connect the
CDR-In jacks
your receiver or preamp.
To play the output of the Record Deck through
the digital decoder in your receiver or an external processor, connect the CDR Coax
Optical
ing digital-input jacks on your receiver or processor. Note that you may have to change a setting
on the receiver or processor to link the digital
input to the “Tape” button or the specific input
selector associated with the digital inputs.
Consult the owner’s manual on your receiver or
processor for details, as this configuration may
vary from unit to unit.
™
£
to the Tape Rec/Out jacks on
•
digital outputs jacks to the match-
¡¢ª
™£∞§¶•
%
. Depending on the
to the Play/In jacks of a Tape
labeled
¢
or optical
∞
¡
or
To make recordings from external digital
sources, such as a CD, DVD or MD player, connect the CDR Coax-In jacks
Optical In Jacks
appropriate digital output jacks on your receiver
or processor. If your receiver does not have digital-output jacks, you may connect the CDR
Coax In jacks
¶^on the CDR 30 directly to the matching
digital output on your CD player or other digital
device from which you’d like to make recordings.
Connections to a portable digital CD or MD
player may also be made by connecting the
Coax or Optical Digital Output of the player to
the matching Front Panel Digital Input Jack
^&
on the CDR 30.
IMPORTANT NOTES ON DIGITAL
CONNECTIONS:
Coax Connections: Although digital-coax con-
nections use the same type of “RCA” phono jack
as standard analog signals, please take special
care to connect digital signals only to digital
jacks. In many cases, the digital jacks may be
identified by an orange colored insert ring
around the center of the jack. When making digital connections, be sure to use coax-interconnect cables, such as the one supplied with the
CDR 30 or cables intended for video applications. Even though they have the correct type of
RCA connector, do not use audio-interconnect
cables that have twisted pair construction, as
they are not appropriate for digital signal use. If
you have any questions about the type of cables
to use with the CDR 30, consult your dealer.
Optical Connections: To ensure proper connection of optical cables, fully insert them into
the jack until there is an audible click. This tells
you that the connector has been completely
inserted. Remember to save the plastic dust caps
that cover the optical jacks, and replace them
when a jack is not in use to prevent dust from
entering the connection point.
¶^on the CDR to the
§&or CDR Optical In Jacks
§&or CDR
12 INSTALLATION AND CONNECTIONS
Page 13

Installation and Connections
Batteries
Insert the two AA batteries supplied with the
CDR 30’s remote as shown below being careful
to follow the + and – polarity indications in the
bottom of the compartment. Replace the cover
by first seating the two small tabs into the mating holes at the top of the remote, and then
gently push the cover down until the latch snaps
into place with an audible click.
NOTE:When replacing batteries, replace both at
the same time.When the remote will not be
used for an extended period of time, remove the
batteries to avoid the possibility of damage due
to corrosion. Batteries contain chemical substances and we recommend that you dispose of
them properly and in compliance with any local
regulations.
IR Remote Connections
If the CDR 30 is installed behind a cabinet or
other obstruction that may block the path
between the front panel Remote Sensor
and the location where you will use the remote,
an optional external IR sensor may be used.
Connect the sensor to the Remote IR In Jack
‚
on the rear panel. This jack may also be connected to the IR Output jack of another compatible Harman Kardon component or a compatible
IR system remote product that is not blocked by
a cabinet.
You may also use the IR Sensor in the CDR 30 to
send commands to other compatible remote
products. Connect the Remote IR Out Jack
to the input of the other product or system.
Power Connections
Connect the AC Power Cord
power source. the CDR 30 uses sensitive, highperformance computer-grade CD drives, and to
protect them we recommend that you consider
the use of a surge protector, just as you would
for a computer.
If the rear panel AC outlet on a receiver or other
product is used, make certain that it provides at
least 28 watts, and that the total power of all
products connected does not exceed the maximum rated output of the product containing the
outlets. If the CDR 30 is connected to a switched
outlet, remember to turn on the outlet or product controlling it in order for the CDR 30 to
operate.
¤
¯
⁄
to an AC
INSTALLATION AND CONNECTIONS 13
Page 14

CD Recording Basics
CD Recorders (CDRs) are similar to standard CD
players, with the addition of the features and
controls needed for recording. Functions such as
play, search and programming for playback will
be familiar, but the recorder will function slightly
differently than what you may be used to for
magnetic tape recorders.
Disc Types
Unlike a conventional CD player, the CDR 30
uses three types of discs, and it is important to
understand how each one plays.
Both decks in the CDR 30 will play
any conventional CD that bears this logo.
Discs that bear this logo or whose
packaging is labeled with ”Digital Audio” and
”CD-R” or ”CD Recordable” may be recorded
on one time, and when they are finalized they
will play in either deck in the CDR 30 or in any
conventional CD player, including home, car and
portable models.The Record Deck
CDR 30 may also be used to record on these
discs, and it will play those CD-R/Audio discs
even if they have not been finalized.
Discs that bear this logo or whose
packaging is labeled with ”Digital Audio” and
”CD-RW” or ”CD Rewritable” may be recorded,
and they may also be erased and reused.They
may be recorded on the Record Deck
the CDR 30 and on other CD-RW recorders and
played on both decks of the CDR30 (on the Rec
Deck
%
even if the CD-RW is not finalized) or
on CD-RW compatible players.They will NOT
play in most current CD players unless the player
is CD-RW compatible. CD-RW Audio discs will
play on most DVD players once they have been
finalized.
%
on the
%
of
Discs that bear this logo
are designed for use in computer CD-R drives
and may not be used for recording in the CDR
30. Only discs specifically designed for use in
consumer CD audio recorders may be used. If
you attempt to use a
able disc for recording
see a NOAUDIO message in the Time/
Message Display
78
or Dubbing
recording will not be possible. However, discs
that have been recorded in the CD-R drive of a
computer may be played in the CDR 30, provided that they have been properly finalized in
accordance with audio standard IEC958.
Note that the CDR 30 is specifically designed for
the recording and playback of consumer audio
discs, and cannot be used to copy data discs,
DVD discs, or other optical discs used by videoor computer-game systems.
Recording Options
Digital Source to CD Audio: Depending on
the particular input source used, the CDR 30 will
make a CD Audio disc when fed a signal from a
digital source such as an external CD or DVD
player, MiniDisc or DAT player. When the input
signal is not at the 44.1kHz standard used by
digital audio discs it will be converted to the
proper standard by the CDR 30’s built-in sample
rate converter. Input signals will be transferred
directly to the copy disc as a digital signal, provided that it is an original recording. Digital
sources that are copies can be copied only via
the analog inputs.This is a requirement of the
SCMS system, which is part of the CD recording
system.
When copying using the dual-deck capability of
the CDR 30, the copy may be made in real time
or at twice or four times normal speed.
Analog sources to CD Audio:When the input
signal is a conventional line-level analog audio
signal, such as the record output of a receiver or
processor, it will be converted to digital data and
recorded as a standard CD audio disc. These
dubs may be made in real time only.
MP3 discs to CD Audio:A unique feature of
the CDR 30 is its ability to play discs recorded
with MP3 data files.These discs may be copied
to conventional CD audio discs using the dualdeck dub capabilities, but only at normal speed.
Note that it is not possible to copy MP3 discs to
additional MP3 disc copies.
The CDR 30 is not equipped to accept external
MP3 files for direct recording.
blank-computer-type record-
on the CDR 30 you will
F
as soon as any Record
9)
button is pressed and
CDR Terminology and Display Messages
Compact disc recording has its own special terminology, and some of the messages you will
see when using the CDR 30 may be new to you.
Before using the CDR 30, you may wish to familiarize yourself with some of the terms used by
the CDR 30. Additional error message displays
may occasionally appear. Please see page 25 for
a complete explanation of those messages.
Finalize: This term refers to the process
that completes the recording of a disc by recording a final Table of Contents and preparing the
disc so that it may be played on other machines.
A CD-R disc may not be played on the CDP deck
of other CD players until it is finalized. However,
once the finalization process is complete, a CD-R
disc may not be recorded on again. CD-RW discs
must be finalized too to be playable on CD-RW
compatible players, but they may be
“Unfinalized,” so that certain or all tracks may
be deleted or additional tracks may be recorded
on a disc.
TOC: Stands for Table of Contents and it refers
to the data recorded on each CD that tells the
player how many tracks are on the disc, the total
time of the disc and the running time of each
individual track. Each time a disc of any sort is
placed in the CDR 30, you will see a TOCto
indicate that the unit is reading this data from
the disc. This is required to copy the track information to any recording.
OPC: Stands for Optical Processing Calibration.
When you see this message in the Time/
Message Display
transport inside the unit is making the calibrations and adjustments needed so that the
recording process is optimized for the specific
disc in use.
BUSY: When you see this message, it means
that the Record Deck is completing part of the
record operation.When you see this message, do
not press any buttons; simply wait until the message clears from the display.
DISC FULL: When there is no more record
time remaining on a recordable disc, a DISC
FULL message will appear in the Time/
Message Display
sage, the CDR 30 has stopped the recording
process and, when a CD-R is being recorded,
you can insert a new blank disc or, when a CDRW is in use, either use a new disc or erase
existing tracks following the instructions on
page 24.
F
, it means that the laser
F
. When you see this mes-
14 CD RECORDING BASICS
Page 15

Playback Basics
Playback of CDs on the CDR 30 resembles traditional CD players with a few exceptions to
accommodate the availability of two separate
playback decks. Before using the CDR 30,
power-up the unit by pressing in the Main
Power Switch
Standby Mode Indicator
indicating that the unit is on and functioning.
At the same time, the Information Display
˜ will light, the Time/Message Display
will briefly display HARMAN KARDON
MODEL CDR 30 and the indicators behind
the front panel controls will also light up.
Once the Main Power Switch
turned on, the CDR 30 may be powered-on or off using the remote control. Pressing the
Power-Off button
place the unit in a Standby mode, as indicated
by the orange color of the Standby Mode
Indicator
remote, simply press the Power-On button
Note that when the unit is in the Standby mode,
it is still drawing power from the AC main outlets.To turn the unit completely off, press in the
Main Power Switch
release it so that it pops forward.When the
Standby Mode Indicator
CDR 30 is off and not drawing any power. When
you will not be using the unit for an extended
period of time, such as during a vacation, we
recommend using the Main Power Switch
to turn the unit completely off.
Although compact discs are very reliable, rough
handling may damage them. Avoid scratching
either side of the discs, as this will affect playback of standard CDs and interfere with the
recording of CD-R and CD-RW discs. It is also a
good idea to always handle discs by their edges
to avoid fingerprints which may also interfere
with playback quality and possibly cause damage to the laser and lens assembly.
Loading and Unloading Discs
To load a disc, first open the desired CD deck by
pressing the appropriate Open/Close button
6$
2Q
the Time/Message Display
certain that there is sufficient room in front of
the unit for the disc drawers to open.
1
until it latches. Note that the
2
will turn green,
1
has been
on the remote will
2
. To turn the unit on using the
1
slightly, and then
2
goes out, the
. The word OPEN will appear in
F
. Always make
F
0
1
Load a disc in the tray with the printed (label)
side facing up. Once the disc is seated,make
certain that it is properly centered within the
tray.When using 8 cm (3") single discs, take
extra care to make certain that the disc is carefully centered within the smaller ridges in the
disc tray.
Labeled
Surface
To close the drawer, press the appropriate
Open/Close button
press on the outside of the front cover of the
.
disc tray.When the drawer is closed the word
CLOSE will appear momentarily in the
Time/Message Display
TOCwill begin to flash in the display once the
drawer s completely closed.
If the disc is a standard CD or a CD-R or CD-RW
disc, TOCwill flash while the unit reads the
disc’s Table of Contents information.Once that
data is read, the Time/Message Display
will show the total number of tracks and the
total time of all tracks on the disc.The CD
Indicator
standard CD is in use.
When an unfinalized CD-R or CD-RW disc is
placed in the Record Deck
OPCwill flash once the preliminary Table of
Contents has been read. This indicates that the
unit is optimizing its circuits for maximum compatibility with the specific recordable disc in use.
The number and total running time of any tracks
that have already been recorded will appear in
the Time/Message Display
appropriate indicator
CD-R or CD-RW disc is in use.
If a computer data disc is placed in the CDR 30,
a DATA DISC or DISC ERROR message will appear, depending on if the data disc is
finalized or not. Data discs will not play, and
may not be recorded or dubbed on the CDR 30.
Q
6$
2Q
F
, and the letters
will also light to indicate that a
%
, the letters
F
, and the
Q
will light to tell you if a
or gently
F
Using The Remote
The CDR 30’s infrared remote control is designed
to operate both CD decks, as well as control the
playback programming and start the recording.
To allow for efficient use of the remote,it’s operation is different from standard CD players.
Some buttons are dedicated to one specific CD
deck, while others are shared between the two
decks.
No matter which deck is playing, the Play Deck
(CDP) and Record Deck (CDR) Display
1
and Open/Close buttons
will always send a command to their respective
deck, as well as the buttons Text
Scan
I
and Level IndicatorJ. The other
transport and programming functions,however,
are shared. To use any of the transport controls,
such as Play
Search and Skip buttons
Numeric Keys
Keys
the CDP button
Deck
the Record Deck
pressed, a message reading CDPor CDRwill
appear in the appropriate Time/Message
Display
To switch the remote from controlling one deck
to controlling the other, simply press the Select
button
trol at any time.
It is always a good idea to press the CDR
Select button Pwhen a recording from an
external source is to be made, otherwise possibly
the recording cannot be started with the remote
(by pressing Play/Select
stopped (by pressing Pause
Note that the record-function buttons
Auto/Man
the Single/Dual buttons
cated feature buttons that do not require any
special selection.
9
, StopK, PauseLor the
58MO
E
or the Programming
47AFG
3
to command the Play
3
or the CDR button Pto command
%
. When the button is
F
to confirm the selection.
3P
for the deck you wish to con-
9
C
and Track IncrementDand
6N
2Q
B
, Intro
, first press either
) or paused or
L
or StopK).
are dedi-
, the
PLAYBACK BASICS 15
Page 16

Playback Basics
Normal Play
To play a disc, first make certain that the unit is
properly installed and that the Main Power
Switch
1
is turned on, this will also turn the
unit on completely.When the CDR30 is in
Standby mode (Status Mode Indicator
glows orange), turn the CDR 30 on by pressing
the Power-On button
note that the front-panel display will illuminate.
Insert a disc following the instructions shown on
the previous page.To start the play,press the
Play button on the front panel for the appropriate deck
on the remote for the desired deck
then press the Play button on the remote
The Play/Pause Indicator
angle pointing right
Display
played under the Track Time Indicator
the running time of the track under the Time
Indicator
the track time will reset to 00:00and begin to
count up for the new track.
When a disc is stopped after it has been loaded
and the Table Of Contents (TOC) data read, the
following information will be shown in the
Time/Message Display F:
For CD Audio Discs, or mixed/multisession discs
when the MP3 Indicator P is NOT lit: The
number of tracks on the disc and the total time
of the disc.
For MP3-only discs,or mixed/multisession discs
when the MP3 Indicator P is lit: The total
number of tracks.
NOTE: Remember that unfinalized CD-R or
CD-RW discs will only play in the Record Deck
%
the Play Deck
sage will appear to remind you to play the disc
in the other deck.
To go directly to a specific track on a disc, enter
the track number using the Numeric Keys
Note that when selecting a two-digit track number, the second digit must be entered within
three seconds after the first Numeric Key is
pressed. To play the track selected press the
Play/Select button
(
F
will show the track number being
S
. As each new track begins to play,
. If you attempt to play an unfinalized disc in
0
on the remote and
or press the Select button
L
will show a tri-
›› and the Time/Message
››
3
,a DISC ERROR mes-
(9.
3P
W
2
and
9
and
E
To momentarily stop the disc at any time,press
L
Ô
the Pause button
paused, the Play/Pause Indicator
two vertical lines to indicate a paused disc. Press
either the Play button
Pause button
at the point where the disc was paused.
When there is only one disc in the unit, it will
automatically stop when all tracks on a disc
have played through. To stop playback at any
time, press the Stop button
deck in use.
When there is a disc in each deck, the player will
respond in one of two ways, depending on
.
which dual-play setting is activated. In normal
operation (Single-Play Indicator
when the disc in one drawer finishes, the disc in
the other drawer will begin to play.When the
Dual button
Dual-Play Indicator
operate as a separate,single-play CD unit without regard to the status of the other deck. For
complete information on Dual-Deck and DualPlay operation, see page 18.
At the end of a listening session, remove the
discs from the decks by following the instructions shown on the previous page. Do not leave
the disc drawers open when the unit is not in
use to prevent dust and dirt from entering the
unit and to prevent damage to the tray.
To place the unit in a Standbymode at the
end of a listening session, press the Power-Off
button
appear briefly in the Time/Message Display
F
, any open disc trays will automatically close,
and the Status-Mode Indicator
orange.
MP3 Playback
The CDR 30 is unique among consumer audio
CDR/RW recorders in that it plays discs recorded
with MP3 data. It may also make conventional
CD Audio copies of these discs when they are
dubbed using the CDR 30’s dual-deck capabili-
.
ties. Since MP3 discs may appear in two different forms, their playback may require different
operation.
When a disc has been recorded ONLY with MP3
data, simply insert the disc in the CDR 30 as you
would for any CD.After the disc’s Table of
Contents (TOC) data has been read, the MP3
Indicator
disc is in use.
L
Ô
N¸is pressed so that the
. The word POWER OFF will
P
will light to indicate that an MP3
. When a disc is
9
(
to resume playback
K
D
is lit, each deck will
L
or the
Ó
D
2
will add
for the
is lit),
will turn
When discs are recorded on a computer, it is
possible to place both standard CD Audio and
MP3 tracks on the same disc.These are known
as “Mixed Session” or “Multisession” discs.
When they are used in the CDR 30, the default
mode is to play ONLY the standard CD audio
tracks. In Stop mode, the Time/Message
Display
F
will show the number of all tracks
on the disc (including MP3) and their total running time (including the time of the MP3 tracks
compressed). To play the MP3 data tracks only,
wait until the disc’s Table of Contents is read
and the Time/Message Display
data for all audio tracks.Then, press the MP3
Button
HÒand note that an MP3ON
message will flash three times in the Time/
Message Display
P lights above the appropriate deck. Then the
Display will shown the number of MP3 tracks on
the disc.
• If the MP3 Button
the CD Audio tracks of a Multisession disc is
playing, an MP3ON message will flash three
times in the Time/Message Display
then playback will stop. Press the Play
Button
tracks.
• If the MP3 Button
the MP3 tracks of a Multisession disc is playing, an MP3OFFmessage will flash three
times in the Time/Message Display
then playback will stop. Press the Play
Button
CD Audio tracks.
When an MP3 disc is inserted into the CDR 30,
the displays are somewhat different than what
you may be used to for standard CD Audio discs
or from traditional CD players.After the Table of
Contents (TOC) is read, the Time/Message
Display
F
tracks on the disc. During playback of an MP3
disc, the default display will show the running
time for the track being played, but not the track
number, as is the case for normal CD playback.
F
and the MP3 Indicator
HÒis pressed while
9
(
to playback the MP3
HÒis pressed while
9
(
to playback the standard
will display the total number of
F
shows the
F
F
and
and
16 PLAYBACK BASICS
Page 17

Playback Basics
During normal playback of MP3 discs, pressing
the CDP or CDR Display Button
ˆ˘
will show the following information, in
order:
Elapsed time of current track ➜ Remaining Time
of current track ➜ Current Track Number ➜ File
name of Current Track (Up to the first six digits)
To read the total time of all tracks recorded on
an MP3 disc, the disc must be stopped.
Then, press the CDP or CDR Display Button
1
ˆ˘
(as appropriate) for three sec-
onds, until a TTLTIMEON message appears
in the Time/Message Display
the CDP or CDR Display Button again to alternate between a display of the total number of
tracks and the total time of the disc. Press
and hold the CDP or CDR Display Button again for
three seconds until a TTLTIMEOFF message
appears in the Time/ Message Display
return to standard display.
While MP3 playback is possible from both the
CDP and CDR decks, only one MP3 disc may be
played at a time. If you load two MP3 discs at
the same time, both MP3 Indicators
lit. Press the Play Button
the deck you wish to play.
If you try to play an MP3 disc in one of the decks
when the other is already playing an MP3 disc, an
MP3 BUSY message will appear in the
Time/Message Display
disc has been inserted.
Also when a standard Audio CD is placed in one
deck and an MP3 disc in the other and you want
to play both, first start the MP3 disc and then the
standard disc, otherwise the display will also
show the message MP3 BUSY.
Notes About MP3 Playback:
• When an MP3 disc is played,only the Analog
Audio Outputs
no signal at the Digital Audio Outputs
¢∞•ª
that the MP3 output is heard, make certain
that the correct analog input is selected on
your receiver, processor or preamp.
• The forward and reverse “fast play” or Search
Controls fy do not operate during
MP3 playback. However, the standard Play
9
(
ÓKControls operate as they do for
normal play.The Next Track wÛ˝
and Previous Track
work normally during MP3 playback.
• The CDR 30 will play only standard MP3 discs
recorded in the MPEG 1/Layer 3 format. Other
compressed digital audio formats will not be
played back, and any non-MP3 tracks will be
skipped.
• When an MP3 disc is dubbed in the CDR 30,
the copy disc will be recorded in the standard
“Red Book” CD Audio format. It is not possible
¡™
during MP3 playback. To ensure
, Pause
ÔLand Stop
8
1
F
. Then press
F
to
P
will be
9
(
for
F
where the second
are available.There is
Ù
Controls also
to make an MP3 copy of an MP3 disc. Moreover MP3 dub is possible at normal speed only.
HDCD Playback
HDCD, which stands for High Definition Compatible Digital, is a special recording process that
enables the CDR 30 to deliver the ultimate in CD
audio playback. The CDR 30’s circuitry takes
advantage of the special HDCD recording process
when HDCD-encoded discs are used, and it is
also completely compatible with non-HDCD
discs, which benefit from the unit’s advanced digital-to-analog converters.
No special adjustment is needed to play HDCD
encoded discs. Simply use the disc as you would
any other CD.Although these discs also play on
conventional CD players, when played on the
CDR 30 the special HDCD decoding circuitry is
automatically activated, delivering extraordinary
fidelity and the highest possible overall quality.
The CDR 30 will playback and internally decode
HDCD discs from either the CDP or CDR decks
and the appropriate HDCD Indicator
light above the deck in use. However when
HDCD discs are played on both decks simultanously (in Dual mode), the internal decoder
works only with the first disc selected and the
appropriate HDCD Indicator
Nevertheless, when the HDCD decoding is done
in an external receiver or processor using a digital output connection from the CDR 30, the digital signal from any deck can be HDCD decoded,
no matter if the appropriate HDCD Indicator
N
lights in the CDR30´s display or not.
CD Text Playback
An increasing number of CD discs are recorded
with CD Text information that may display the
disc’s title, the name of the artists, the title of
specific individual tracks, and the artist for specific individual tracks, depending on how the disc’s
producers program the information.
When a disc’s Table of Contents (TOC) has been
read, but the disc is stopped, press the CD Text
Button
B
for the deck in use (either the left
side, Play/CDP deck or the right side, Record/
CDR deck) to view the title of the disc followed
by the name of the artist.
N
N
will light.
will
When a disc with CD Text information is playing,
press the CD Text Button
use (either the left side, Play/CDP deck or the right
side, Record/CDR deck) to view the name of the
track that is playing and the artist for that track.
Notes on CD Text Display:
• If the CD Text buttons are pressed when the
disc playing does not contain CD Text information, a NO TEXT message will flash three
times in the Time/Message Display
• Only capital letters will be displayed, and lower
case letters will be capitalized.
• Blank spaces may occasionally appear in place
of invalid text characters.
Search
You may quickly scan through the contents of a
disc while listening to the playback at high speed
in forward or reverse.To move forward through a
disc, press the Forward Search button
the remote or press and hold the Next button
Û
on the front panel that is appropriate for
the deck in use.To move backwards through a
disc, press the Reverse Search button f on
the remote, or press and hold the Previous but-
ton
Ù
on the front panel that is appropriate
for the deck in use.When using the remote,
always remember to make certain that you have
selected the deck you wish to control by pressing
the appropriate selector button
entering the desired remote command.
Track Skip
To move from one track on a disc directly to
another, enter the number for the desired track
with the Numeric Keys
briefly to locate the track, and then immediately
play it. When entering a two-digit track number,
the second digit must be entered within three
seconds of the first digit.
To move to the next track on a disc, press the
Next button
the appropriate front panel Next button
for the deck in use.Additional presses of the button will move forward through the tracks on the
disc.
When a disc is playing, press the Previous button
8
of the track being played.Additional presses of
the Previous button will move backwards
through the tracks on the disc.
When a disc is stopped, you may press the Next
or Previous buttons repeatedly to locate a
specific track that you wish to play.When the
desired track number appears at the left side of
the appropriate Time/Message Display
press the Play button
track.
M
on the remote, or briefly press
Ù
briefly to return to the beginning
B
for the deck in
3P
E
. The disc will pause
9
(
F
.
O
before
Û
F
to hear that
on
,
PLAYBACK BASICS 17
Page 18

Playback Basics
Dual-Play Mode
Since the CDR 30 has more than one CD deck,
you may play a disc in either drawer. After the
unit was turned on or the Single Play Select
6
button on the remote or Dual/Single Play
Select
¸
button on the front panel was
pressed, the unit will turn to the Single mode. In
that mode the Single Play Indicator
and only one disc may play at a time, even when
both decks are loaded with discs. Moreover in
the Single mode, the audio output will be fed to
all digital and analog Output jacks
ª¡™
select the input on your receiver, preamp or
processor for either deck. For example, if you
have the Play Deck connected to ”CD” and the
Record Deck connected to ”Tape,” when any
deck is playing, either input may be selected.
It is also possible to play two discs at once, using
the Dual mode.To initiate dual-mode playback,
press the Dual Play Select
the remote or on the front panel until the Dual-
Play Indicator
ent disc in both decks at the same time and you
even may record on a disc in the CDR deck
and play a disc in the CDP deck 3simultanously.The output of each deck will be sent to
its analog and digital output jacks, and you will
need to select the deck you wish to listen to
using the input selectors on your receiver, preamp or processor. You may also use the output of
one deck to feed your main-room system, while
the second deck is used to feed a remote room.
As long as the Dual-Play Indicator
each deck functions as a separate CD player, and
will respond to its own set of controls on the
front
ÔÚÛÙˆ or
remote, remember to first press the Selector button for either the Play/CDP Deck
Record/CDR Deck
desired command function.
It is possible to view the level for either the out-
put of the CDP/Play deck or the CDR/Record
deck. To select the display to be viewed, press
the desired Level Indicator Select t.
NOTE:When in the Dual mode, you may return
to Single play mode by pressing the Single Play
Select Button
Dual/Single Play Select Button
front panel. However, pressing the Single
Button
automatically stop playback of the disc in the
Record Deck
Deck
the play deck will be sent to both sets of output
jacks.
NOTE:When using the dual-play function with a
conventional Audio CD in one deck and an MP3
or HDCD-encoded disc in the other, start with
for both decks.This means you may
N¸button on
D
is lit. You may play a differ-
panel for either the
. To control the transports using the
6¸while both decks are playing, will
%
3
continues to play, and the output of
Record Deck (Ó
Play Deck ˘
P
, and then press the
6
on the remote or the
while the disc in the Play
D
¢∞•
D
is lit,
3
or the
¸
on the
is lit
P
either of those discs first before playing the conventional CD Audio disc.
NOTE: Remember that only one MP3 disc may
play at a time, even when the Dual Play mode is
in use. If two discs containing MP3 selections are
loaded in the CDR 30, one must be removed and
replaced with a standard CD Audio disc for the
dual play mode to operate.
Two-Disc Changer Operation
Since the CDR 30 has two separate CD decks, it
may be used to function as a two-disc changer,
so that you can play two discs one after the
other
When the CDR 30 is in the Single-Play mode, as
shown by the Single-Play Indicator
lit, when the disc in one deck has played through
to the end, the disc in the other deck will automatically begin to play. Each disc will play
through, and when one deck is finished the other
will start. To stop playback, press the Stop but-
ton
K
Ó
for the deck that is currently
playing.
To have the CDR 30 function as two separate CD
players, where the deck in use stops at the end
of a disc, press the Dual Button
the Dual-Play Indicator
mode, each deck acts independently of the other
and when the disc in one deck finishes, it stops
unless one of the Repeat functions has been activated (see page 19).
Time Display
The CDR 30’s time display is capable of showing
a wide range of information about the contents
of a CD.
For Standard CD Audio discs, once the disc’s
Table of Contents or TOC data has been read, the
Time/Message Display
ber of tracks on the disc in the two left digits of
the display, and the total running time of the disc
in the remainder of the display.When the disc is
playing, the tracks will count up as each new
track is reached, and time display will show the
elapsed time for the track being played.
To view the time remaining in the track being
played, press the Display button
ˆ˘
for the deck in use so that the Track
Remain Time Indicators
The Time/Message Display
down the time remaining in the track, and at the
start of the next track the counter will start to
count down the running time of that track.
D
F
WTS
D
being
¸Nuntil
lights. In the Dual
will show the num-
1
illuminate.
F
will count
To view the total time remaining on the disc,
press the Display Button
deck in use so that the Total Remain Time
Indicators
Display
for all tracks on the disc and count down until
the disc has finished playing. Note that all time
modes listed above are selectable also with programmed tracks (see page 19) except the total
remaining time.
For MP3 discs,once the disc’s Table of Contents
data has been read, the Time/Message Display
F
disc. During disc playback, press the appropriate
Display Button
use, and with each press the display will cycle
through the following available information:
Elapsed time of current track ➜ Remaining Time
of current track ➜ Current Track Number ➜ File
name of Current Track (Up to the first six digits)
To read the total time of all tracks recorded on
an MP3 disc, the disc must be stopped.Then,
press and hold the CDP or CDR Display
Button
seconds, until a TTL TIME ON message
appears in the Time/Message Display
press the CDP or CDR Display Button again to
alternate between a display of the total number
of tracks and the total time of the disc. Press and
hold the CDP or CDR Display Button
1
TTL TIME OFF message appears in the
Time/Message Display
dard display.
Headphone Listening
You may listen to the output of the CDR 30
through headphones at any time by simply plugging the headphones into the Front-Panel Jack
4
. The volume of the headphone output may be
adjusted with the Headphones Level Control
5
. Note that changes to the headphone level
will not alter the output settings to the analog
outputs.Those levels are fixed, and the volume
should be adjusted using your receiver, preamp
or processor.
Note that when only one deck is playing back a
disc in the single play mode, the output of that
deck will be fed to the headphone jack. When
the unit is in the Dual-Playback mode, only the
output of the Play Deck
headphone jack.
VTS
F
will show the total time remaining
will show the total number of tracks on the
1
1
ˆ˘
ˆ˘
again for three seconds until a
1
ˆ˘
for the
light. The Time/Message
ˆ˘
for the deck in
(as appropriate) for three
F
. Then
F
to return to stan-
3
will be fed to the
18 PLAYBACK BASICS
Page 19

Program Play
The CDR 30’s advanced programming system
enables you to program certain tracks for play or
the order in which tracks are played or dubbed,
to repeat one track or all tracks,or to repeat any
segment of a disc without regard to track numbers.
Programming Play Lists
To program certain tracks or the order of playback for the tracks on a disc, insert the disc, let
the unit read the Table of Contents information,
and wait until the disc has stopped and the number of tracks and total running time is displayed.
Next, select the deck that will be programmed by
pressing the CDP Select button
remote for the Play Deck
Select button
Record Deck
To begin the programming sequence, press the
Program Button
Prog Indicator
Message Display
standard CD Audio discs and 000P01for MP3
discs.
Next, enter the track numbers to be played by
pressing the Numeric Keys
track numbers, be certain to enter the second
digit within three seconds after the first number
is entered. As each track is entered, the display
will blink three times, alternating between two
displays (blinking and alternating will not be with
MP3 discs). The first display will show the track
number just entered on the left side of the
Time/Message Display
Indicator
number of steps that have been programmed.
For example,after programming the first step to
be track number 3, the display will flash 03P-
01for CDs or 003P01 for MP3 discs.
With standard Audio CDs, alternating with the
track number and program step will be a display
of the track and the total running time of all
tracks that have been programmed so far. For
example, a display of 06 11:25 will indicate
that track number six was the last track programmed, and that the total time of all tracks so
far is 11 minutes and 25 seconds.The Total
Time Indicators
play to remind you of the display’s contents.
These displays will alternate three times,and
then show a steady display of the last track and
the number of steps programmed.
Now you can continue to add tracks in the order
you wish to have them played until the programming session is complete.You may add up to 32
tracks, repeating a track if desired, as long as the
total number does not exceed 32. If you exceed
the 32 track limit, the display will read FULL.
Tracks may also be added using the Next
M
Û
locate the track, and the Program button
P
on the remote for the
%
.
4
Ú
C
will light and the Time/
F
will show 00 P-01 for
W
, while the right side will flash the
SV
will flash with this dis-
and Previous buttons8Ù
3
3
or the CDR
and note that the
E
. For two-digit
F
under the Track
on the
4
Ú
to enter that track to the programmed
sequence.
When the complete list of tracks has been
entered, press the Play button9(
tracks will then play in the order they have been
entered.
Note that a programmed list of tracks may also
be recorded if the disc being programmed is in
the Play Deck
page 21 for complete information on recording
and dubbing.
To escape from the program play mode and
return to normal play follow these steps: While
the program is playing, the Program button
4
Ú
continue to play tracks in normal mode.And
while the player is stopped the Stop button
ÓKmust be pressed. In both cases the
Prog Indicator
Checking, Editing and Clearing
Programmed Play Lists
Once you have entered a program list it will
remain in the unit’s memory until the disc is
removed or the unit is turned off.Thus, if you’ve
played through a program list, simply press the
Play button
while the Prog Indicator
first press Program
you wish to check the list or make changes,that
is also possible by following a few simple steps:
To scroll through a program list, note that the
Prog Indicator
Program
Check button
move through the tracks that have been programmed.The display will alternate between the
track number plus the program step number
(e.g., 12P-03 for CD Audio discs, or
012P03for MP3 discs, tells you that Track
12 on the disc is the 3rd program step) and the
track number plus the total running time so far in
the program (e.g., 12 16:04 tells you that
at this point you have programmed a total of 16
minutes and 4 seconds of material).
Note that alternating indication of total running
time of all programmed tracks is not available
with MP3 discs, even when the TTLTIME
ONindication mode is selected (see page 17).
At any point in the list you may overwrite a programmed track number by simply entering the
new track number using the Numeric Keys
E
. Alternatively you can modify the track num-
ber to be changed with the Next
Previous
pressing the Program button
both cases the formerly programmed track number will be overwritten and automatically deleted
from the program list.To add a track number
(possible only to the end of a program list), press
to
the Program Check button
until the track number 00(or 000 with MP3
3
. Follow the instructions on
must be pressed and the unit will
C
will go out.
9
(
again to replay the list
C
is lit (otherwise
4
Ú
). If you find that
C
is lit (otherwise press
4
Ú
) and press the Program
7
. Each press of the button will
8
Ù
buttons and enter it by
4
7
M
Û
Ú
.In
repeatedly
.The
and
discs) is displayed, then enter the track number
you wish to add with the Numeric buttons
directly or press the Next or Previous buttons
and then the Program button
Ú
, as described above.
To remove a step in the program, first use the
Program Check button
you wish to delete. Next,press the Clear button
. The information in the display will blink and
the step will be removed from the
Program steps need not be deleted
as long as you have located a step in the program list, it may be erased.
To remove a total program list when the disc is
stopped, press the Clear button
(will delete one track after another, starting with
the first track programmed) until the appropriate
Prog Indicator
close the disc drawer. Whenever a disc is removed or the unit is turned off,the program list
is erased.
Repeat Play
The CDR 30’s programming system enables you
to repeat either a single track on a disc, the
entire disc (or all programmed tracks), or a specially programmed passage that you select.
Repeat One Track
To repeat the track you are currently listening to,
press the Repeat button
Repeat Mode Indicator
1. If the track is changed by using the Next/
Previous Skip Buttons
or the Numeric buttons Ewhile the Repeat
1 mode is active, the new track will now be
repeated.
Once Repeat 1 playback has been started, it will
continue until the unit is stopped by pressing the
Stop button
opened by pressing the appropriate Open/Close
button
6$
stopped, the Repeat mode is turned off automatically.
C
deletes or simply open and
K
Ó
2Q
. When playback is
4
7
to locate the track
program list.
in any order;
G
and note that the
B
will light Repeat
8M
ÛÙ
, or the disc deck is
E
repeatedly
PROGRAM PLAY 19
Page 20

Program Play
Repeat All Tracks
To repeat all the tracks on a disc (or all programmed tracks) in order, press the Repeat but-
ton
G
twice while the disc is playing and note
that the Repeat Mode Indicators
Repeat All. The disc will play all the way
through, until the Stop button
pressed.
Repeat All Discs
When two discs are loaded and you want to
repeat all tracks on both discs in sequence continually, turn the Single mode on by pressing the
Single Play Select button
or the Dual/Single Play Select button
the Front Panel (see "Dual-Play Mode",page
18). While any disc is playing, press the Repeat
button
G
until the Repeat Mode Indicators
B
will light Repeat All CD´s. The current disc
will play through to the end, then the second
disc will start and play through too, and this will
repeat continually until the Stop button for the
deck in play
Any Repeat function may be cancelled at any
time by pressing the Repeat button
Repeat Mode Indicators
Repeat Function is also canceled when the Stop
button
opened.
Repeat A-B
The CDR 30 may be programmed to repeat any
section within a track, or a complete passage
that includes material from a series of consecutive tracks.
To program the unit for A-B Repeat play, first
play the disc and locate the point where you
wish to begin the repeated section. At the start
point, press the A-B Repeat button
note that the Repeat Mode Indicator
show Repeat and a blinking A-. Let the disc
play or skip or search forward until the point at
which the section to be repeated will end. At that
end point, press the A-B Repeat button
again and note that the Repeat Mode
Indicator A-
showing Repeat A-B.
The unit will immediately begin to play the
section you have programmed, and continually
repeat it.
Notes:
• The program material selected for A-B repeat
must be at least 3 seconds long.
• The repeat A-B feature does not function when
an MP3 disc is playing.
To resume normal play, press the A-B Repeat
button
B
through to the end. Stopping the disc or opening
the disc drawer will automatically cancel the
Repeat A-B programming.
K
Ó
is pressed.
K
Ó
is pressed or the disc drawer is
B
will stop blinking and will light
F
again. The Repeat A-B Indicators
will go out, and the disc will continue playing
K
6
on the remote
B
go out. The
B
Ó
G
F
will light
is
¸
on
until all
and
B
will
F
Random Play
The CDR 30 may be programmed to play all the
tracks on any disc in random order, playing each
track until the entire disc has been played.
To playback the tracks in a random sequence
from stop or play mode, press the Random Play
Button
A
, making certain that you have first
pressed the CDP
P
, as appropriate,so that the random com-
mand will be accepted by the proper deck. Once
the Random Play Button
Random Indicator
30’s internal processor will select the tracks to be
played in random order and play through the
disc.
If one of the Next Track Buttons
pressed during Random Play, the unit will move
to the next randomly selected track, not the next
track in numerical sequence. If the Random
Play Button
mode is canceled and the unit continues to play
in normal mode.
To stop a Random Play sequence,simply press
the Stop Button for the deck in play
The Random Play mode is also canceled when a
disc drawer is opened by pressing one of the
Open/Close Buttons
Notes:
• Random play will not function in combination
with Program play,programmed tracks cannot
be played randomly.
• In Single mode, when two discs are loaded and
one is played through randomly,the CDR30
automatically will start to randomly play the
second disc through.
• In Play or Pause mode,the random function
can be combined with the Repeat All Tracks
or even the Repeat All Discs function (see
above). Then all titles of the current disc or
alternatingly of both discs will be played
through randomly,until the Random function is
stopped as decribed above.
3
or CDR Select Button
A
is pressed, the
A
will light and the CDR
M
A
is pressed again, Random play
K
2Q
6D
Û
Ó
.
is
Intro Scan Play
Intro Scan Play is a feature of the CDR 30
that allows you to quickly go through the contents of a disc by automatically playing the first
10 seconds of each track.
To begin Intro Scan Play, press the Intro Scan
Button
I
for the deck containing the disc you
wish to hear. The deck will automatically go into
the Play mode, and will play the first 10 seconds
of each track on the disc in sequence, while the
Play Indicator
tracks are played or the Stop button for the deck
in play
To hear the entire contents of a track while it
is playing in the Intro Scan mode, press the Play
Button
.
K
9
›
L
starts to blink, until all
Ó
is pressed.
(
for the appropriate deck.
20 PROGRAM PLAY
Page 21

CD Recording
Making recordings on the CDR 30 is simple and
easy once you become accustomed to the basics
of CD Recording. Before making your first recording, please take a moment to review the CDR
Basics on page 14. In particular, you will need to
become familiar with the types of discs that may
or may not be used in the CDR 30. In addition,
some terms used in the following pages may be
new to you. The following definitions and information will help you to make CD recordings
using the CDR 30’s many features:
• In the following the terms "analog dubbing"
or "analog recording" will say only that the
signal fed to the CDR30 for recording is analog. Of course,in the CDR30 all analog record
signals will be converted to digital (A/D converter) and recorded on discs in digital form
only.
• The CDR 30 accepts analog inputs and digital
coax or optical inputs. Before making a recording, be certain that you have selected the correct input, using the Input Select Button
ı
• After a disc is recorded, it must be finalized.
This process adds the final table of contents
data to the disc and makes it playable on other
machines. Until a disc is properly finalized,it
may not be played on standard CD players.
• The CDR 30 may record on either CD-R or
CD-RW discs, but they must be of the type
specifically designed for use in consumer-audio
CD recorders.These discs may be recognized by
looking for the words “Digital Audio” in the
compact disc logo on the blank disc or its packaging. Discs with the logo reading only
“Compact Disc/Recordable” are designed for
computer data recording, and they may not be
recorded using the CDR 30.
• CD-R discs may not be erased or have material
added to them once they have been finalized.
• At least four (4) seconds of blank recording
time must remain on an unfinalized disc for
recording to take place.
• The maximum number of tracks that may be
recorded on a disc is 99.
• Note that some rare CD-R/CD-RW audio
recording discs may be used for single-speed
recordings only. If you use a disc with such a
warning, make certain not to dub at 2x or 4x
speed. However, the CDR 30 has been tested
for compatibility with a wide range of blank
discs from manufacturers throughout the
world. In most cases,blank discs will produce
high-quality recordings at any dub speed.
• In some rare cases, a CD player may not play
certain CD-R discs. If you find that a CD-R disc
plays in some players but not in others, the
fault is most likely with the player, not with the
recorded disc or the CDR 30. Remember that
CD-RW discs made in the CDR 30 will play only
in CD players that are specially designed to
accommodate CD-RW discs. Note that most
DVD players are compatible with finalized CD-
RW discs, but many are not with CD-R discs.
• Some commercial CD discs may contain a copy
protection data bit that will prevent a digital
copy of the disc to be dubbed from external CD
players (analog copies always can be made
from external sources as well as internal dubbings, see next chapter).In that case, the Copy
Prohibit Indicator
you that the inability to record is intentional,
and not the result of a problem with the
CDR 30.
• This product is equipped with the Serial Copy
Management System (SCMS) to protect the
rights of copyright owners.Although it is
possible to make a copy of most CDs for
your own personal use, it is not possible to
make a digital copy from another digital copy,
including CDP, although it is possible to make
an analog copy of a digital copy.
• The CDR 30 will not copy DVD discs, computerdata discs, CD-based computer or video-game
.
discs, or digital audio discs with a sample rate
that is not compatible with the range of the
CDR 30s sample-rate converter.
• Discs containing MP3 data may only be copied
to the standard CD Audio format.
Recordings on the CDR 30 may be made in a
number of ways:
I
will light to remind
• Discs may be dubbed using the playback deck
on the CDR 30 as a source.These copies may
be made in real time, at twice normal speed,or
at four times normal playback speed (from
MP3 discs only in real time). More information
on Disc Dubbing see next chapter.
• Synchronized digital Recordings may be made
from an external CD or MD player or other digital source that is synchronized with the dub
being made in the CDR 30, see chapter "Sync
Recording" on page 23.
• Analog or digital recordings may be made from
any compatible external digital source, see
chapter "Recording From an External Source"
on next page.
• Analog recordings may be made from any
external analog source, see chapter "Recording
From an External Source" on next page.
Disc Dubbing
The easiest way to make a copy of an entire disc
is to use the CDR 30’s internal dub capability.
First, insert a blank CD-R/CD-RW or a disc with
sufficient blank space for recording in the
Record Drawer
the CDR 30 will examine it to determine if it is a
CD-R or CD-RW disc, and optimize itself for the
best possible recording. This is indicated by OPC
message (Optical Processing Calibration) in the
Time/Message Display
Place the disc to be dubbed in the Play Drawer
3
and wait until the Table of Contents data is
read and the Time/Message Display
the track and running time data for the disc.
Next, select a dub speed.The default speed is 4
times dubbing, where the recording takes only
1/4 of the actual running time of the disc.
However, with the CDR 30 you may also select
x1 (real time) dubbing or x2 dubbing. Press the
Speed button
by the x2/x4 Indicators
Indicator lights, the unit is set to real-time
recording. Note that the slower the record-dub
speed, the more tolerant the unit is of errors on
the blank or played disc. However, with most
high-quality blank discs, the 2x and 4x speeds
should not present a problem. Note also the 2x
and 4x speed dub is not possible with an MP3
disc.
Before beginning a dub, make certain that there
is sufficient blank space on the record disc. To do
this, select the total remaining time to be shown
in the record side Time/Message Display
by pressing the Display button ˆ
stop mode.That number should be greater than
the total time of the disc to be dubbed, which is
shown in the play side Time/Message Display
F
.
If you wish to copy the entire disc, proceed to the
next step. However, if you wish to copy only one
track from a disc, first select that track by pressing the Next Button
number appears in the Time/Message Display
F
or enter the track number directly with the
Numeric Keys
When you are ready to start the dub, press the
Dubbing Button ) if the entire disc (or all
tracks programmed, see Notes on page 22) is to
be copied, or the 1 Track Dub Button 9,if
you wish to copy only one track. During this
process the Dubbing Indicator J will light,
the Record Indicator O will flash, a BUSY
message will flash in the Record Deck’s Time/
Message Display
to be dubbed will be examined if copy prohibited
or not and their numbers will count up subsequently in the playback deck´s Information
Display
record side Information Display returns to nor-
%
. When the disc is inserted,
F
.
!
to select a speed as indicated
H
. When no Speed
˝Muntil the track
E
on the remote.
F
and all tracks on the disc
˜
(not with MP3 discs). When the
F
once in
shows
F
CD RECORDING 21
Page 22

CD Recording
mal, and both Play/Pause Indicators GB
appear in the display, press any
9
(
to start the dub.
While the dub is in progress, you will see the
track numbers and running time increase as
the disc is copied. The Level Indicators
also flash and the record levels may be adjusted
(up to +/-3dB) also during the dubbing process
(see chapter Record Levels on page 23). It is possible to listen to the source disc while it is being
dubbed by selecting the appropriate input (analog or digital) for the Play Deck on your receiver,
preamp or processor.
Important Note: When a high-speed (x2 or x4)
dub is being made (not possible with an MP3
disc), you will hear the playback from the analog
CDP Outputs
Fast speed playback increases the pitch of a
sound, and when played back at high volume
levels this may damage your speakers.DO NOT
use high volume levels when listening to highspeed dubs while they are in progress.
The dub will stop automatically when the source
disc has played through to the end. After the dub
is finished, the Time/Message Display
show an UPDATE message, and then return to
normal operation.To manually stop a dubbing
operation, press the Stop button
either deck.
As with all recorded CD-R/CD-RW discs, the disc
must be finalized before it can be played in other
machines. See page 24 for instructions on disc
finalization.
Notes on Dubbing:
¡
at the faster speed.
Play
K
Button
G
F
Ó
L
will
will
for
• If you wish to make a dub with selected tracks
or the tracks in a different order from the original disc, omit tracks on a disc, or make a dub
that mixes tracks from different discs, create a
Program-Playback List before pressing the
Dubbing Button
a program list may be found on page 19.
)
. Instructions for creating
• Dubs containing program lists may only be
made at the x1 or x2 speed. If you attempt to
make a Programmed Dub at the x4 speed, the
unit will automatically select the x2 speed.
• The Pause buttons do not operate while a dub
is in progress.
• Track numbers will be added automatically to
mirror the track structure of the original disc.
• The Total Time indication of the recorded CD
may vary slightly from the original due to variations in the spin speed of each drive and a
pause added at the end of the recording, but
this is normal. No information has been lost in
the recording process.
• If the original disc being dubbed is a digital
copy or if it contains copy-prohibit signals, the
unit will automatically make an analog copy.
• When a dub is made from an external digital
source that has a sample rate other than
44.1kHz, such as some modes of MiniDisc or
DAT, DVD players and DVB receivers, the CDR
30’s built-in sample rate converter will automatically convert the digital signal to 44.1kHz for
proper recording of a standard CD Audio disc.
When the sample rate converter is in use, the
Sample Rate Converter Indicator
light.
R
will
• Remember that MP3 discs may only be copied to
the conventional CD Audio format and only at
normal speed.
• So when dubbing an MP3 disc, the total running time of the material on the MP3 disc may
exceed the capacity of the record disc, since
the compressed file structure of the MP3 format allows over ten hours to be recorded on a
disc, while most CD-R discs have a time limit of
74 minutes.
Recording From an External Source
Digital recordings can be made only from a digital source, connected to eigther the Coaxial
§&or Optical¶^
while analog recordings can be made from any
source, connected to the Analog inputs
Recordings from external sources can be made in
three modes: Sync, Manual or Auto mode.
• The Sync mode (see next chapter) starts and
stops the recording automatically and increases
the track numbers syncronously with the tracks
on the source.This mode should be used with
digital recordings from external sources, providing CD standard conforming track information (see below) like normal CD,many DVD
(with CDs only) and most MD players.
inputs on the CDR30,
£
.
• The Auto mode for either digital or analog
recordings must be started manually, but the
track number will be increased automatically
after the CDR 30 receives silence for 3 seconds
syncronously with the music starting. When the
source is paused or stopped, after 3 or 10 seconds (depends on the source used) the recording will stop.Also after 10 seconds of silence
(analog or digital sources) the recording will
stop.This mode is recommended for recordings
from digital sources, providing no CD standard
conforming track information (see below), like
some DVD and MD players, DAT, DVB receivers
and other digital sources with a sample rate
between 32kHz and 96kHz. To activate the
Auto mode, press the Auto/
Manual Track Increment Button
and note that the Manual Track Increment
Indicator
K
goes out.
C
once
• The default mode is Manual as indicated by
the Manual Track Increment Indicator
In that mode for either digital or analog recordings, the recording must be started and
stopped manually and you must add track
numbers manually by pressing the Track
Increment Button
increase the track number. As the correct
operating of the track increment in the Auto
mode (see above) depends on the length of
music pauses and the level of the residual
noise during these pauses, what may be critical
with analog sources, we recommend the
Manual mode for all recordings from analog
sources.To activate the Manual mode (unless
selected already by default), press the
Auto/Manual button
Manual indicator
As outlined above recordings from analog
sources should be made with the Manual mode.
But the recording mode for use with a digital
source depends on whether the source has CD
standard track information or not.To find out for
the first time, whether the source provides that
information, place an eraseable CD-RW audio
disc in the Record Deck
digital input connected with that source by pressing the Input Select Button
button will cycle between the input choices,
which will be shown in the Time/Message
Display
F
as COAXIAL REAR,COAXIAL FRONT,OPTICAL REAR,OPTICAL FRONTor ANALOG.In addition, an
Input Indicator
selected input.
Then press the Sync Record
until ALLwill be shown in the Time/Message
Display
starts the recording automatically when the
source is started. After min. 3 seconds skip the
source forward to the next track and examine if
the CDR30 increases the track number in its
Record Deck Display
Indicator
source is CD standard conforming and you can
use the Sync mode with it, otherwise the Auto
mode should be used.
Now after you are informed about the source
type you´ll use, you can prepare for a recording
with the optimal record mode. Select the appropriate input for your source (if not already
selected) and the appropriate mode Sync (see
next chapter), Auto or Manual as recommended
above.
F
and examine whether the CDR30
W
D
when you wish to
C
and note that the
K
goes on.
%
. Next, select the
ı
. Pressing the
YZ
will light to show the
8
button twice
F
under the Track
. If both is the case your digital
K
.
22 CD RECORDING
Page 23

CD Recording
To make Auto or Manual recordings, next press
the Record Button
O
will flash, and the word BUSYand OPC
will appear in the Time/Message Display
When the Display returns to the track and running-time information, the unit is ready to record.
Now, particulary when you record from an analog source, play any high level part of the source
repeatedly and adjust the CDR30´s input level
using the Analog Record-Level Control
for analog recordings and, if desired, the Dig.
Rec. Level Controls
With analog recordings adjust the levels so that
the blue segments of the display are almost lit,
and the red segments flash only occasionally. See
the chapter Record Levels below for more
information on adjusting the record levels.
After you´ve adjusted the record level, start the
actual recording by pressing the Play/Select
Button
(9and immediately also start the
source to be recorded. Note that the Record
Indicator
Message Display
running time of the recording and the track data.
Depending on which mode of track increment
has been selected as described above, track numbers must be increased manually or they will be
added automatically. Regardless of which mode
has been selected, a track number may be added
at any time by pressing the Track Increment
Button
Note: During recording from an external source
in the Auto mode, the unit will automatically go
into “Record/Pause“ when it senses 10 seconds
of silence. In both modes, Auto and Manual,
when the Pause button
ing a recording, the track number will increase by
one number and the recording will stop and
must be restarted by pressing the Play/Select
Button
To stop the recording, press the Stop Button
ÓK,a BUSYmessage and an UPDATE
message will appear and the unit will return to
normal operation. Remember to finalize the disc
(see on page 24) after recording so that it may
be used in other players.
The recording will automatically stop if it takes
more space than is available on the CD-R/RW disc.,
and a DISC FULL message will appear to
remind you that a new disc is needed.
O
D
(9.
7
. The Record Indicator
for digital recordings.
will stop flashing and the Time/
F
will begin to show the
.
ÔLis pressed dur-
F
*
Sync Recording
Sync recording allows you to make an automatic
digital recording from an external CD or MD
player or any digital source, providing CD stan-
.
dard track information (see page 22 for more
information on how you can find out if or not
you can record from a source with the Sync
mode). During Sync Recording, the record unit
starts in sync with the source, and tracks are
added automatically.
To make a Sync recording:First, make certain
your playback source is prepared and tracks you
want to record from that source (if so) are programmed or selected. Next, select the appropriate digital input by pressing the Input Button
ı
until the desired input indication appears in
the Time/Message Display
Indicator
made from an analog input.
Next, make certain that there is a fresh disc in
the Record Drawer for the recording. Press the
Sync Record Button
and note that the Sync Indicator
and the Record Indicator
the type of recording to be made:
YZ
. Sync recordings may not be
F
8
as instructed below
O
will flash. Select
• To record only one track from the source play-
er, press the Sync Record Button
so that 1 TRK appears in the Time/
Message Display
F
.
• To record the entire disc or tape,press the
Sync Record Button
appears in the Time/Message Display
When the desired mode has been selected, start
the playback from the source machine.The CDR
30 will automatically recognize the incoming digital data and begin recording and the track numbering from the original disc will be carried over
to the dub.
The recording will continue until the CDR 30
senses that the playback is finished when there is
no incoming signal for more than three seconds.
At that point the recording will stop.You may
also stop the recording at any time by pressing
the Record Deck Stop Button
there is no more time remaining on a blank disc,
the unit automatically will stop the recording
process and a BUSY and UPDATE and then
a DISC FULL message will appear in the
Time/Message Display
being recorded, insert a new blank disc or, when
a CD-RW is in use, either use a new disc or erase
the latest existing tracks following the instructions on page 24.
After the recording is stopped, first a BUSYand
then an UPDATE message will appear, and the
unit will then return to normal operation.
Remember to finalize the recorded disc so that it
may be used in other machines.
8
TWICE so that ALL
ÓK. When
F
. When a CD-R is
and Input
M
will light
8
ONCE
F
Important Note: With a few CD and DVD players the CDR30´s Sync mode recording will start
as the as the source player is set from Stop to
Pause.With those sources tracks to be recorded
should be started only from the Stop mode rather
than from Pause.
Note: With CD Sync track numbers cannot be
increased manually by pressing the Track
Increment button
the Auto and Manual mode only.
Record Levels
Particulary with analog recording, the setting of
record levels is important to the creation of a
copy disc that is correctly recorded so that it is
both free from noise (caused by too low a record
level) or distortion (caused by too high a record
level). Since the CDR 30 accepts both digital and
analog sources, a different procedure is required,
depending on the type of input used.
In general practice, and particularly for analog
recordings, a proper recording is made when the
individual left and right Level Indicators
run in the left two-thirds of the display scale, and
the red OVER
If the level is too high or too low during an analog recording, simply adjust the Analog Record
Level Control
(more information on adjusting the analog record
level see left on this page).
It is important to note that for digital recordings
the level indications will always run lower than
.
what you would expect for an analog recording.
This is due to the fact that, within limits, low level
for digital recordings is not a severe problem.
However, too high digital levels will cause audible
distortion as with analog recordings.
The default setting for level control is Manual
with the adjustment set at a 0 dB level, then the
Digital Record Level Status Indicator
will not be lit. This setting is appropriate for most
recordings, and under normal circumstances you
will not need to make any changes.Increase digital levels may be needed only when the disc or
track to be recorded will deliver too low a signal
level to the CDR30. Decrease level only when
you wish to record the disc on the CDR30 with a
lower level than on the original.
To manually adjust the digital level, press the
appropriate
Button
Level Status Indicator
make certain that the level shown in the Level
Indicators
Digital levels may only be adjusted from –3dB
to +3dB, as shown in the Time/Message
Display
F
D
, this is possible with
G
indicators flash only briefly.
*
until the level is set properly.
⁄
or ¤ Digital Level Control
and note that the Digital Record
X
lights as DRLC, but
G
does not exceed the red levels.
.
G
X
CD RECORDING 23
Page 24

CD Recording
When automatic control of digital level is
desired, press and hold both Digital Level
Control Buttons
the Digital Record Level Status Indicator
lights as A DRLC. In this mode, the system will
automatically limit digital record levels from the
moment an OVER Level Indicator
for the first time to prevent any audible distortion. Note that with digital recordings an OVER
indication is possible only when sources recorded
with highest levels, are used and the Digital
Level Control
Finalizing CD-R and CD-RW Discs
Finalizing is a simple process that completes the
recording of a disc so that it may be used in
other players. Once that is done, a CD-R disc may
not be changed or added to. CD-RW discs are
“locked” once they are finalized,but they may be
unfinalized to permit additional recording or erasure.
To finalize a disc, place it in the Record Drawer
%
, if it is not already in that drawer. Once the
disc’s Table of Contents (TOC) information has
been read and the OPC process has been completed, press the Finalize Button
that the word FINAL will begin to flash in the
Time/Message Display
onds, press the CDR Play/SelectButton
The finalization process will take up to two min-
utes, depending on the length of the material
recorded on the disc. During finalization you will
see the number of seconds remaining in the
process count down in the Time/Message
Display
F
finalization the CDR deck will not accept any
operating commands.
When the finalization process is complete, the
Time/Message display will return to its normal
messages, and the R/RW Indicator
out, with the CD indication
cate that the disc is finalized and ready for play
on standard CD players (CD-R discs, CD-RW discs
only on CD-RW-compatible players).
Unfinalizing and Erasing CD-RW Discs
CD-RW discs are unique in that they are both
recordable and rewritable.This means that you
may use them over again like a cassette tape.
However, the process of reusing a CD-RW disc is
slightly different from that used with tapes.
Unfinalizing a CD-RW Disc
To keep the material that is already recorded on
a finalized CD-RW disc and to add an additional
track or to erase the last track or the complete
disc, you must first unfinalize the disc.To do that,
place the CD-RW disc in the Record Deck
and wait until the Table of Contents data has
been read.
and release them when
G
flashes
is turned up.
#
and note
F
. Within five sec-
(9.
until the disc is finalized. During
Q
will go
Q
remaining to indi-
X
%
@
Press the Erase Button
make certain that the words UN- and FINAL
flash alternatingly in the Time/Message
Display
F
. Within three seconds, press the
CDR Play/Select Button
process. Similar to the finalization process the
unfinalization will take up to two minutes.During
that time you will see the number of seconds
remaining in the process count down in the
Time/Message Display
the word UN-FIN.
When the UN-FIN message goes out and is
replaced with a normal display and the RW
Indicator
been unfinalized and is ready to have single
tracks erased or new tracks added.
Erasing an Entire CD-RW Disc
Erasing the entire contents of a disc is simple,
and it does not matter if the disc has been finalized or not. To erase the disc, press the Erase
Button
ERASE appear alternatingly in the Time/
Message Display
press the Play/Select Button
that the word ERASE will keep flashing. The
erasure process takes about a minute, and it is
complete when the Time/Message Display
resets to 00 00:00 and ERASE goes out.
The disc is now totally erased and may be
reused.
Erasing a Single Track
The individual tracks on a CD-RW disc may be
erased one at a time, starting with the last track
on the disc, or you may erase more than one
track. Note that before individual tracks may be
erased the disc must be unfinalized. If the disc is
finalized, follow the instructions above for unfinalizing before proceeding with these steps.
To erase only the last track,press the Erase
Button
Display
alternatingly. Press the Play/Select Button
(9within three seconds, now the last track
will be erased.When ERASE goes out, the
Time/Message Display
number of tracks that now remain on the disc
(under the Track Indicator
running time of all tracks.
Erasing Several Tracks
You may erase more than one track, counting
backwards from the last track. First,press the
Erase Button
Display
will flash. Within 3 seconds press the Next
Button
until the number of tracks to be erased appears in
the Time/Message Display
when 06 TRK appears in the display a total of
Q
has re-appeared, the disc has
@
TWICE, so that the words ALLand
@
. Note that the Time/Message
F
will display 01 TRK and ERASE
@
. Note that the Time/Message
F
will display 01 TRK and ERASE
MÛor Previous Button8Ù
once and check to
(9to start the
F
, alternating with
F
. To start the erasure,
(9and note
F
will show the total
W
) and the total
F
. For example,
F
six tracks will be erased, counting back from the
last track on the disc. Next, press the Play/
Select Button
making the track selection.When all selected
tracks are erased, the Time/Message Display
F
will show the total number of tracks that now
remain on the disc (under the Track Indicator
W
) and the total running time of all tracks.
Important Note on Erasing Tracks: Tracks at
the beginning or in the middle of the disc may
not be erased until all of the tracks after them
have been erased.
Important Note on Erasure and
Finalization Times: Regardless of the speed at
which a disc was recorded, the CDR 30 will erase
and finalize discs at the x4 speed to minimize the
length of the process. However, in some cases, it
may be necessary for the unit to repeat the erasure or finalization due to the nature of an individual disc. For that reason,it is normal for the
time required to complete these steps to vary
from one disc to another.
(9within three seconds of
24 CD RECORDING
Page 25

Troubleshooting Guide and Error Messages
TROUBLESHOOTING GUIDE
SYMPTOM POSSIBLE CAUSE SOLUTION
Unit does not operate when • No AC power • Make certain AC power cord
remote Power-On
Remote does not function • Wrong deck selected • Press the CDP button
Disc does not erase • CD-R disc in use • CD-R discs do not erase, only CD-RW discs may be erased
Recorded CD-R disc does not play in • CD-R disc not finalized • Finalize the CD-R disc in the CDR 30’s Record Deck
another CD player or DISC ERROR (see page 24)
message appears in Play Deck Display
Recording suddenly stops • Input source stopped or paused • In the Auto mode recordings will always stop when the input
0
is pressed • Check to see if AC outlet is switch controlled.
• Main Power Switch 1is off • Turn on Main Power
press the CDR button
• Dead batteries • Replace both batteries
• Sensor
• CD-RW disc is finalized • Un-finalize the CD-RW disc, before erasing.
F
¯
blocked • Remove obstructions from front panel or
connect a remote sensor to the Remote-In Jack
source is paused or stopped for more than 3 or 10 seconds
(depends on source) for digital recordings or after silence for
min. 10 seconds with analog or digital recordings.
B
is plugged into a live outlet.
3
to control the Play Deck;
P
to control the Record Deck
‚
%
ERROR MESSAGES
ERROR MESSAGE EXPLANATION AND PROBABLE CAUSE SOLUTION
CHECK DISC • A record-related button has been pressed when a • Unfinalize the disc to add tracks to a CD-RW disc
Finalized disc is in the Record Deck
• A record-related button has been pressed when a • Replace the disc with a blank or unfinalized CD-R or CD-RW disc
standard CD is in the Record Deck
DATA DISC • A non-audio CD-ROM or Video-CD disc has been • Only CD Audio, MP3 and DTS discs will play in the CDR 30;
placed in the machine replace the disc
DISC ERROR • An unfinalized disc has been placed in the Play Deck
• A DVD disc has been placed in the unit • Replace the disc. The CDR 30 does not play or dub DVD discs
DISC FULL • There is no more record time remaining • Use another blank CD-R or CD-RW disc
on the disc being recorded • Erase one or more tracks on a CD-RW disc
ERROR • The disc is not seated properly • Open the drawer and check to see that the disc is properly seated
• There is a problem with the disc • Try another disc
FAILED • A dub has not been completed properly • Check the play disc
FULL • More than 99 tracks have been recorded • The CDR 30 does not record more than 99 tracks on a disc
NO AUDIO • A record-related button has been pressed when • Replace the disc with a blank or unfinalized CD-R or
a recordable non-audio disc (Computer disc, see page14) CD-RW Audio disc
is in the Record Drawer
SVC-1 • There is an internal problem with the CDR 30 • Contact an authorized Harman Kardon service depot
%
%
%
3
• Finalize the disc (see page 24)
• Repeat the dub process
TROUBLESHOOTING GUIDE 25
Page 26

Technical Specifications
Signal Format
Playback Sampling Frequency 44.1 kHz
D/A Conversion 96 kHz, Multi-Bit Delta-Sigma Conversion
Oversampling 128 Times
Playback Specifications
Frequency Response 20 Hz – 20.050 Hz
Playback S/N 105 dB (A-weighted)
Playback Dynamic Range 100 dB (A-weighted)
Playback THD 0.004%
Analog Audio Output 1V RMS, ± 2dB (2V with HDCD discs)
Digital-Coaxial Output 0.5 Vpp/75Ω
Headphone Output 0.5V RMS/32Ω Load
Record Specifications
Digital Input Sample Rates 32 kHz – 96 kHz
Recording S/N: Analog 91 dB
Recording S/N: Digital Dub Mode Equal to Source
Recording S/N: Digital External Source Source –10dB
Recording Dynamic Range 91 dB
Recording THD 0.005%
Analog Input Sensitivity 330 mV RMS / 47kΩ = 0dB
Digital Inputs (Direct Recording) 44.1kHz, ±100 ppm/min.
General
Power Requirement 100~240 VAC/50~60Hz
Power Consumption 26 Watts
Dimensions
Width 440 mm
Height 112 mm
Depth 363 mm
Weight 4.8 kg
Depth measurement includes knobs, buttons and connection jacks.
Height measurement includes feet and chassis.
All features and specifications are subject to change without notice.
Harman Kardon is a registered trademark, and Power for the digital revolution is a trademark, of Harman Kardon, Inc.
DTS is a registered trademark of Digital Theater Systems, Inc.
HDCD system manufactured under license from Pacific Microsonics,Inc.
This product is covered by one or more of the following: In the USA:5,479,168;5,638,074; 5,640,161; 5,808,574; 5,838,274; 5,854,600; 5,864,311;
5,872,531; and in Australia: 669114.
Other patents pending.
250 Crossways Park Drive,Woodbury, New York 11797
www.harmankardon.com
Harman Consumer International:
2, Route de Tours, 72500 Château-du-Loir, France
© 2000 Harman Kardon, Incorporated
Part #3828R-D010A
 Loading...