

Page 1
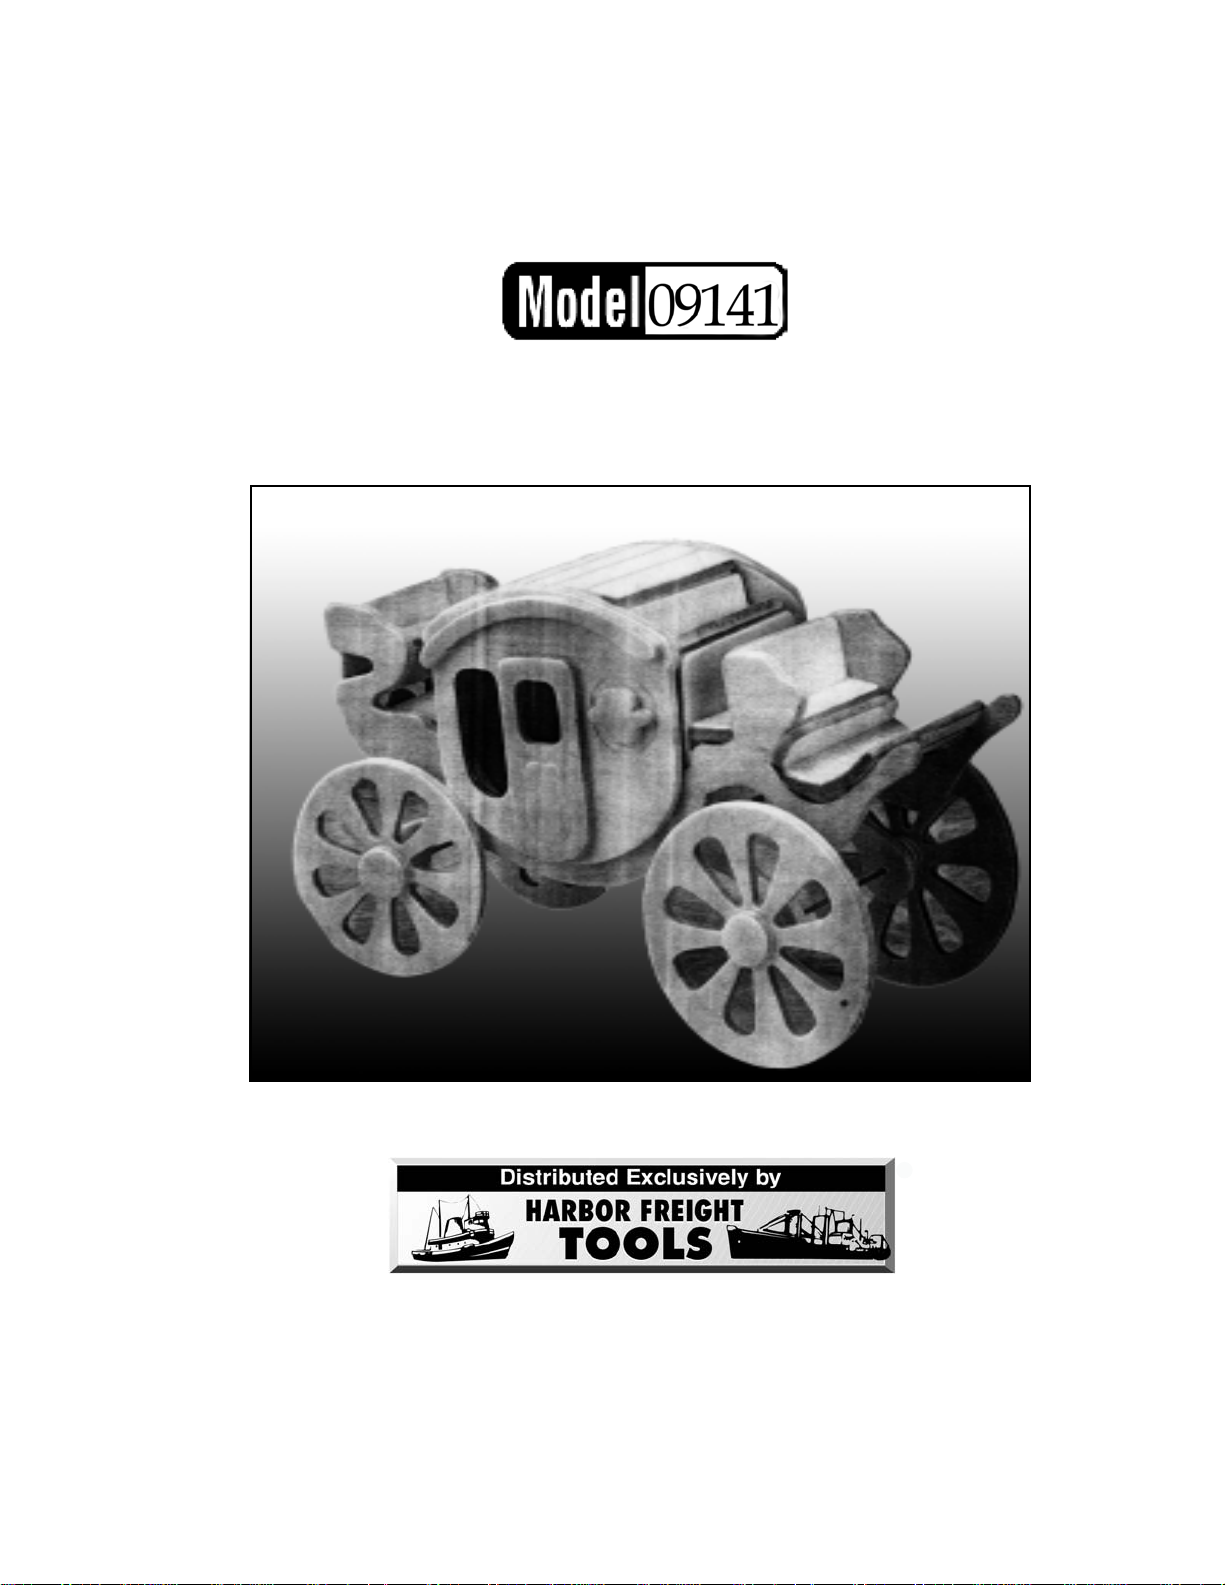
BUCK HORN WAGON
®
WOODEN MODEL
ASSEMBLY INSTRUCTIONS
3491 Mission Oaks Blvd., Camarillo, CA 93011
Visit our Web site at http:www.harborfreight.com
Copyright © 2003 by Harbor Freight Tools®. All rights reserved. No portion of this manual
or any artwork contained herein may be reproduced in any shape or form without the
express written consent of Harbor Freight Tools.
For technical questions please call 1-800-444-3353
Page 2

SPECIFICATIONS
ITEM
Overall Dimensions
Templates Dimension
Finish
Materials
Net Weight
Age Appropriate
6-1/2” Long X 4” Wide X 2-7/8” High
9” Long X 7-1/4” Wide (2X)
Natural Pressed Core-Wood
Pressed/Template Scored Core-Wood
5.2 Ounces
6 years and older
DESCRIPTION
SAVE THIS MANUAL
You will need the manual for the safety warnings and precautions, assembly
instructions, operating and maintenance procedures, parts list and diagram. Keep
your invoice with this manual. Write the invoice number on the inside of the front
cover. Keep the manual and invoice in a safe and dry place for future reference.
SAFETY WARNINGS AND PRECAUTIONS
1. KEEP PRODUCT USAGE AREA CLEAN. Cluttered areas invite injuries.
2. KEEP YOUNG CHILDREN AWAY FROM PRODUCT USAGE AREA. This product has
small parts that could pose a choking hazard. Allow children to handle this product only
with supervision. Be aware of the dangers of glue sniffing or swallowing small parts.
3. CHECK FOR DAMAGED PARTS. Check for damaged parts and any other conditions
that may affect it’s construction.
4. DETACH PARTS FROM BASE PLATE CAREFULLY. Pieces are to be pushed out with
thumb. These are delicate pieces. If handled too roughly, they will be damaged and
construction of model impossible to complete.
5. AVOID SHARP EDGES WHEN ASSEMBLING. If not careful, splinters may lodge under
fingernails when assembling.
6. THIS IS NOT A TOY but a model to be constructed according to these directions.
Putting the model together will help develop coordination and problem-solving skills for
children ages six and older. Children should be supervised when model is being
built.
SKU 90141 PAGE 2
Page 3

ASSEMBLY INSTRUCTIONS
1. Check the part numbers on the templates below to the drawing on Page 4. Mark each
with the corresponding number with a pencil to help organize. Lay out in numeric order
on a smooth surface after pressing out each piece with your thumb. (See Figure A-B)
#26
#4
#17
#1
#6
#23
#8
#7
#5
#9
#12
#13
#2
#4
#25
#20
#20
Figure A
#19
#18
#10
#16
#3
#18
Figure B
SKU 90141 PAGE 3
#24
#11
#21
#22
#24
Page 4

2. Smooth the edges of the punched out pieces with sand paper. Begin putting together
by using the drawing below as a guide. Use glue on the portions shown in “black”.
See arrows in Figure D.
3. Use Scotch Tape
®
on the backside to hold round or non-flat pieces together.
4. A rubber band can be used to hold assembled pieces until glue has dried. Clean the
edges or surfaces of the Wagon with a wet cloth to remove wet glue or unsightly
smudges.
5. Rod “A” passes through Wheels (#23, #24, #26 & #4) front and rear of wagon.
6. When assembly is completed, you can finish the Wagon with paint, colored
markers or crayons using your creativity.
#17
#7
#23
#18
#19
#4
#9
#5
#8
#6
#2
#4
#11
#12
#14
#13
#15
#24
#26
#25
#25
“A”
Brass
Rod
#24
#26
#23
Figure C
#21
#22
#1
#3
#23
#16
SKU 90141 PAGE 4
Page 5

PARTS LIST
PART # DESCRIPTION QTY
#1
1
2
3
A
Templates-Scored Core-Wood
Glue (White)
Sand Paper (2” X 2”)
Axle Rod (not shown)
#1
2
1
1
2
MAINTENANCE
1. For better and safer performance, keep all parts of this product clean and dry.
2. Periodically check to see that all hardware is in place.
PLEASE READ THE FOLLOWING CAREFULLY
THE MANUFACTURER AND/OR DISTRIBUTOR HAS PROVIDED THE PARTS DIAGRAM IN THIS
MANUAL AS A REFERENCE TOOL ONLY. NEITHER THE MANUFACTURER NOR DISTRIBUTOR
MAKES ANY REPRESENTATION OR WARRANTY OF ANY KIND TO THE BUYER THAT HE OR SHE IS
QUALIFIED TO MAKE ANY REPAIRS TO THE PRODUCT OR THAT HE OR SHE IS QUALIFIED TO
REPLACE ANY PARTS OF THE PRODUCT. IN FACT, THE MANUFACTURER AND/OR DISTRIBUTOR
EXPRESSLY STATES THAT ALL REPAIRS AND PARTS REPLACEMENTS SHOULD BE UNDERTAKEN
BY CERTIFIED AND LICENSED TECHNICIANS AND NOT BY THE BUYER. THE BUYER ASSUMES
ALL RISK AND LIABILITY ARISING OUT OF HIS OR HER REPAIRS TO THE ORIGINAL PRODUCT OR
REPLACEMENT PARTS THERETO, OR ARISING OUT OF HIS OR HER INSTALLATION OF REPLACEMENT PARTS THERETO.
SKU 90141 PAGE 5
 Loading...