

Page 1
MIG WELDER 131MIG WELDER 131
MIG WELDER 131
MIG WELDER 131MIG WELDER 131
06098
ASSEMBLY AND OPERATING INSTRUCTIONS
3491 Mission Oaks Blvd., Camarillo, CA 93011
Visit our Web site at http://www.harborfreight.com
Copyright © 2003 by Harbor Freight Tools®. All rights reser ved. No portion of
this manual or any artwork contained herein may be reproduced in any shape
or form without the express written consent of Harbor Freight Tools.
For technical questions and replacement parts, please call 1-800-444-3353
Page 2

Specifications
ITEM DESCRIPTION
Welding Current 25 ~ 85 amps
Duty Cycle
Pow er Consumption 120 VAC, 21 amps at 60 Hz
Open Circuit Voltage 19 to 30 volts
Heat Control 25 ~ 85 amps, variable
Ground Cable 6 feet, 4 AWG, si ngle instu lat ion, grounding cl amp.
Torch Powe r Cable 6 feet, 8 AWG, single insulation
Power Cord 6 feet, 3-core, 14 AWG, UL
Ther m al Overload
Protection with Light
Wire Size
Welding Material Size 22 gauge to 5/32"
Wire Spool Size 4 inch spool di ameter
20% at 75 amps; 45% at 50 amps; 90% at 35 amps;
100% at 25 amps
(Peak)
®
Listed; 3-prong plug
Auto matic shutdown and rest art after cool down
0.023 to 0.035 inch steel and stainle ss steel
0.030 to 0.035 inch aluminum; 0.030 flux core
Weight 55.1 lbs.
1 - Hand held shaded face shield
Accessories
1 - Br us h H amme r
1 - Wheel Kit
1 - 2 lb. spool of flux wi re
Save This Manual
You will need the manual for the safety warnings and precautions, assembly instructions,
operating and maintenance procedures, parts list and diagram. Keep your invoice with this
manual. Write the invoice number on the inside of the front cover. Keep the manual and
invoice in a safe and dry place for future reference.
Safety Warnings and Precautions
WARNING: When using tool, basic safety precautions should always be followed to
reduce the risk of personal injury and damage to equipment.
Read all instructions before using this tool!
1. Keep work area clean. Cluttered areas invite injuries.
2. Observe work area conditions. Do not use machines or power tools in damp or wet
locations. Don’t expose to rain. Keep work area well lighted. Do not use electrically
powered tools in the presence of flammable gases or liquids.
3. Keep children away . Children must ne ver be allow ed in the work area. Do not let them
handle machines, tools, or extension cords.
Page 2SKU 06098
12/03
Page 3

4. Store idle equipment. When not in use , tools must be stored in a dry location to inhibit
rust. Always lock up tools and keep out of reach of children.
5. Do not force tool. It will do the job better and more safely at the rate for which it was
intended. Do not use inappropriate attachments in an attempt to e xceed the tool capacity .
6. Use the right tool for the job. Do not attempt to force a small tool or attachment to do
the work of a larger industrial tool. There are certain applications for which this tool was
designed. Do not modify this tool and do not use this tool for a purpose for which it was
not intended.
7. Dress properly. Do not wear loose clothing or jewelry as they can be caught in moving
parts. Protective, electrically non-conductive clothes and non-skid footwear are
recommended when working. Wear restrictive hair cov ering to contain long hair.
8. Use eye and ear protection. Always wear ANSI approved, arc shaded, impact safety
full face shield when arc welding. W ear an ANSI approv ed dust mask or respirator when
working around metal, chemical dusts, fumes and mists.
9. Do not overreach. Keep proper footing and balance at all times. Do not reach over or
across running machines.
10. Maintain tools with care. Keep tools sharp and clean for better and saf er performance.
Follow instructions for lubricating and changing accessories. Inspect tool cords
periodically and, if damaged, have them repaired by an authorized technician. The
handles must be kept clean, dry, and free from oil and grease at all times.
11. Disconnect power. Unplug tool when not in use.
12. Remove adjusting keys and wrenches. Check that keys and adjusting wrenches are
removed from the tool or machine work surface before plugging it in.
13. Av oid unintentional starting. Be sure the switch is in the Off position when not in use
and before plugging in. Do not carry any tool with y our finger on the trigger , whether it is
plugged in or not.
14. Stay alert. Watch what y ou are doing, use common sense. Do not operate any tool when
you are tired.
15. Check for damaged parts. Before using any tool, an y part that appears damaged should
be carefully checked to determine that it will operate properly and perform its intended
function. Chec k for alignment and binding of moving parts; any brok en parts or mounting
fixtures; and any other condition that ma y affect proper operation. Any part that is damaged
should be properly repaired or replaced by a qualified technician. Do not use the tool if
any switch does not turn On and Off properly.
16. Guard against electric shock. Prevent body contact with grounded surfaces such as
pipes, radiators, ranges, and refrigerator enclosures.
17. Replacement parts and accessories. When servicing, use only identical replacement
parts. Use of any other parts will void the warranty. Only use accessories intended for
use with this tool. Approved accessories are available from Harbor Freight Tools.
18. Do not operate tool if under the influence of alcohol or drugs. Read warning labels
on prescriptions to determine if your judgment or reflexes are impaired while taking drugs.
Page 3SKU 06098
Page 4

If there is any doubt, do not operate the tool.
19. Maintenance. For your saf ety, service and maintenance should be performed regularly
by a qualified technician.
20. Use proper size and type extension cord. If an extension cord is required, it must be of
the proper size and type to supply the correct current to the tool without heating up.
Otherwise, the extension cord could melt and catch fire, or cause electrical damage to
the tool. This tool requires use of an 120 VAC extension cord of 20 amps minimum
capability (up to 30 feet), with wire size r ated at 10 AWG. Longer e xtension cords require
larger size wire. If you are using the tool outdoors, use an extension cord rated for outdoor
use (signified by “WA” on the jacket).
21. Pacemaker safety warning. People with pacemakers should consult with their
physician(s) before using this product; operation of equipment in close proximity to a
heart pacemaker could cause interference or failure of the pacemak er.
Note: Performance of this tool may vary depending on variations in local line voltage. Extension cord usage may also affect tool performance.
Warning: The warnings, cautions, and instructions discussed in this instruction manual
cannot cover all possible conditions and situations that may occur. It must be understood by the operator that common sense and caution are factors which cannot be
built into this product, b ut m ust be supplied b y the operator.
Arc Welding Safety Warnings and Precautions
Warning: This product, when used for welding and similar applications, produces chemicals known to the State of California to cause cancer and birth defects (or other reproductive harm). California Health & Safety Code 25249.5, et seq.
1. Avoid electrical shock. Do not permit electrically live par ts, cables, or electrodes to
contact skin, clothing, or gloves. Protective clothing should be free of holes, dry, and
ANSI approved.
This unit draws enough current to cause serious injury or death. Before turning the welder
on, check the electrode holder to be sure that there are no protruding screw heads, and
that all insulation is secure. Do not weld unless you are insulated from ground and the
work piece.
2. Avoid breathing fumes or gases. They can cause serious health problems. Use an
active ventilation system directly above the welding area. Keep your head out of the
fumes.
3. Av oid e ye and body damage. Arc rays and infrared radiation can injure ey es and burn
skin. Wear ANSI approved eye and body protection. Do not allow viewing by visitors
without proper eye and body protection. Use a Face Shield with arc shaded filter plate.
4. Know proper arc welding practices. Read and understand this instruction manual, as
well as your employer’s safety practices for arc welding.
5. Connect only to a code approved power source. Connect only to a grounding power
source conforming to the National Electrical Code and Local Codes.
Page 4SKU 06098
Page 5

6. Avoid fire and explosion. Remove flammable and explosive material from at least 35
feet from the welding arc to pre vent welding sparks or molten metal from starting a fire.
Keep a type ABC fire e xtinguisher within easy reach. Thoroughly clean the object being
welded of any paint, grease, or other foreign material.
7. Av oid being burned. Alwa ys wear ANSI approved welding gear: leather gloves , leather
apron, and shoes.
8. Wear pr oper clothing when welding. Use flameproof, welding type gloves . Wear cuffless
pants and pocketless shirt. Both must be free of oil and g rease. W ear high-topped, safety
to shoes with rubber soles.
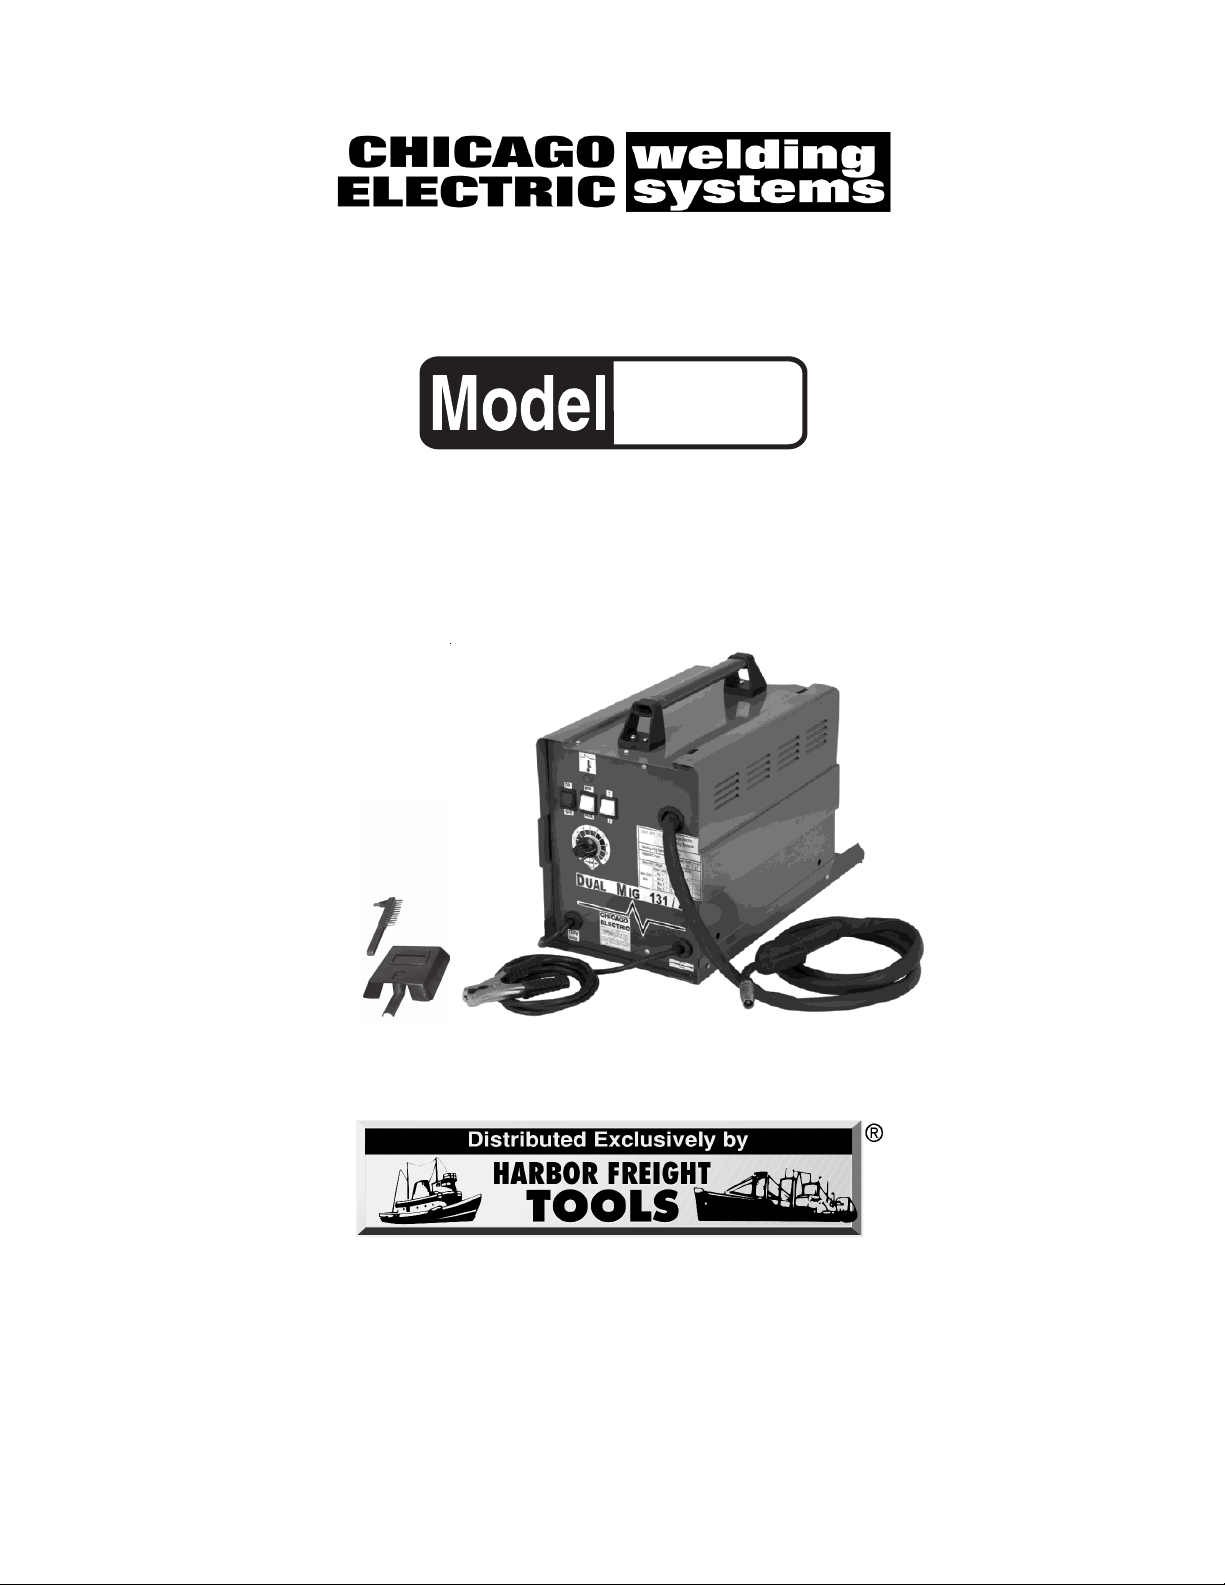
Unpacking
When unpacking, check to make sure the following parts are included.
Line Cord (13)
Brush Hammer
Handheld Shaded
Face Shield
Ground Cable with Clamp
If any parts are missing or broken, please call Harbor Freight Tools at the number on the cover
of this manual as soon as possible.
Page 5SKU 06098
Welding T orch (15)
REV 05/04
Page 6

Assembly
MIG Welder Unit
1. Insert the Handle (4) into the Handle Sockets (3) and mount the Handle Soc k ets to the
Side Panel B (1) top using supplied hardware.
2. Lift Side Panel B (1) all the way to expose the wire spool and Wire Feed Mechanism
(10).
Side Panel B (1)
(C)
–
(29)
+
(D)
Wire Spool Axle (9)
Wire Spool
Wire Feed Mechanism (10)
3. Remove the Nut from the Wire Spool Axle (9). Place the Wire Spool over the Axle with
the wire exiting the spool over the top. Refer to photos above. Replace the Spool Axle
Nut.
4. Open the Wire Feed Mechanism (10) as shown in the photo (top-right).
5. Feed and guide the spool wire into the Wire Feed Mechanism, past the feed wheels
(C), and into the W elding T orch / Cab le (15).
It will help if the W elding Torch / Cable (15) is straightened out as much as possible.
Push in until the wire comes out the Welding Torch head. If it cannot be fed manually
all the way out, it can be fed automatically when the welding unit is powered up.
6. Close the Feed Mechanism (10) over the wire, and adjust the feed tension (D) if
necessary.
7. Check that +/– cables to connection Knobs (29) are correct. See photo (top-left).
When using non-flux wire and protective gas, connect wire cables as shown in photo.
For 0.9 flux cored wire, no gas is required. Reverse cable connections.
8. Close the Side Panel B (1).
Page 6SKU 06098
Page 7

Handheld Shaded Face Shield
Assemble the Handheld Shaded Face Shield as illustrated in its Assembly Drawing at the
end of this manual.
Operation
Controls and Indicators
Overload-shutdown
Indicator Lamp
Min / Max Switch
On / Off Switch
1 / 2 Pow er Level Switch
Wire Feed Speed Control
Line Cord
Ground Cable with Clamp (14)
Welding T orch Cable (15)
Welding
Caution: Bef ore ar c welding, read and understand all safety precautions and warnings
listed on pages 2 through 5.
1. If using non-flux core wire, connect and secure the Argon / CO2 gas hose to the rear of
the MIG Welder. (If using flux core wire, protective gas is not required.)
2. Attach the Ground Cable with Clamp (14) as close as possible
to the metal object to be welded, or to the metal work bench
where the object is mounted and electrically connected.
3. Set the desired welding current (30~120 amps) for the type of
metal being welded using the Min/Max Switch and 1/2 Power
Level Switch.
Refer to the power setting tab le on the next page. Thinner metals use lower current.
Heavier metals use higher current.
4. Verify that the On/Off Switch is in the OFF position, then plug the MIG Welder Line
Cord into a dedicated, 120 VAC, 20 amp line with delayed action type circuit breaker
or fuses. If an extension cord is used, it must have the following wire size: up to 30 feet,
use 10 AWG siz e wire; 30 to 50 f eet, 8 AWG wire; Over 50 feet, 6 AWG wire.
Page 7SKU 06098
Page 8

Rated DC Output Set Pow er Swi tches Amps Duty Cycle Volts
Mi n. - - 1 2 5 1 00% 15. 2
Maximum OCV 28V
Min. -- 2 35 90% 15.7
Max. -- 1 50 45% 16.5
Max. -- 2 75 20% 17.7
5. While holding the Welding Torch handle, with the electrode wire clearly out of the way
of any grounded objects, turn the On/Off Switch to the ON position.
6. Momentarily press the Welding Torch trigger switch to test the wire f eed speed.
Adjust the speed by turning the Wire F eed Speed Control knob.
7. Orient yourself on the area to be welded, then hold the Arc Shaded Face Shield over
your eyes.
Warning: Never look at the ignited arc without ANSI approved, arc shaded, eye protection in a full face shield. P ermanent eye damage or blindness can occur . Skin burns can
occur. Never breath arc fumes.
8. Press (and hold) the Torch Trigger Switch and stroke the area to be welded with the
electrode wire to ignite the arc.
Never tap the electrode wire into the welding surface to ignite the arc. This damages
its external coating on the electrode which prevents oxygen in the air from coming into
contact with the molten metal, causing it to oxidize.
9. Once the arc is ignited, tilt the electrode wire forward at an
angle of about 35°. Refer to the illustration at right.
The wire feeds automatically at a speed dependent on the
Min. or Max. current setting. The wire speed can also be
adjusted using the Wire Feed Speed Control.
Note: If too much current is dra wn from the MIG W elder, the Thermal Overload protector will activate, the red Overload indicator
will light, and the Arc W elder will turn off until it cools down. If this
happens, turn the On/Off Switch to the OFF position and wait about 3 ~ 5 minutes.
10. When the weld is complete, lift the Welding Torch handle electrode wire clearly away
from any grounded object, remov e your Face Shield, and turn the On/Off Switch to the
OFF position.
11. Unplug the power Line Cord from the electrical outlet.
Page 8SKU 06098
Page 9

Troubleshooting
Symptom Possible Cause Checks and Remedies
MIG Welder does not
work when turned on.
Wire does not feed
properly.
Reduced welding
power.
No power t o MIG W elder.
Overheated during use. In overload mode; Allow to cool down.
Insufficient wire feed spring tension. Tighten spring tension knob. See photo on page 6.
Wire guide sheath blocked. Clean or replace wire sheath.
Wire spool axle nut too tight. Loosen nut so reel moves freely .
Braking on wire reel excessive. Loosen brake using adjusting screw.
Wire reel has oxidized, poorly wound
or quali ty wire.
Ground Cable not connected or poor
connection.
Check Line Cord and plug. Check facility circuit
breaker.
Replace wire reel.
Check that the Ground Cable Clamp is secu rely
attached to the metal being welded. This area should
be cleaned down to the metal and free of paint, dirt
and grease.
Porous or spongy
welds.
Gas supply does not
switch off.
Press ing Welding Torch
trigger produces no
result.
In ternal connec tion loose on switches.
Faulty contactor. Check the state of the contacts and the me chanical
One or more rectifiers f ailed.
No gas; Litt le gas. Check presence of gas and supply line and pressure.
Clogged hole s in Welding Torch head
diffuser.
Sole noid valve bl ocked.
Poor q uality gas or wire. Gas must be very dry. Use a moisture filter. Use a
Worn or dirty solenoid valve.
Faulty Welding Torch trigger ;
Disconnected or broken control
cables.
Overload controller defective.
A qualified technician should open the unit and check
and tighten any loose connectors.
operation of the contactors.
A qualified technician should open the unit and check
for burnt rectifiers and replace.
Clear clogged holes using compressed air.
A qualified technician should open the unit and check
solenoid operation and electrical connection.
dif ferent type of wire.
A qualifi ed technic ian should open the unit and
dismantl e valve, clean orifice and seatin g element.
A qualifi ed technic ian should open the unit and
remove the torch connection plug and short-circuit
the poles. Check and repair control cables.
A qualifi ed technic ian should open the unit and
replace the overload controll er.
Maintenance
Caution: Bef ore performing any maintenance on the MIG W elder, unplug the power Line
Cord from the electrical outlet.
1. Periodically using compressed air, open the top and side panels and blow out all dust
from the interior.
Page 9SKU 06098
Page 10

2. Store the unit in a clean and dry location.
3. Periodically clean out the Torch Head.
Replacing the Wire Reel
When the wire on the Feed Reel is used up, you will need to replace it as described on
page 6, step 5 through step 9.
NOTE: Some parts are listed and shown for illustration purposes only and are not available
individually as replacement parts.
PLEASE READ THE FOLLO WING CAREFULLY
THE MANUFACTURER AND/OR DISTRIBUTOR HAS PROVIDED THE PARTS DIAGRAM IN THIS
MANUAL AS A REFERENCE TOOL ONLY. NEITHER THE MANUFACTURER NOR DISTRIBUTOR
MAKES ANY REPRESENT ATION OR WARRANTY OF ANY KIND TO THE BUYER THAT HE OR SHE IS
QUALIFIED TO MAKE ANY REPAIRS TO THE PRODUCT OR THAT HE OR SHE IS QUALIFIED TO
REPLACE ANY PARTS OF THE PRODUCT. IN F A CT, THE MANUF ACTURER AND/OR DISTRIBUT OR
EXPRESSLY STATES THAT ALL REPAIRS AND PARTS REPLACEMENTS SHOULD BE UNDERTAKEN BY CERTIFIED AND LICENSED TECHNICIANS AND NOT BY THE BUYER. THE BUYER
ASSUMES ALL RISK AND LIABILITY ARISING OUT OF HIS OR HER REPAIRS TO THE ORIGINAL
PRODUCT OR REPLACEMENT PARTS THERETO, OR ARISING OUT OF HIS OR HER INSTALLATION OF REPLACEMENT PARTS THERET O.
Page 10SKU 06098
Page 11

Wire Feed Mechanism Assembly Drawing
Page 11SKU 06098
Page 12

MIG Welder 131 Schematic Diagram
MIG Welder 131 Assembly Drawing
Page 12SKU 06098
Page 13

Hand Held Shield Assembly Drawing
Page 13SKU 06098
 Loading...