

Harbor Freight Tools 60652 Owner's Manual
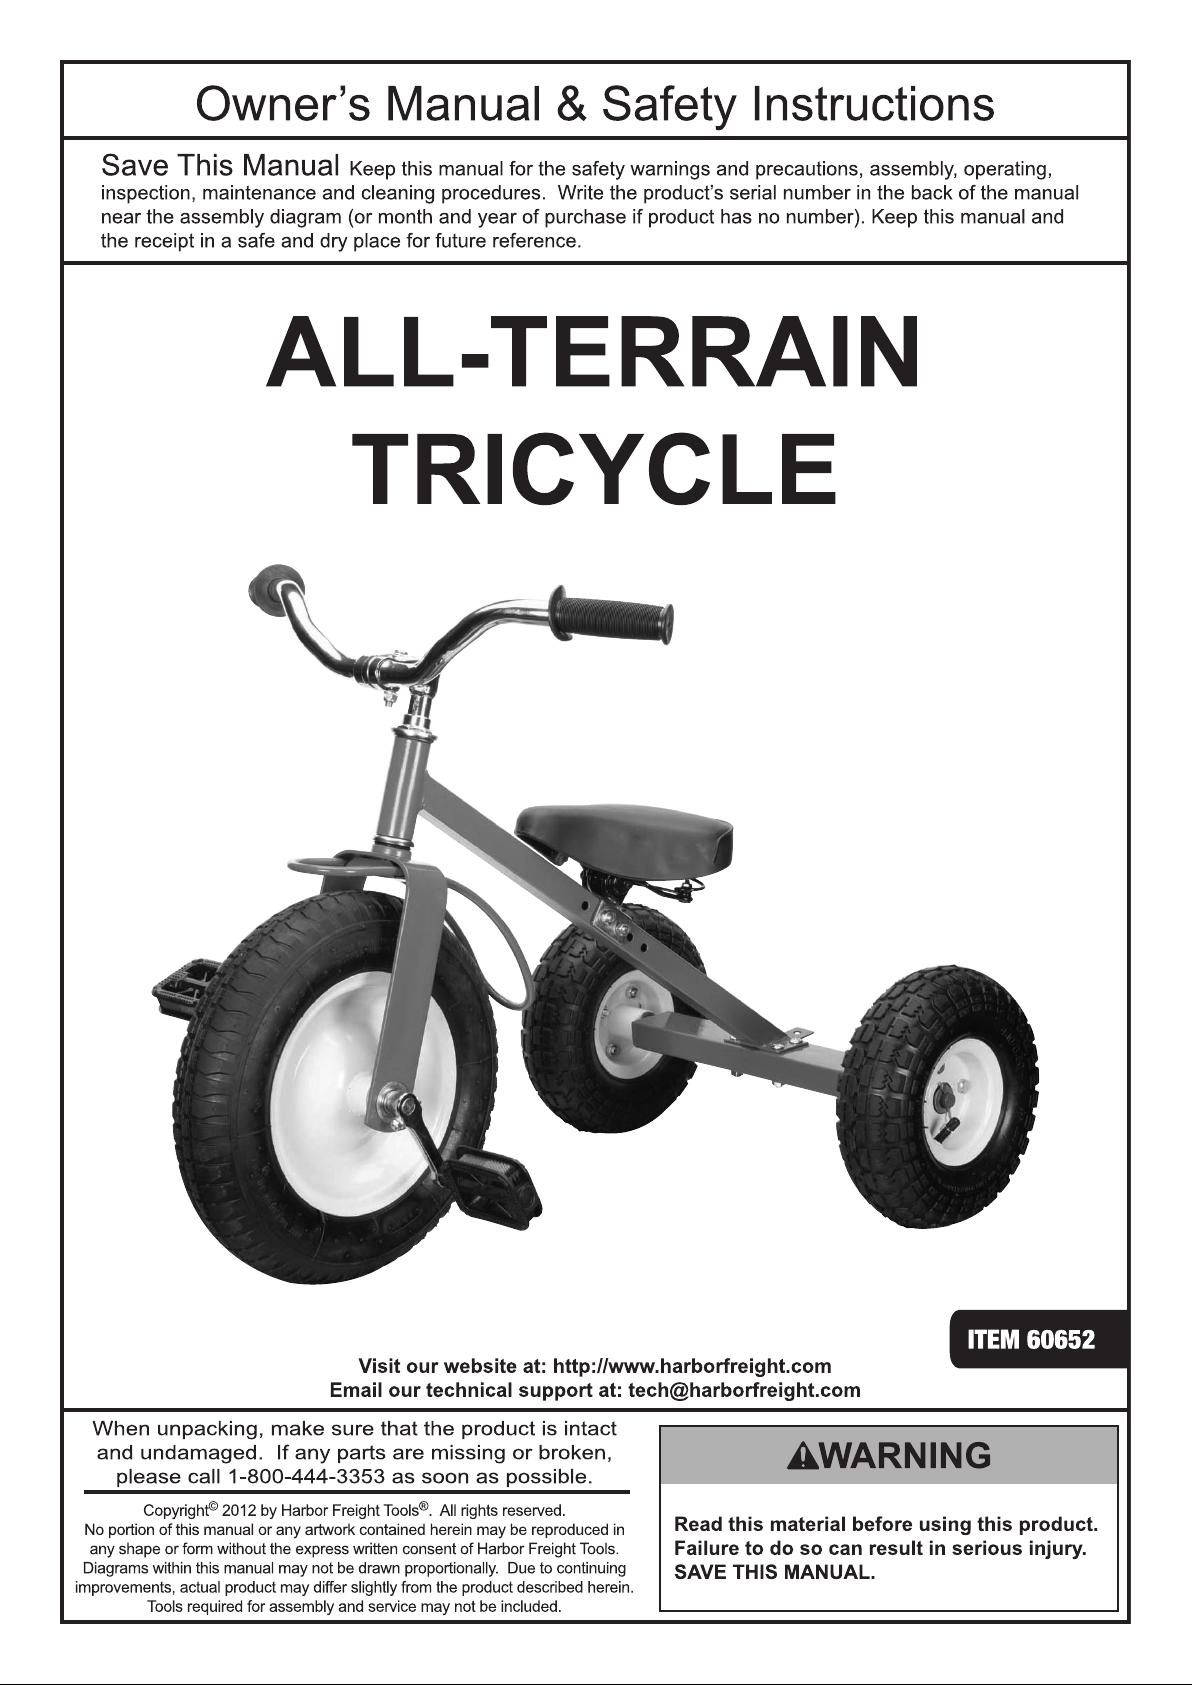

Specifications
Tricycle Height 26″
Front Wheel 5/8″ Axle Diameter, 13″ Pneumatic Knobby Tire
Back Wheels 5/8″ Axle Diameter, 10″ Pneumatic Knobby Tire
Age Range 5 and up
Weight Capacity 150 lb.
IMPORTANT SAFETY INFORMATION
Read all safety warnings and instructions.
Failure to follow the warnings and instructions may result in serious injury.
Save all warnings and instructions for future reference.
1. AGES 5 AND UP ONLY.
Do not allow younger children to use.
2. WEAR PROPER SAFETY HELMET AND
COMPLETE SAFETY GEAR WHEN RIDING.
Responsible adult must supervise during use.
Use as intended only.
Rider must stay seated at all times during use.
Do not allow more than one child
to play with tricycle at once.
3. Do not use in unstable or dangerous area.
Tipping over can cause injury.
Do not use in areas where vehicles may be present,
such as parking areas, driveways, or roads.
4. Wear ANSI-approved safety goggles
and work gloves during assembly.
5. Read manual before assembly and/or use.
6. Do not exceed 150 lb. capacity.
7. Inspect before every use;
do not use if parts loose or damaged.
Check and tighten hardware periodically.
8. Assemble completely according to instructions
before allowing a child to play with this product.
Page 2 For technical questions, please call 1-800-444-3353. Item 60652
Assembly Instructions
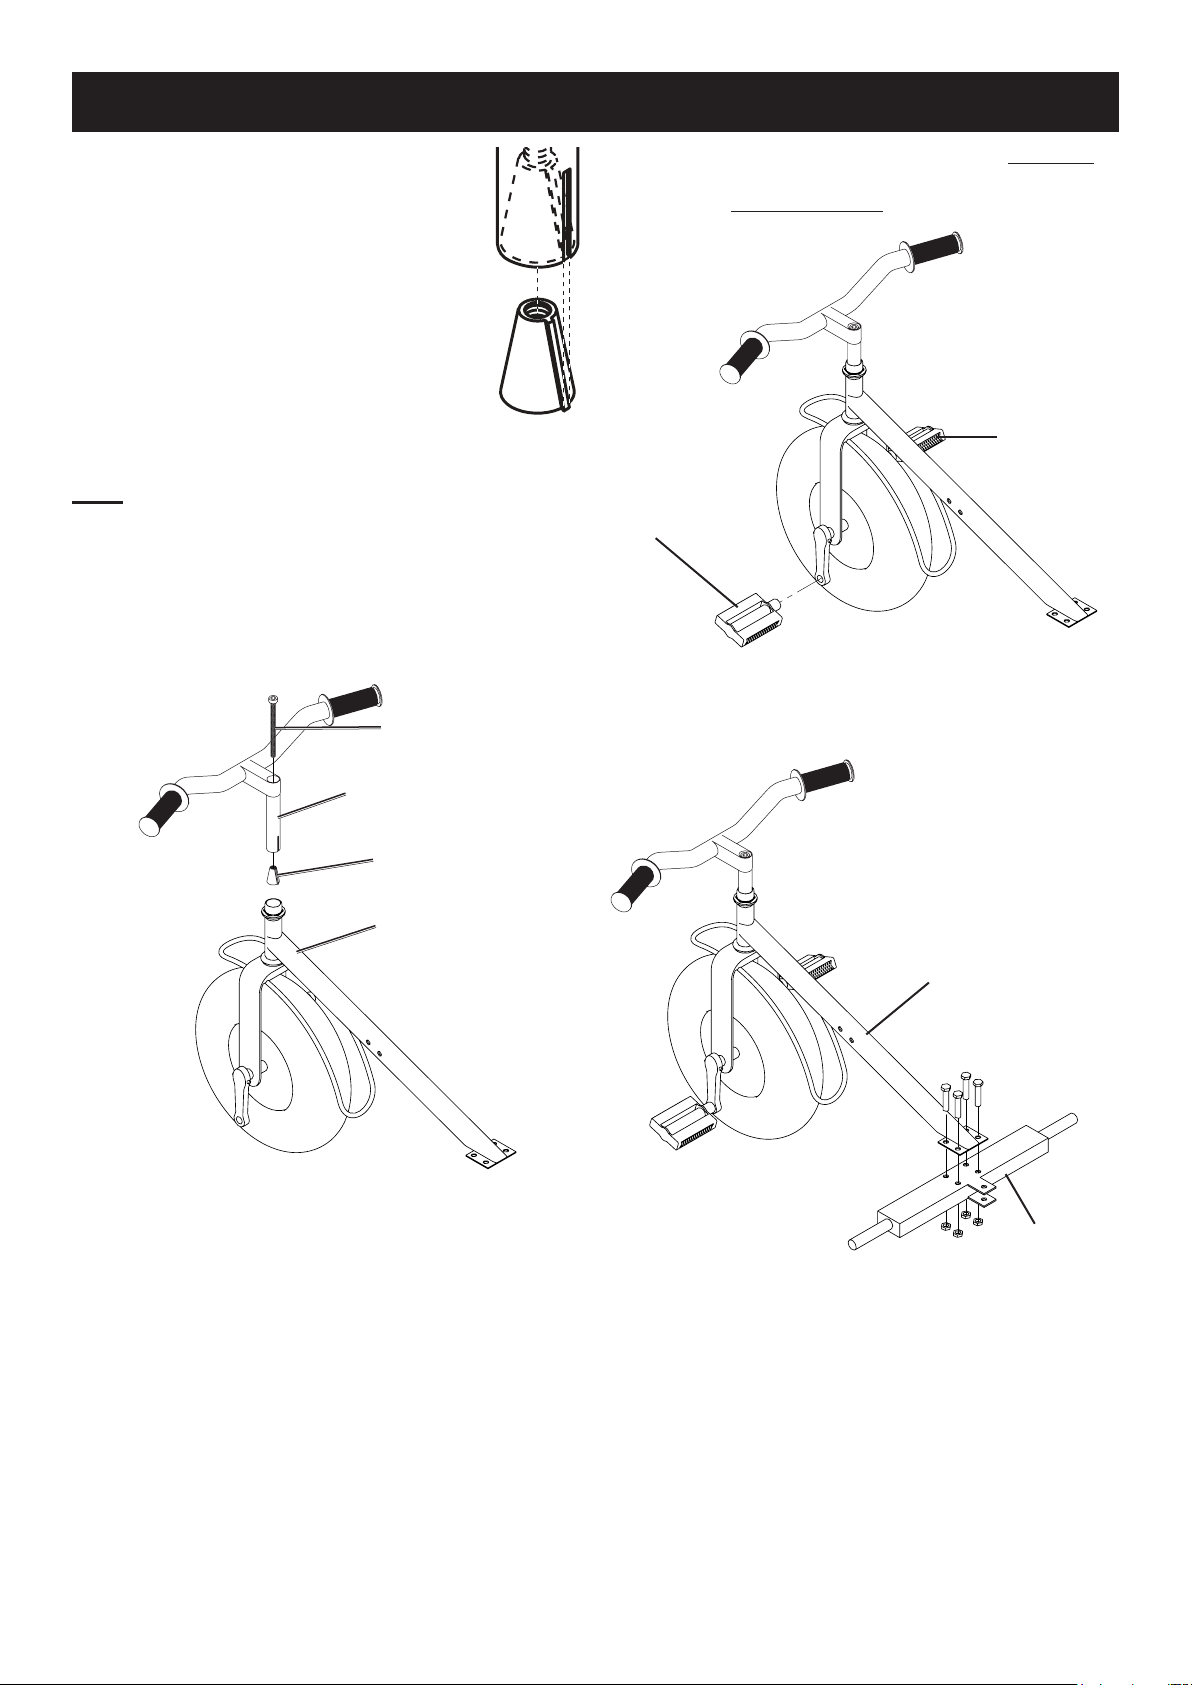
1. Examine Handlebar (12) assembly
to make sure that rail on Insert (17) is
aligned with and fits into slot on bottom of
Handlebars, as shown to the right.
4. Thread the left Pedal (5a) onto the crank clockwise.
Thread the right Pedal (6a) onto
the crank counterclockwise.
2. Insert Handlebar assembly
into Frame (8) as shown in Figure A.
Note: Although they are illustrated separately,
the Bolt (13) and Insert (17) should already be
part of the Handlebar assembly at this point.
3. Align Handlebars carefully with Front Wheel (1) while
tightening the Bolt (13) at the top center of them.
If needed, have an assistant hold the Handlebars
straight while tightening this Bolt.
Bolt (13)
Handlebars (12)
Insert (17)
Frame (8)
Left
Pedal (5a)
(clockwise)
Figure B: Pedal Installation
5. Use 4 Bolts and Nuts to attach the
Rear Frame (10) to the Frame (8).
Frame (8)
Right
Pedal (6a)
(counterclockwise)
Figure A: Handlebar Installation
Rear
Frame (10)
Figure C: Rear Frame Installation
Page 3For technical questions, please call 1-800-444-3353.Item 60652
 Loading...