

Page 1
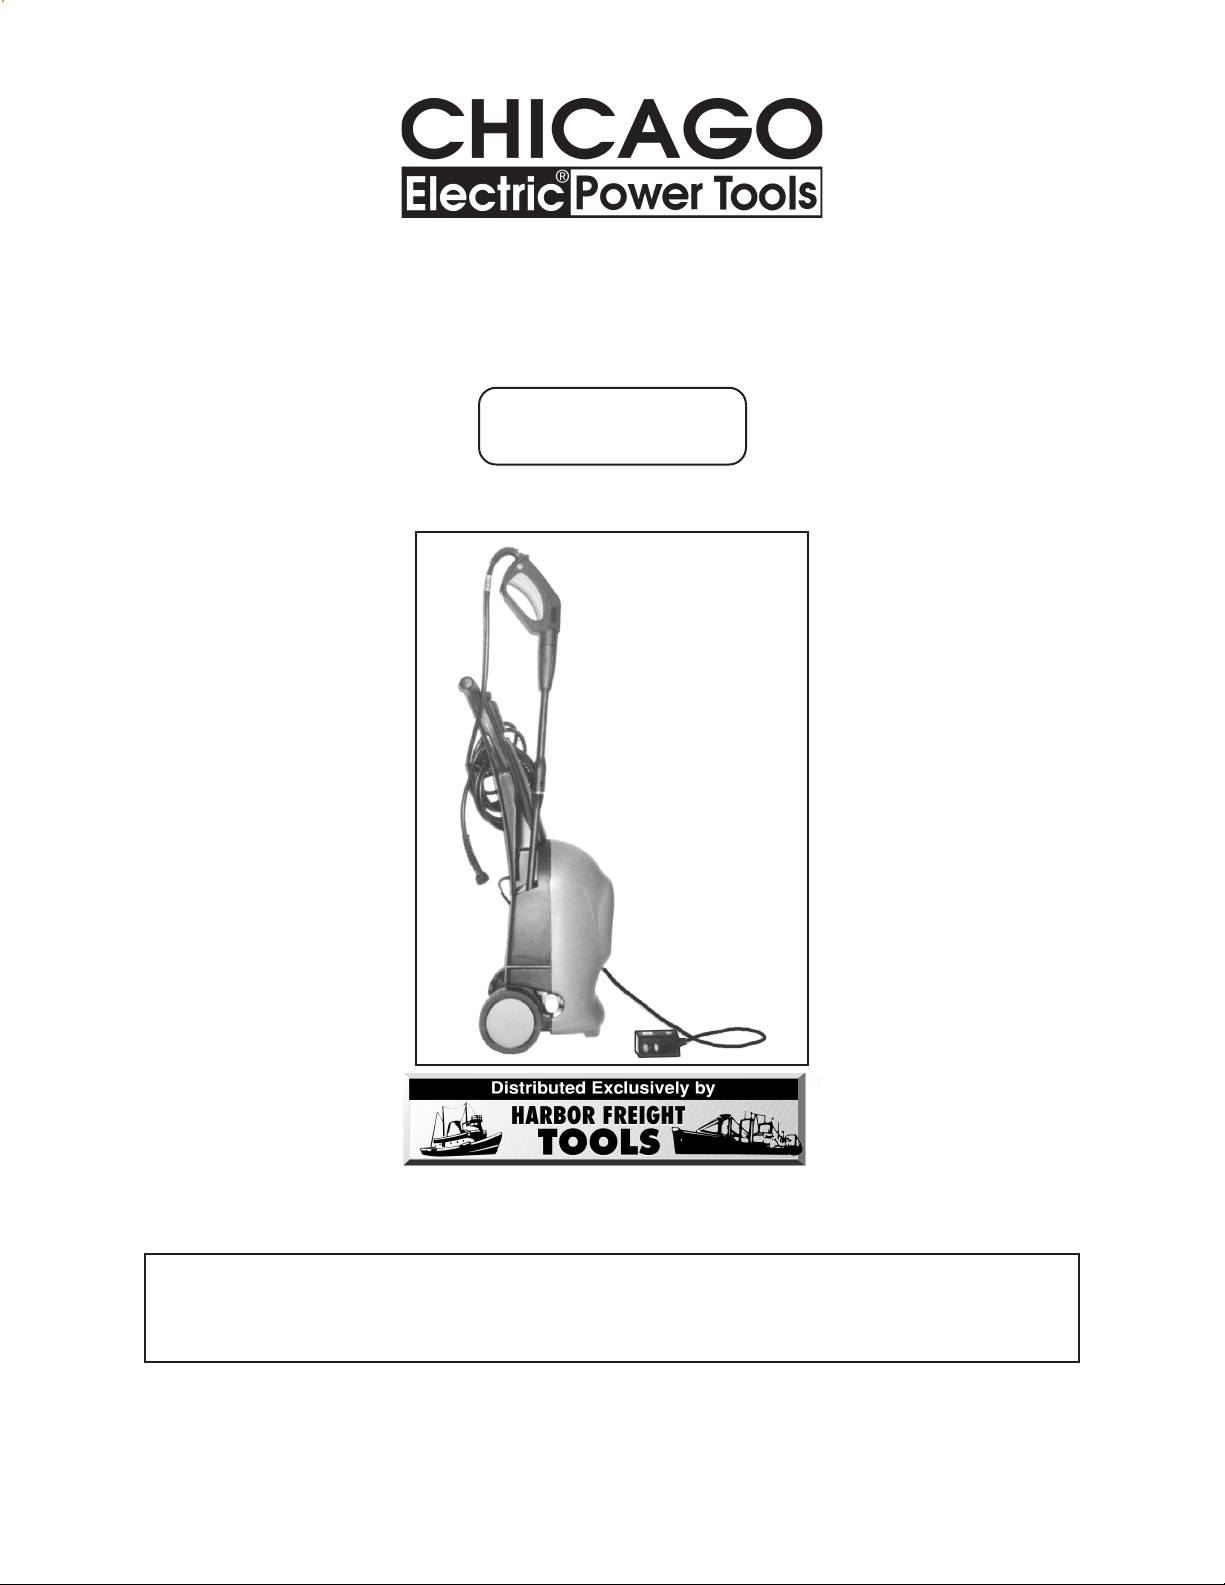
PRESSURE WASHER
®
1800 PSI
Model 02433
ASSEMBLY AND OPERATING INSTRUCTIONS
3491 Mission Oaks Blvd., Camarillo, CA 93011
Visit our Web site at: http://www.harborfreight.com
TO PREVENT SERIOUS INJURY,
READ AND UNDERSTAND ALL WARNINGS
AND INSTRUCTIONS BEFORE USE.
Copyright© 2004 by Harbor Freight Tools®. All rights reserved. No portion of this
manual or any artwork contained herein may be reproduced in any shape or form
without the express written consent of Harbor Freight Tools.
For technical questions or replacement parts, please call 1-800-444-3353.
Manual revised 02/05; 06/05; 08/05
Page 2

Contents
Unpacking ................................................................................2
Specifications..........................................................................3
Safety ..................................................................................... 3-9
General Safety Rules.......................................................................3
Specific Safety Rules ...................................................................... 6
Grounding......................................................................................... 8
Assembly ................................................................................10
Controls And Setup................................................................12
Operation ................................................................................15
Operating Tips ........................................................................16
Inspection, Maintenance, And Cleaning...............................18
Parts Lists And Diagrams ................................................... 19-21
Parts List A / Assembly Diagram A ..............................................19
Parts List B / Assembly Diagram B ..............................................20
Parts List C / Assembly Diagram C ..............................................21
Troubleshooting .....................................................................22
UNPACKING
When unpacking, check to make sure all the par ts shown on the Parts Lists on
pages 19-21 are included. If any parts are missing or broken, please call Harbor Freight
Tools at the number shown on the cover of this manual as soon as possible.
Remove the foam packing block underneath the Top Shell (4A) before assembling
or using the Washer.
SKU 02433 PAGE 2
For technical questions, please call 1-800-444-3353;
Troubleshooting section at end of manual.
Page 3
SPECIFICATIONS
metInoitpircseD
stnemeriuqeRlacirtcelEsPMA31/zH06/V021
gulPrewoPICFGgnorP-3
droCrewoPgnoL.tF13
WISP008,1
thgieW.sbL63
erusserPreta
etaRwolFetuniMrePsnollaG1.2
deriuqeRylppuSretaW
htgneLesoH.tF91
htgneLlatoTecnaL)elbats
htgneLelzzoNobruT"4/1-13
htgneLhsurB"8/5-72
htgneLecnaLnuG"8/3-31
erutaeFlanoitiddAreggirTffOkco
MPG4-3muminim
ujdA("8/1-33
LytefaS
SAVE THIS MANUAL
You will need this manual for the safety warnings and precautions, assembly, operating, inspection, maintenance and cleaning procedures, parts list and assembly diagram.
Keep your invoice with this manual. Write the invoice number on the inside of the front
cover. Keep this manual and invoice in a safe and dry place for future reference.
E193752
GENERAL SAFETY RULES
IMPORTANT SAFETY INSTRUCTIONS!
WARNING!
READ AND UNDERSTAND ALL INSTRUCTIONS
Failure to follow all instructions listed below may result in
electric shock, fire, and/or serious injury.
SAVE THESE INSTRUCTIONS
WORK AREA
1. Keep your work area clean and well lit. Cluttered and dark work areas invite
accidents.
2. Do not operate power tools in explosive atmospheres, such as in the presence
of flammable liquids, gases, or dust. Power tools create sparks which may ignite
the dust or fumes.
3. Keep bystanders, children, and visitors away while operating a power tool.
Distractions can cause you to lose control.
REV 04/05
SKU 02433 PAGE 3
For technical questions, please call 1-800-444-3353;
Troubleshooting section at end of manual.
Page 4

ELECTRICAL SAFETY
1. Grounded tools must be plugged into an outlet properly installed and grounded
in accordance with all codes and ordinances. Never remove the grounding
prong or modify the plug in any way. Do not use any adapter plugs. Check
with a qualified electrician if you are in doubt as to whether the outlet is properly
grounded. If the tools should electrically malfunction or break down, grounding
provides a low resistance path to carry electricity away from the user.
2. Avoid body contact with grounded surfaces such as pipes, radiators, ranges,
and refrigerators. There is an increased risk of electric shock if your body is
grounded.
3. Do not expose power tools to rain or wet conditions. Water entering a power
tool will increase the risk of electric shock.
4. Do not abuse the Power Cord. Never use the Power Cord to carry the tools or
pull the Plug from an outlet. Keep the Power Cord away from heat, oil, sharp
edges, or moving parts. Replace damaged Power Cords immediately. Damaged
Power Cords increase the risk of electric shock.
5. When operating a power tool outside, use an outdoor extension cord marked
“W-A” or “W”. These extension cords are rated for outdoor use, and reduce the risk
of electric shock.
PERSONAL SAFETY
1. Stay alert. Watch what you are doing, and use common sense when operating
a power tool. Do not use a power tool while tired or under the influence of
drugs, alcohol, or medication. A moment of inattention while operating power
tools may result in serious personal injury.
2. Dress properly. Do not wear loose clothing or jewelry. Contain long hair. Keep
your hair, clothing, and gloves away from moving parts. Loose clothes, jewelry,
or long hair can be caught in moving parts.
3. Avoid accidental starting. Be sure the Power Switch is off before plugging in.
Carrying power tools with your finger on the Power Switch, or plugging in power
tools with the Power Switch on, invites accidents.
4. Remove adjusting keys or wrenches before turning the power tool on. A wrench
or a key that is left attached to a rotating part of the power tool may result in personal
injury.
5. Do not overreach. Keep proper footing and balance at all times. Proper footing
and balance enables better control of the power tool in unexpected situations.
SKU 02433 PAGE 4
For technical questions, please call 1-800-444-3353;
Troubleshooting section at end of manual.
Page 5

6. Use safety equipment. Always wear eye protection. Nonskid safety shoes, hard
hat, or hearing protection must be used for appropriate conditions. Always wear
ANSI approved safety impact goggles and thick rubber boots during use and
maintenance.
TOOL USE AND CARE
1. Use clamps (not included) or other practical ways to secure and support a
smaller workpiece to a stable platform. Holding the work by hand or against your
body is unstable and may lead to loss of control.
2. Do not force the tool. Use the correct tool for your application. The correct tool
will do the job better and safer at the rate for which it is designed.
3. Do not use the power tool if the Power Switch does not turn it on or off. Any
tool that cannot be controlled with the Power Switch is dangerous and must be
replaced.
4. Disconnect the Power Cord Plug from the power source before making any
adjustments, changing accessories, or storing the tool. Such preventive safety
measures reduce the risk of starting the tool accidentally.
5. Store idle tools out of reach of children and other untrained persons. Tools are
dangerous in the hands of untrained users.
6. Maintain tools with care. Keep tools clean. Properly maintained tools are easier
to control. Do not use a damaged tool. Tag damaged tools “Do not use” until repaired.
7. Check for misalignment or binding of moving parts, breakage of parts, and
any other condition that may affect the tool’s operation. If damaged, have the
tool serviced before using. Many accidents are caused by poorly maintained
tools.
8. Use only accessories that are recommended by the manufacturer for your
model. Accessories that may be suitable for one tool may become hazardous when
used on another tool.
SERVICE
1. Tool service must be performed only by qualified repair personnel. Service or
maintenance performed by unqualified personnel could result in a risk of injury.
2. When servicing a tool, use only identical replacement parts. Follow instructions
in the
unauthorized parts or failure to follow maintenance instructions may create a risk of
electric shock or injury.
“Inspection, Maintenance, And Cleaning”
section of this manual. Use of
SKU 02433 PAGE 5
For technical questions, please call 1-800-444-3353;
Troubleshooting section at end of manual.
Page 6

SPECIFIC SAFETY RULES
1. Maintain a safe working environment. Keep the work area well lit. Make sure
there is adequate surrounding workspace. Always keep the work area free of
obstructions, grease, oil, trash, and other debris. Do not use the Pressure Washer in
areas near flammable chemicals, dusts, and vapors.
2. Maintain labels and nameplates on the Pressure Washer. These carry important
information. If unreadable or missing, contact Harbor Freight Tools for a replacement.
3.
4. Use the right product for the right job. There are certain applications for which
5. This product must continuously run with cold water only.
6. To avoid electrical shock, never start and run the Pressure Washer in the rain.
7. Do not allow the GFCI Plug (11A) to become wet. Always place the GFCI Plug
8. When using the Pressure Washer, always maintain a firm grip on the Wash
WARNING! Risk of injection or severe injury. Keep clear of Nozzle. Do not
direct discharge stream at people or animals. Keep the work area clear of all
people and animals.
this product was designed. Do not use small equipment, tools, or attachments to do
the work of larger industrial equipment, tools, or attachments. Do not use this product
for a purpose for which it was not intended.
Never use hot water.
Dry running will cause serious damage to the seals. Make sure the water supply
used for the Pressure Washer is not dirty, sandy, and does not contain any corrosive
chemical products.
Never allow water to leak inside the Body of the Pressure Washer. Do not direct
discharge stream at the Pressure Washer itself or at other live electrical equipment.
in a dry location and as far away as possible from the object being sprayed.
Keep all electrical connections dry and off the ground.
Gun (5A) with
force.
both hands. Squeezing the Trigger of the Wash Gun causes a kickback
9. Do not pull or carry the Power Washer by its Power Cord (11A), or pull the Cord
around sharp corners or edges. Do not unplug the Power Washer by pulling on
the Cord. Keep the Cord away from heated surfaces.
10. Do not handle the GFCI Plug (11A) with wet hands.
11. Avoid unintentional starting. Make sure you are prepared to begin work before
turning on the Pressure Washer.
12. The work area should have adequate drainage to reduce the possibility of a
fall due to slippery surfaces.
13. This Pressure Washer is intended for outdoor residential use only.
SKU 02433 PAGE 6
For technical questions, please call 1-800-444-3353;
Troubleshooting section at end of manual.
Page 7

14. Some chemicals or detergents may be harmful if inhaled or ingested. Use an
ANSI approved respirator or mask whenever there is a chance that vapors may be
inhaled.
15. Keep the High Pressure Hose connected to the Pressure Washer and Spray
Gun while the system is pressurized. Disconnecting the Pressure Hose while
the unit is pressurized is dangerous, and may cause injury.
16. Prior to starting the Pressure Washer in cold weather, check all of the parts of
the unit to make sure ice has not formed. Do not store the unit anywhere that the
temperature will fall below 32° F (0° C). (See “Inspection, Maintenance, and
Cleaning” section for proper storage procedures.)
17. Do not feed already-pressurized water (such as that from another pressure
washer) into this washer.
18. When dispensing detergent, apply the detergent to the cleaning area at low
pressure only. Then, spray the detergent off the cleaning area by using the
adjustable Nozzle. NOTICE: Detergent dispensing only works when the spray wand
is in the low-pressure position.
19. The high pressure water flow can damage the work surface if not used properly.
Always test the spray in an open area first.
20. Never move the Pressure Washer by pulling on the High Pressure Hose. Use
the Handle provided on the top of the unit.
21. Never leave the Pressure Washer unattended when it is plugged into an
electrical outlet. Turn off the Pressure Washer, and unplug it from its electrical
outlet before leaving.
22. If water is leaking out of the Pressure Washer immediately shut off the unit.
Unplug the Pressure Washer, and discharge all pressure before tightening fittings
or having repair work done by a qualified technician.
23.
24.
WARNING! People with pacemakers should consult their physician(s) before
using this product. Operation of electrical equipment in close proximity to a heart
pacemaker could cause interference or failure of the pacemaker.
WARNING! The warnings and precautions discussed in this manual cannot
cover all possible conditions and situations that may occur. It must be understood
by the operator that common sense and caution are factors which cannot be built
into this product, but must be supplied by the operator.
SAVE THESE INSTRUCTIONS.
SKU 02433 PAGE 7
For technical questions, please call 1-800-444-3353;
Troubleshooting section at end of manual.
Page 8
GROUNDING
WARNING!
Improperly connecting the grounding wire can result in the risk of electric shock.
Check with a qualified electrician if you are in doubt as to whether the outlet is
properly grounded. Do not modify the power cord plug provided with
the tool. Never remove the grounding prong from the plug. Do not use the
tool if the power cord or plug is damaged. If damaged, have it repaired by
a service facility before use. If the plug will not fit the outlet, have a proper
outlet installed by a qualified electrician.
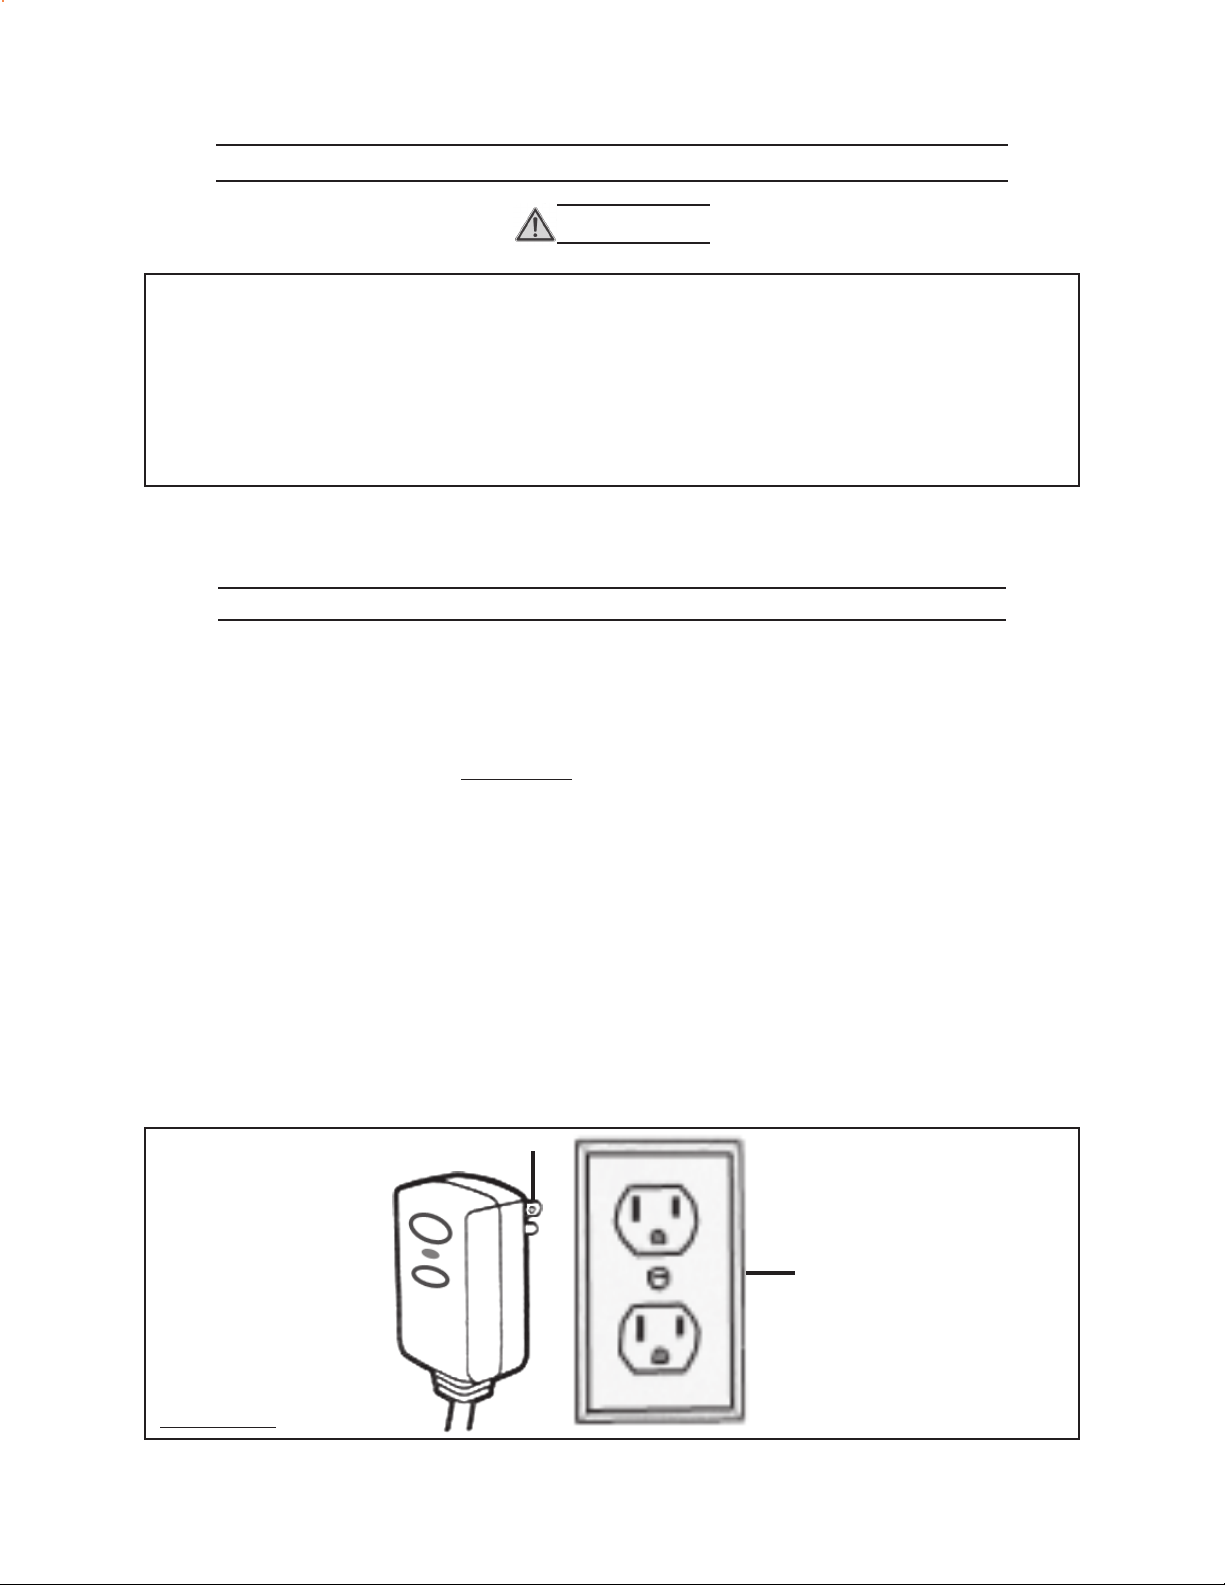
GROUNDED TOOLS: TOOLS WITH THREE PRONG PLUGS
1. Tools marked with “Grounding Required” have a three wire cord and three prong
grounding plug. The plug must be connected to a properly grounded outlet. If the
tool should electrically malfunction or break down, grounding provides a low
resistance path to carry electricity away from the user, reducing the risk of electric
shock. (See Figure A,
next page.)
2. The grounding prong in the plug is connected through the green wire inside the
cord to the grounding system in the tool. The green wire in the cord must be the only
wire connected to the tool’s grounding system and must never be attached to an
electrically “live” terminal. (See Figure A.)
3. Your tool must be plugged into an appropriate outlet, properly installed and grounded
in accordance with all codes and ordinances. The plug and outlet should look like
that in the following illustration. (See Figure A.)
3-PRONG PLUG
ELECTRICAL OUTLET
FIGURE A
SKU 02433 PAGE 8
For technical questions, please call 1-800-444-3353;
Troubleshooting section at end of manual.
Page 9

EXTENSION CORDS
1.
Grounded
tools require a three wire extension cord.
2. As the distance from the supply outlet increases, you must use a heavier gauge
extension cord. Using extension cords with inadequately sized wire causes a serious
drop in voltage, resulting in loss of power and possible tool damage. (See Table A.)
3. The smaller the gauge number of the wire, the greater the capacity of the cord. For
example, a 14 gauge cord can carry a higher current than a 16 gauge cord.
WARNING! Do not use 16 or 18 AWG extension cords on this product.
4. When using more than one extension cord to make up the total length, make sure
each cord contains at least the minimum wire size required. (See Table A.)
5. If you are using one extension cord for more than one tool, add the nameplate
amperes and use the sum to determine the required minimum cord size.
(See Table A.)
6. If you are using an extension cord outdoors, make sure it is marked with the suffix
“W-A” (“W” in Canada) to indicate it is acceptable for outdoor use.
7. Make sure your extension cord is properly wired and in good electrical condition.
Always replace a damaged extension cord or have it repaired by a qualified
electrician before using it. Protect your extension cords from sharp objects, excessive
heat, and damp or wet areas.
AelbaT
SEREPMAETALPEMAN
)daoLlluFtA(
52
F
tee
0.61-1.214121
0.02-1.612101
tpordegatlovenilehtgnitimilnodesaB*
SYMBOLOGY
Ta bl e B
)V021(*SDROCREWOPROFEGUAGERIWMUMINIMDEDNEMMOCER
HTGNELDROCREWOP
05
teeF
TEEF05REVO
tsumsdroCnoisnetxE
.desuebTON
.serepmadetarehtfo%051tastlovevifo
SKU 02433 PAGE 9
For technical questions, please call 1-800-444-3353;
Troubleshooting section at end of manual.
REV 08/04
Page 10

ASSEMBLY
NOTE: For additional information regarding the parts discussed in the following pages,
refer to the Assembly Diagrams on pages 19-21.
1. Check the Inlet Strainer for any blockage, including packaging debris. The Pressure
Washer may be shipped with a plastic plug in the Inlet.
2. If you have not already done so, remove the foam packing block underneath the Top
Shell (4A).
3. Position the rear of the Handle (1A) above the rear of the Pressure Washer body.
Insert the Valve located at the bottom of the Handle into the Suction Tube located at
the top of the Pressure Washer body. Make sure that the Suction tube does not bend
or get pinched during assembly. Lower the Handle fully onto the Pressure Washer
Body. Then secure the Handle to the Pressure Washer body, using the four Screws
(12A) provided. (See Figure D.)
REAR
VIEW
HANDLE (1A)
VALVE
SUCTION TUBE
SCREW (12A) SCREW (12A)
SCREW (12A)
SCREW (12A)
FIGURE D
SKU 02433 PAGE 10
For technical questions, please call 1-800-444-3353;
Troubleshooting section at end of manual.
Page 11

4. Insert the Spray Wand (9C) or Turbo Wand (33C) into the Spray Wand Extension
(8C), and twist the Wand into the Extension until the Wand locks in place. Pull the
Wand to make certain it is secure. (See Figure E.)
SPRAY WAND EXTENSION (8C)
SPRAY WAND (9C)
TURBO WAND (33C)
FIGURE E
5. If using the Brush Wand (34C), insert the Brush Wand into the Brush Adapter (35C)
and twist the Wand into the Adapter until the Wand locks in place. Then insert the
Adapter into the Spray Wand Extension (8C), and twist the Adapter into the Extension
until the Adapter locks in place. Pull the Wand to make certain it is secure. The
Brush Wand is used to apply detergent at low pressure. (See Figure F.)
BRUSH WAND (34C)
BRUSH ADAPTER (35C)
SPRAY WAND EXTENSION (8C)
FIGURE F
6. Attach the High Pressure Hose (24C) to the left/lower side of the Pressure Washer.
Attach the
the Pressure Washer. Screw the
duty garden hose (not included). Then, attach the
Set to the
female
female
part of the Quick Connector Set (36C) to the right/ lower side of
male
part of the Quick Connector Set onto a heavy
male
part of the Quick Connector
part of the Quick Connector Set. (See Figure G.)
LEFT SIDE VIEW
HIGH PRESSURE HOSE
(24C)
FEMALE
QUICK COUPLER
(36C)
RIGHT SIDE VIEW
MALE
QUICK COUPLER
(36C)
HEAVY DUTY
HOSE
(NOT INCLUDED)
FIGURE G
REV 10/04
SKU 02433 PAGE 11
For technical questions, please call 1-800-444-3353;
Troubleshooting section at end of manual.
Page 12

CONTROLS AND SETUP
Note: Familiarize yourself with the location and function of all of the machines
controls before proceeding to setup of the machine.
CONTROLS AND FEATURES
1. The Pressure Washer features an automatic On/Off Micro Switch (42B). The
Motor (3A) of the Pressure Washer does not run continuously, but only when the
Trigger (21C) is squeezed. When spraying water through the unit stops, the Motor
will automatically shut off.
2. The Pressure Washer features a 3-
Prong, Ground Fault Circuit
Interrupter (GFCI) Power Plug (11A).
The GFCI Power Plug provides
additional protection from the risk of
electrical shock. Make sure that the
Trigger (21C) is released before
plugging in. Plug the GFCI Power
Plug into a grounded, 120 volt,
electrical outlet. Press the TEST
button and then the RESET button.
The
indicator
should appear
on the Power Plug
red. If the indicator is
not red, have the power plug inspected
by a qualified electrician. Should
replacement of the GFCI Power Plug
become necessary,
only
a qualified technician should perform the service. Never
attempt to alter or disable the GFCI Power Plug. (See Figure H.)
RESET
BUTTON
TEST
BUTTON
RED
INDICATOR
GFCI POWER PLUG (11A)
FIGURE H
3. The Pressure Washer is equipped
with a Trigger Safety Lock (26C).
When the Trigger (21C) is not
SAFETY
TRIGGER LOCK
(26C)
squeezed, the Safety Lock should be
pressed all the way in to help prevent
children from using the tool. To
disengage the Safety Lock, press the
TRIGGER
(21C)
opposite side. (See Figure I.)
4. The adjustable Nozzle on the Spray
FIGURE I
Wand (9C) can be rotated for a
range of spray patterns, from a full fan spray to a direct stream spray. (See
Figure J,
next page.)
Also, the adjustable nozzle can be slid out for low-pressure spray and detergent
application, or pulled in for normal high-pressure spray. (See Figure J.)
SKU 02433 PAGE 12
For technical questions, please call 1-800-444-3353;
Troubleshooting section at end of manual.
Page 13

Pattern Adjustment
NOZZLE
Pressure Adjustment
SPRAY WAND
(9C)
FIGURE J - ADJUSTMENTS
5. The Turbo Wand (33C) features a
fixed
Nozzle which increases the Pressure
Washer’s effectiveness and decreases its cleaning area, and is recommended
for heavy duty cleaning of small areas. The spray pattern on the Turbo Wand is
not
adjustable, but provides a circular water pattern as it sprays the high pressure
water. The Turbo wand must only be used on areas that cannot be cleaned with the
normal nozzle and are resilient enough to withstand the increased pressure involved.
(See Figure K.)
6. The built-in Detergent Dispenser
located in the Handle (1A) allows
the application (USING THE BRUSH
WAND OR SPRAY WAND LOW
PRESSURE SETTING ONLY) of
pressure washing detergent
(not
included) onto the work surface.
FIGURE K
TURBO WAND
(33C)
When filling the Detergent Dispenser
with
pressure washing detergent
, do
DETERGENT DISPENSER FILL CAP
not exceed 3 quarts of detergent. The
Pressure Washer will automatically
mix the detergent and water. Note:
Detergent is dispensed in a 6%
solution. Do not add water to the
HANDLE
(1A)
Detergent Dispenser.
CAUTION! NEVER use any products
not designed for pressure washer use,
nor any products with bleach, chlorine,
or any other corrosive materials,
including liquids containing solvents,
trisodium phosphate products,
FIGURE L
ammonia, or acid-based cleaners.
Fill the Detergent Dispenser
only
when the unit
is not
running or plugged in.
(See Figure L.)
REV 08/04; 10/04
SKU 02433 PAGE 13
For technical questions, please call 1-800-444-3353;
Troubleshooting section at end of manual.
Page 14

SETUP
1. CHECK THE WATER SUPPLY. Prior to using the Pressure Washer for the first time,
it is ESSENTIAL to verify that the water supply is adequate. The Pressure Washer
needs TWICE the water supply (or volume) than the stated water output (2.1 GPM).
This Pressure Washer will need about 3-4 GPM to operate correctly and efficiently.
If the water is being supplied by a well/pump, make certain that the well/pump
produces enough water to keep up with the Pressure Washer’s water demands.
Water supply hoses should be heavy duty to withstand the forces involved. Water
hoses up to 25’ long must be
not use hoses longer than 50’. The more minerals in the water (the harder the water)
you use, the more often mineral buildup will need to be cleaned out from the nozzles.
Flow rate of the water supply must never be allowed to fall below 3 GPM.
To determine the water supply’s flow rate: Run the water at full for one minute
into a 5 gallon container, and measure the amount of water in the container.
CAUTION! If the Pressure Washer is run with an inadequate water supply, the pump
will cavitate. Cavitation causes the pump to operate loudly and will damage it.
2. ARRANGE FOR A PROPER ELECTRICAL SUPPLY. This unit uses a large amount
of current, especially during start-up. Connect this unit only to a dedicated household
circuit capable of providing ample current to it. A dedicated circuit has no additional
loads (running devices) connected to it; shut off any appliances or lights that dim or
slow down while the washer is running. For best results, connect the plug to that
circuit’s outlet that is nearest to the circuit breaker panel.
5
/8” ID. Water hoses up to 50’ long must be 3/4” ID. Do
3. MAKE SURE THE WASHER IS CLEAN AND READY FOR USE. Ensure the inlet
water strainer, nozzle, and the rest of the Washer are totally free of buildup or debris.
4. PLAN OUT THE JOB: Plan out what areas will be cleaned, how many sessions
will be necessary, and how long the individual sessions of work will need to
be. Plan to clean the higher portions first, because the higher portions will typically
remain cleaner while the other areas are cleaned. Plan a safe direction for runoff to
flow while the job is being performed, and plan on working your way in that direction.
You will have a clearer idea of the time involved to clean the area after doing a test
run, as explained on page 16, #3.
5. PREPARE THE CLEANING AREA. Clear the cleaning area of all objects that are
not being cleaned. If any water prone or delicate items cannot be moved, protect or
move them. If detergent is to be used, cover or remove any plants or animals that
may be damaged by the chemicals in the cleaner.
6. PLACE THE PRESSURE WASHER IN AN APPROPRIATE LOCATION. The
location should be protected from any water from the cleaning area; if possible,
select a location higher than the cleaning area. The pressure washer’s location
should be close enough so that the hose will reach every portion of the job to be
done with some slack for movement. Also, select an area with proper access to a
dedicated circuit that can be reached with as short an extension cord as possible.
SKU 02433 PAGE 14
For technical questions, please call 1-800-444-3353;
Troubleshooting section at end of manual.
Rev 04/06
Page 15

OPERATION
1. Make sure the Power Switch is in the “OFF” position. (See Figure M.)
2. Attach the heavy duty hose to the Pressure Washer, using the Quick Connector Set
(36C). (See Figure G.)
3. Attach the Spray Wand (9C), Turbo Wand (33C), or Brush Wand and Adapter (34C,
35C) into the Spray Wand Extension (8C), and press and twist the Wand into the
Extension until the Wand locks in place. (See Figures E and F.)
NOTE: The Pressure Washer will not pressurize if the Nozzle is not completely
assembled. It will not work properly with only part of the Wand installed.
4. Connect the High Pressure Hose (24C) to the Pressure Washer. (See Figure G.)
Make sure all connections are tight. Then, open the water supply valve fully. If
leaks occur, shut off water and retighten connections.
5. IMPORTANT! Prior to
turning on the Pressure
Washer, connect the unit
to the water supply. Turn
on the water, disengage
the safety, and squeeze the
Trigger (21C) until water
flows out of the Wash Gun
(5A). This removes air from
the system and allows the
unit to properly perform.
Failure to follow this step
can damage the Pump.
6. Test the cleaning capabilities
and the run before starting
your cleaning project, as
explained on page 17, #1. Turn the Power Switch to the “ON” position, it should
illuminate. The motor will briefly run when the switch is first turned on to build
up pressure and then go to standby until the trigger is squeezed.
NOTE: The Motor (3A) does not run continuously, but only when the Trigger is
squeezed. If a humming noise persists while the motor is on standby, briefly
discharge the nozzle in a safe direction.
POWER SWITCH
(Illuminates while
on.)
FIGURE M (REAR VIEW)
7. Point the Nozzle in a safe direction. Then, disengage the Safety and squeeze the
Trigger (21C). Switch the unit’s switch to the OFF position whenever the gun is not
in use. (See Figures I and M.) Clean the area, following the tips contained in the
Operating Tips section.
8. When finished spraying, fully engage the Trigger Safety Lock (26C), turn the Power
Switch to its “OFF” position, and turn off the water supply. (See Figure M.)
SKU 02433 PAGE 15
For technical questions, please call 1-800-444-3353;
Troubleshooting section at end of manual.
Page 16

WARNING: Do not disconnect the high-pressure hose or water inlet hose
until all pressure is discharged safely.
9. IMPORTANT! When turning off the unit after use, high pressure will remain inside
the unit its High Pressure Hose (24C), and the water inlet hose. Point the Wash Gun
(5A) in a safe direction and discharge all remaining pressure. The high-pressure
hose and water inlet hose can be disconnected after the pressure is released.
10. Store the pressure washer and all accessories in accord with the directions under
Storage
on page 18.
IF ANY UNEXPECTED PROBLEMS ARISE, PLEASE REFER TO THE
TROUBLESHOOTING SECTION AT THE END OF THIS MANUAL.
OPERATING TIPS
BECOME FAMILIAR WITH YOUR MACHINE:
1. Before beginning work, set aside enough time to familiarize yourself with this
machine’s cleaning rate and capacity along with all instructions and precautions
contained in this section, along with the Operating Instruction and Operating Controls
sections.
2. This unit is intended for various light to moderate cleaning applications. If deeper
cleaning is desired, it can be attained at times, however this is done at the expense
of speed. This unit is not intended for paint stripping or deep concrete cleaning
applications.
3. Clean a test area to satisfaction before proceeding with the entire area, as stated in
Cleaning Recommendations on the next page. Use this area to approximate the
amount of time required for the project. Be certain to factor in time for touch-ups and
cleanup after the general cleaning is finished.
4. This unit has several settings and adjustments that effect the speed of cleaning and
the water force applied to cleaning. Good guidelines to keep in mind are:
WIDE STREAM =
QUICKER COVERAGE BUT
LIGHTER CLEANING.
NARROW STREAM =
DEEPER CLEANING BUT
SLOWER COVERAGE.
USE PROPER PRESSURE WASHER OPERATION TECHNIQUES:
The machine may suddenly stop and require a rest period from time to time;
this is normal and does not indicate a problem
However, certain use techniques may help reduce or even prevent the need for such rest
periods, increasing efficiency:
(see Troubleshooting, page 22).
(Techniques continued on following page.)
SKU 02433 PAGE 16
For technical questions, please call 1-800-444-3353;
Troubleshooting section at end of manual.
Page 17

a. Do not release the trigger between sweeps. Release the trigger as few times
as possible during use. Interrupted or sporadic spraying will cause the unit to
heat up quickly and will increase the need for rest periods.
b. Make sure that all obstacles have been moved and the entire area is ready before
starting.
c. For small jobs, try to finish an entire portion of the job before taking a break.
CLEANING RECOMMENDATIONS
1. Clean an inconspicuous test area to help avoid damaging the surface: Always
begin with the fan spray at a distance of about 3-5 feet from the surface being cleaned
to avoid damaging the surface of the object. Make sure that the test area is clear of
people and water prone/delicate objects. If a pressure washing detergent is to be
used, apply the detergent to this area as well. After cleaning this area, switch off the
pressure washer and inspect the area carefully for any damage or discoloration. If
any damage is noted from the pressure setting, use a lighter setting when cleaning
the rest of the area. If damage or discoloration is noted from the detergent, do not
use it when cleaning.
2. First, pass over the area with a light cleaning, and then more thoroughly clean it.
3a. For a
a. Wash from the top down.
b. If possible, direct the stream in the same direction as the slope towards a draining
3b. For a
a. If a thin layer of water accumulates on the surface, periodically use the stream to
b. After the major cleaning is done, sweep the surface with the stream to help direct
4. If detergent is to be applied: Only use pressure washing detergent; other detergents
will clog or damage the pressure washer. Apply the detergent at low pressure, by
either using the Brush Wand (34C) or the low pressure setting of the Spray Wand
(9C). Allow the detergent several minutes to sit and soak into the work surface; this
will improve cleaning efficiency. If the Spray Wand is used, briefly shut off the unit
and pull the adjustable nozzle in to switch to high pressure mode and automatically
shut off the soap dispenser for rinsing. Make certain to rinse off all detergent
completely.
5. Hold the Wash Gun at about a 45° angle and steadily sweep the stream back and
forth; if a severe, head-on angle is used, dirt may imbed in the surface being cleaned.
Follow a steady, consistent pace during cleaning; this will help prevent stripes or
discoloration afterwards. If streaking or uneven cleaning is noted at the end of a
project, go over the edges of the streaks with a wide fan pattern to help blend these
lighter areas in.
vertical
area. This will enable better drainage and therefore better cleaning.
flat
direct this water towards the drainage.
loose debris toward the drainage.
or
surface:
sloped
surface:
6. If several different surfaces are to be cleaned, be careful not to damage any of the
SKU 02433 PAGE 17
For technical questions, please call 1-800-444-3353;
Troubleshooting section at end of manual.
Page 18

less solid surfaces while trying to clean the harder ones. This is especially a concern
when cleaning tile and grout, bricks and mortar, or stones and mortar.
7. If wood is being cleaned, be careful not to damage it. Wood will usually require
resurfacing (sanding) and re-coat with a surface protectant (wood, stain, varnish)
after it has dried again. Try to avoid leaving water on a wooden surface; doing so
can harm the surface.
INSPECTION, MAINTENANCE, AND CLEANING
1. WARNING! Make sure that (1) the Trigger is locked in its off position, (2) the
Power Switch of the Pressure Washer is in its “OFF” position, (3) the plug is unplugged
from its electrical outlet, (4) that the water supply is shut off, and (5) all residual
water pressure is safely expelled before performing any inspection, maintenance,
or cleaning procedures. Point the Wash Gun (5A) in a safe direction and discharge
all remaining pressure. Then, disconnect the garden hose from the unit.
2. Before each use, inspect the general condition of the Pressure Washer. Check for
loose screws, misalignment or binding of moving parts, damaged electrical wiring,
damaged High Pressure Hose, damaged accessories, and any other condition that
may affect its safe operation. If abnormal noise or vibration occurs, have the problem
corrected before further use.
3. To clean, remove excess water from the Pump by tipping the unit on both sides to
drain any remaining water from the inlet and outlet fittings. Drain the Detergent
Dispenser and flush with running water. Use only a clean cloth and mild detergent
to clean the body of the Pressure Washer. Do not use solvents. Remove the Inlet
Filter and run water through it backwards to remove any debris.
Do not immerse any part of the tool in liquid. Dry off any remaining water on all
parts and fittings. Then engage the Trigger Safety Lock.
Use the included Wire Tip Cleaner (37C) to help remove mineral deposits from the
nozzles. The more minerals that are dissolved in the water (the harder the water)
you use, the more often mineral buildup will need to be cleaned out from inside
nozzles.
4. STORAGE: When storing, always completely empty the Pressure Washer of water.
Frost will damage the Pressure Washer if the unit contains water. Store the Pressure
Washer indoors in a dry, frost-free room. Minerals in the water can harden inside the
workings. Flush the unit with automotive antifreeze prior to long-term storage. Always
dispose of antifreeze in accord with local ordinances.
Do not use damaged equipment.
SKU 02433 PAGE 18
For technical questions, please call 1-800-444-3353;
Troubleshooting section at end of manual.
Page 19

PARTS LIST A / ASSEMBLY DIAGRAM A
PLEASE READ THE FOLLOWING CAREFULLY
THE MANUFACTURER AND/OR DISTRIBUTOR HAS PROVIDED THE PARTS DIAGRAM IN THIS MANUAL AS A
REFERENCE TOOL ONLY. NEITHER THE MANUFACTURER NOR DISTRIBUTOR MAKES ANY REPRESENTATION OR WARRANTY OF ANY KIND TO THE BUYER THAT HE OR SHE IS QUALIFIED TO MAKE ANY REPAIRS TO
THE PRODUCT OR THAT HE OR SHE IS QUALIFIED TO REPLACE ANY PARTS OF THE PRODUCT. IN FACT, THE
MANUFACTURER AND/OR DISTRIBUTOR EXPRESSLY STATES THAT ALL REPAIRS AND PARTS REPLACEMENTS SHOULD BE UNDERTAKEN BY CERTIFIED AND LICENSED TECHNICIANS AND NOT BY THE BUYER.
THE BUYER ASSUMES ALL RISK AND LIABILITY ARISING OUT OF HIS OR HER REPAIRS TO THE ORIGINAL
PRODUCT OR REPLACEMENT PARTS THERETO, OR ARISING OUT OF HIS OR HER INSTALLATION OF RE-
PLACEMENT PARTS THERETO.
Part # Description Qty. Part # Description Qty.
1A Handle 1 7A Switch Cover 1
2A Clip Box 1 8A Bottom Shell 1
3A Motor 1 9A Axle 1
4A Top Shell 1 10A Wheel 2
5A Wash Gun 1 11A GFCI Plug/Cord 1
6A Pump 1 12A Screw (not shown) 4
1A
2A
3A
4A
5A
11A
8A
9A
10A
7A
6A
SKU 02433 PAGE 19
For technical questions, please call 1-800-444-3353;
Troubleshooting section at end of manual.
Page 20

PARTS LIST B / ASSEMBLY DIAGRAM B
Part # Description Qty. Part # Description Qty.
1B Ca m 1 23B Valve Core 2
2B Washer, Bearing 1 24B Outer Piston 1
3B Thrust Needle Bearing 1 25B O-Rin g 1
4B B earing Washer 1 26B O-Ring 6
5B Ring 1 27B Valve Cover 6
6B P iston 3 28B Piston 6
7B Piston Re turn Sprin g 3 29B Spring 6
8B Piston Return Sprin g 3 30B Check Valve, Outlet 6
9B P ump Seat 1 31B O-Ring 6
10B O-Ring 1 32B Bolt 6
11B B olt 1 33B Bolt 4
12B O-Ring 3 34B O-Rin g 1
13B O-Ring 3 35B Bolt 1
14B Cover Board 3 36B O-Rin g 1
15B O-Ring 3 37B Canal 1
16B Pump Bo dy 1 38B Conical Spiral Spring 1
17B Cap, Retainer 1 39B Steel Ball 1
18B O-Ring 1 40B O-Rin g 1
19B O-Ring 1 41B Suction Can al 1
20B B lock 1 42B Micro Switch 1
21B L arge Spring 1 43B Bolt 4
22B Small Spring 1
42B
41B
40B
39B
38B
37B
43B
11B
10B
36B
12B
35B
13B
34B
14B
15B
16B
32B
33B
31B
30B
29B
28B
27B
25B
26B
24B
23B
21B
22B
19B
20B
18B
17B
9B
8B
7B
6B
5B
4B
3B
2B
1B
SKU 02433 PAGE 20
NOTE: Some parts are listed and shown for illustration purposes
only, and are not available individually as replacement parts.
For technical questions, please call 1-800-444-3353;
Troubleshooting section at end of manual.
Page 21

PARTS LIST C / ASSEMBLY DIAGRAM C
#traPnoitpircseD.ytQ#traPnoitpircseD.ytQ
C1gnisaC1C02niP-U1
C2gnisaC1C12reggirT1
C3gniR-O2C22gnirpS1
C4evlaVnotsiP1C32gnilpuoC1
C5yd
C6elkcubnruT1C52tekcaJ1
C7gniR-O2C62kcoLytefaS1
C8noisnetxEdnaWyarpS1C72tekcaJ1
C9dnaWyarpS1C82tuN1
C
01gniR-O1C92rotcennoC1
C11evlaVnotsiP1C03gnilpuoC1
C21elzzoN1C13gniR-O1
C31gniR-O2C23wercSgnippaTfleS7
C41gniR-O1C33dnaWobruT1
C51mo
C61rosserpmoCedalB1C53retpadAhsurB1
C71allemaL1C63teSrotcennoCkciuQ1
C81bonK1C73renaelCpiTeriW1
C91ni
oBevlaV1C42esoHerusserPhgiH1
ttoBevlaV1C43dnaWhsurB1
P2
19C
36C
18C
17C
19C
15C
16C
33C
34C
14C
13C
20C
12C
32C
11C
10C
35C
6C
8C
9C
7C
7C
21C
5C
31C
3C
30C
2C
3C
37C
22C
29C
23C
28C
1C
26C
24C
25C
27C
NOTE: Some parts are listed and shown for illustration purposes only, and are not
available individually as replacement parts.
SKU 02433 PAGE 21
For technical questions, please call 1-800-444-3353;
Troubleshooting section at end of manual.
Page 22

TROUBLESHOOTING
IMPORTANT!
Be CERTAIN to shut off the Pressure Washer, release all pressure in a safe manner, and
disconnect it from power and water before adjusting, cleaning, or repairing the unit.
PRESSURE WASHER STOPS SUDDENLY
Check whether the power switch is on
and lit.
SWITCH IS LIT SWITCH IS NOT LIT
The thermal safety Switch may be
tripped. Switch the unit off and allow the
unit to rest for 20-30 minutes and retry.
UNIT DOES NOT
RESTART
UNIT OPERATES
NORMALLY AFTER
RESTING
Contact qualified
technician.
The following points should be
applied to help reduce the
frequency of rest periods:
1. Use proper operating techniques.
Review the Operating Tips section,
starting on page 16.
2. Verify that this unit is being supplied
with the correct voltage, see page 14, #2.
Connect the plug to the outlet nearest
the circuit breaker panel and remove any
other loads that may be on the circuit.
3. If possible, reduce the length of or
eliminate any extension cord used, see
page 9.
Check the indicator on the GFCI power
plug (explained under
Features,
INDICATOR
APPEARS
#2 on page 12).
RED
Dry self thoroughly
and check the
circuit breaker on
your household
panel.
Controls and
INDICATOR NOT
RED
Make sure unit is
totally dry, then
press reset button.
If GFCI continues to
trip, contact a
certified electrician.
BREAKER NOT
TRIPPED
Contact
qualified
technician.
BREAKER TRIPPED
Check for electrical shorts. If
none are found, reset
breaker.
If breaker continues to trip,
try another circuit or contact
a certified electrician.
WATER LEAKING FROM WITHIN THE HOUSING
Seals or gaskets may be worn or damaged.
Leaking water creates a shock hazard;
PROMPTLY
repaired by a qualified technician.
If the steps above do not solve the problem or if the repairs involved are too
complex, contact a qualified technician.
SKU 02433 PAGE 22For technical questions, please call 1-800-444-3353.
have the unit inspected and
Page 23

TROUBLESHOOTING (CONTINUED)
IMPORTANT!
Be CERTAIN to shut off the Pressure Washer, release all pressure in a safe manner, and
disconnect it from power and water before adjusting, cleaning, or repairing the unit.
PRESSURE WASHER WILL NOT START
Dry self thoroughly and check the voltage
at the outlet, and the reset button on the
GFCI power plug (explained under
Controls and Features,
#2 on page 12).
POWER SUPPLY
INADEQUATE
Have a certified
electrician correct
the problem.
PRESSURE WASHER DOES NOT BUILD PRESSURE
HOSE IS KINKED
OR SCREEN IS
CLOGGED
RESET BUTTON NOT
SET CORRECTLY
Setup the GFCI plug
as explained on
page 12.
If the power switch is in the
ON position and lit, the
Thermal safety Switch may
be tripped. Switch the unit
off and allow the unit to rest
for 20-30 minutes and retry.
Check that hose is unbent and
Inlet Screen is free from debris
and deposits.
HOSE IS NOT KINKED AND
SCREEN IS CLEAN
POWER SUPPLY ADEQUATE
AND RESET BUTTON SET
PROPERLY
Clean Screen and
straighten hose.
Switch to a shorter
Air may be getting in the
water supply hose, check all
connections.
hose, if possible.
CONNECTIONS
ARE LOOSE
Retighten
connections.
Internal valves, seals, or the
nozzle may be worn, contact
ALL CONNECTIONS
a qualified technician.
If the steps above do not solve the problem or if the repairs involved are too
complex, contact a qualified technician.
SKU 02433 PAGE 23For technical questions, please call 1-800-444-3353.
ARE TIGHT
Page 24

TROUBLESHOOTING (CONTINUED)
IMPORTANT!
Be CERTAIN to shut off the Pressure Washer, release all pressure in a safe manner, and
disconnect it from power and water before adjusting, cleaning, or repairing the unit.
PRESSURE CHANGES DURING USE
Air may be getting in the water supply
hose, check all connections.
CONNECTIONS
ARE LOOSE
Retighten
connections.
Clean tip, using the
included Tip Cleaning
wire.
ALL CONNECTIONS
ARE TIGHT
Check that tip is free from
debris and deposits.
TIP IS
DIRTY
Internal valves or seals may
be worn or sticking, contact
a qualified technician.
DETERGENT WILL NOT DISPENSE
Verify that proper type of pressure
washer detergent is being used, and
that the appropriate wands/settings are
being used, see page 13, #6.
TIP IS
CLEAN
NON-PRESSURE
WASHER DETERGENT
USED
Remove the Handle
(1A) and thoroughly
rinse out the detergent
INCORRECT WANDS/
SETTINGS USED
Set up the washer as
explained on page 13.
Remove the Handle (1A)
and check that the suction
tube is not bent or pinched.
CORRECT DETERGENT,
WANDS, AND SETTINGS
bottle and passages.
Refill with correct
detergent.
If the steps above do not solve the problem or if the repairs involved are too
complex, contact a qualified technician.
SKU 02433 PAGE 24For technical questions, please call 1-800-444-3353.
USED
 Loading...